Log In
Register
Forums
Welcome To FitFreak
Fit Freak Newbie / FAQs
Site Feedback and Suggestions
The Honda Fit and Jazz Forums
General Fit Talk
1st Generation (GD 01-08)
2nd Generation (GE 08-13)
3rd Generation (2015+)
Fit Photos & Videos
Car Shows, Events, and Racing
Other Car Related Discussions
Off Topic Discussion
Buy, Sell, Trade, Product Market Research and Group Buys
For Sale / Want To Buy / Classified Ads for USED Fit Items
FIT-Vendor Sponsored Group Buys and Sales
Gauge Interest in a Fit Product or Group Buy
Merchant Group Buys and New Product Sales
General For Sale Section
Fit Modifications
General Fit Modifications Discussion
Fit DIY: Repair & Maintenance
Fit Engine Modifications, Motor Swaps, ECU Tuning
Fit Exterior Modifications & JDM Styling
Fit Interior Modifications
Fit I.C.E.
Fit Wheels & Tires
Fit Suspension & Brake Modifications
Fit Interior & Exterior Illumination
Honda Dealer and Honda USA Discussions
Honda Fit Dealer Representatives
Honda Fit Dealer Reviews
Vendor Marketplace Forums
FIT Vendor General Discussion Area
FIT-Vendor Sponsored Group Buys
Tire, Wheel, Brake & Suspension
Fit Forums & Clubs
America East
America Central
America West
Canada Fit Forums & Clubs
Mexico Fit Forums & Clubs
European Fit Forums & Clubs
Asia Fit Forums & Clubs
Gallery
Tools
Car Payment Calculator
Tire Rim Calculator
Vin Decoder
Recalls
Technical Service Bulletins (TSBs)
Members List
Live Feed
Marketplace
Vendor Directory
Become a Vendor
New Posts
View Dark Mode
Please register or login to enable Dark Mode.
Log In
Register
Threads
Google
Threads
Posts
Advanced
Dark Mode
Please register or login to enable Dark Mode.
Log In
Forgot your Password?
By logging into your account, you agree to our
Terms of Use
and
Privacy Policy
, and to the use of cookies as described therein.
or
Login with Facebook
Recent
Commented
Albums
My Pictures
My Post Pictures
Pyts
June 17, 2017
448
0
Sort:
Most Recent
Default
Most Recent
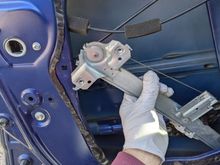
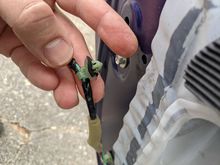
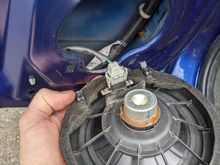
3 bolts for the motor swap. Super simple. Don't worry about the cable coming unwound, it's not actually affixed to the motor.
0
2022/01/10 13:16:18
82172
And the OEM guide.
0
2022/01/10 13:14:35
82172
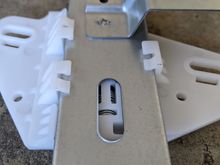
Close up of the Aisin's guide
0
2022/01/10 13:13:50
82172
The OEM assy. had some cracks in it. I'm not sure how much they affected performance, but they seemed to facilitate movement inboard and outboard (towards and away from the cab)
0
2022/01/10 13:10:03
82172
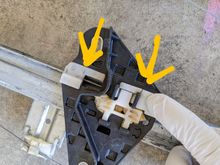
Note some differences..OEM left, Aisin right. Suffice to say Aisin isn't the original manufacturer. And to think I put out extra funds, omitting a full assembly with new motor to get their brand. 🥲 It seems to have even more play at the guide.. But I haven't test driven yet to find out if it vibrates.
0
2022/01/10 13:02:23
82172
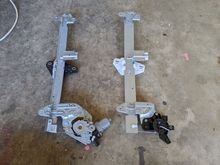
With the assembly removed my attention was drawn to the guides, assuming they were responsible for window rattle. While I still believe this to be the case, they seemed to have less play than the Aisin assemblies I replaced them with. Pics to follow
0
2022/01/10 12:54:51
82172
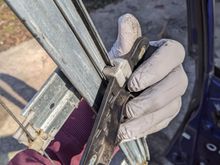
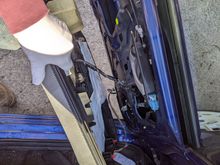
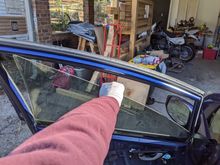
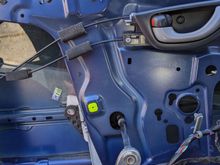
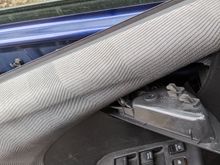
Lower the assembly all the way down and work it under the cables as shown to remove.
0
2022/01/10 12:33:26
82172
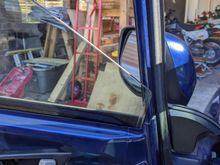
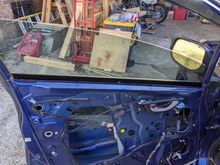
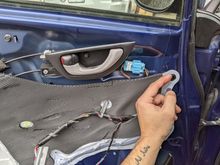
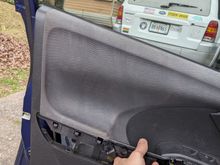
Here's me holding the electrically reconnected door panel (just that one connector to the controls.) Key to ON II and lowered the window. to the height shown in images following
0
2022/01/10 12:13:05
82172
Once unbolted, rotate the assembly and unclip the window motor's electrical connector
0
2022/01/10 12:09:34
82172
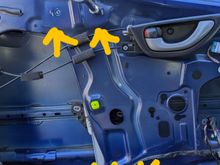
5 bolts for the window motor regulator assy. All the same length.
0
2022/01/10 12:06:42
82172
Another pic showing orientation
0
2022/01/10 12:03:09
82172
0
2022/01/10 12:01:50
82172
Remove the bolts!
0
2022/01/10 11:59:44
82172
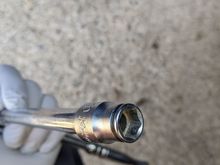
Koken nut grabber. picked up a metric rail from frankstools. I love their neat import tools, but one time the dude didn't ship my pliers, offer a refund, or respond. If there was another place to get some of the stuff..
0
2022/01/10 11:56:14
82172
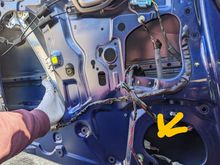
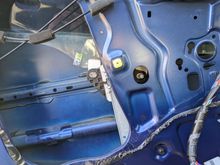
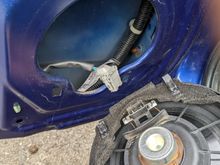
Here's a shot of the hole and the two bolts holding the window to the arm. A 10mm socket will get them out. For removal I used a "nut grabber" socket made by koken. I'll show it next, it's totally unnecessary, but the sockets were reasonable and each have a ball detent to help prevent dropping bolts/nuts. In absence of those one might want to have a magnet stick handy just in case
0
2022/01/10 11:04:33
82172
Here's the aforementioned hole!
0
2022/01/10 11:03:39
82172
0
2022/01/10 11:02:08
82172
0
2022/01/10 10:57:02
82172
Game called on account of rain. Will pick this back up tomorrow if the weather permits as right now I can't use my car 😂
0
2022/01/09 14:43:04
82172
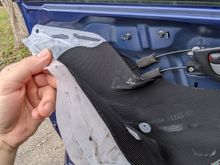
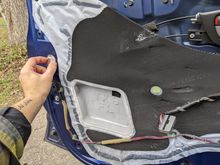
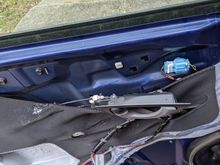
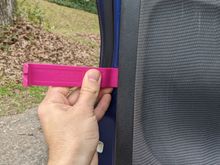
Here's me finishing removal of the barrier. Once it's unbound, slide it off of the harness and set it aside. I'd recommend placing it sticky-side up in your car so that it doesn't blow away or otherwise get damaged/stepped on/whatever
0
2022/01/09 14:41:33
82172
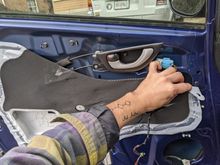
So begins the process of gently peeling the plastic away from the miraculously still very sticky/goopy black adhesive that holds it in place. I used my fingers to attempt to get as much of the adhesive as possible to stay on the door while pulling the barrier away. I started on the upper right side and worked my way around
0
2022/01/09 14:39:27
82172
0
2022/01/09 14:37:03
82172
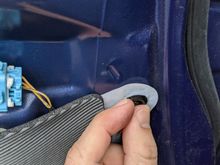
Now we unclip the section of harness that went to the door control panel from the door. Its clip also has two legs and is best removed with a flat head, one side at a time.
0
2022/01/09 14:34:29
82172
Here's me working off the upper left plug!
0
2022/01/09 14:33:28
82172
Another shot of the upper right plug
0
2022/01/09 14:32:48
82172
0
2022/01/09 14:29:39
82172
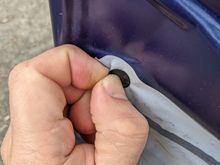
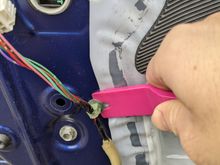
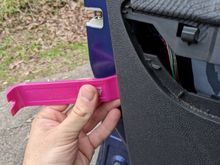
Please pry them using a flat head as shown. Pull or pry the clip away from the door enough to get a flat head in there, then press in toward the center of the clip to release one of the two legs, then do the other leg. Using only a pry tool will rip the plastic barrier. At least that's my experience.
0
2022/01/09 14:26:12
82172
Here's the clip design
0
2022/01/09 14:24:36
82172
Here I show off my fancy pry tool at work removing the first clip holding this leg of the harness to the door. I WOULD NOT ADVISE USING A PRY TOOL! In the next two pics I'll show off the clip's design and demonstrate how they could be removed more safely and effectively with a flat head screwdriver, preserving your clips and preventing unnecessary damage to the plastic barrier
0
2022/01/09 14:21:36
82172
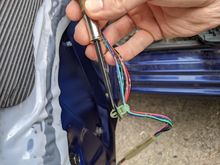
Next up, we disconnect this connector and will begin unclipping the harness from the door so that we can fit it out through the vapor barrier.
0
2022/01/09 14:19:53
82172
Disconnect the speaker's connector and set the speaker aside. Its another simple squeeze clip
0
2022/01/09 14:18:28
82172
0
2022/01/09 14:13:25
82172
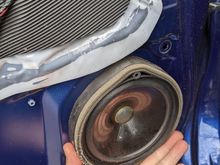
The manual says to just push up on the speaker, but I don't think I agree. Just pushing up resulted in a broken clip, and also it was freakin stuck. I'll show you why and offer a suggestion in the image below
0
2022/01/09 14:11:24
82172
0
2022/01/09 14:09:37
82172
Here it is, hand tightened, as promised.
0
2022/01/09 14:08:40
82172
0
2022/01/09 14:06:04
82172
0
2022/01/09 14:03:35
82172
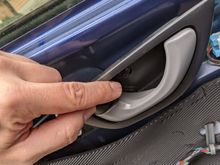
Now you can lift straight up and free your door panel, but bear in mind that the door handle is still running through it. I'll show you in the next pic how I oriented the handle to get it through the panel without scratching anything.
0
2022/01/09 14:01:02
82172
Spot #6, the final clip!
0
2022/01/09 13:59:57
82172
Spot #5 rear lower
0
2022/01/09 13:58:36
82172
First
Page
5 of 12
Last
Go To
Page
1
2
3
4
5
6
7
...
12
5 of 12
Go To
GO
Go to page
of 12
pages
1
2
3
4
5
6
7
...
12