
What did you do to your GE fit today?
 04-08-2016, 06:38 PM


Banned
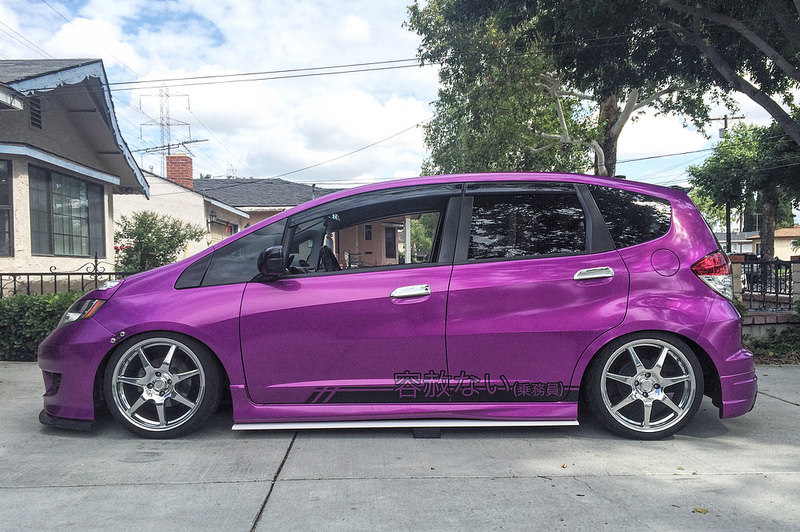
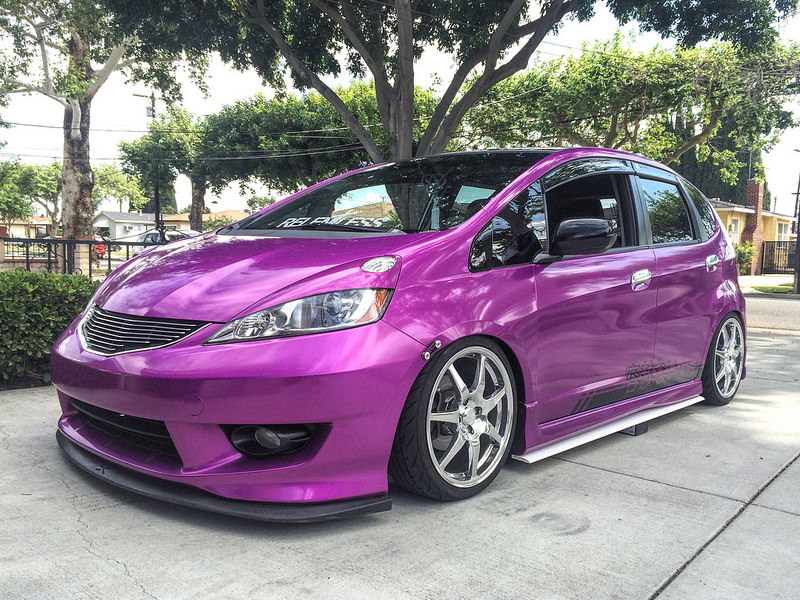
Replaced my sway bar end-links today with Moog K750381 end-links. The knocking was annoying as hell, but what I didn't realize is how much performance was dampened by the bad end-links. The car handles much better now and bumps aren't anywhere near as bumpy as they were before. And of course, the knocking/thumping is gone 

 04-09-2016, 01:05 PM
Banned
Yeah that and the bearings are probably bad as well. The Moog links have grease fittings as well, so they should last quite awhile.
04-09-2016, 08:54 PM
 04-09-2016, 11:03 PM
Banned
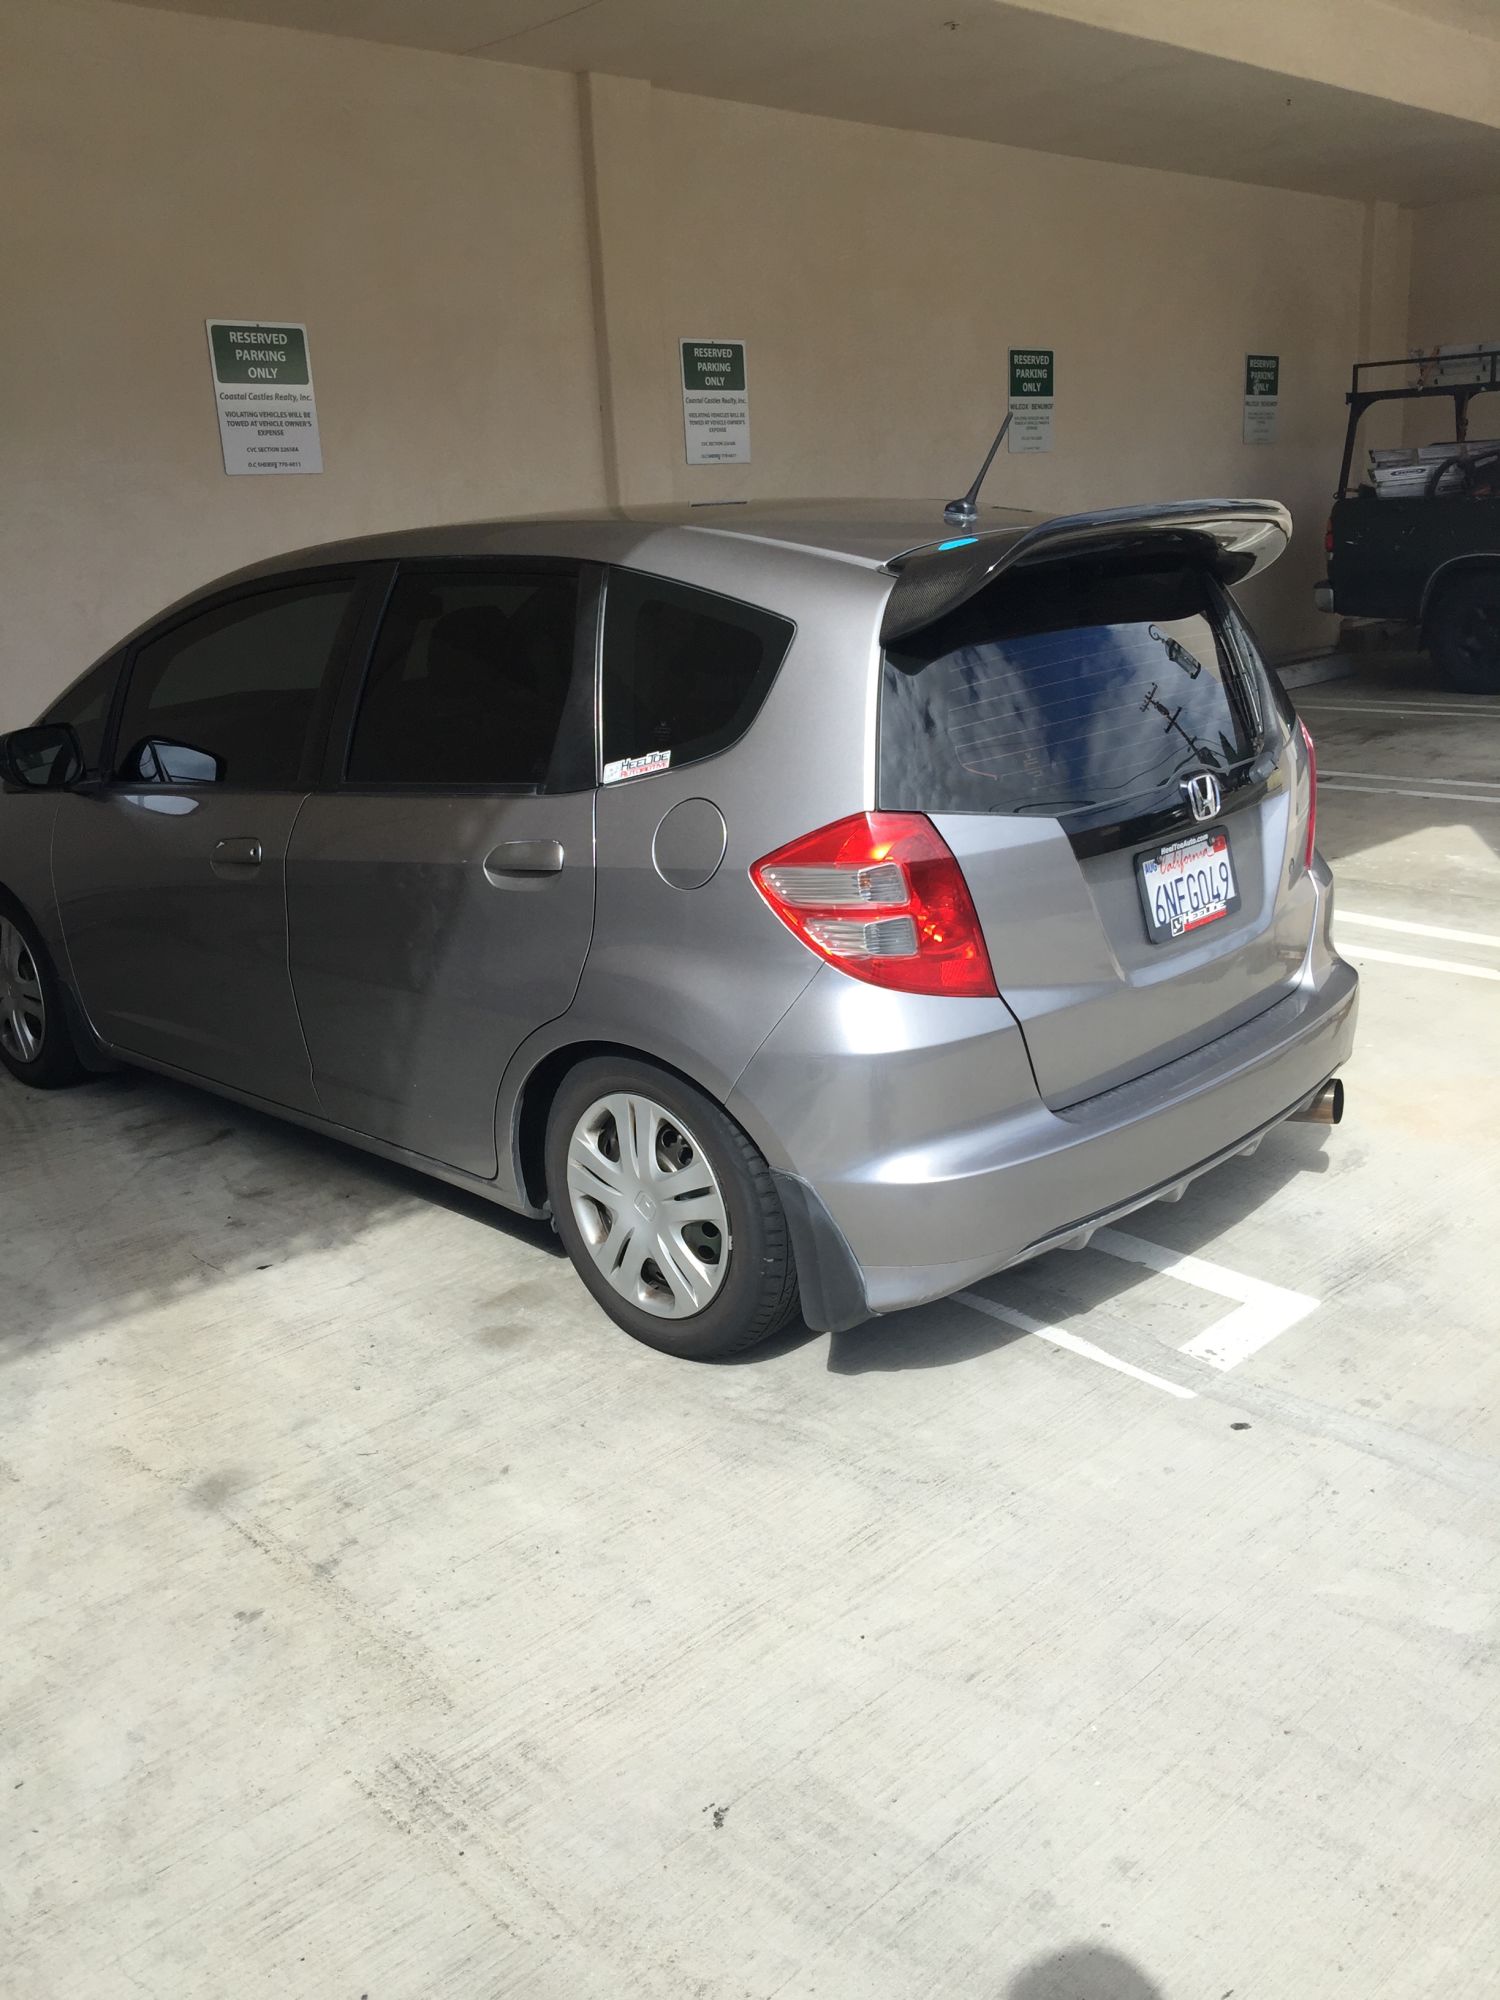
Got new front tires today... And although the end-links helped with the knocking, it was still there... The culprit? Driver's side strut mount. It was pretty loose, so I tightened the hell out of it. Noise gone, handling improved.
04-11-2016, 12:45 AM
Got my resonator welded back on. The drone is now gone, and so its the deep exhaust note...but it's drivable now so that's worth it.
Ordered a front windshield banner, which will actually be functional. Somehow the sun always pokes in between the interior sun visors.
Ordered a front windshield banner, which will actually be functional. Somehow the sun always pokes in between the interior sun visors.
04-11-2016, 01:44 AM
Still has a pretty deep exhaust note by itself though, but yea def not as loud haha
04-11-2016, 11:13 AM
This is one of my pet peeves on the fit.. have to arch to the left of or to the right so the sun gets blocked by the visor or else it hits that perfect spot to be annoying.. especially in my mornings driving in to work as the sun is rising
04-11-2016, 11:41 AM

I'm tall enough that the headliner is my visor. Thehe side windows are another story altogether, even with the visors out thevdo almost nothing for me.
04-11-2016, 12:35 PM
04-11-2016, 01:10 PM
I can use the headliner as a visor if i lean back.. but not comfortable either.. was looking at this
2009-2010 Honda Fit Windshield Tint Strip
 04-11-2016, 08:08 PM
Looks like the edge is tapered.. Is it done with a router?
I've been thinking of using pvc board for the sides.. And possibly rear
04-11-2016, 09:09 PM
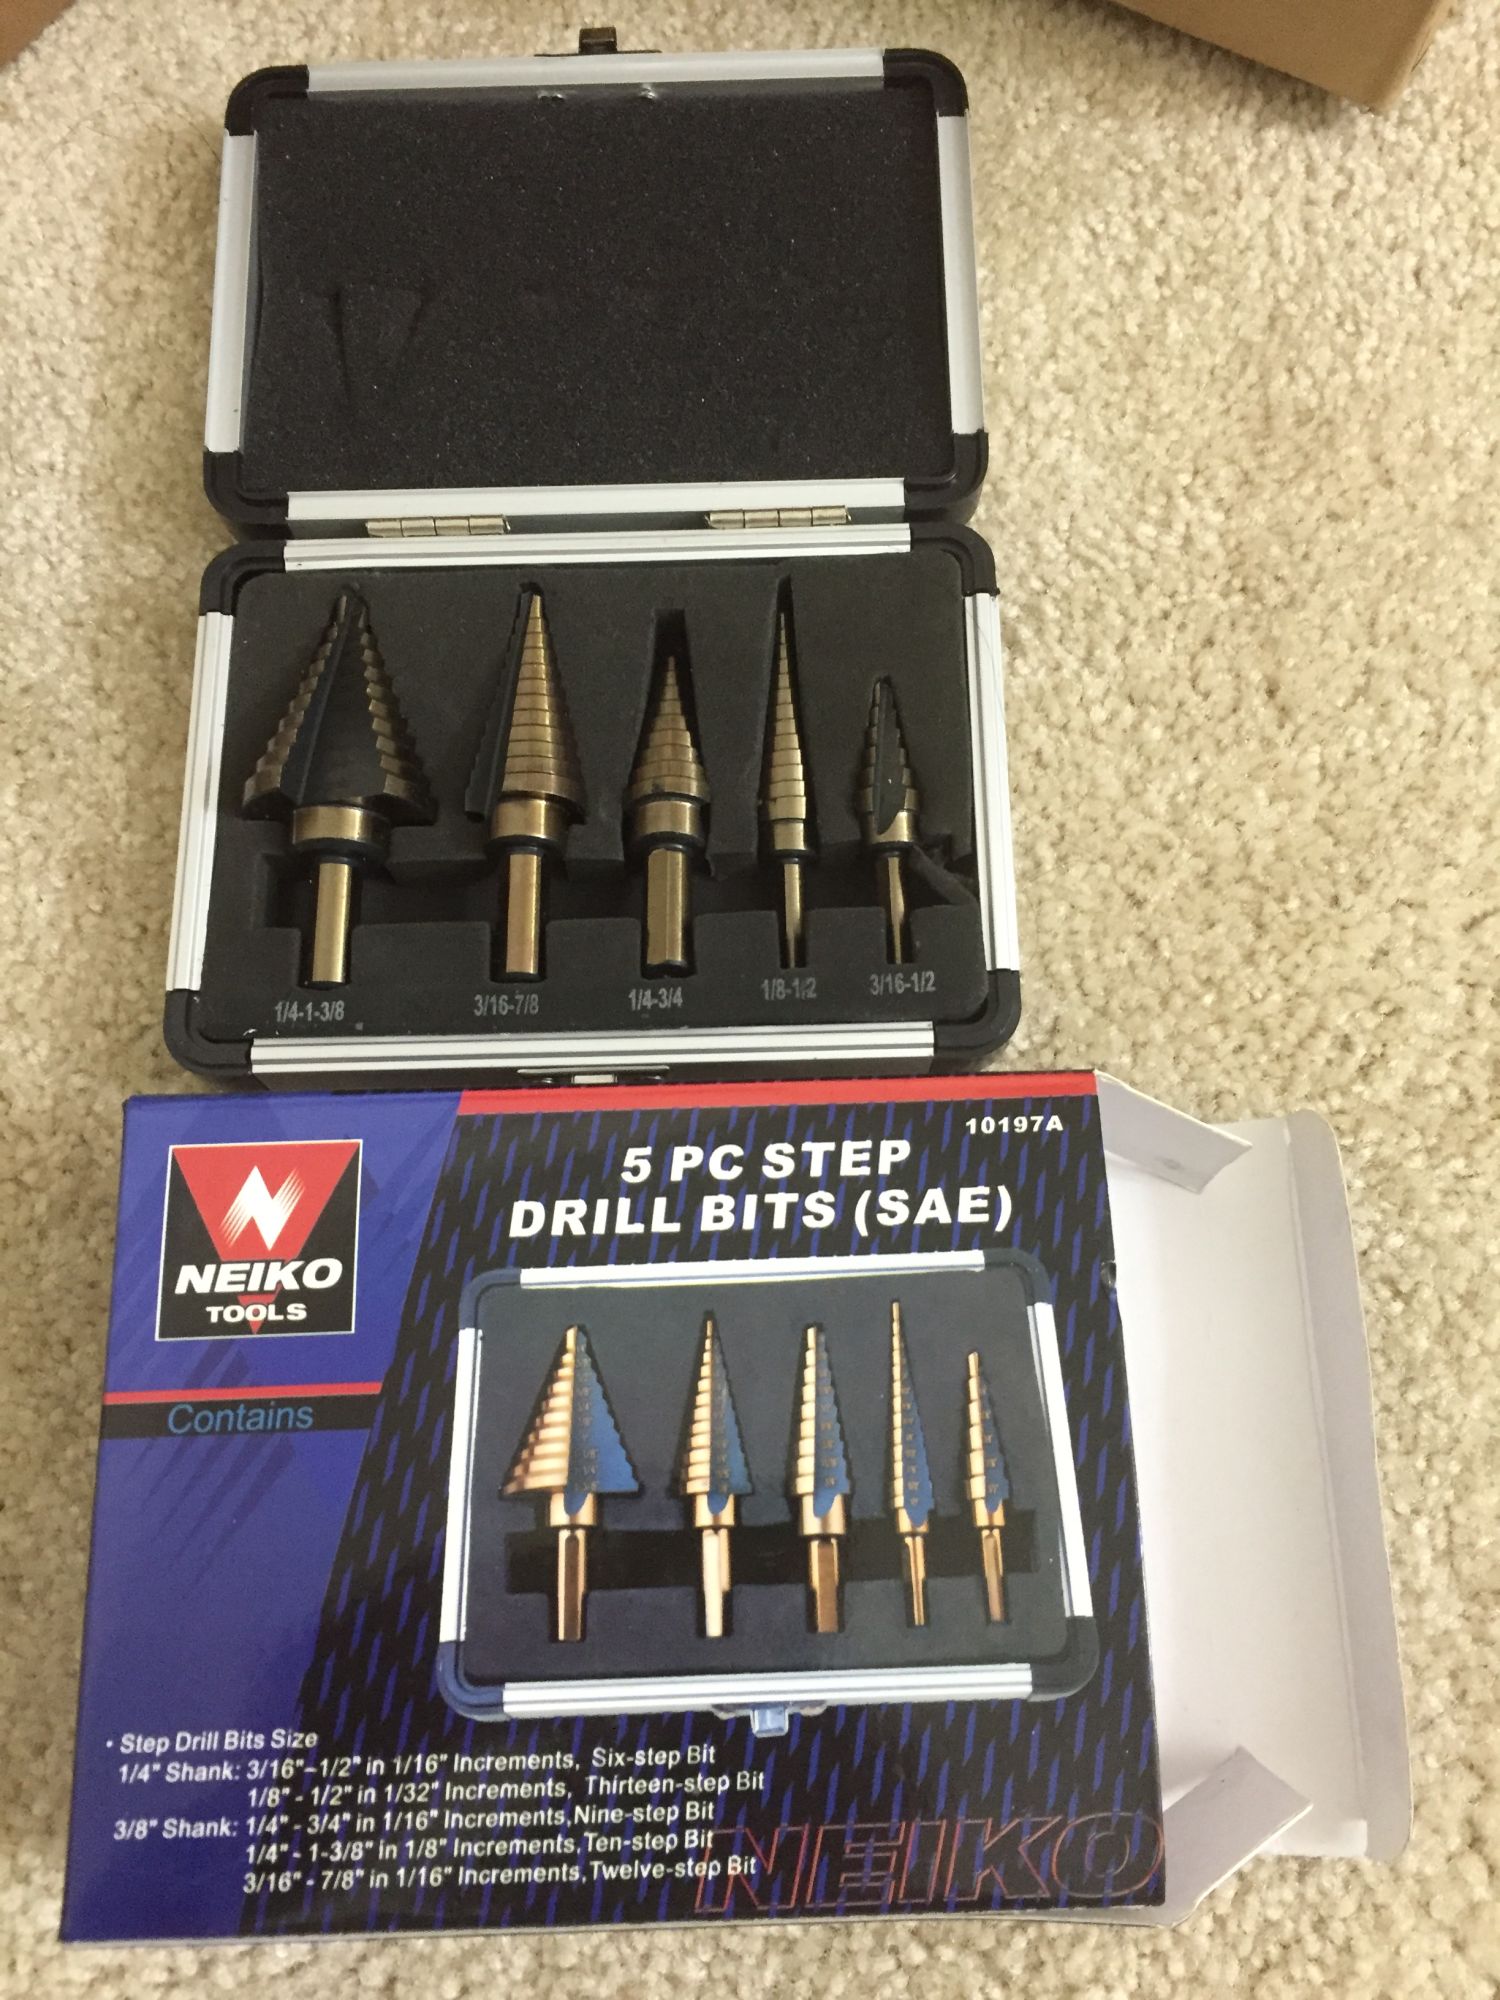
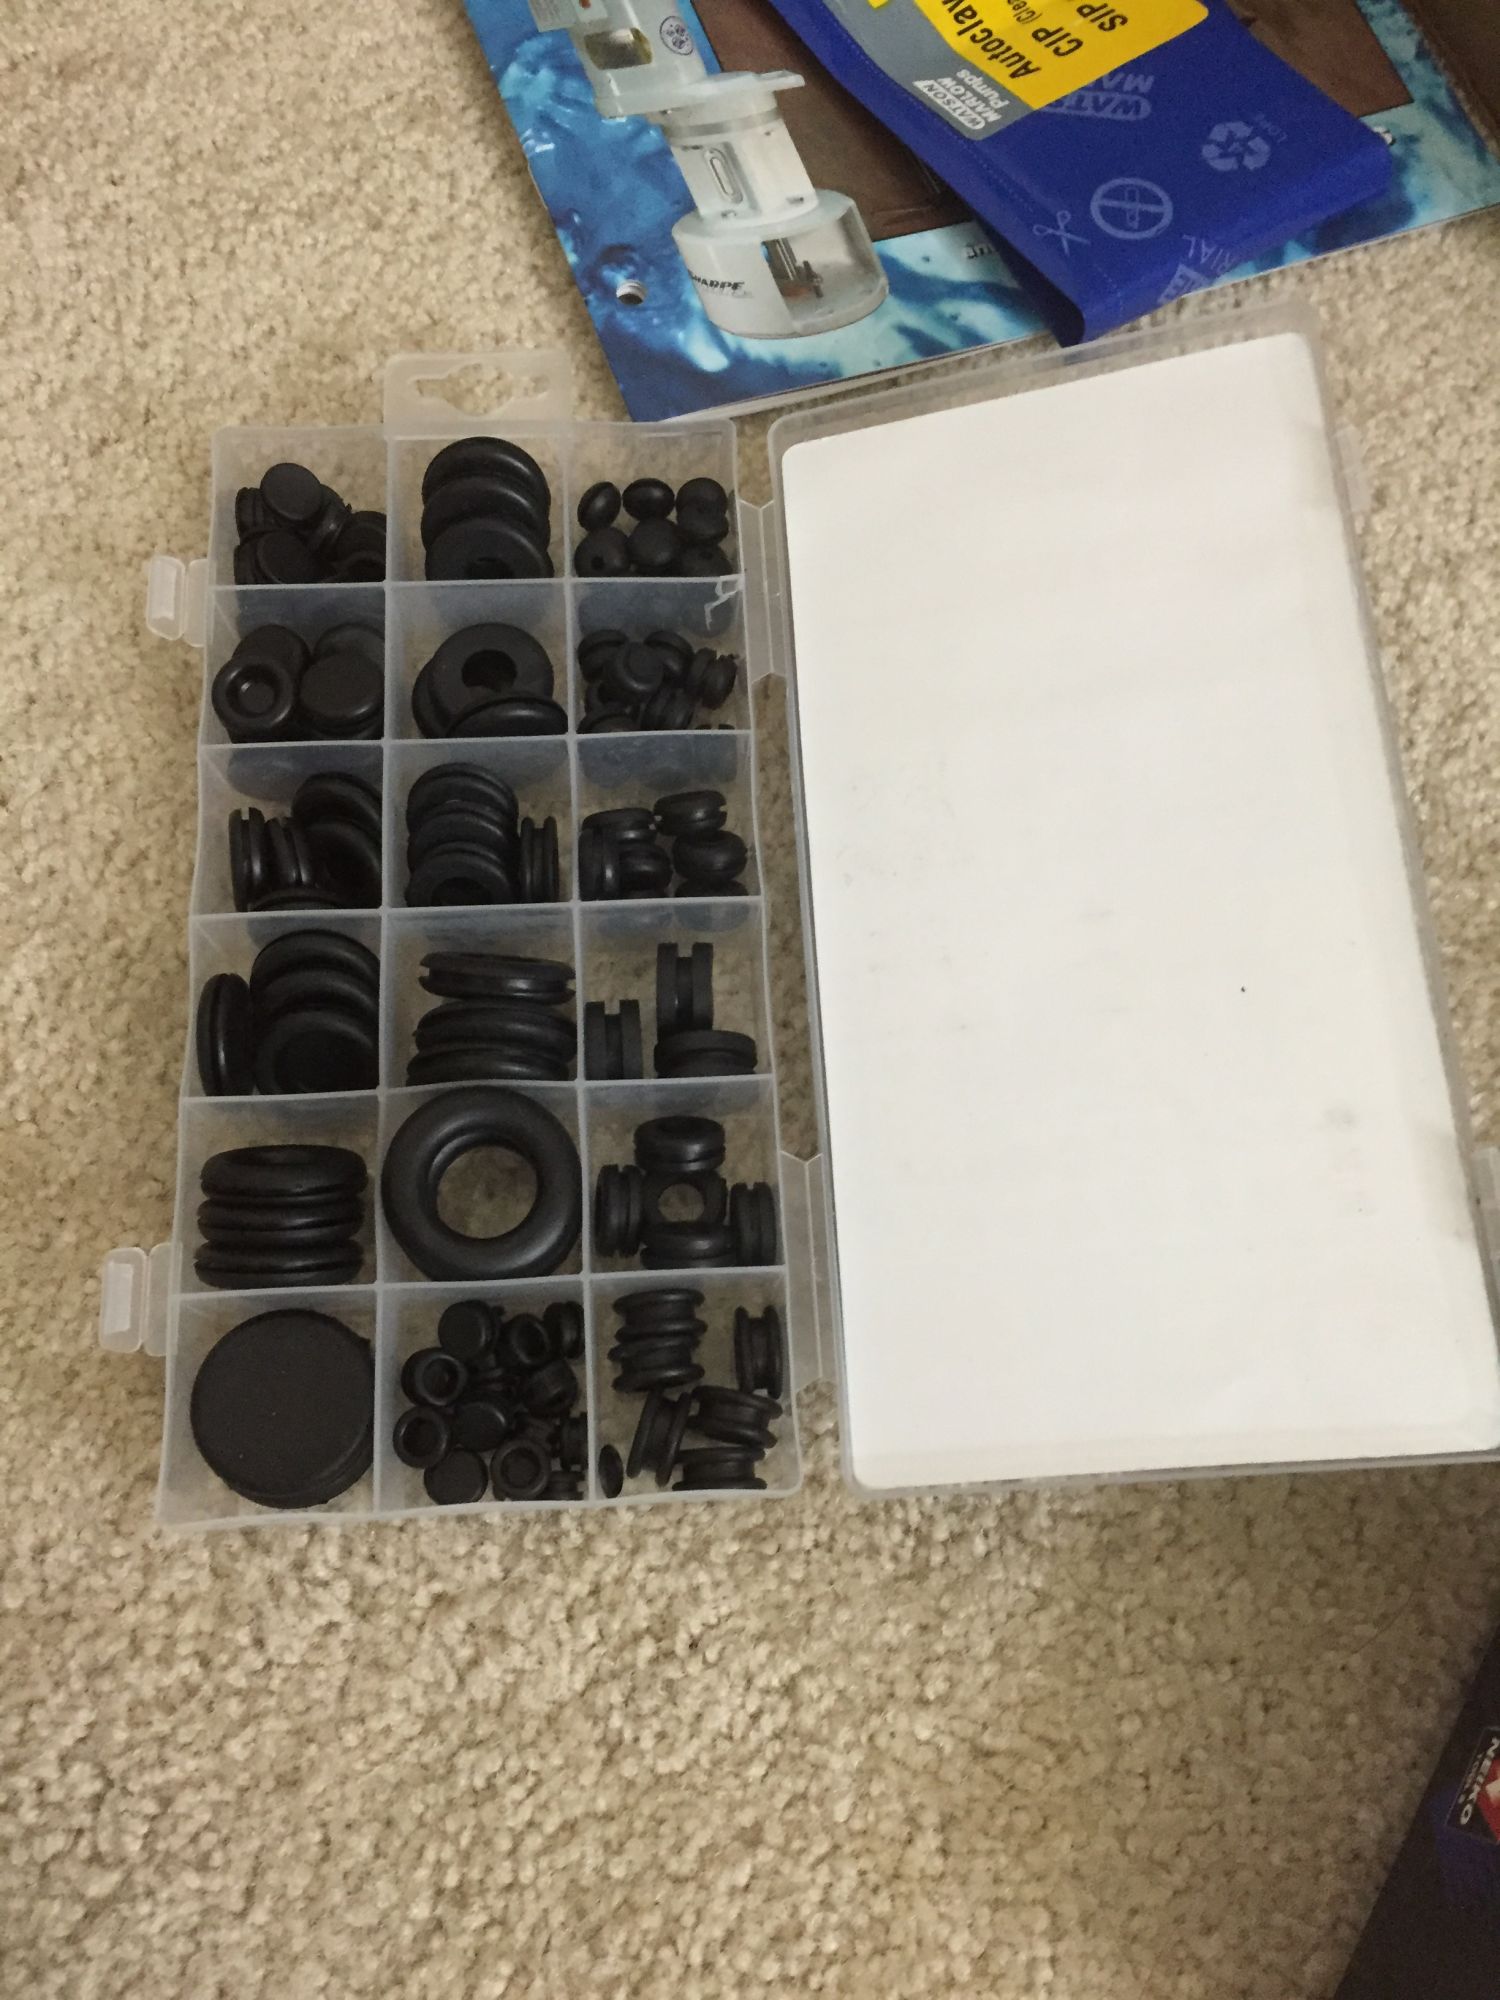
Some parts and tools arrives today:
Drilling Bits to drill holes on the firewall and Rubber Grommet to protect the wiring from the sharp edges of the holes.
This holes will be where the Boomslang Wiring Harness, Defi Boost Gauge and Water Temp Harness pass from inside the cabin to the engine bay.
Few days ago, the ATI Adapter ring so the AEM 52mm UEGO gauge can fit perfectly into the Gauge Pod arrives along with the extra O-Ring for the Sprintex Intake Elbow:

Several shades of High Temp Black Paint and Primer to paint the Sprintex
Supercharger:

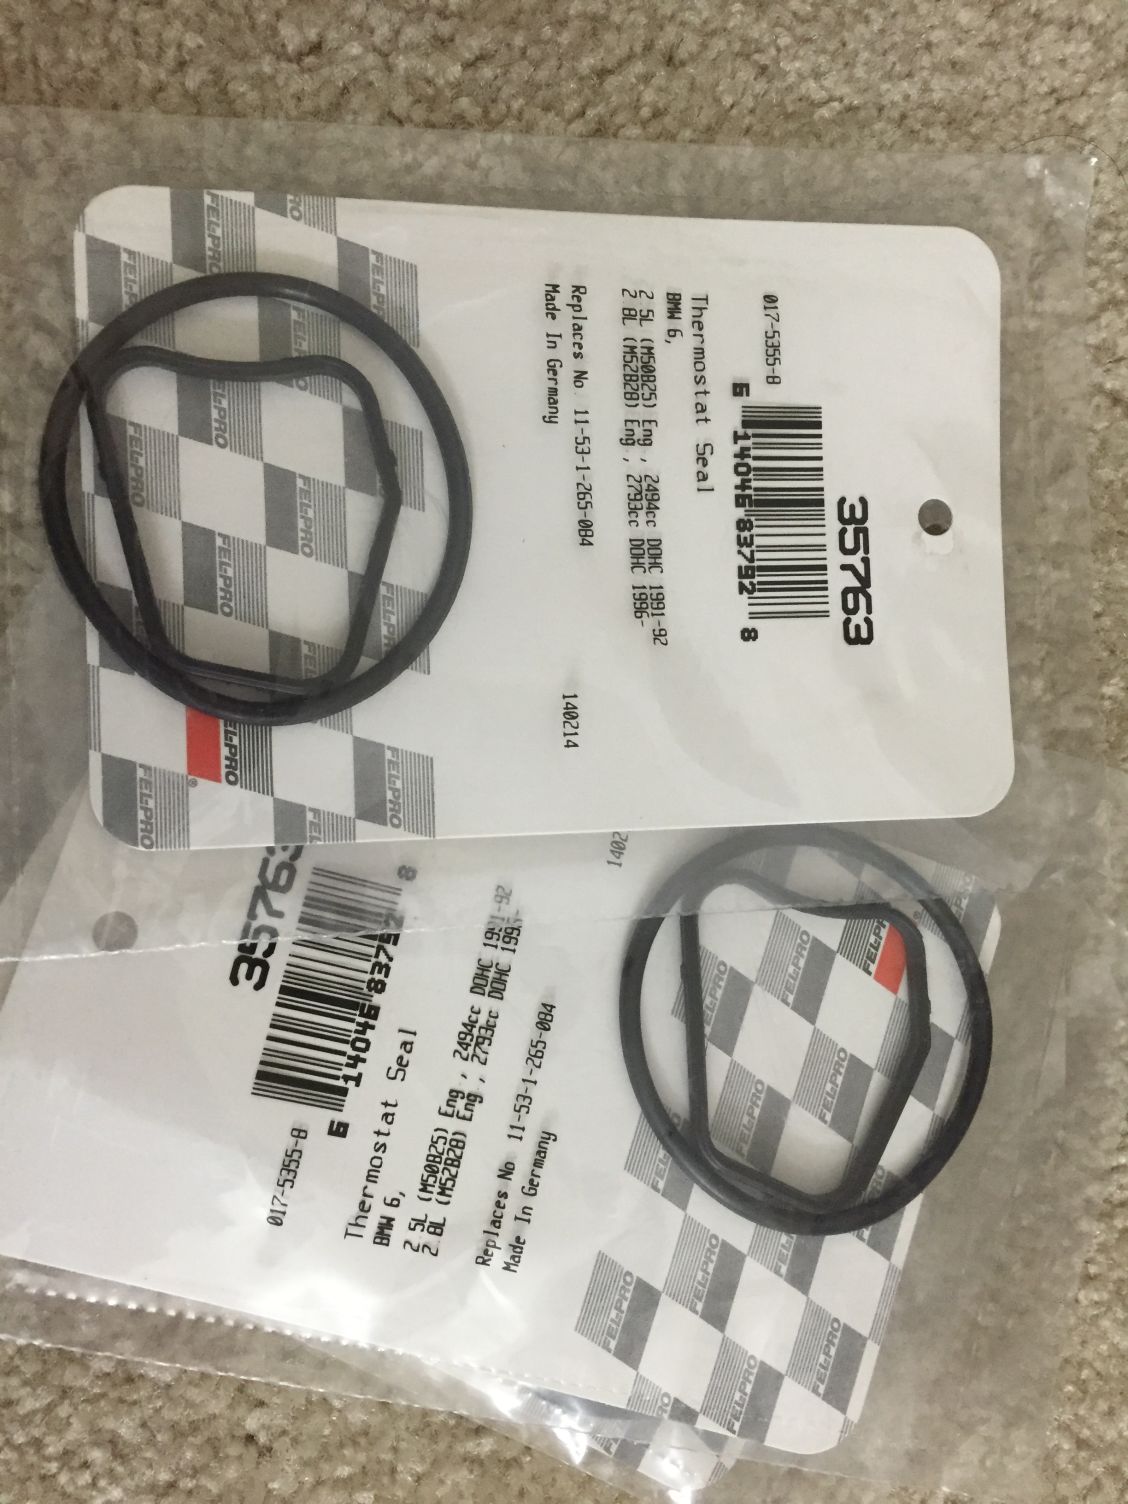
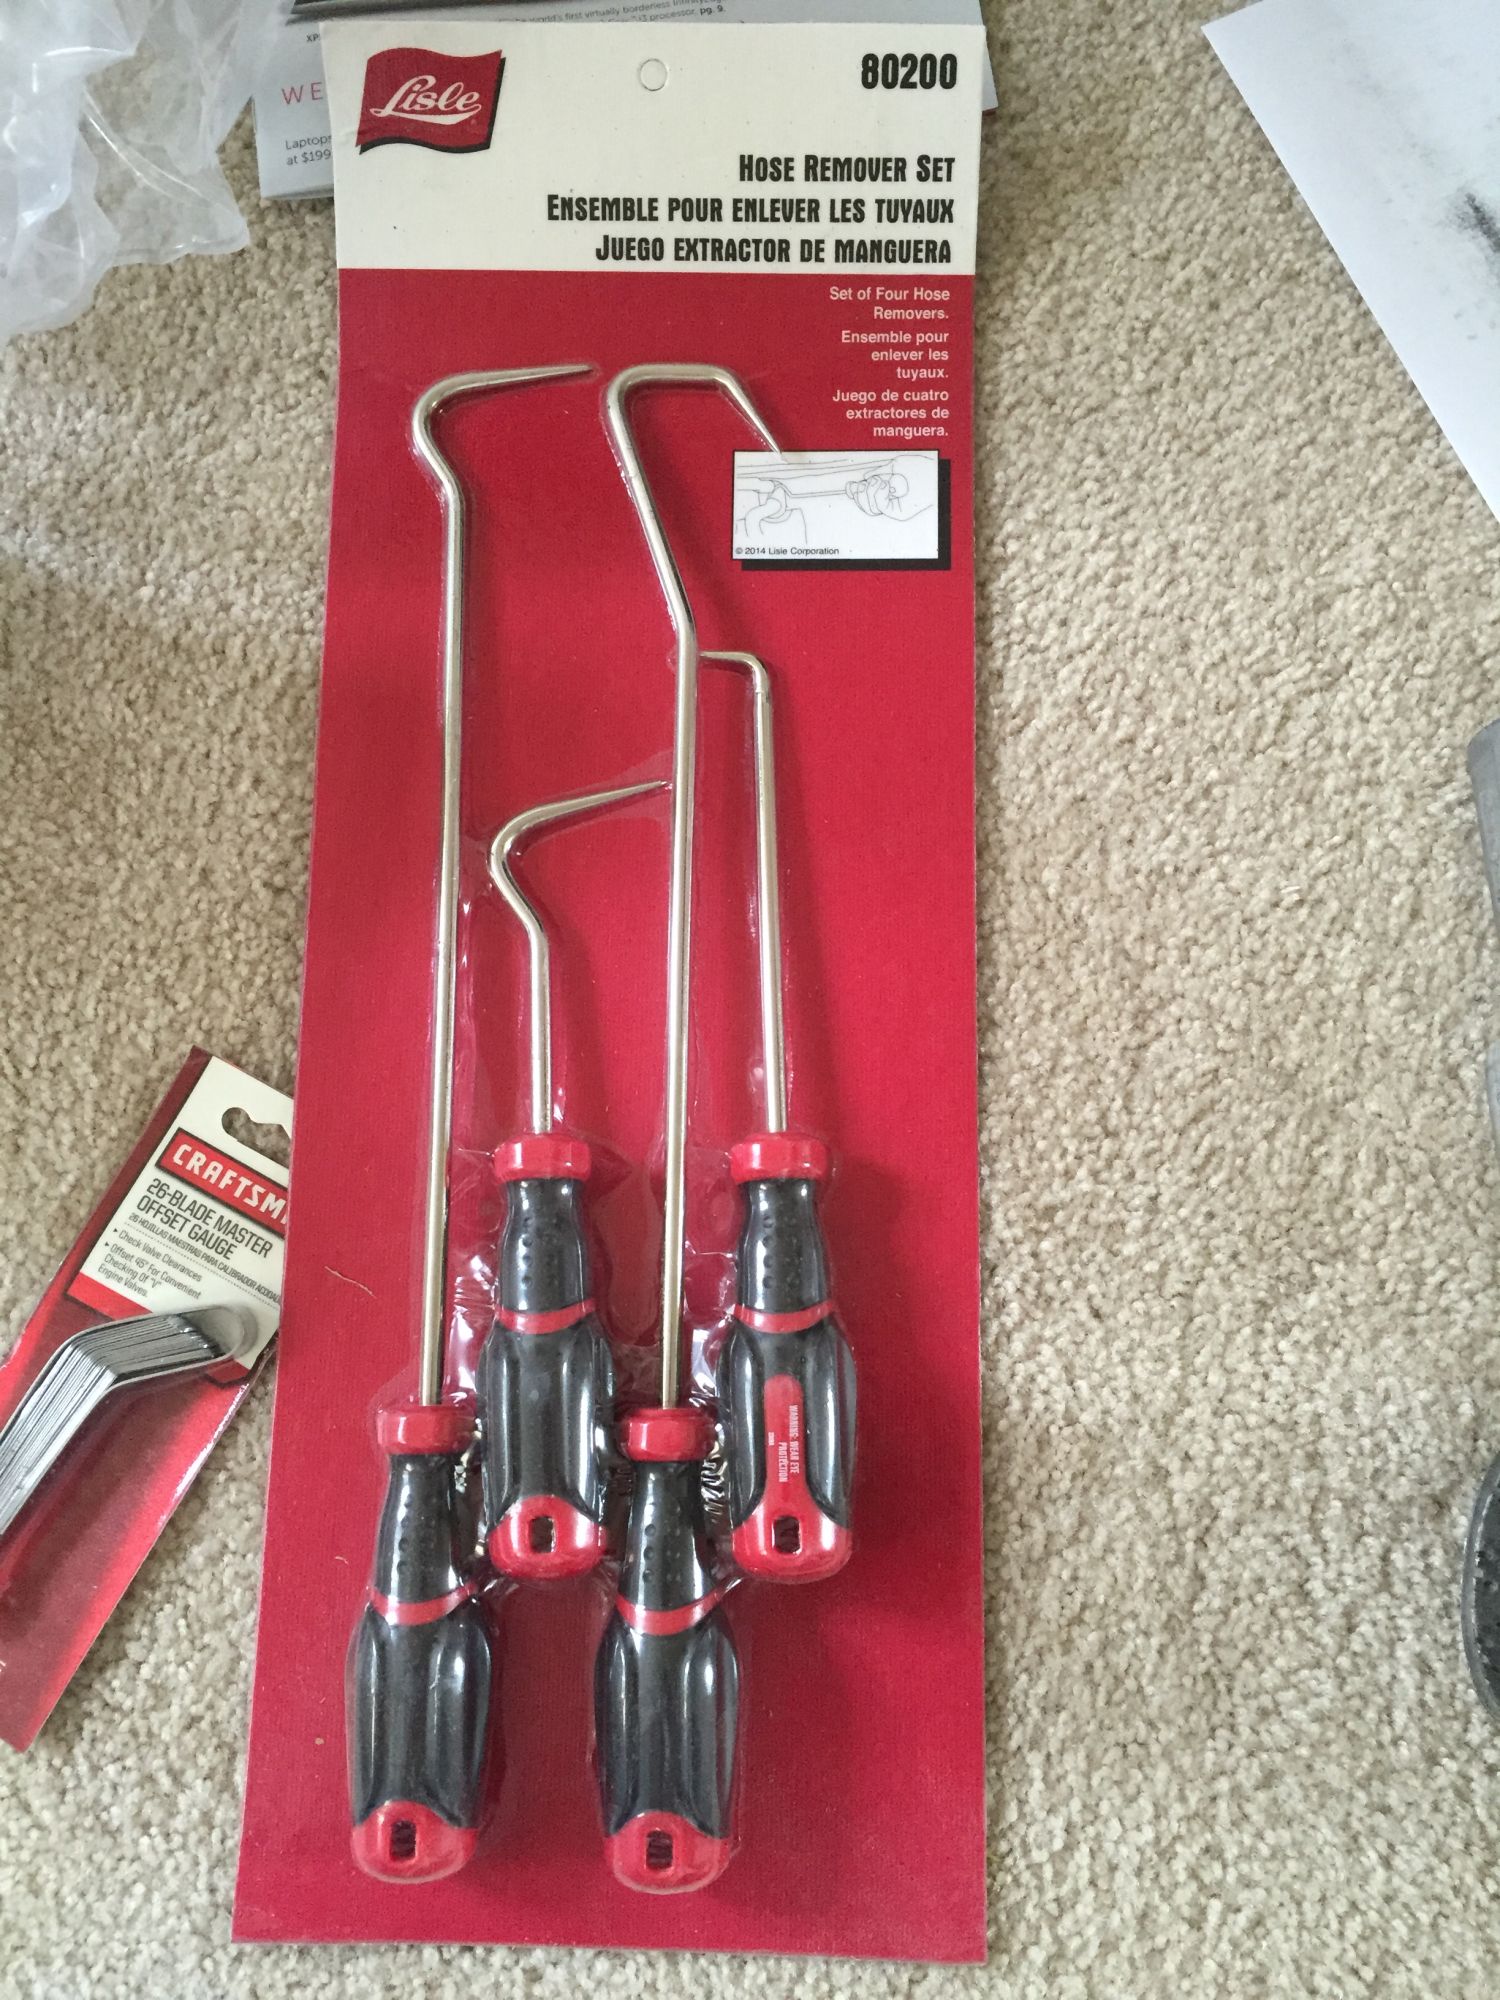
Tools to help with taking out the OEM Radiator and Breather Hoses so I can replace it with Yellow Samco Hoses
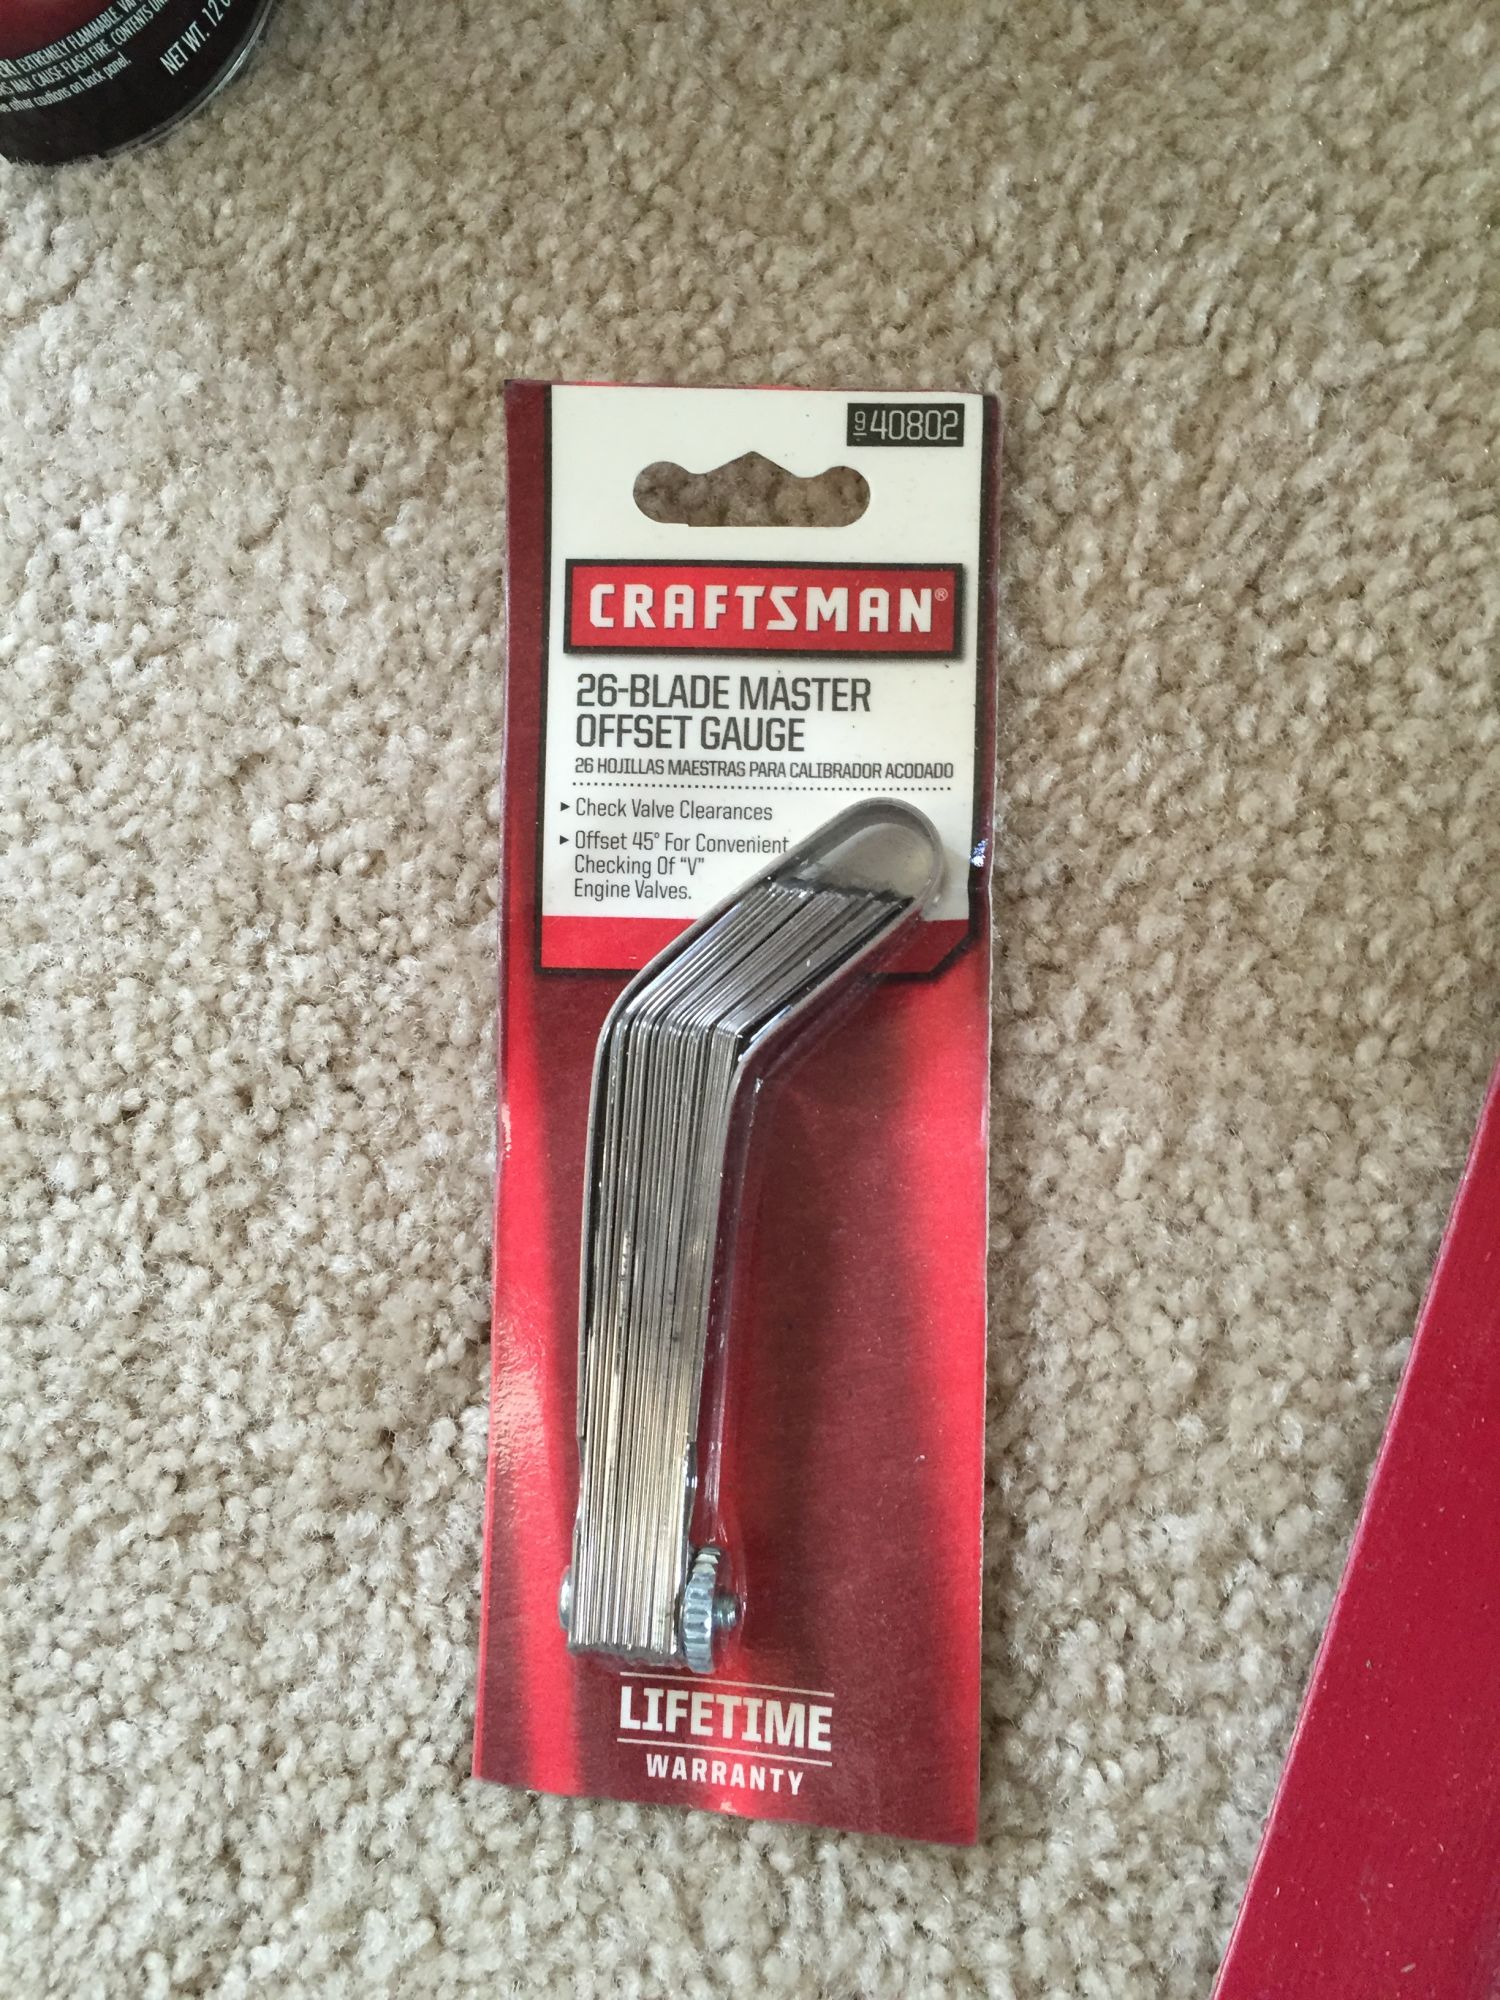
Plus Tools to do the VALVE Gap Adjustment:
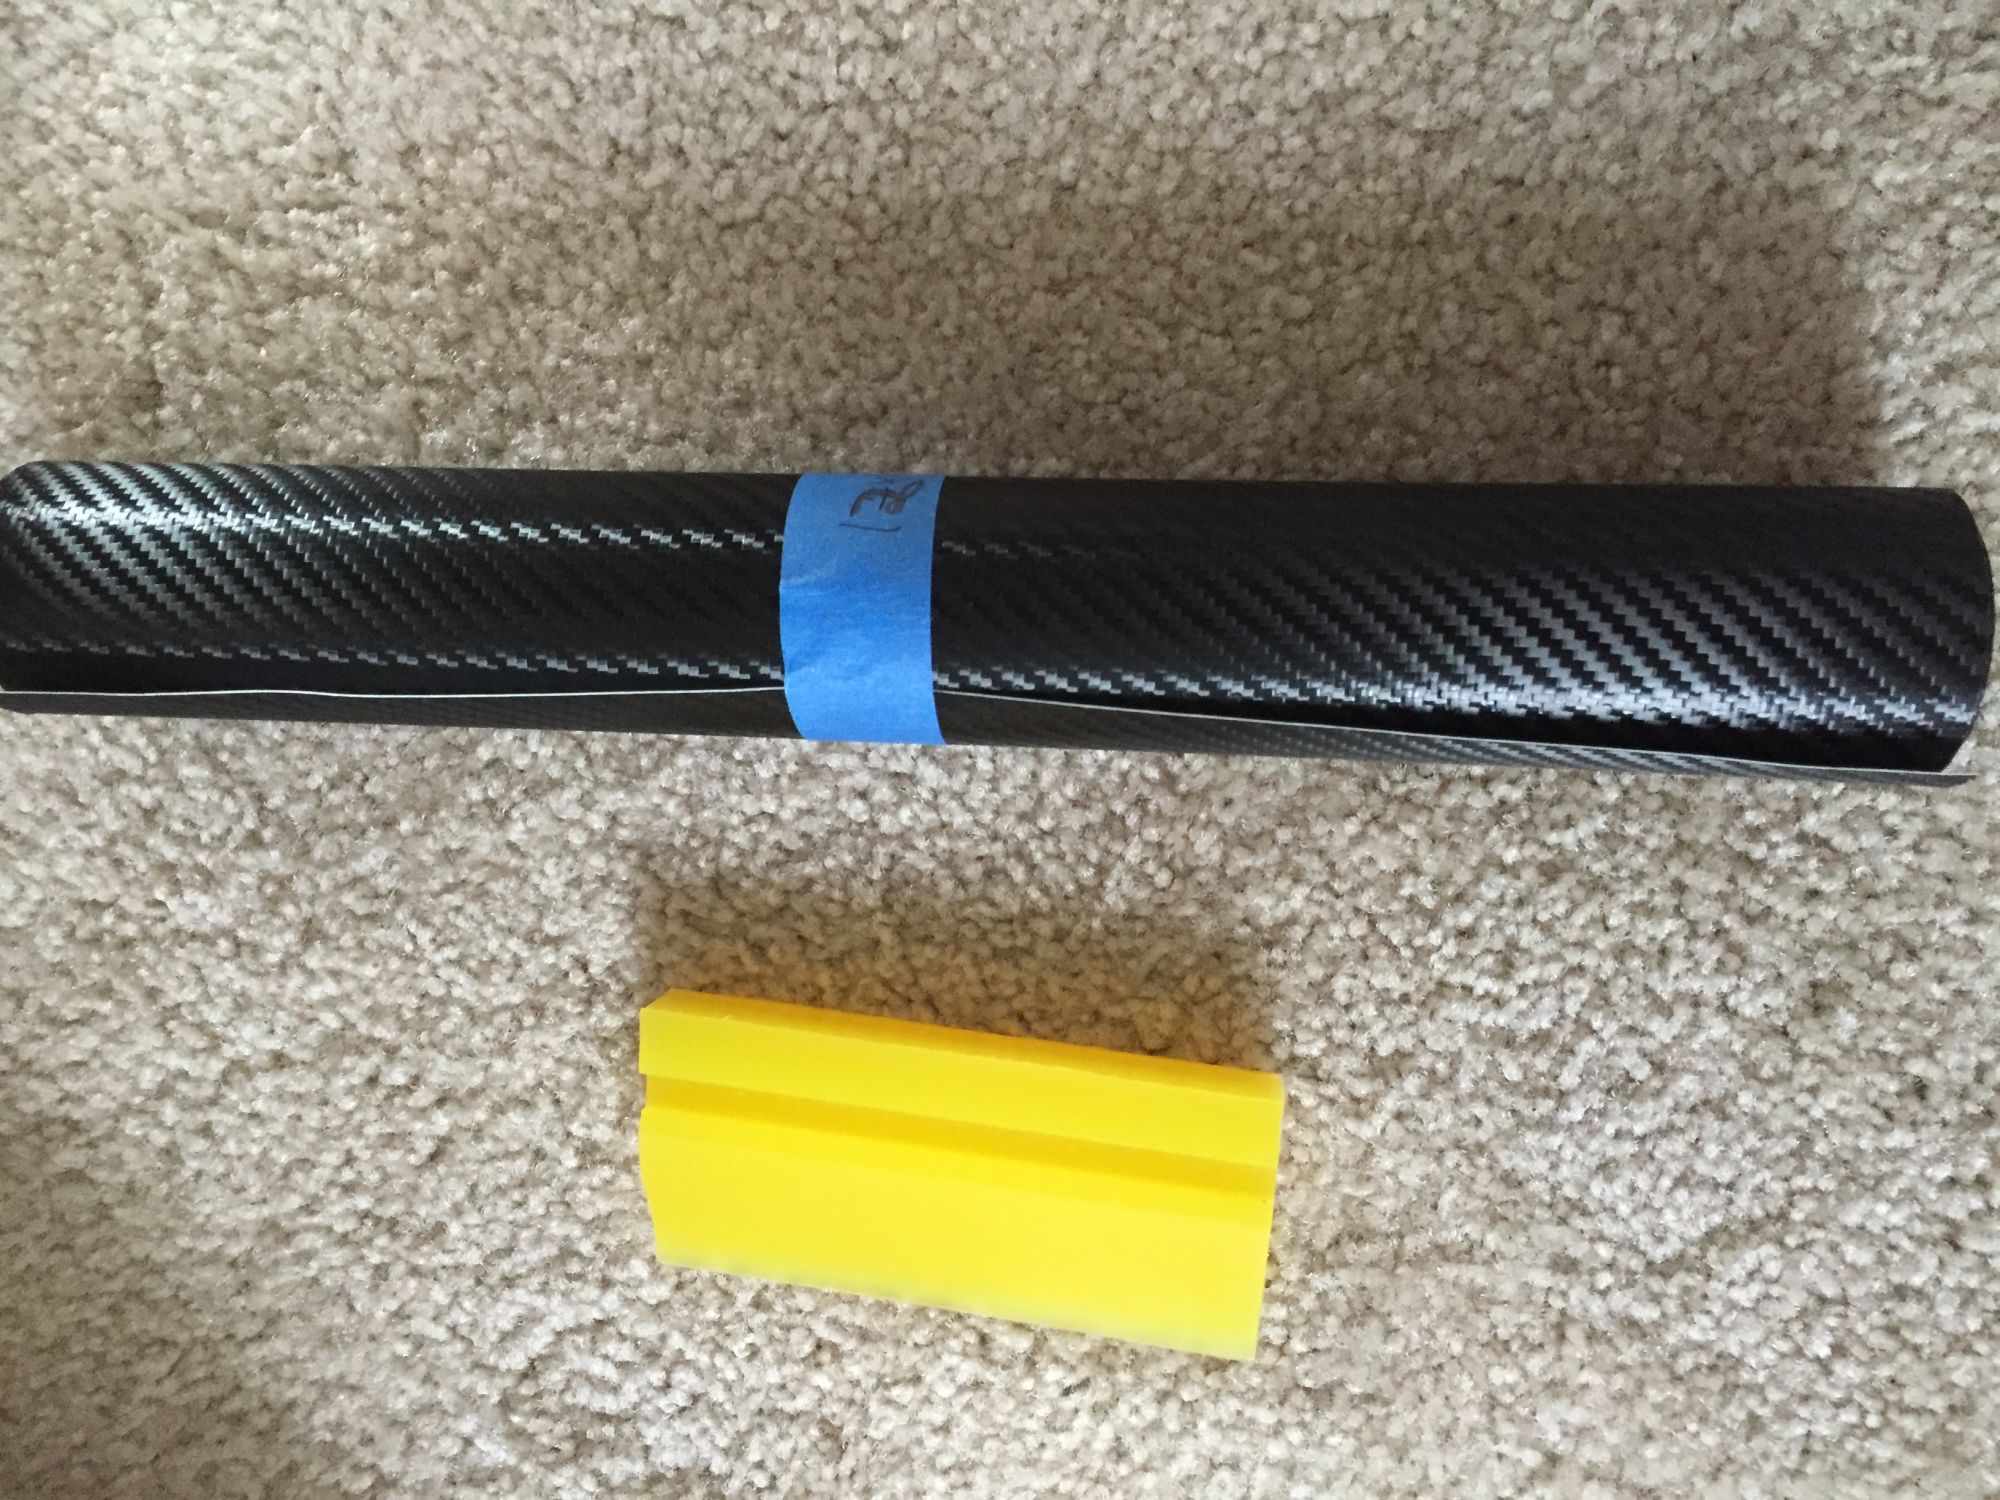
3M 1080 CF12 Carbon Fiber Vinyl Wrap and the tools to apply it,
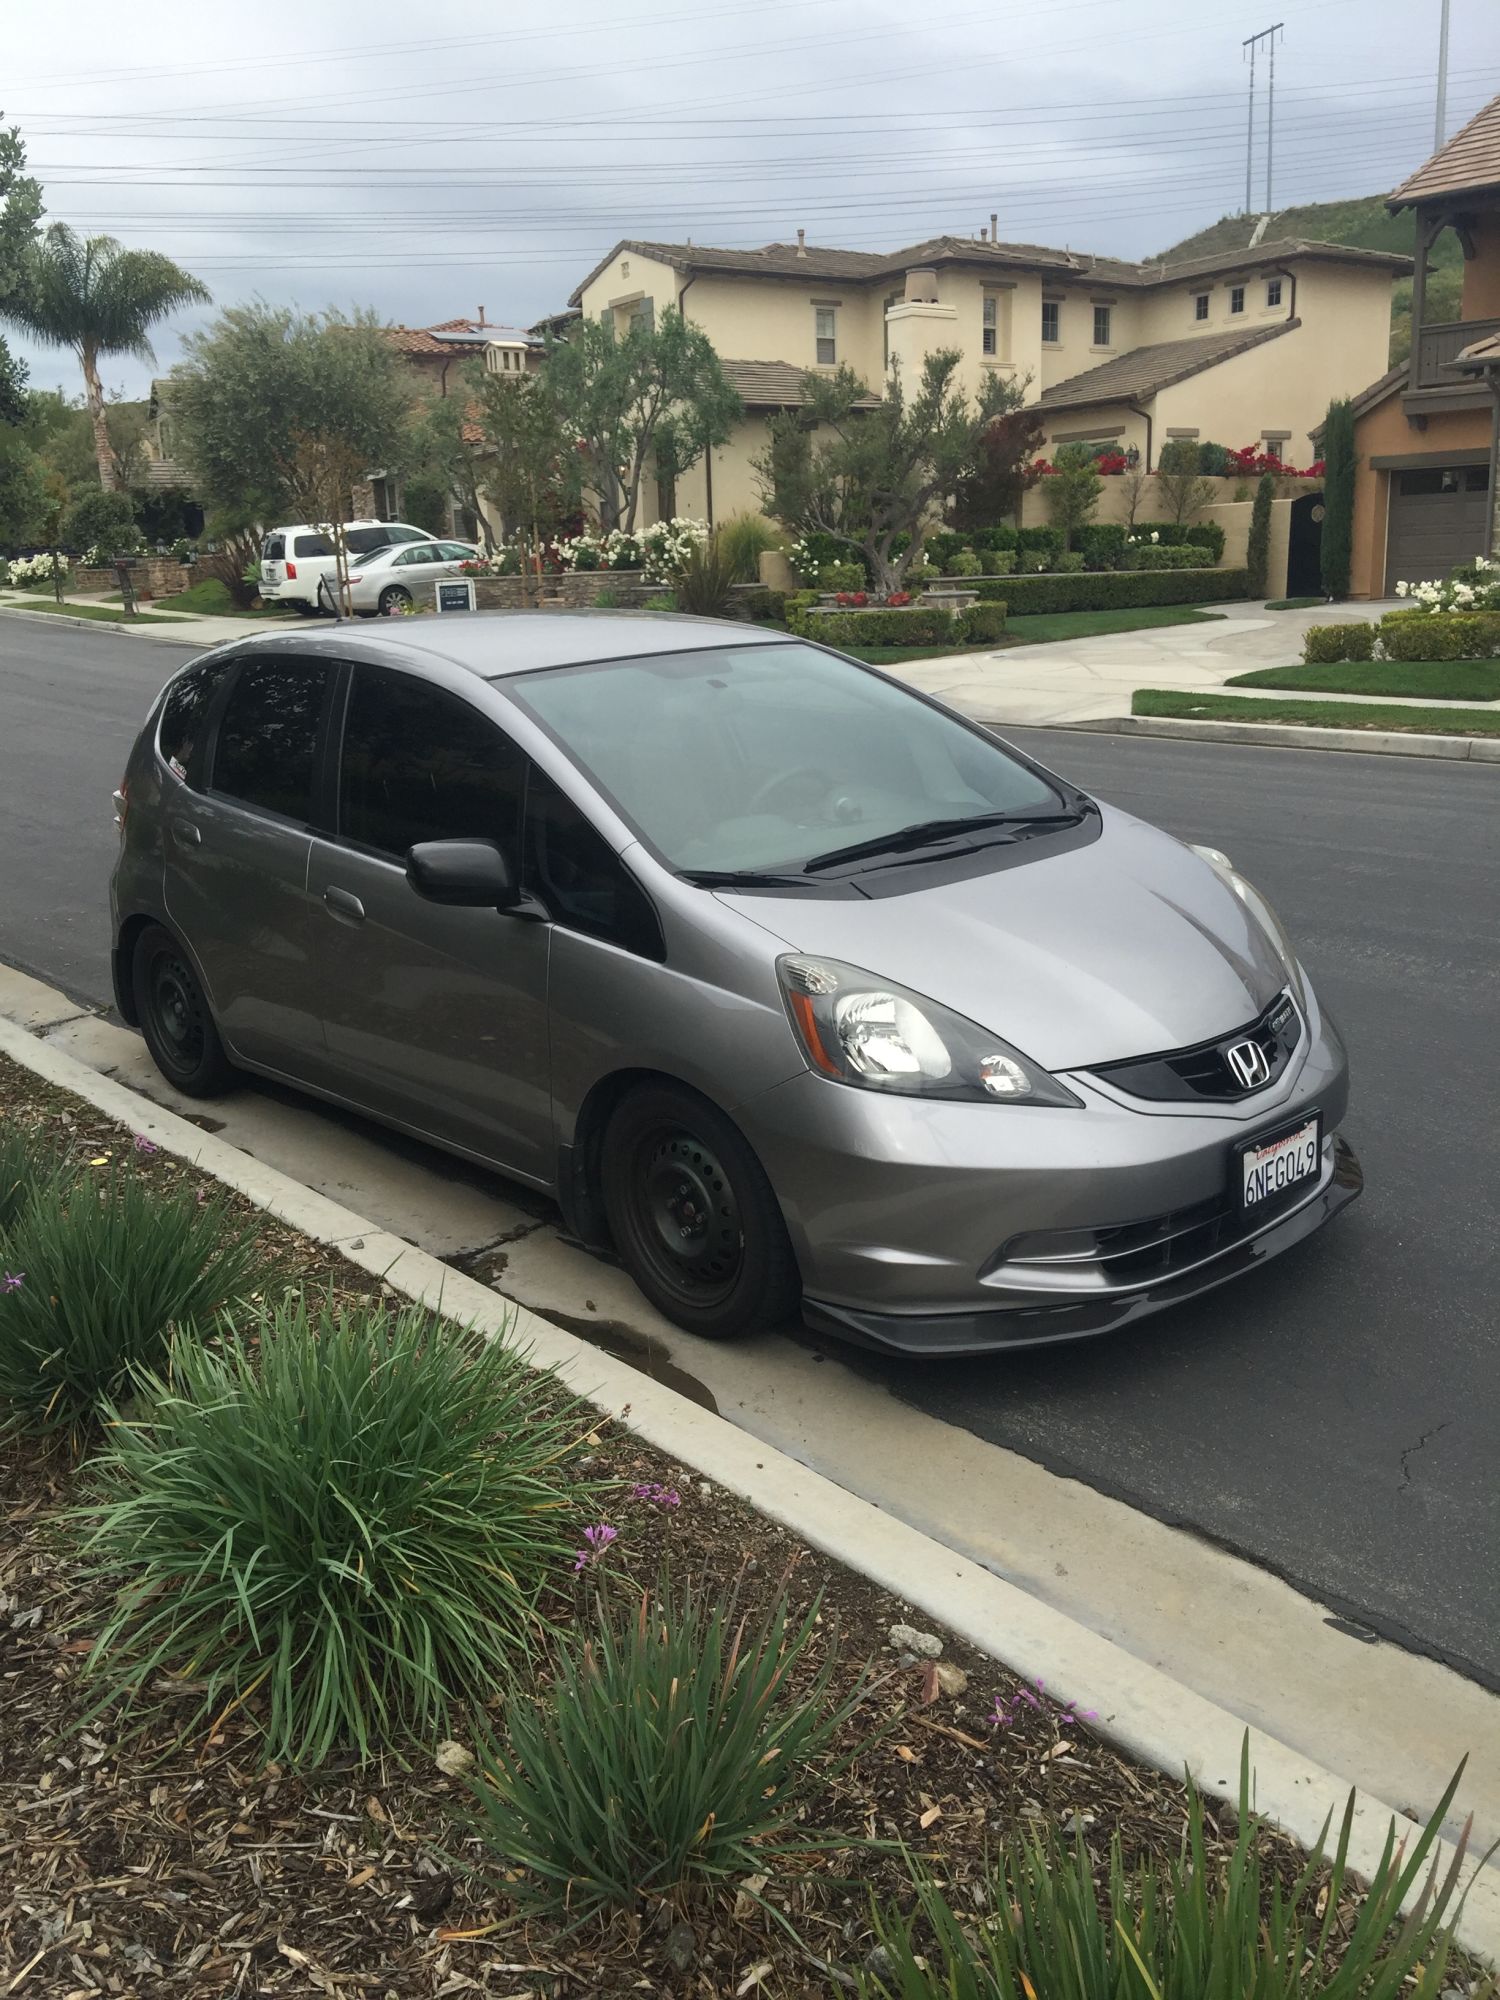
I am going to WRAP the ALL-FIT Rubber Lip below my front bumper
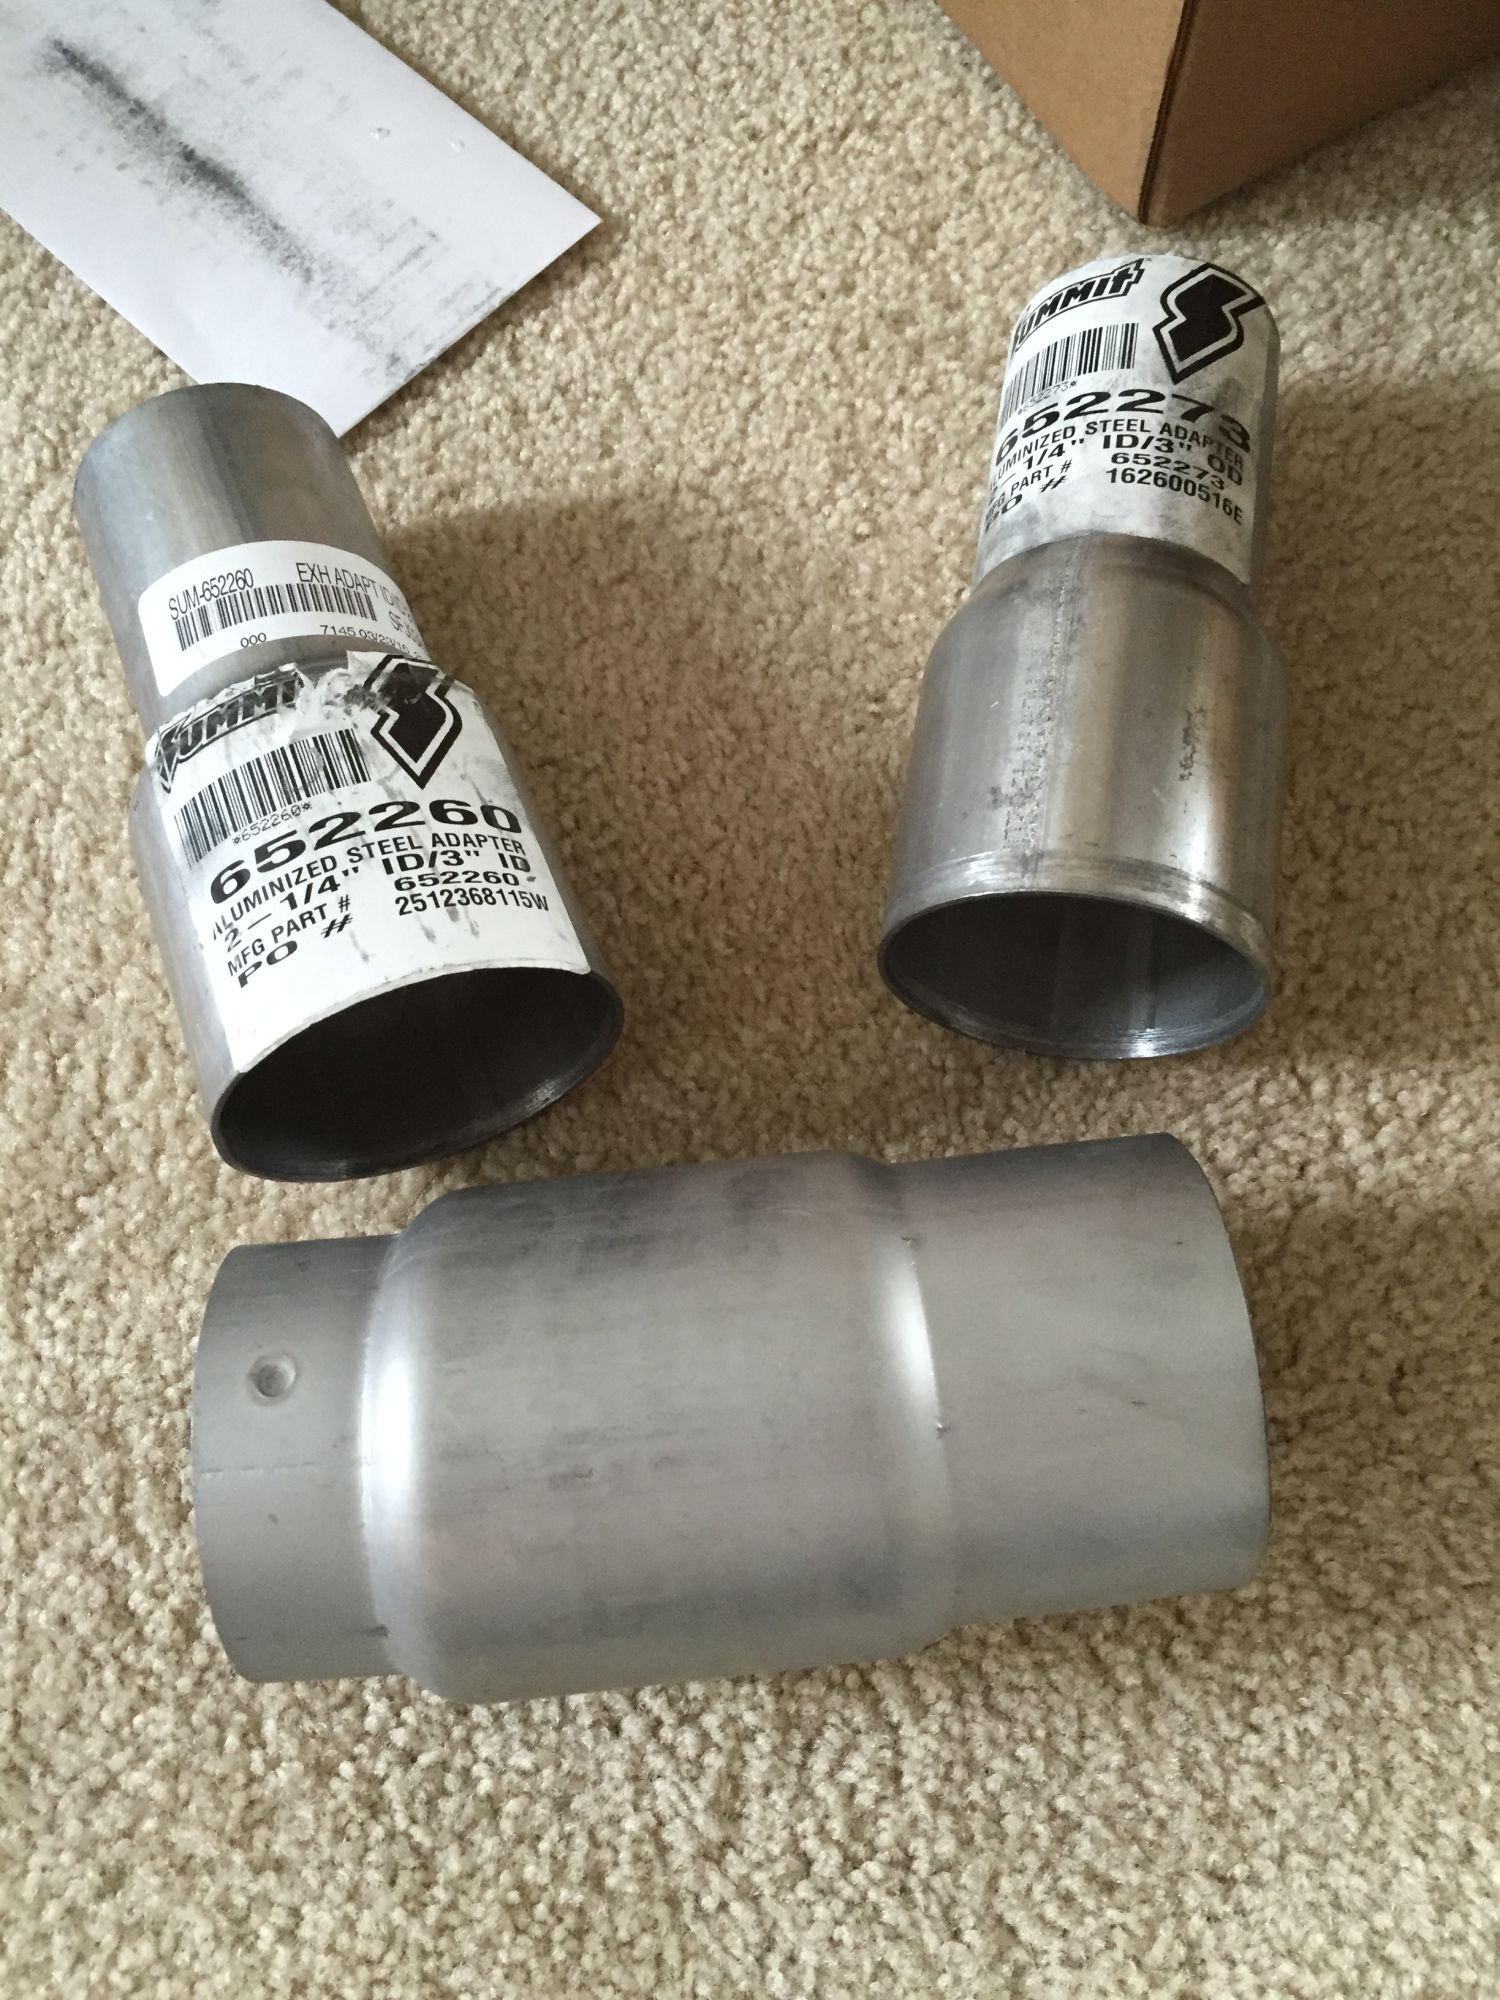
Last, the 3.5in diameter Dynomax Race Mini Bullet Muffler model 24249 with 2 piece of Summit Racing 3.5in to 2.25 in Adapter arrives too,
I am going to check the space later, and if I see there is enough space
for the larger 4in diameter 24250, I will get that instead and return this 24249...
Drilling Bits to drill holes on the firewall and Rubber Grommet to protect the wiring from the sharp edges of the holes.
This holes will be where the Boomslang Wiring Harness, Defi Boost Gauge and Water Temp Harness pass from inside the cabin to the engine bay.
Few days ago, the ATI Adapter ring so the AEM 52mm UEGO gauge can fit perfectly into the Gauge Pod arrives along with the extra O-Ring for the Sprintex Intake Elbow:
Several shades of High Temp Black Paint and Primer to paint the Sprintex
Supercharger:
Tools to help with taking out the OEM Radiator and Breather Hoses so I can replace it with Yellow Samco Hoses
Plus Tools to do the VALVE Gap Adjustment:
3M 1080 CF12 Carbon Fiber Vinyl Wrap and the tools to apply it,
I am going to WRAP the ALL-FIT Rubber Lip below my front bumper
Last, the 3.5in diameter Dynomax Race Mini Bullet Muffler model 24249 with 2 piece of Summit Racing 3.5in to 2.25 in Adapter arrives too,
I am going to check the space later, and if I see there is enough space
for the larger 4in diameter 24250, I will get that instead and return this 24249...
04-11-2016, 09:54 PM
 -- though someone could make it very easily haha. It's just base moulding from Home Depot, made out of wood. Ordered it online though because the shape isn't available at the stores. I picked the tapered edge to work with the front sti lip I have and so it has more flow to it than a basic square one would.

 04-12-2016, 12:00 AM
Not exactly homemade -- though someone could make it very easily haha. It's just base moulding from Home Depot, made out of wood. Ordered it online though because the shape isn't available at the stores. I picked the tapered edge to work with the front sti lip I have and so it has more flow to it than a basic square one would.
-- though someone could make it very easily haha. It's just base moulding from Home Depot, made out of wood. Ordered it online though because the shape isn't available at the stores. I picked the tapered edge to work with the front sti lip I have and so it has more flow to it than a basic square one would.Z that looks really good! I didn't expect it to be made of wood. I have thought about some universal side skirt splitters (top1 motorsports). It would help with some of the cone rash during autoX lol.
I love that JDP lip for the bases, it should be on every base owners list. Also glad to know John is still cooking, I am thinking of picking up a duckbill soon. How was the mounting?
04-12-2016, 12:16 AM
You should! Looks good too haha
04-12-2016, 12:46 AM
I love that JDP lip for the bases, it should be on every base owners list. Also glad to know John is still cooking, I am thinking of picking up a duckbill soon. How was the mounting?[/QUOTE]
Mounting was sketchy had to drill into the hatch but it all worked out it was worth it. John is a cool guy he had to make it for me took him three weeks well worth the wait.
Mounting was sketchy had to drill into the hatch but it all worked out it was worth it. John is a cool guy he had to make it for me took him three weeks well worth the wait.