
Sid 6.7 Picture Trail
#1
 01-10-2009, 04:03 AM


Newest Fit Pics: Sid 6.7
Never posted a picture trail, so I figured it was about time.
So here it goes.
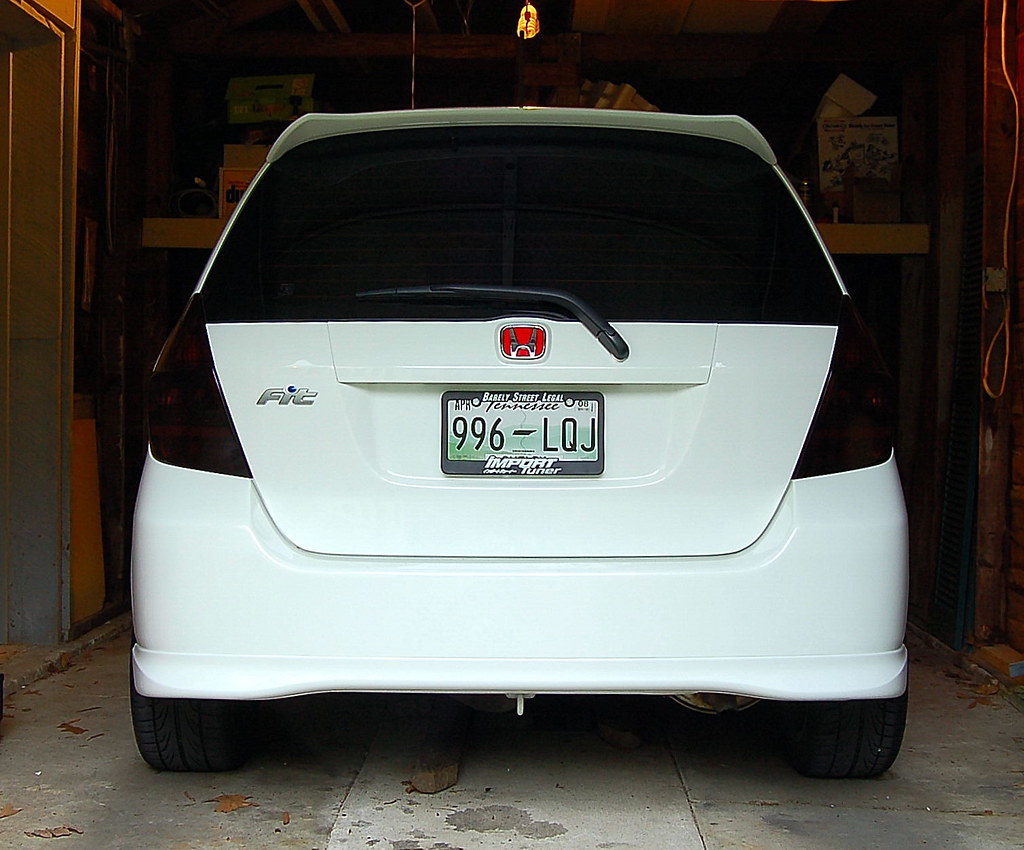
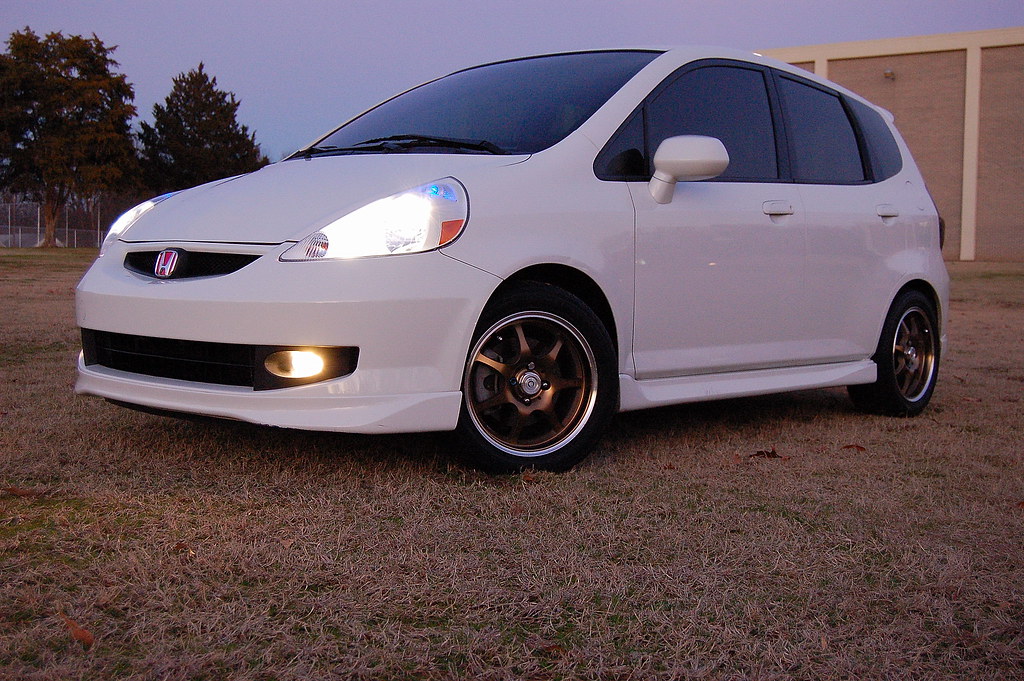
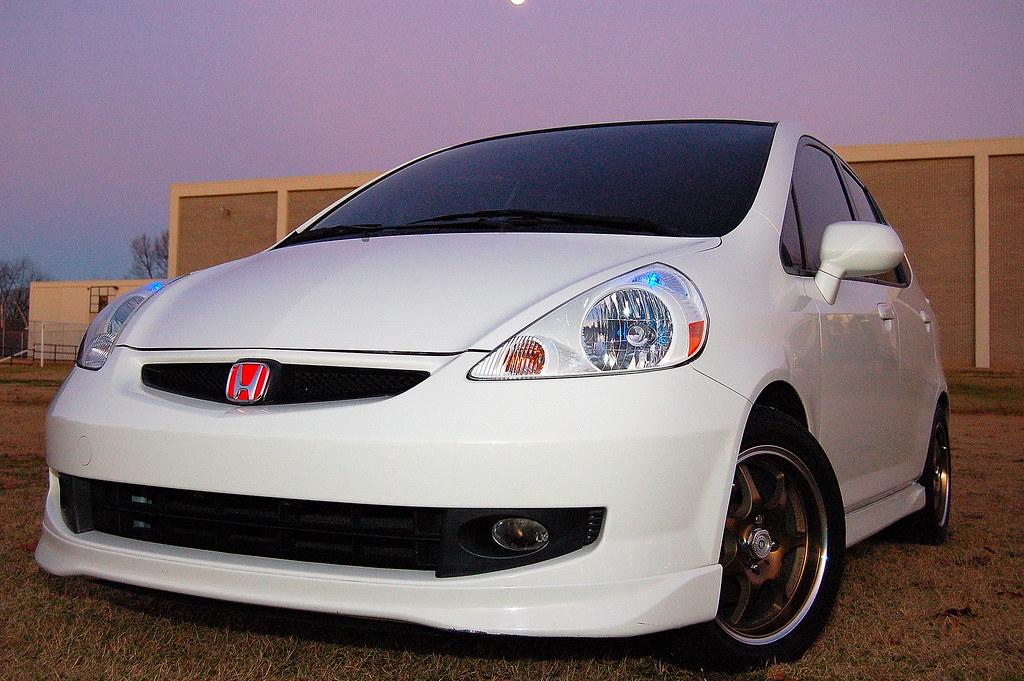
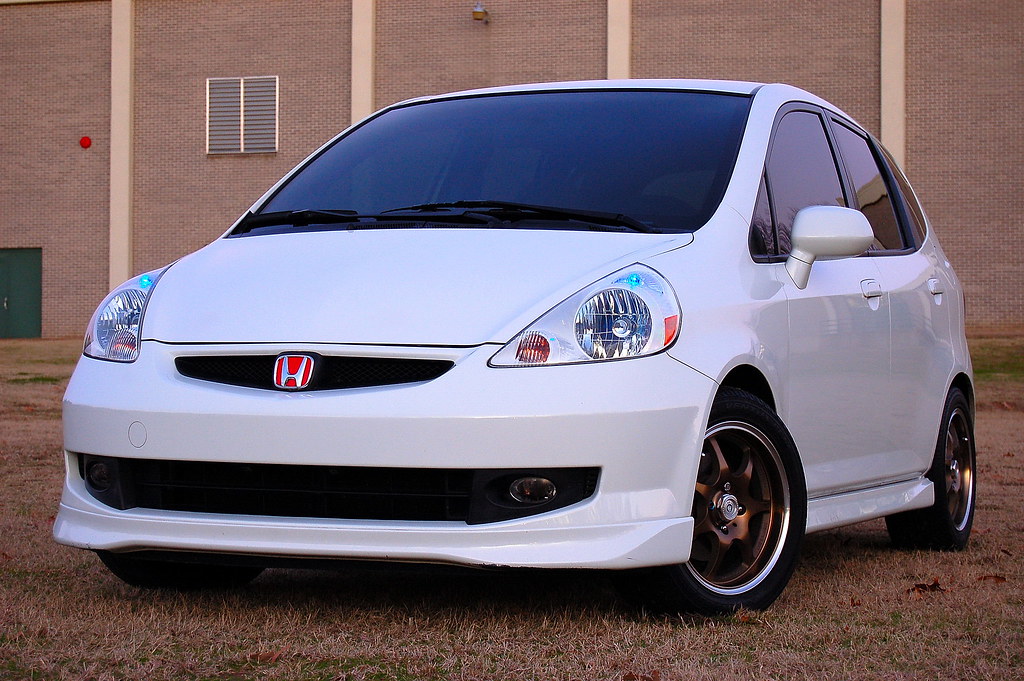
Here it is on a Saturday, the day after I bought it and brought it home. I had washed, clayed it, buffed it, waxed it, and had it tinted: 15% sides/rear and 35% entire windshield.

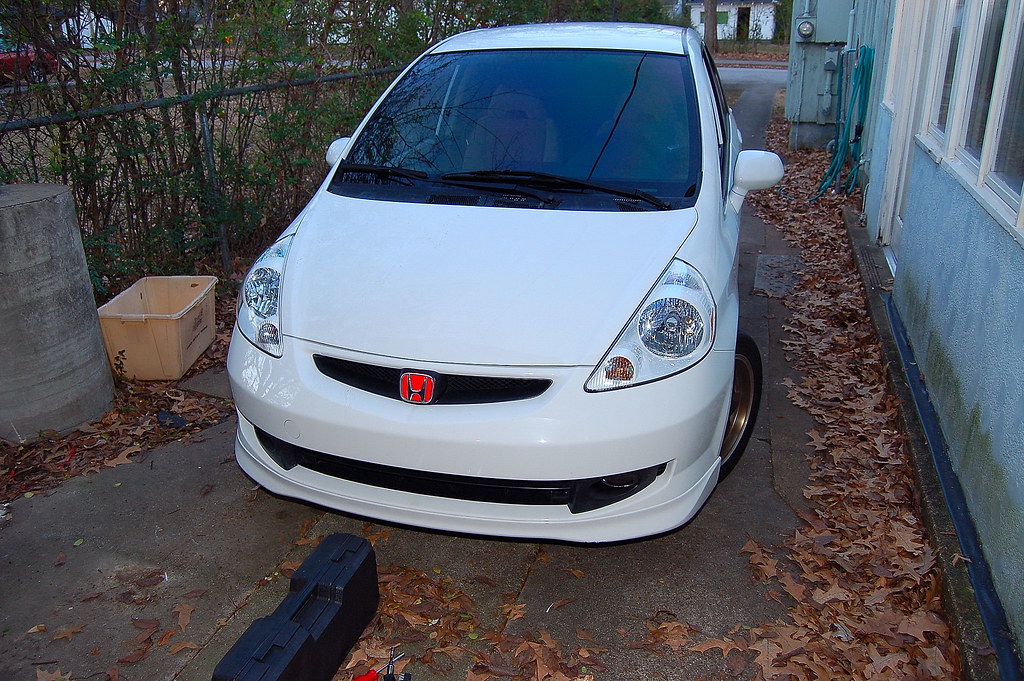
Two weeks later I got my new shoes, 15"x7" Konig Next wheels in bronze with Ventus HRII 205/50/R15 tires.


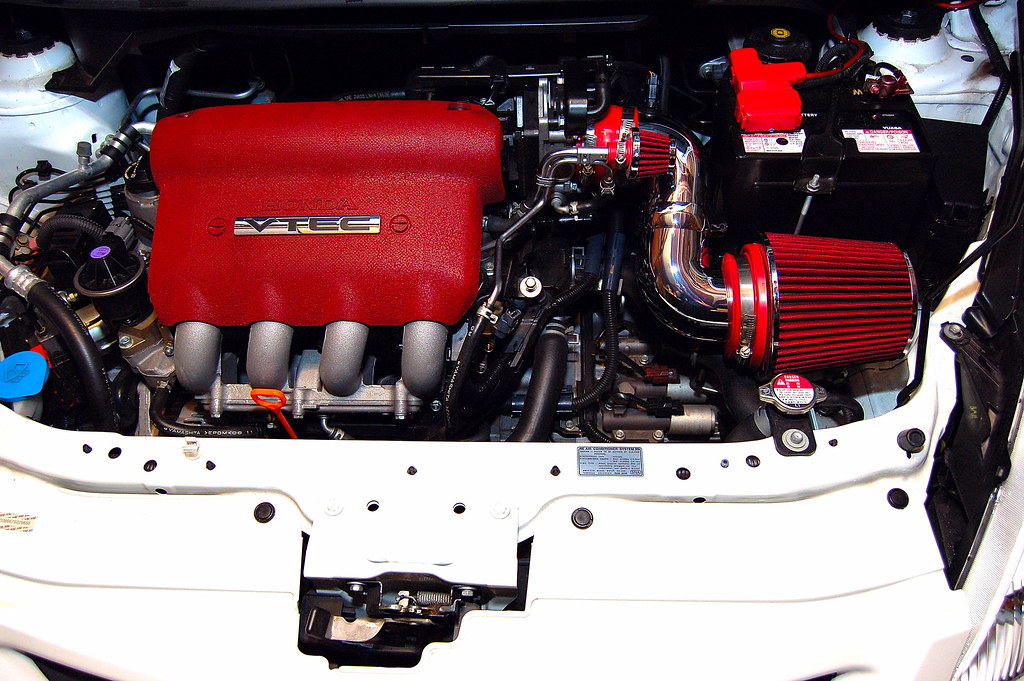
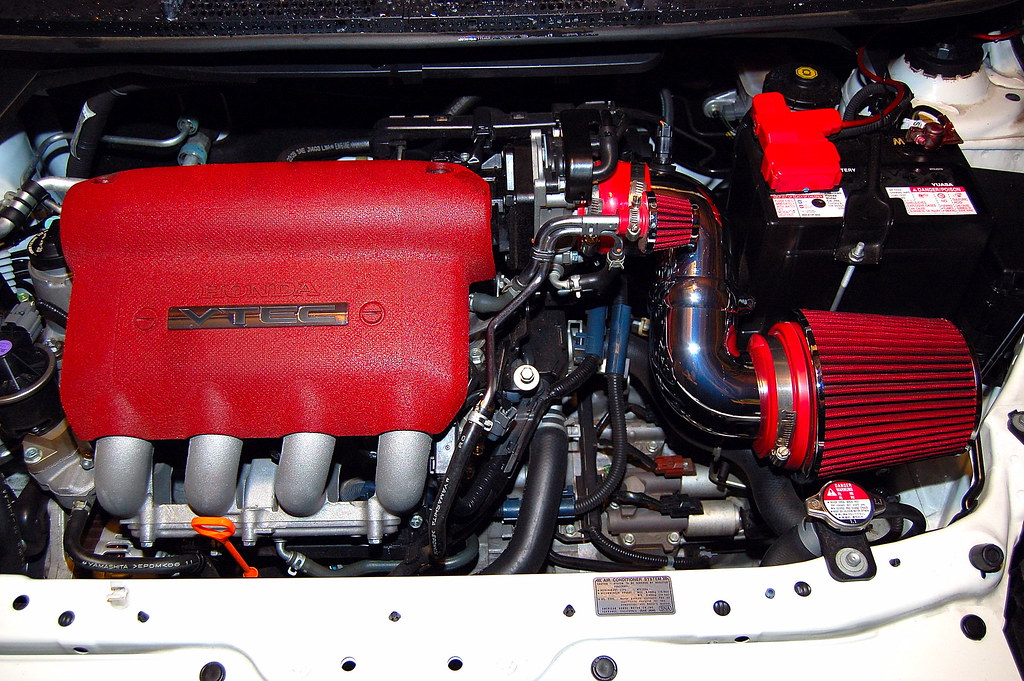
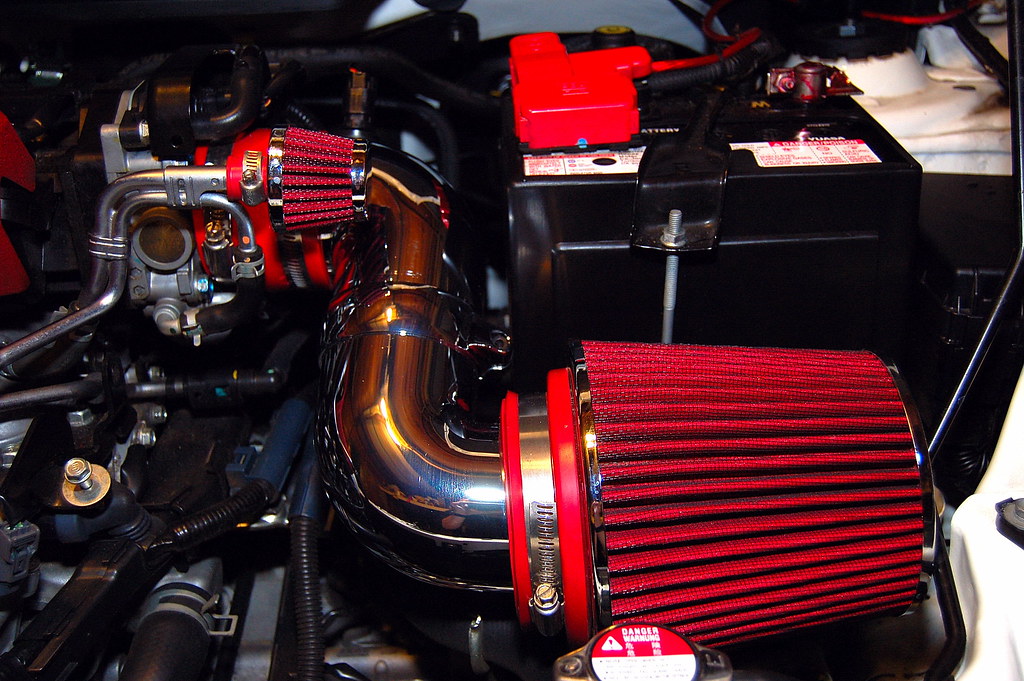
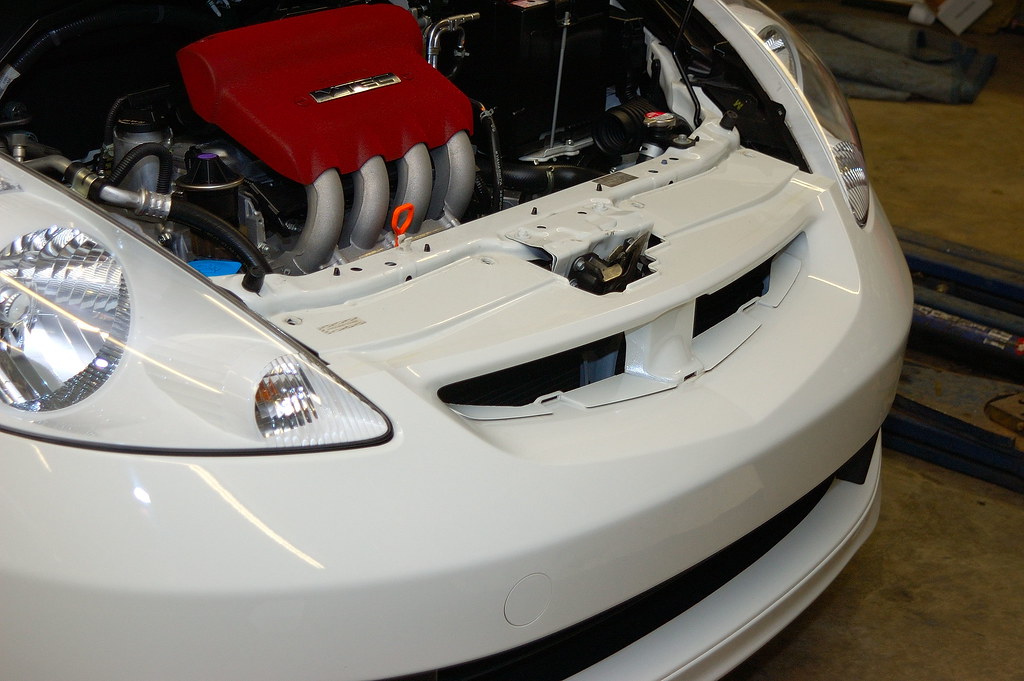
Few weeks later, I decided on a DIY homemade SRI that was later christened the SSR Intake System (for Sid Short Ram). At first I only had the one 90 degree bend and it cost about $50.


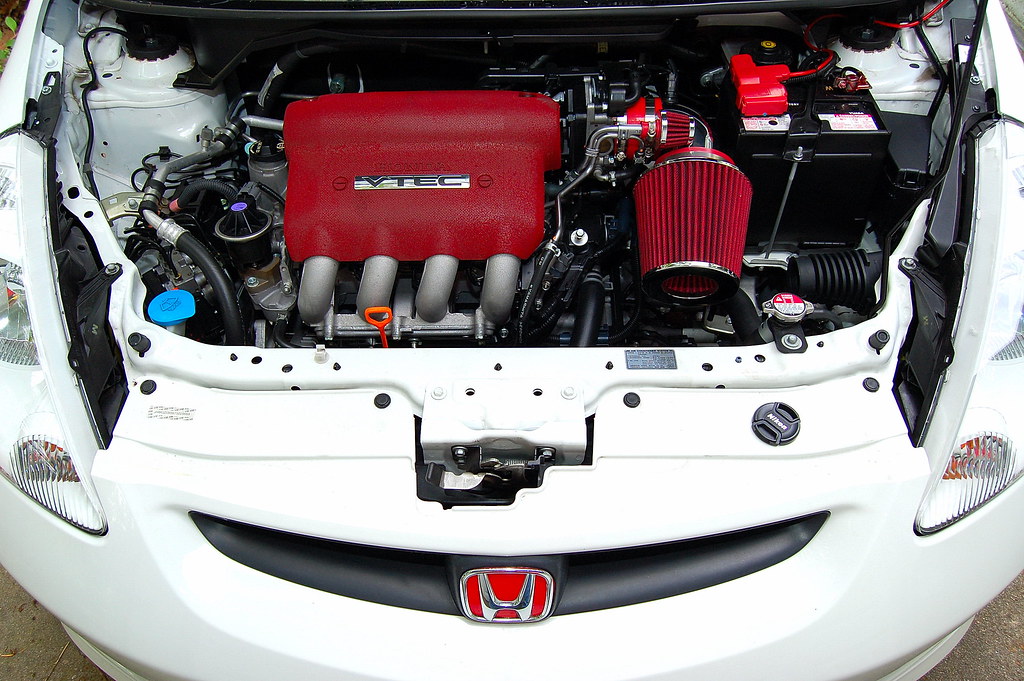
Later on I updated my SSR Intake with the addition of another 90 degree elbow. Since everyone had strongly recommended that this would lower the intake temps, I decided it was worth a try.

Then came the Metra double DIN install kit and a JVC head, Kicker SS 6.5" comps, Kicker amp and Kicker 10" DVC sub in a bandpass box.


Then came the flat-black painted fog bezels.


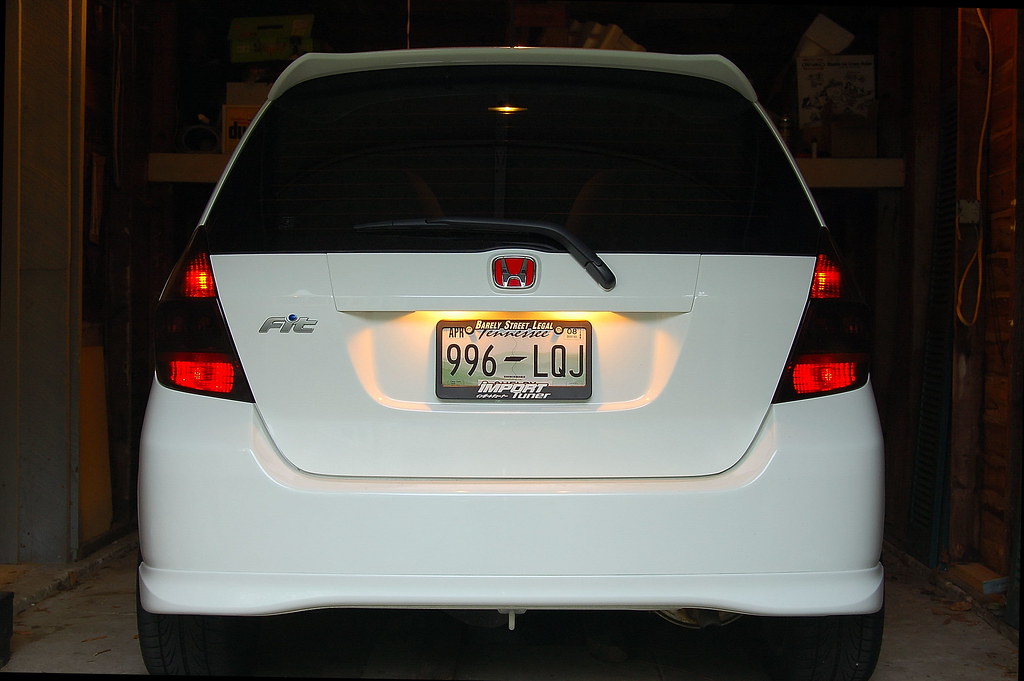
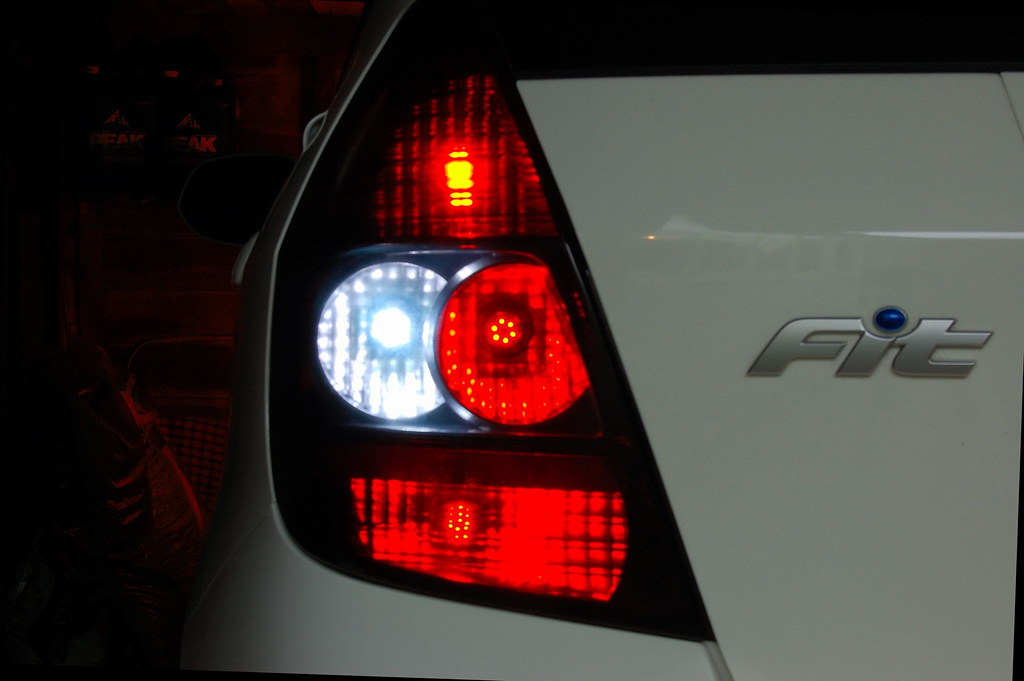
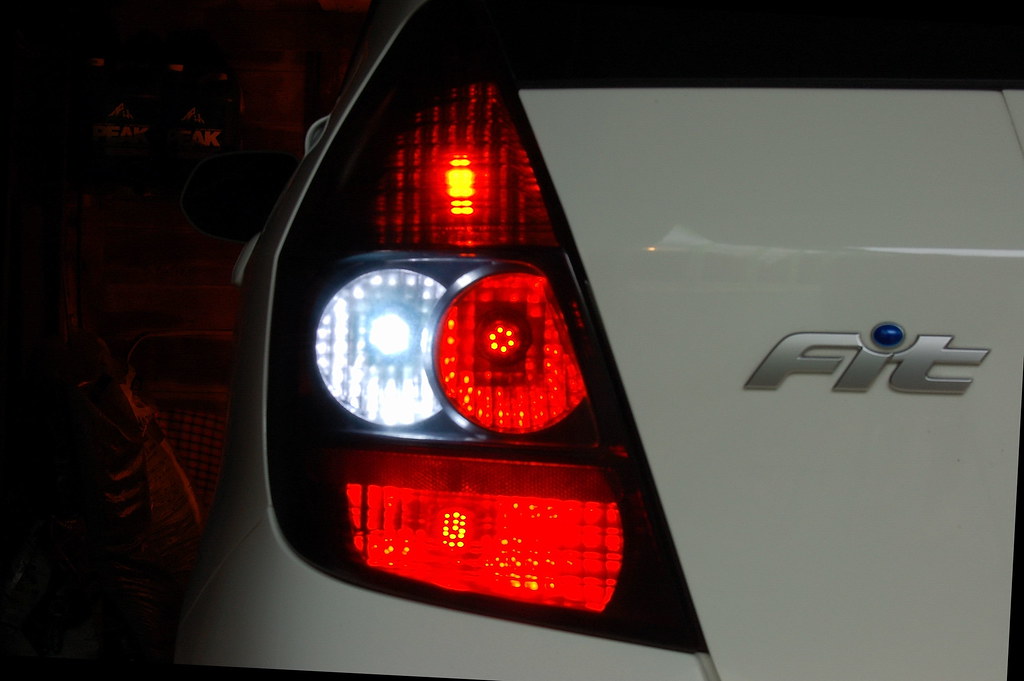
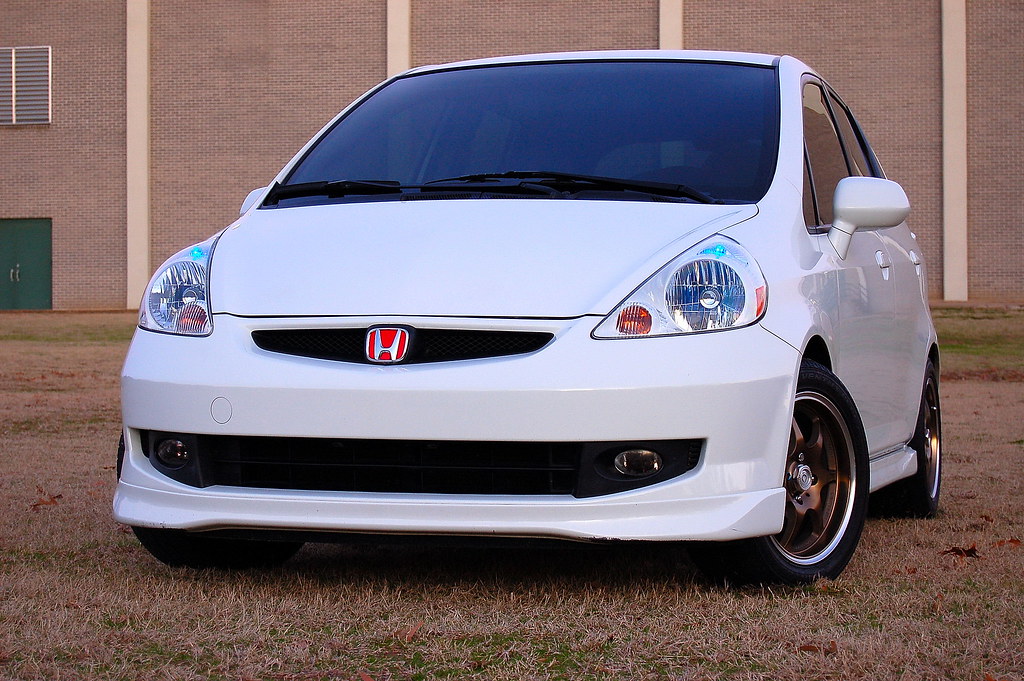
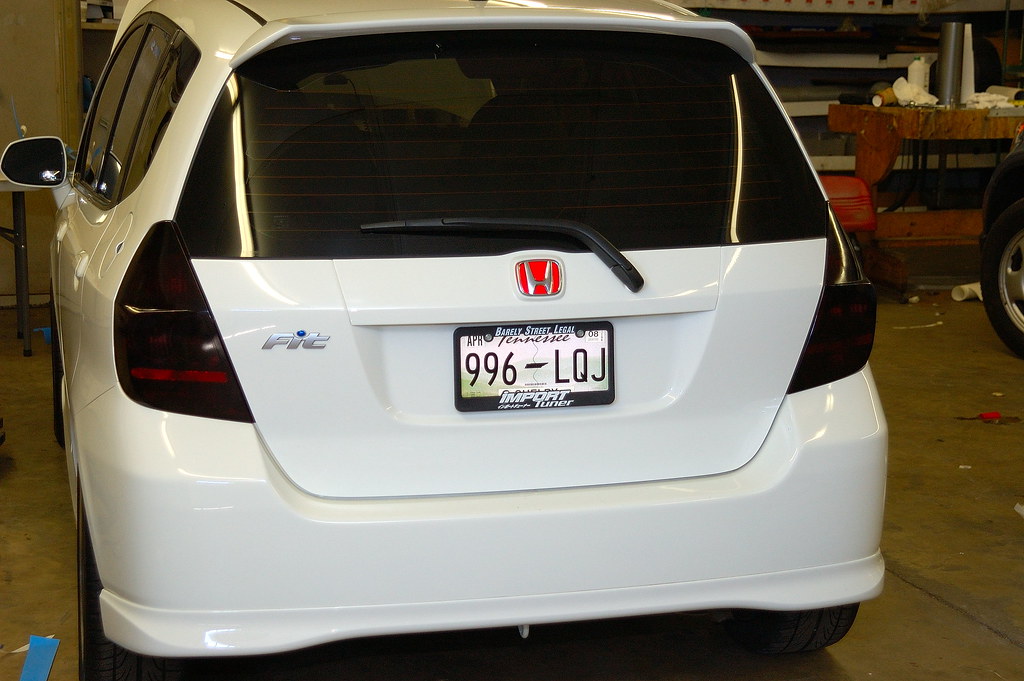
Then another wash, clay, buff, wax session, and the addition of OEM tails that were tinted with VHT NiteShades spray tint.


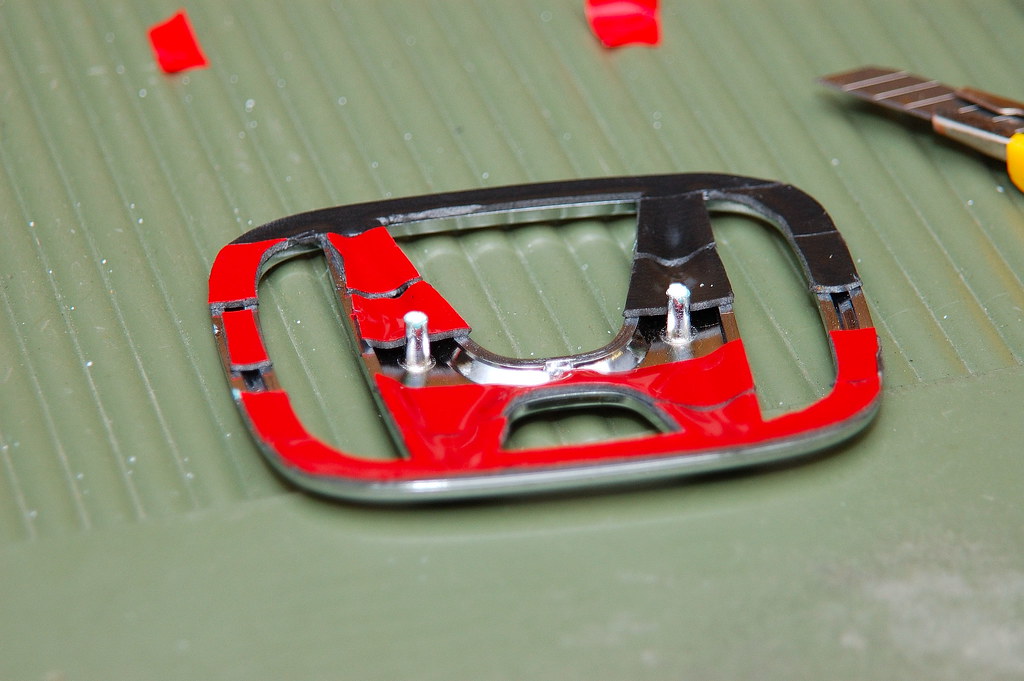
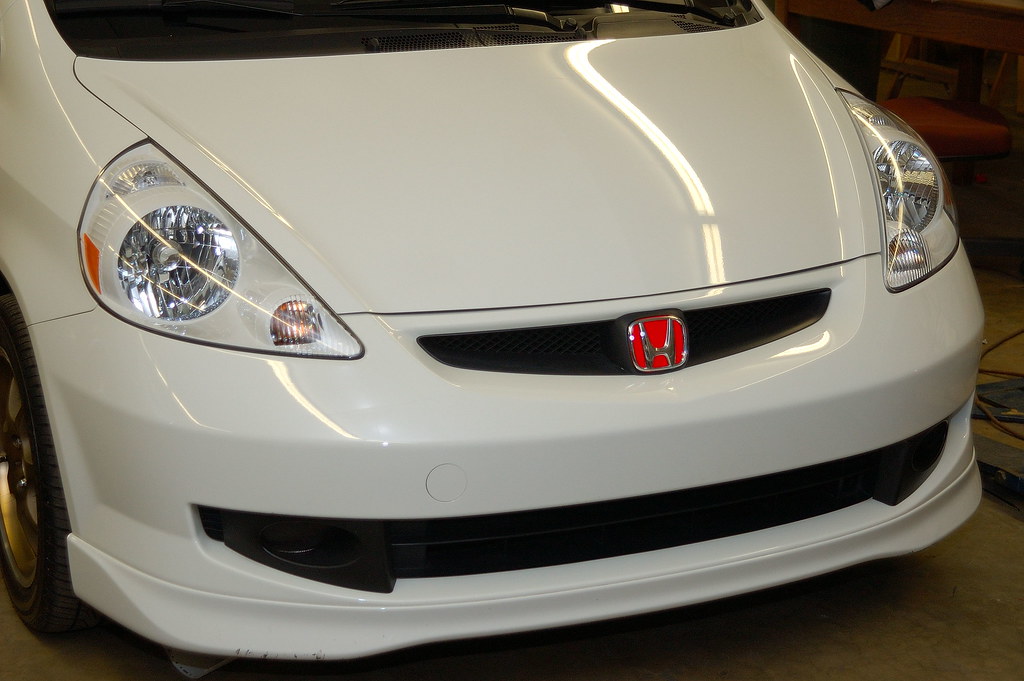
Then came the DIY "JDM syle" red 'H' badges front and rear. These pics are from the DIY thread I made about it.
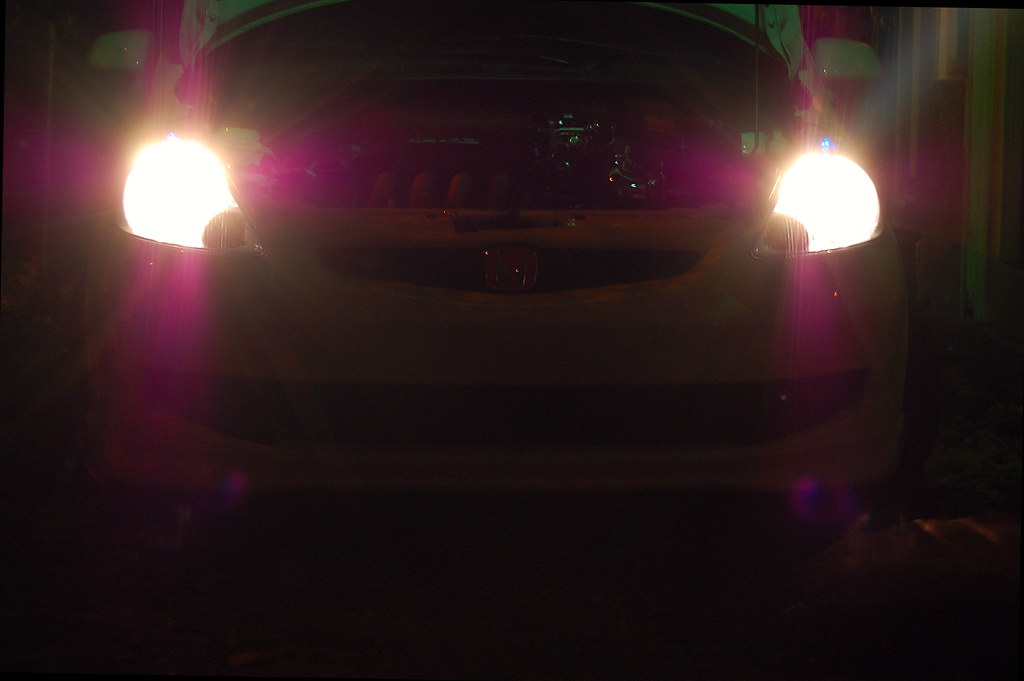
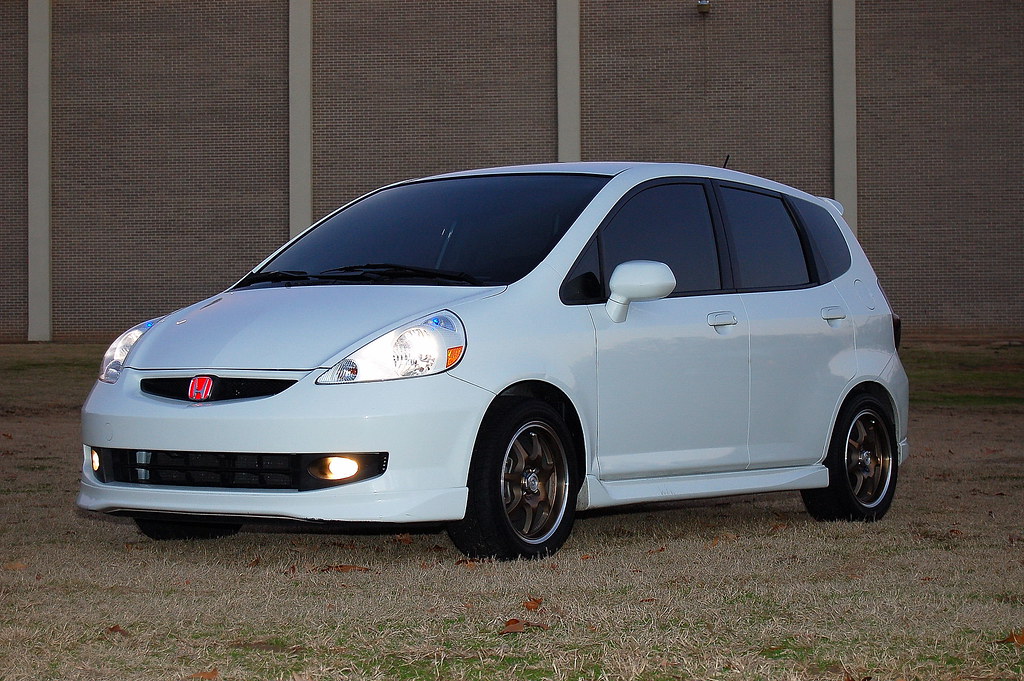
Here we are after the install of complete set of super-bright LED bulbs.
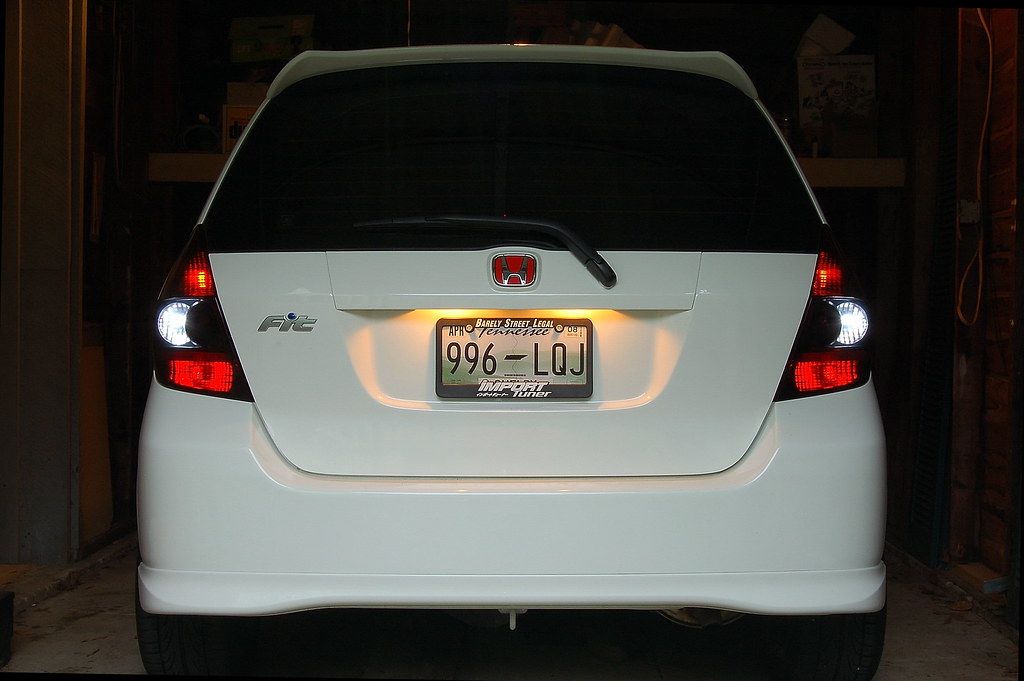
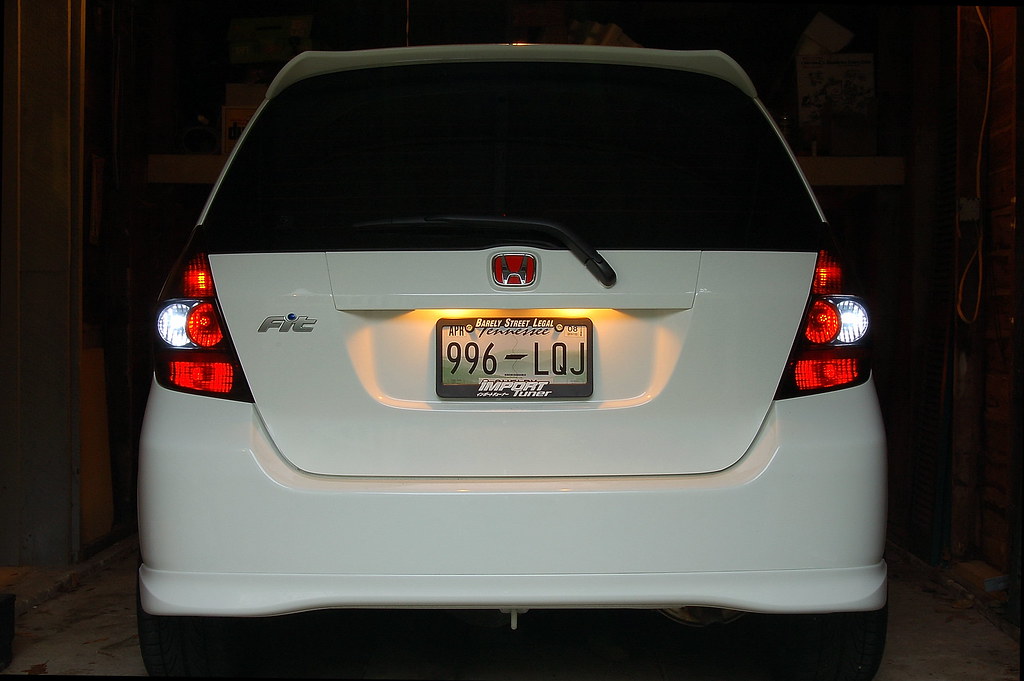
DIY I made about swapping out the old 55/60watt SilverStar Ultras for a set of motorcyle spec 90/100watt H4s.
Step 2: Jack up one side of the vehicle. Check the owners manual to see where to actually place the jack before jacking it up
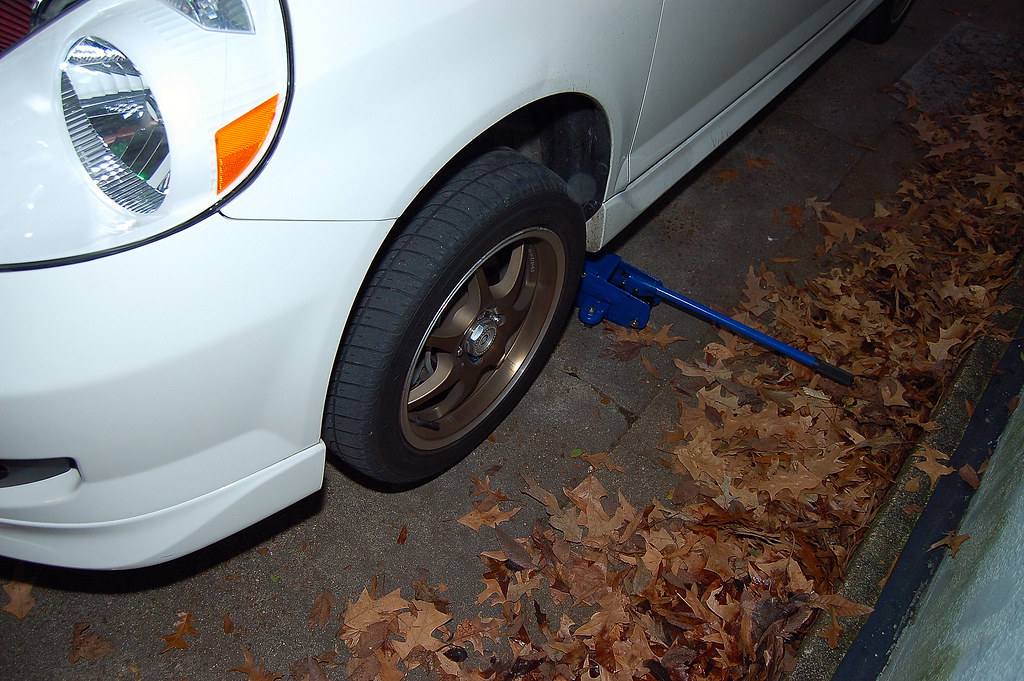
Step 3: Remove the front wheel from the car.
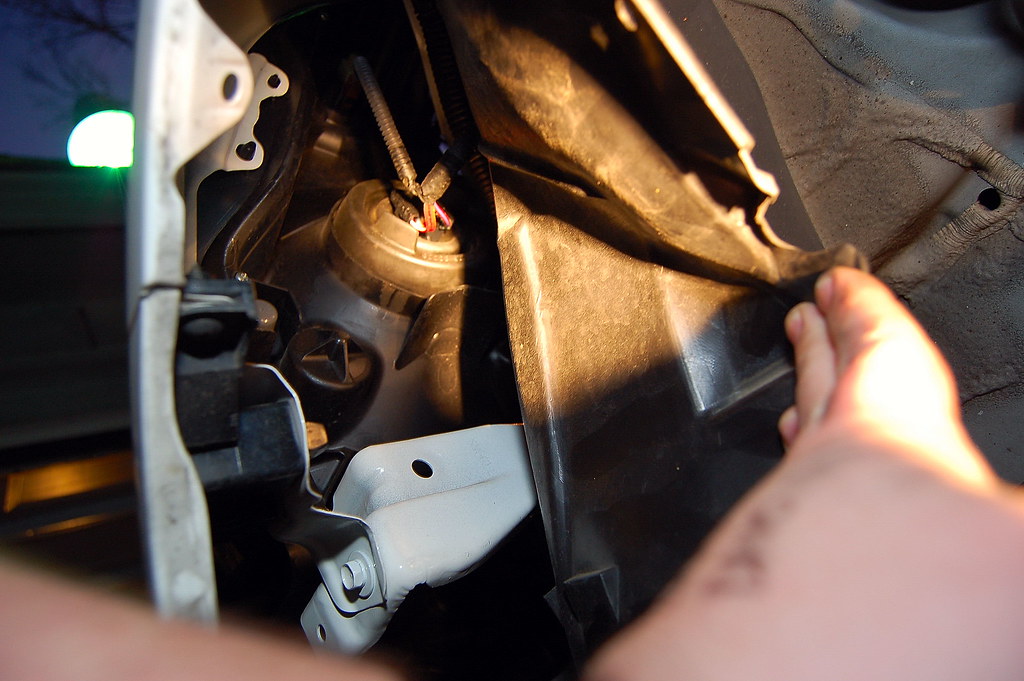
Step 4: Take notice of the retaining clip the connects the inner fender liner to the fender that is right next to the bright light spot to the left. It is really the only retaining clip you have to remove. The liner will move enough to reach the bulb without removing any other clips.

Step 5: When you pull back the fender liner you can see the headlight bulb wiring harness and seal.
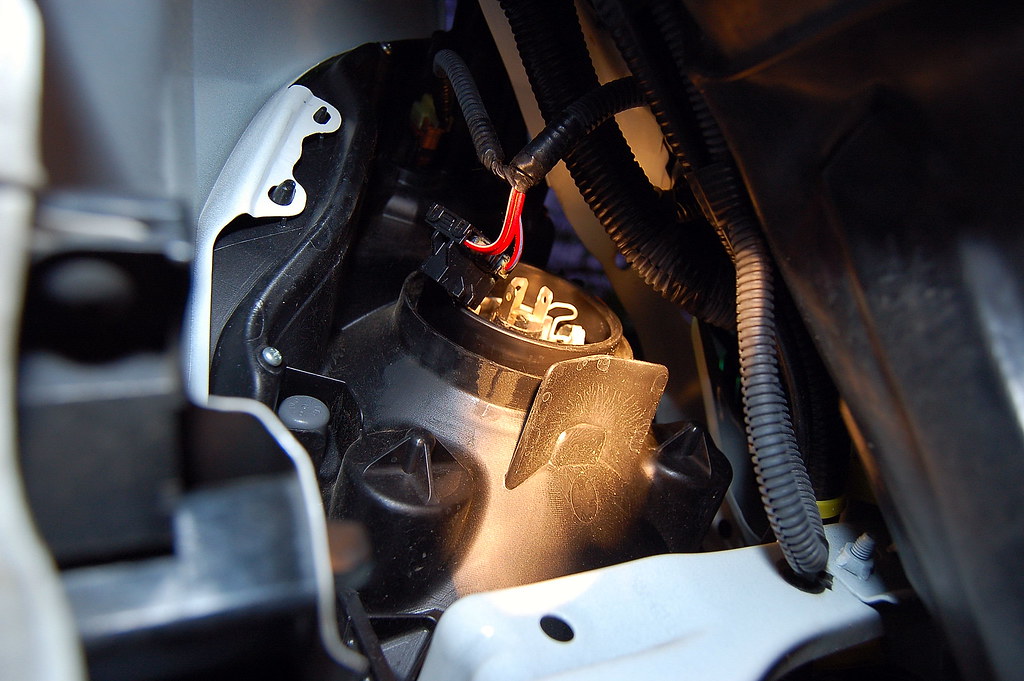
Step 6: Remove the harness clip from the bulb terminal and remove the rubber seal. Here you can see the retaining clip that holds the bulb in. You will need to push it in and toward the top to release the bulb. Take notice the pattern of the 3 light bulb rear terminals. The middle horizontal terminal is located on the top with the vertical terminals on either side.
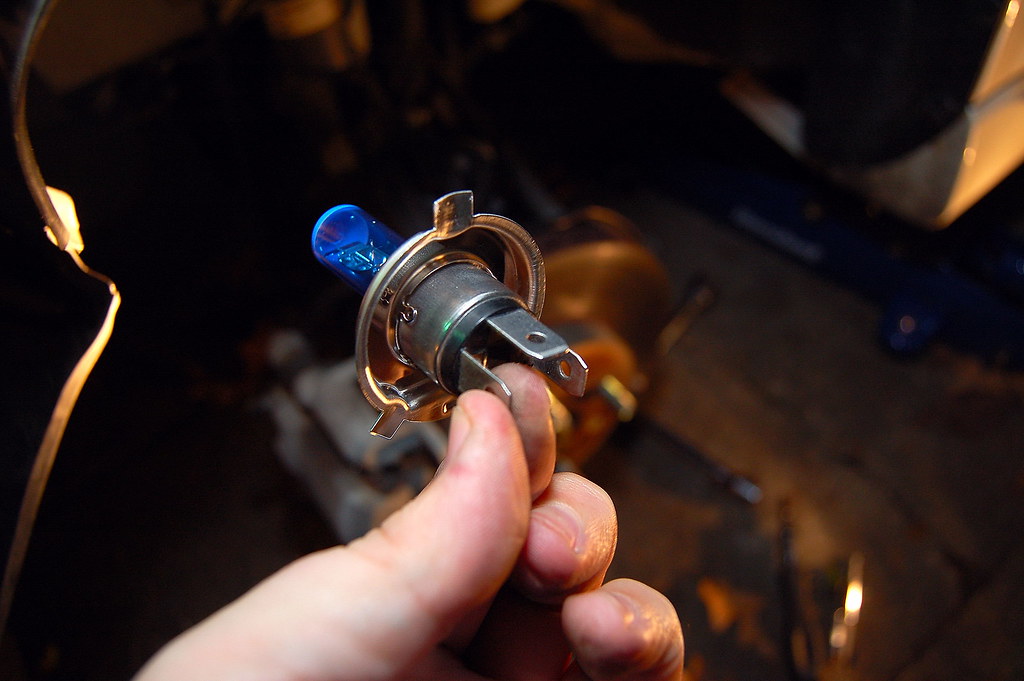
Here is the new bulb I am installing. It is a bulb I got from a motorcycle shop. It's an H4 bulb with 90w low and 100w high beam. They are super bright and look awesome. Notice again the middle terminal is on the top.
Step 7: Place the new bulb in and push in the retaining clip in and down.

Step 8: Then you want to replace the rubber seal making sure all three terminals poke through the center. Then replace the harness clip.
Here you can see a SilverStar Ultra H4 on the left and the new 90/100w H4 on the right. It is considerably brighter. I did not have the camera on a tripod and there seems to be some glare or blooming, but it's only showing that way in the picture. I thought the SilverStar Ultras looked good and bright, but man they pale in comparison to these new 90/100w H4s.

Step 9+: Repeat the proceeding steps for the passenger side. Then replace the wheels and make sure the lugnuts are torqued properly.
Here are what both new H4 bulbs look like.
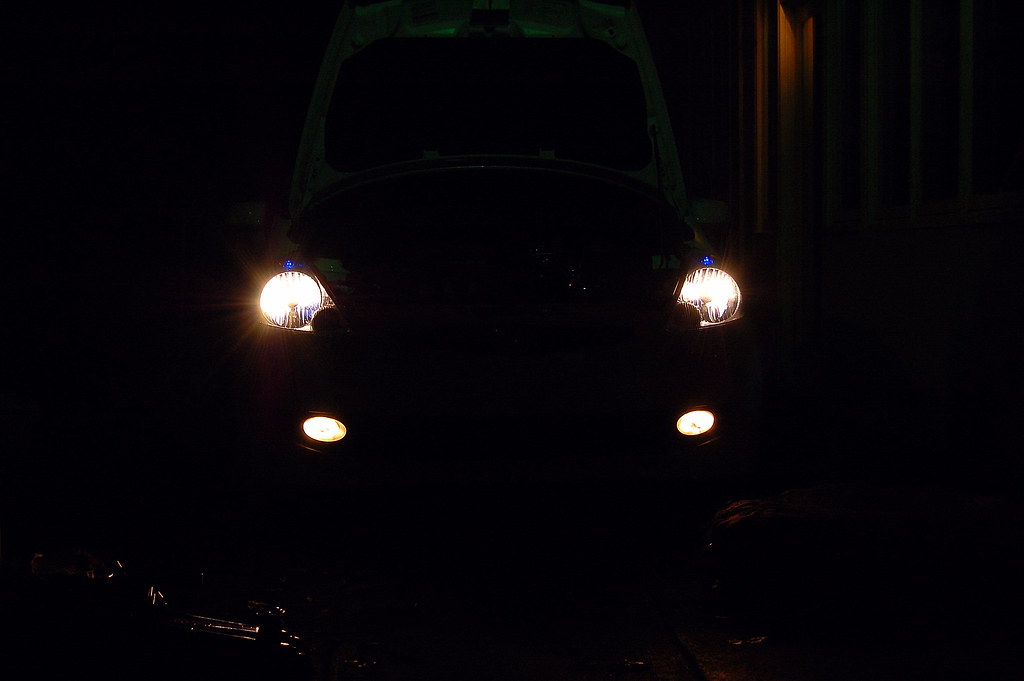
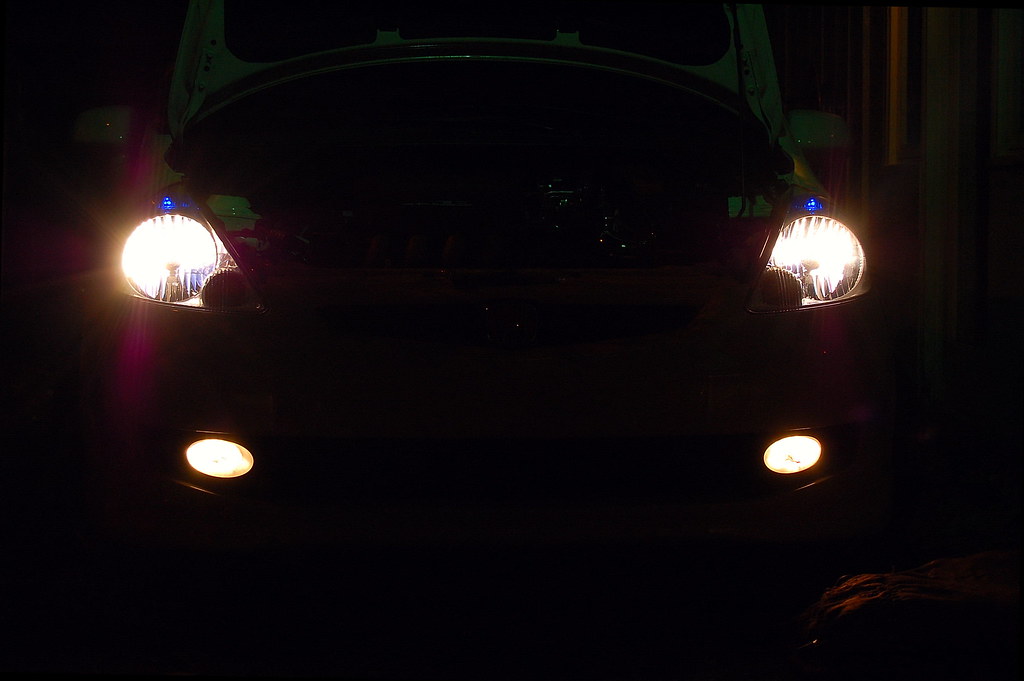
And here are the brights.
 Newest pics taken yesterday.
And there we have it. Enjoy.
So here it goes.
Here it is on a Saturday, the day after I bought it and brought it home. I had washed, clayed it, buffed it, waxed it, and had it tinted: 15% sides/rear and 35% entire windshield.
Two weeks later I got my new shoes, 15"x7" Konig Next wheels in bronze with Ventus HRII 205/50/R15 tires.
Few weeks later, I decided on a DIY homemade SRI that was later christened the SSR Intake System (for Sid Short Ram). At first I only had the one 90 degree bend and it cost about $50.
Later on I updated my SSR Intake with the addition of another 90 degree elbow. Since everyone had strongly recommended that this would lower the intake temps, I decided it was worth a try.
Then came the Metra double DIN install kit and a JVC head, Kicker SS 6.5" comps, Kicker amp and Kicker 10" DVC sub in a bandpass box.
Then came the flat-black painted fog bezels.
Then another wash, clay, buff, wax session, and the addition of OEM tails that were tinted with VHT NiteShades spray tint.
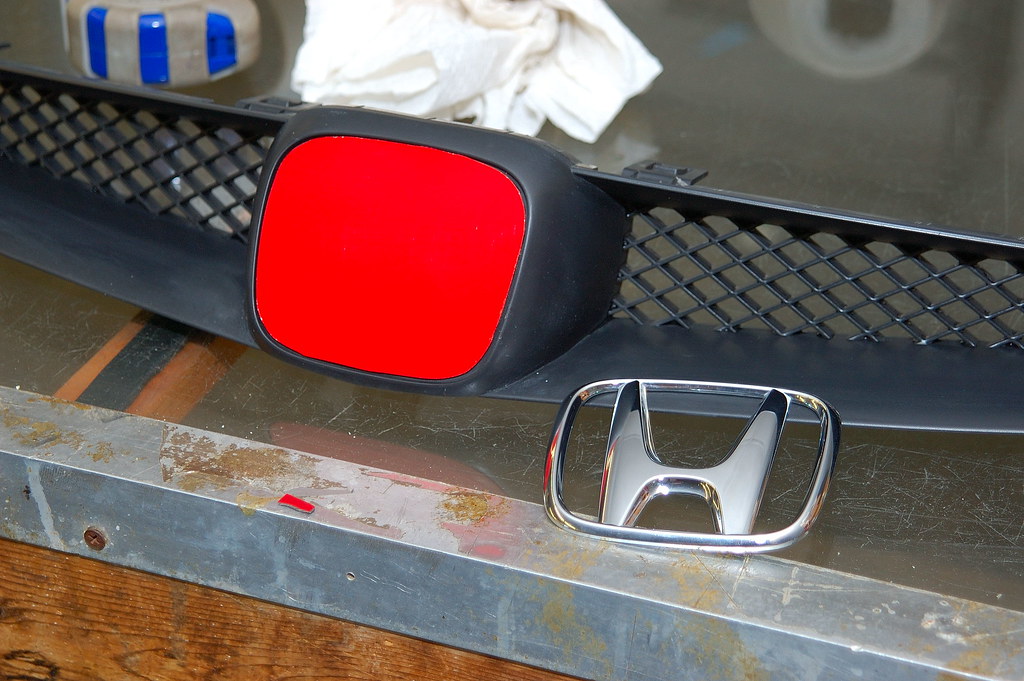
Then came the DIY "JDM syle" red 'H' badges front and rear. These pics are from the DIY thread I made about it.
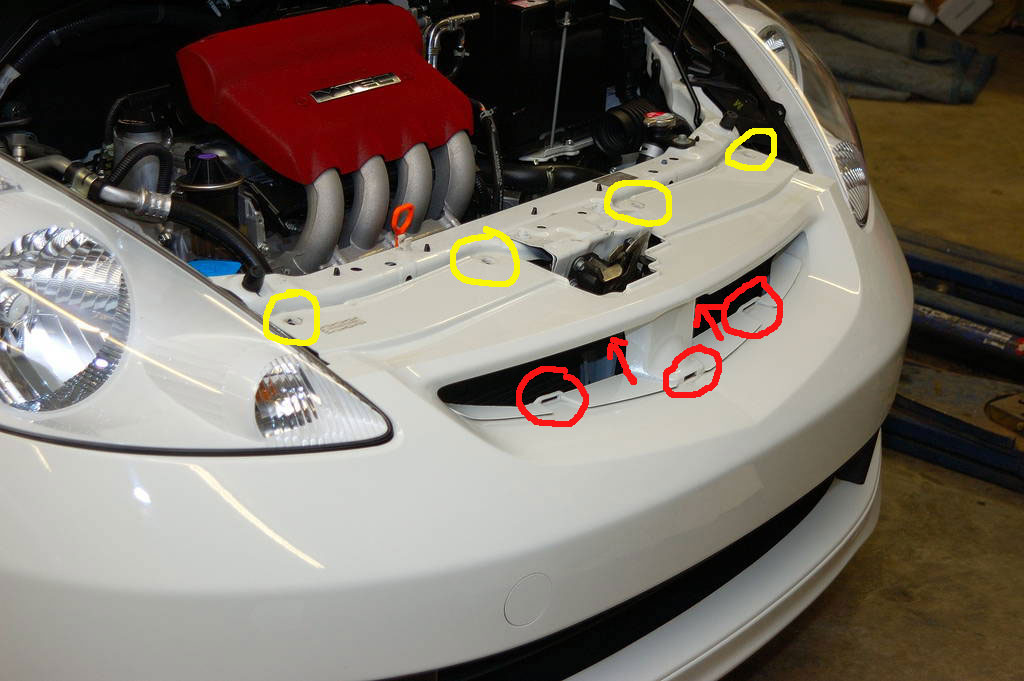
I started by removing the pop up tabs on the top of the bumper cover than are under the hood indicated by the yellow circles. I then lifted the top of the bumper cover up and reached in and popped out the 5 tabs on the grill indicated by the red. Simple as that.
As for the rear: I opened up the hatch and looked into the area above the license plate where the license plate lights are. I then used a long flat bladed screwdriver to break off the two rivets holding on the plastic "H" and the emblem just fell off.
For the front emblem I used a flat piece of chrome PVC used for chrome rocker panels on like Cadillacs and such. I then covered the chrome PVC with red reflective vinyl. The chrome PVC gave a nice flat background to work with. I then drilled the two holes in it so the posts on the back of the "H" could stick through and line it up right. I used reflective red high performance vinyl and 3M double stick tape to reattach the "H" emblems.
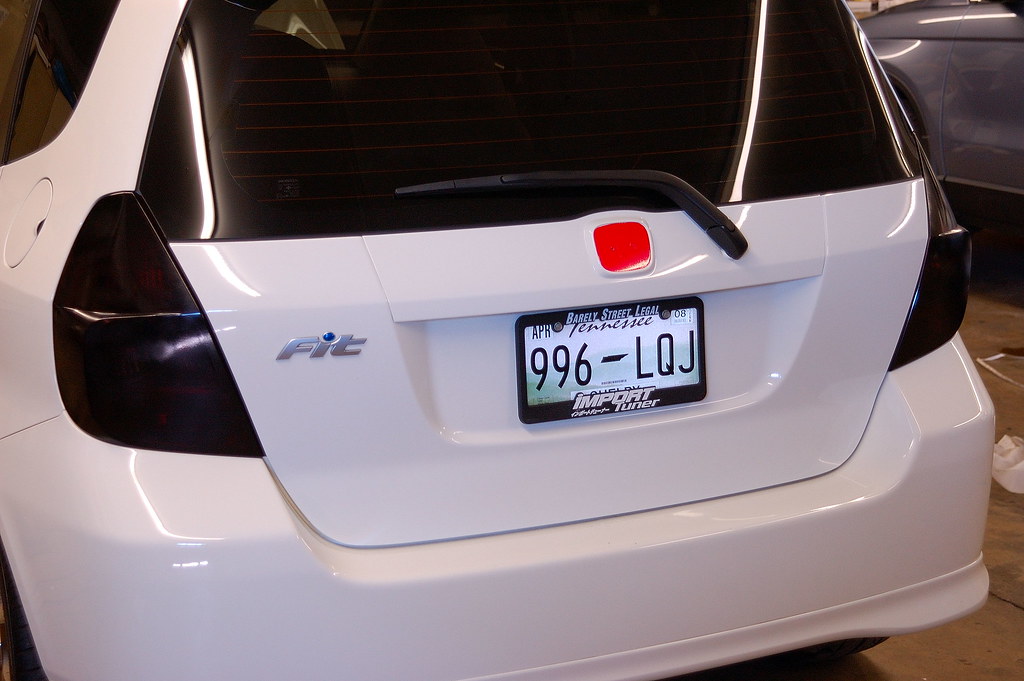
DIY I made about swapping out the old 55/60watt SilverStar Ultras for a set of motorcyle spec 90/100watt H4s.
Step 2: Jack up one side of the vehicle. Check the owners manual to see where to actually place the jack before jacking it up
Step 3: Remove the front wheel from the car.
Step 4: Take notice of the retaining clip the connects the inner fender liner to the fender that is right next to the bright light spot to the left. It is really the only retaining clip you have to remove. The liner will move enough to reach the bulb without removing any other clips.
Step 5: When you pull back the fender liner you can see the headlight bulb wiring harness and seal.
Step 6: Remove the harness clip from the bulb terminal and remove the rubber seal. Here you can see the retaining clip that holds the bulb in. You will need to push it in and toward the top to release the bulb. Take notice the pattern of the 3 light bulb rear terminals. The middle horizontal terminal is located on the top with the vertical terminals on either side.
Here is the new bulb I am installing. It is a bulb I got from a motorcycle shop. It's an H4 bulb with 90w low and 100w high beam. They are super bright and look awesome. Notice again the middle terminal is on the top.
Step 7: Place the new bulb in and push in the retaining clip in and down.
Step 8: Then you want to replace the rubber seal making sure all three terminals poke through the center. Then replace the harness clip.
Here you can see a SilverStar Ultra H4 on the left and the new 90/100w H4 on the right. It is considerably brighter. I did not have the camera on a tripod and there seems to be some glare or blooming, but it's only showing that way in the picture. I thought the SilverStar Ultras looked good and bright, but man they pale in comparison to these new 90/100w H4s.
Step 9+: Repeat the proceeding steps for the passenger side. Then replace the wheels and make sure the lugnuts are torqued properly.
Here are what both new H4 bulbs look like.
And here are the brights.
And there we have it. Enjoy.
Last edited by Sid 6.7; 01-12-2009 at 01:27 AM.
#4
01-10-2009, 12:52 PM
Join Date: Aug 2006
Location: Orlando, FL
Posts: 8,956
Pics look good. I suggest taking pics with just the running lights on. No fogs or headlights. Causes them to bleed out of the pic.
Car and pics look great.
Car and pics look great.
#5
01-10-2009, 02:25 PM

Looks good, Sid. Nice name btw. You're not the only Sid on the forum. 
You planning to lower it?
You planning to lower it?
 i want white!!!!!!!!
#10
01-11-2009, 07:53 AM
I have to say your H badge looks so much better than the authentic type-r badges.. its really subtle but doesnt look fake. good shit
#11
01-11-2009, 10:21 AM
IT IS ABOUT TIME YOU'VE POSTED PICS!!!!!!!
That is pretty neat. I would so do that.
That is pretty neat. I would so do that.
#12
01-11-2009, 10:38 AM
Believe me I would love to have the mean stance that would result from having lowered my suspension. But I live in a city where the roads are absolute shit. I mean potholes and jacked up manhole covers and everything.
Not to mention that my house sits on a hill, and I scrape the front lip going up and coming down every day, not matter how slow, or what angle I try to attack it at.
It simply would not be practical nor drivable if I were to lower this car even 1". And I hate it.
If there was any way around it, I would have already had a TEIN coil-over set with EDFC on it.
I even considered contracting out the demolition and re-building of my driveway to lesson the angle of attack.
But in the end I couldn't justify to the wifey an equation that involved hiring thousands of dollars worth of time consuming, specialized laborers to tear up and rebuild a perfectly good driveway, in order to lower the least expensive car Honda was selling in 2007, an inch or so.
Even after the wine coolers, she wasn't buying it.
#13
01-11-2009, 10:44 AM
Funny thing is that every single one of those pics has been previously posted here on FF.net, they are just scattered about in different threads.
This is just the first time I put them all in the same place at once.
This is just the first time I put them all in the same place at once.
#15
01-11-2009, 12:10 PM
get rid of that rear windshield wiper, any fit is amazing looking without that thing on there, i hardly used mine and i took it off in 5 mins and ran down to lowes and bought a 7/8 black plug and painted it with some touch up paint and it looks so much cleaner, since u do a lot of the simple diys on here like the SRI and the emblems id suggest doing this one too bec its only 1.20 for two damn plugs, just a suggestion. check my sig its got a picture of what it looks like, i have a thread i just posted if you want the part number and everything yesterday. check it out! plus if you dont like it, just put it back on!
#16
01-11-2009, 12:43 PM
Living in California has its perks.
#17
01-11-2009, 01:30 PM
true true, i didnt think about that one, well he could always make the plug and take it off whenever he wants to not have it on, its a piece of cake to take on and off
