DIY: Acura TL Switchblade Key Fob
#1
DIY: Acura TL Switchblade Key Fob
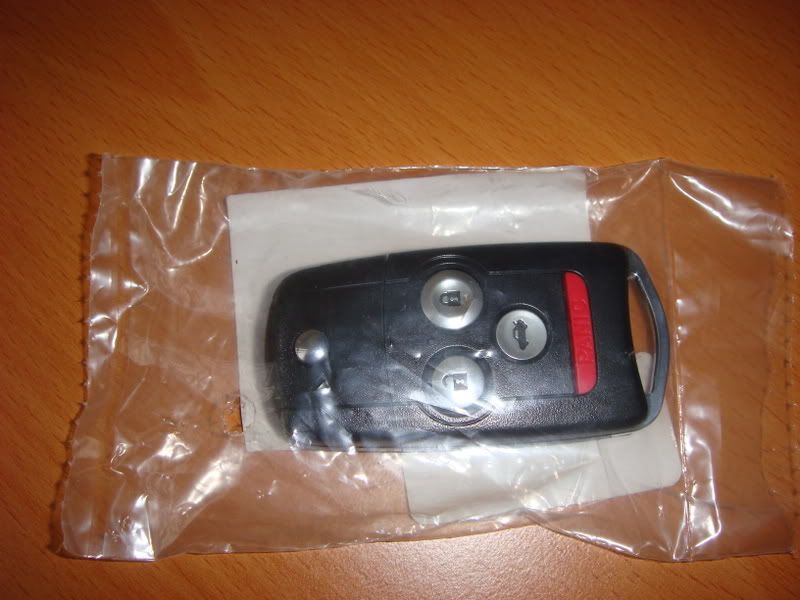
NOTE: This mod was done on a 2007 Sport Model. It appears that the 2008 models MAY have the same immobilizer as the TL does. What this means is that if you do not want to waste one of your keys by taking it apart, you can just get the TL fob key cut and the immobilizer programmed to match your car. I have no personal knowledge if this works or not, so do so at your own risk
Disclaimer: The following is provided as a GUIDE ONLY, and neither myself, nor FITFREAK.NET endorse, recommend, encourage nor take any responsibility for the outcome of someone else doing the following. You follow these steps at your own risk!
Tools: Phillips screwdrivers, drill
Time: an hour or less
What you will need to buy:
First thing you need to do is disassemble one of your current Fit keys. Use a small phillips screwdriver to unscrew and remove the back piece of the key. You should see something similar to this:
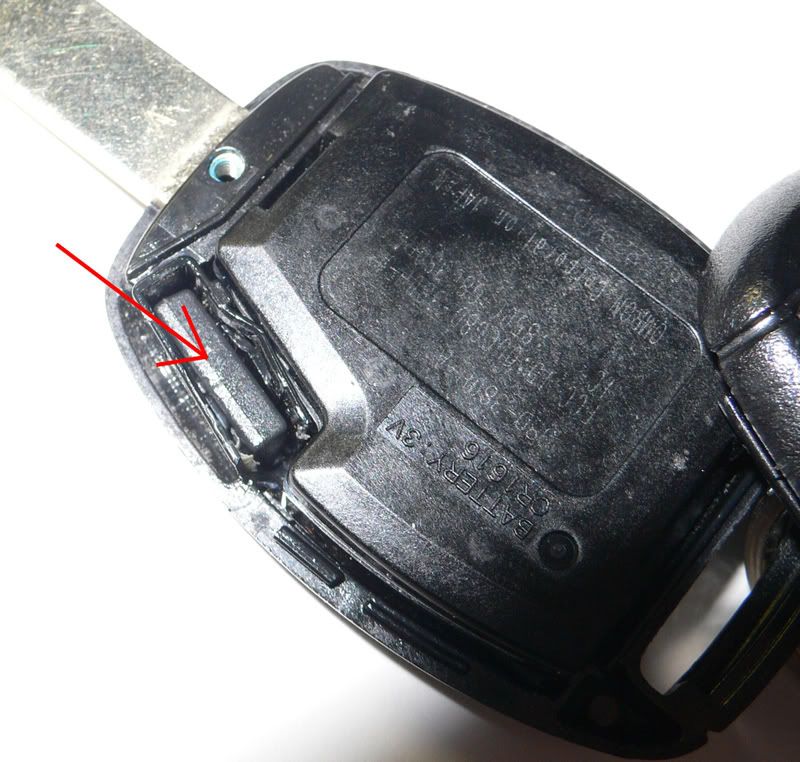
The red arrow is pointing to where you will find the immobilizer chip for the Fit. There will be a small white piece of plastic overing the chip. Remove that and carefully pry the chip out of the hole. It is held on by some adhesive so a little force may have to be used, but be careful as the chip is encased in glass shell.
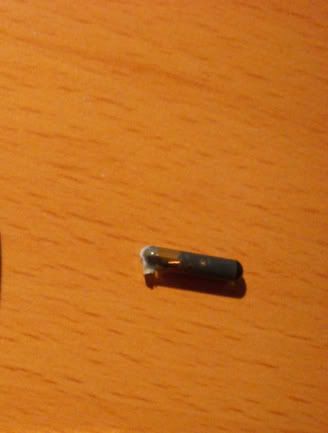
This is what the chip looks like:
Put the chip somewhere safe, as we'll need it later.
Next, take your phillips screwdriver and unscrew the screw at the bottom end of the TL key fob.
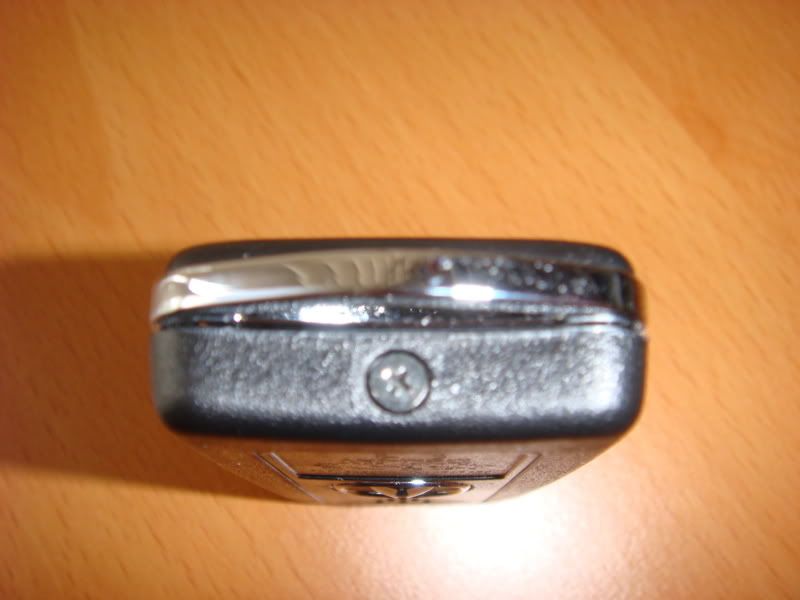
This will allow you to remove the remote transmitter section of the fob.
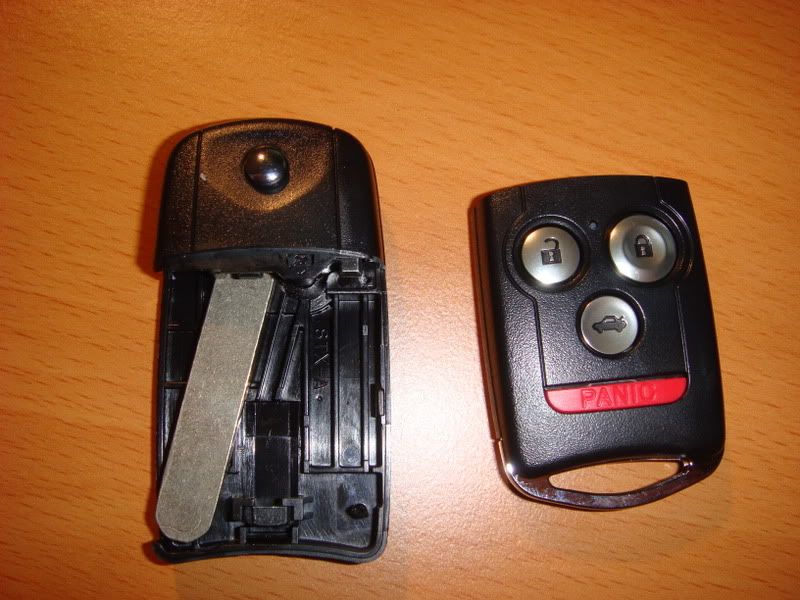
Also, pry off the top of the front cover (It's held on by two clips and some double sided sticky tape).
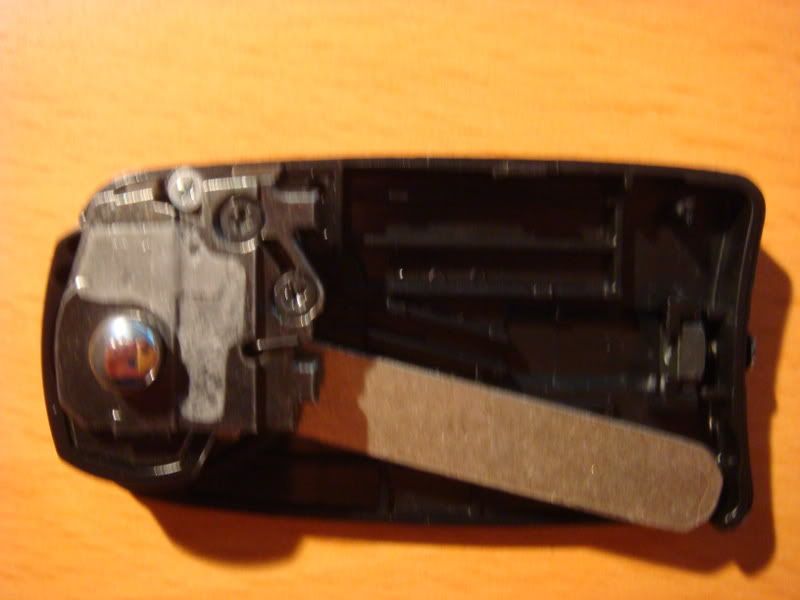
There are three screws that need to be removed, but before you do that, note the position of the spring that is sticking out. You will need to know this for when you reassemble the fob.

The three screws are held in by something like locktight, so you will need to use some force to remove them. Just be careful not to strip them. Once you have the three screws out, you will be able to remove the metal piece that holds the key in place, along with the spring.
Take the blank key and flip it over and you'll see this:
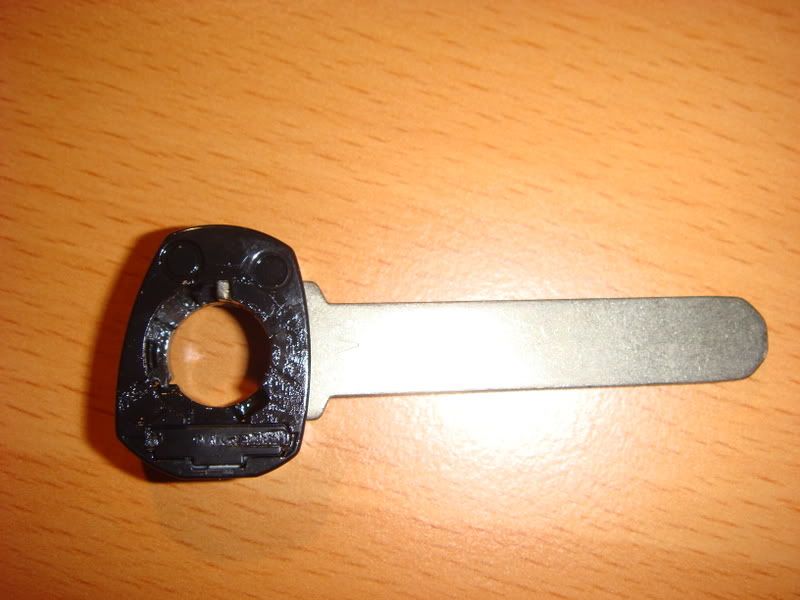
There is a small plastic flap where the immobilizer chip sits. Pry the flap open and remove the chip. (I drilled a hole from the underside and pushed the chip out of the slot as it's held in there with some adhesive)
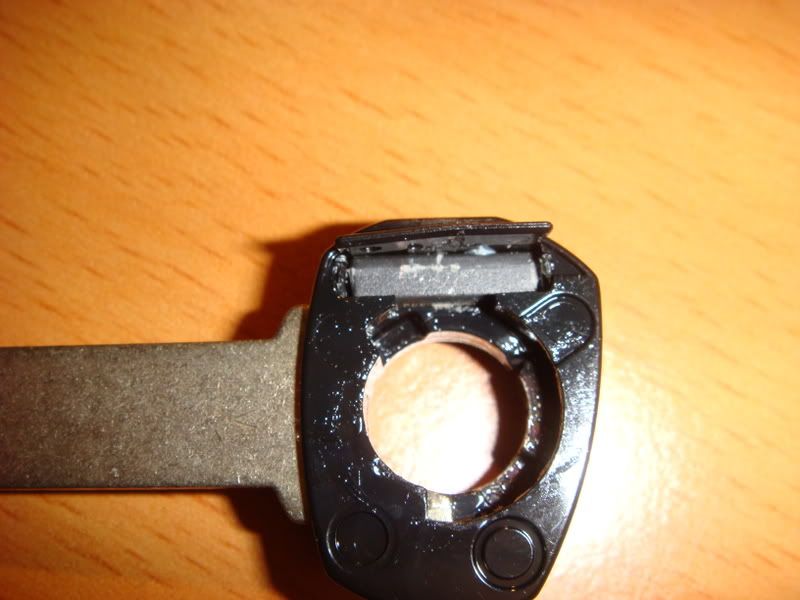
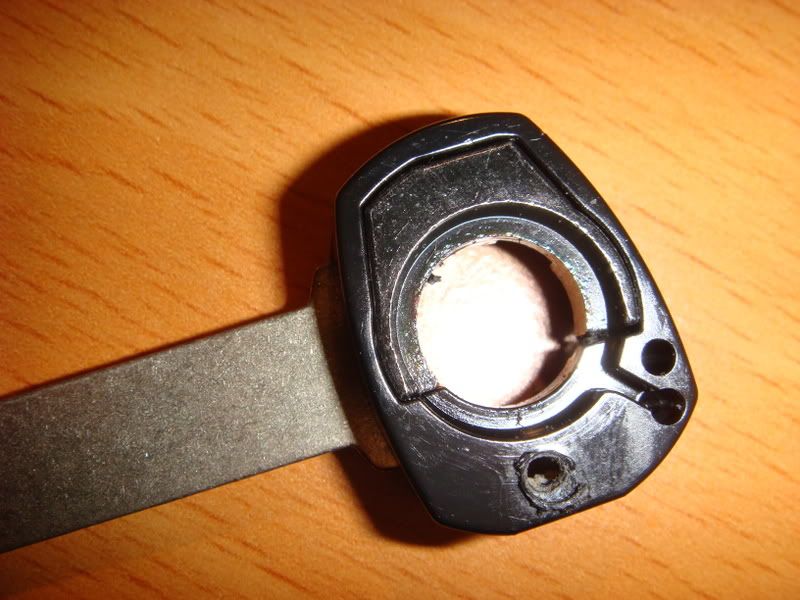
Put the Fit immobilizer chip into the slot and you'll see that the hole isn't big enough for it to fit.
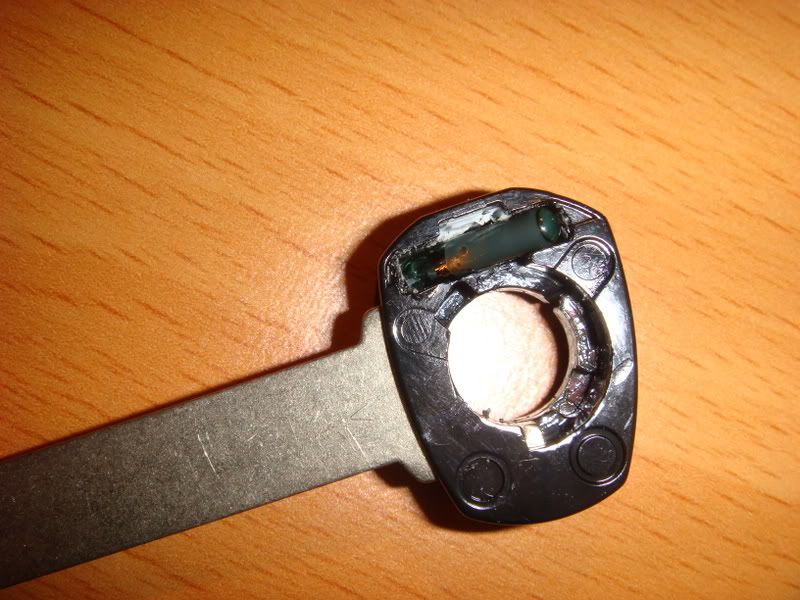
I took the drill and slowly cut away at the end of the slot making it bigger. You only need to make it big enough so that the immobilizer chip can fit in without sticking out anywhere. Use some superglue or something like that to stick the immobilizer in the hole as you don't want it rattling around.
Put everything back together and you're done!
To program the remote, you first have to disable the memory feature!
All you have to do is hold the lock and unlock buttons together, until the LED on the remote blinks twice. This will mean that it's disabled.
PROGRAMMING THE REMOTE TRANSMITTER (KEYFOB):
NOTE: It is important to maintain the time limits between the steps. Make sure the doors, the hood and the hatch are closed.
1. Turn the ignition switch ON (II)
2. Within 1 to 4 seconds, press the transmitter lock button.
3. Within 1 to 4 seconds, turn the ignition switch OFF.
4. Within 1 to 4 seconds, turn the ignition switch ON (II).
5. Within 1 to 4 seconds, press the transmitter lock button.
6. Within 1 to 4 seconds, turn the ignition switch OFF.
7. Within 1 to 4 seconds, turn the ignition switch ON (II).
8. Within 1 to 4 seconds, press the transmitter lock button.
9. Within 1 to 4 seconds, turn the ignition switch OFF.
10. Within 1 to 4 seconds, turn the ignition switch ON (II).
11. Within 1 to 4 seconds, press the transmitter lock button.
12. Confirm you can hear the sound of the door lock actuators within 1 to 4 seconds, then push the transmitter lock button again, or the code will not be stored.
13. Within 10 seconds, press the transmitter lock button on any other fob you wish to program. Confirm that you can hear the sound of the door lock actuators after each transmitter code is stored.
14. Turn the ignition switch OFF, and remove the key.
15. Confirm proper operation with the transmitters.
NOTE: I programmed all of my keys at the same time that I programmed the TL fob. I'm not sure if you have to do this or if you can just program the TL fob without doing your other keys.
You will now need to get the blade of the Fob cut. When you bought your car, you should have received a small piece of plastic with a sticker of a barcode on it (looks like something that would hang off of your keyring). Take that along with the key to your local Honda / Acura dealer and they can cut the key to fit your car.
Cost to me:
TL Fob - $43.07
Cutting - $45.00
With tax, just over CDN$100
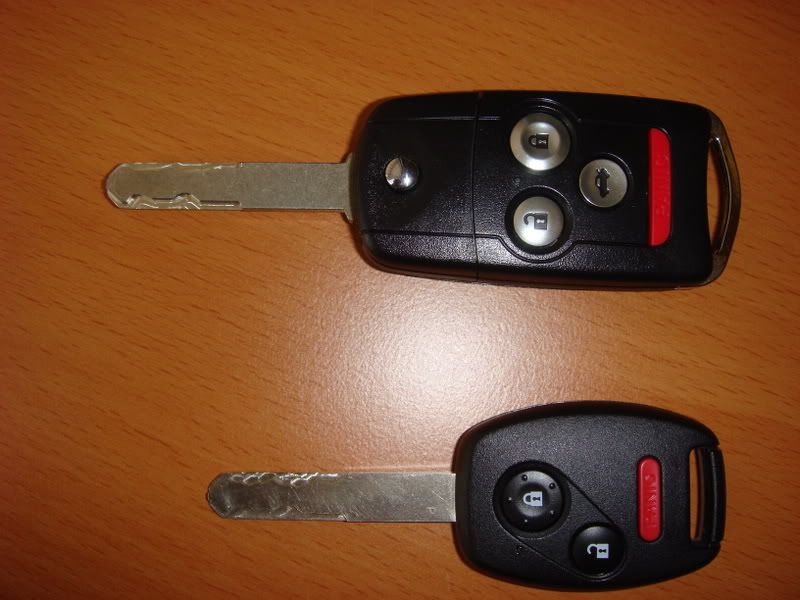
To use the RDX faceplate, you need to do the following:
Remove the transmitter piece from the TL fob.

Push on the button and separate the faceplate from the transmitter.
There are 4 tabs on the transmitter to take it apart.

With the transmitter taken apart, cut the trunk button off.

Reassemble the transmitter and use the RDX faceplate instead of the TL one.
(Note - I didn't do this myself as I also own an RDX and am using the trunk button to distinguish between the remotes!!)
Disclaimer: The following is provided as a GUIDE ONLY, and neither myself, nor FITFREAK.NET endorse, recommend, encourage nor take any responsibility for the outcome of someone else doing the following. You follow these steps at your own risk!
Tools: Phillips screwdrivers, drill
Time: an hour or less
What you will need to buy:
- TL key/transmitter assembly: 35111-SEP-306 - this part # is for the Memory 1 fob. I'm unsure if the Memory 2 fob will work or not, but it was double the price at the dealership!!
- **OPTIONAL** RDX faceplate (to delete the trunk button): 35118-STK-A01


First thing you need to do is disassemble one of your current Fit keys. Use a small phillips screwdriver to unscrew and remove the back piece of the key. You should see something similar to this:

The red arrow is pointing to where you will find the immobilizer chip for the Fit. There will be a small white piece of plastic overing the chip. Remove that and carefully pry the chip out of the hole. It is held on by some adhesive so a little force may have to be used, but be careful as the chip is encased in glass shell.
This is what the chip looks like:

Put the chip somewhere safe, as we'll need it later.
Next, take your phillips screwdriver and unscrew the screw at the bottom end of the TL key fob.

This will allow you to remove the remote transmitter section of the fob.

Also, pry off the top of the front cover (It's held on by two clips and some double sided sticky tape).

There are three screws that need to be removed, but before you do that, note the position of the spring that is sticking out. You will need to know this for when you reassemble the fob.

The three screws are held in by something like locktight, so you will need to use some force to remove them. Just be careful not to strip them. Once you have the three screws out, you will be able to remove the metal piece that holds the key in place, along with the spring.
Take the blank key and flip it over and you'll see this:

There is a small plastic flap where the immobilizer chip sits. Pry the flap open and remove the chip. (I drilled a hole from the underside and pushed the chip out of the slot as it's held in there with some adhesive)


Put the Fit immobilizer chip into the slot and you'll see that the hole isn't big enough for it to fit.

I took the drill and slowly cut away at the end of the slot making it bigger. You only need to make it big enough so that the immobilizer chip can fit in without sticking out anywhere. Use some superglue or something like that to stick the immobilizer in the hole as you don't want it rattling around.
Put everything back together and you're done!
To program the remote, you first have to disable the memory feature!
All you have to do is hold the lock and unlock buttons together, until the LED on the remote blinks twice. This will mean that it's disabled.
PROGRAMMING THE REMOTE TRANSMITTER (KEYFOB):
NOTE: It is important to maintain the time limits between the steps. Make sure the doors, the hood and the hatch are closed.
1. Turn the ignition switch ON (II)
2. Within 1 to 4 seconds, press the transmitter lock button.
3. Within 1 to 4 seconds, turn the ignition switch OFF.
4. Within 1 to 4 seconds, turn the ignition switch ON (II).
5. Within 1 to 4 seconds, press the transmitter lock button.
6. Within 1 to 4 seconds, turn the ignition switch OFF.
7. Within 1 to 4 seconds, turn the ignition switch ON (II).
8. Within 1 to 4 seconds, press the transmitter lock button.
9. Within 1 to 4 seconds, turn the ignition switch OFF.
10. Within 1 to 4 seconds, turn the ignition switch ON (II).
11. Within 1 to 4 seconds, press the transmitter lock button.
12. Confirm you can hear the sound of the door lock actuators within 1 to 4 seconds, then push the transmitter lock button again, or the code will not be stored.
13. Within 10 seconds, press the transmitter lock button on any other fob you wish to program. Confirm that you can hear the sound of the door lock actuators after each transmitter code is stored.
14. Turn the ignition switch OFF, and remove the key.
15. Confirm proper operation with the transmitters.
NOTE: I programmed all of my keys at the same time that I programmed the TL fob. I'm not sure if you have to do this or if you can just program the TL fob without doing your other keys.
You will now need to get the blade of the Fob cut. When you bought your car, you should have received a small piece of plastic with a sticker of a barcode on it (looks like something that would hang off of your keyring). Take that along with the key to your local Honda / Acura dealer and they can cut the key to fit your car.
Cost to me:
TL Fob - $43.07
Cutting - $45.00
With tax, just over CDN$100

To use the RDX faceplate, you need to do the following:
Remove the transmitter piece from the TL fob.

Push on the button and separate the faceplate from the transmitter.

There are 4 tabs on the transmitter to take it apart.

With the transmitter taken apart, cut the trunk button off.

Reassemble the transmitter and use the RDX faceplate instead of the TL one.
(Note - I didn't do this myself as I also own an RDX and am using the trunk button to distinguish between the remotes!!)
Last edited by Mugen_Dom; 03-21-2010 at 09:19 PM.
#16
Great DIY!!!!
I have a Fit base with keyless. The key and the remote are separate. I am really interested in consolidating the two into a switchblade thingamajig. Thank you and +10 cool points to you.
I am also wondering where the best price for the TL key fob is. I'm starting to research this. I'll post the best price I find.
In the interest of saving money I am thinking the blank key blade can be cut by home depot or locksmith for cheaper.
#18
Very nice DIY. I always wanted one of those switchblade keys. Also where did you buy your parts? Also looking to do this for fun. And is it possible for someone else to do the cutting besides Honda/Acura dealers?
#19


