Just Installed my FlyAudio Navigation
#21
 05-18-2010, 06:24 PM


Just installed my FlyAudio. What a breeze that was. Everything was plug and play and it popped right in. The iPod interface and GPS are definitely my favorite features so far! Mat @ Automax provided AWESOME tech support. He answered all my questions over the phone (on the weekend) and had a bunch of tips for the install. Thanks!
Sweet! Take some pictures!

#22
05-18-2010, 07:16 PM

Here is a basic FlyAudio install writeup I did on the Honda Fit. Install at your own risk. There are some helpful tips on FlyAudio's website and Mat was a great resource at Automax Service.
Disconnect your battery before you start. Use plastic pry bar to remove trim piece below the radio/dash area.
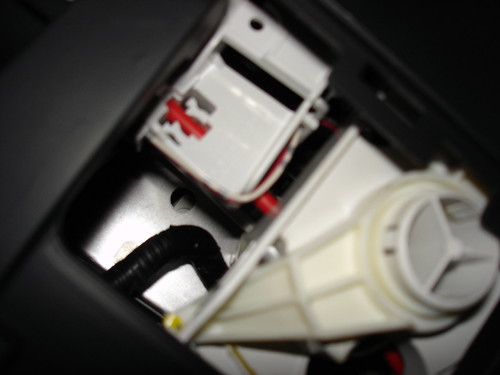
Once you remove the bottom trip pieces you can look up into the bottom of the radio and there is a screw that needs to be unscrewed. It's hard to see in this picture, but the screw is up there and it needs to come out. It is totally unnecessary, but it "secures" the radio. As if the dash isn't doing a good enough job.
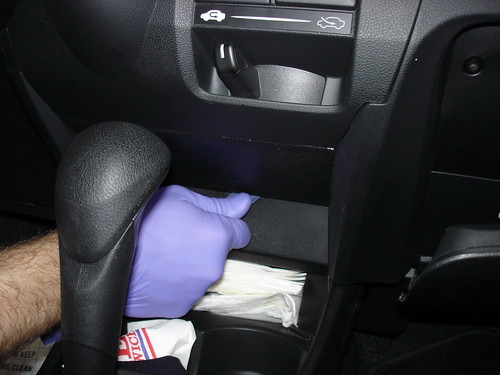
Pop the glove box open and get a plastic pry bar under the radio trim piece and pull up.
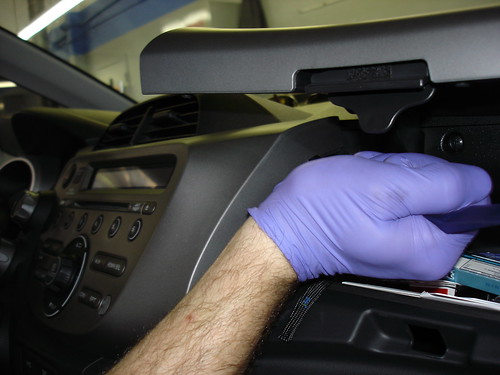

Now you want to pry from the bottom

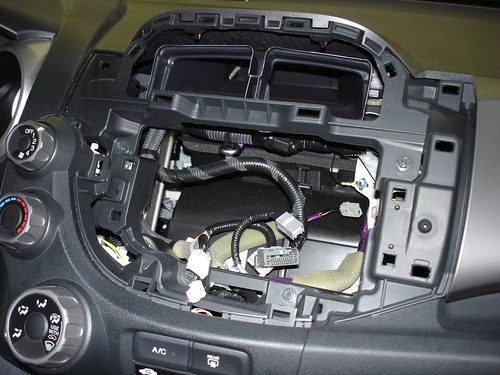
Once you pop all the tabs, the radio should come out pretty easily. Just make sure to disconnect all the connectors in the back of the system.
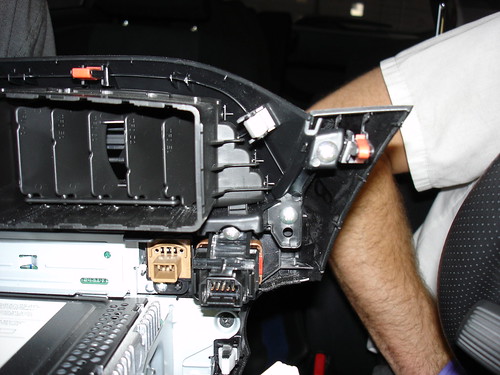
AWW no radio!
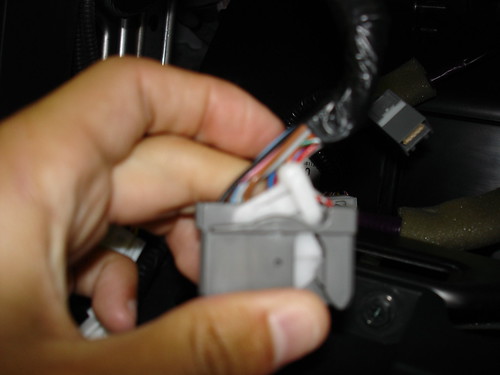
One of the connectors has this little tab on it that you have to turn so that the connector releases.
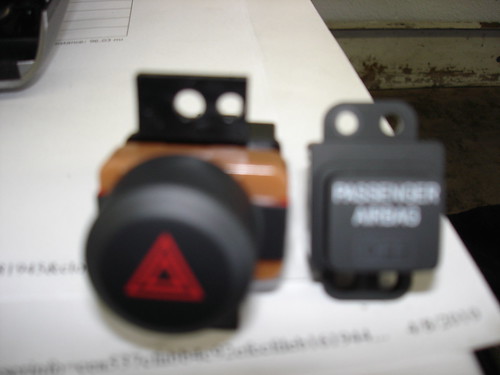
Remove the Yield button and the passenger airbag/seat occupancy sensor. They each unscrew or unclip from the factory radio, you need those again. The yield button will fit into the new faceplate, but the seat occupancy sensor will not. You just need to plug it back into the Honda factory harness and zip tie it behind the radio. This will eliminate any warning lights, you just won't be able to see the sensor.

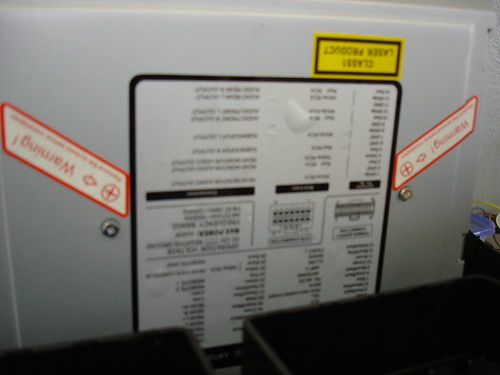
Time for the FlyAudio. Make sure to remove the 2 screws in the bottom of the DVD player.
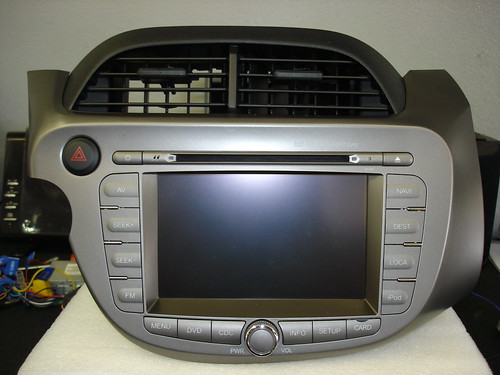
Beautiful FlyAudio for Honda Fit!!
Before we put the FlyAudio in, I ran all the wiring for the FlyAudio Bluetooth microphone and FlyAudio GPS antenna (all included with the system). Remove side paneling on passenger side.
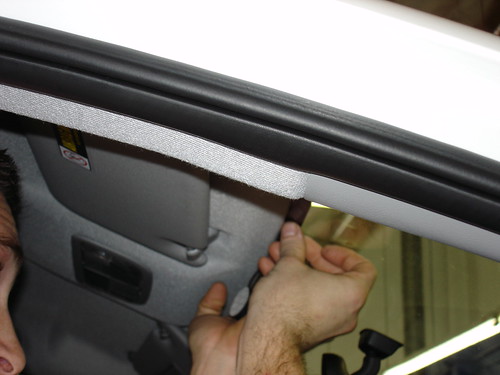
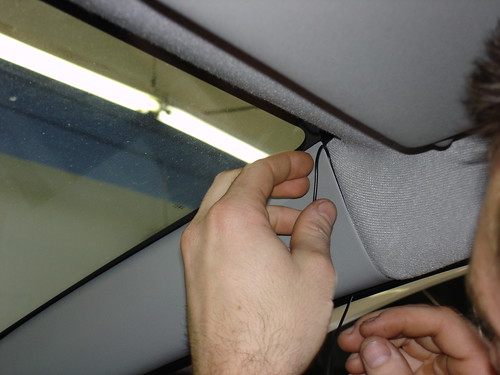
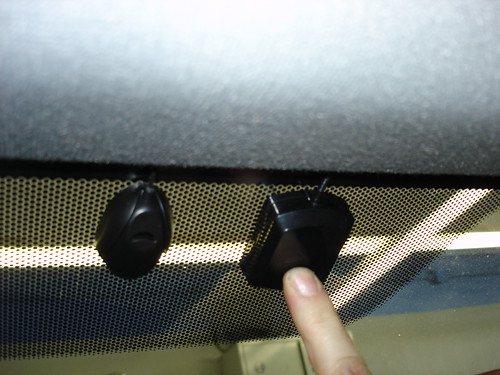
The wiring goes from the radio, behind/thru the glovebox, up the passenger side A-pillar, thru the headliner, and down behind the rearview mirror, to its final destination where I mounted the GPS antenna and bluetooth microphone. Also, make sure to run the iPod charging/syncing cable, USB cable, and RCA cables into the glovebox or wherever you want them.
Plug everything in to the back of the FlyAudio and re-connect your battery to test the system before you put everything back. All the harnesses are plug and play, so it makes it really easy.
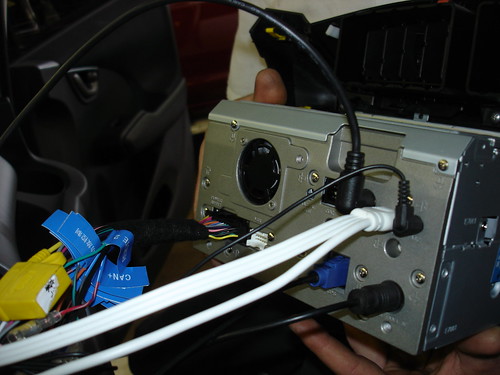
If you test the FlyAudio and everything works fine, start piecing everything back together.
When you put the mini SD card in the 1st time you have to select "Browse" ---> OdyseeyNavi ---> Bin---> Odyssey.exe . Then check the box for "Auto Run Navigation Next Time" and then select "Run Navigation"
It wasn't a very difficult install, but if you wanted to have it done by a stereo shop, I can't see it costing more than $100. Here are some pictures of the FlyAudio installed.
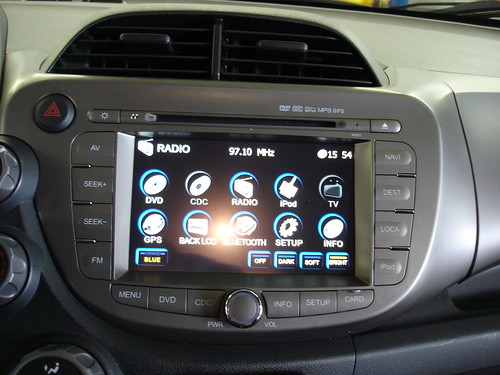
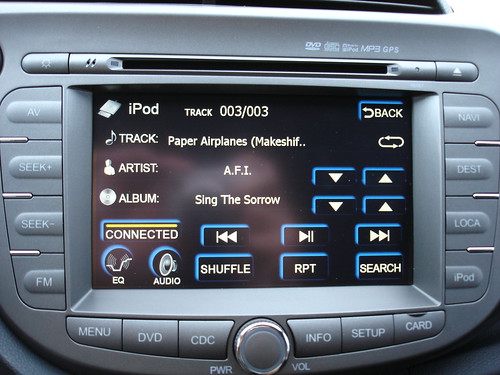
Well that's about it, thanks to Monkeyboi for finding this!
Disconnect your battery before you start. Use plastic pry bar to remove trim piece below the radio/dash area.
Once you remove the bottom trip pieces you can look up into the bottom of the radio and there is a screw that needs to be unscrewed. It's hard to see in this picture, but the screw is up there and it needs to come out. It is totally unnecessary, but it "secures" the radio. As if the dash isn't doing a good enough job.
Pop the glove box open and get a plastic pry bar under the radio trim piece and pull up.
Now you want to pry from the bottom
Once you pop all the tabs, the radio should come out pretty easily. Just make sure to disconnect all the connectors in the back of the system.
AWW no radio!
One of the connectors has this little tab on it that you have to turn so that the connector releases.
Remove the Yield button and the passenger airbag/seat occupancy sensor. They each unscrew or unclip from the factory radio, you need those again. The yield button will fit into the new faceplate, but the seat occupancy sensor will not. You just need to plug it back into the Honda factory harness and zip tie it behind the radio. This will eliminate any warning lights, you just won't be able to see the sensor.
Time for the FlyAudio. Make sure to remove the 2 screws in the bottom of the DVD player.
Beautiful FlyAudio for Honda Fit!!
Before we put the FlyAudio in, I ran all the wiring for the FlyAudio Bluetooth microphone and FlyAudio GPS antenna (all included with the system). Remove side paneling on passenger side.
The wiring goes from the radio, behind/thru the glovebox, up the passenger side A-pillar, thru the headliner, and down behind the rearview mirror, to its final destination where I mounted the GPS antenna and bluetooth microphone. Also, make sure to run the iPod charging/syncing cable, USB cable, and RCA cables into the glovebox or wherever you want them.
Plug everything in to the back of the FlyAudio and re-connect your battery to test the system before you put everything back. All the harnesses are plug and play, so it makes it really easy.
If you test the FlyAudio and everything works fine, start piecing everything back together.
When you put the mini SD card in the 1st time you have to select "Browse" ---> OdyseeyNavi ---> Bin---> Odyssey.exe . Then check the box for "Auto Run Navigation Next Time" and then select "Run Navigation"
It wasn't a very difficult install, but if you wanted to have it done by a stereo shop, I can't see it costing more than $100. Here are some pictures of the FlyAudio installed.
Well that's about it, thanks to Monkeyboi for finding this!
Last edited by kman; 05-19-2010 at 10:25 PM.
#23
05-19-2010, 09:46 AM


Great Stuff!!
Thanks Kman. That picture tutorial was really really great. I'm going to save everything on my computer so that when I get my radio I won't have any major problems. Great job.
We need more of these pictorial tutorials on this site.
A question:
When you ran the wire for the antennae up the a-frame, did you remove the air bag cover?... or, did you just slide the wire below it?.. To me, it appears the latter.
We need more of these pictorial tutorials on this site.
A question:
When you ran the wire for the antennae up the a-frame, did you remove the air bag cover?... or, did you just slide the wire below it?.. To me, it appears the latter.
#24
05-19-2010, 10:51 AM
Thanks Kman. That picture tutorial was really really great. I'm going to save everything on my computer so that when I get my radio I won't have any major problems. Great job.
We need more of these pictorial tutorials on this site.
A question:
When you ran the wire for the antennae up the a-frame, did you remove the air bag cover?... or, did you just slide the wire below it?.. To me, it appears the latter.
We need more of these pictorial tutorials on this site.
A question:
When you ran the wire for the antennae up the a-frame, did you remove the air bag cover?... or, did you just slide the wire below it?.. To me, it appears the latter.

Thread
Thread Starter
Forum
Replies
Last Post
KathMeistr
2nd Gen GE8 Specific Fit Interior Modifications Sub-Forum
2
09-17-2010 12:04 PM