
2017 EX 6MT - Crystal Black Pearl
#21
 10-07-2014, 08:08 AM


Any advice on installing the side moldings? I have them in hand, along with the templates, and will install them when my daughter comes home for fall break (her car). I actually purchased the rubber roller the instructions called for. I'm just concerned I will misplace them by not paying attention. As I recall, that sticky part really sticks and holds, so no forgiveness with mistakes.
#22
10-07-2014, 08:59 AM
Any advice on installing the side moldings? I have them in hand, along with the templates, and will install them when my daughter comes home for fall break (her car). I actually purchased the rubber roller the instructions called for. I'm just concerned I will misplace them by not paying attention. As I recall, that sticky part really sticks and holds, so no forgiveness with mistakes.
I did not use the roller, just a microfiber cloth and pushed firmly across the entire molding. Yes the 3m sticky tape is unforgiving. You need to expose the corner and first few inches to get the positioning right, then expose the rest and holding the other end so it doesn't lay down to stick just yet. Slowly then you work your way across the molding verifying its straight and following the template. Should be good then. Not difficult at all, if you follow the directions.
#23
10-07-2014, 09:03 AM
Yessir, only around 9 bucks for a pair of 2 off ebay! Vendor in CA! The tricky part installing those decals is first need to wax the area, clean with an alcohol pad, and SLOWLY peel way the protective backing without lifting the letters off the other side that hold them in place. I used the same squeegee that was included to put on the rear bumper applique making the job much easier!
#24
10-07-2014, 10:21 AM
Super Moderator
Join Date: Mar 2014
Location: Hawaii: relocated to Western Canada Sept, 2015
Posts: 1,116
Likewise got my i-VTEC stickers from Ebay.
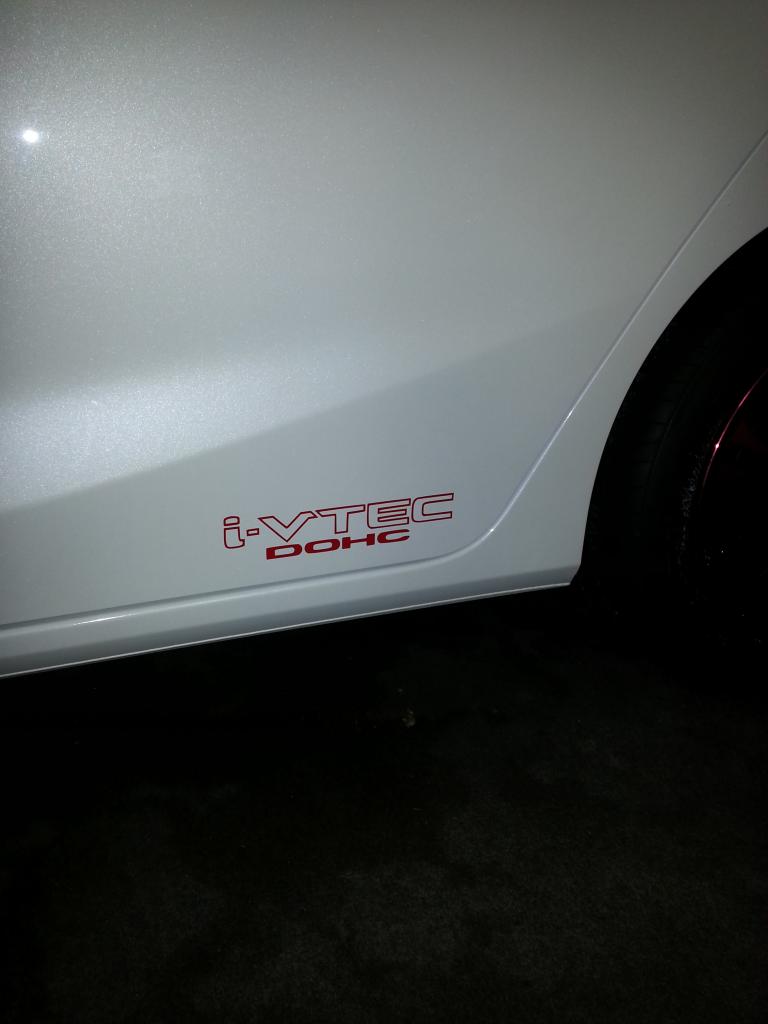
Cost was $3/pair w/ Free Ship. Multiple colors available.
2 X I-VTEC DOHC 9" X 2" VINYL DECAL STICKER STICKERS HONDA JDM USA SELLER: sfcustomdecals
Cost was $3/pair w/ Free Ship. Multiple colors available.
2 X I-VTEC DOHC 9" X 2" VINYL DECAL STICKER STICKERS HONDA JDM USA SELLER: sfcustomdecals
#25
10-13-2014, 09:16 AM
Prelimary Test fit of heated side mirrors to EX
Update on this little project. Turns out its not so little. Not difficult, but time consuming.
1. Removing the mirror glass is easy long as you are careful. Flathead screwdriver works best
2. You need to remove the inner door panel to snake wires through from side mirror
3. You also need to unbolt the ENTIRE side mirror from door to snake the wire through the swivel joint.
4. The painted back of the mirror is clipped in, this needs to be removed in order to snake the two power wires through.
5. Snaking the wires through rubber grommet between the door and body is a bitch!
6. It sounds crazy, but the passenger side mirror is easier to snake wires into the cabin than the drivers side. Less wiring in the way where the grommet is.
Once you get the wires in the cabin its fairly smooth sailing. Getting access to the defroster switch is fairly straight forward, remove the glovebox and you can tap into the switched side of the defroster to activate the relay for the side mirrors.
I'll have pictures up when I can.
#26
10-13-2014, 09:30 AM

Man! I've been curious about this project since you first brought it up months ago. I'm glad to see you were successful.
Can you comment on the total cost of the project? I think at this point that would be my only hindrance.
Can you comment on the total cost of the project? I think at this point that would be my only hindrance.
#27
10-13-2014, 10:35 AM
The cost isn't bad at all for the parts, its the labor to install them. I sized up the job yesterday, actually haven't done the work yet. So many side projects between new windows for the house, other electronic projects, and restoring/rebuilding my pinball machine.
Heated mirror glasses: ~$75
SPST Relay & Wire: ~$20
Add a circuit fuse holder with 7.5A fuse: ~$6
Molding and Panel removal kit from HF: ~$7
Zip ties: $2
Total: $110
Time wise I'm looking at half a days worth of labor for me. Yeah I may be slow in that respect but I'm taking precaution not to break any plastic panels or break something else costing me more money.
#28
10-13-2014, 11:02 AM
Oh awesome! I thought I remembered that the mirrors were over $200 a piece so $75 is sounding much better.
IS that $75 each or for the pair? Looking forward to pics (and thank you in advance because posting pics here is sort of a pain).
Excellent work. I feel like this is an incredible improvement to the EX. Thanks for your research and for pioneering new features.
IS that $75 each or for the pair? Looking forward to pics (and thank you in advance because posting pics here is sort of a pain).
Excellent work. I feel like this is an incredible improvement to the EX. Thanks for your research and for pioneering new features.
#29
10-13-2014, 11:13 AM
Oh awesome! I thought I remembered that the mirrors were over $200 a piece so $75 is sounding much better.
IS that $75 each or for the pair? Looking forward to pics (and thank you in advance because posting pics here is sort of a pain).
Excellent work. I feel like this is an incredible improvement to the EX. Thanks for your research and for pioneering new features.
IS that $75 each or for the pair? Looking forward to pics (and thank you in advance because posting pics here is sort of a pain).
Excellent work. I feel like this is an incredible improvement to the EX. Thanks for your research and for pioneering new features.
Yes $75 or so for the pair. I just got the mirror glasses which is all you need. If I had gotton the entire mirror ear forget it, 600-900 bucks PER MIRROR. That damn lanewatch camera is "paired" with the car and the dealer needs to code if you ever need it replaced.
See this post:
https://www.fitfreak.net/forums/3rd-...ml#post1261854
Last edited by Bassguitarist1985; 10-13-2014 at 11:18 AM.
#30
10-15-2014, 09:22 AM
Heated side mirrors part#
Fit EX Mirror SUB assembly part# (Glass/bracket w/o heating grid)
Left: 76253-T5R-305 ~$36.46 USD
Right: 76203-T5R-305 ~$31.07 USD
Fit EX-L Mirror Glass SUB assembly part# (Glass/bracket with heating grid)
Left: 76253-T5R-306 ~$44.02
Right: 76203-T5R-306 ~$37.04 USD
For those looking into this. Cost is very reasonable.
Left: 76253-T5R-305 ~$36.46 USD
Right: 76203-T5R-305 ~$31.07 USD
Fit EX-L Mirror Glass SUB assembly part# (Glass/bracket with heating grid)
Left: 76253-T5R-306 ~$44.02
Right: 76203-T5R-306 ~$37.04 USD
For those looking into this. Cost is very reasonable.
#31
10-15-2014, 03:49 PM
Fit EX Mirror SUB assembly part# (Glass/bracket w/o heating grid)
Left: 76253-T5R-305 ~$36.46 USD
Right: 76203-T5R-305 ~$31.07 USD
Fit EX-L Mirror Glass SUB assembly part# (Glass/bracket with heating grid)
Left: 76253-T5R-306 ~$44.02
Right: 76203-T5R-306 ~$37.04 USD
For those looking into this. Cost is very reasonable.
Left: 76253-T5R-305 ~$36.46 USD
Right: 76203-T5R-305 ~$31.07 USD
Fit EX-L Mirror Glass SUB assembly part# (Glass/bracket with heating grid)
Left: 76253-T5R-306 ~$44.02
Right: 76203-T5R-306 ~$37.04 USD
For those looking into this. Cost is very reasonable.
#32
10-15-2014, 07:19 PM

Have you checked to see if the wiring harness already exists in the doors? It's possible that all you have to add is the factory mirror elements and the existing rear window defog switch and relay will run it.
Last edited by GeorgeL; 10-15-2014 at 07:52 PM.
#33
10-16-2014, 09:06 AM
No the wiring harness does not have pre-existing wiring for the side mirrors in the EX. The ACC fuse panel has slots for them, but there are not wired up. The connectors DO have open slots for the two wires needed for the mirrors. Seeing as I need to disassemble the entire mirror to snake the wires through anyway I don't see the point of adding to the connector harness. As mentioned the parts are reasonable, the work required to install them is fairly involved. Difficulty on a 1-10 (10 being hardest) I'd call this job a 6.
I have not investigated the existing circuit for the rear defroster yet, such as wire gauge, fuse size, current amp draw, relay current capacity, etc. Adding 4 amps to the circuit could very well be fine, but I prefer not to do a quick hack job like that. The right way is to have the side mirrors own powered bus with a relay from the defrost switch activating it.
#34
10-30-2014, 10:34 PM
Adding EX-L Winkers to EX model
I looked into this mod, and this is doable as well. It requires swapping the "skull" or rather the front cover of the side mirror for the EX-L and purchase the winker light assembly. Like installing the heated side mirrors, there is a fair amount of labor involved. Some of the skulls are higher priced than others dependent on the paint color. They are paint matched to your vehicle obviously. Don't ask me why they are different priced, just another way to make money I think
For the Crystal Black Pearl:
Light/Winker Assembly:
Left: 34350-T2A-A02
Right: 34300-T2A-A02
Skulls/Covers:
Left: 76251-T5R-P01ZF
Right: 76201-T5R-P01ZF
For the Crystal Black Pearl:
Light/Winker Assembly:
Left: 34350-T2A-A02
Right: 34300-T2A-A02
Skulls/Covers:
Left: 76251-T5R-P01ZF
Right: 76201-T5R-P01ZF
#35
10-30-2014, 10:48 PM
Purchased Trailer Hitch, Trailer wire Harness, & Tire Chains
Put the order in today, got free shipping from Etrailer.com. The company is EXTREMELY helpful, highly recommended.
I should note that at this time there is no "plug & play"" trailer harness for the 2015 Honda Fit...yet. They told me that it is in the works, but it is still months away. Main reason I believe is to get surplus taillight connectors from Honda to assemble the kits required for the converter box. i got a universal converter kit where you need to splice in the wires via compression crimp connectors. Plan is after winter is to pickup a small 4x8ft utility trailer with some side walls. Good for moving stuff around for up to 1k pounds. Likely I will NEVER haul something that heavy. 4x8FT is plenty of space for many utilitarian uses.
The snow chains were pretty cheap and look very useful. Certainly much cheaper than buying studded snow tires. For $37 bucks they seem like a bargain. Only time will tell how effective they are in the snow.
I'll get pictures when I can, but below is what I purchased.
https://www.etrailer.com/p-PW1026.html - Tire Chains
https://www.etrailer.com/p-C11406.html - Trailer Hitch
https://www.etrailer.com/p-119190KIT.html - Trailer Wire Harness
#37
10-31-2014, 07:43 AM
Not to worry. Lights only come on when the door opens and closes. Though I can override it its pretty much illegal everywhere. For $40 bucks in parts I thought it would make the car look sharp while parked enter/exiting
#38
10-31-2014, 07:49 AM
Ohhhh... I thought those were the lights that got popular a few years ago, that were on while people were driving!
#39
10-31-2014, 09:22 AM
Haha, I'd rather have the lights on my car rather than another flashing them that is chasing me aggressively for no apparent reason....

#40
11-02-2014, 05:31 PM
EXL heated side mirror to EX project...so far
As promised, here are pics and videos.
I should point out a few important things:
1. I confirmed that wire harness does not have the wiring to "plug and play" the heated mirrors, but it is interesting to note that the connectors have open slots to accommodate.
2. When you remove the stock mirror, DO NOT REMOVE THE WHITE MOUNTING BRACKET FROM THE ACTUATOR! This thing is on their tighter than a ducks ass! Reason for that is due to a metal compression ring holding the 4 "fingers" to the actuator arms. Don't risk breaking this. The new heated side mirrors come with the white mount brackets too. You can remove them and attach the mirror to the one on the actuator. Easy.
Four hours in and I have successfully completed the drivers side heated side mirror installation. Swapped out the mirror itself for the heated one, ran wires for it, through the pivot point, then inside the door, and finally the hardest part between the door and firewall weatherproof grommet. It is not a straight shot, and unless someone can show me an easier way, you have to remove the door off the hinges, support it on an angle to make that weather grommet "straight" then snake the wires through into the cabin. This is what took me the longest, and I ran out of daylight. Yeah I could have drilled into the grommet where the wires would be outside it, but to me that would have looked unprofessional and compromised the weather seal itself.
I haven't done the passenger side yet, but I'm expecting similar difficulty, though I should be quicker now that I know what to expect. The driver side I think is the hardest to route wires through the firewall since there are so many wires and panels in front of where the firewall grommet comes in the cabin. The passenger side the connector is right next to the kick plate unimpeded by anything in front of it.
Here are some photos. I'll be doing the passenger side this weekend, and finally wiring up the relay to the defroster switch.


Comment: BG1985, kudos for this great effort in sharing the heated mirror mod. Its coming at the right time of the year for the FF's on the mainland. Exacting info. always the preferred guide for those "not in the know".
On another note, used to play and own an '85 Precision back in the day. My first bass was a Hofner - Paul McCartney style but right-handed. - rttby
I should point out a few important things:
1. I confirmed that wire harness does not have the wiring to "plug and play" the heated mirrors, but it is interesting to note that the connectors have open slots to accommodate.
2. When you remove the stock mirror, DO NOT REMOVE THE WHITE MOUNTING BRACKET FROM THE ACTUATOR! This thing is on their tighter than a ducks ass! Reason for that is due to a metal compression ring holding the 4 "fingers" to the actuator arms. Don't risk breaking this. The new heated side mirrors come with the white mount brackets too. You can remove them and attach the mirror to the one on the actuator. Easy.
Four hours in and I have successfully completed the drivers side heated side mirror installation. Swapped out the mirror itself for the heated one, ran wires for it, through the pivot point, then inside the door, and finally the hardest part between the door and firewall weatherproof grommet. It is not a straight shot, and unless someone can show me an easier way, you have to remove the door off the hinges, support it on an angle to make that weather grommet "straight" then snake the wires through into the cabin. This is what took me the longest, and I ran out of daylight. Yeah I could have drilled into the grommet where the wires would be outside it, but to me that would have looked unprofessional and compromised the weather seal itself.
I haven't done the passenger side yet, but I'm expecting similar difficulty, though I should be quicker now that I know what to expect. The driver side I think is the hardest to route wires through the firewall since there are so many wires and panels in front of where the firewall grommet comes in the cabin. The passenger side the connector is right next to the kick plate unimpeded by anything in front of it.
Here are some photos. I'll be doing the passenger side this weekend, and finally wiring up the relay to the defroster switch.
Comment: BG1985, kudos for this great effort in sharing the heated mirror mod.
Its coming at the right time of the year for the FF's on the mainland. Exacting info. always the preferred guide for those "not in the know".On another note, used to play and own an '85 Precision back in the day. My first bass was a Hofner - Paul McCartney style but right-handed.
- rttby
Last edited by ROTTBOY; 11-02-2014 at 08:32 PM.