Action Jackson's tinkering


#22
 04-09-2016, 07:16 PM


So I wasn't happy with the flimsiness of the first one. 2Rismo2, it was originally 1/2" thick.
I apologize for some fuzzy pics. I left my camera on manual focus.
ALL materials from Home Depot Canada. Bag from Princess Auto.
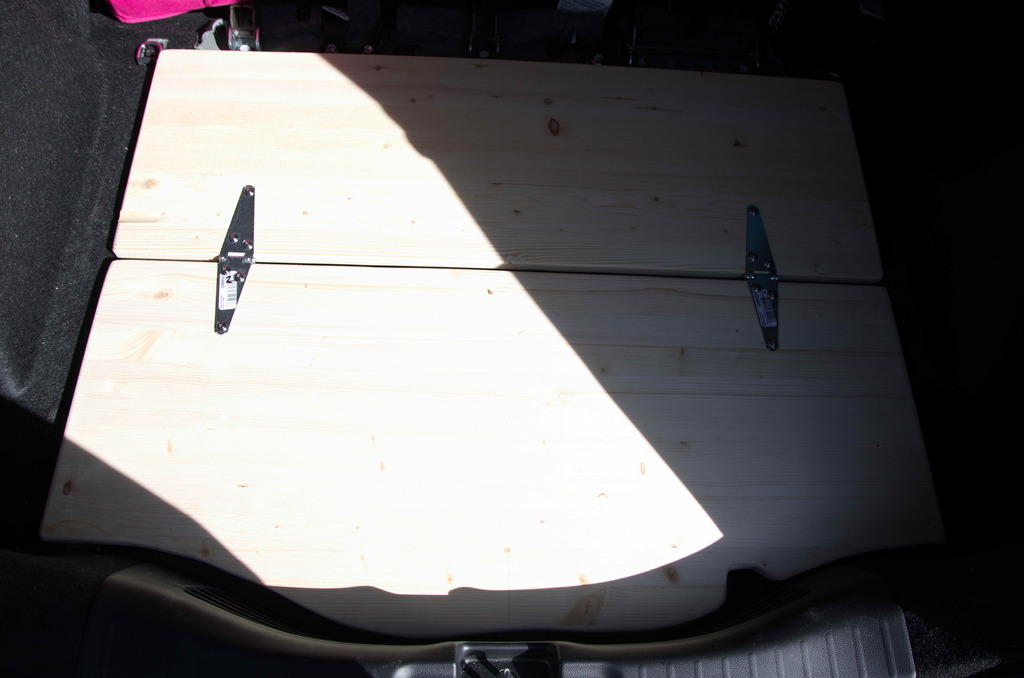
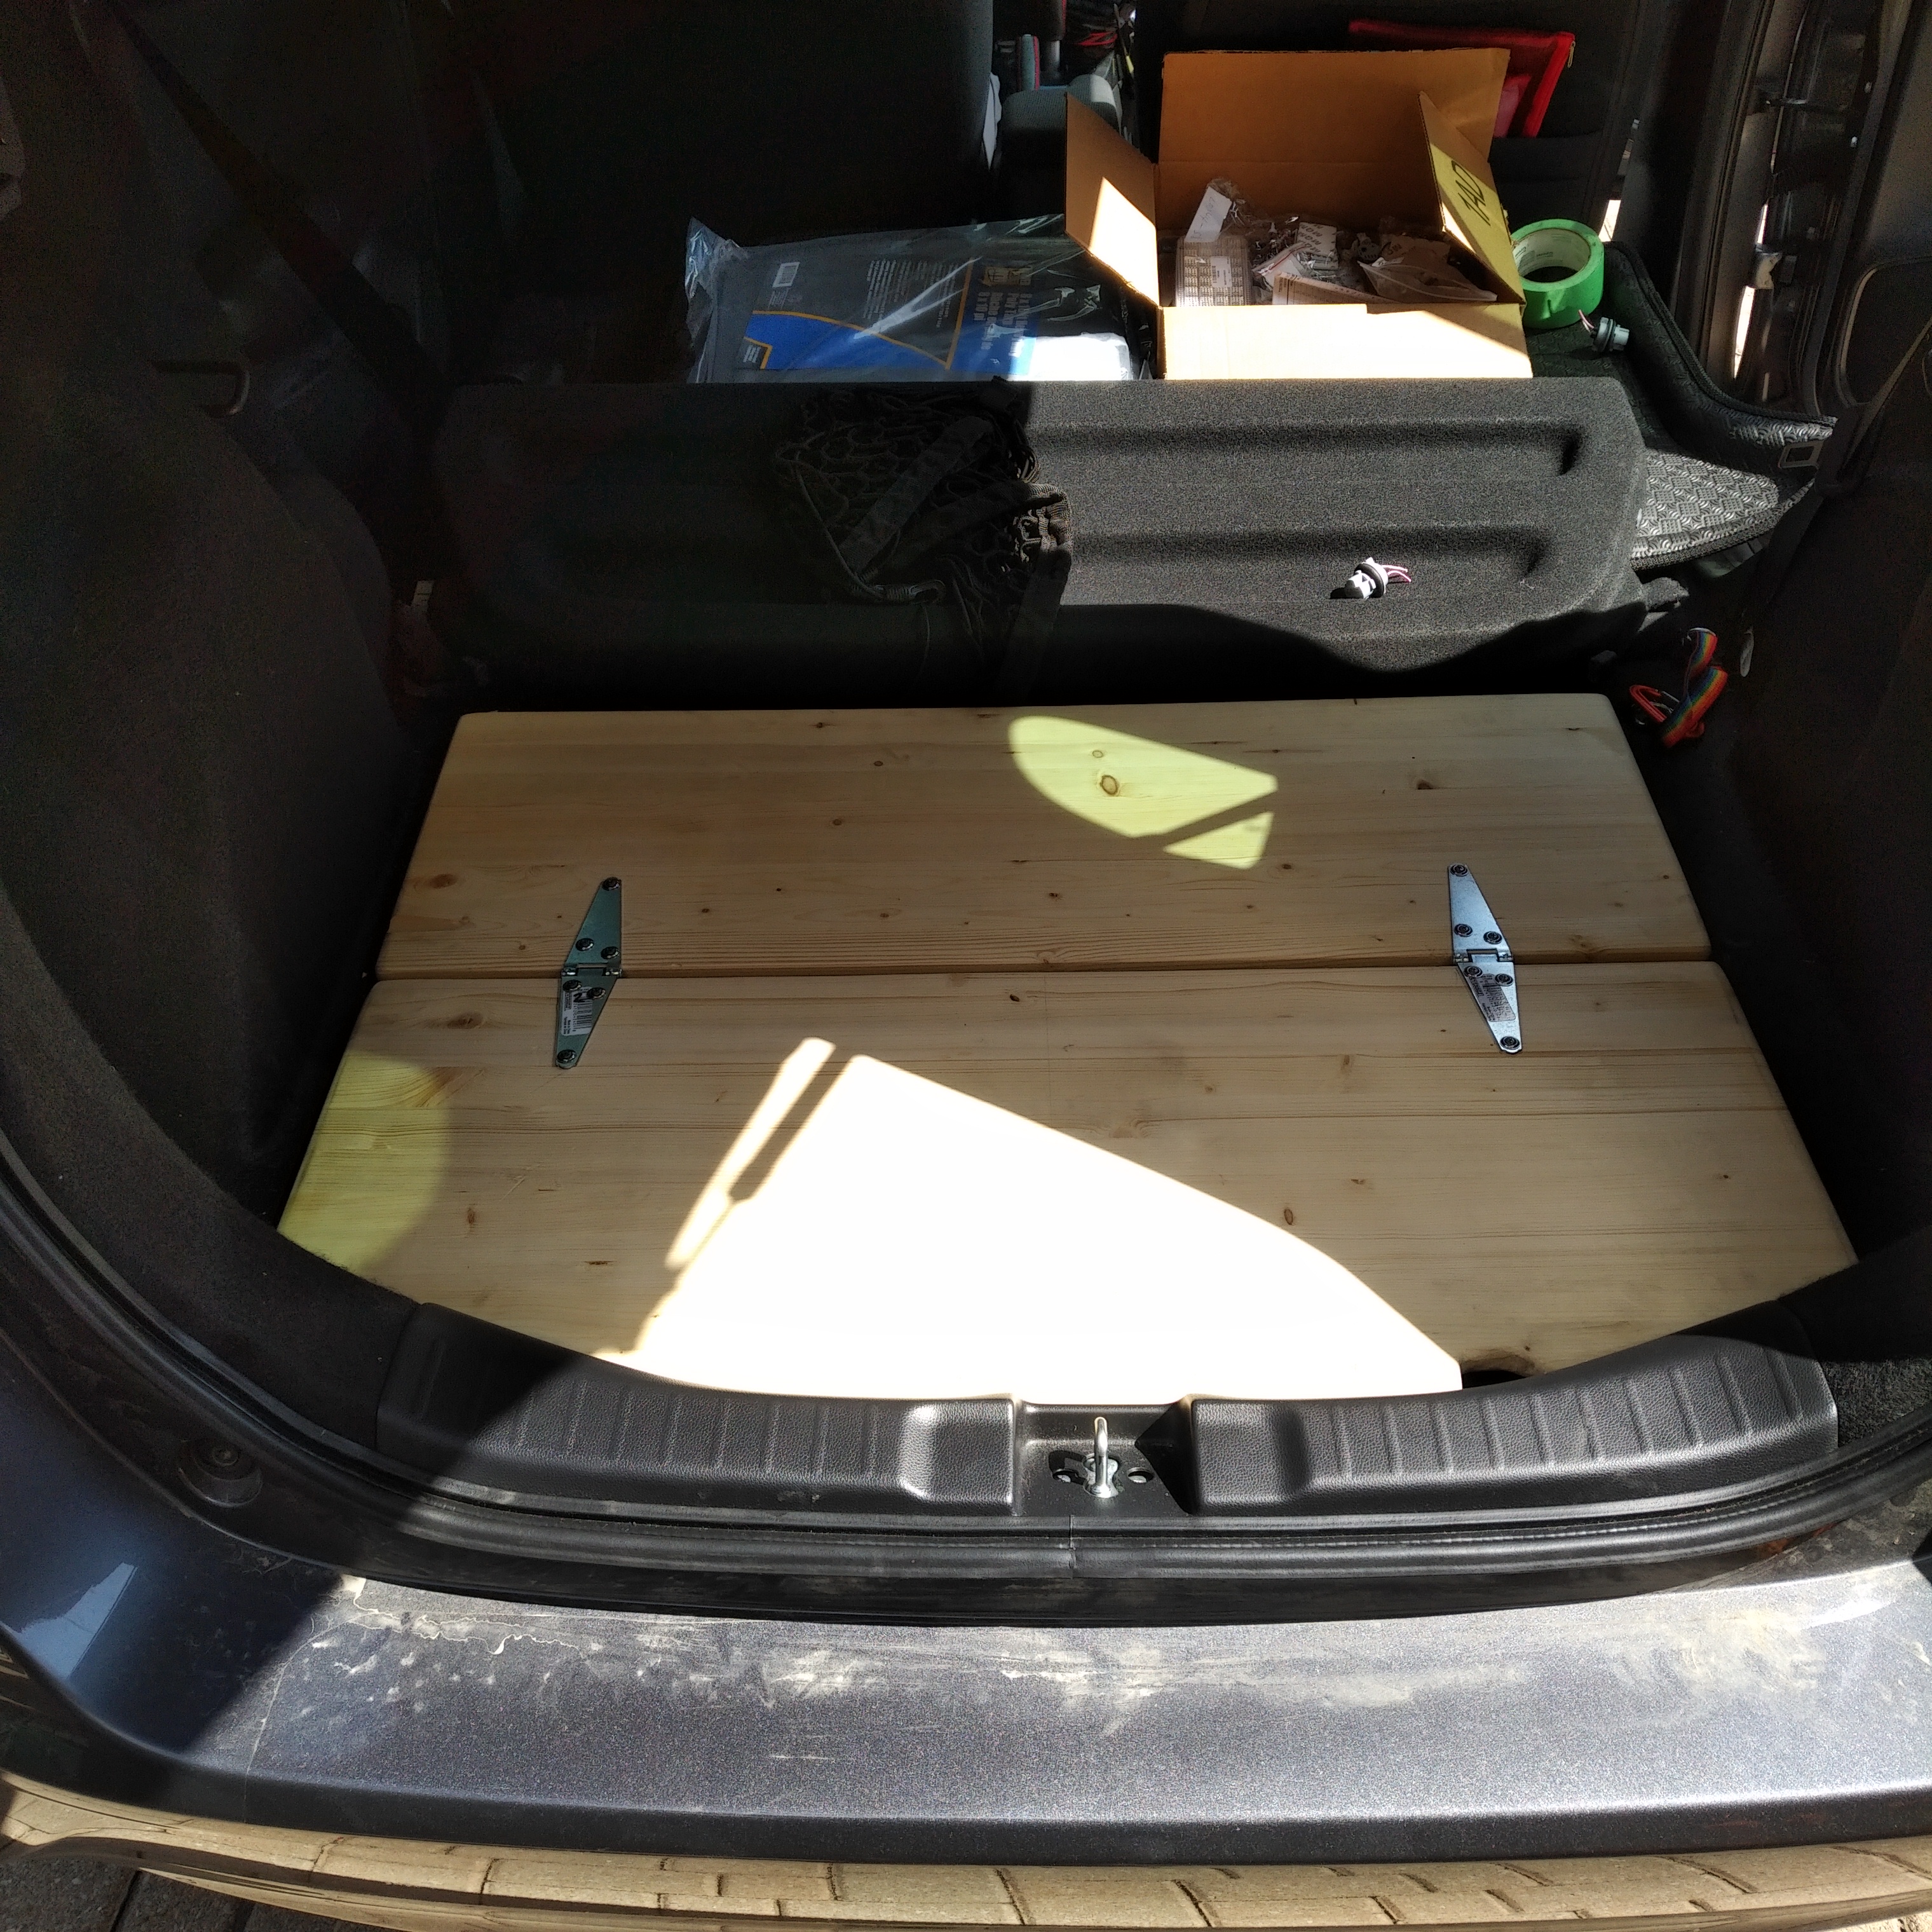
The original one was 38" wide. The trunk is just about 39" wide. This new board is 36" wide. There's no issues. It's actually better as it's easier to remove from the trunk.
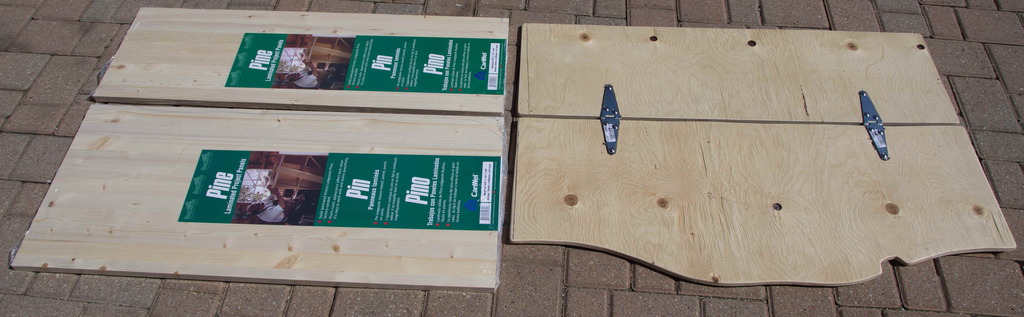
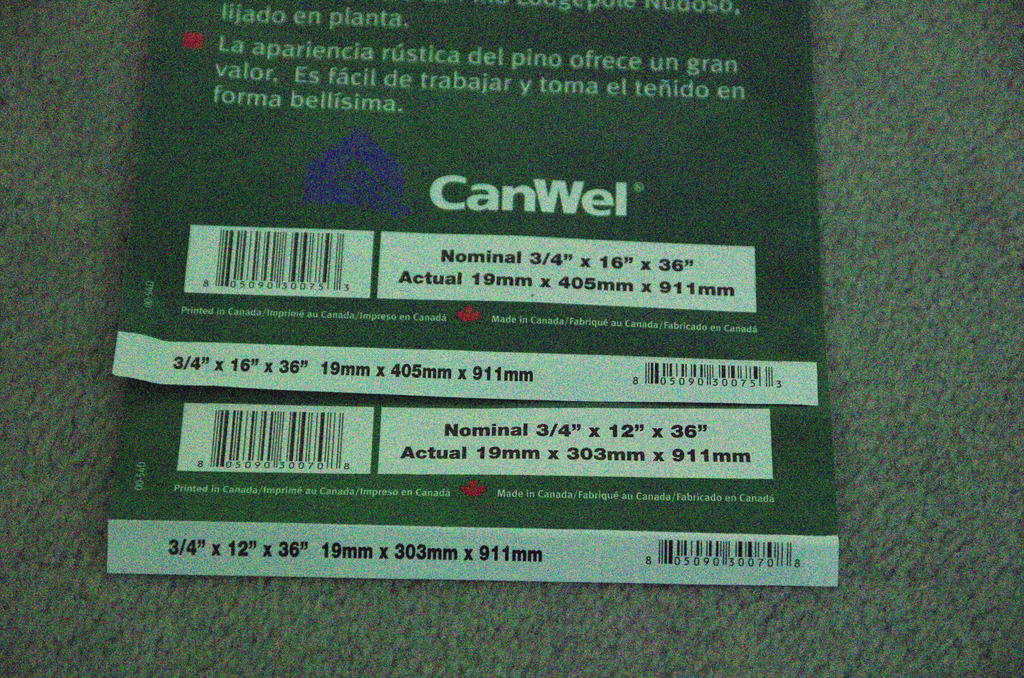
This wood is 3/4" and STIFF. I sat on it in the trunk, and there was zero flex.
With these boards, there's minimum cutting, and I rounded out the corners and edges with a handsander.
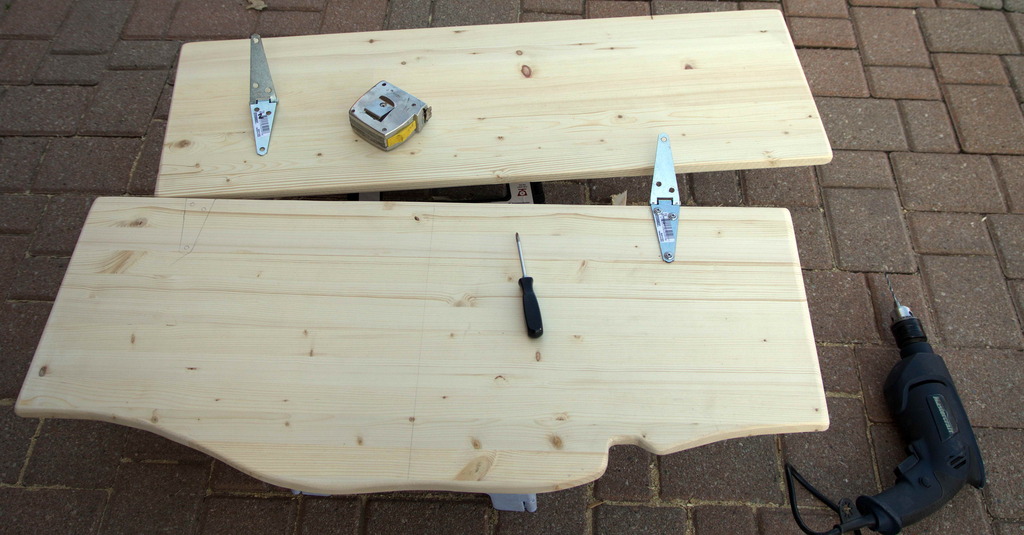
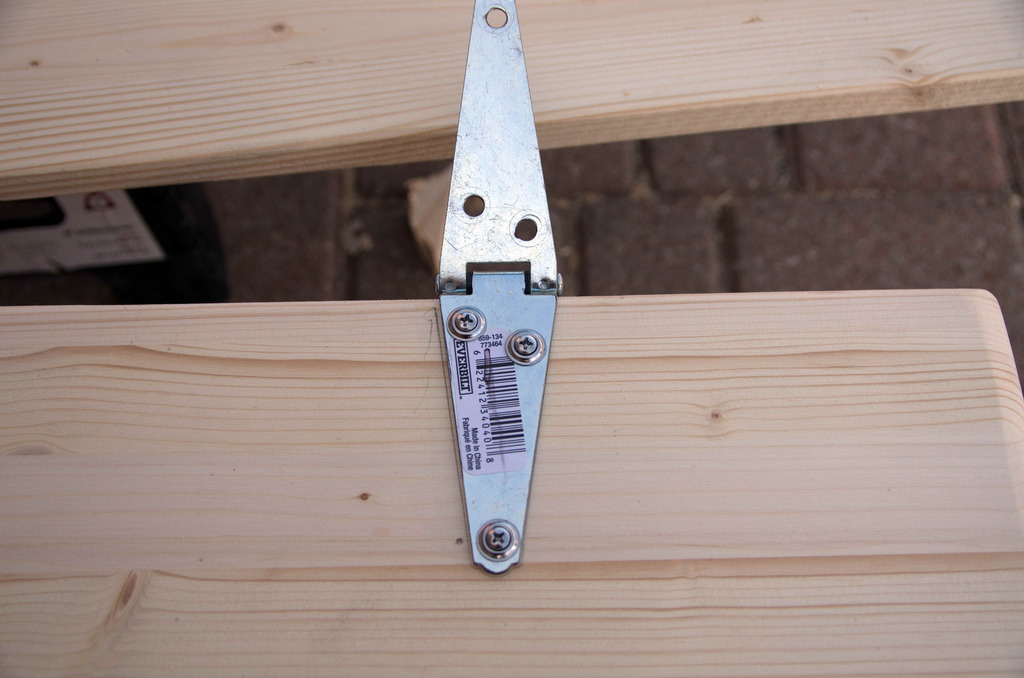
This is a 4" Heavy Strap Hinge. Heavy so it offers resistance, and it holds the board up. I used Trim Finishing screws as they are self tapping (I still drilled pilot holes) and everything sits pretty flat.
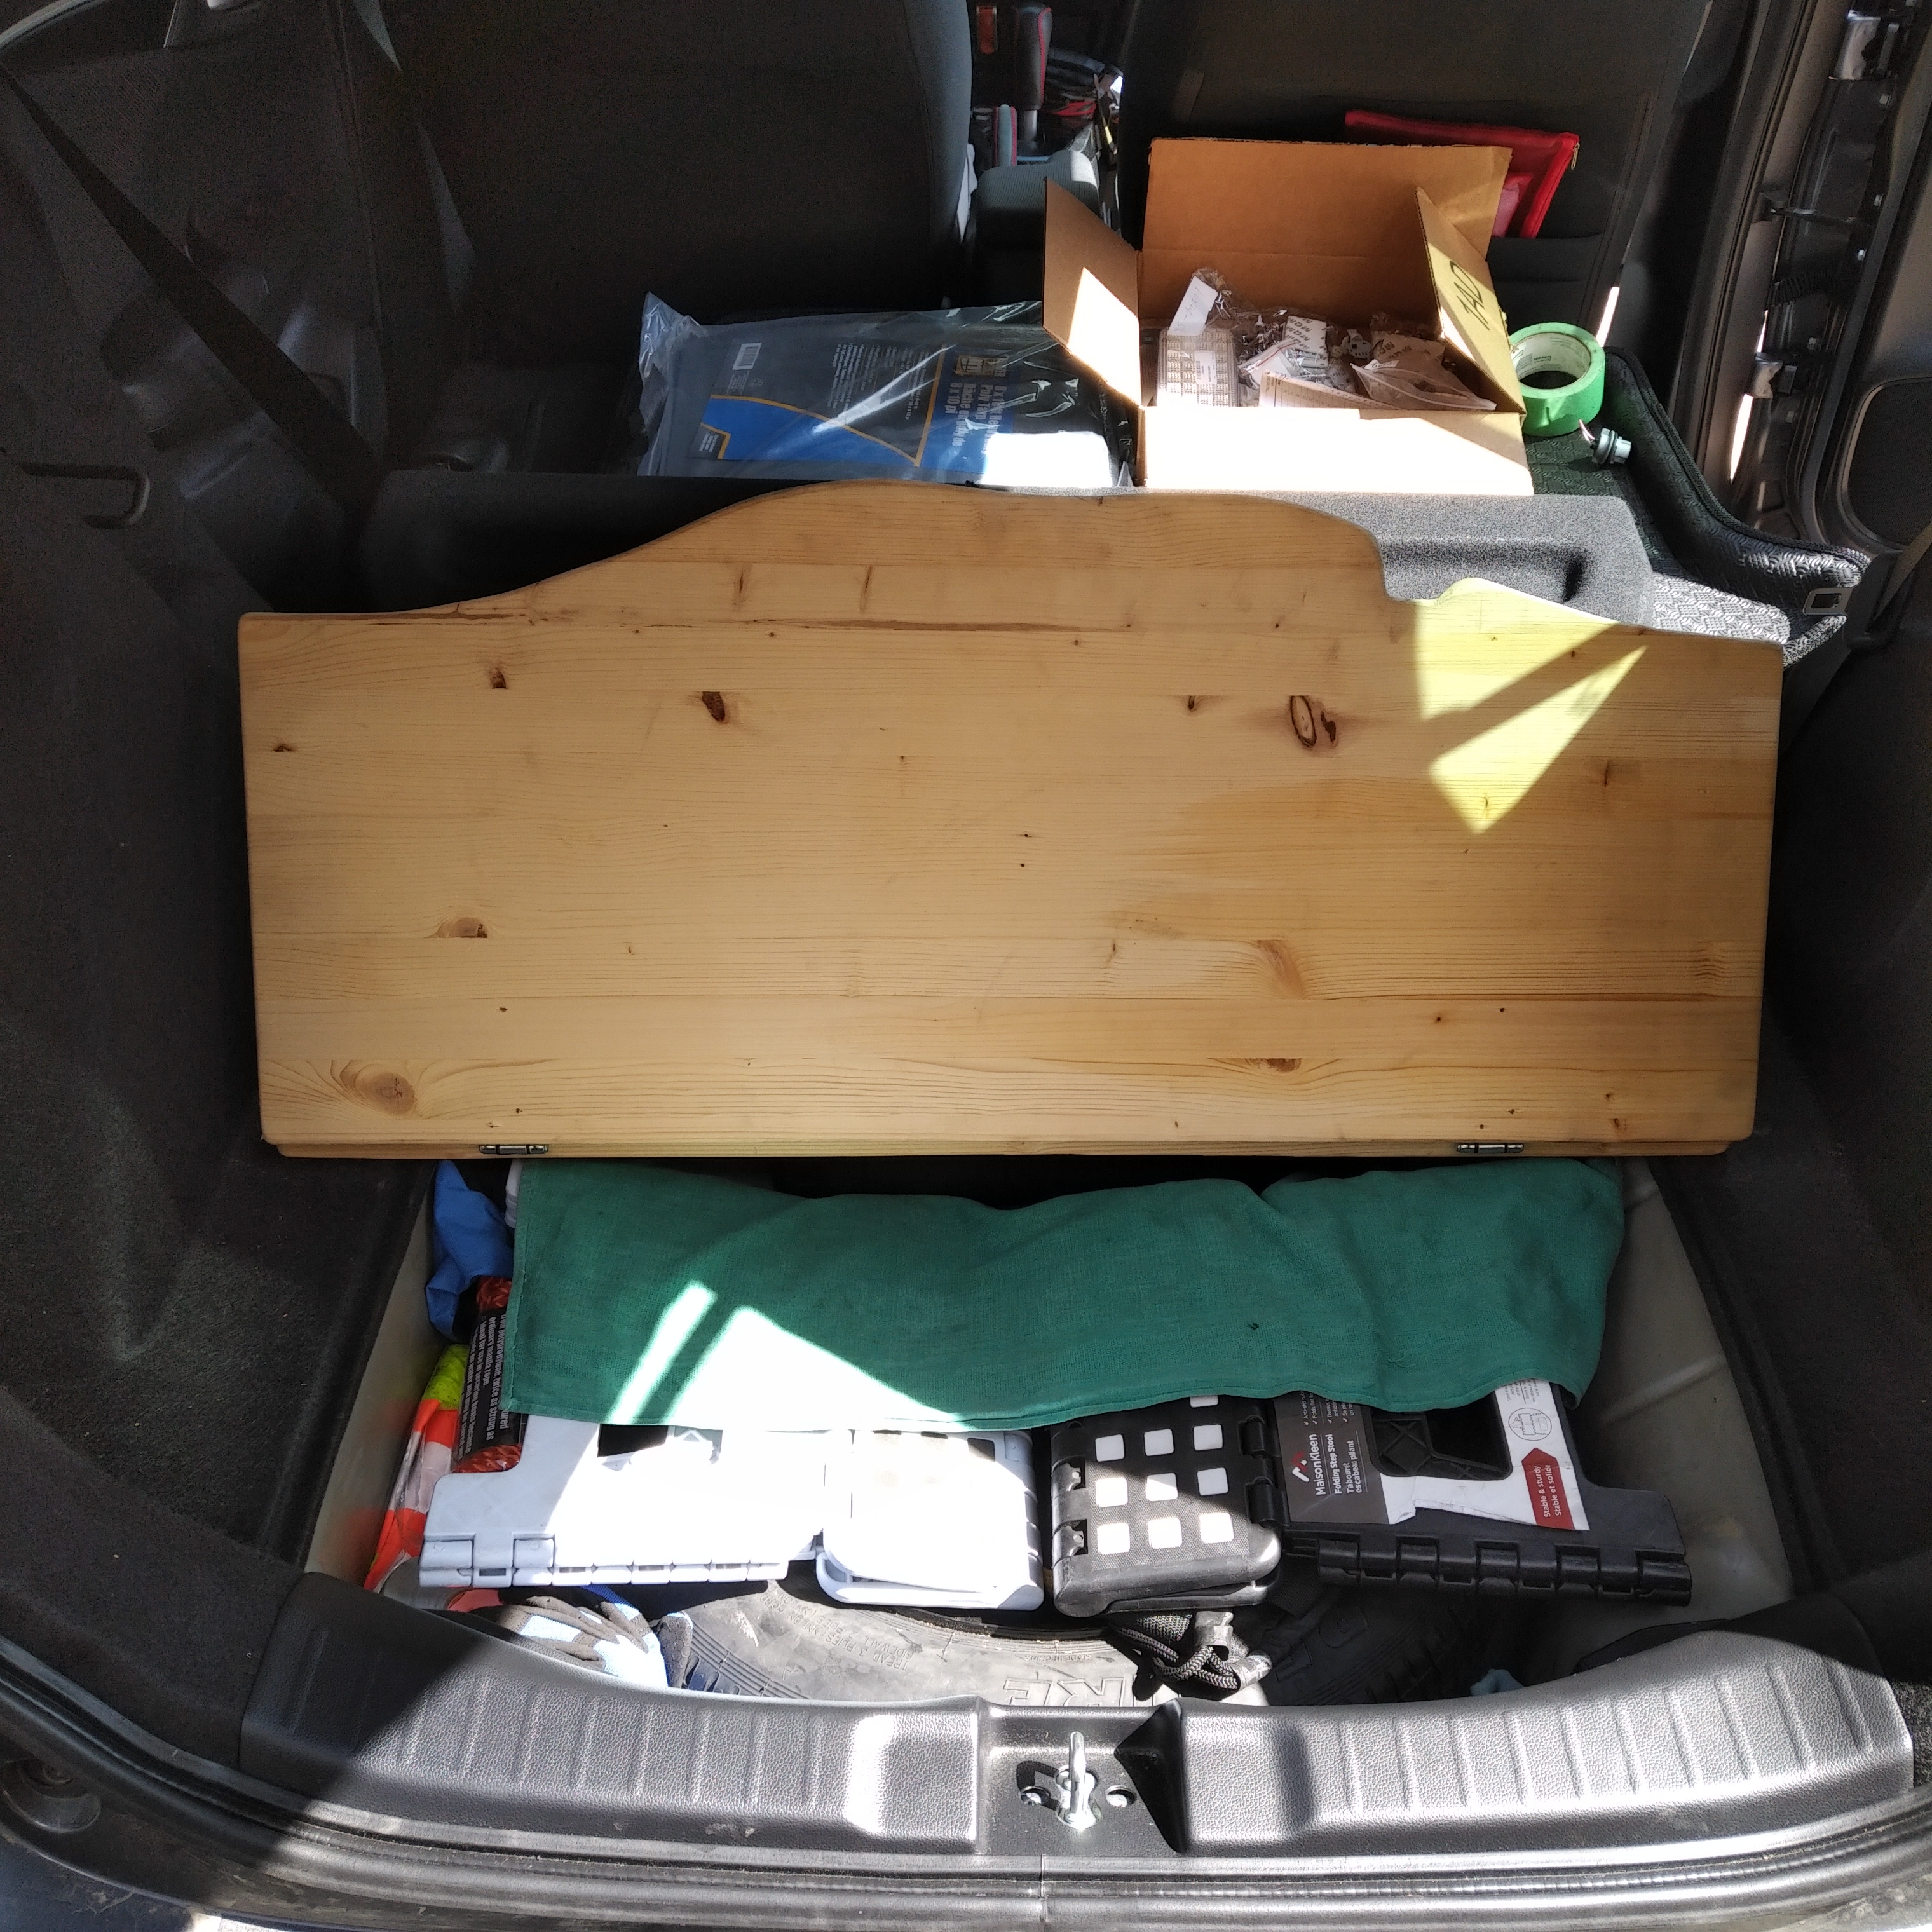
New boards fitment.
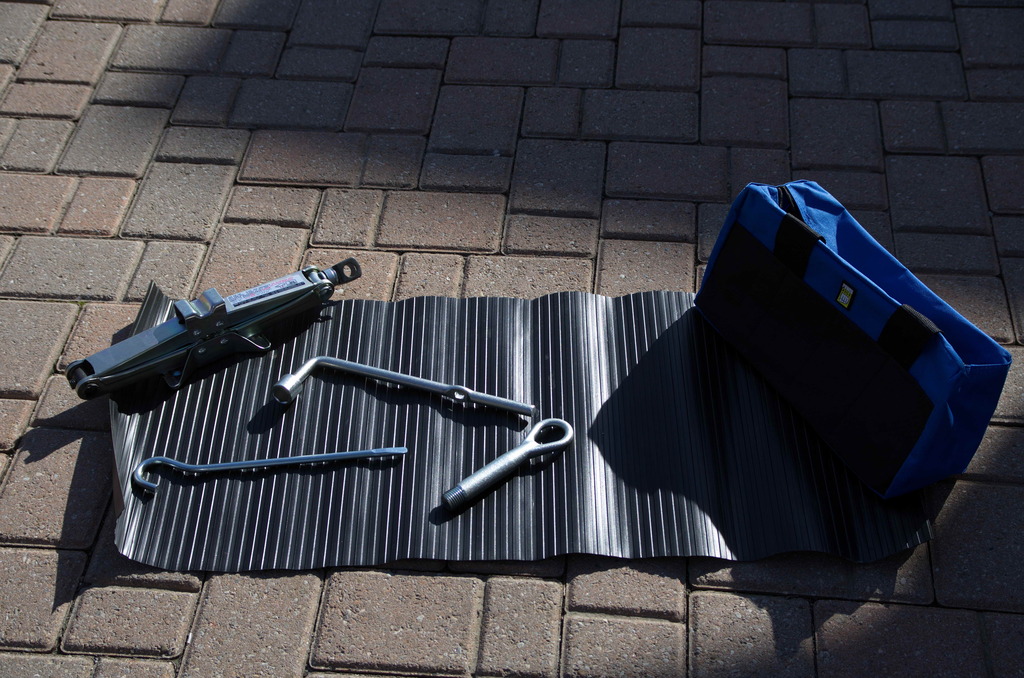
Trimming off some excess off this vinyl roll gives me a "mat" to roll up that I've used when working on the ground. The jack kit fits into a Princess Auto 14" bag perfectly.
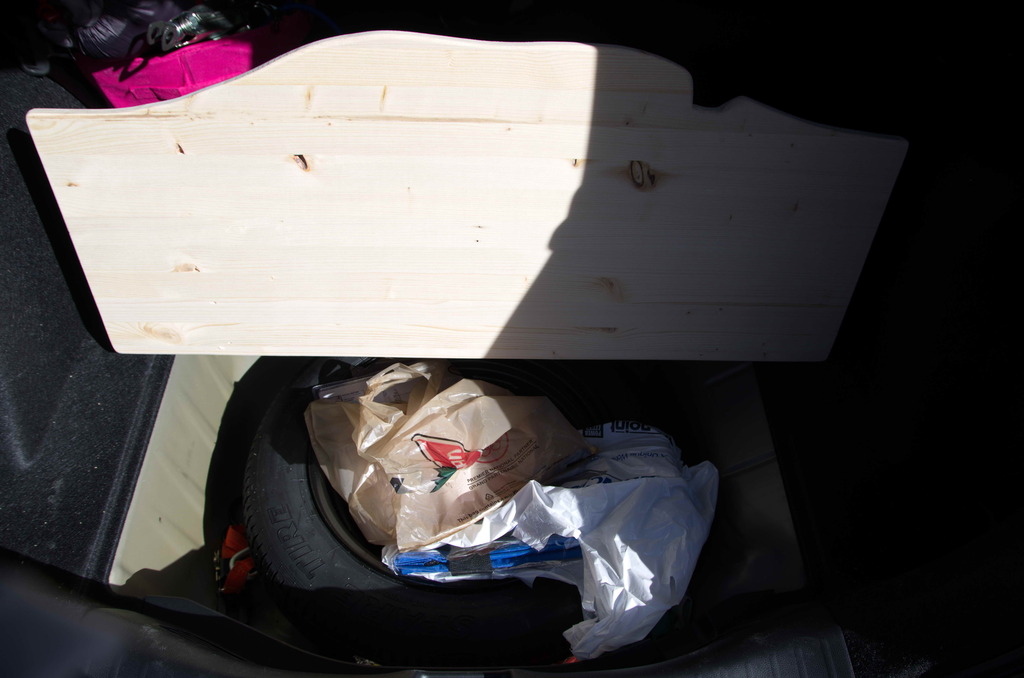
There you have it. I am now enjoying the extra space in the spare tire well, which frees up more space in the actual trunk. There is no interference with the cargo cover. I'm happy and the 2nd time around only took a few hours.
You can use this for a stealth sub setup. I might stick my powered sub in here once it arrives.
If you really want, you can build a 2 tier setup. I believe the JDM GE Jazz might have this option.
I apologize for some fuzzy pics. I left my camera on manual focus.
ALL materials from Home Depot Canada. Bag from Princess Auto.
The original one was 38" wide. The trunk is just about 39" wide. This new board is 36" wide. There's no issues. It's actually better as it's easier to remove from the trunk.


This wood is 3/4" and STIFF. I sat on it in the trunk, and there was zero flex.
With these boards, there's minimum cutting, and I rounded out the corners and edges with a handsander.

This is a 4" Heavy Strap Hinge. Heavy so it offers resistance, and it holds the board up. I used Trim Finishing screws as they are self tapping (I still drilled pilot holes) and everything sits pretty flat.

New boards fitment.


Trimming off some excess off this vinyl roll gives me a "mat" to roll up that I've used when working on the ground. The jack kit fits into a Princess Auto 14" bag perfectly.


There you have it. I am now enjoying the extra space in the spare tire well, which frees up more space in the actual trunk. There is no interference with the cargo cover. I'm happy and the 2nd time around only took a few hours.
You can use this for a stealth sub setup. I might stick my powered sub in here once it arrives.
If you really want, you can build a 2 tier setup. I believe the JDM GE Jazz might have this option.
Last edited by Action Jackson; 02-17-2019 at 10:00 AM.
#23
04-22-2016, 06:13 PM

That's pretty cool, I've been wondering where I would stick a sub. I don't want to give up my magic seat options by putting it under a rear seat.
#24
04-23-2016, 02:21 PM
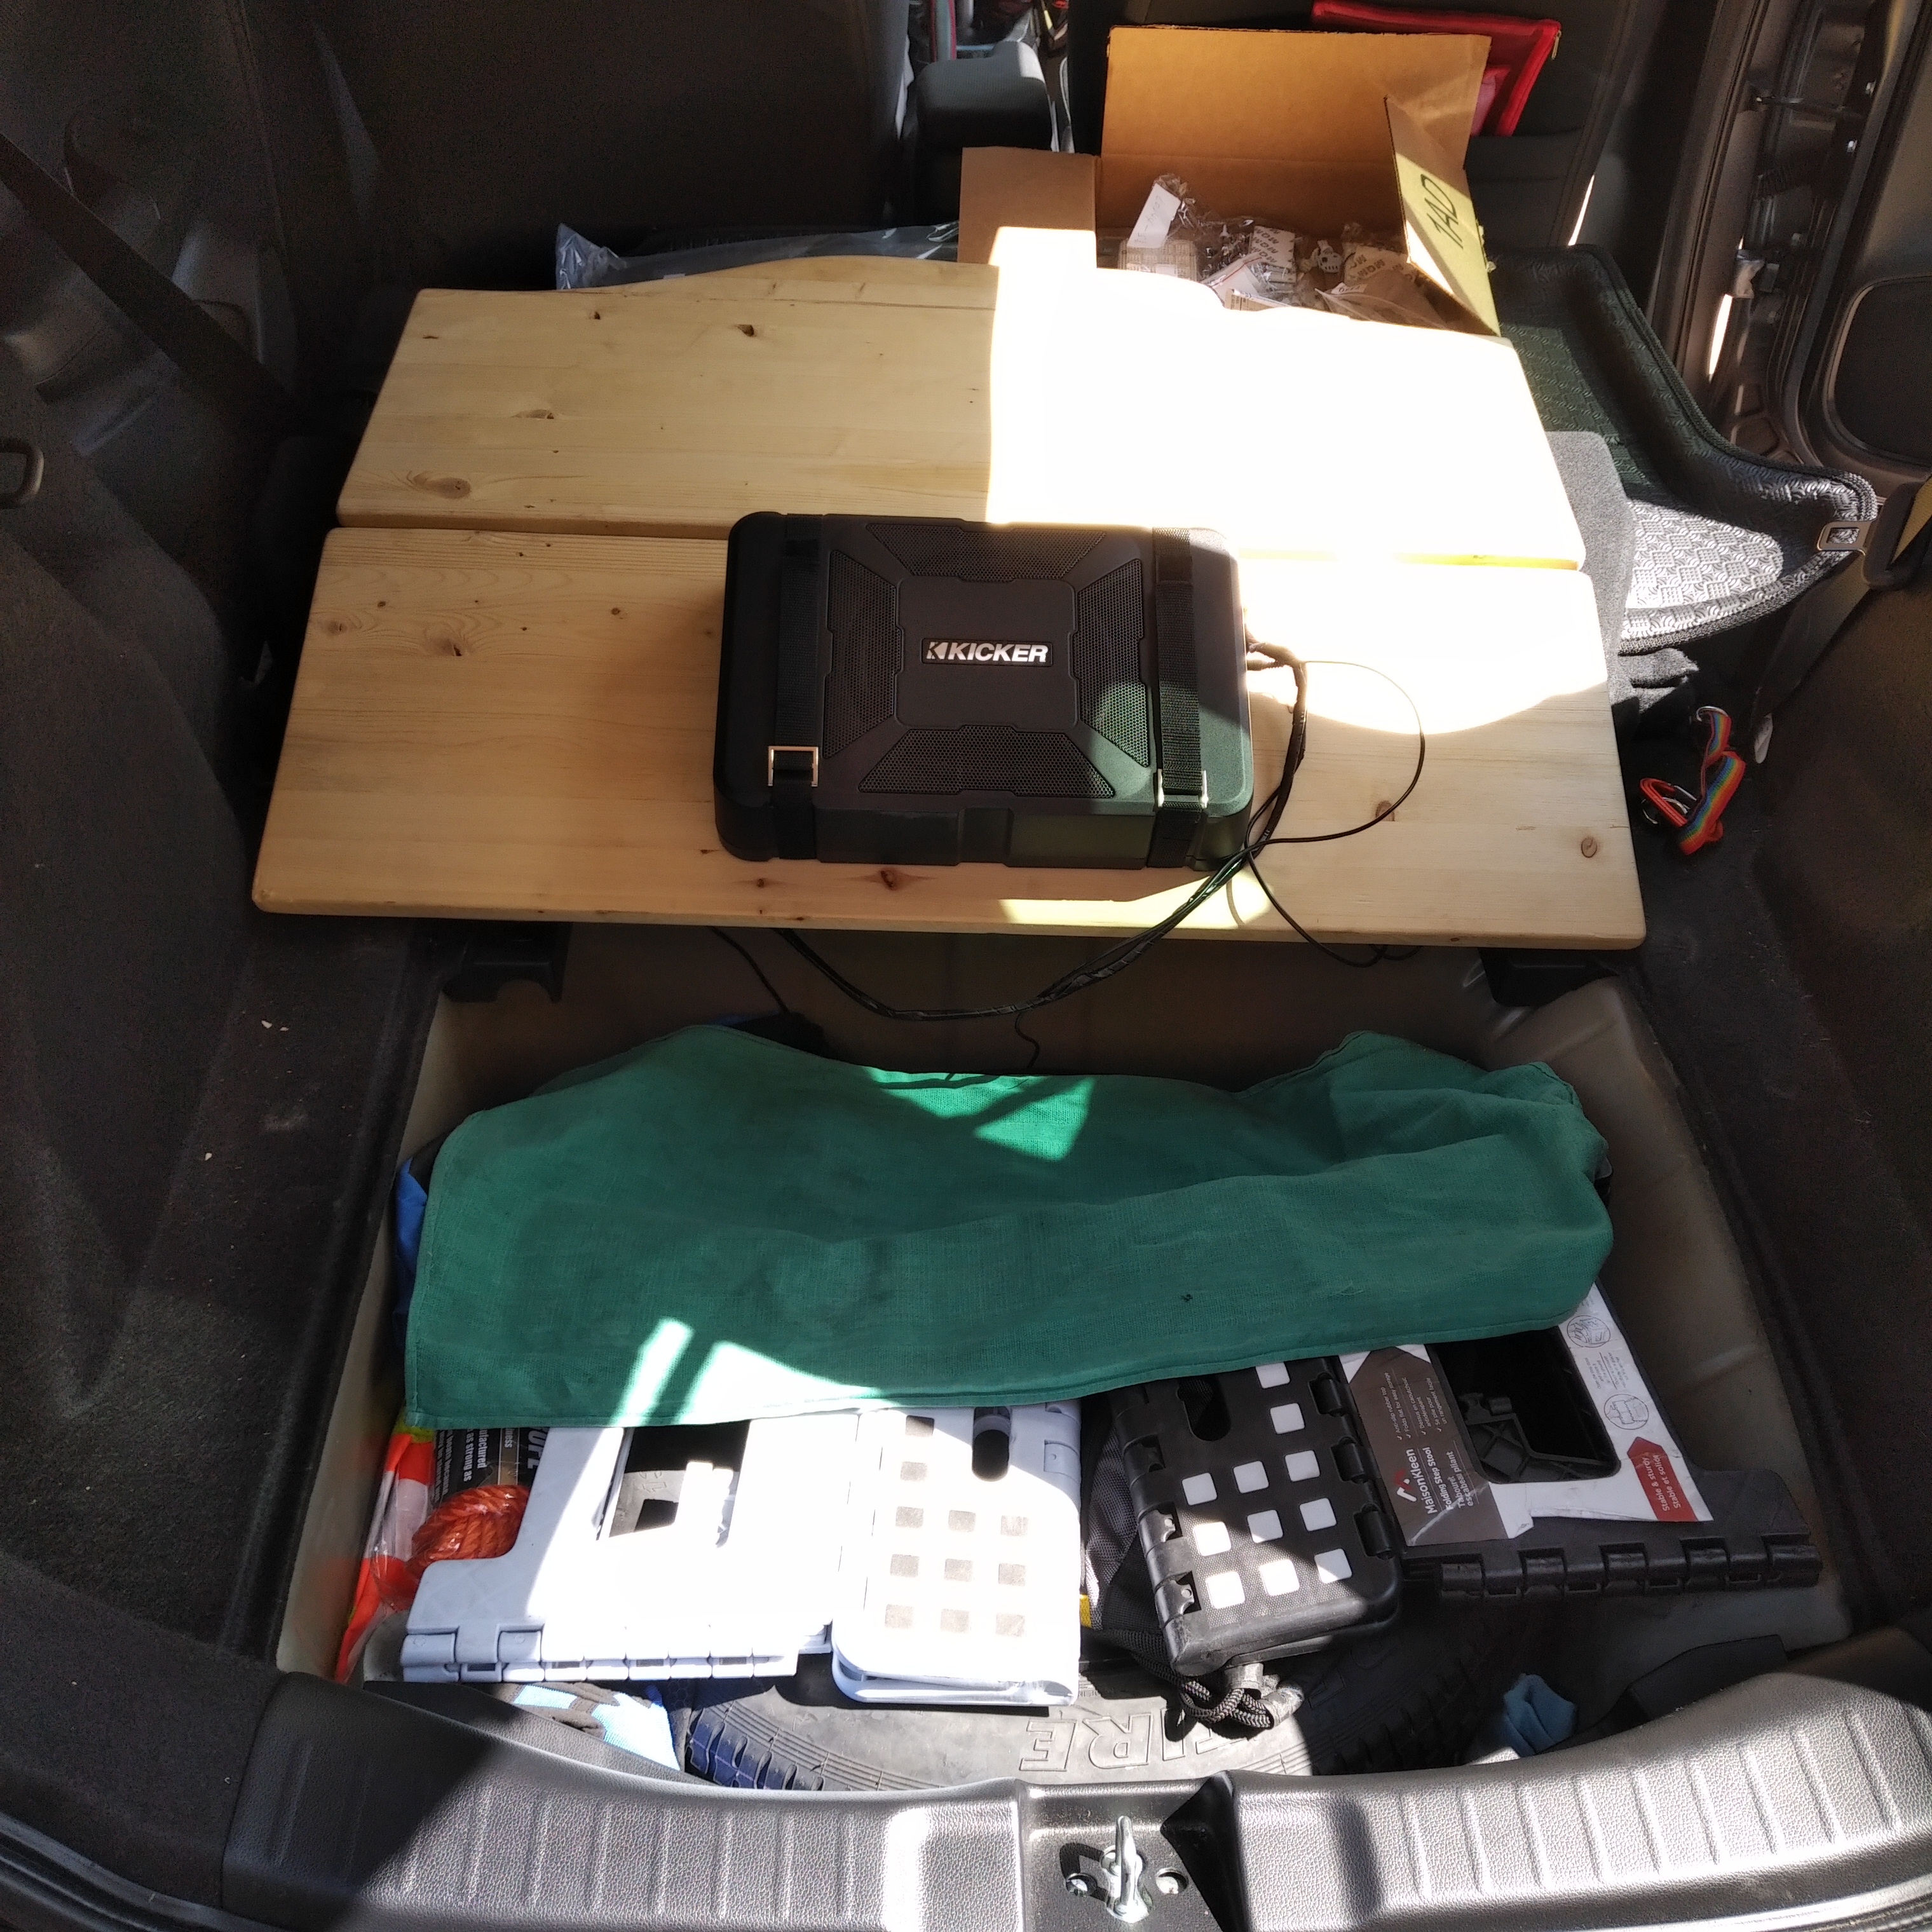
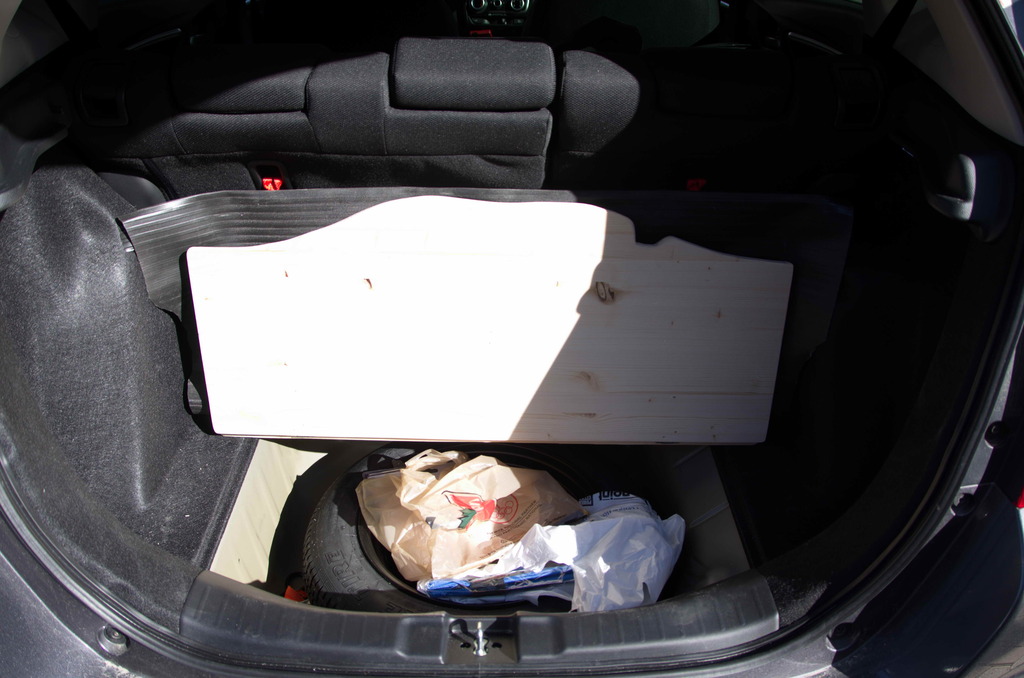
Bear Knuckles, as you can now see, my sub doesn't intrude into the passenger compartment. There's still plenty of space in my "new trunk".
Last edited by Action Jackson; 10-24-2017 at 01:20 PM.
#28
04-24-2016, 04:47 PM
They're self powered subs (amp and sub built into single unit). My first away from traditional separate setup. There are also shallow mount subs, so that it can go in small boxes or the spare tire.
#30
04-25-2016, 03:58 PM
It's good. Needs to break in a bit, and retune.
You might want to check out these installs:
https://www.fitfreak.net/forums/3rd-...em-oem-hu.html
https://www.fitfreak.net/forums/3rd-...m-install.html
You might want to check out these installs:
https://www.fitfreak.net/forums/3rd-...em-oem-hu.html
https://www.fitfreak.net/forums/3rd-...m-install.html
#31
05-02-2016, 06:14 PM


#32
05-03-2016, 08:24 PM
Finished "tucking in" the top/back part of the steering wheel wrap.
Again used Stembridge's steering wheel removal as a guide:
https://www.fitfreak.net/forums/3rd-...ml#post1330251
and a Honda schematic:
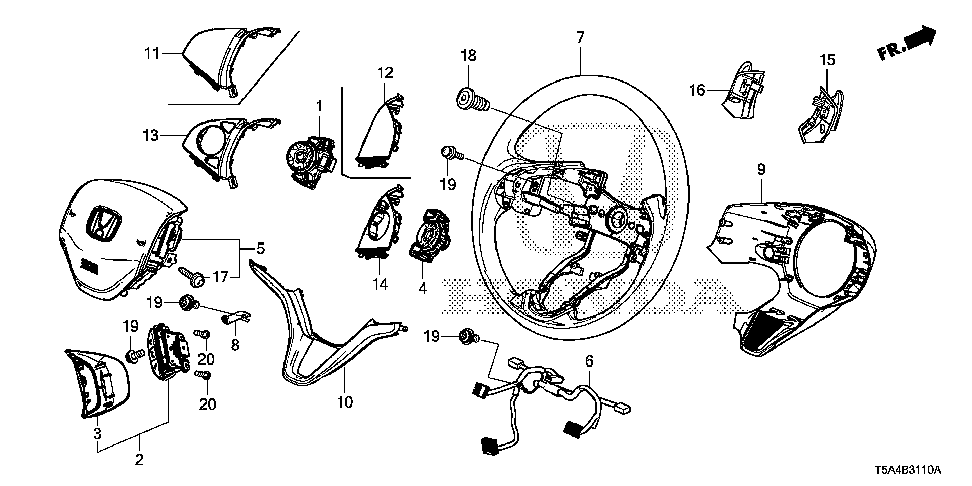
I previously left this piece taped to the steering wheel:
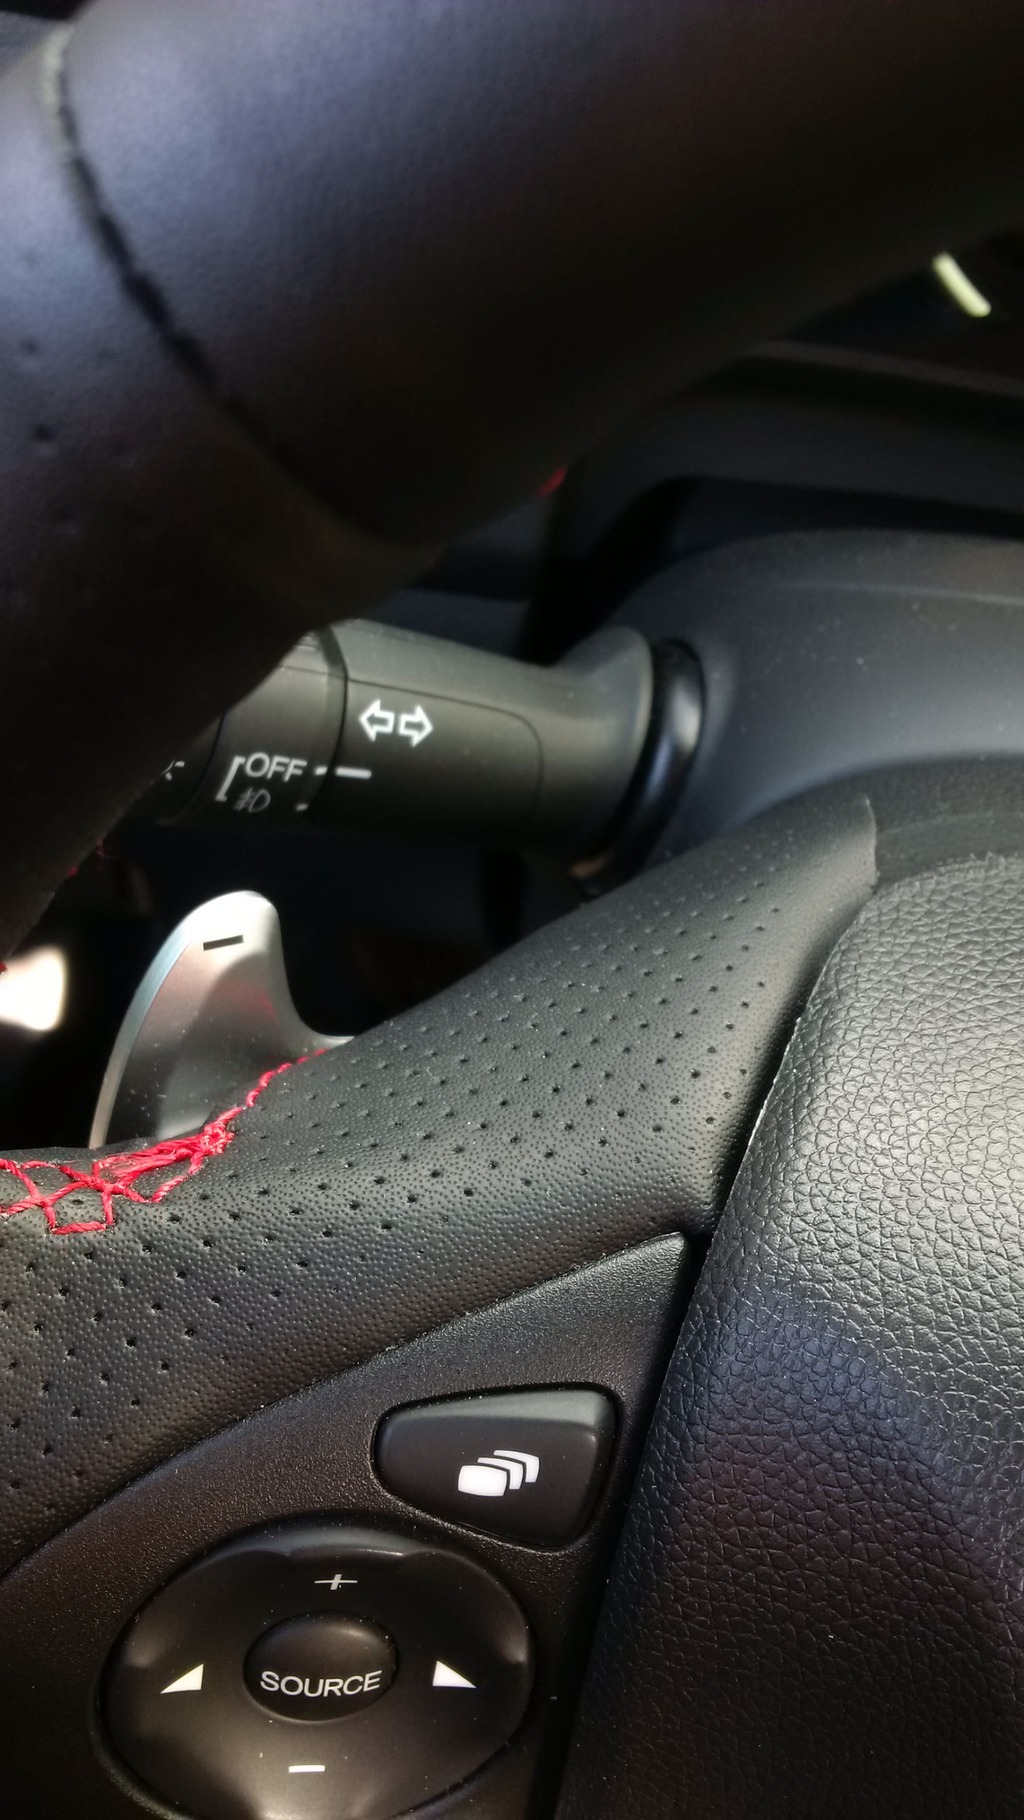

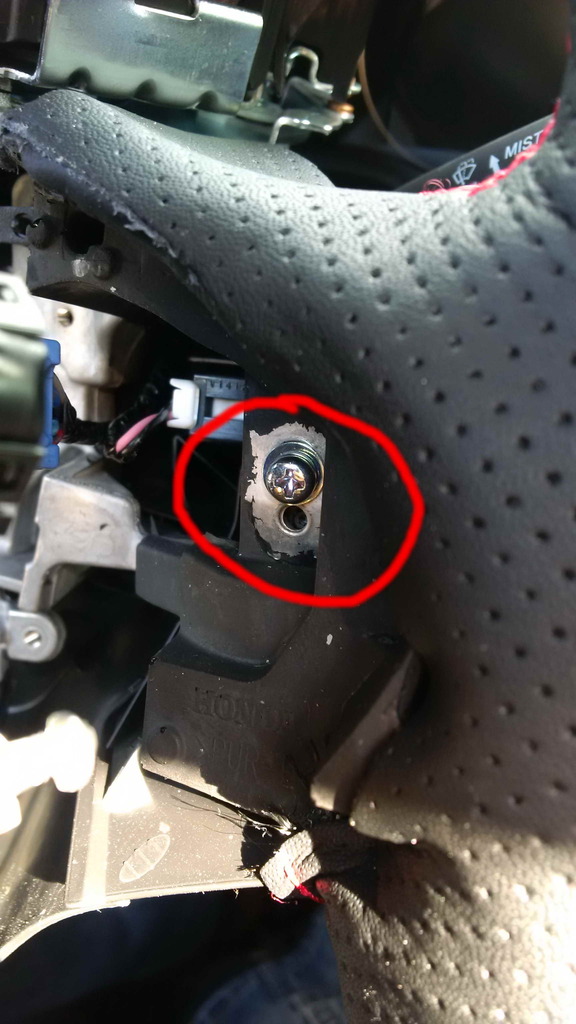
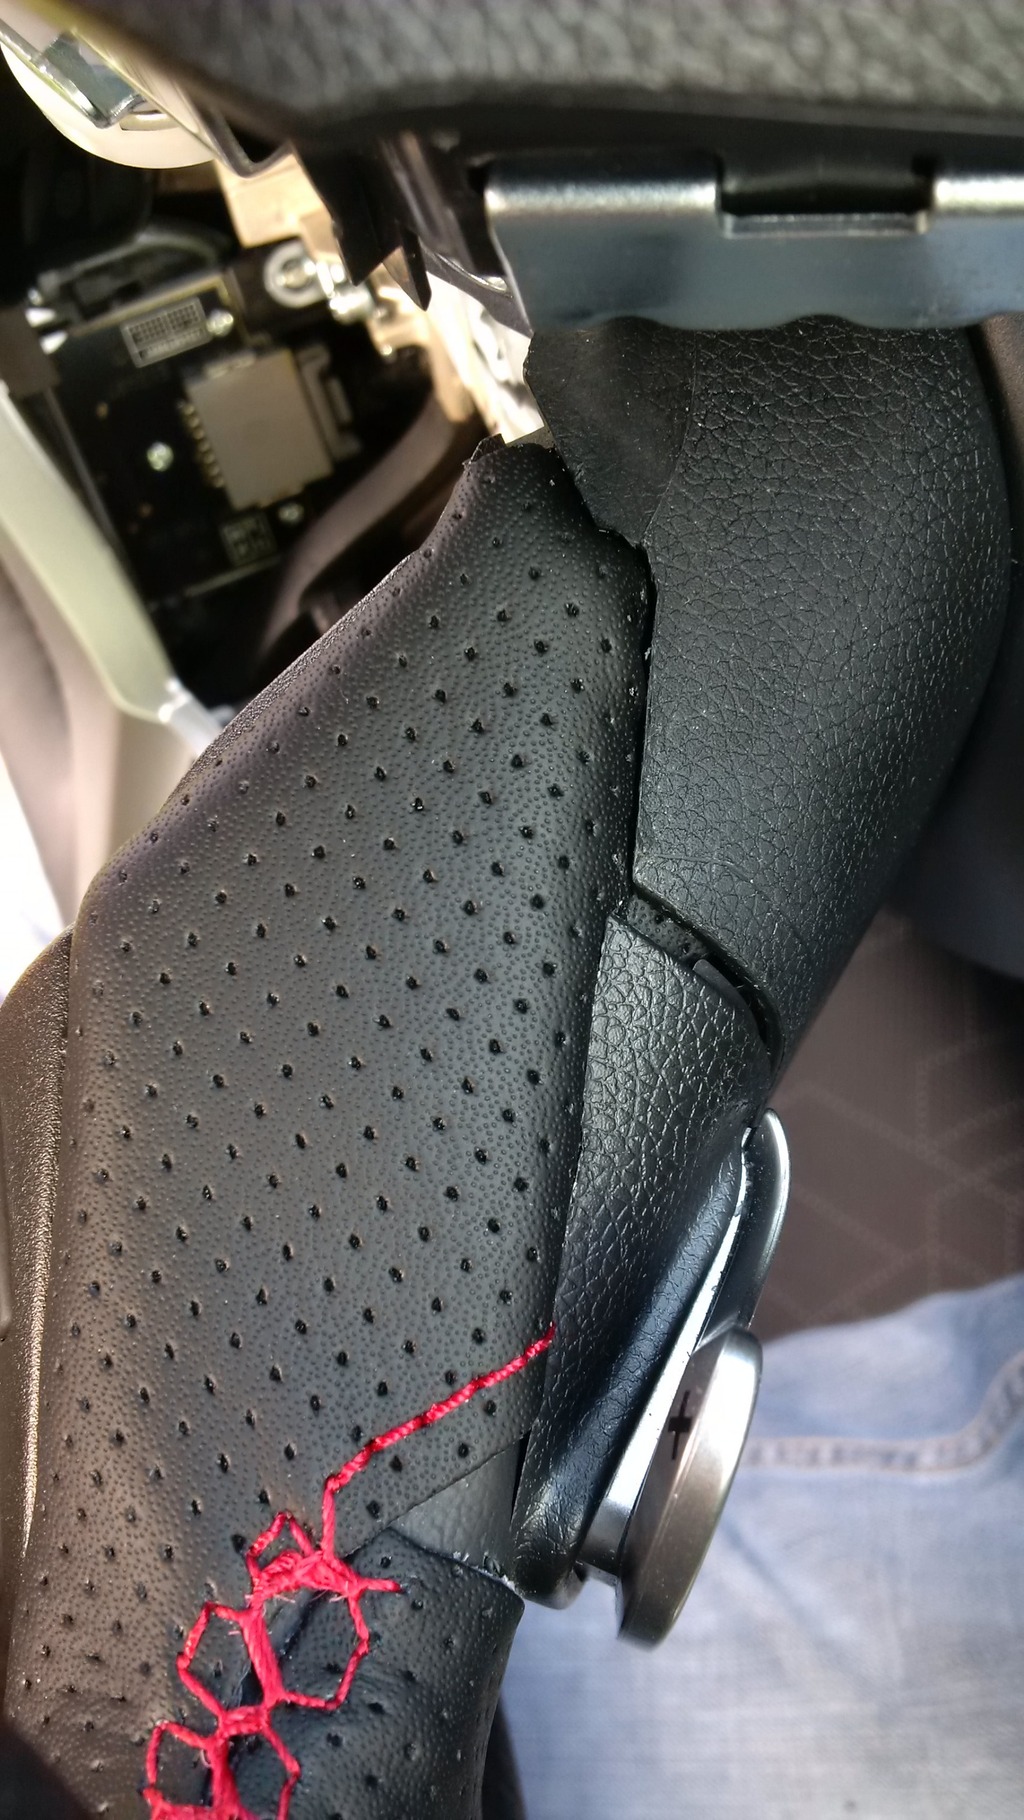
It helps to remove the airbag. There are 2 screws, one behind each paddle shifter. Pic shows screw removed:
And I just flip it up while still connected. WARNING, just because the airbag didn't go off in my car, doesn't mean that I will be the same for you. So disconnect the battery!
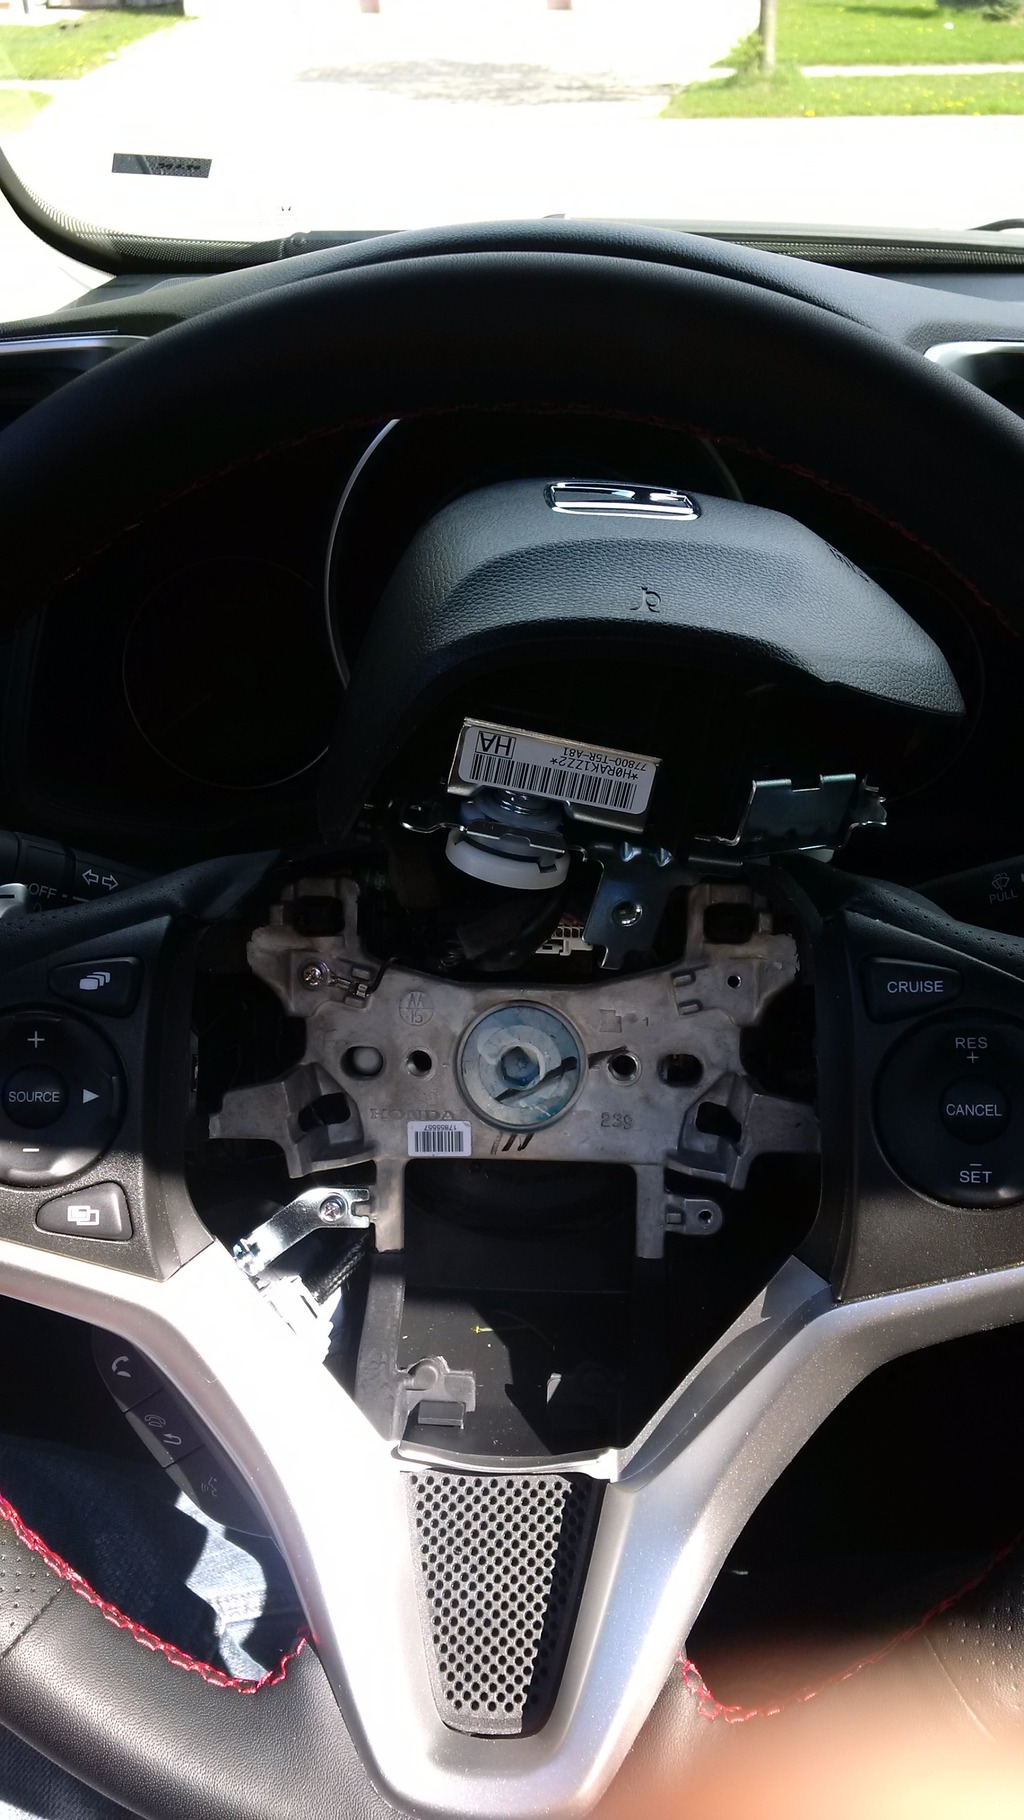
You'll need to pull the trim straight back. I did not remove it completely, just pulled back a bit:
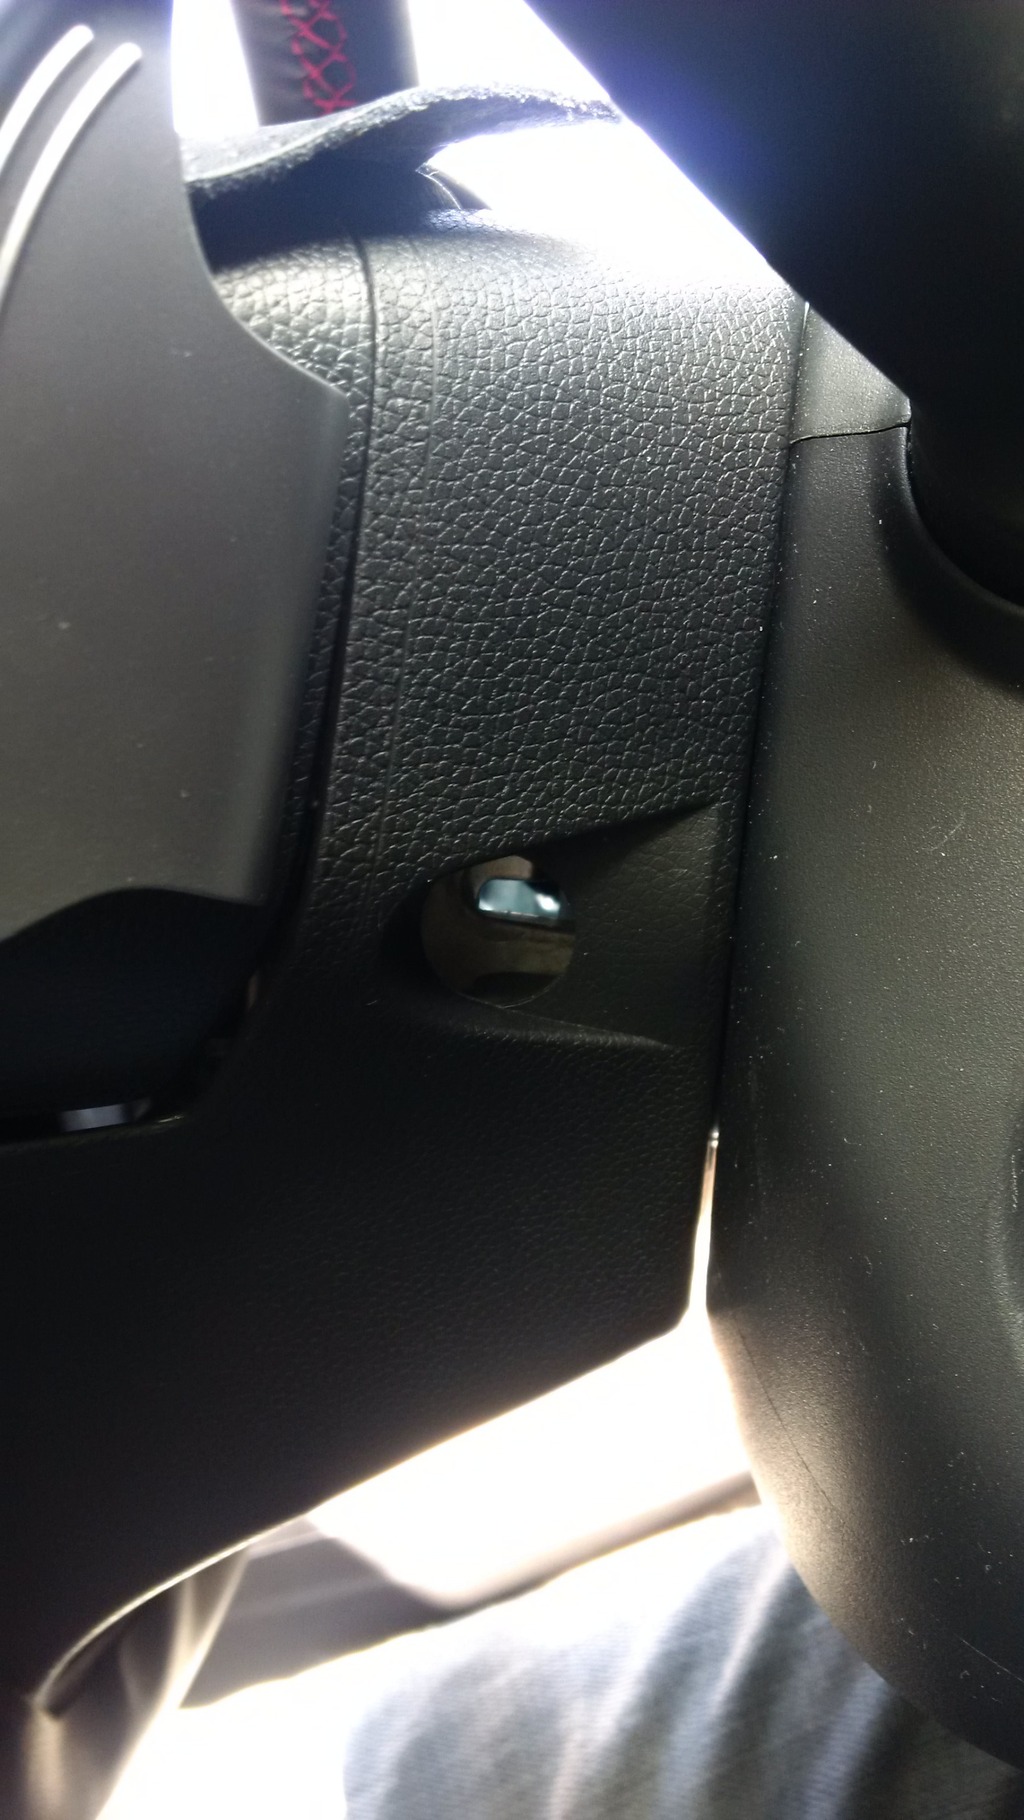
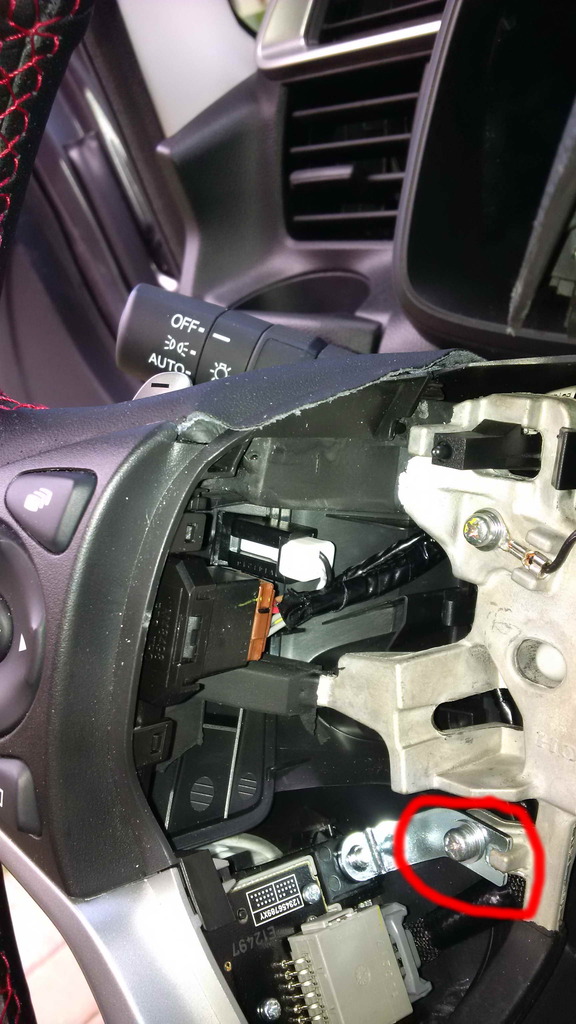
Undo this screw, which loosens up the corresponding panel on the back. There's also a similar screw on the left side:
And with some fiddling, you'll open up enough of a gap in the back to tuck in the wrap:
Align the front first before you do the back part:
If you're lucky, you won't pull the OEM leather wrap away from the steering wheel:

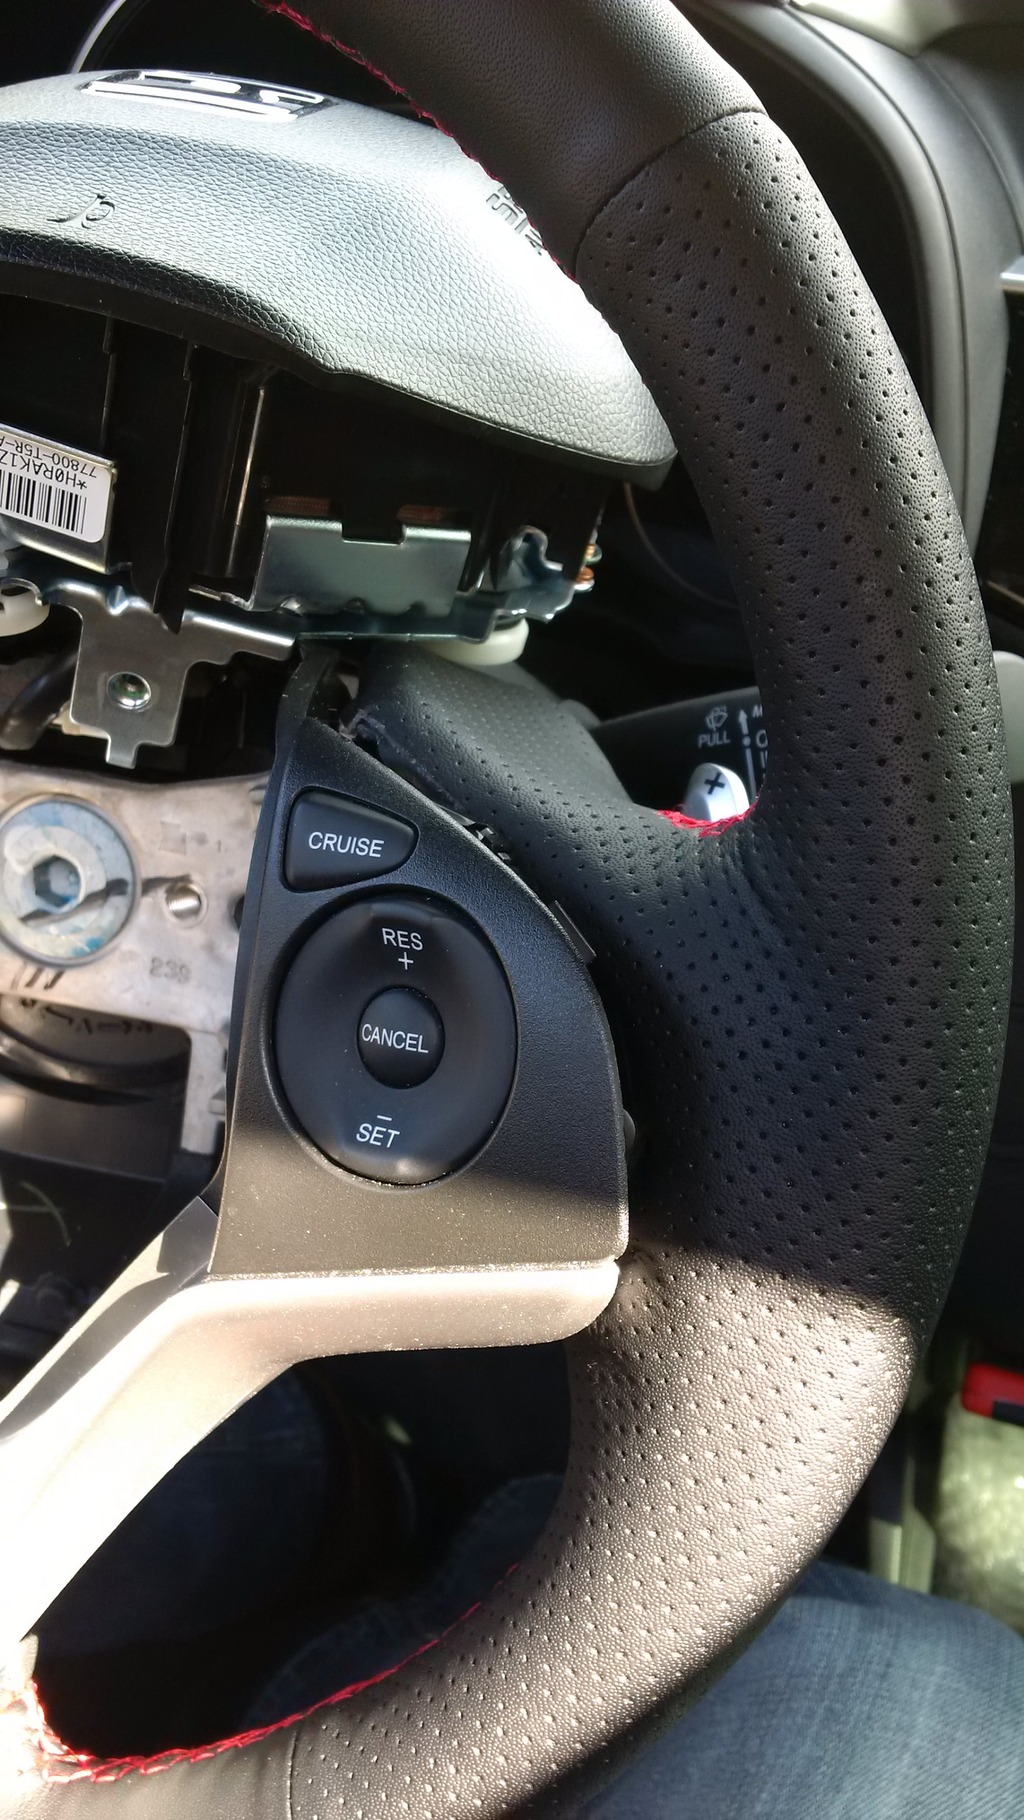
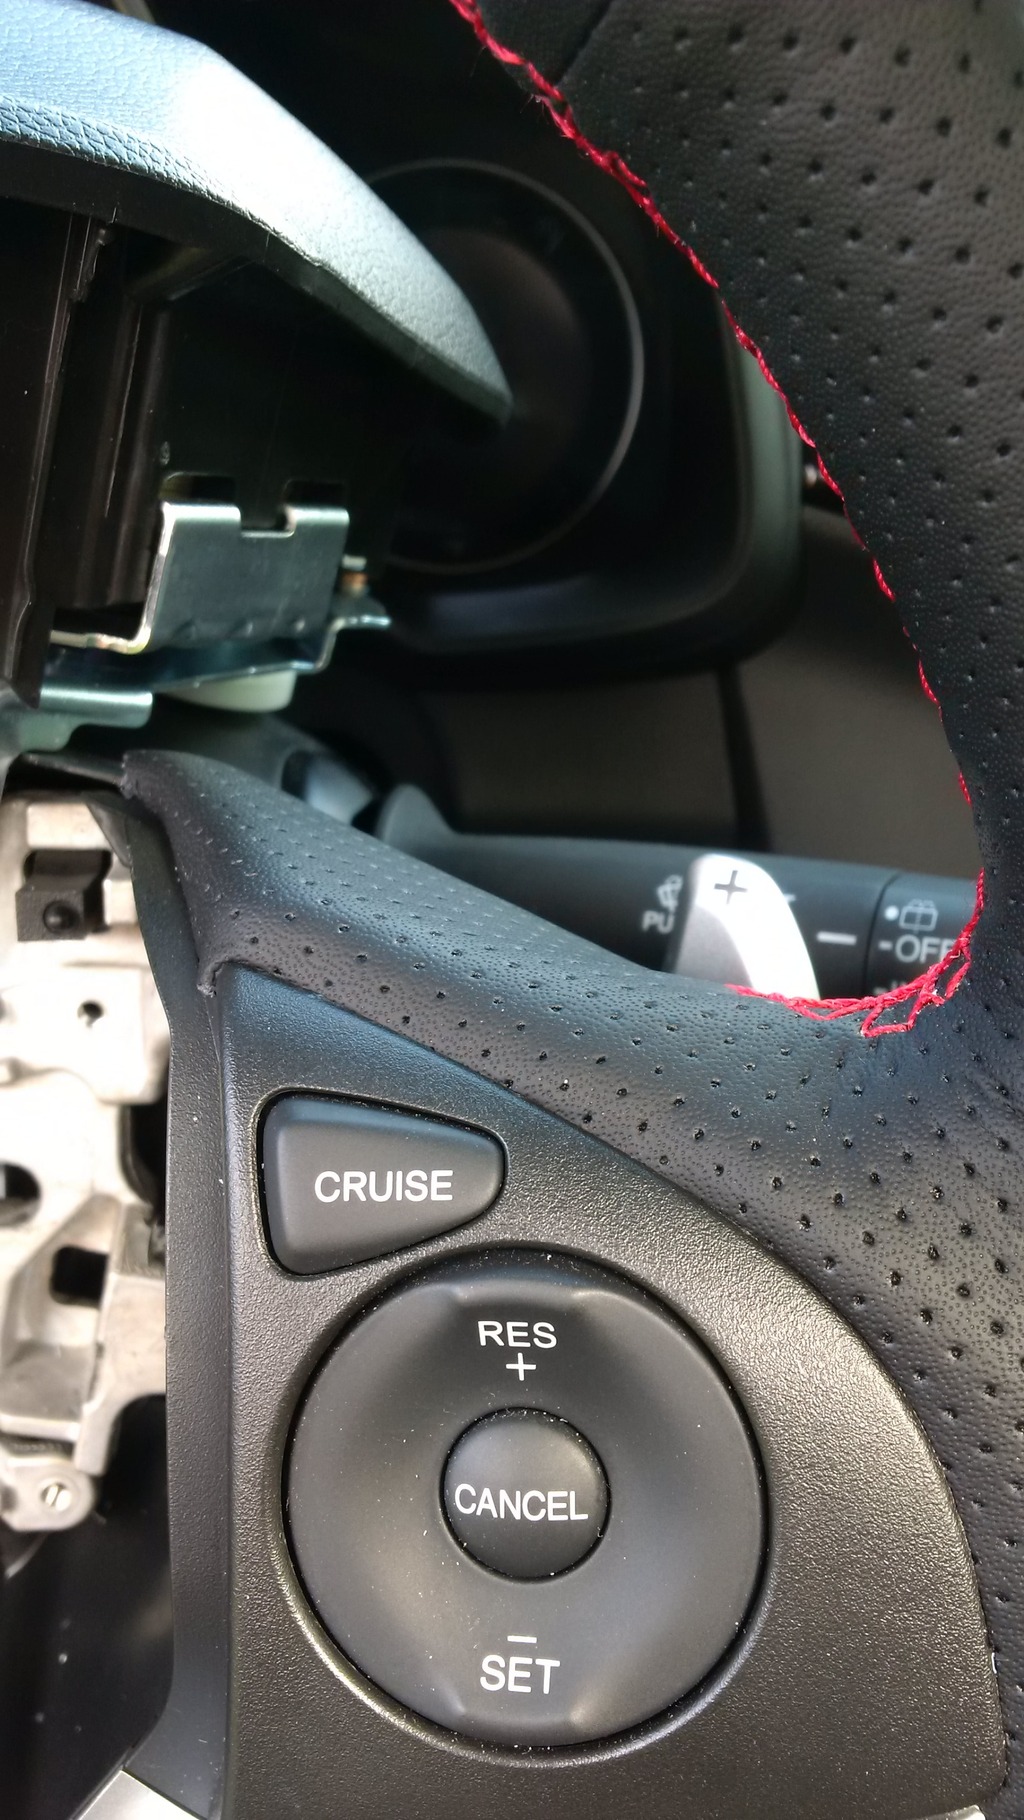
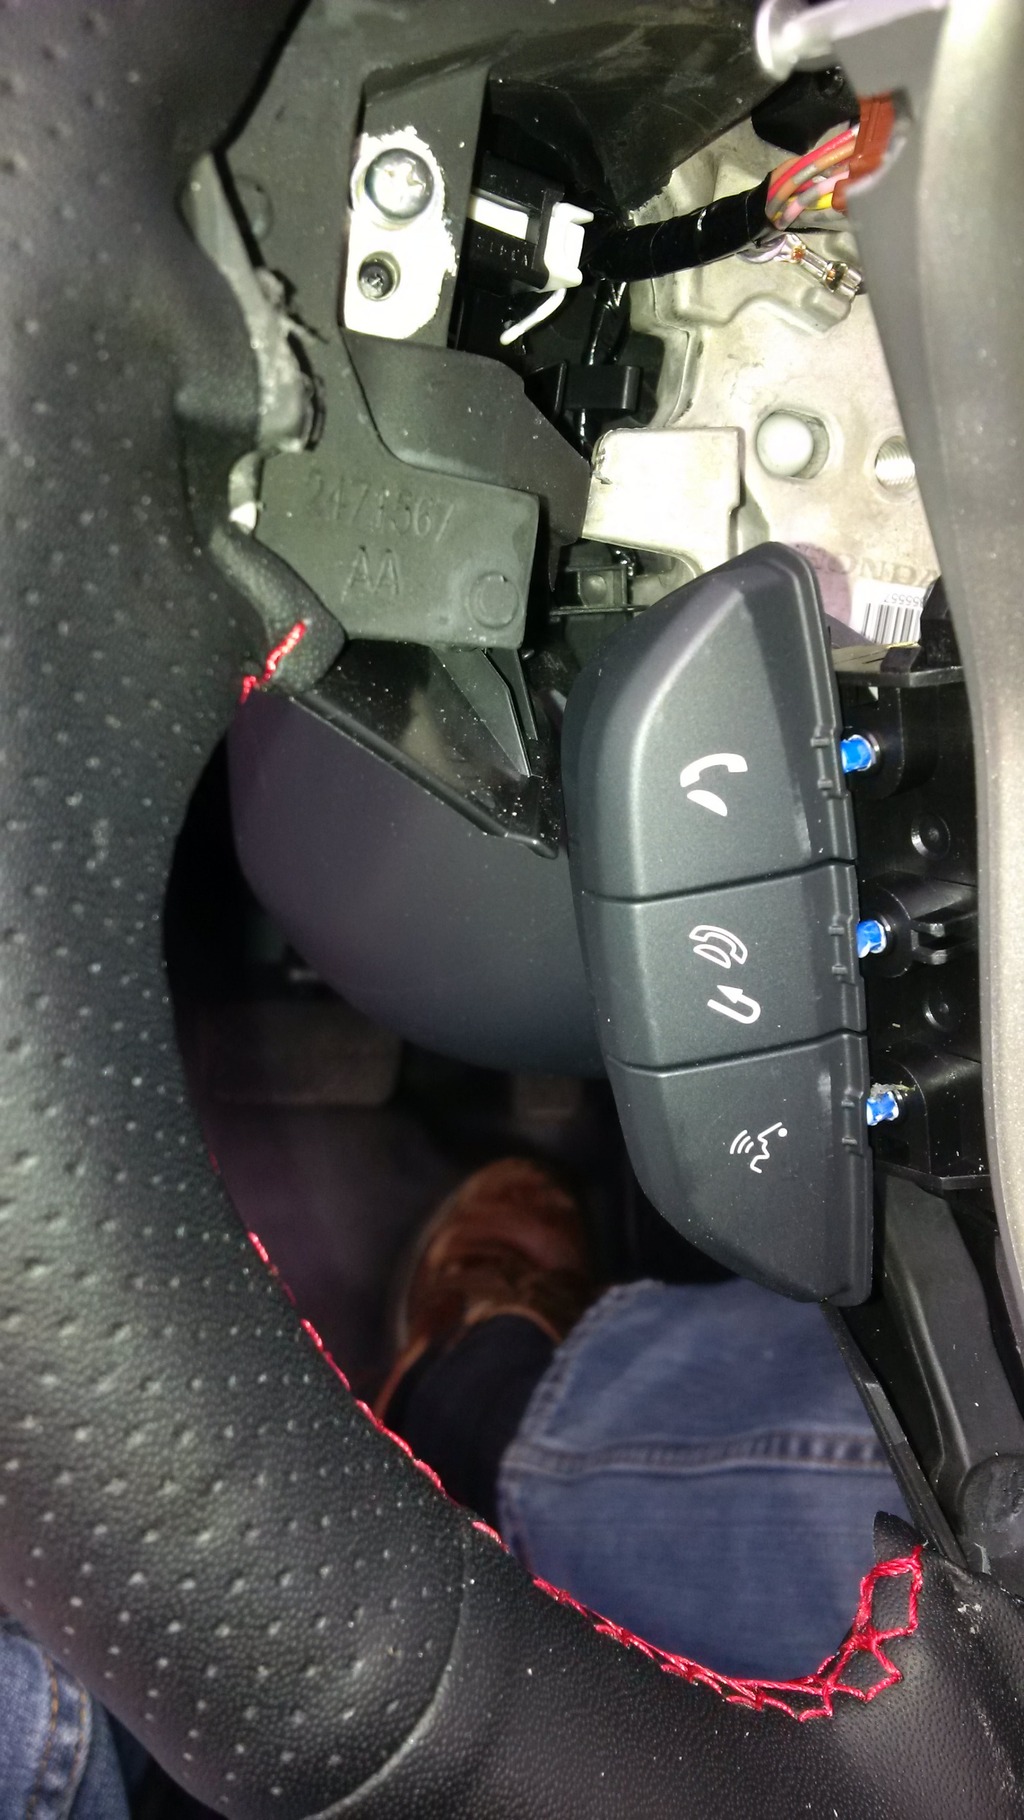
The left side is a littler harder. You have to undo this screw to loosen the phone controls:
I don't know what happened, but this protective sleeve popped off. But it's actually easier to work around with this off:

That's really it.
Again used Stembridge's steering wheel removal as a guide:
https://www.fitfreak.net/forums/3rd-...ml#post1330251
and a Honda schematic:

I previously left this piece taped to the steering wheel:


It helps to remove the airbag. There are 2 screws, one behind each paddle shifter. Pic shows screw removed:

And I just flip it up while still connected. WARNING, just because the airbag didn't go off in my car, doesn't mean that I will be the same for you. So disconnect the battery!

You'll need to pull the trim straight back. I did not remove it completely, just pulled back a bit:

Undo this screw, which loosens up the corresponding panel on the back. There's also a similar screw on the left side:

And with some fiddling, you'll open up enough of a gap in the back to tuck in the wrap:

Align the front first before you do the back part:

If you're lucky, you won't pull the OEM leather wrap away from the steering wheel:

The left side is a littler harder. You have to undo this screw to loosen the phone controls:

I don't know what happened, but this protective sleeve popped off. But it's actually easier to work around with this off:


That's really it.
Last edited by Action Jackson; 05-04-2016 at 07:03 AM.
#33
05-11-2016, 10:57 PM
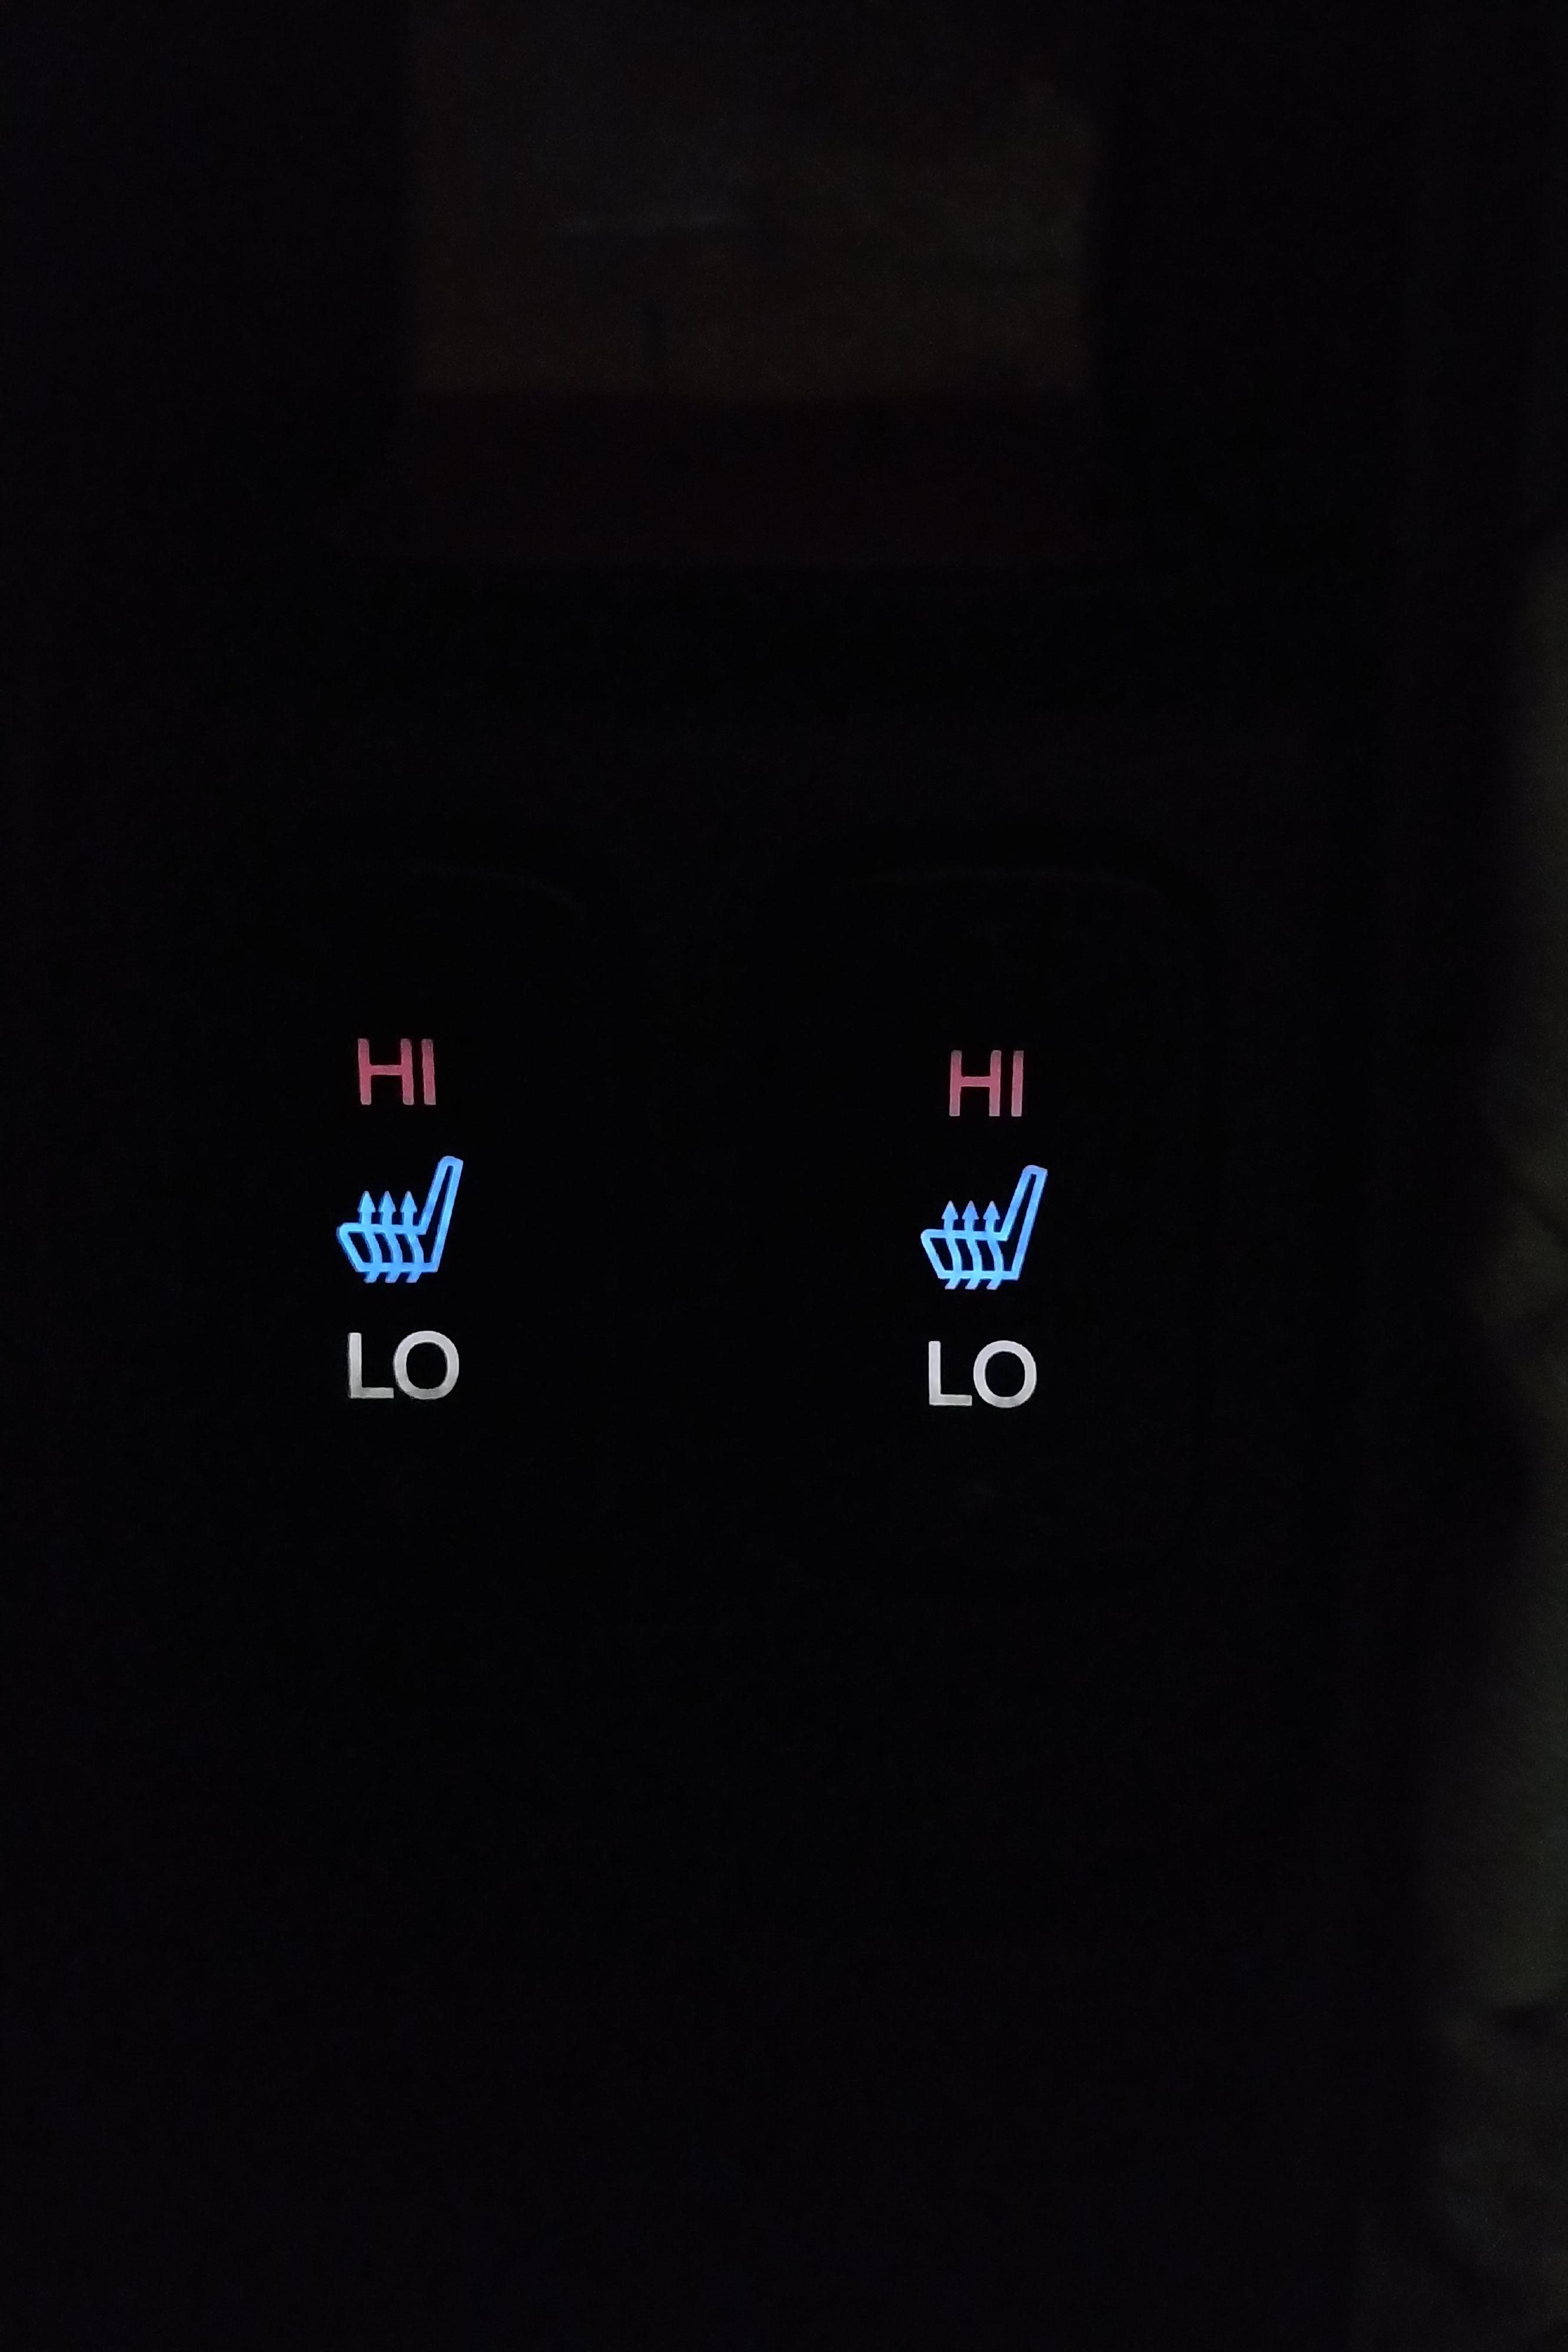
why didn't the orange color come out in the low setting?


VSA button:


A bit of clear Shoe-Goo:


ECO Button:


Power Door Lock Button. I added small green strip. Red lines show plastic part of switch. Looks like a 'T':


Be careful. You can easily break things.
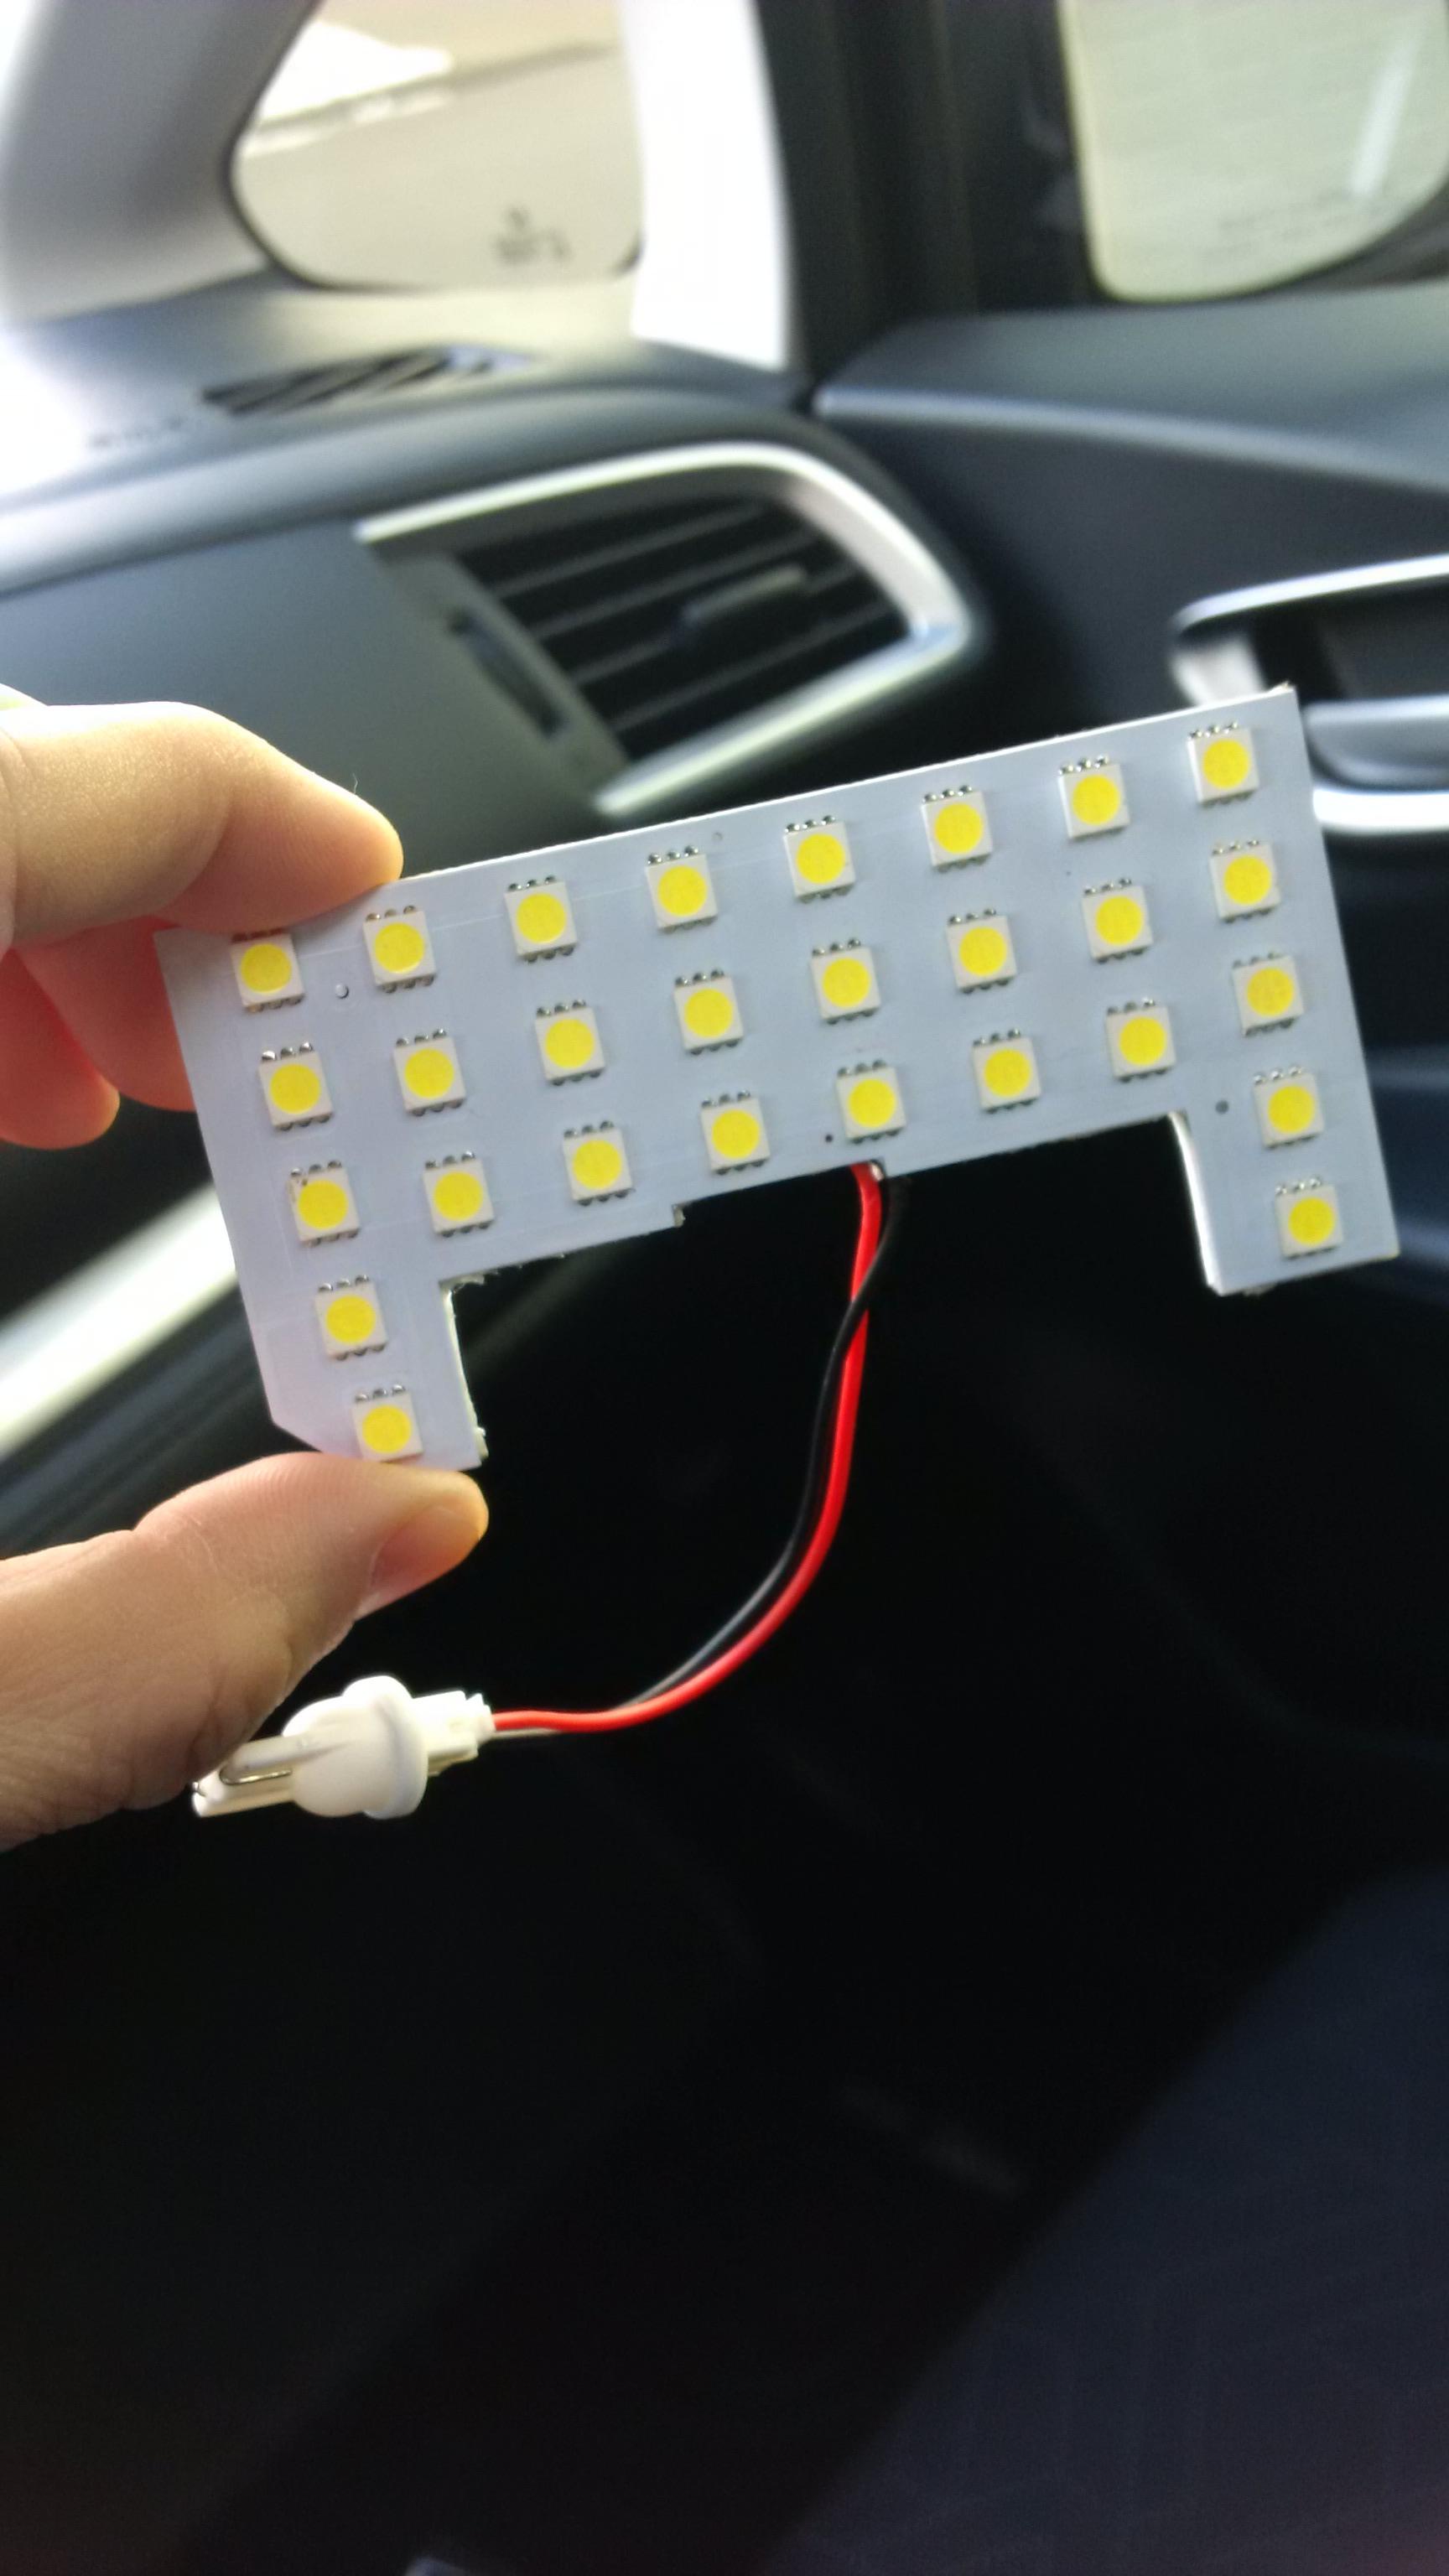
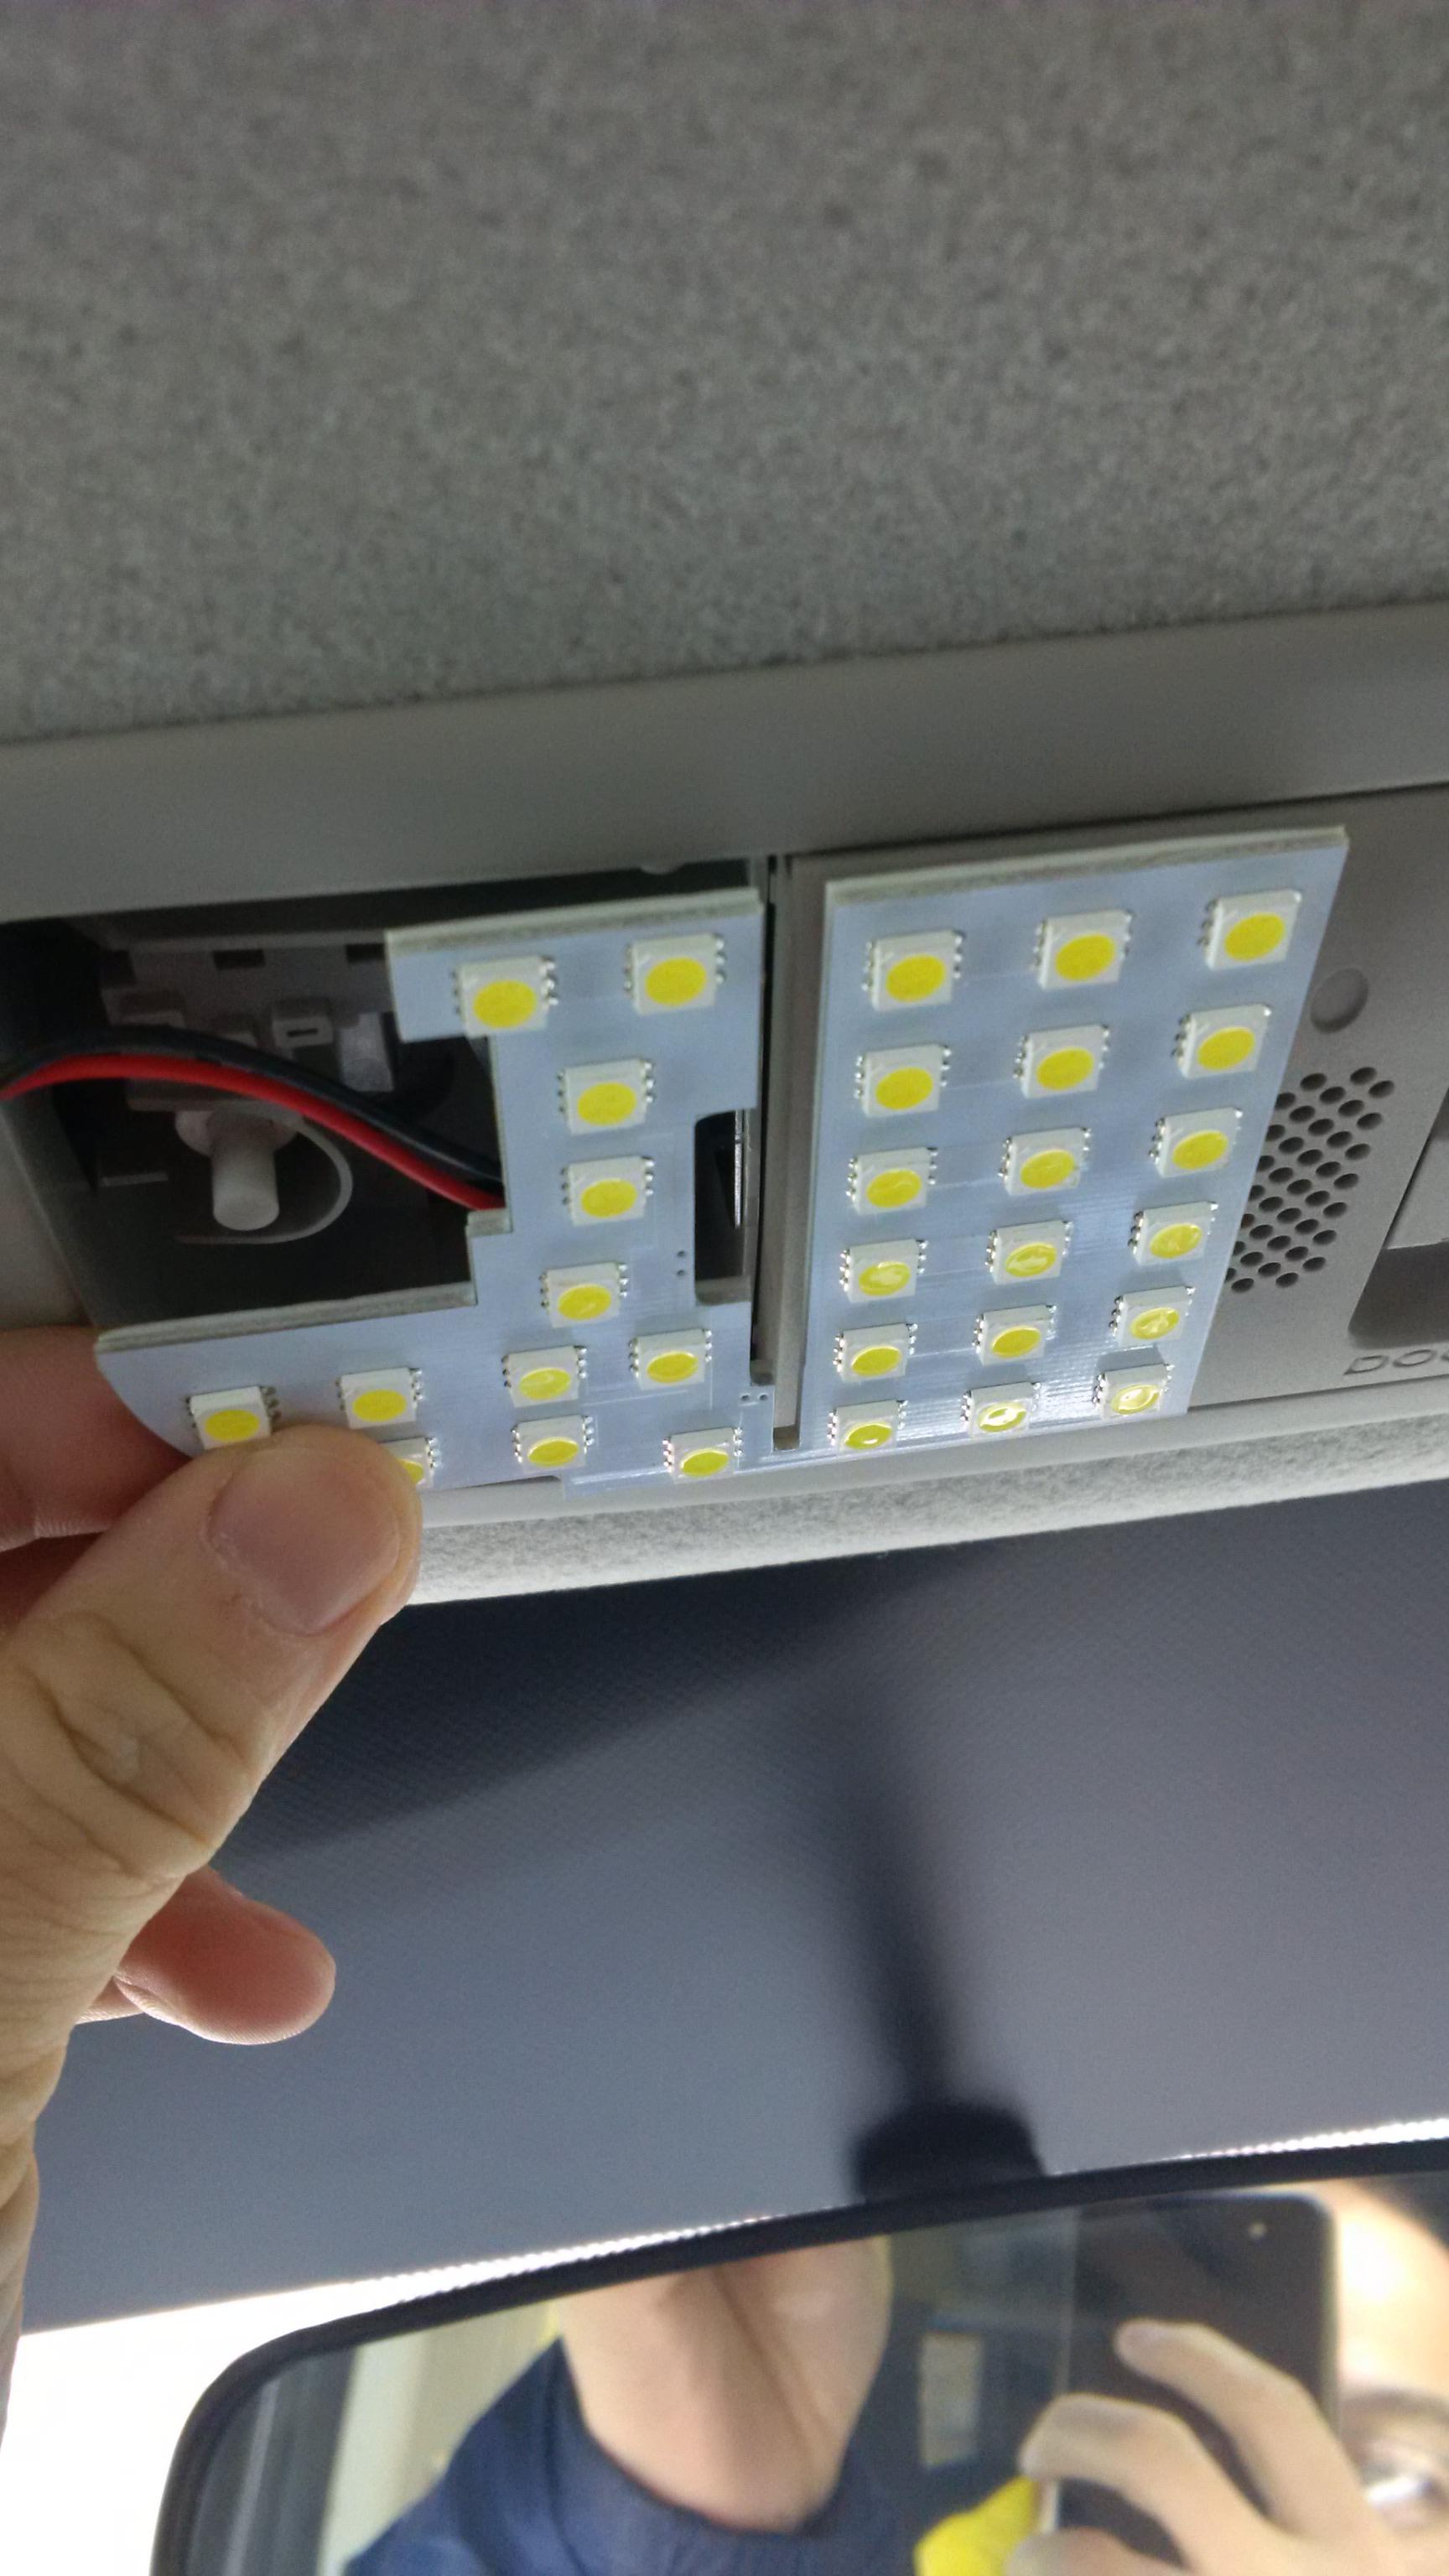
Believe it or not, the last 2 pics are for the JDM LED's.
Last edited by Action Jackson; 03-03-2019 at 11:11 AM.
#34
05-21-2016, 02:39 PM

Thanks for showing how you did this! I always have to put heavy things in my trunk and I've damaged the foam already. going to have to do this asap!
#36
05-24-2016, 09:30 PM
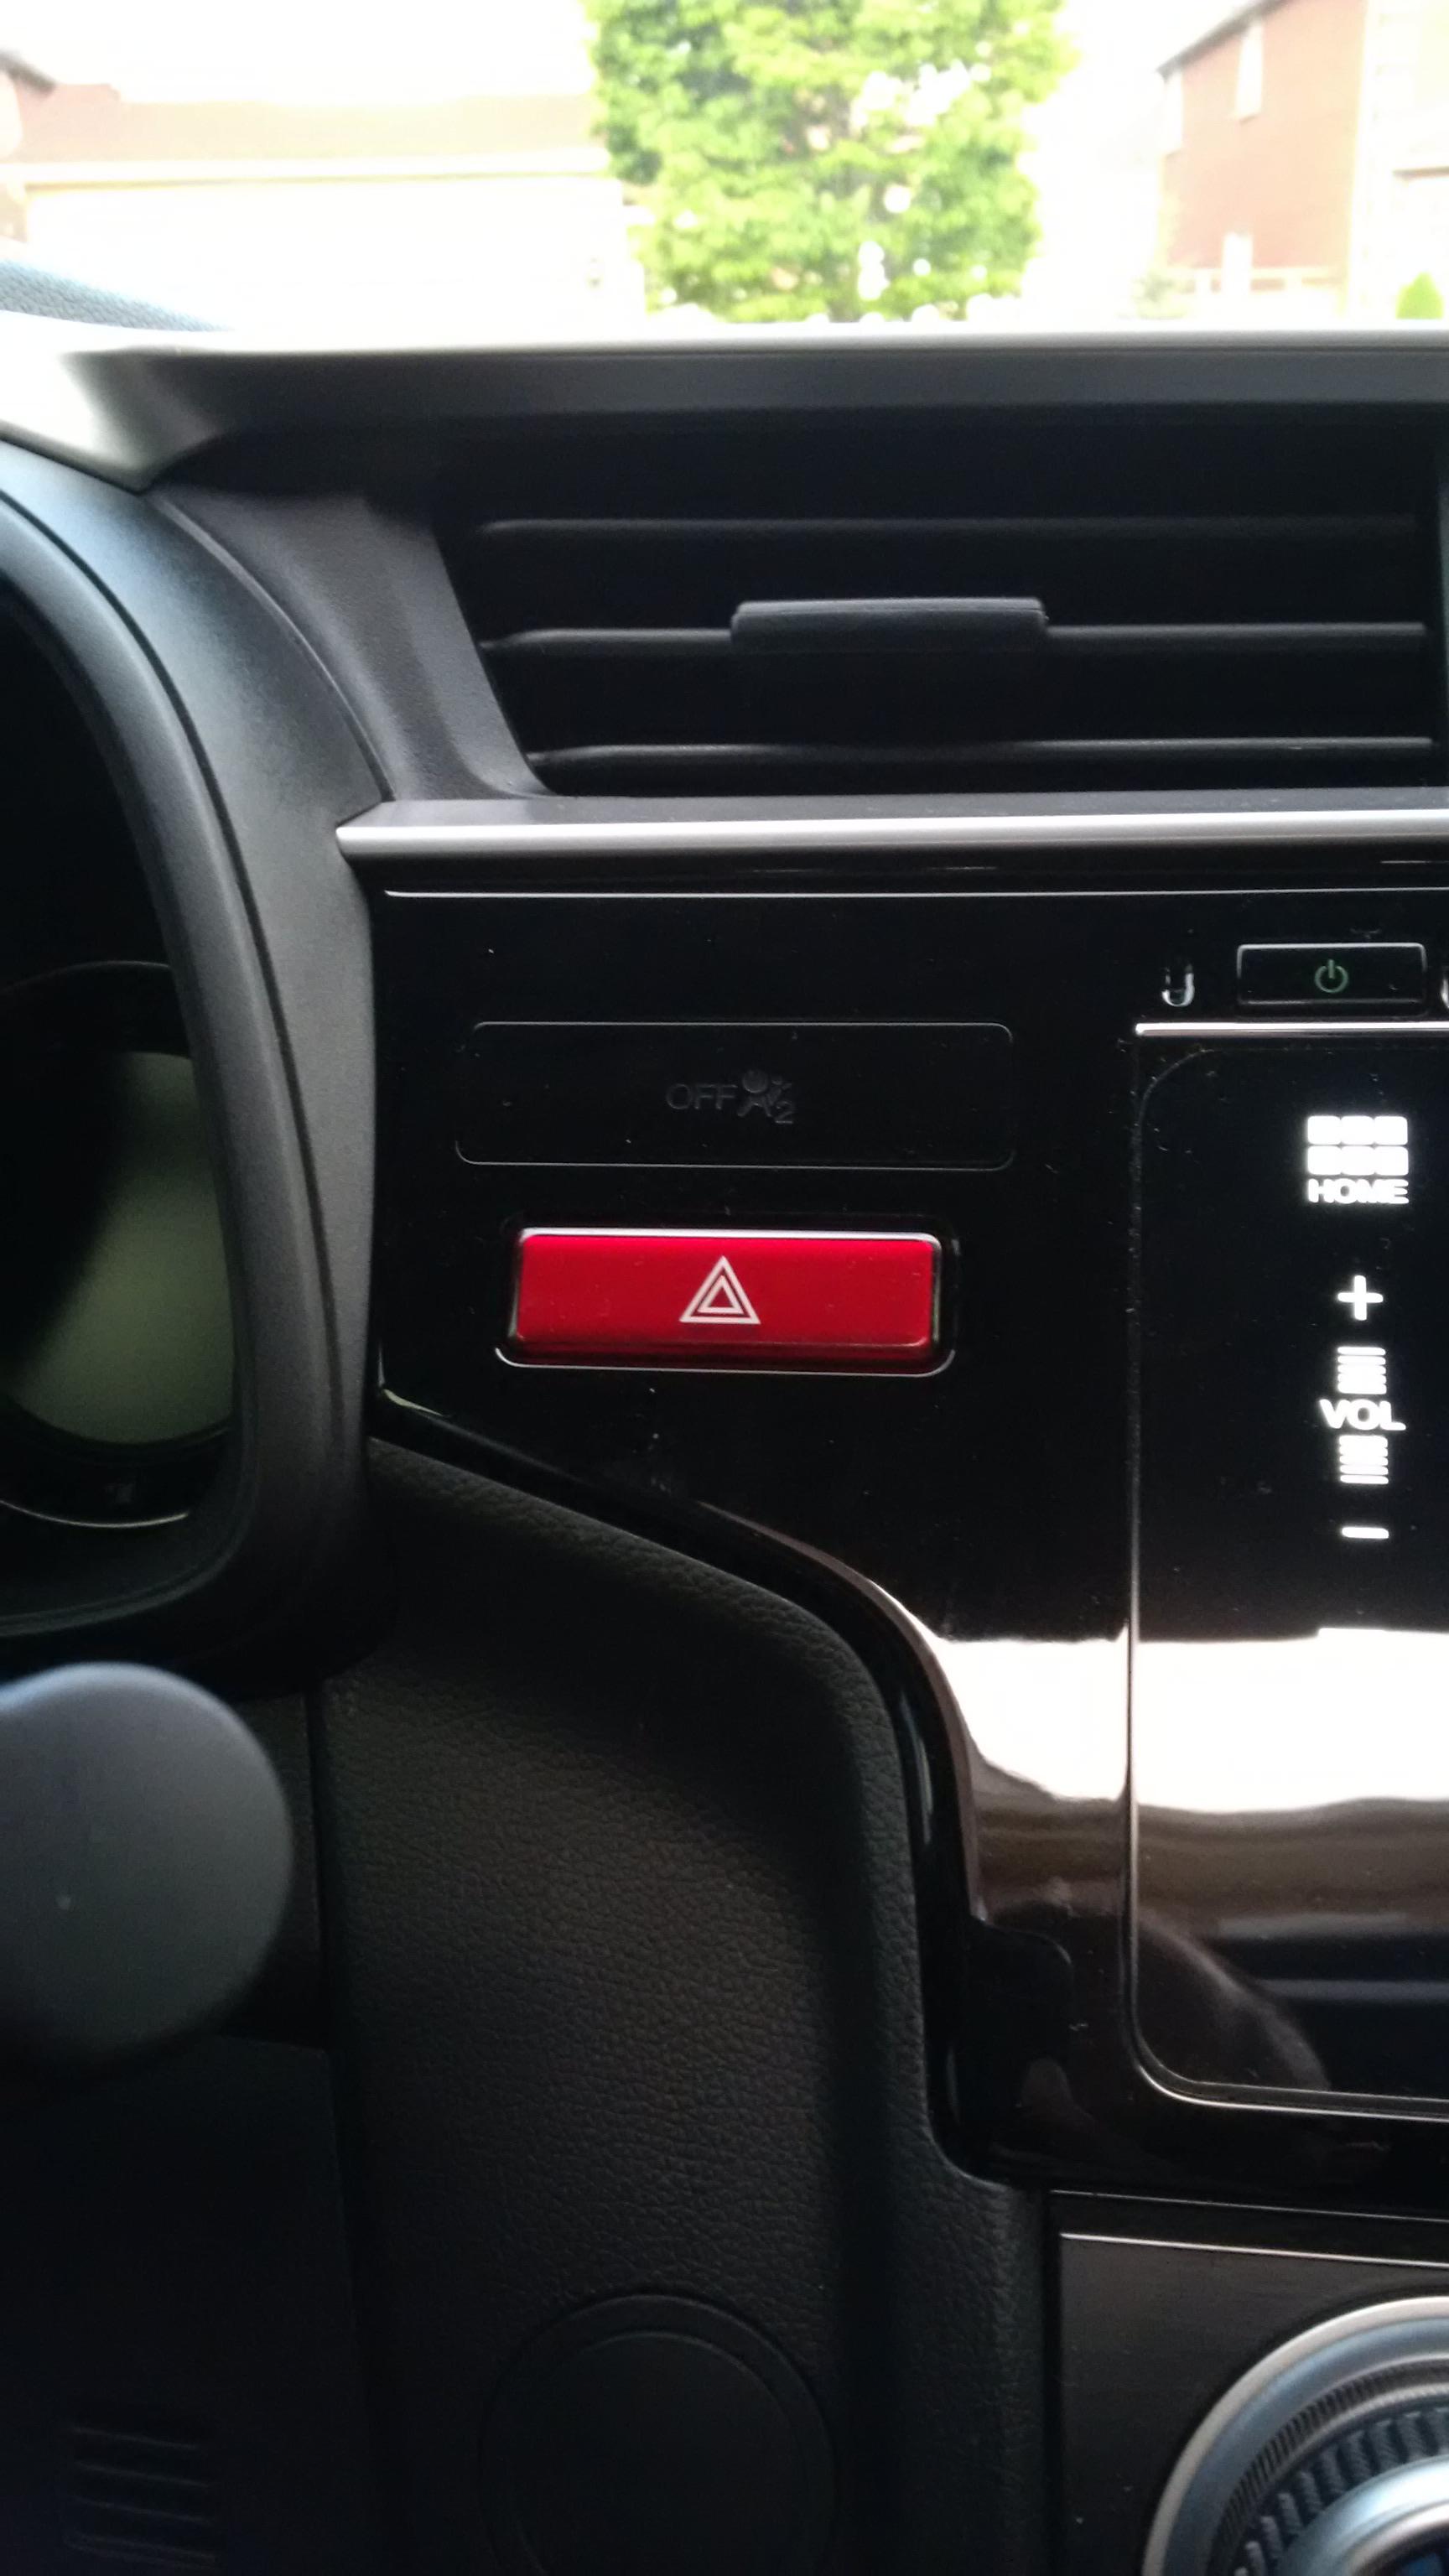
JDM Hazard button. Yes, it lights up red at night.
Last edited by Action Jackson; 10-24-2017 at 01:21 PM.

#38
06-20-2016, 04:47 PM
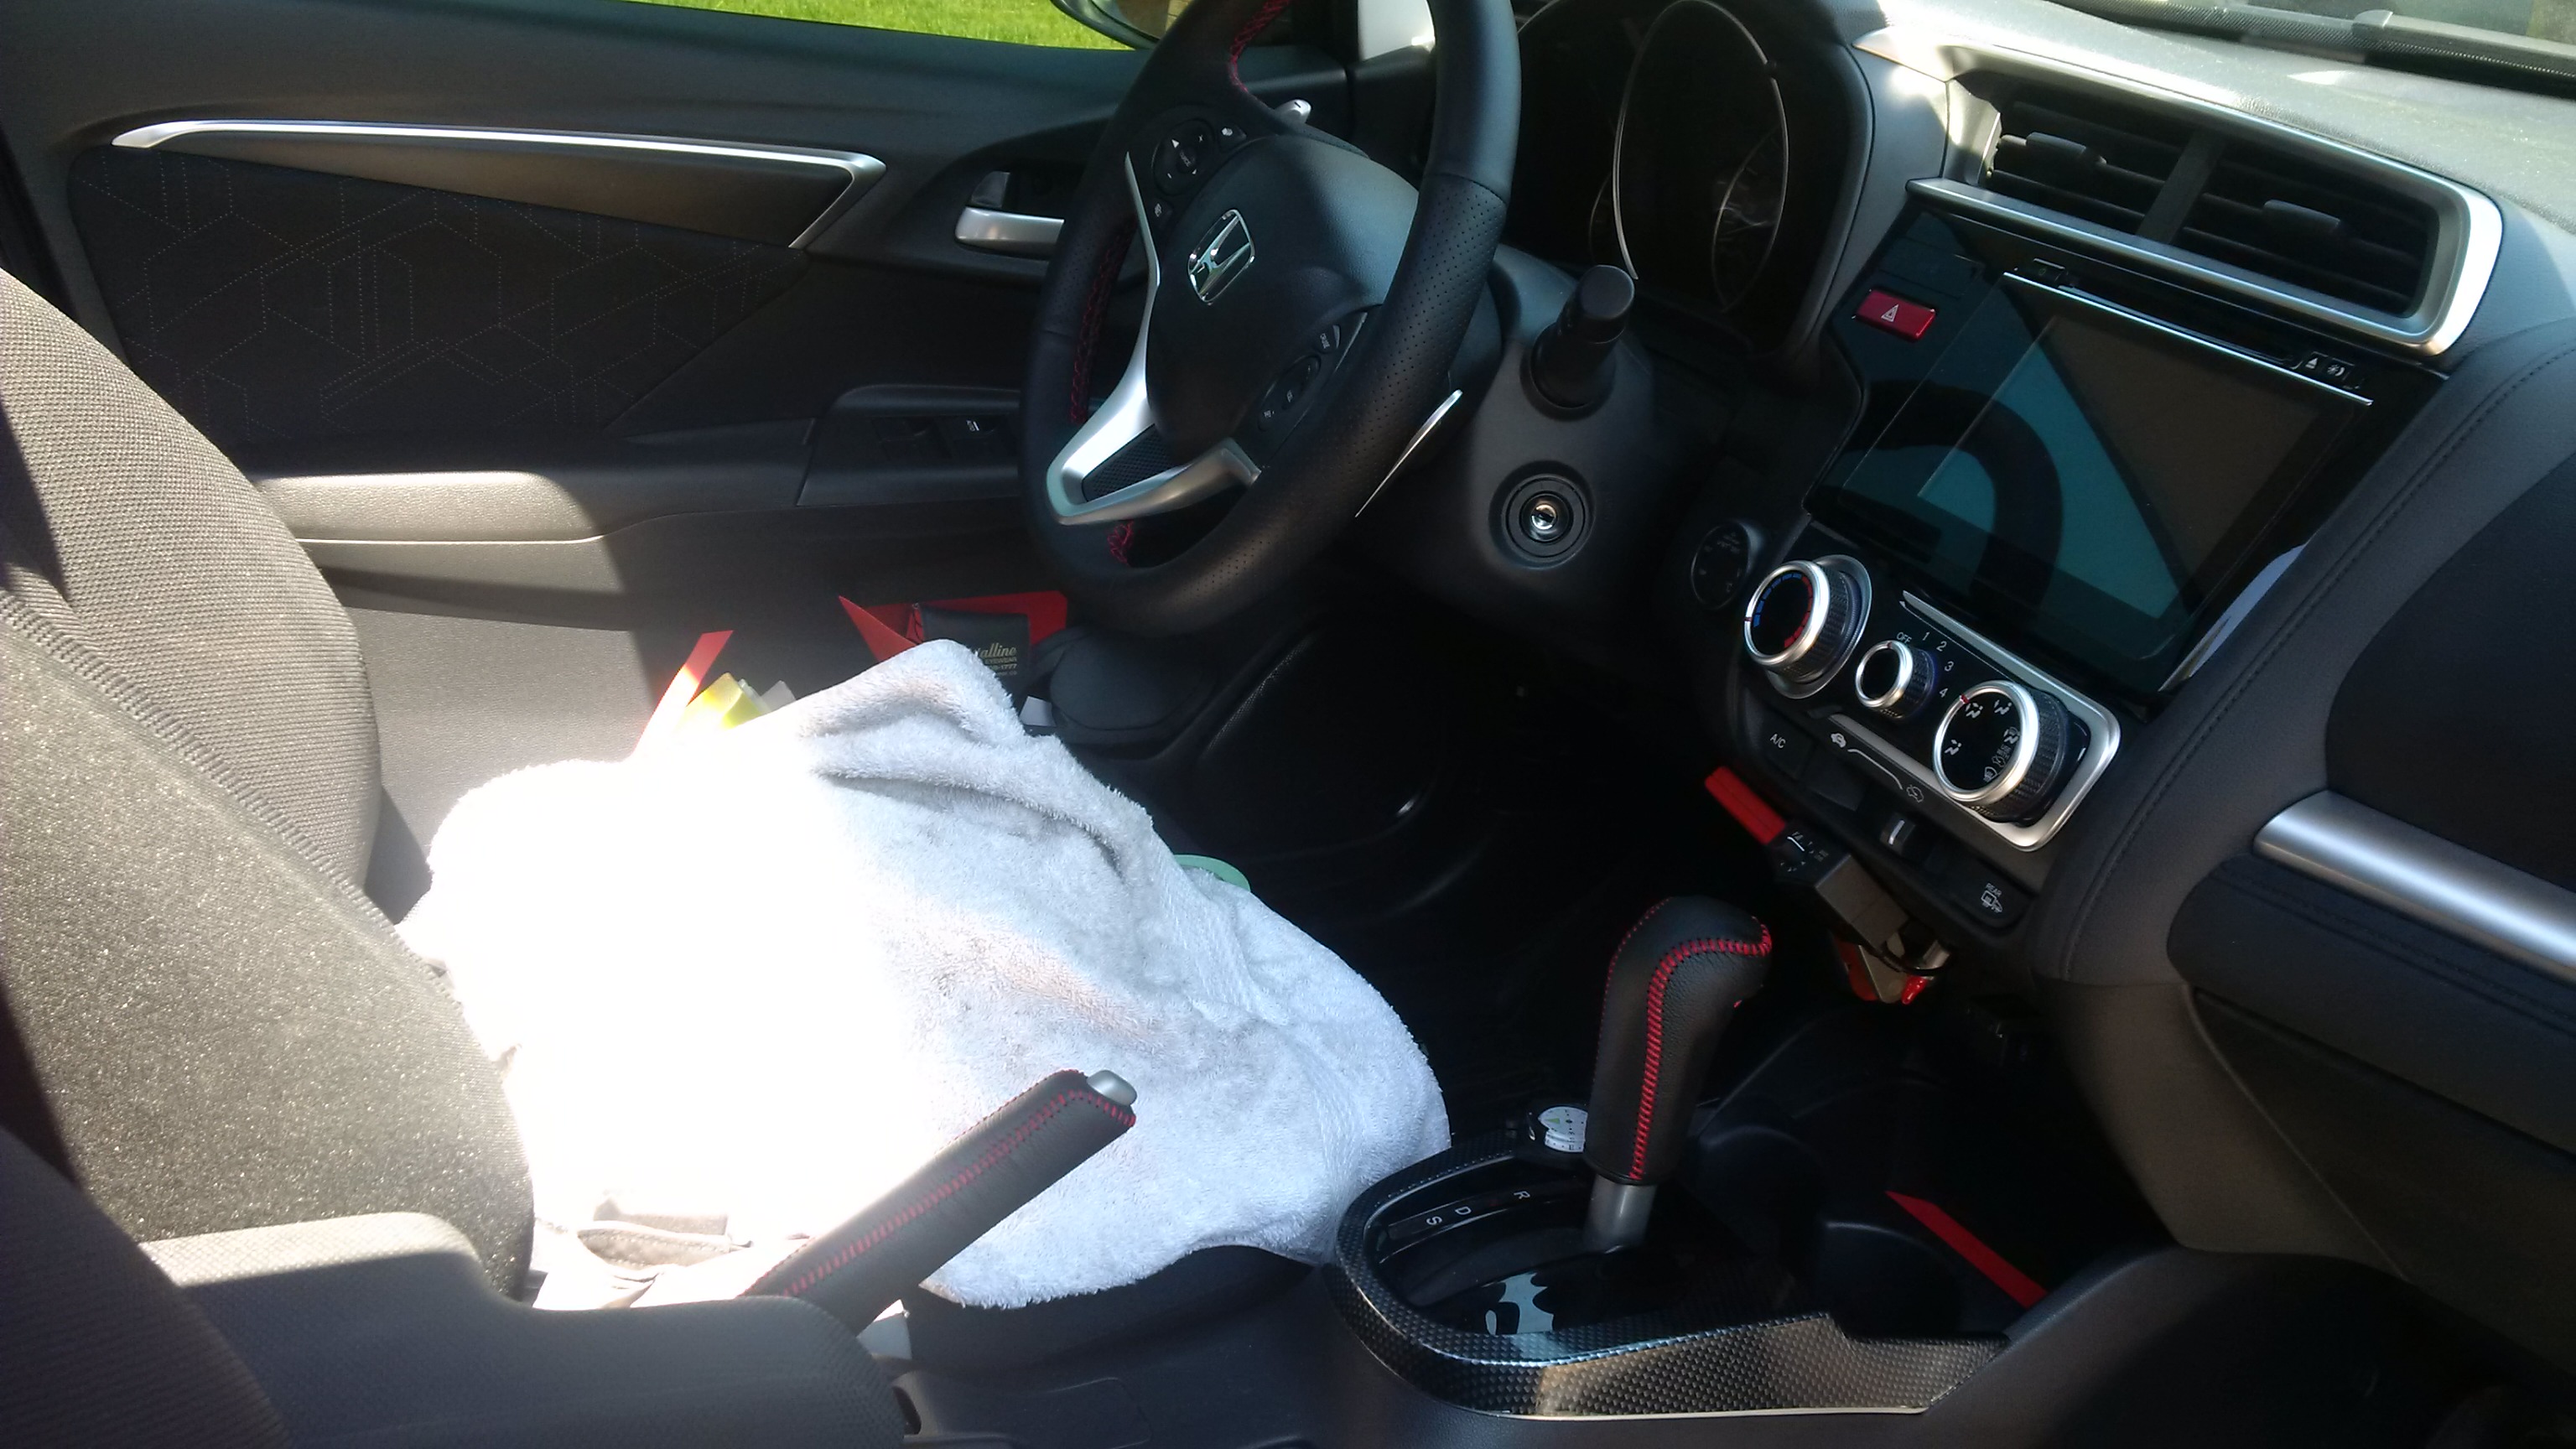
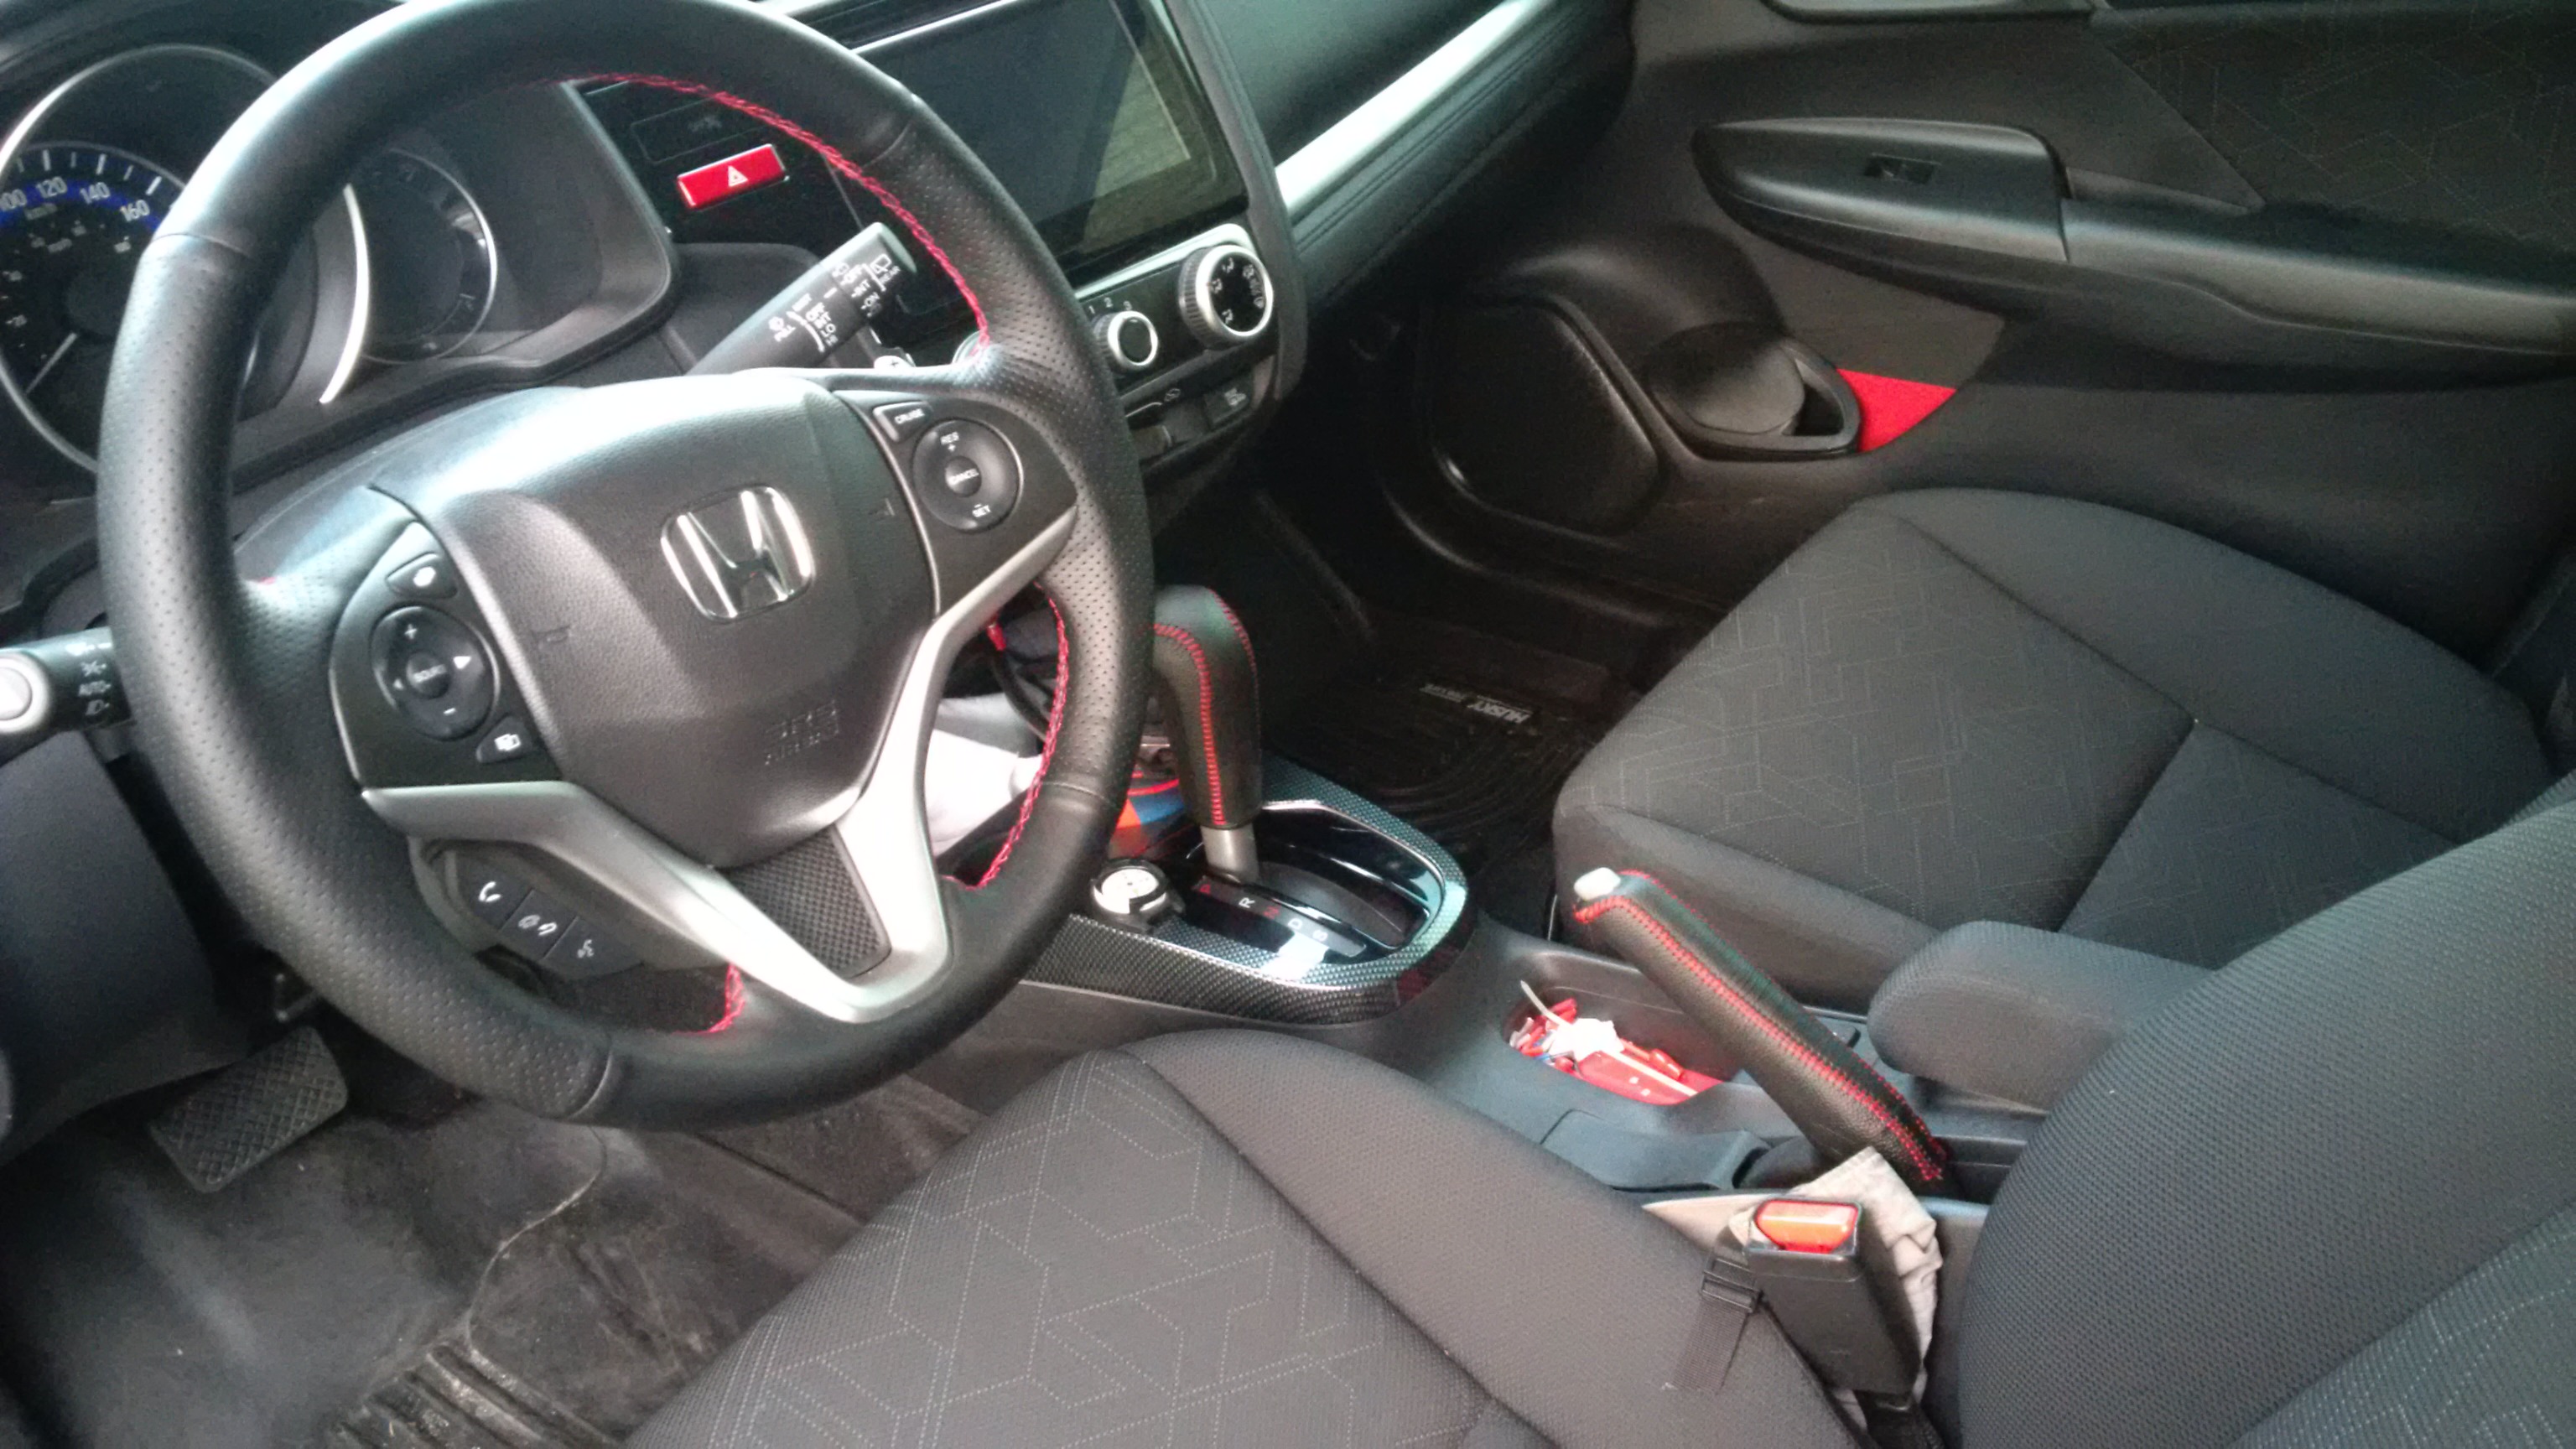
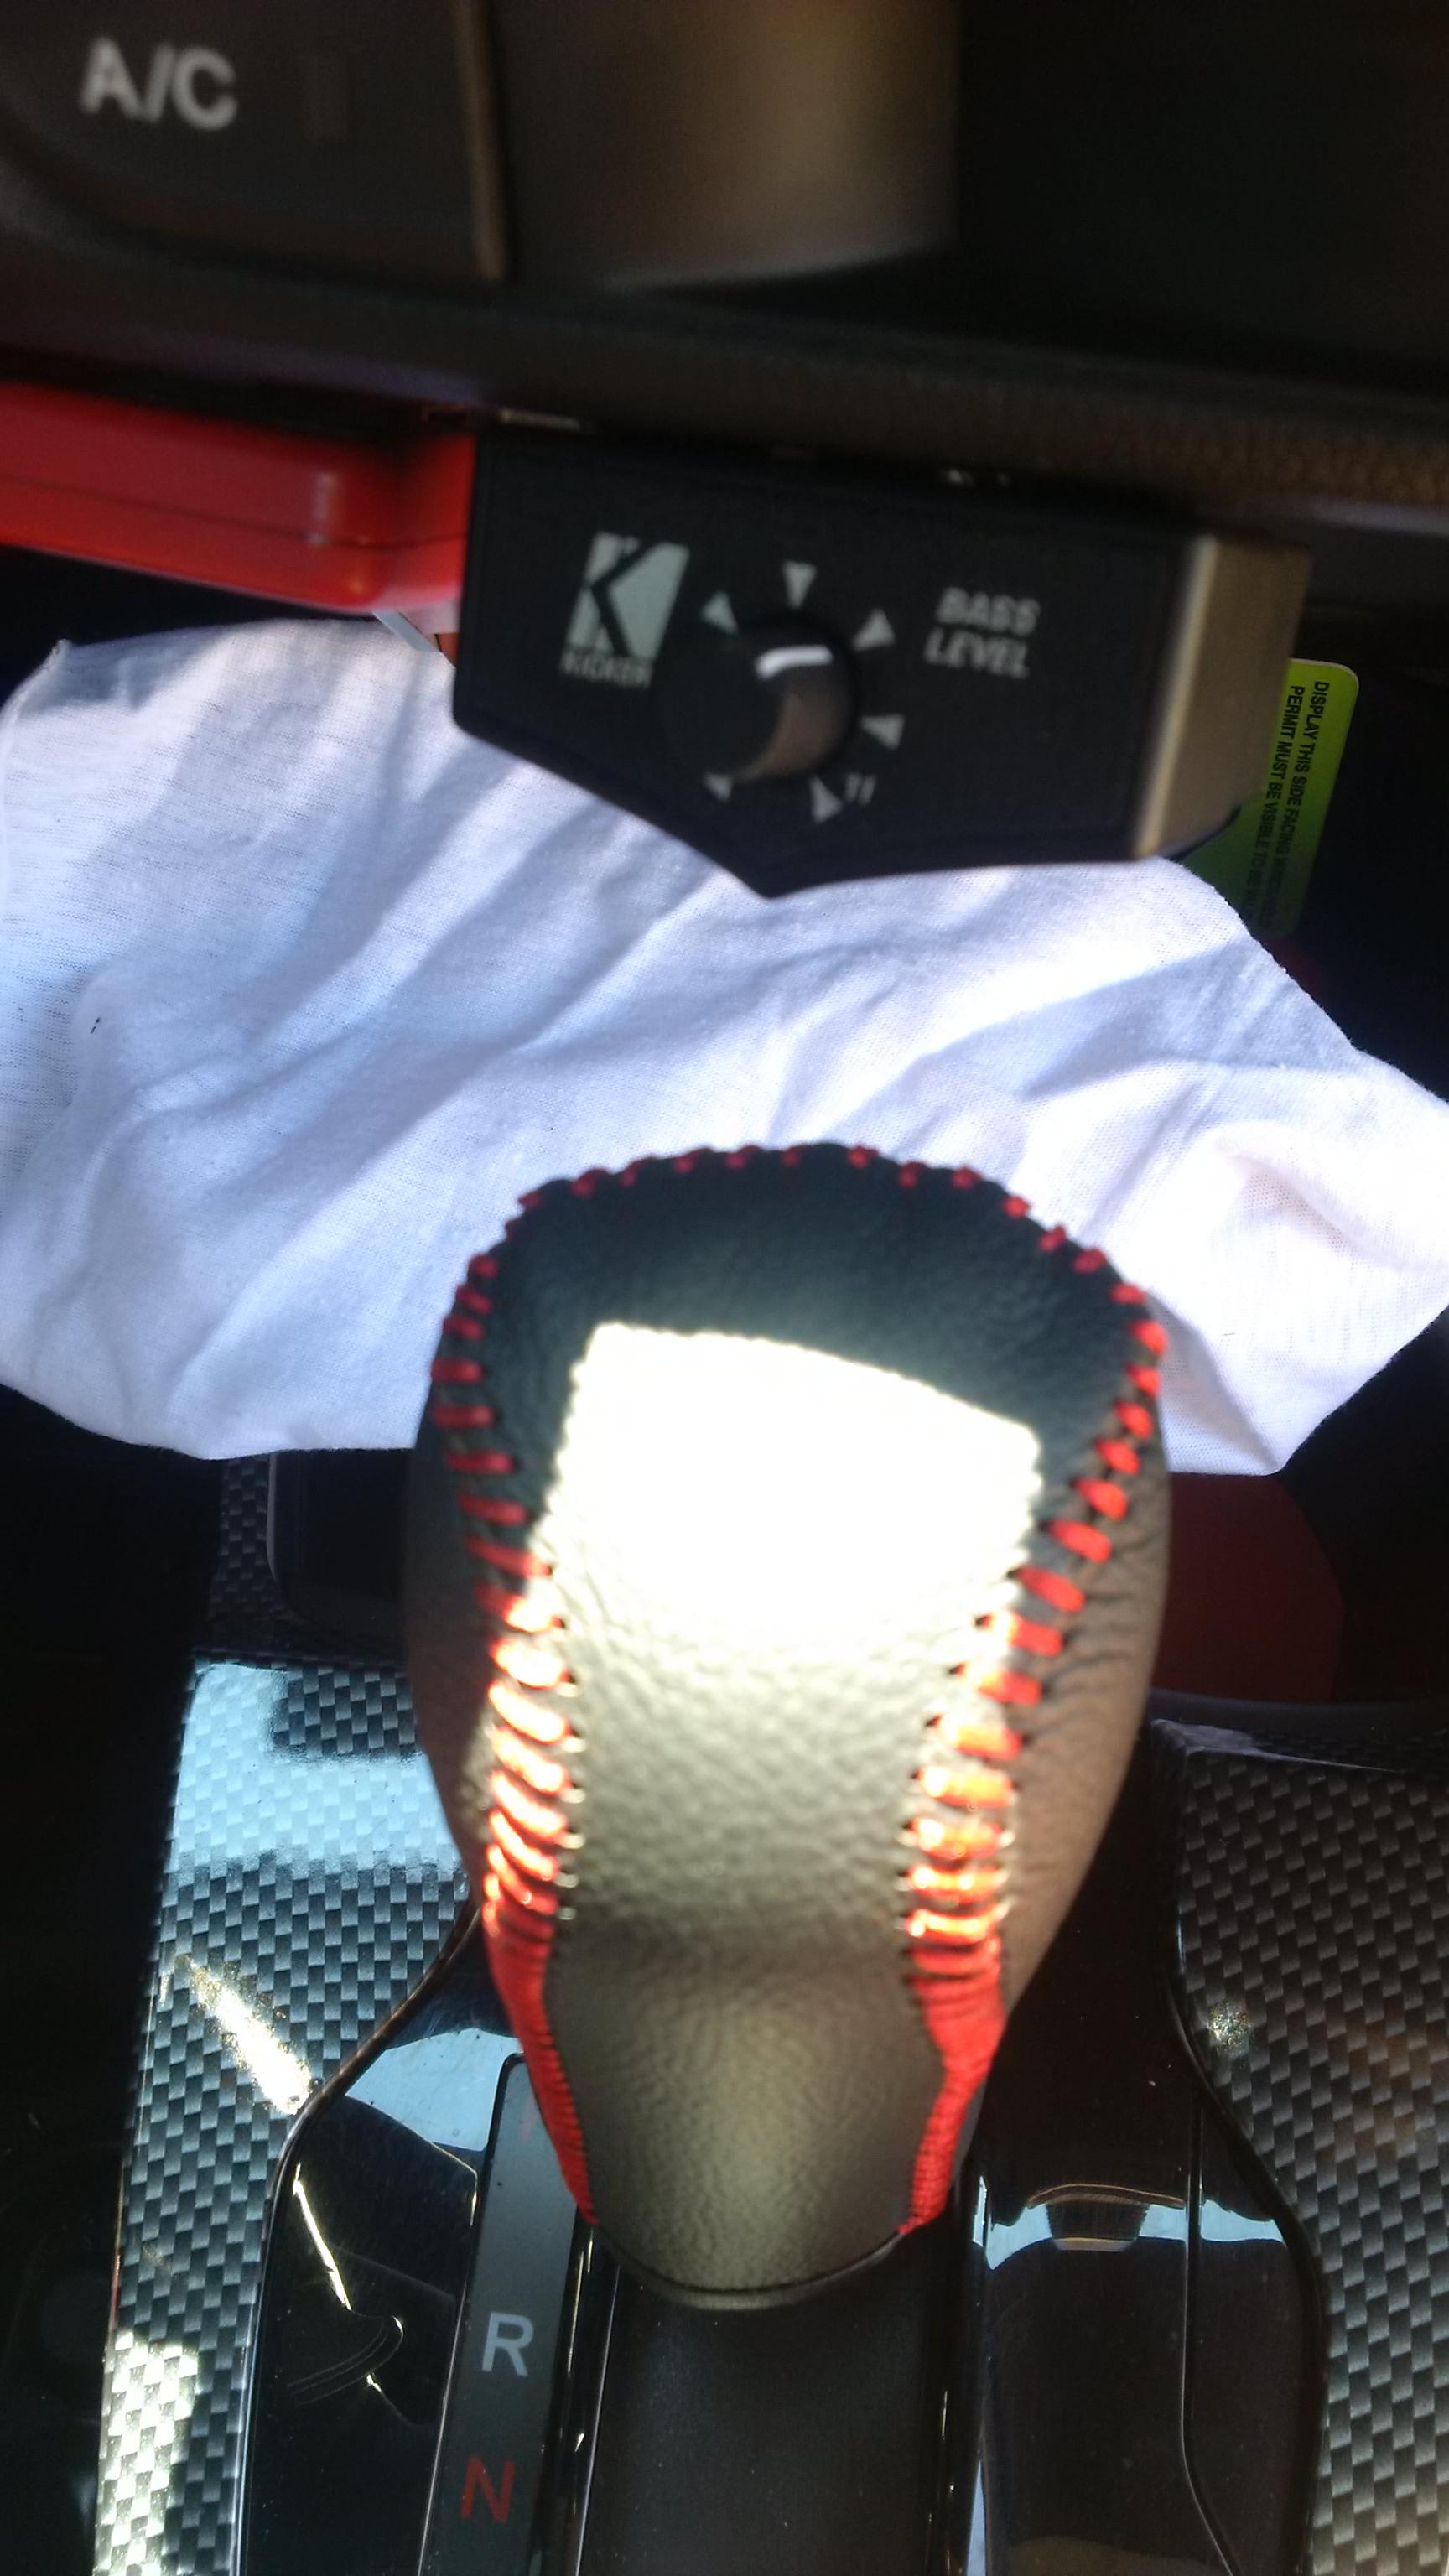
Installed a leather brake handle cover, and CVT shift knob leather cover. Both with red stitching.
Last edited by Action Jackson; 03-03-2019 at 10:51 AM.

#40
06-20-2016, 06:42 PM

The big squeaky block of styrene foam seems likely to contribute to lowering road noise. Notice more noise with it out? Perhaps you could leave it in, under the plywood, or perhaps even better, glue styrene foam (the kind used behind the vinyl siding used for buildings) to the bottom of the plywood - completely cover the bottom of the plywood except for the part that is outside the tirewell - so that you will have insulation completely covering the tirewell - including around the outside of the tire - an area that the original sqeaky block didn't cover.
Last edited by nomenclator; 06-20-2016 at 06:44 PM.