
MODS/ACCESSORIES for the GK
#521
 10-05-2014, 10:46 PM

I think i will end up getting them soon. Its about 130 shipped to US from amazon.jp
#522
10-06-2014, 08:01 AM


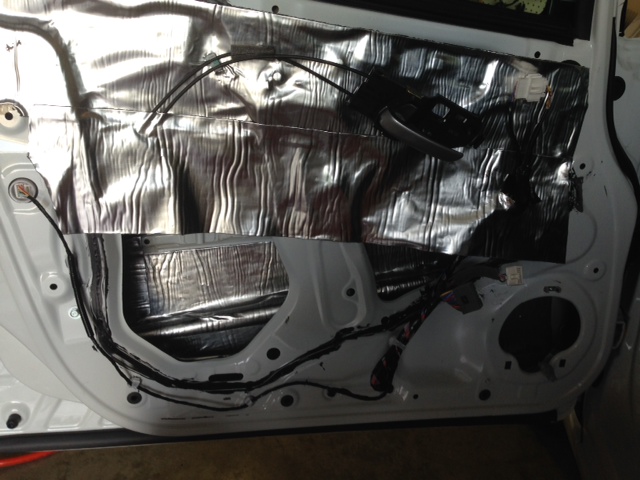
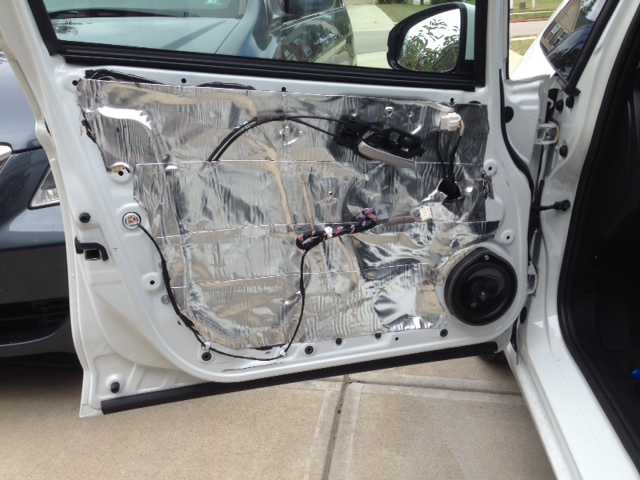
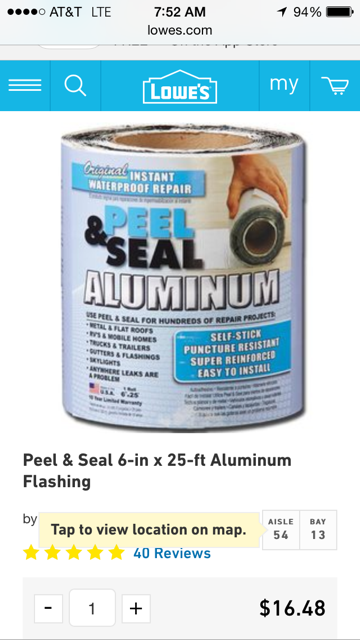
Here are pics of the cheap alternative sound deadening. It's Peel & Seal roof flashing from Lowes.
I did the backside of the outer panels, then the inside panels. I think each roll only weighs about 6 lbs or so. The stuff works awesome. I've used it on several cars in the past. No reason to waste money on the other stuff.
I did the backside of the outer panels, then the inside panels. I think each roll only weighs about 6 lbs or so. The stuff works awesome. I've used it on several cars in the past. No reason to waste money on the other stuff.
#523
10-06-2014, 11:12 AM

fender flares & rear spoiler extension should work, but those bumper valences will not as Us spec bumpers are different.
#524
10-06-2014, 11:19 AM

I used to work at a car audio shop and while we would sell dynamite sound deadening material to customers all the employees would use that gutter liner or rubberized undercoating because it works just as well for a fraction of the price.
#525
10-06-2014, 11:52 AM
Join Date: Mar 2014
Location: Hawaii: relocated to Western Canada Sept, 2015
Posts: 1,116
 from Superfly. If I were to do this all over again, it would be a visit to Lowe's!!!!
Another constructive share!!
 Keep 'em comin boys!!!!!
Last edited by ROTTBOY; 10-06-2014 at 11:59 AM.
#526
10-06-2014, 02:35 PM
 That is a lot easier looking and less expensive to do. We're learning a lot as we go.
Susan


#528
10-06-2014, 03:23 PM

Yes, it is a shame Sir Mixalot designed the usdm bumpers.
I have subscribed to NJ Parts on Facebook as I am thinking of getting a body kit from them and found this little vid this morning that I think you will like especially since they have confirmed in the comments that they will ship to the US.
http://www.facebook.com/video.php?v=...type=2&theater
I have subscribed to NJ Parts on Facebook as I am thinking of getting a body kit from them and found this little vid this morning that I think you will like especially since they have confirmed in the comments that they will ship to the US.
http://www.facebook.com/video.php?v=...type=2&theater
#529
10-07-2014, 02:11 AM
Take heed all, this is sound advise if you wanna save. Sadly, found about this a bit too late from Superfly. If I were to do this all over again, it would be a visit to Lowe's!!!!
Another constructive share!! Keep 'em comin boys!!!!!
Confirmation coming from an former audio shop employee. Insider info that counts!!!! (think you meant Dynamat not Dynamite) Thanks!!!
from Superfly. If I were to do this all over again, it would be a visit to Lowe's!!!!Another constructive share!!
Keep 'em comin boys!!!!!Confirmation coming from an former audio shop employee. Insider info that counts!!!! (think you meant Dynamat not Dynamite) Thanks!!!
https://www.masters.com.au/product/9...ape-220mm-x-5m
#530
10-07-2014, 01:48 PM

im going to be tinting my windows this Satuday. Total cost is $260. that is all windows with the top strip on the front. Best quote I got in my area. thinking of doing 30% all around. ive done that with my past cars and always looked great. not too dark yet not to light.
after that, I will be getting the all weather floor mats and cargo cover. some time in the future I will get the LED interior footwell.
after that, I will be getting the all weather floor mats and cargo cover. some time in the future I will get the LED interior footwell.
#531
10-07-2014, 02:01 PM
Join Date: Mar 2014
Location: Hawaii: relocated to Western Canada Sept, 2015
Posts: 1,116
Guess the tinters here on the island base their charge on the amount of sunlight we get on the beaches!!!
As for your add-ons, this forum is deadly when it comes to making us Fit owners spend. It just adds up more and more!!!! You have now been warned. Don't forget to post pics!!!!!
Talking about pics - Super thanks to WAIZ, Super Mod, who gave us GK owners our own sub-sections.
Last edited by ROTTBOY; 10-07-2014 at 02:03 PM.
#532
10-08-2014, 04:22 AM
Join Date: Mar 2014
Location: Hawaii: relocated to Western Canada Sept, 2015
Posts: 1,116
And the Install saga continues
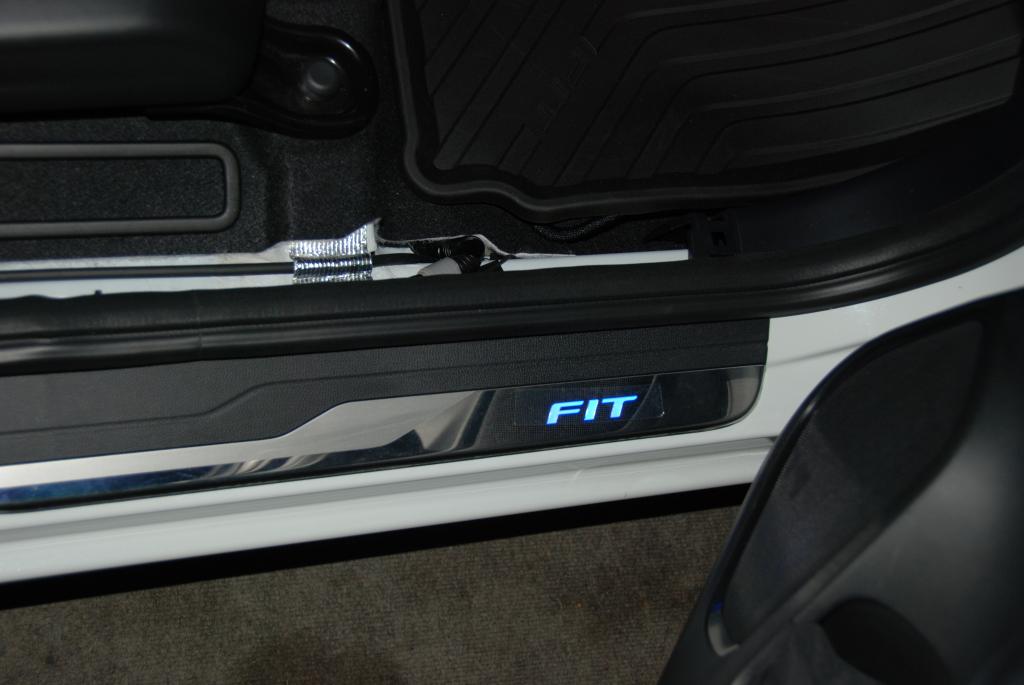
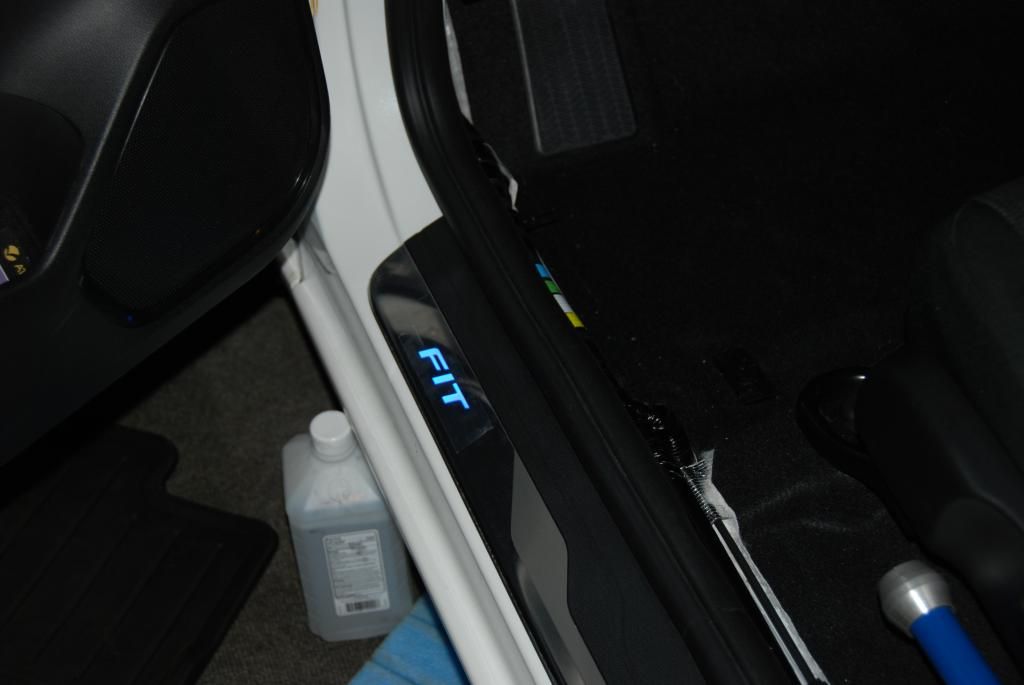
Today, the install of the OEM Door Sills was accomplished. Pricey item, yes!!! ($250 shipped) That's the bad.
The good, wiring harness is complete as well as detailed instructions. Its practically "plug n play". Everything you need (other than tools) are included in the factory kit. Took me three hours but then again, am careful and don't want to break anything.

And the install posts continue!!!
BTW, borrowed my cousin's Nikon SLR, so hopefully the pics generate better quality compared to my phone!!!
The good, wiring harness is complete as well as detailed instructions. Its practically "plug n play". Everything you need (other than tools) are included in the factory kit. Took me three hours but then again, am careful and don't want to break anything.
And the install posts continue!!!
BTW, borrowed my cousin's Nikon SLR, so hopefully the pics generate better quality compared to my phone!!!
Last edited by ROTTBOY; 10-08-2014 at 04:32 AM.
#533
10-08-2014, 06:19 AM
Today, the install of the OEM Door Sills was accomplished. Pricey item, yes!!! ($250 shipped) That's the bad.
The good, wiring harness is complete as well as detailed instructions. Its practically "plug n play". Everything you need (other than tools) are included in the factory kit. Took me three hours but then again, am careful and don't want to break anything.

And the install posts continue!!!
BTW, borrowed my cousin's Nikon SLR, so hopefully the pics generate better quality compared to my phone!!!
The good, wiring harness is complete as well as detailed instructions. Its practically "plug n play". Everything you need (other than tools) are included in the factory kit. Took me three hours but then again, am careful and don't want to break anything.
And the install posts continue!!!
BTW, borrowed my cousin's Nikon SLR, so hopefully the pics generate better quality compared to my phone!!!
#534
10-08-2014, 07:54 AM

Today, the install of the OEM Door Sills was accomplished. Pricey item, yes!!! ($250 shipped) That's the bad.
The good, wiring harness is complete as well as detailed instructions. Its practically "plug n play". Everything you need (other than tools) are included in the factory kit. Took me three hours but then again, am careful and don't want to break anything.
And the install posts continue!!!
BTW, borrowed my cousin's Nikon SLR, so hopefully the pics generate better quality compared to my phone!!!
#535
10-08-2014, 10:08 AM
Those sills look SO good. Based on your experience, how difficult would you say the project is for a total novice? As in, someone who has never so much as plugged in a new light bulb into their car interior (up until last week, anyway :P). I'm relatively good with tools and following directions, but I just have no concept of how to rip into a car, and all things electrical, including terminology and use of random electrical tools like crimpers and wire nuts kind of elude me.
I hope to be doing this project myself soon. You can find the installation directions here http://www.bernardiparts.com/Images/...m_AII51167.pdf
#536
10-08-2014, 11:33 AM
Join Date: Mar 2014
Location: Hawaii: relocated to Western Canada Sept, 2015
Posts: 1,116
Definitely proceed to Jupiter Joe's link and read over and over. Over one week-end, before you make any purchase, attempt to disassemble one side (preferably the driver's side -cause that's where the plug-in is located). Once you feel comfortable with that, you know its time to make the purchase.
Here's a tip - get some plastic trim removal tools. e.g If not for anything else, doing this exercise, will at the very least, make you familiar with the location of the under-dash fuse box.
Please disconnect the negative terminal of the battery before starting any electrical related work. Use a 10mm tool to loosen battery bolt.
YOU CAN DO THIS!!!
Additional input: There is a Bay Area group of FFs that meet regularly. Am sure they won't mind your dropping in. They'll all be glad to help show you what to do!!!! Its basically panel and door weatherstrip removal.
.......doing this project myself soon........ installation directions here http://www.bernardiparts.com/Images/...m_AII51167.pdf
Now its installed, aesthetically, it's a more worthwhile OEM accessory than realized.
One gets to see it everytime you open the door and see "Blue" Fit LED's staring at you. IMO, it does not look cheesy or cheap.
JupiterJoe. You, I, plus all the FF members are gonna continue to assist spaghetina and anyone else who needs guidance.
Good job on posting that link!!!!!!!!
Last edited by ROTTBOY; 10-08-2014 at 11:38 AM.
#538
10-09-2014, 09:26 PM
Join Date: Mar 2014
Location: Hawaii: relocated to Western Canada Sept, 2015
Posts: 1,116
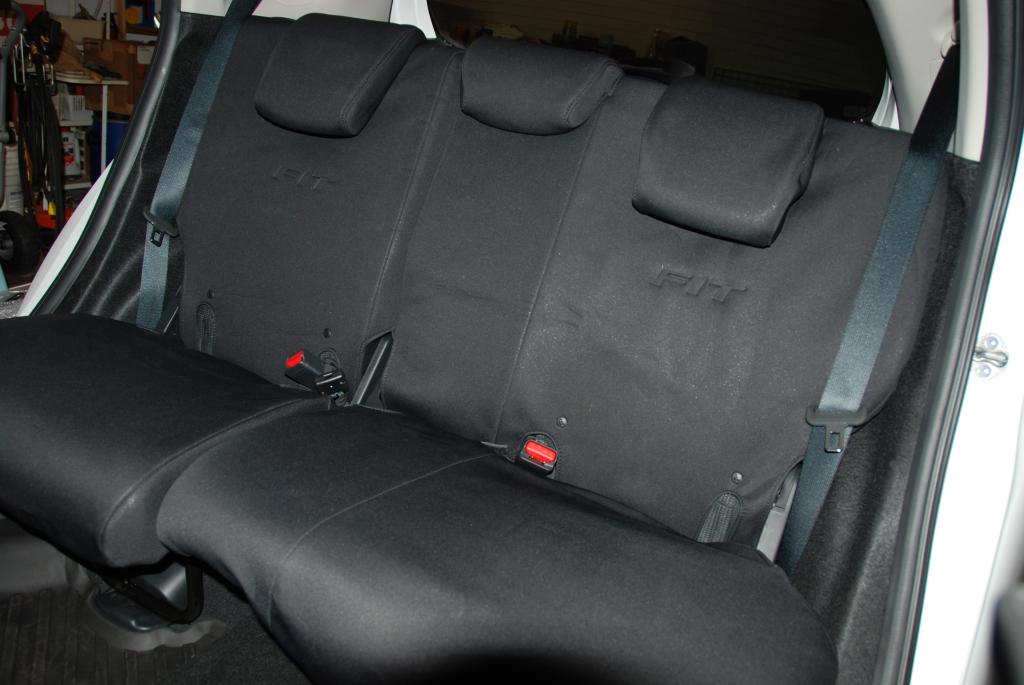
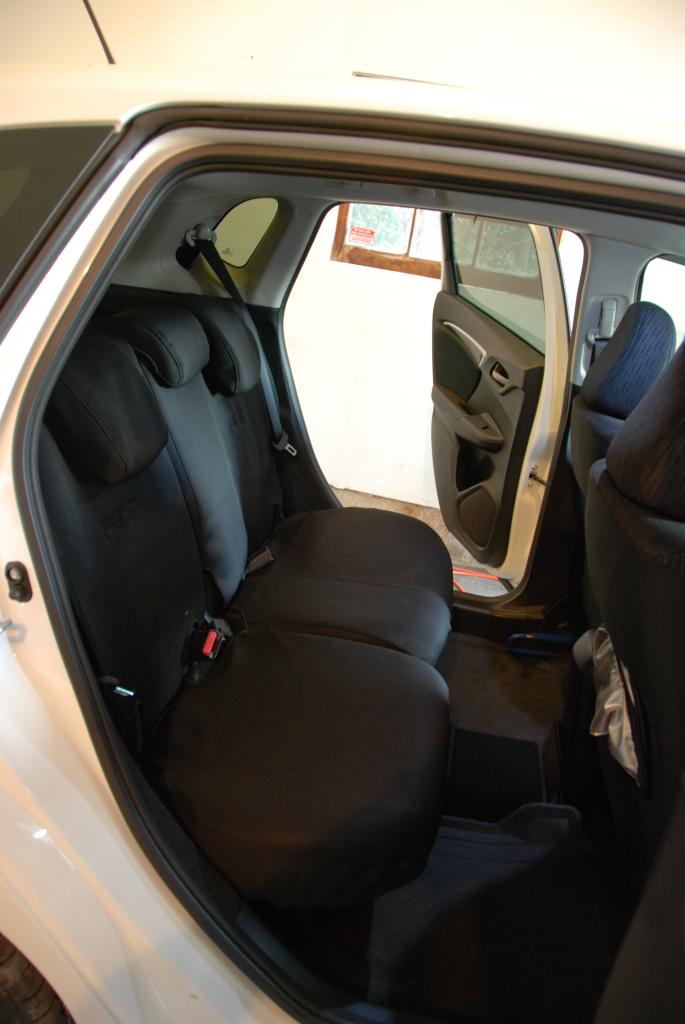
Continuing mod installs
DONE!!!
After doing errands had time to install the OEM rear seat covers. Actually came out pretty good. Its neoprene-type material and should suit my doggie well.
Honda should make them for the front seats too!!!
After doing errands had time to install the OEM rear seat covers. Actually came out pretty good. Its neoprene-type material and should suit my doggie well.
Honda should make them for the front seats too!!!
Last edited by ROTTBOY; 10-10-2014 at 01:03 PM.
#539
10-10-2014, 09:11 PM

i like going through this thread to find cool ideas i can do to my own car. even though it's not a honda. 