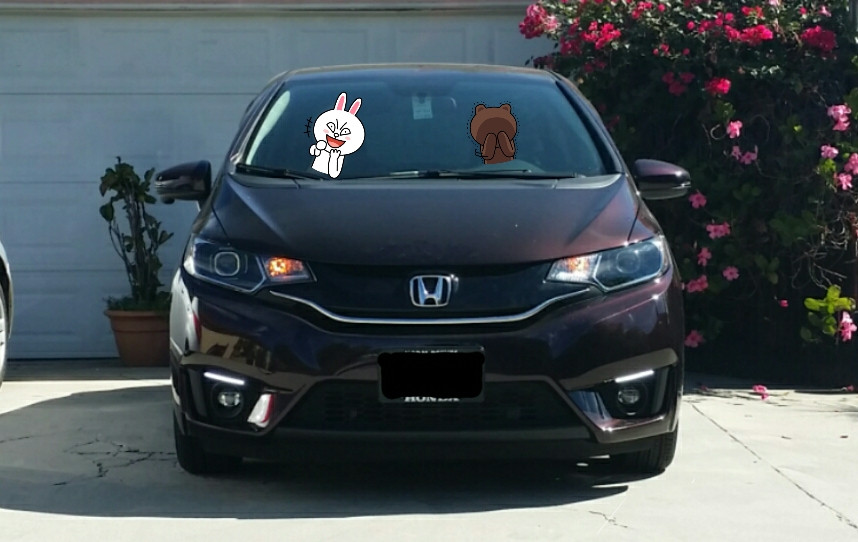
How to: Projector Retrofit your GK
#1
How to: Projector Retrofit your GK
Hey fellow FF, I finally got to have the garage to myself for a few days this week so threw up the retro on my Fit. Thanks to some tips from Superfly and looking at the reflectors myself, some things should be avoided. so here's a How To Guide for those of you planning on retrofitting your GK headlight halogen housings to projectors. You can also go to Superfly's original thread to look at his O lens with Apollo shrouds for his retro.
This here details the X lens and Panasquare shrouds but otherwise is the same steps in doing a retrofit.
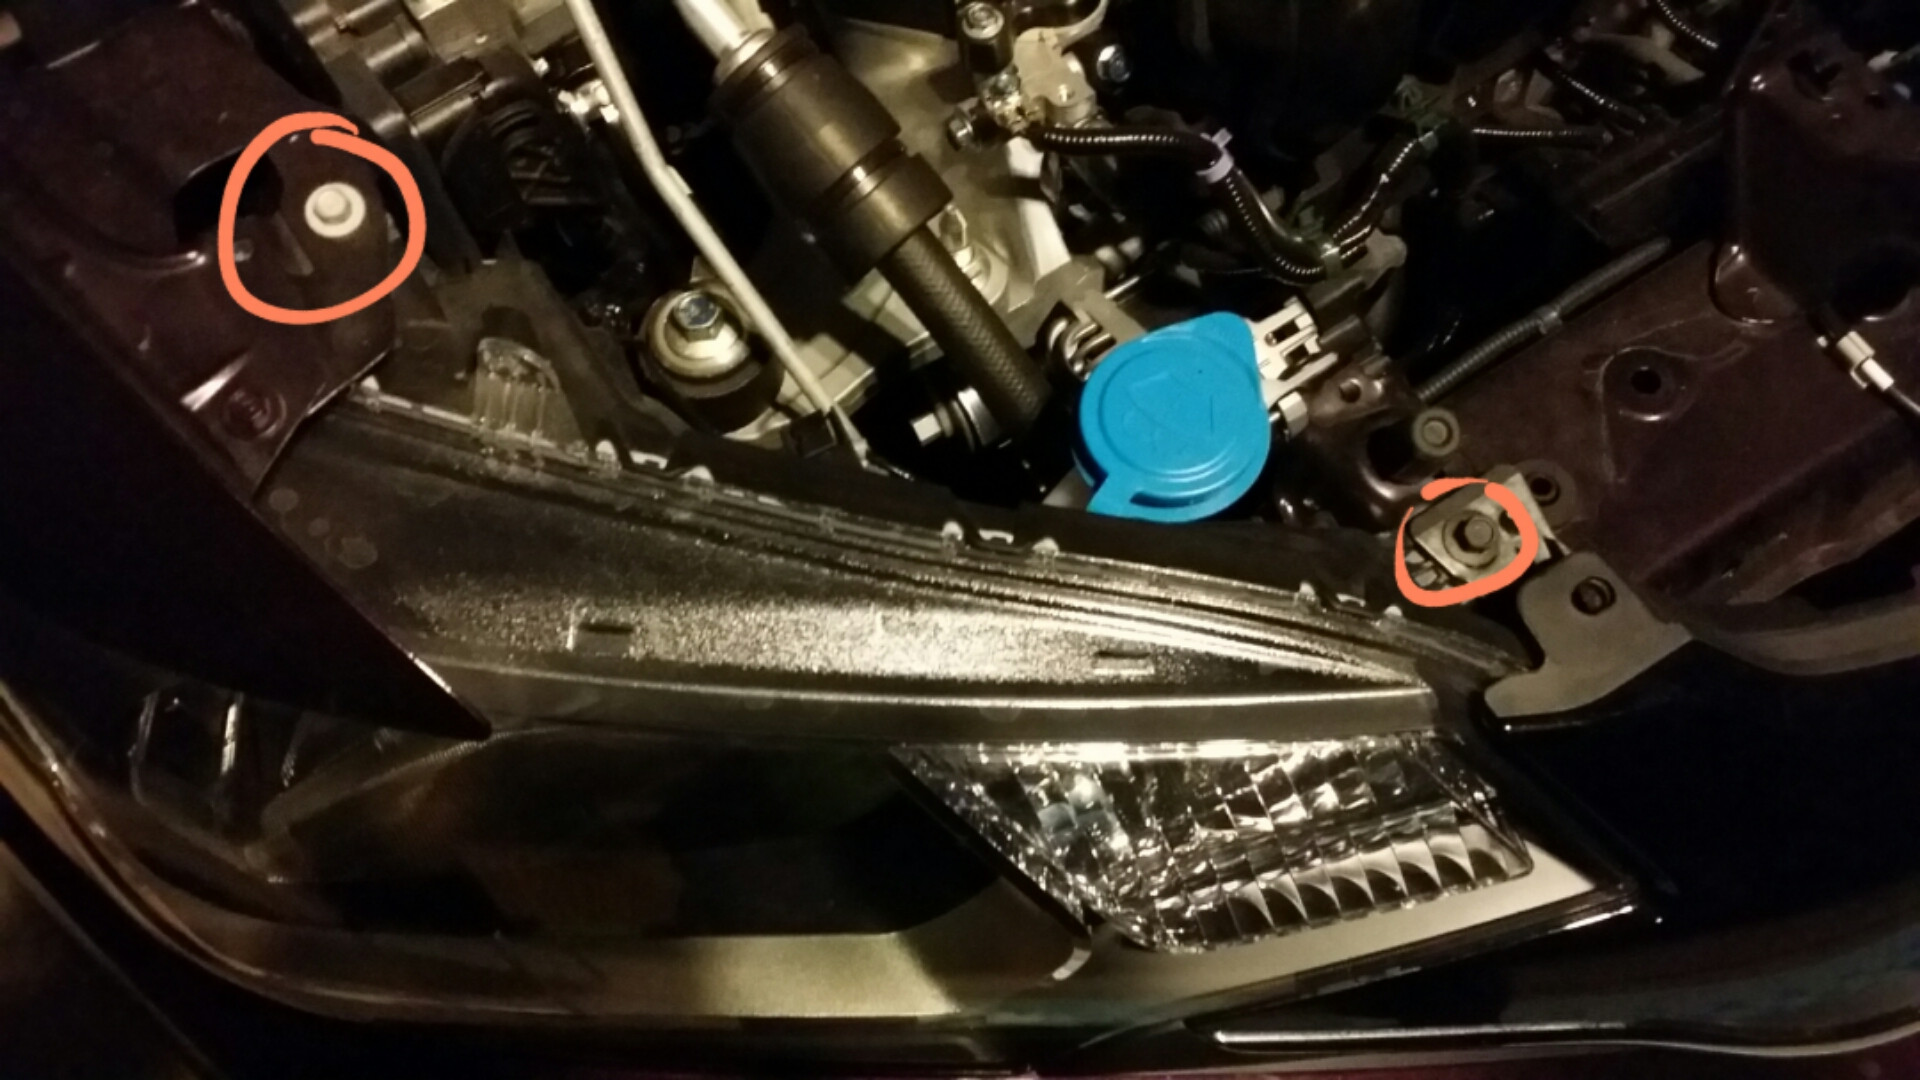
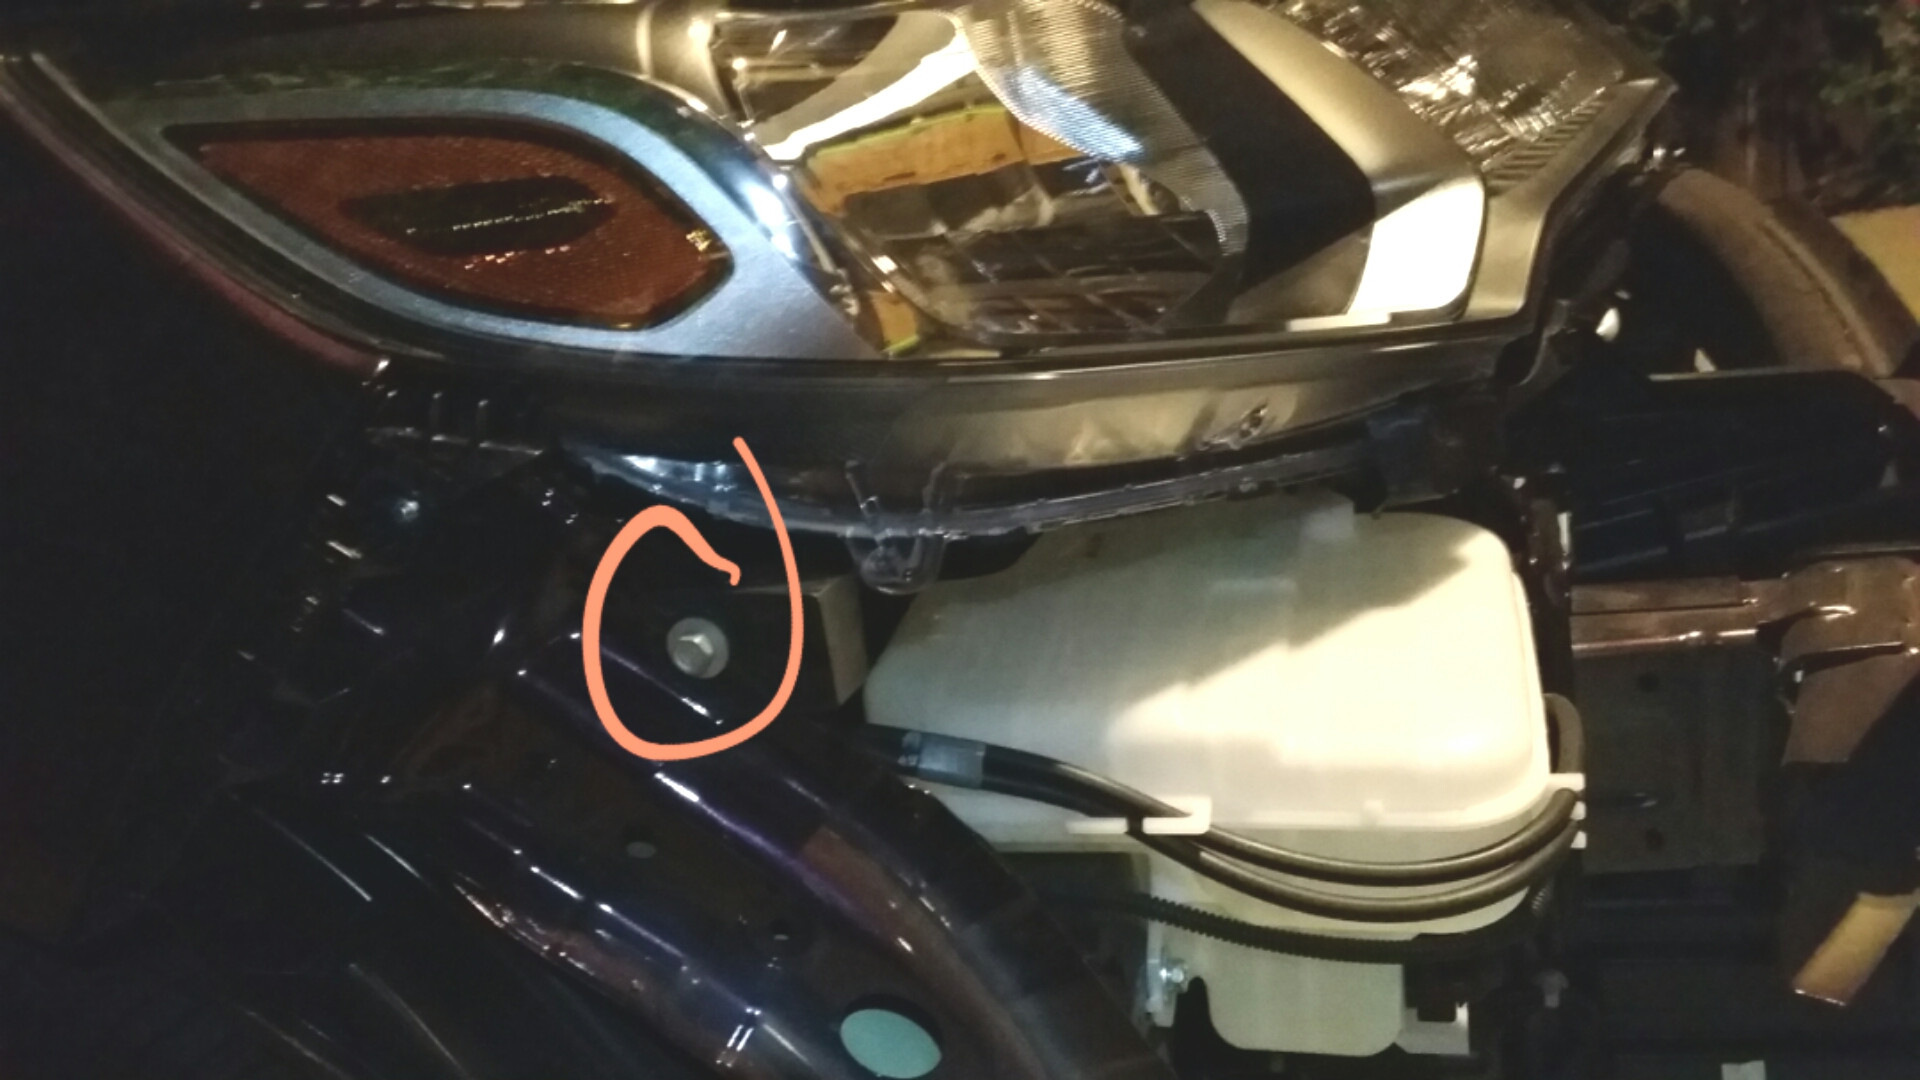
First youíre gonna have to remove your headlights from your Fit. Like Superfly said, thereís four nuts to remove but thereís also a clip to be removed so be careful of that.
Top two nuts
Side nut
Behind the bumper thereís a nut and a clip
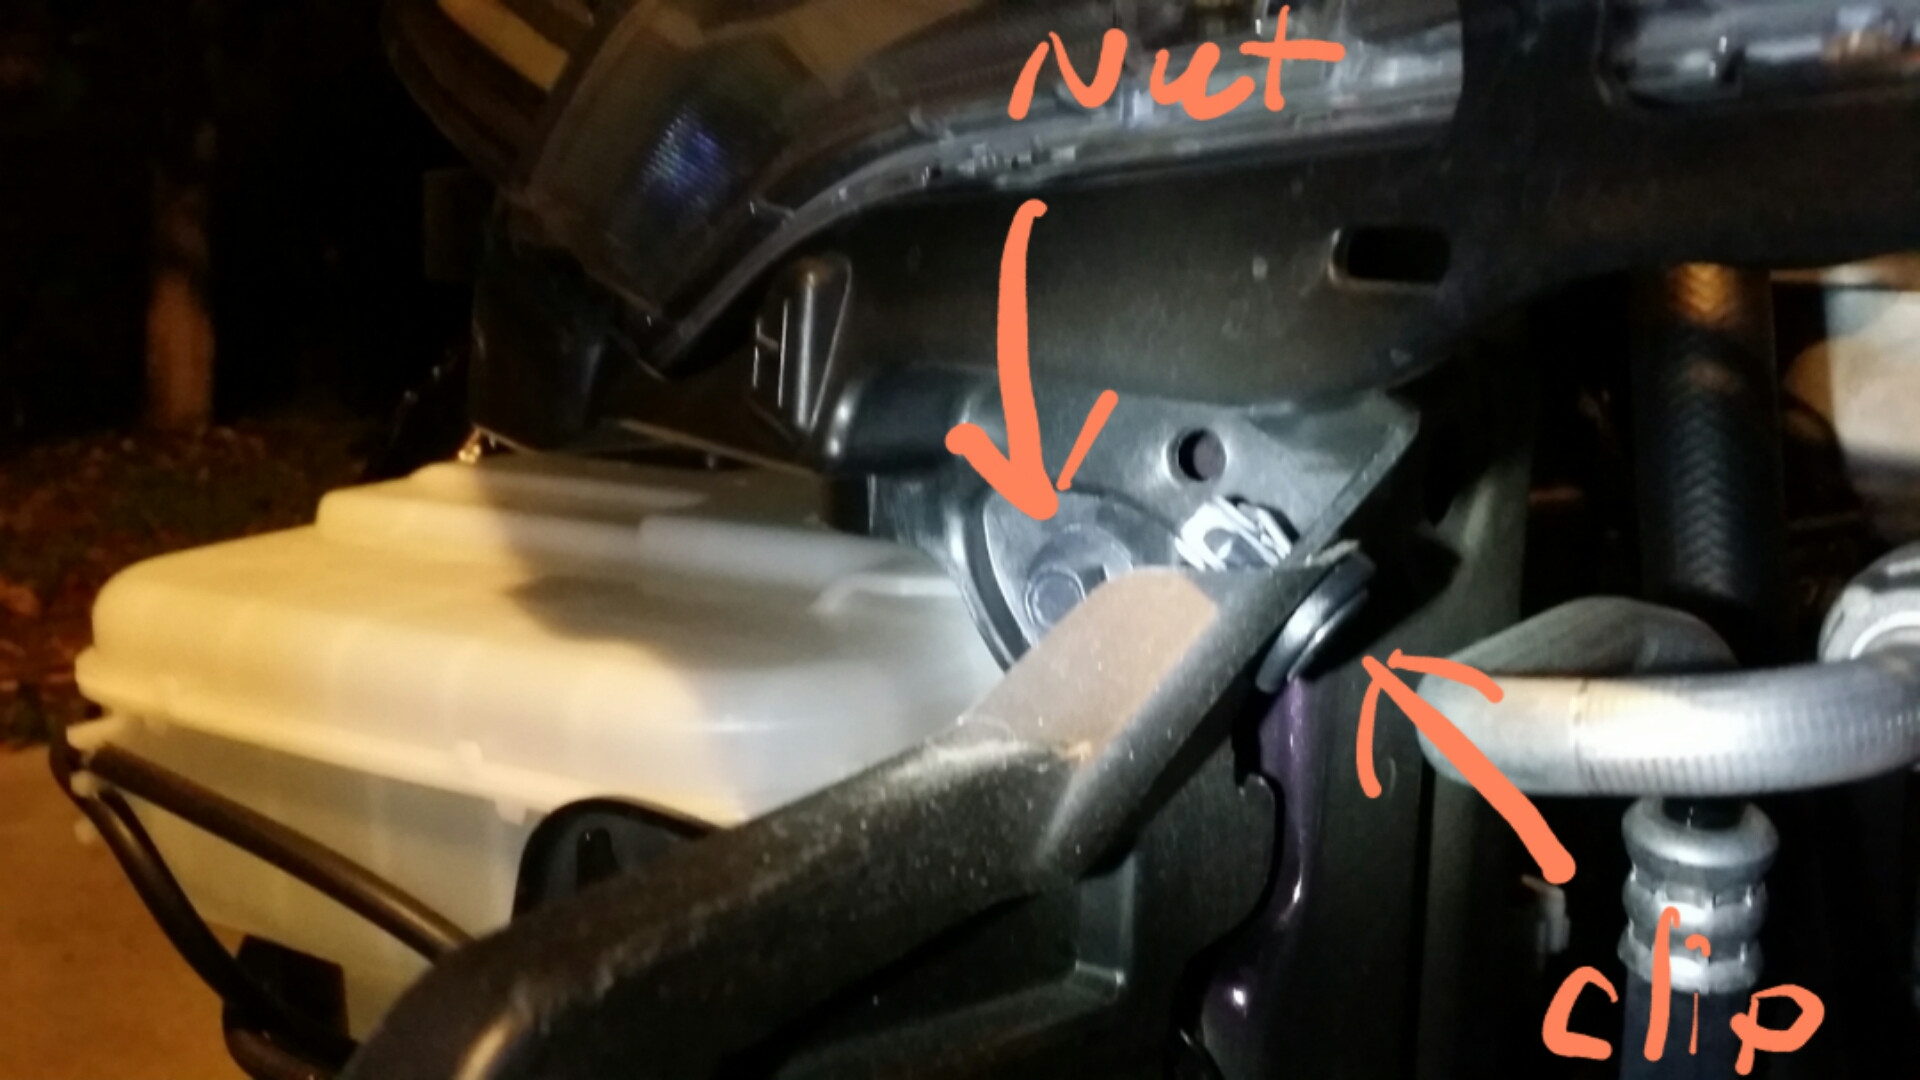
Once you get the nuts off, pop the plastic where the side nut was off, then tilt the headlight down and slide off. This way you donít scratch your headlights too much. When you get your headlight off, you also have to remove the plastic that runs around the turn signal. The bolt is under the headlight.
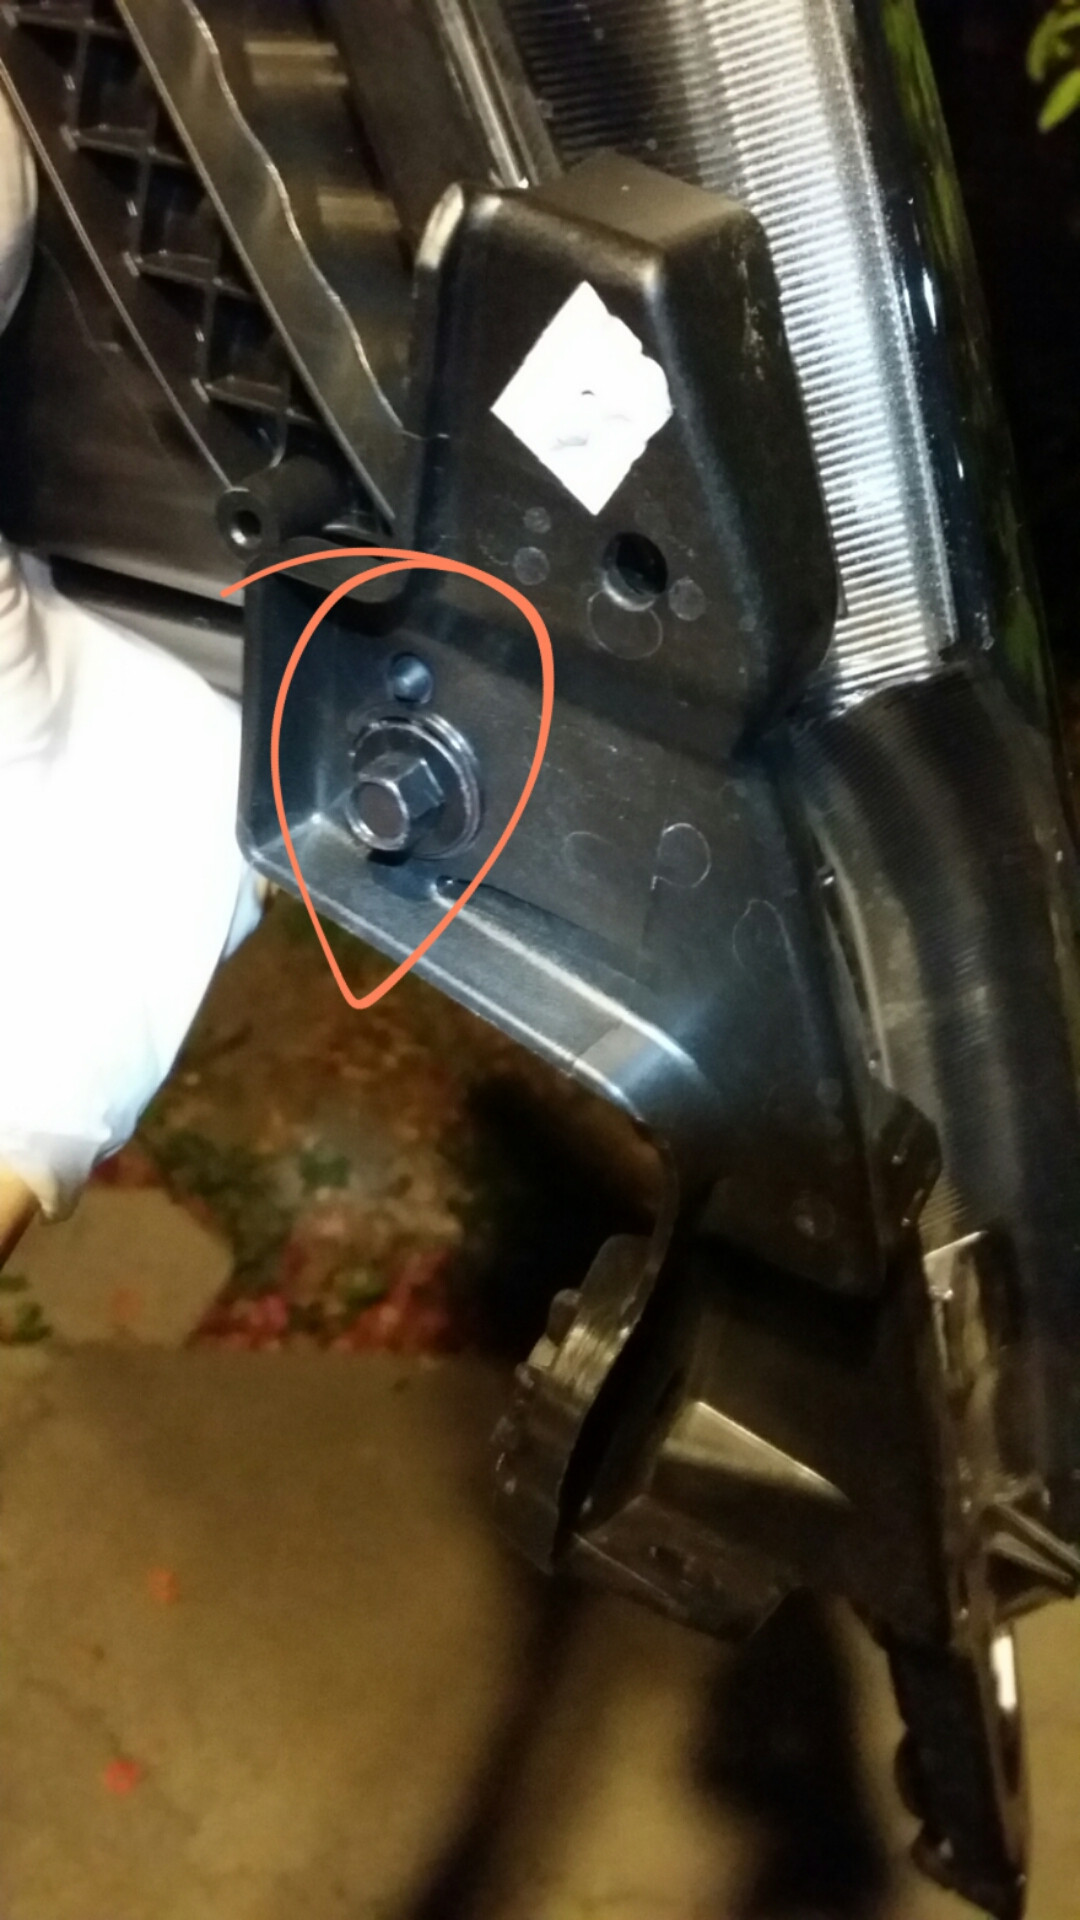
There are four screws to remove from each housing.
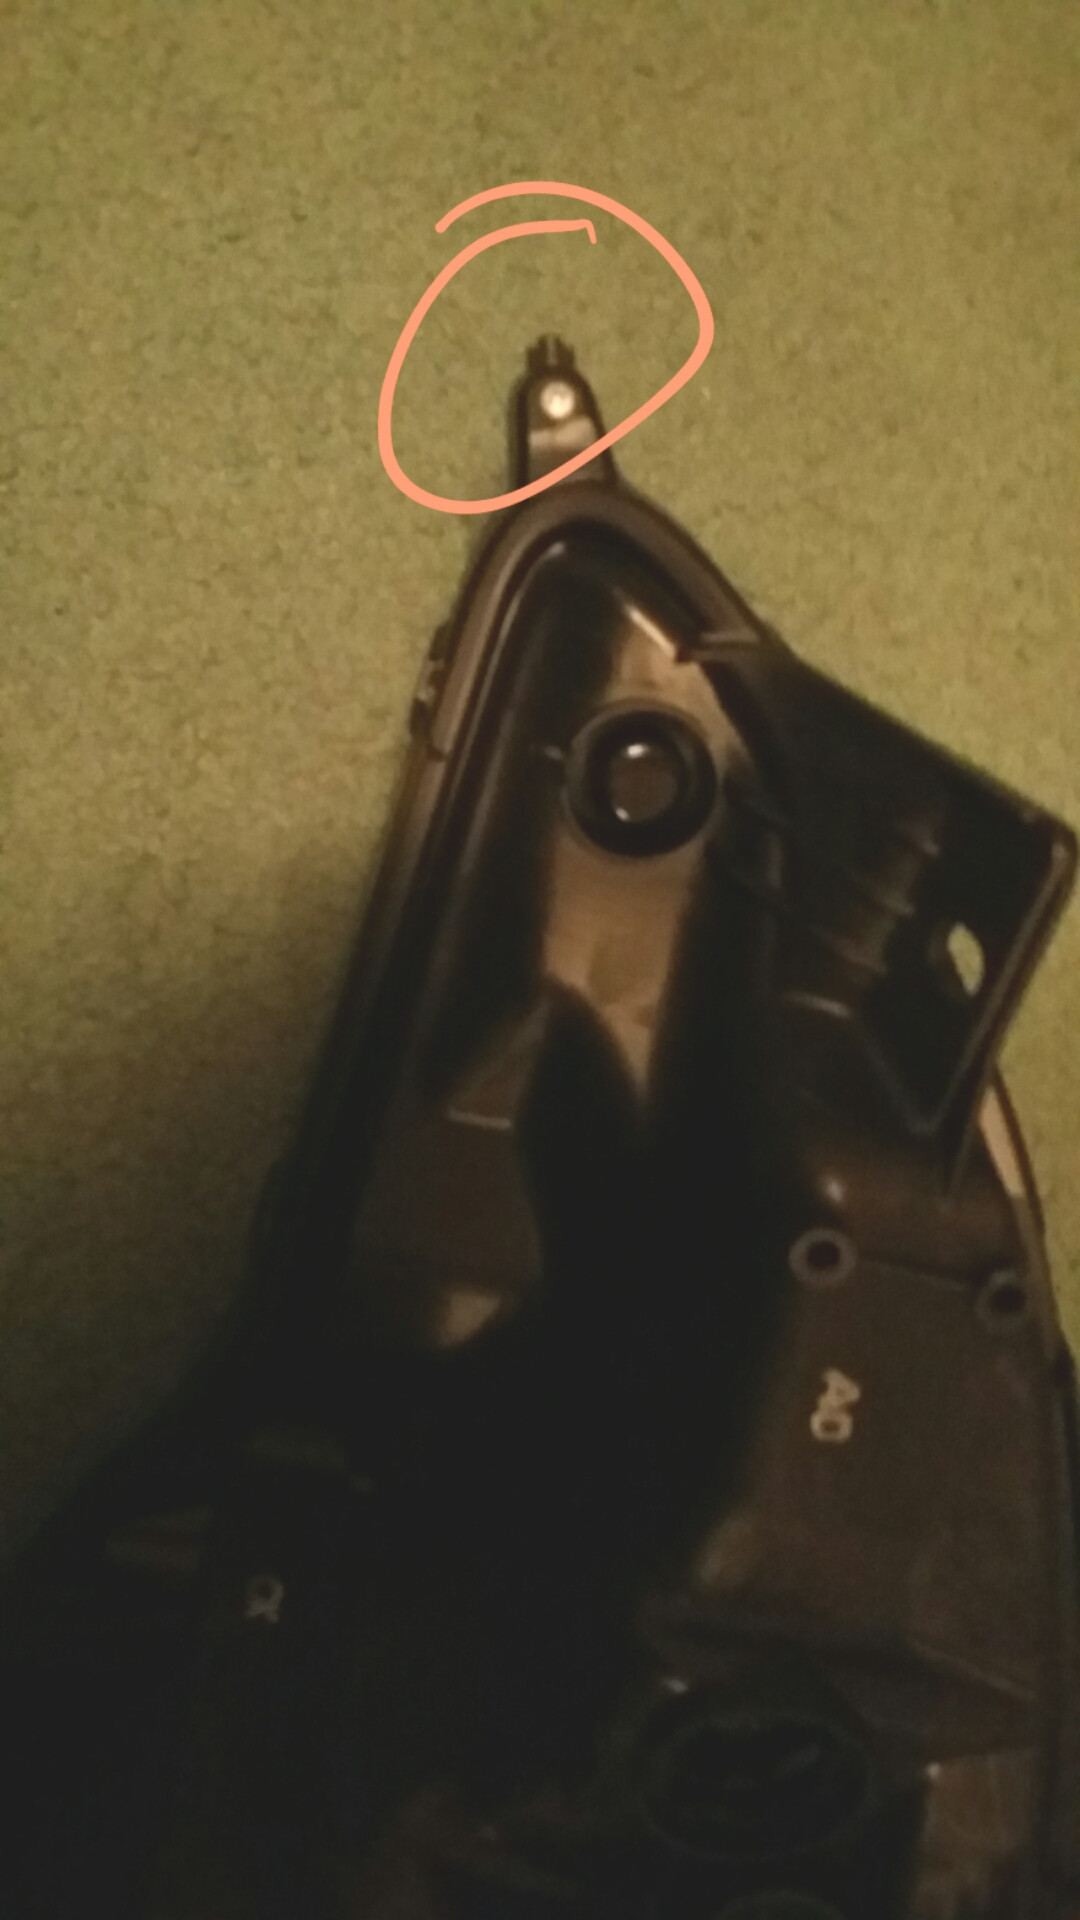
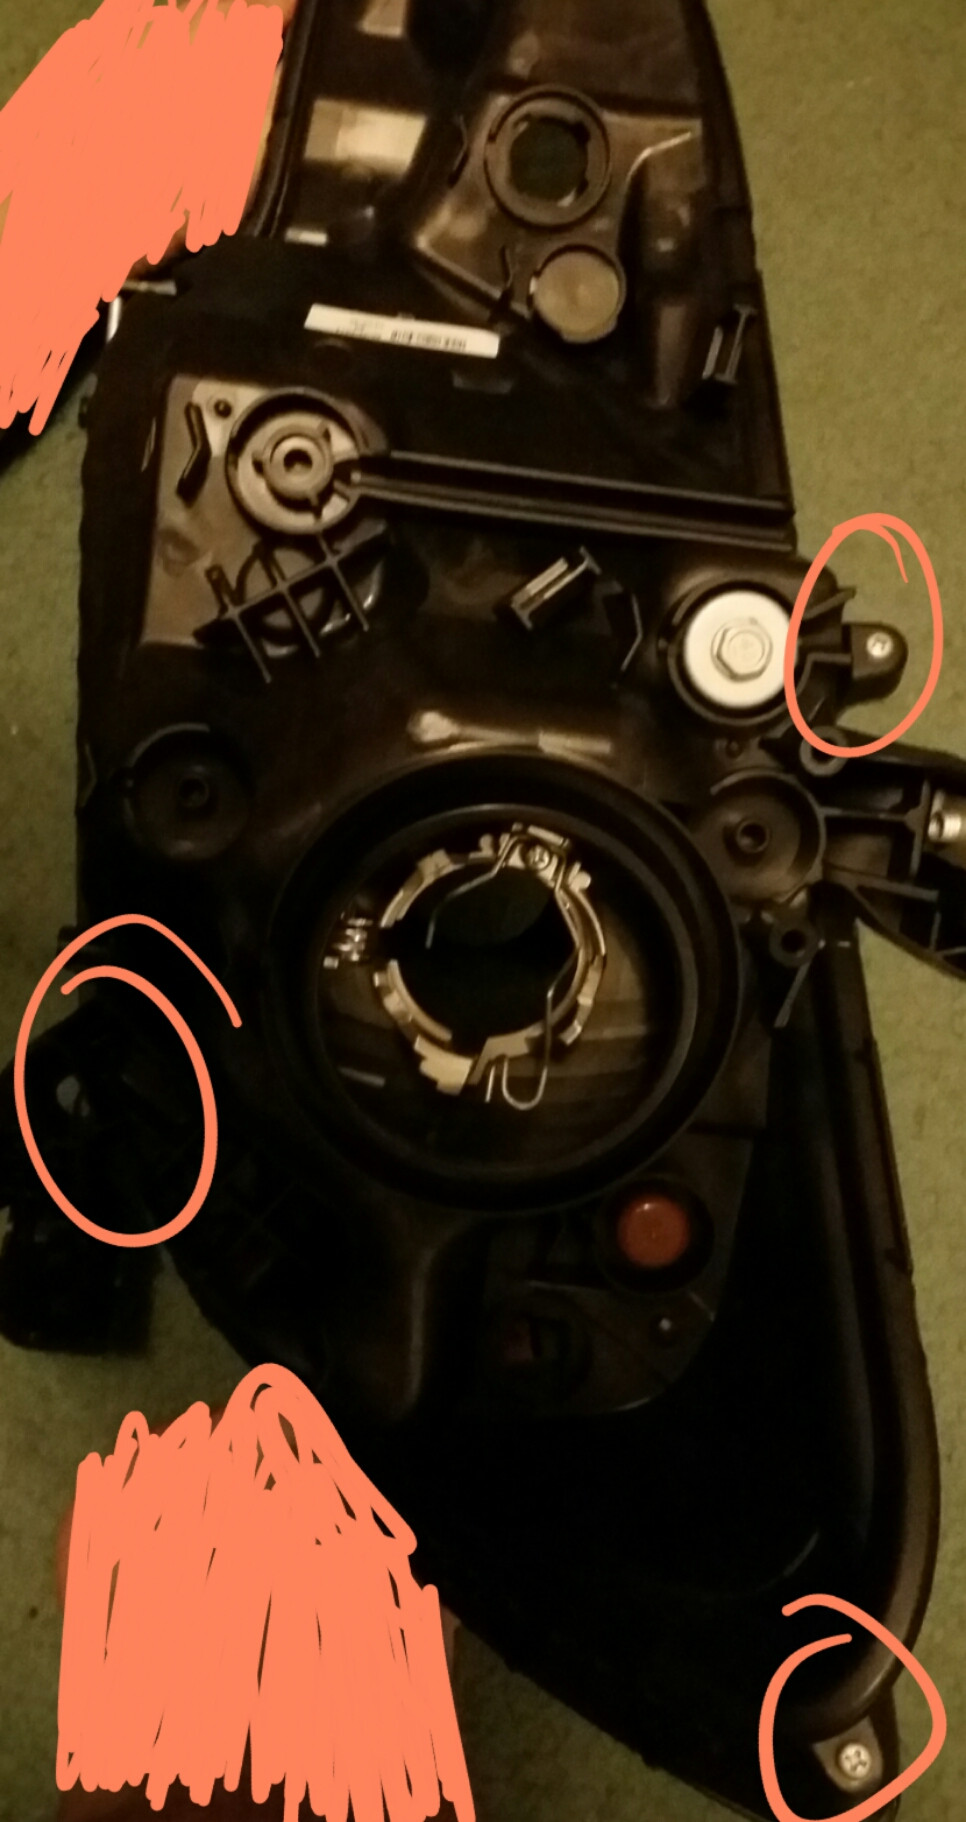
Once the four screws are removed try to get a flat head screwdriver and bend some of the clips out. They donít have to be all the way out, Iíve found that some bend out really easily, but this helps them ďcome offĒ as your headlights get baked.
Also, remove the H4 retainer clip from the back by removing the screw, then taking the clip off.
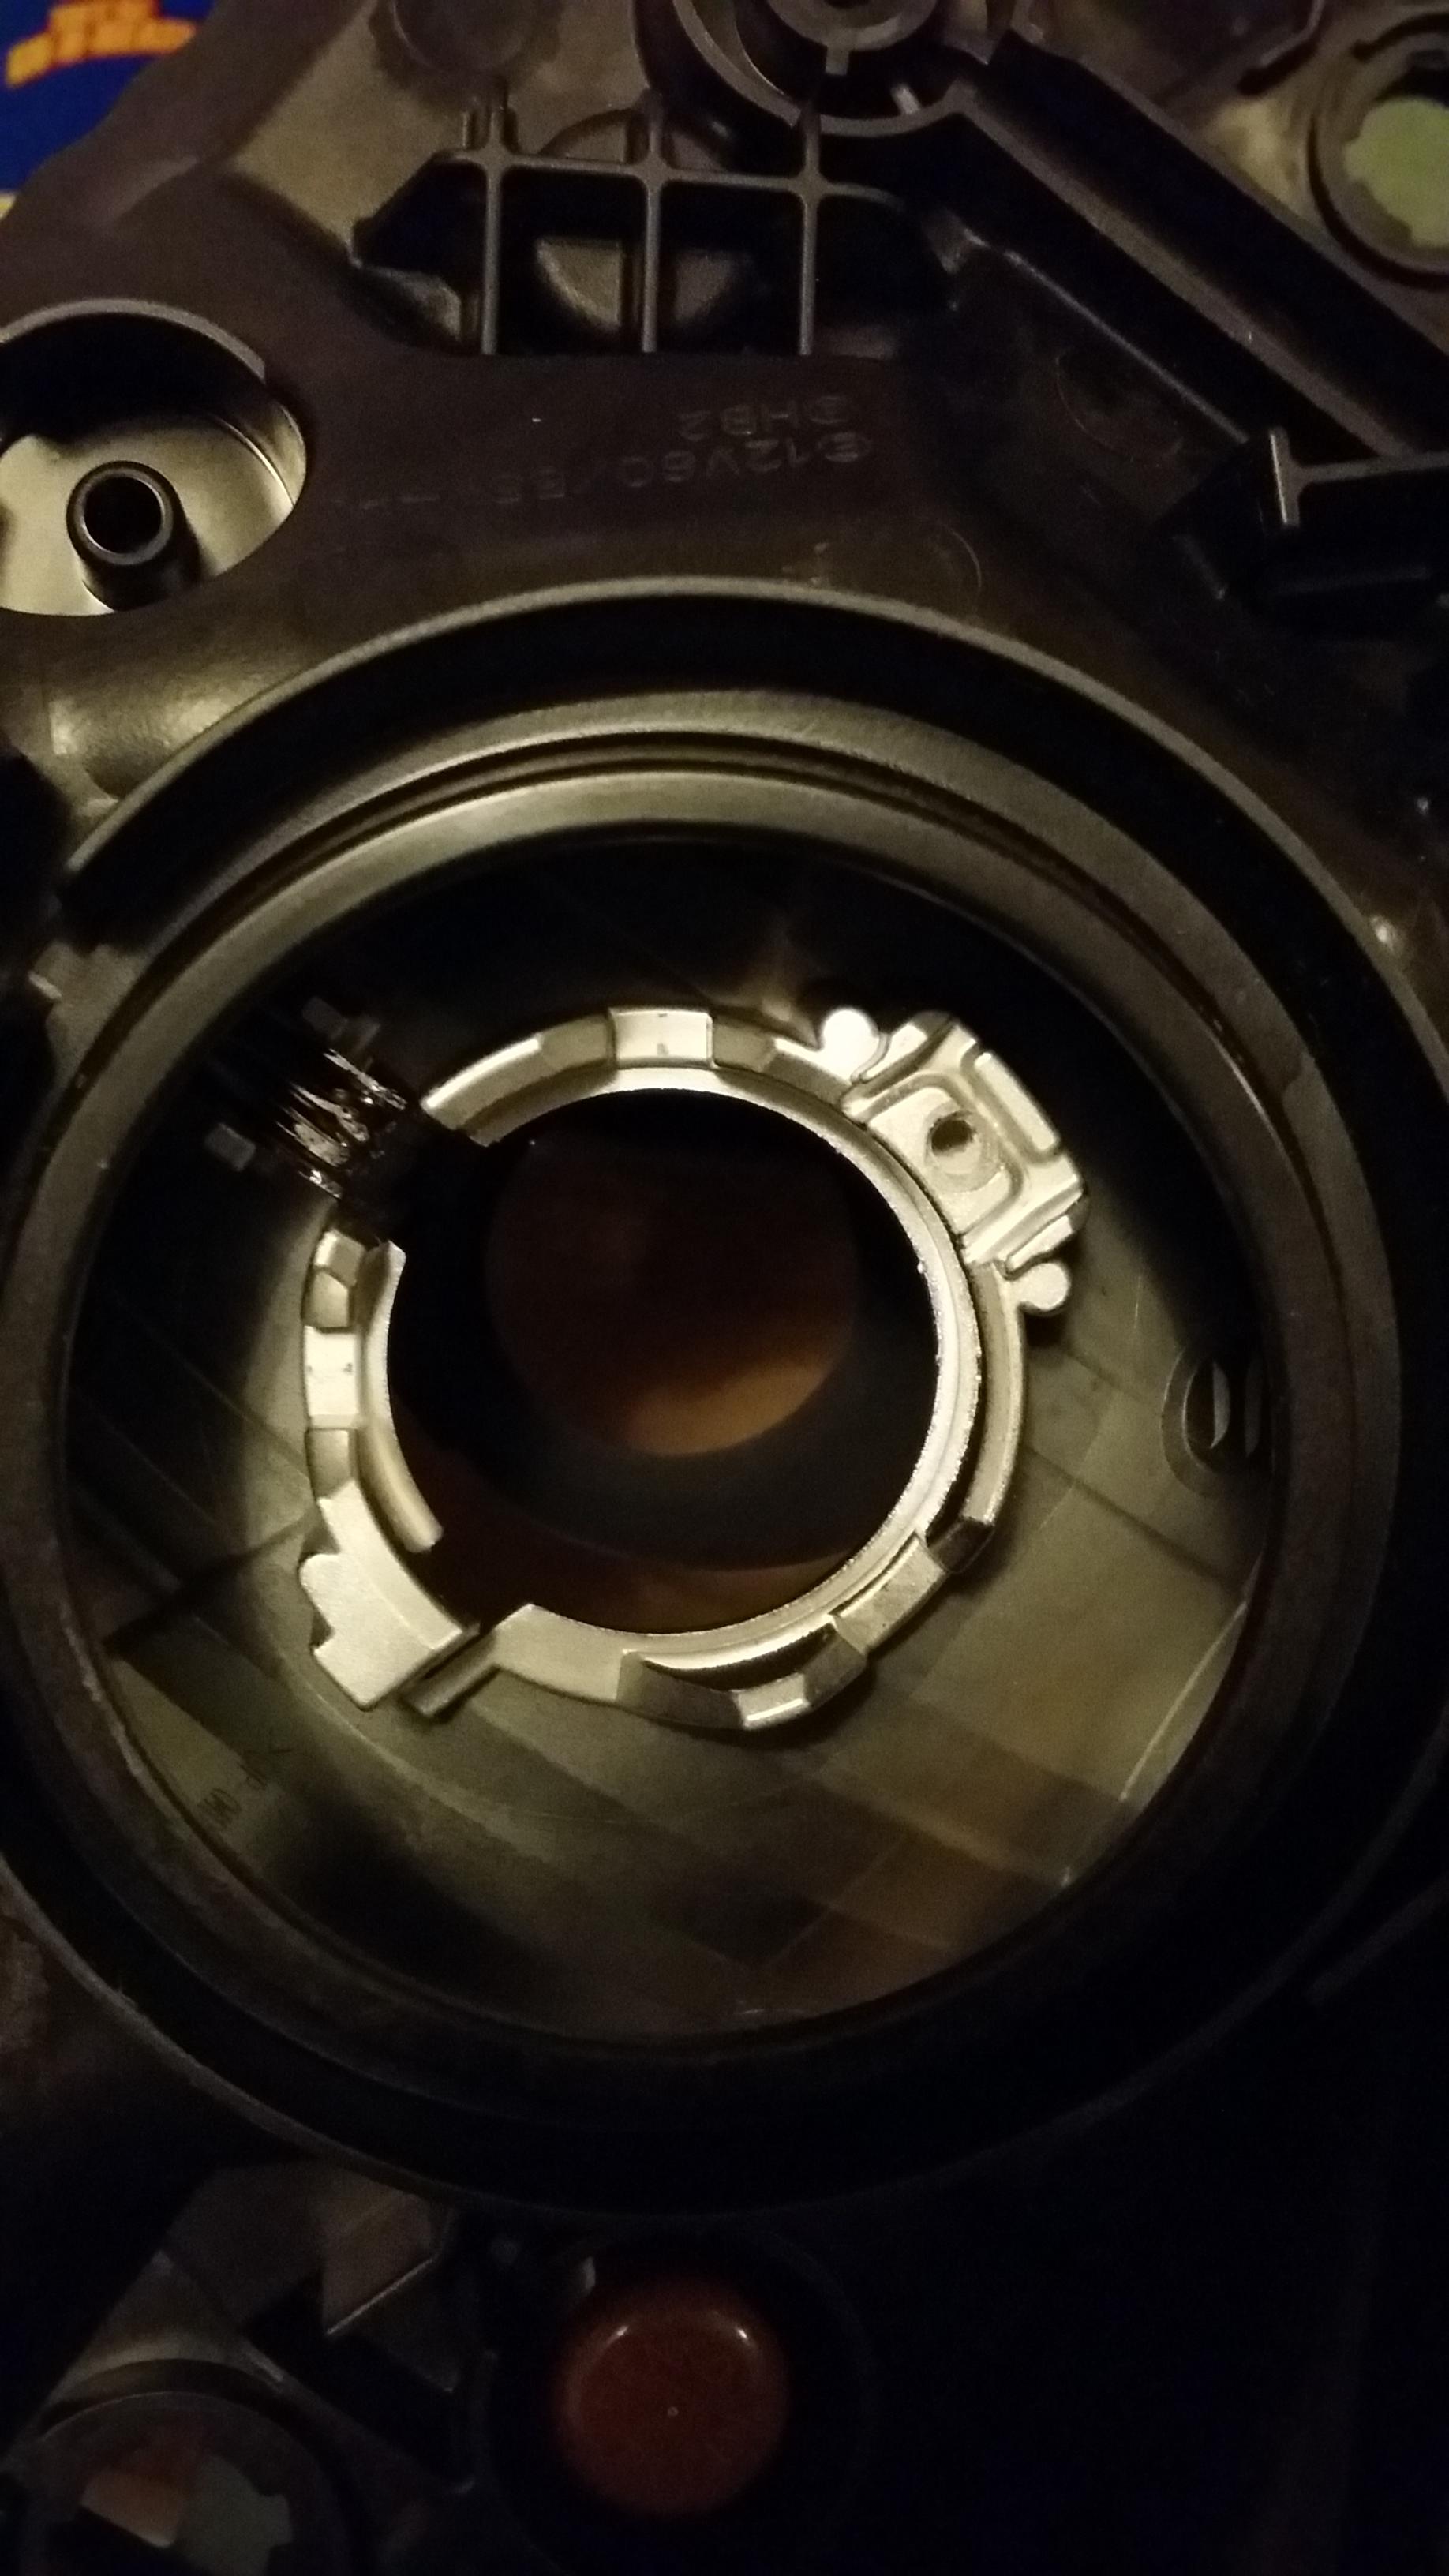
Bake your headlights in the oven for 275-300 F for 10-15 minutes depending on how strong your oven is. If youíre like me and couldnít find an oven that is large enough for the headlights, go out and get a heat gun to remove the headlights. Itís a slower process but doable. Pry slowly and use a flathead screwdriver that you wonít miss to pry off that gray butyl glue as youíre removing the lens. When done, try to remove excess butyl from the channels while itís still warm
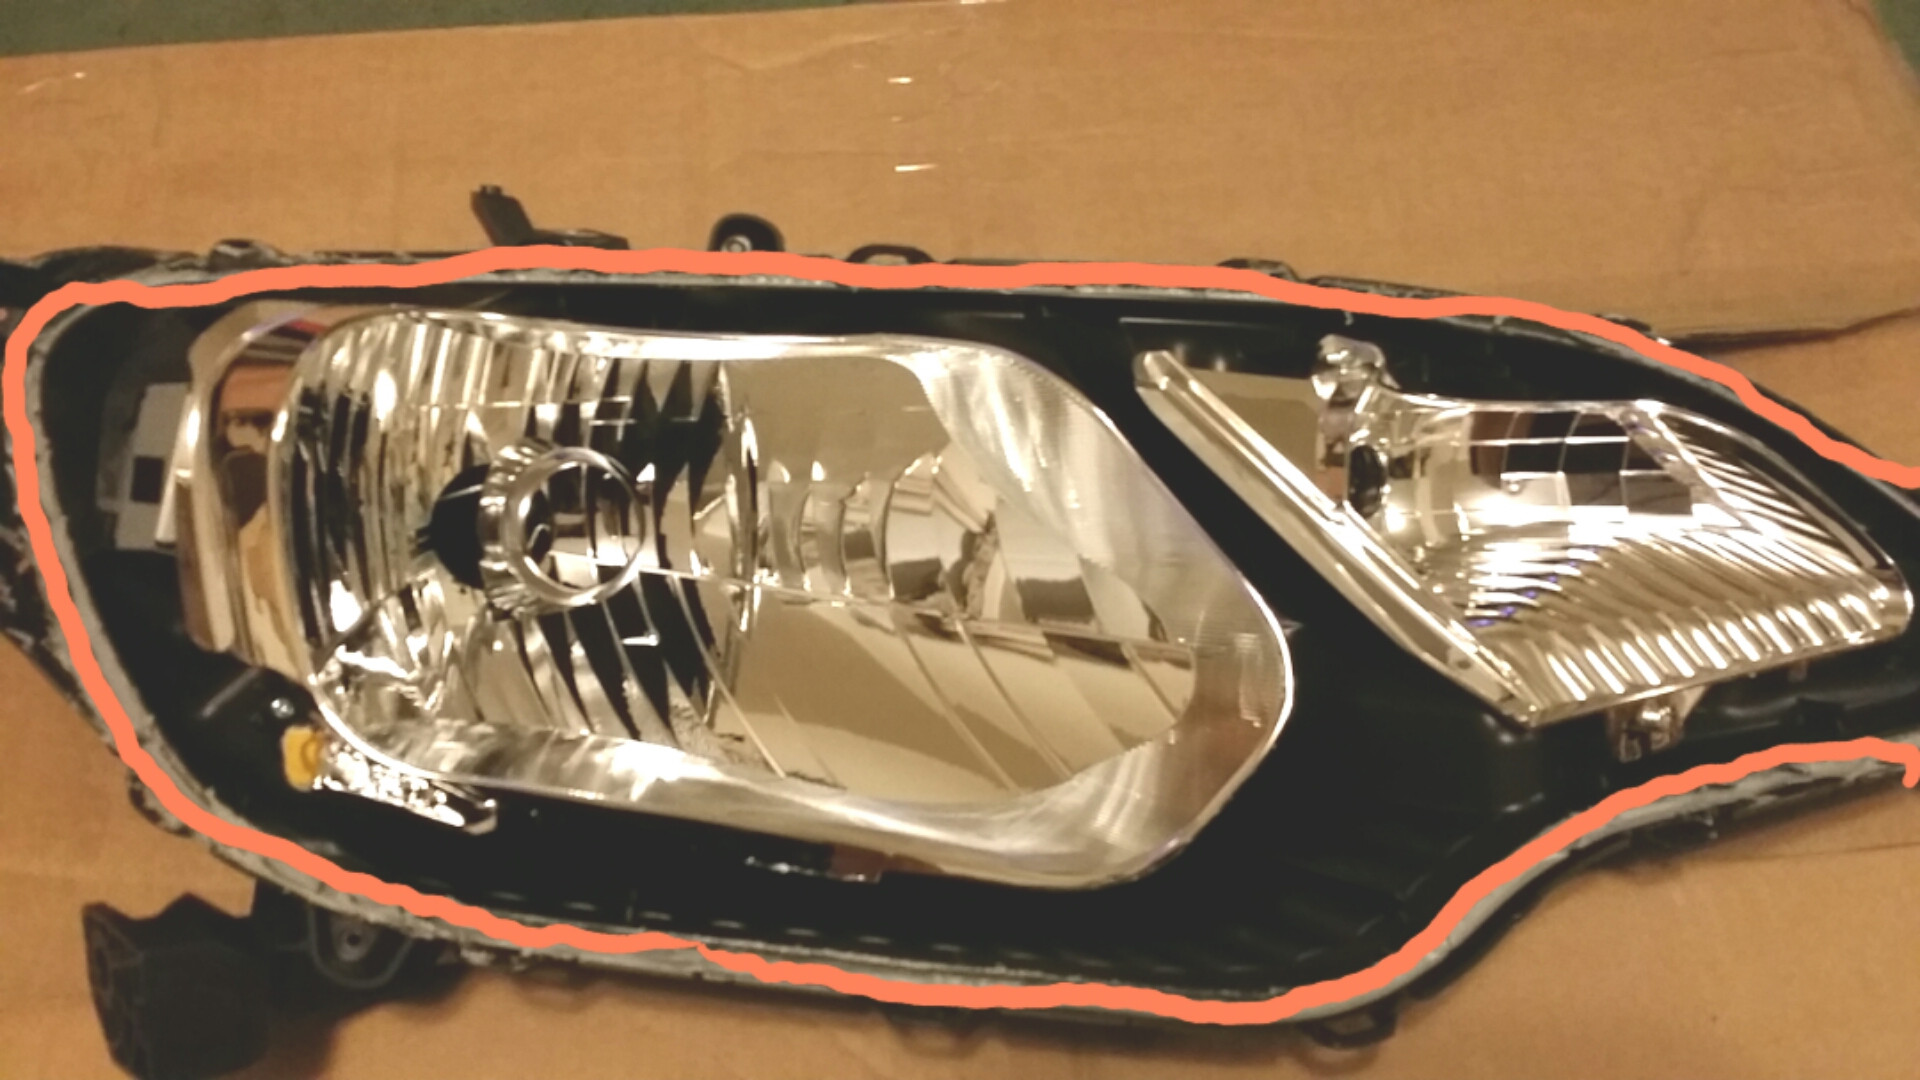
Now, looking at the reflector bowl. This is the issue that both Superfly and I had.
Youíll see that white plastic retainer which holds the bolt for tilt up/down alignment of the headlights. Donít unscrew the bolt because itíll strip that plastic retainer. Apparently, using a needle nose plier wouldnít remove it either. While looking into the back of the bowl, I noticed there seems to be an extra clip or bolt down the middle of the bowl towards the turn signal that seems to be holding the bowl in.
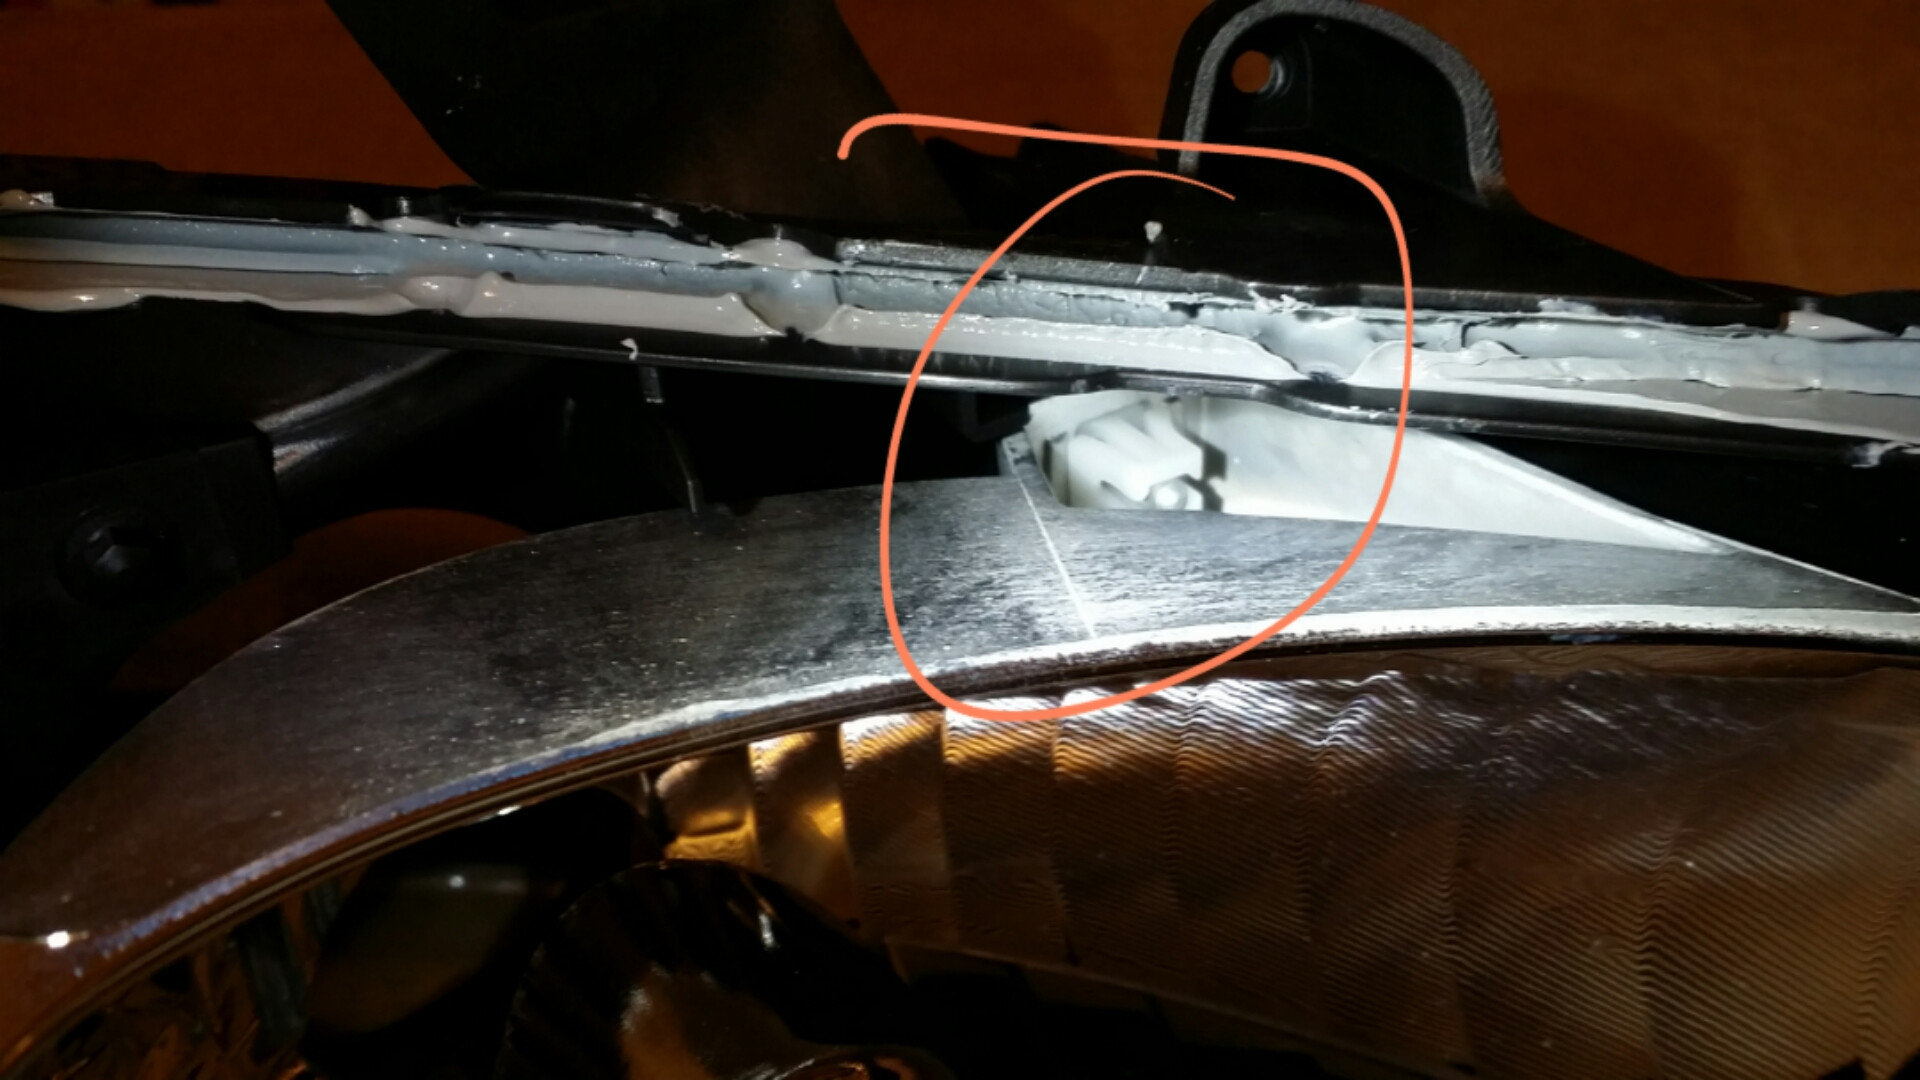
Note: Iím using the same pic as above, but it seems to be where those two plastic circular landmarks are, right below the headlight tilt adjustment. I ainít drilling through that just to remove a clip. So, just adjust your headlight tilt to point the reflector bowl up.
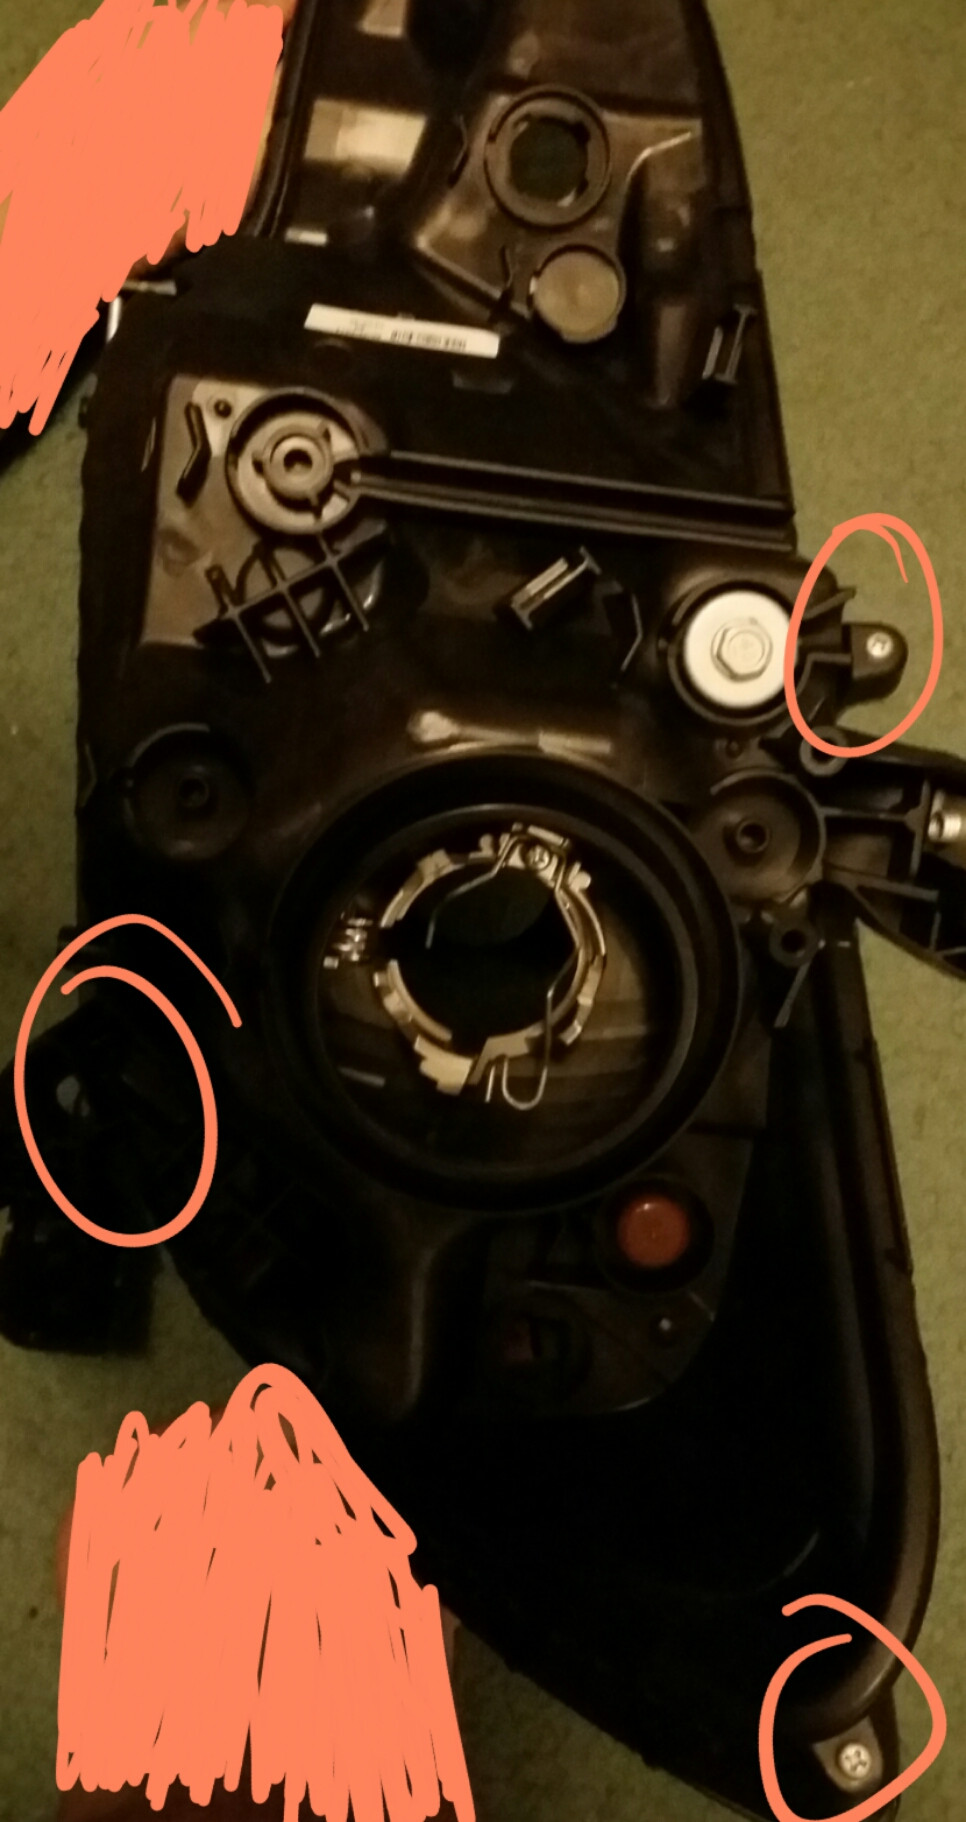
Then youíll see these two screws that are also holding the reflector bowl. Just loosen them. Donít have to remove them. This should allow you enough room to get a small screw driver to take out the screw thatís holding the halogen bulb anti-glare shielding for you to remove.
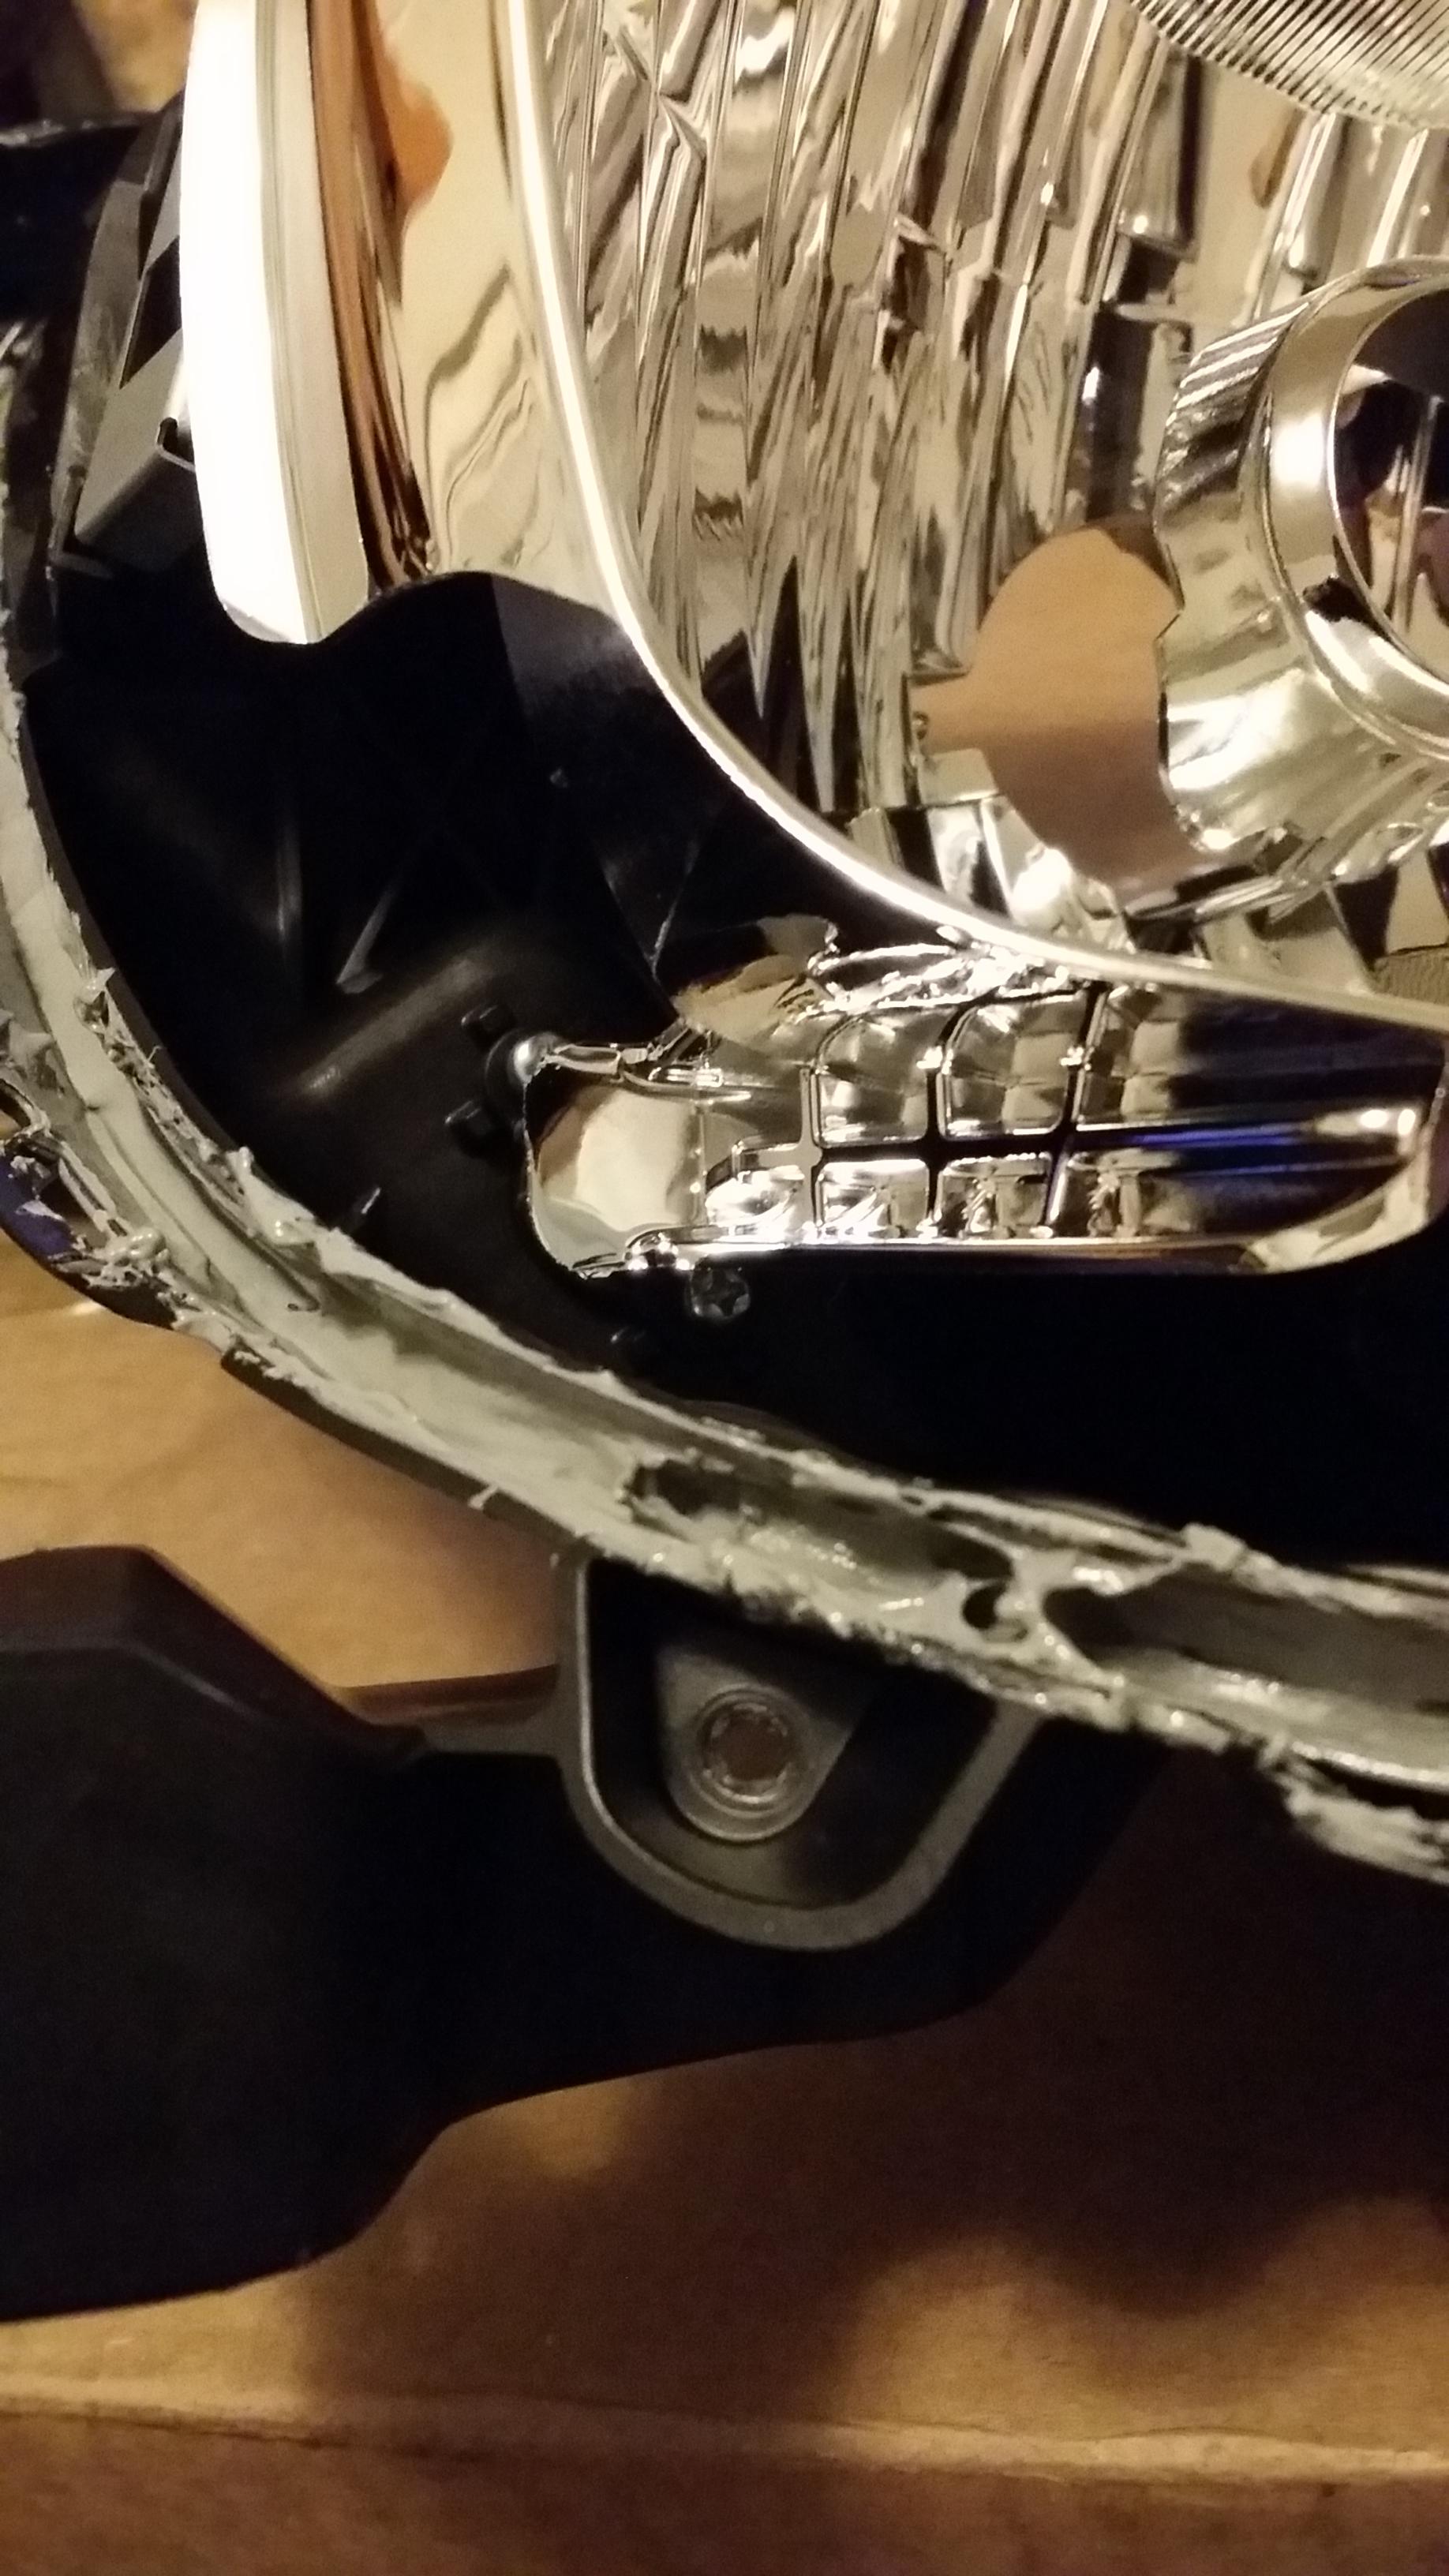
And then you can spray paint the reflector bowl to whatever color you want. You can also spray the turn signals, remove the amber reflectors, etc. Itís your headlights! Do whatever you want to them.
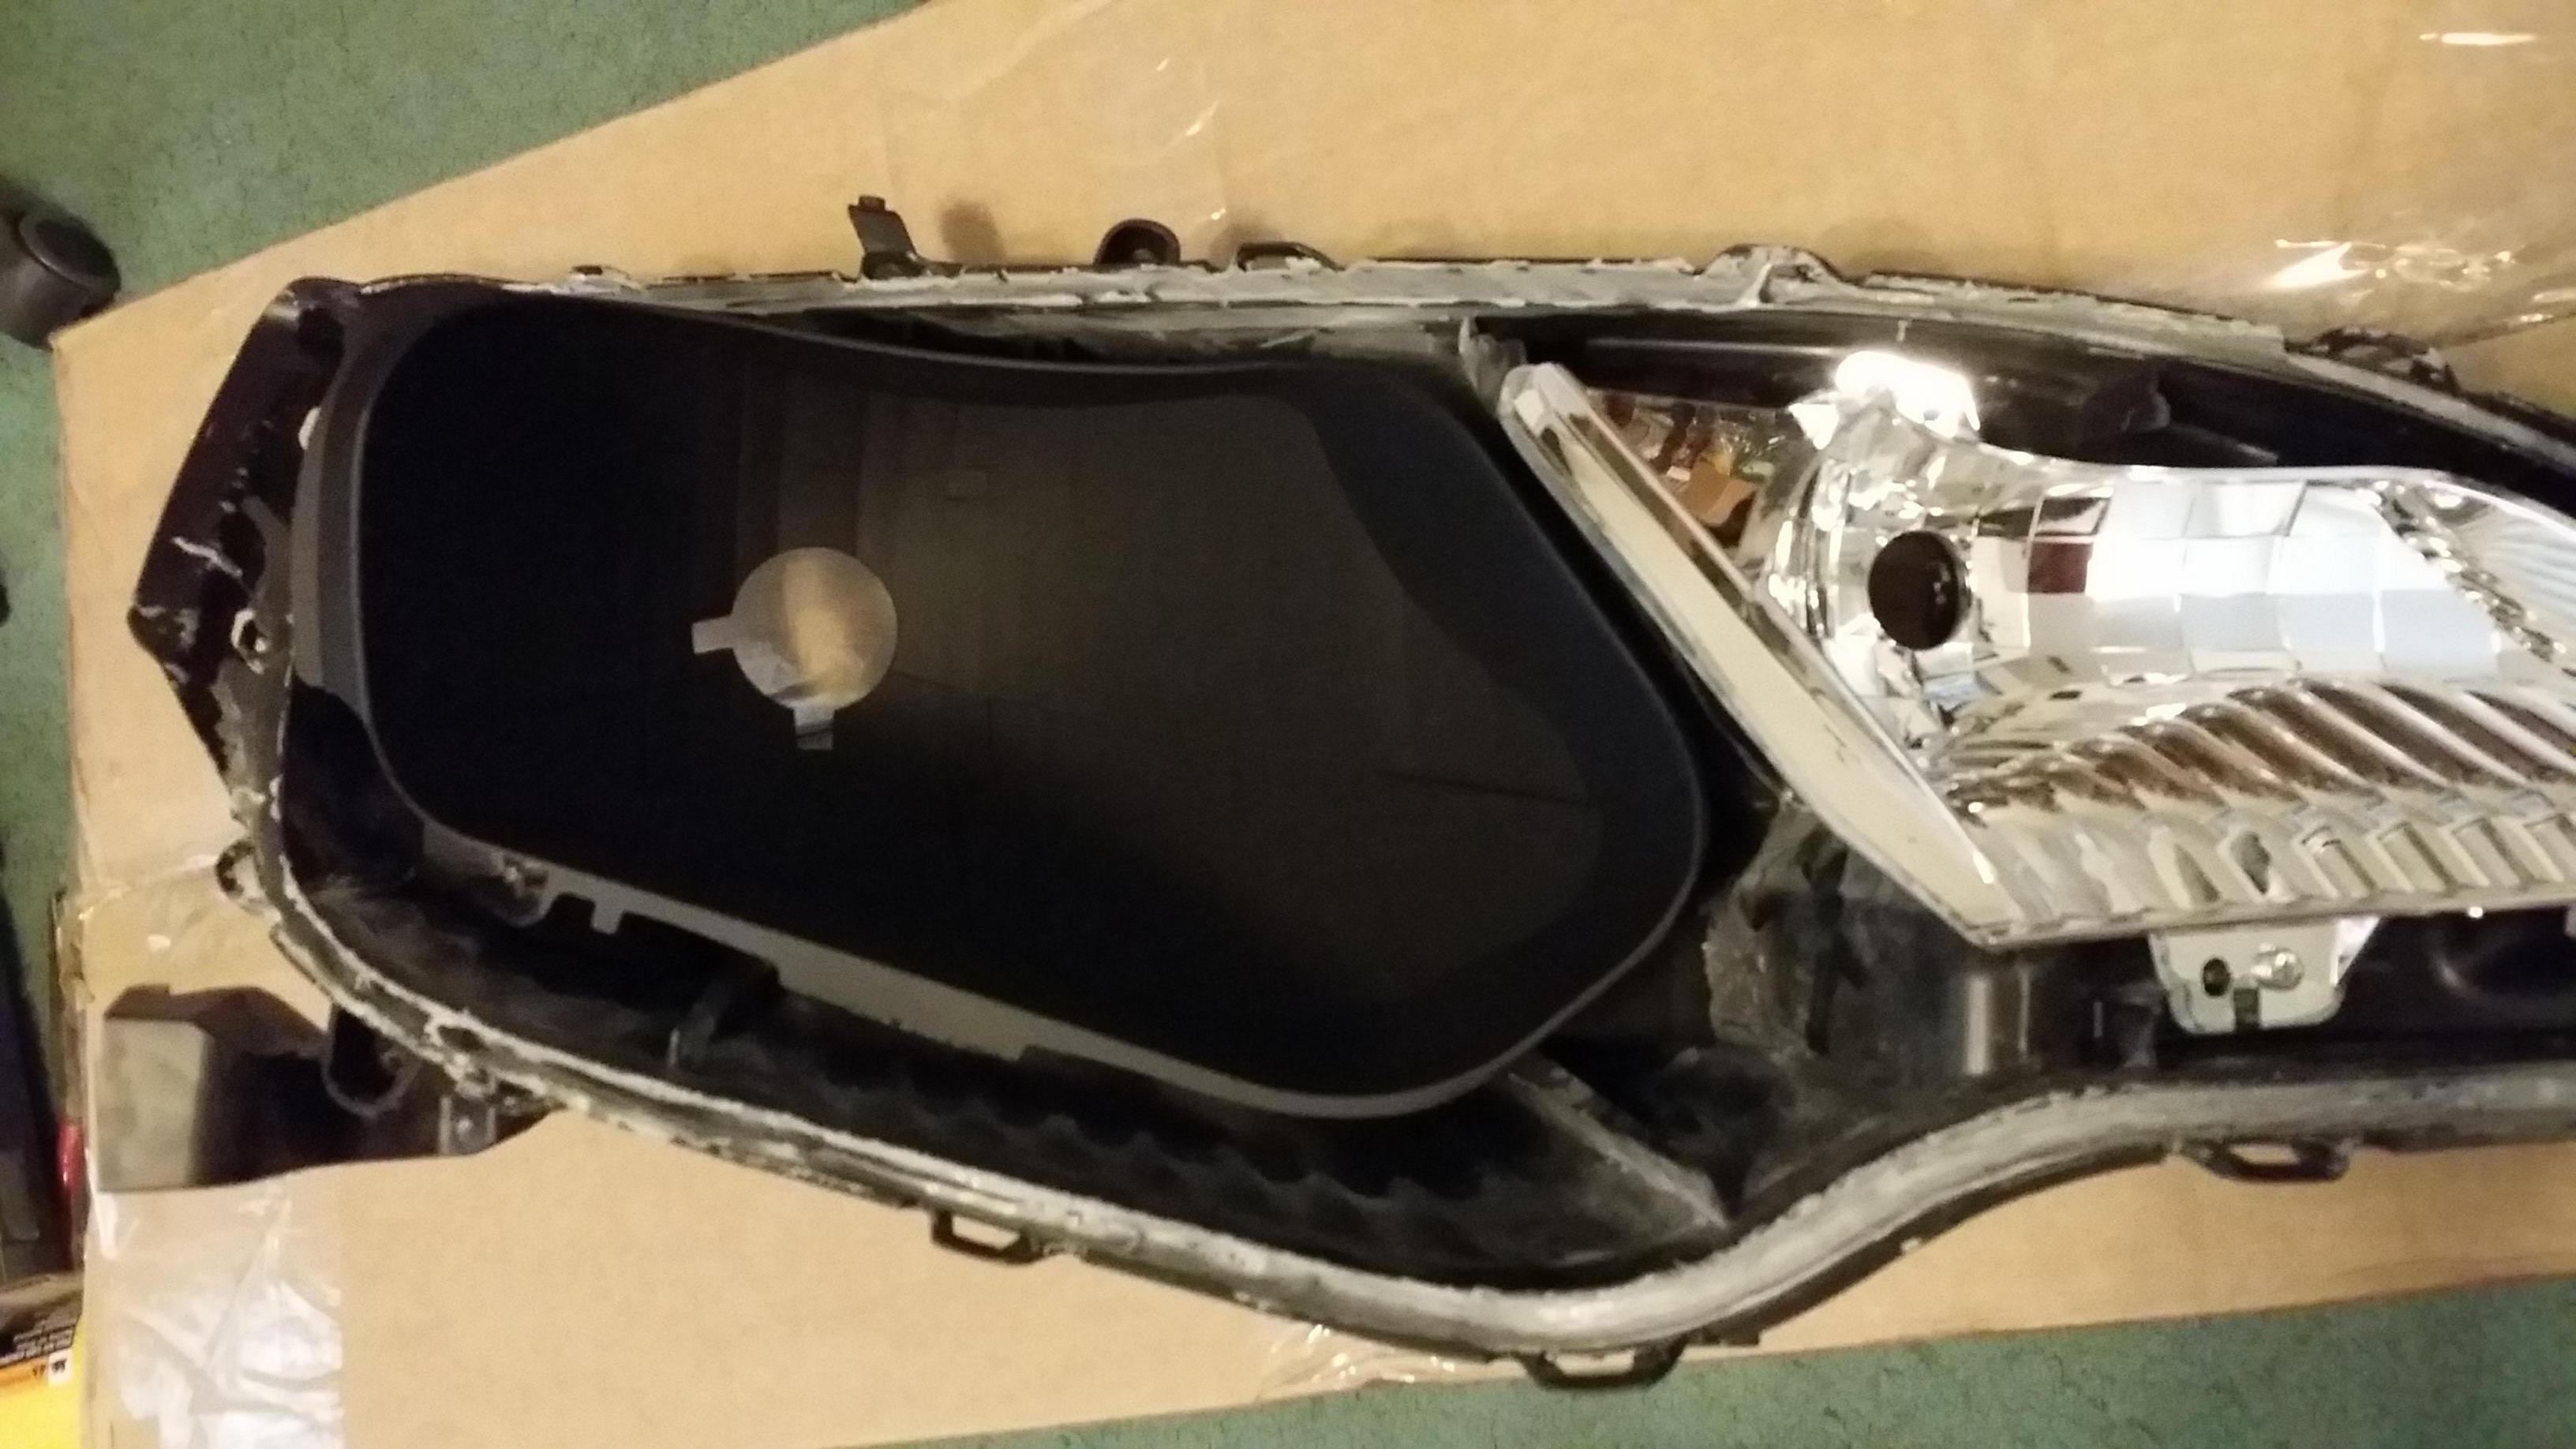
When dry/cured, test fit that projector! Get to know it. Cherish it. Love it.
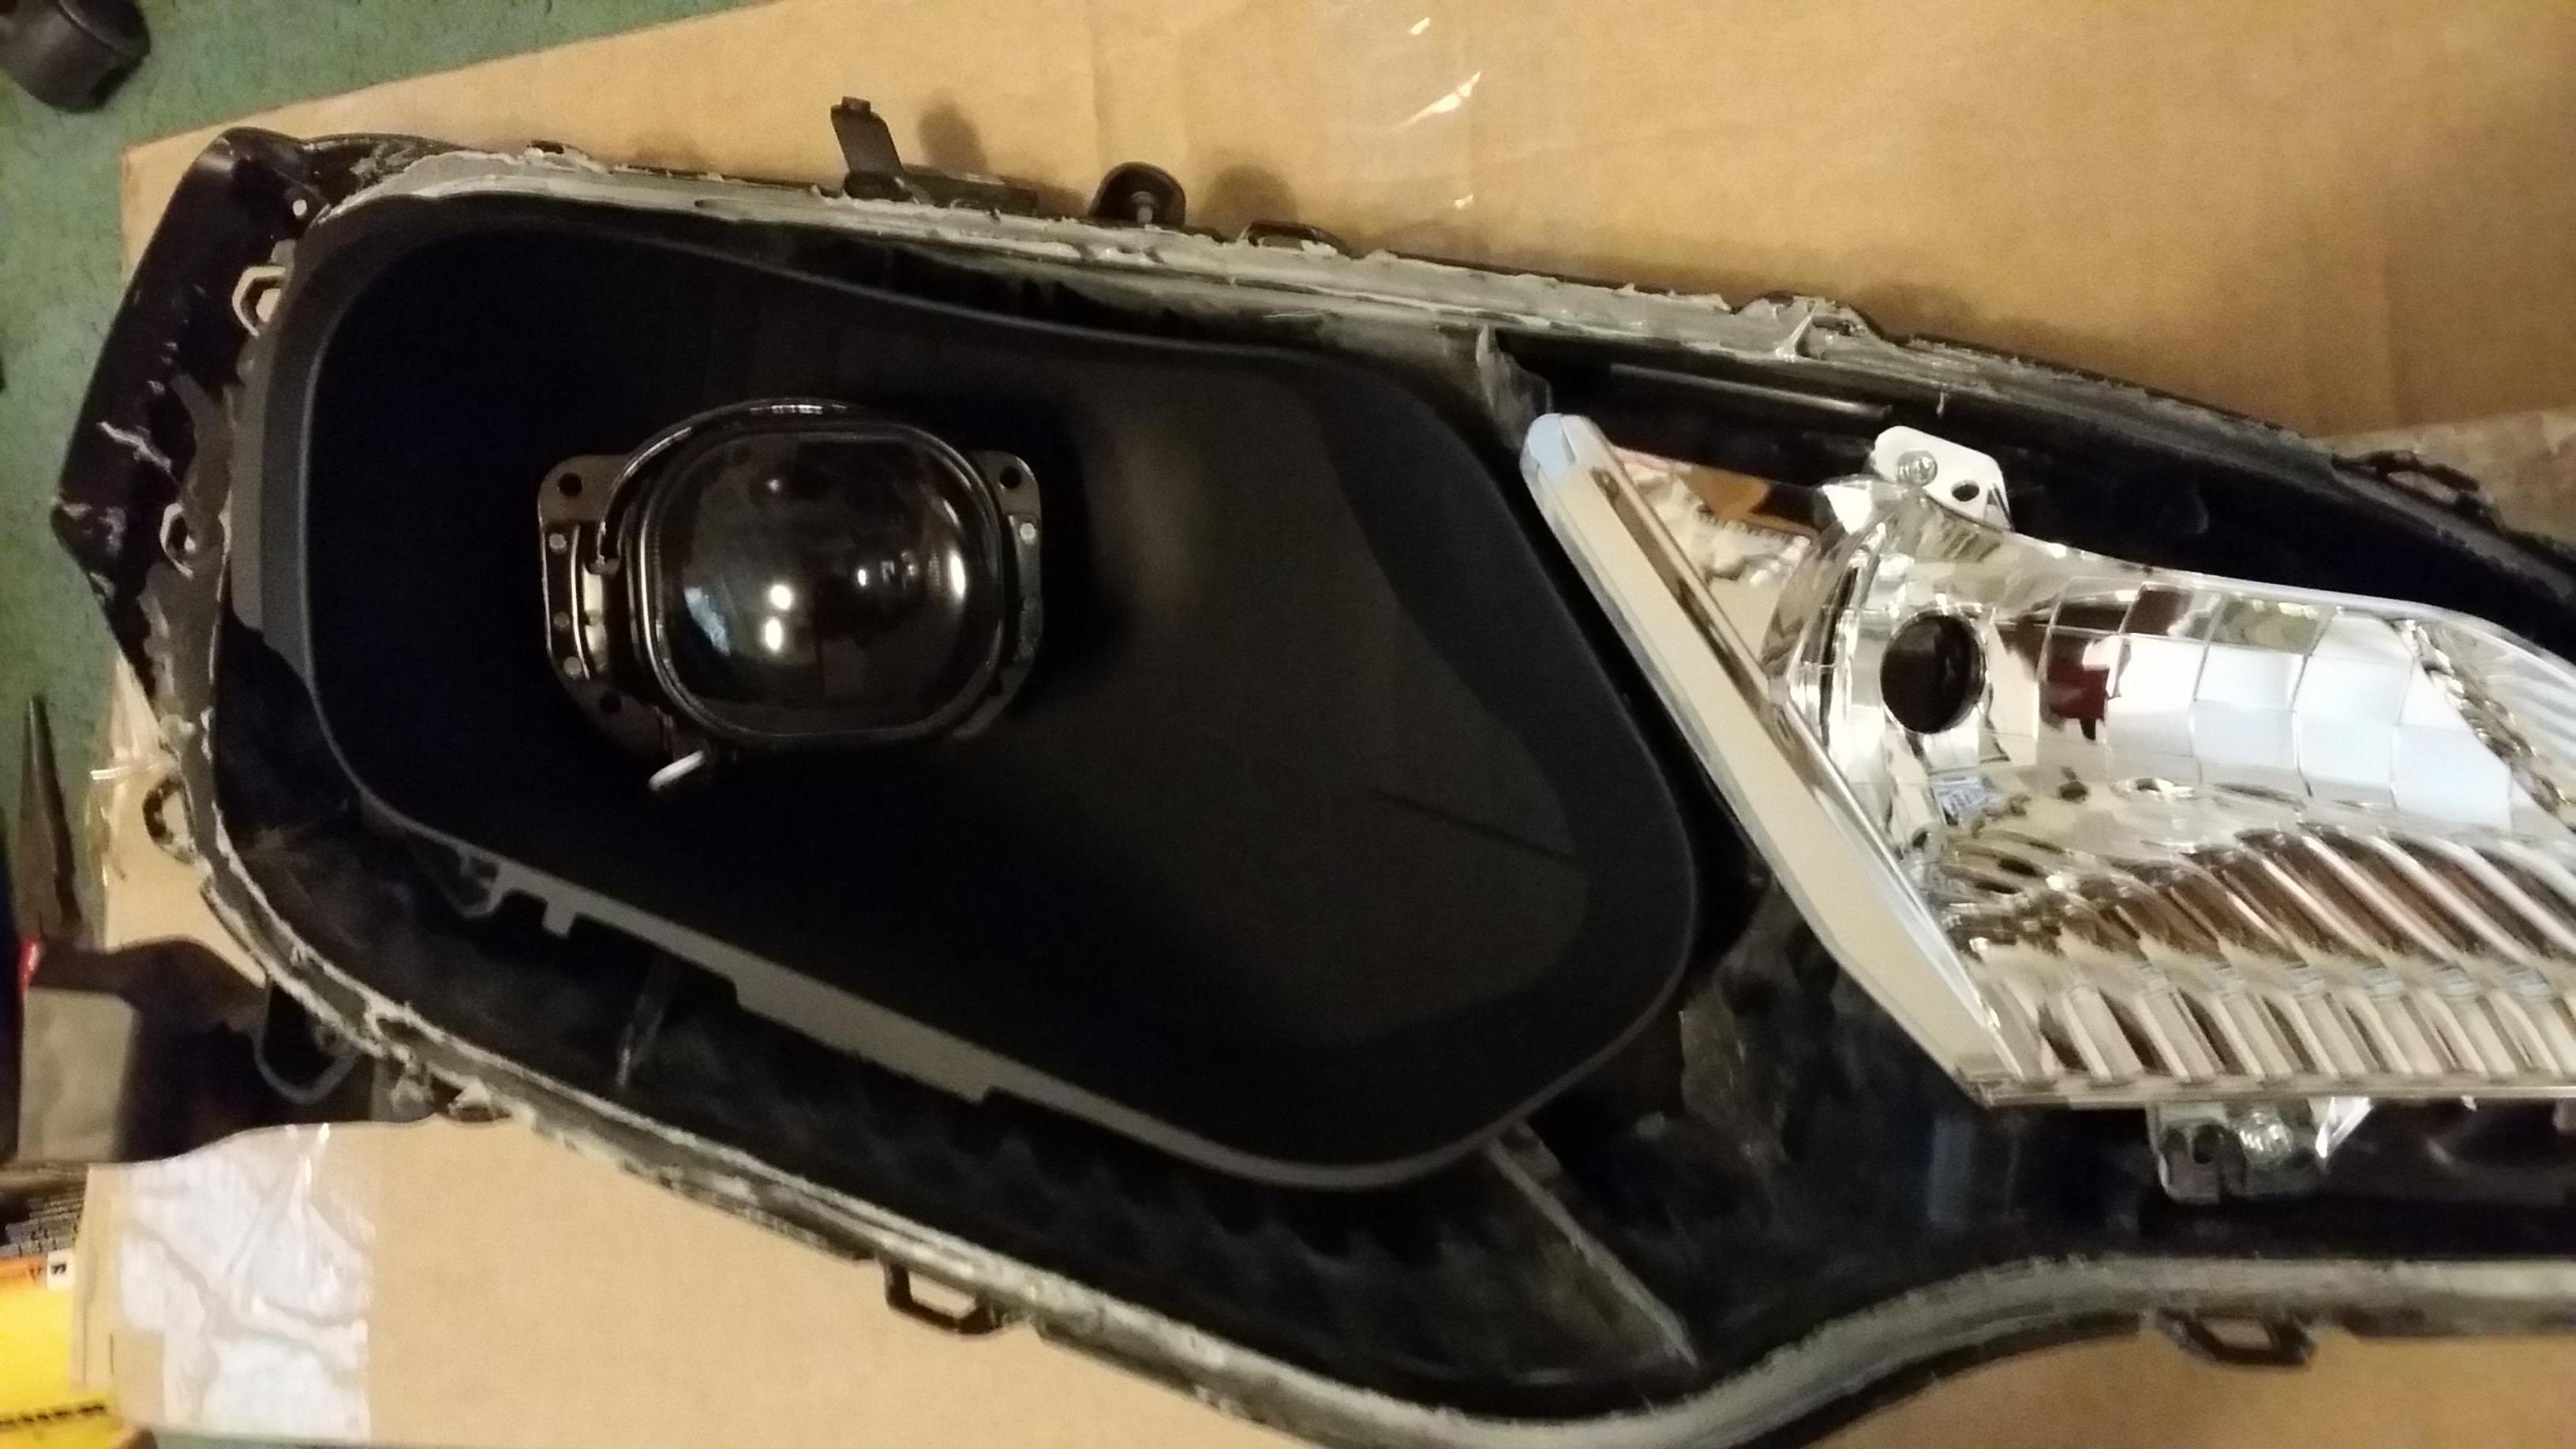
Once youíre done oogling, the sad part of this retrofit is that the flange is too tall to allow the H4 washer and hex nut to screw on. Youíll need to dremel the flange out and then sand it down so itís nice and flush with the H4 washer.
Note: Not shown on the pic but youíll also have to sand down the middle nub in the H4 washer to allow horizontal alignment of the projector, since our GK Halogen headlights donít play nice. This might only apply to the X lens so Iím not sure about the O lens. If you donít, your projectors will output a cut off like \ / instead of -------/------
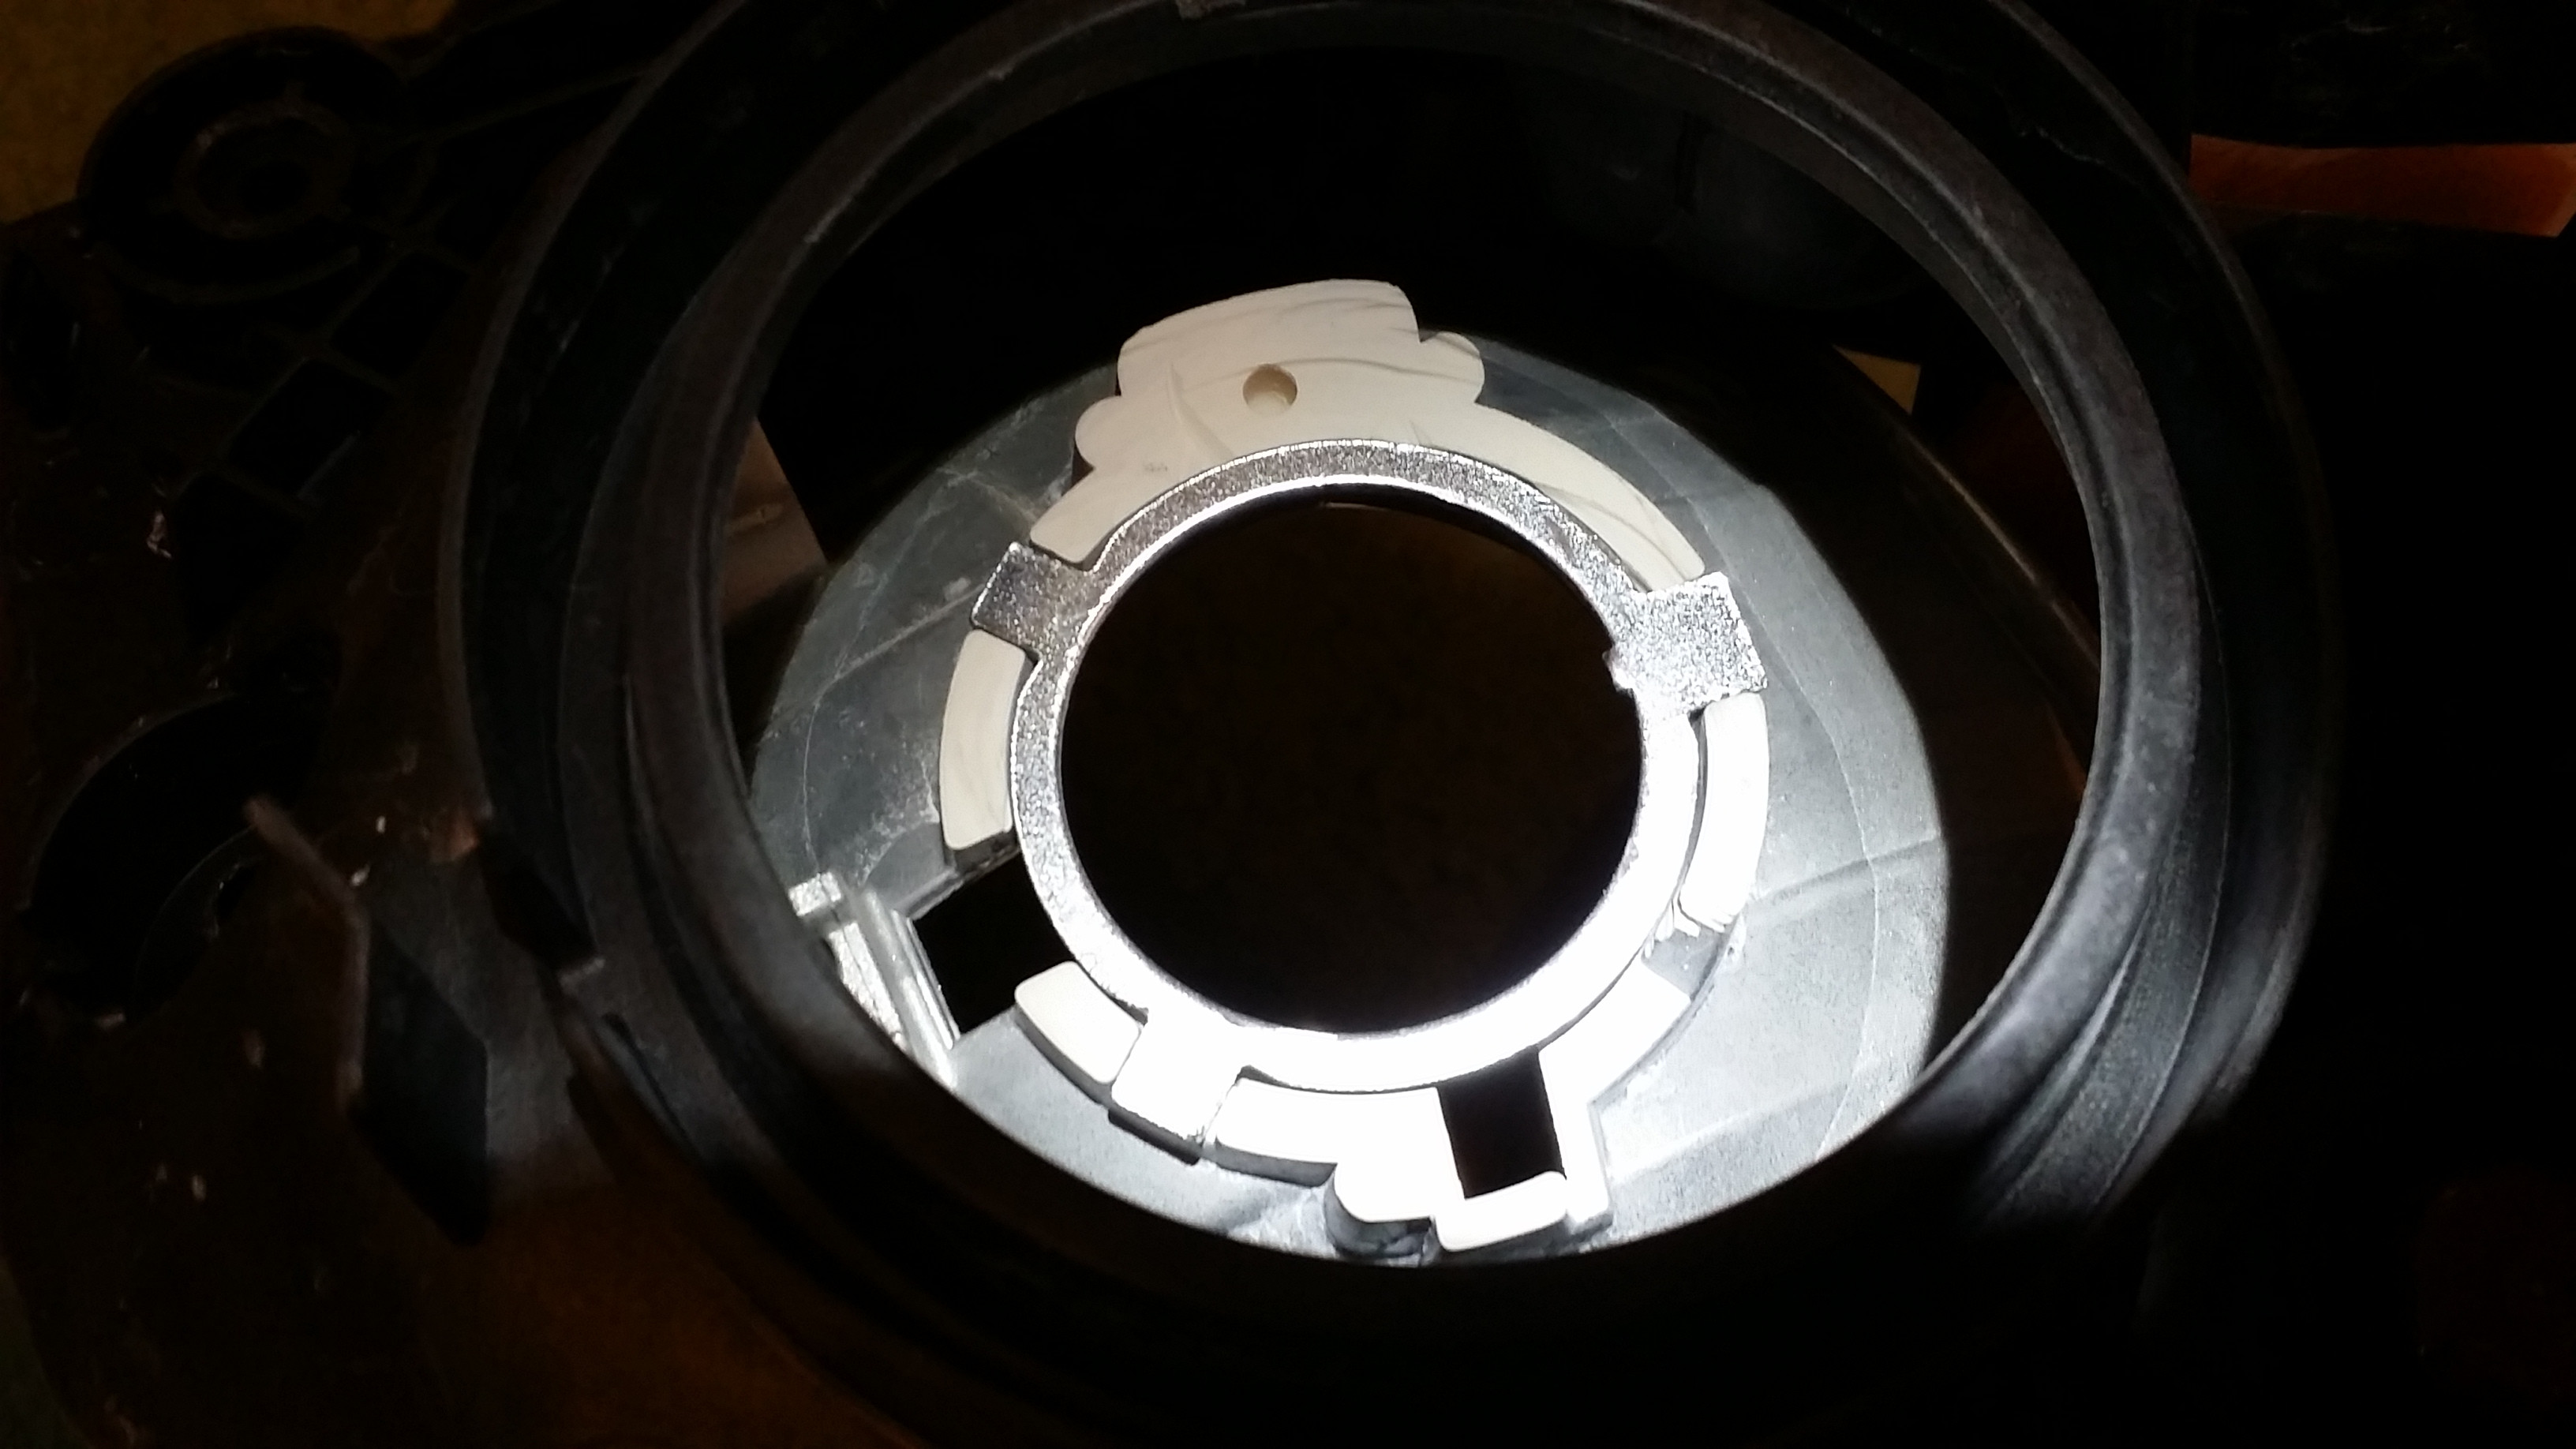
Test fit again and make sure that hex nut screws down. Donít need to over tighten it yet.
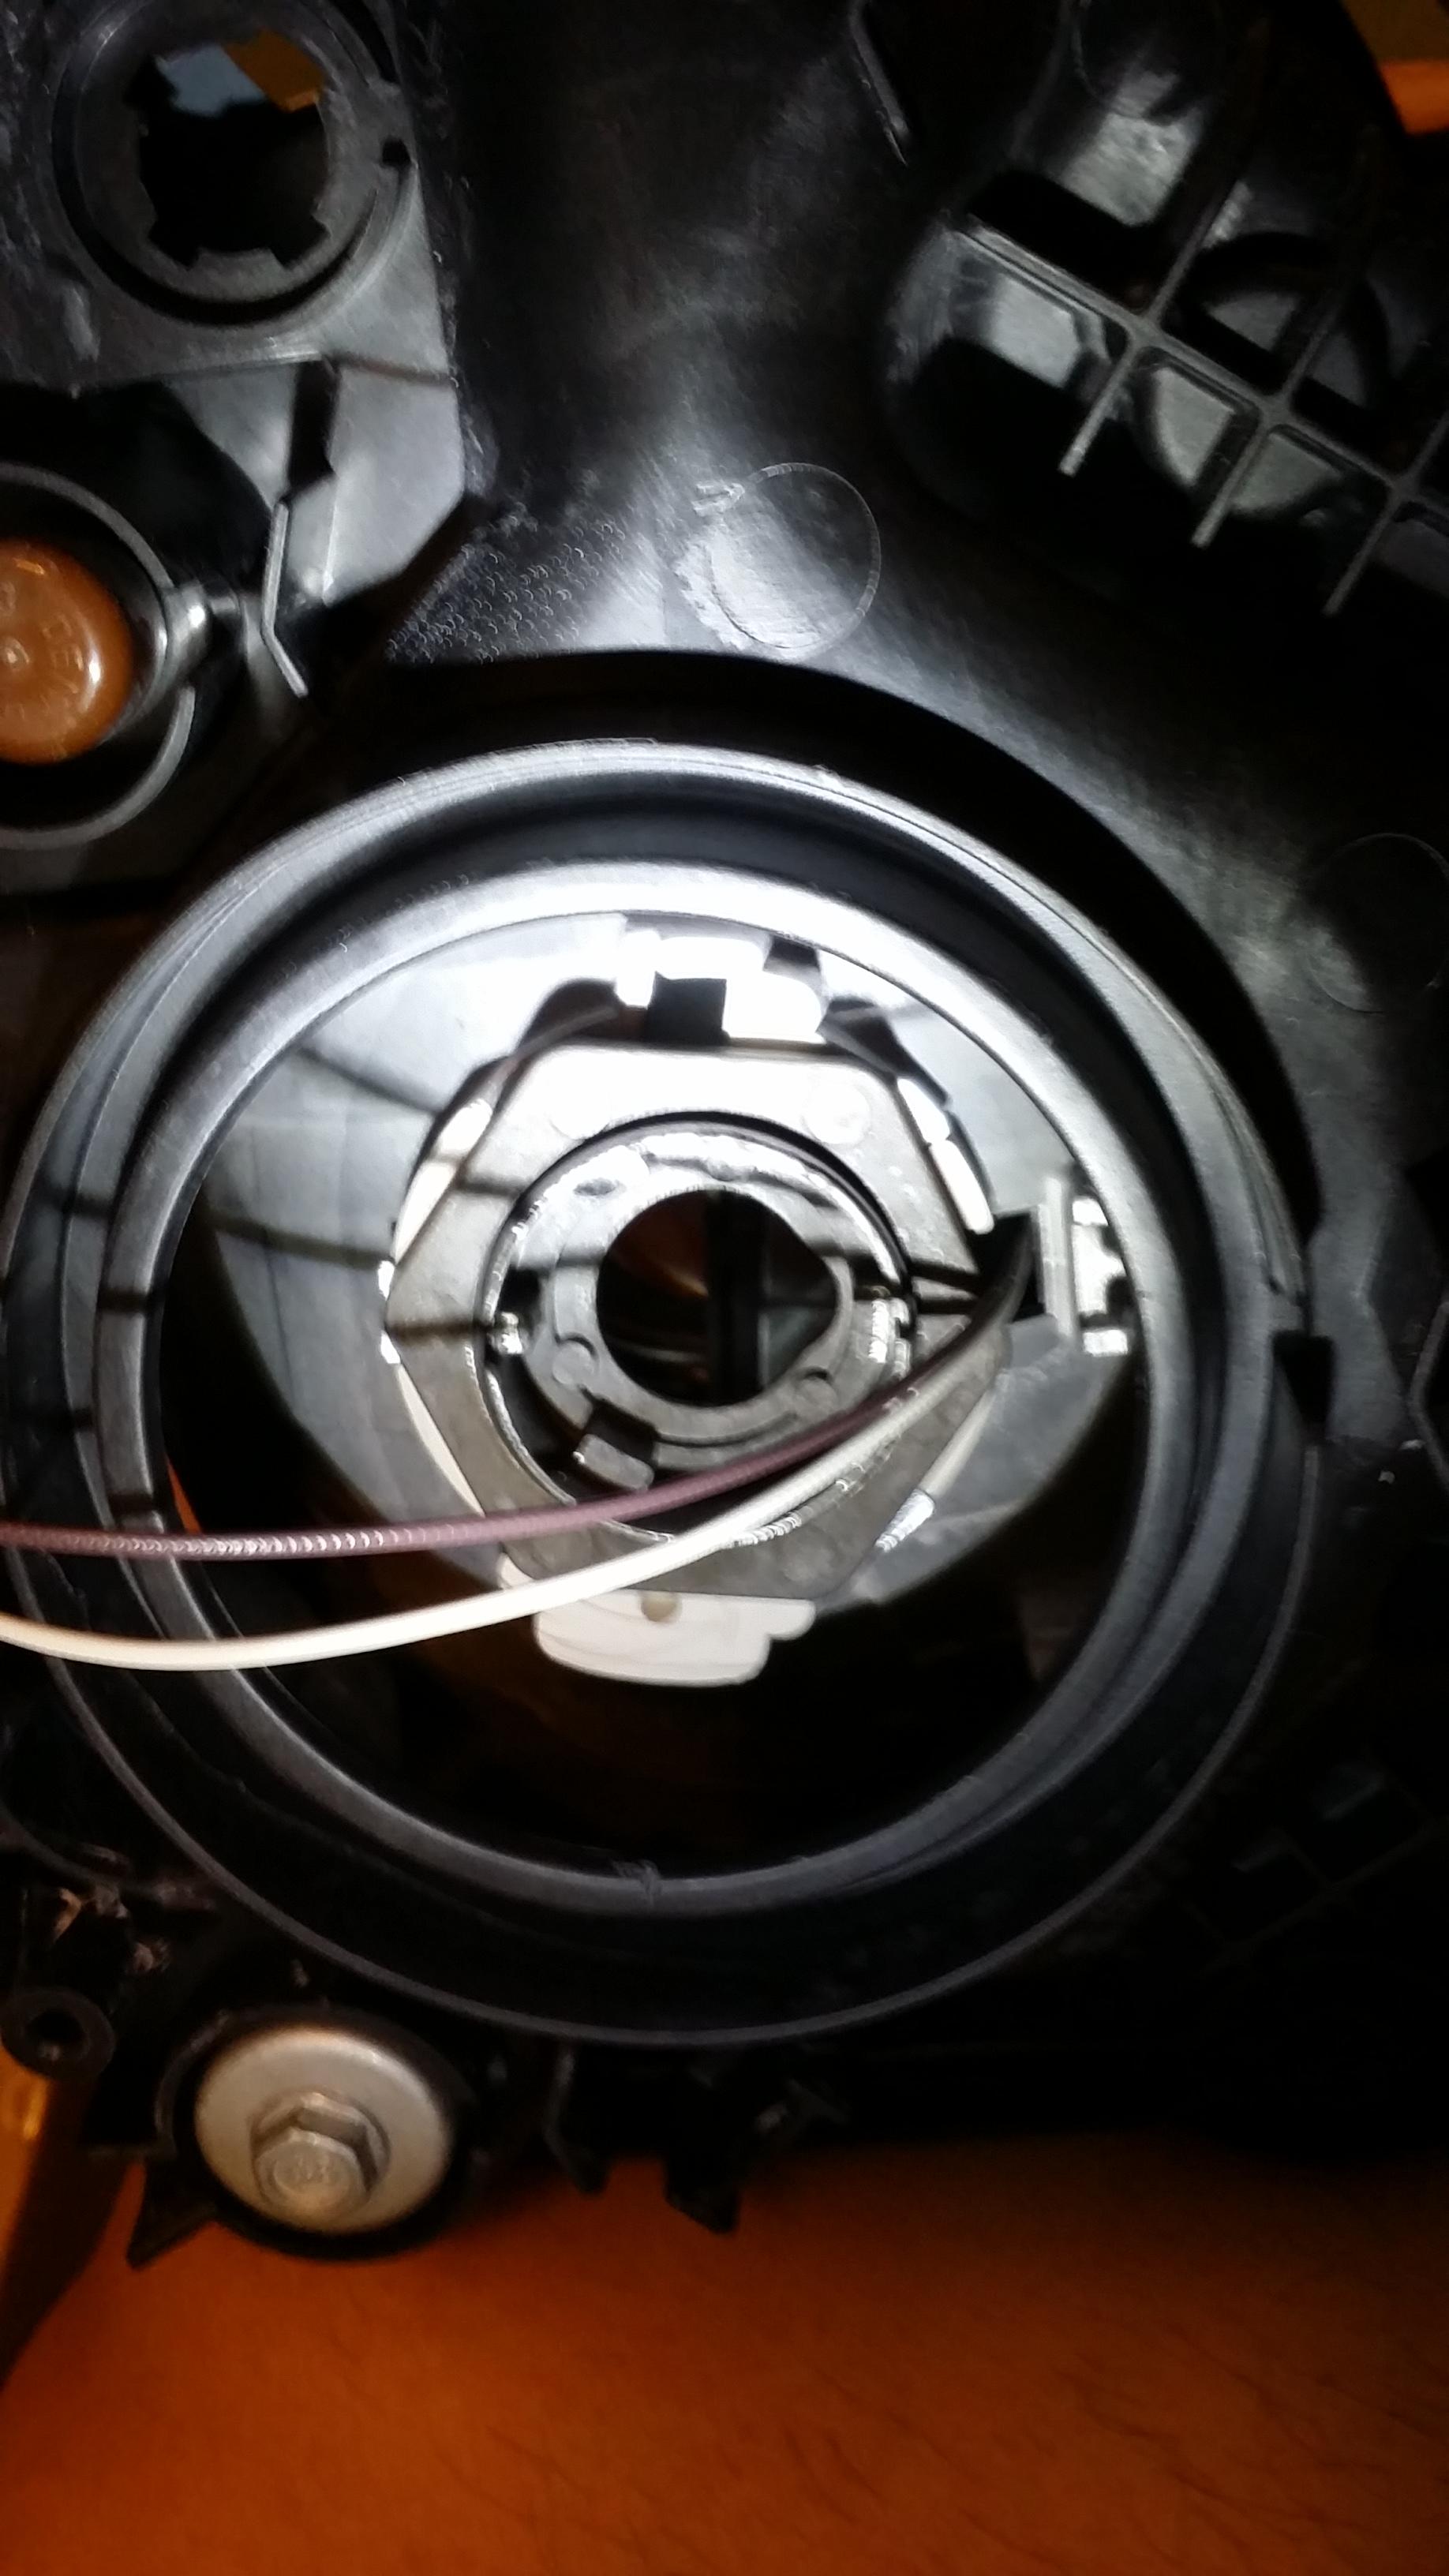
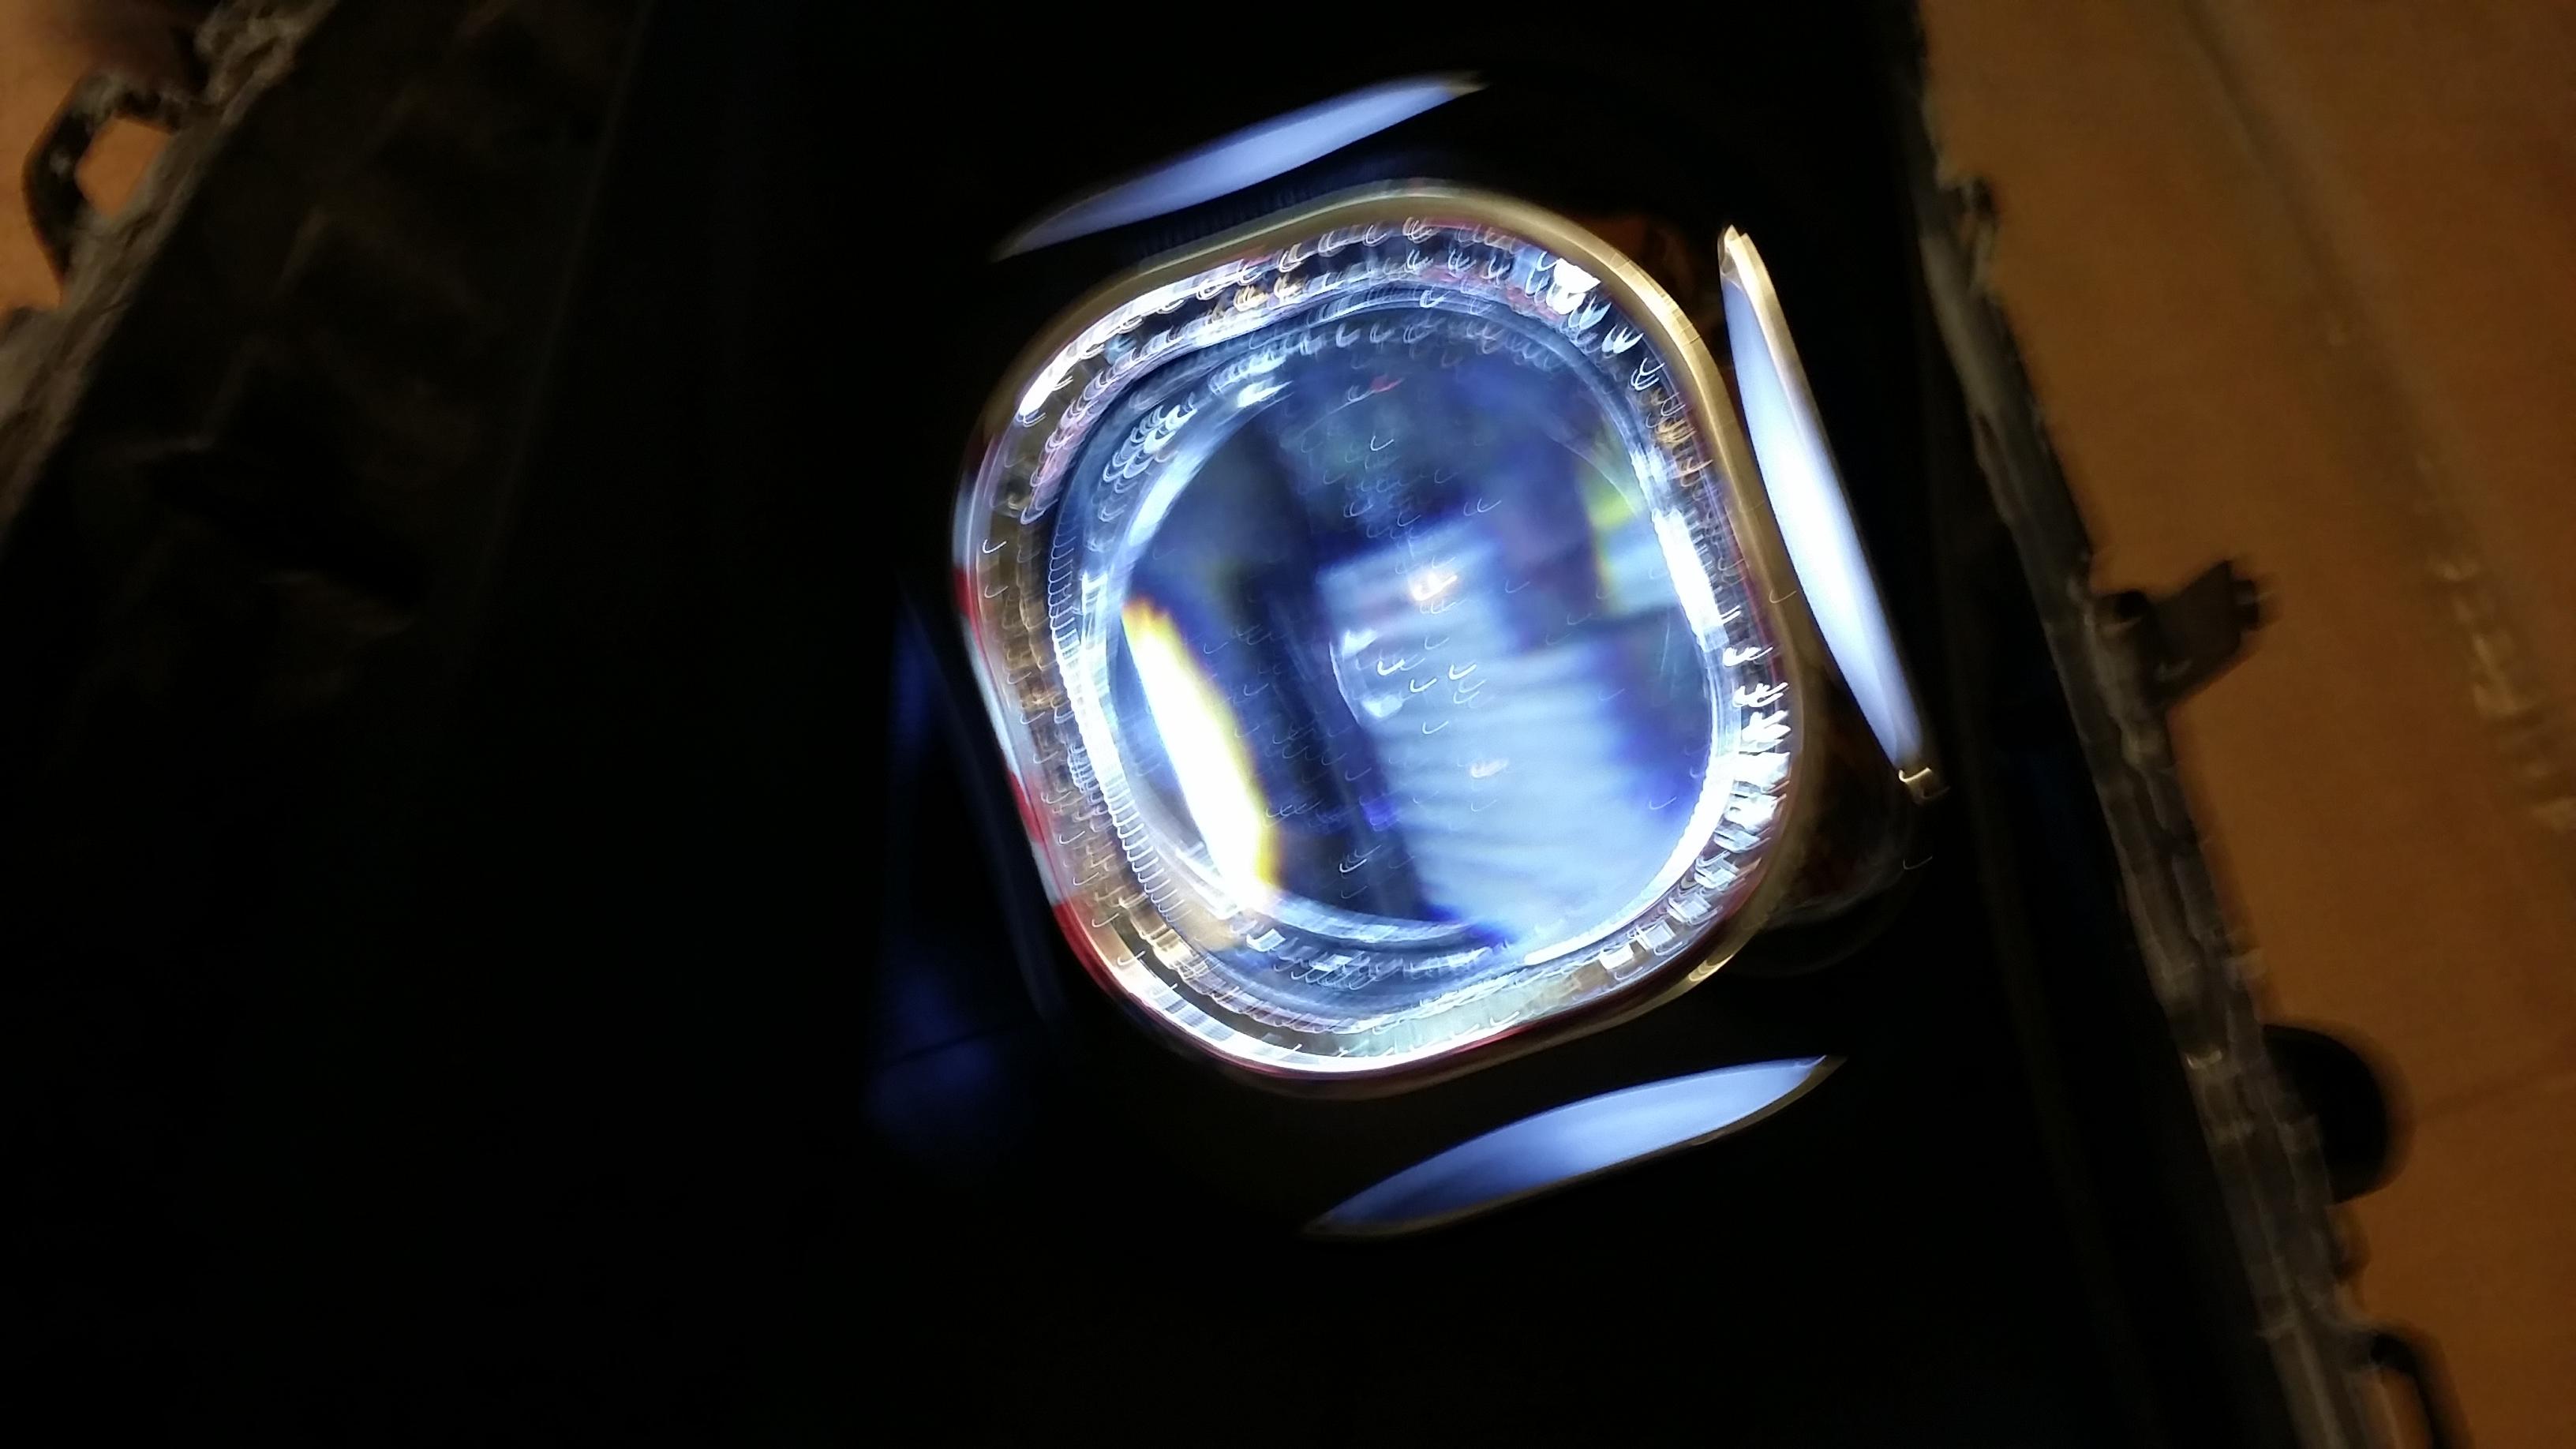
I put a flashlight behind the projector to see what it would look like and give me some ideas on how to and where to do DRL led strips since I had the XB strips too. In the end, I decided not to put it in the housing since if I ever needed to replace them, Iíd rather have easy access than to have to heat gun this whole thing again just to replace LED strips.
Note: I went with the X lens and shrouds because TRS told me they were smaller than the O lens, and plus I wanted the squareish look. Seems they are correct since the shrouds donít need any trimming to fit.
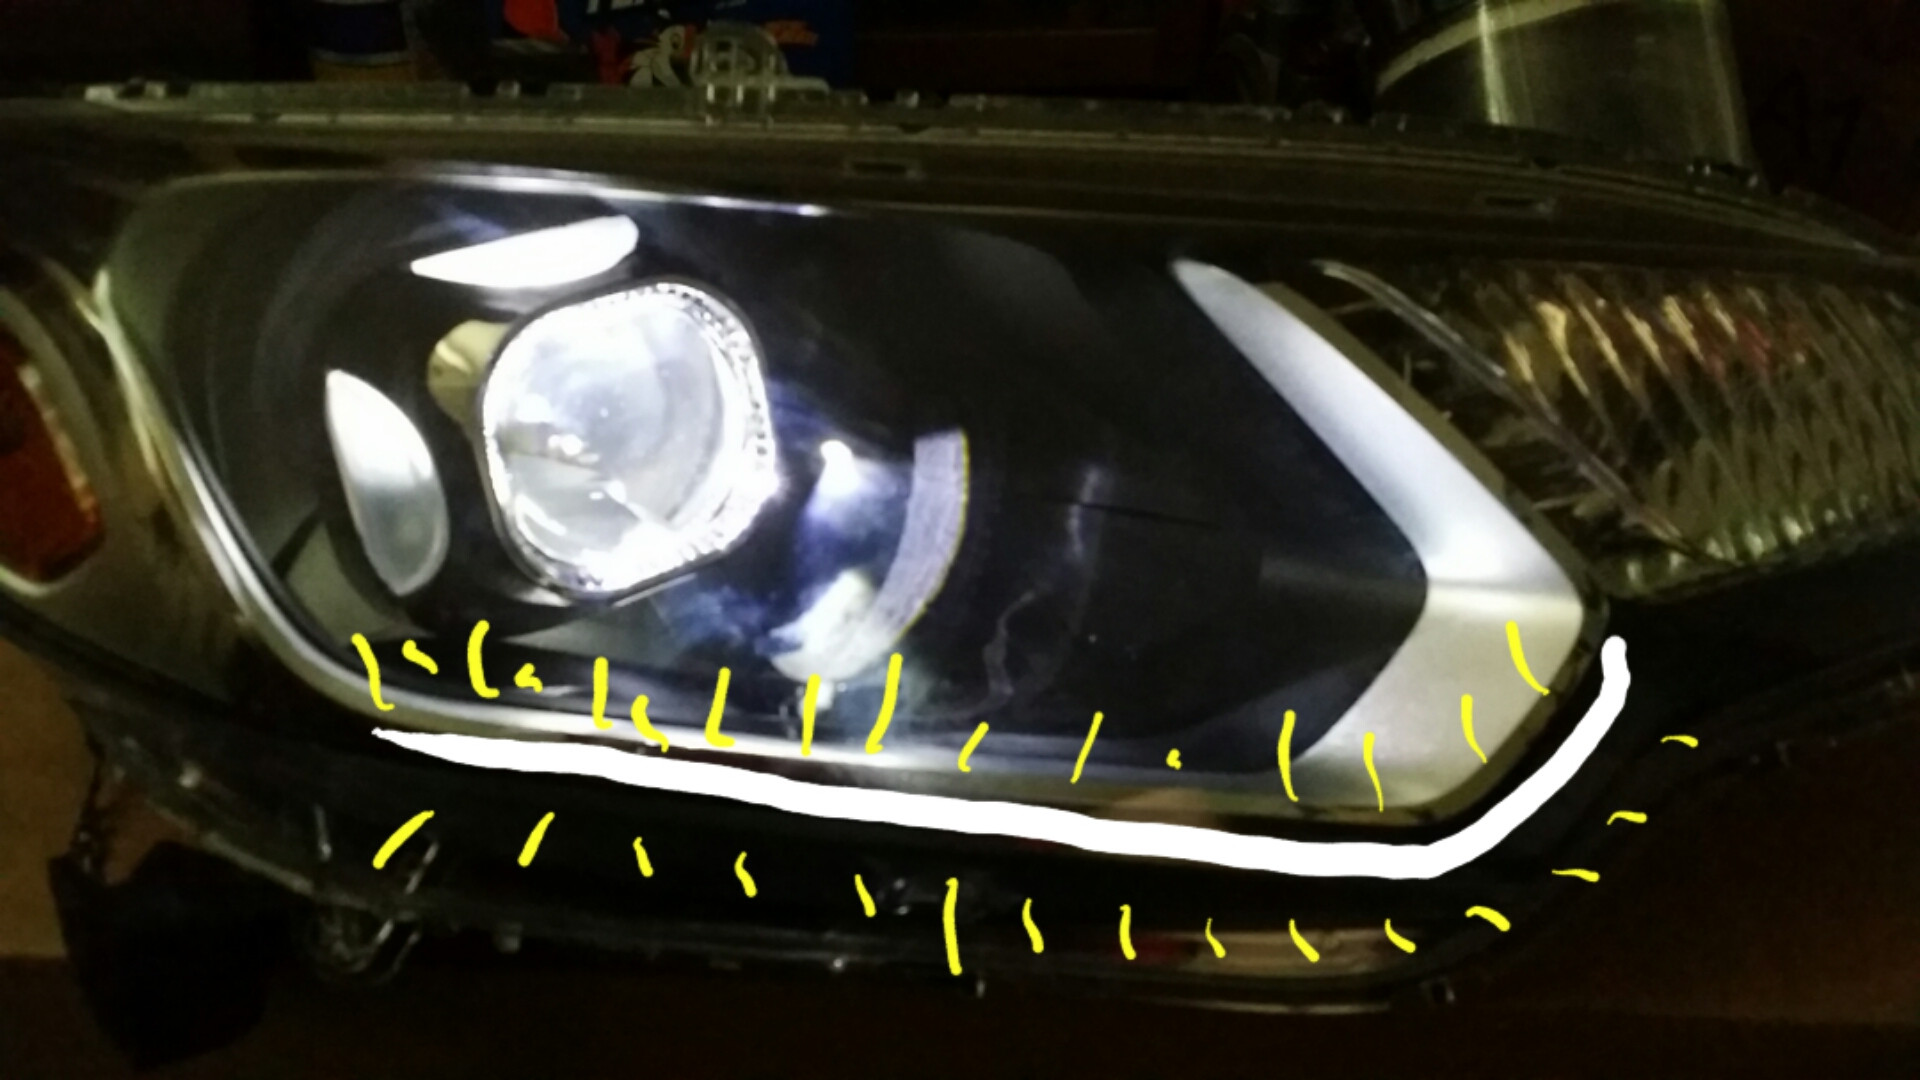
Blurry picture, but putting the flash light behind the projector also let me see all the whack finger prints and smudges on the lens as I was wiping it clean with the microfiber towel.
Once youíve put on the HID bulbs, put the half opened housings in your car, wire it up, turn on the headlights and check the cutoff. Make sure it is horizontal. When you got it horizontal, tighten the hex nut or QuikWeld it in place. Also QuikWeld the shroud on if you want to. It was kinda loose on mine.
Example pic. But once you got the projector secured and know for sure it wonít budge so your horizontal cutoff isnít whack, take out the headlights and put in new butyl glue in the channels. Then pop the lens back on, rebake, reheatgun, whatever you need to do to put the lens back on. And when theyíre back on, remove excess butyl that oozed out of the housing.
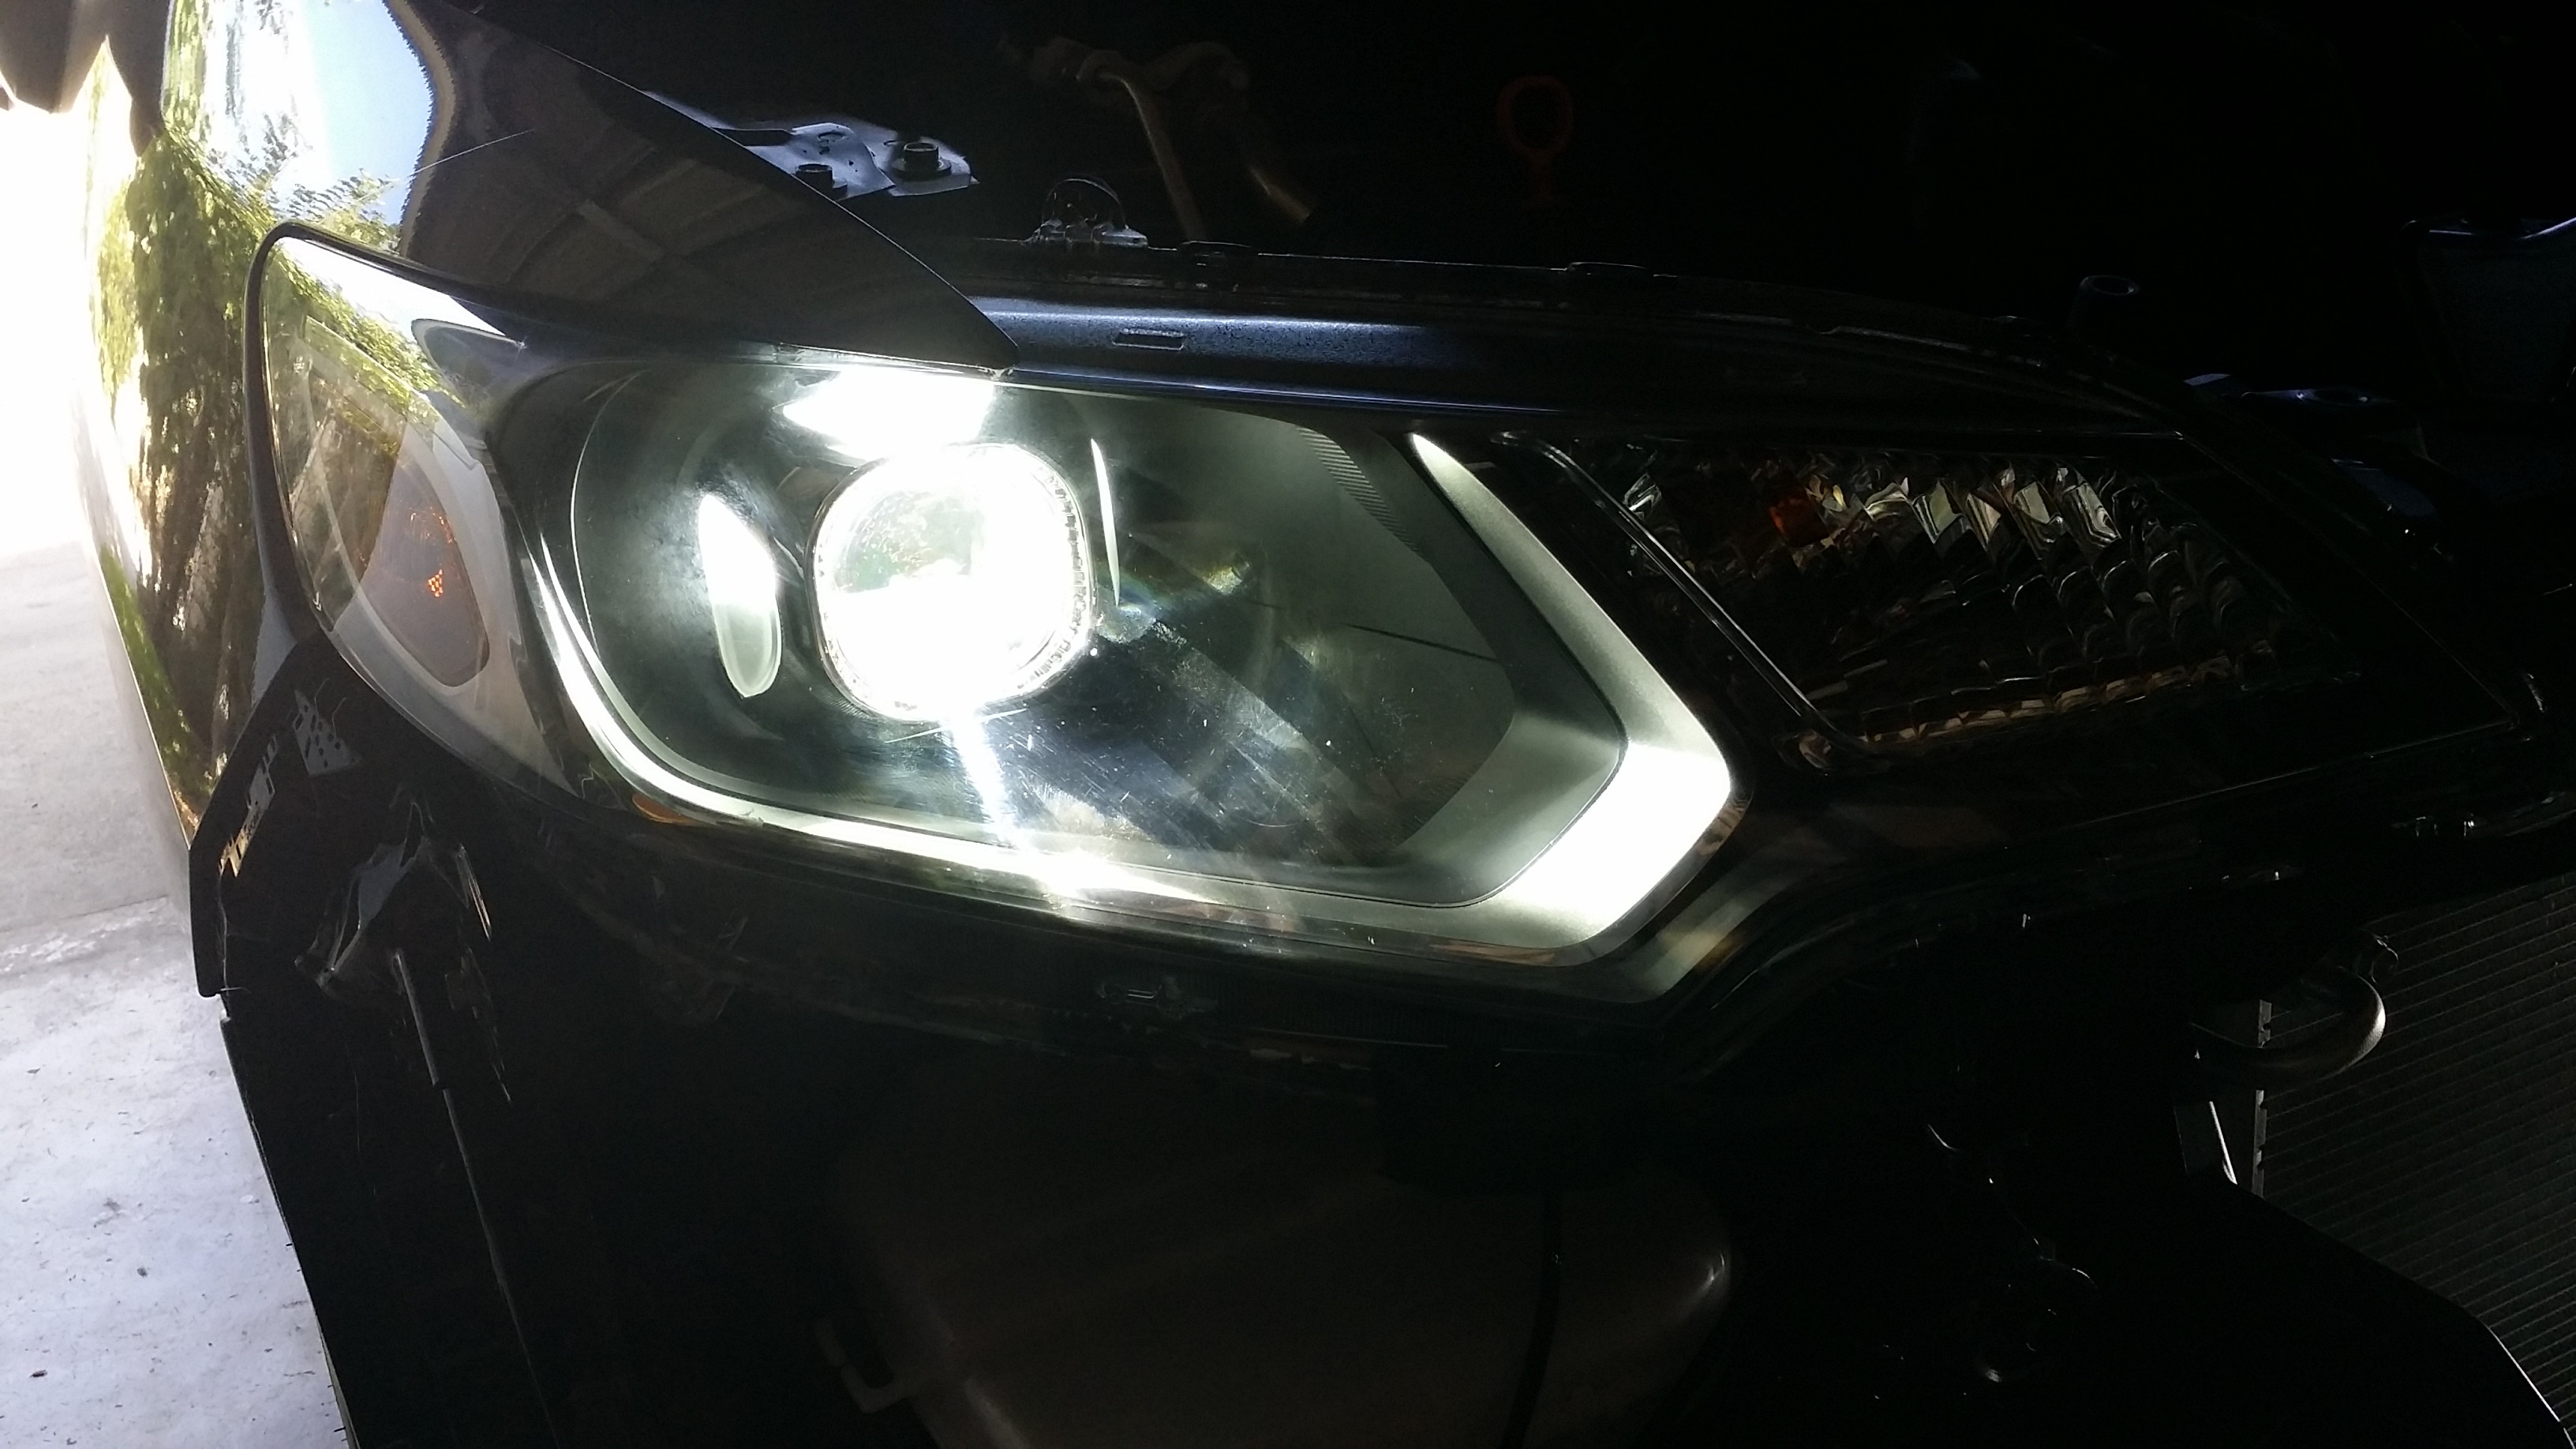
Put the headlights back in your Fit, remove that DRL fuse #25, fire it up, and watch it glow.
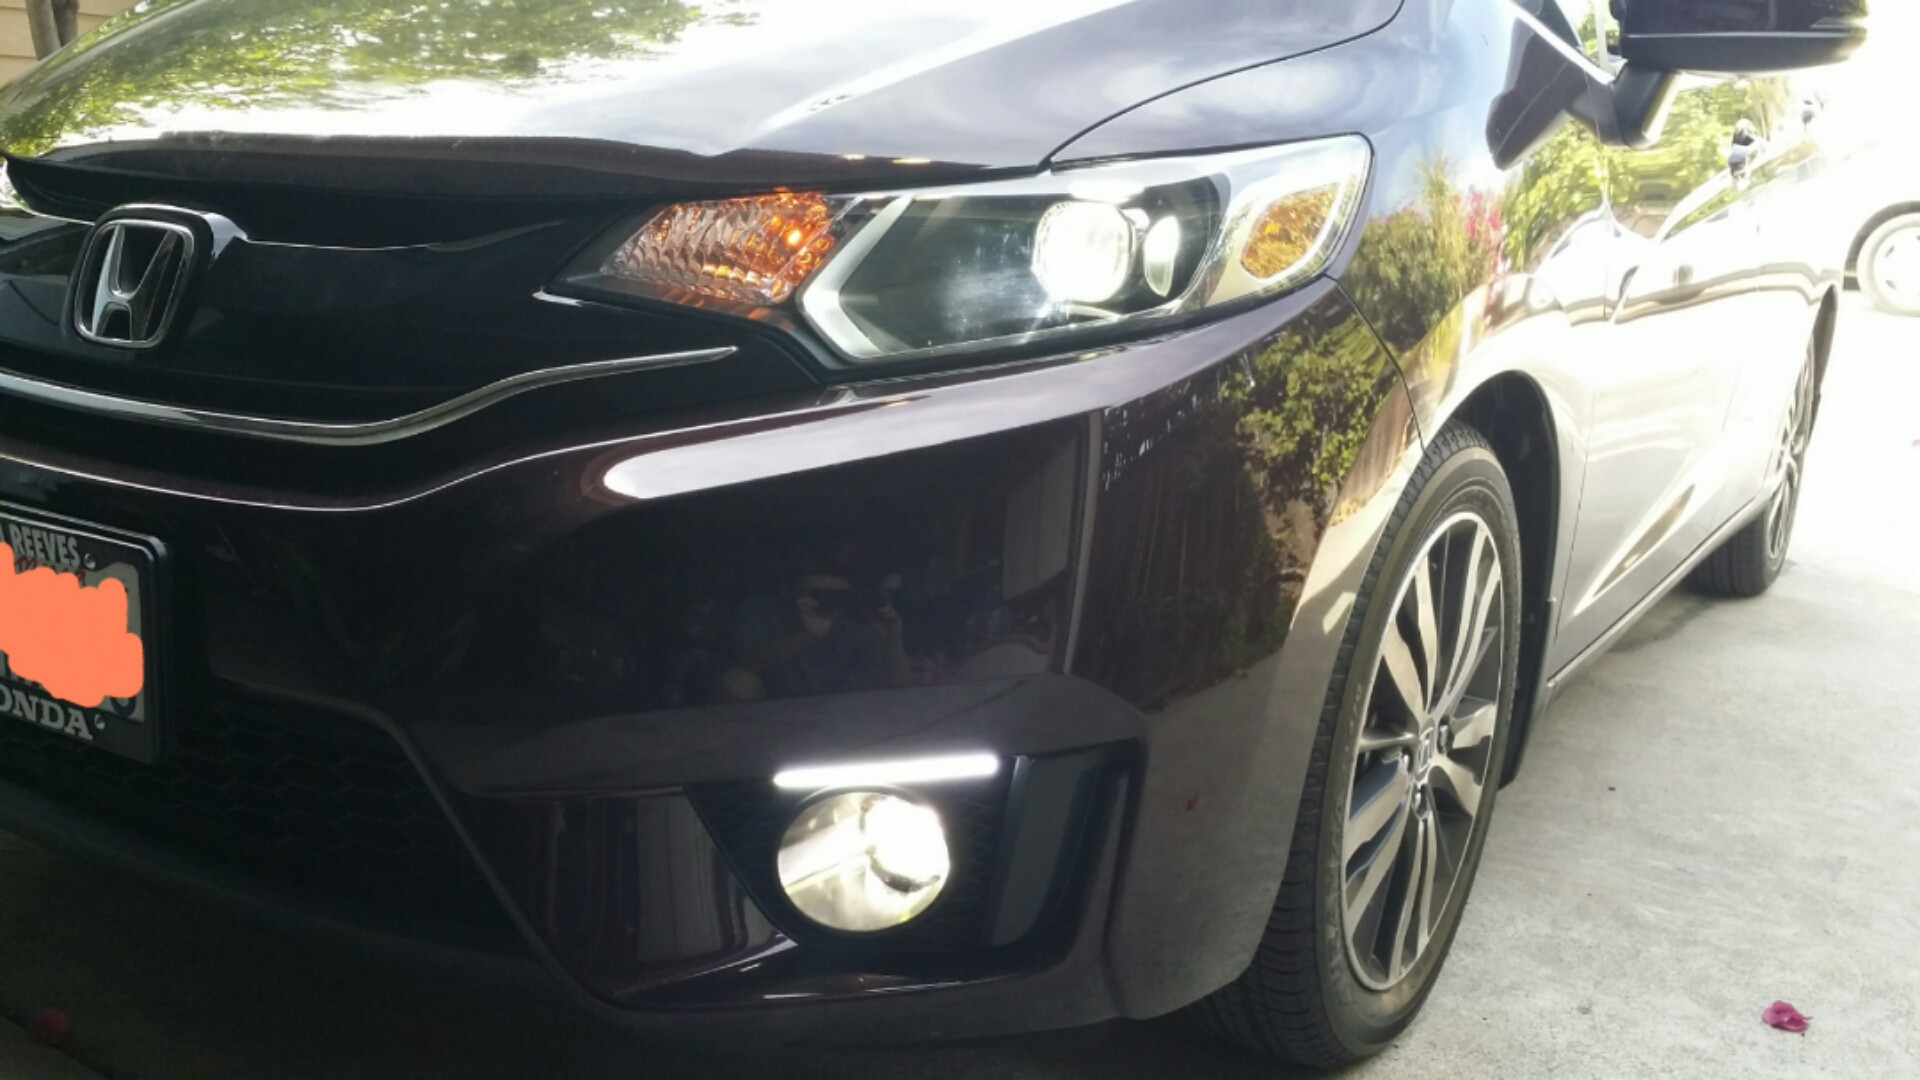
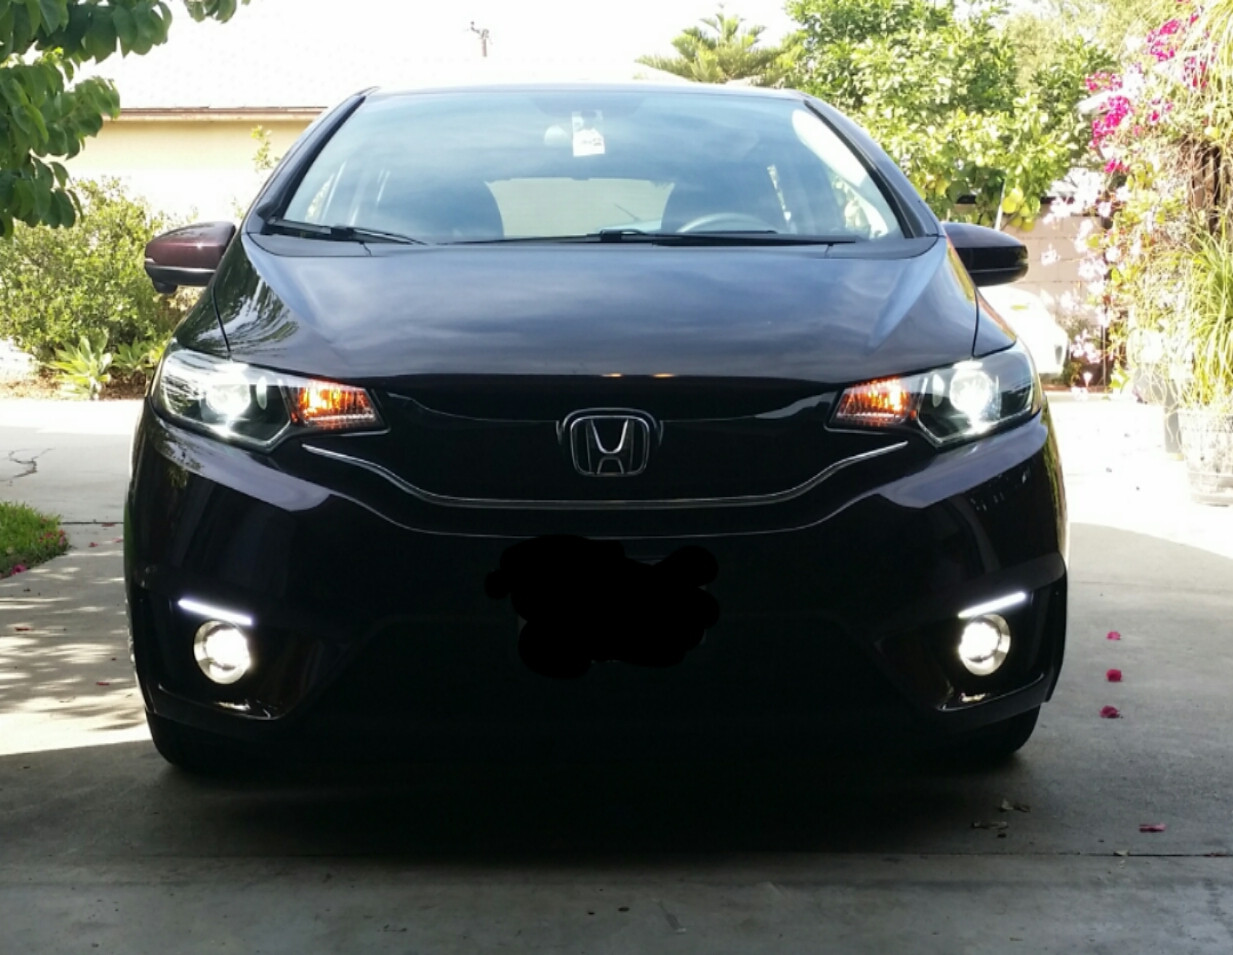
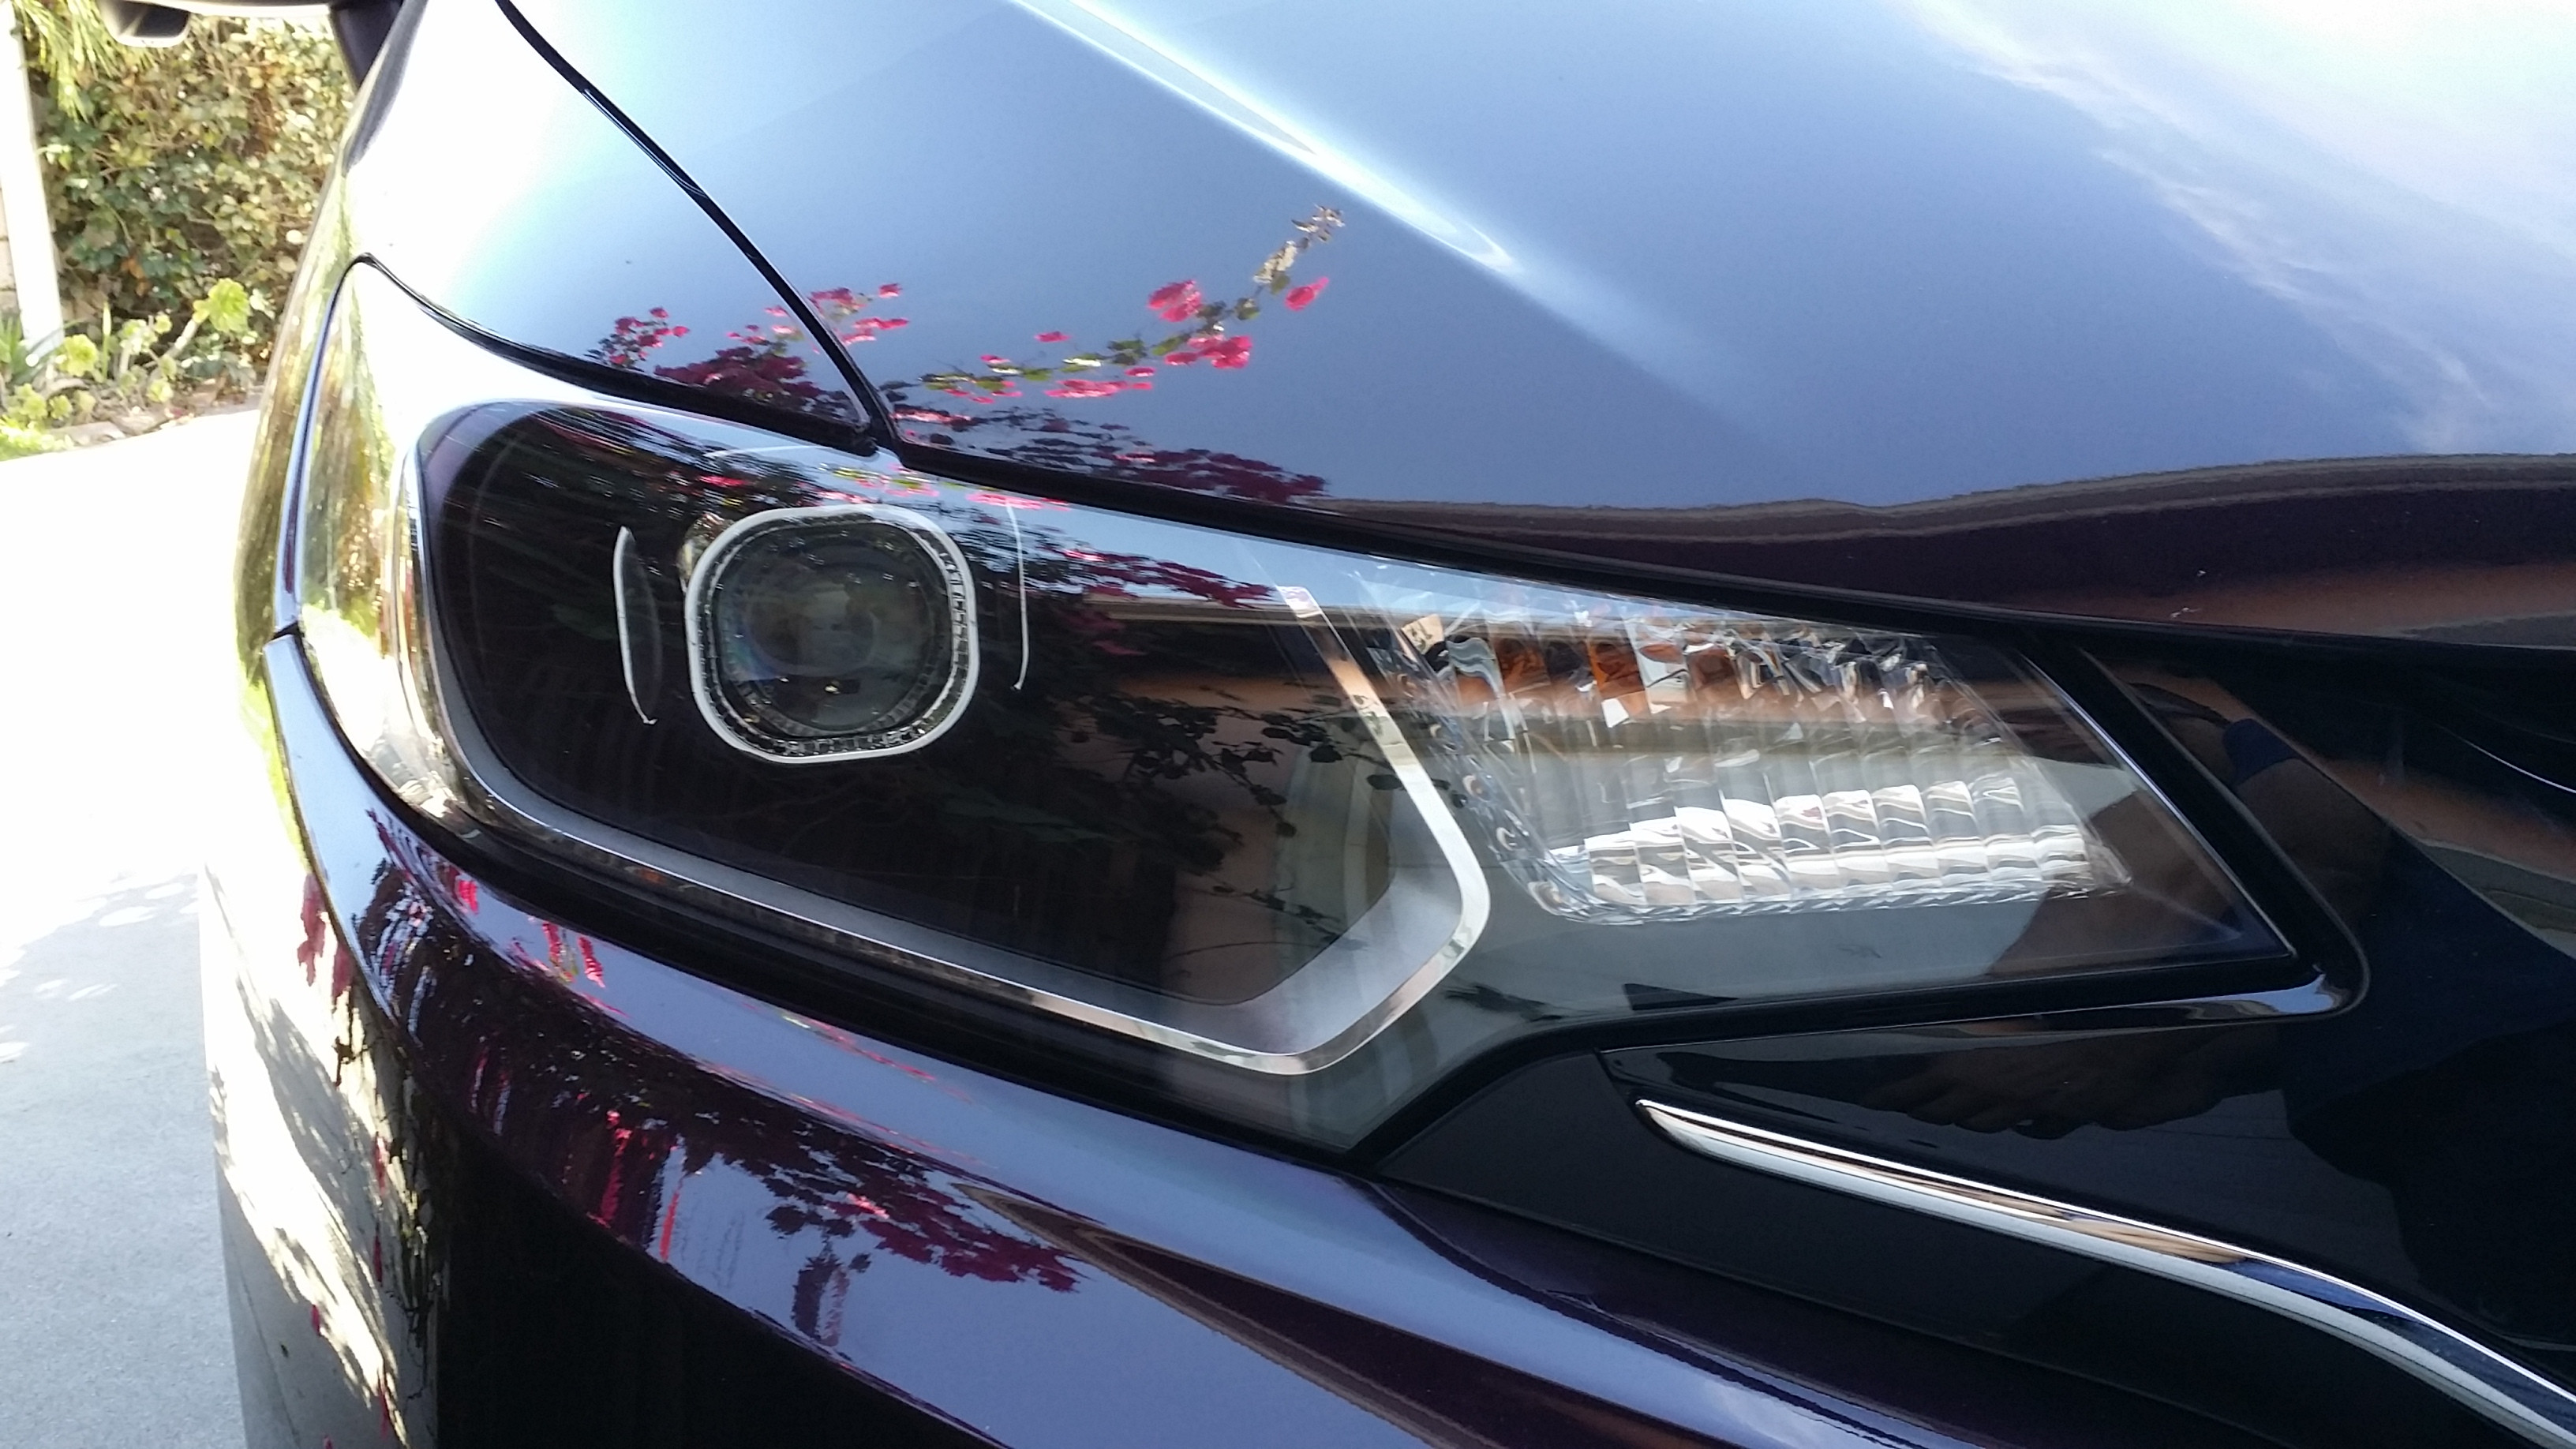
After doing this write up and looking at my pics on IMGUR, I realized I forgot to install the switchback LEDs in the turn signals. *facepalm* Maybe install those another day. Grr. Though, Iím quite happy with the XB led strips.
This here details the X lens and Panasquare shrouds but otherwise is the same steps in doing a retrofit.
First youíre gonna have to remove your headlights from your Fit. Like Superfly said, thereís four nuts to remove but thereís also a clip to be removed so be careful of that.
Top two nuts

Side nut

Behind the bumper thereís a nut and a clip

Once you get the nuts off, pop the plastic where the side nut was off, then tilt the headlight down and slide off. This way you donít scratch your headlights too much. When you get your headlight off, you also have to remove the plastic that runs around the turn signal. The bolt is under the headlight.

There are four screws to remove from each housing.


Once the four screws are removed try to get a flat head screwdriver and bend some of the clips out. They donít have to be all the way out, Iíve found that some bend out really easily, but this helps them ďcome offĒ as your headlights get baked.
Also, remove the H4 retainer clip from the back by removing the screw, then taking the clip off.

Bake your headlights in the oven for 275-300 F for 10-15 minutes depending on how strong your oven is. If youíre like me and couldnít find an oven that is large enough for the headlights, go out and get a heat gun to remove the headlights. Itís a slower process but doable. Pry slowly and use a flathead screwdriver that you wonít miss to pry off that gray butyl glue as youíre removing the lens. When done, try to remove excess butyl from the channels while itís still warm
Now, looking at the reflector bowl. This is the issue that both Superfly and I had.
Youíll see that white plastic retainer which holds the bolt for tilt up/down alignment of the headlights. Donít unscrew the bolt because itíll strip that plastic retainer. Apparently, using a needle nose plier wouldnít remove it either. While looking into the back of the bowl, I noticed there seems to be an extra clip or bolt down the middle of the bowl towards the turn signal that seems to be holding the bowl in.

Note: Iím using the same pic as above, but it seems to be where those two plastic circular landmarks are, right below the headlight tilt adjustment. I ainít drilling through that just to remove a clip. So, just adjust your headlight tilt to point the reflector bowl up.

Then youíll see these two screws that are also holding the reflector bowl. Just loosen them. Donít have to remove them. This should allow you enough room to get a small screw driver to take out the screw thatís holding the halogen bulb anti-glare shielding for you to remove.

And then you can spray paint the reflector bowl to whatever color you want. You can also spray the turn signals, remove the amber reflectors, etc. Itís your headlights! Do whatever you want to them.

When dry/cured, test fit that projector! Get to know it. Cherish it. Love it.

Once youíre done oogling, the sad part of this retrofit is that the flange is too tall to allow the H4 washer and hex nut to screw on. Youíll need to dremel the flange out and then sand it down so itís nice and flush with the H4 washer.
Note: Not shown on the pic but youíll also have to sand down the middle nub in the H4 washer to allow horizontal alignment of the projector, since our GK Halogen headlights donít play nice. This might only apply to the X lens so Iím not sure about the O lens. If you donít, your projectors will output a cut off like \ / instead of -------/------

Test fit again and make sure that hex nut screws down. Donít need to over tighten it yet.

I put a flashlight behind the projector to see what it would look like and give me some ideas on how to and where to do DRL led strips since I had the XB strips too. In the end, I decided not to put it in the housing since if I ever needed to replace them, Iíd rather have easy access than to have to heat gun this whole thing again just to replace LED strips.
Note: I went with the X lens and shrouds because TRS told me they were smaller than the O lens, and plus I wanted the squareish look. Seems they are correct since the shrouds donít need any trimming to fit.

Blurry picture, but putting the flash light behind the projector also let me see all the whack finger prints and smudges on the lens as I was wiping it clean with the microfiber towel.

Once youíve put on the HID bulbs, put the half opened housings in your car, wire it up, turn on the headlights and check the cutoff. Make sure it is horizontal. When you got it horizontal, tighten the hex nut or QuikWeld it in place. Also QuikWeld the shroud on if you want to. It was kinda loose on mine.
Example pic. But once you got the projector secured and know for sure it wonít budge so your horizontal cutoff isnít whack, take out the headlights and put in new butyl glue in the channels. Then pop the lens back on, rebake, reheatgun, whatever you need to do to put the lens back on. And when theyíre back on, remove excess butyl that oozed out of the housing.

Put the headlights back in your Fit, remove that DRL fuse #25, fire it up, and watch it glow.


After doing this write up and looking at my pics on IMGUR, I realized I forgot to install the switchback LEDs in the turn signals. *facepalm* Maybe install those another day. Grr. Though, Iím quite happy with the XB led strips.
#2
On a side note for those interested.
The XB strip is 6 inch. It doesn't fit vertically on the foglight shroud because the + / - wires connecting to the actual strip bulges out an extra 0.5 inch so... it's too long. However, it fits nicely horizontally right above the foglight.
It's really bright and blinded me when I first turned it on while looking at it. BUT, I had thought to blacken them out when off using Lamin-X gunsmoke and that's not a good idea because it dims the output tremendously and you can see the individual LEDs at that point. However, if you don't .... they appear yellow when off (which is an inherent issue with the morimoto XB led strips). So it's kinda a dilemma there.
#8
Thanks guys. here's some photos for Tofu.
Headlight off.
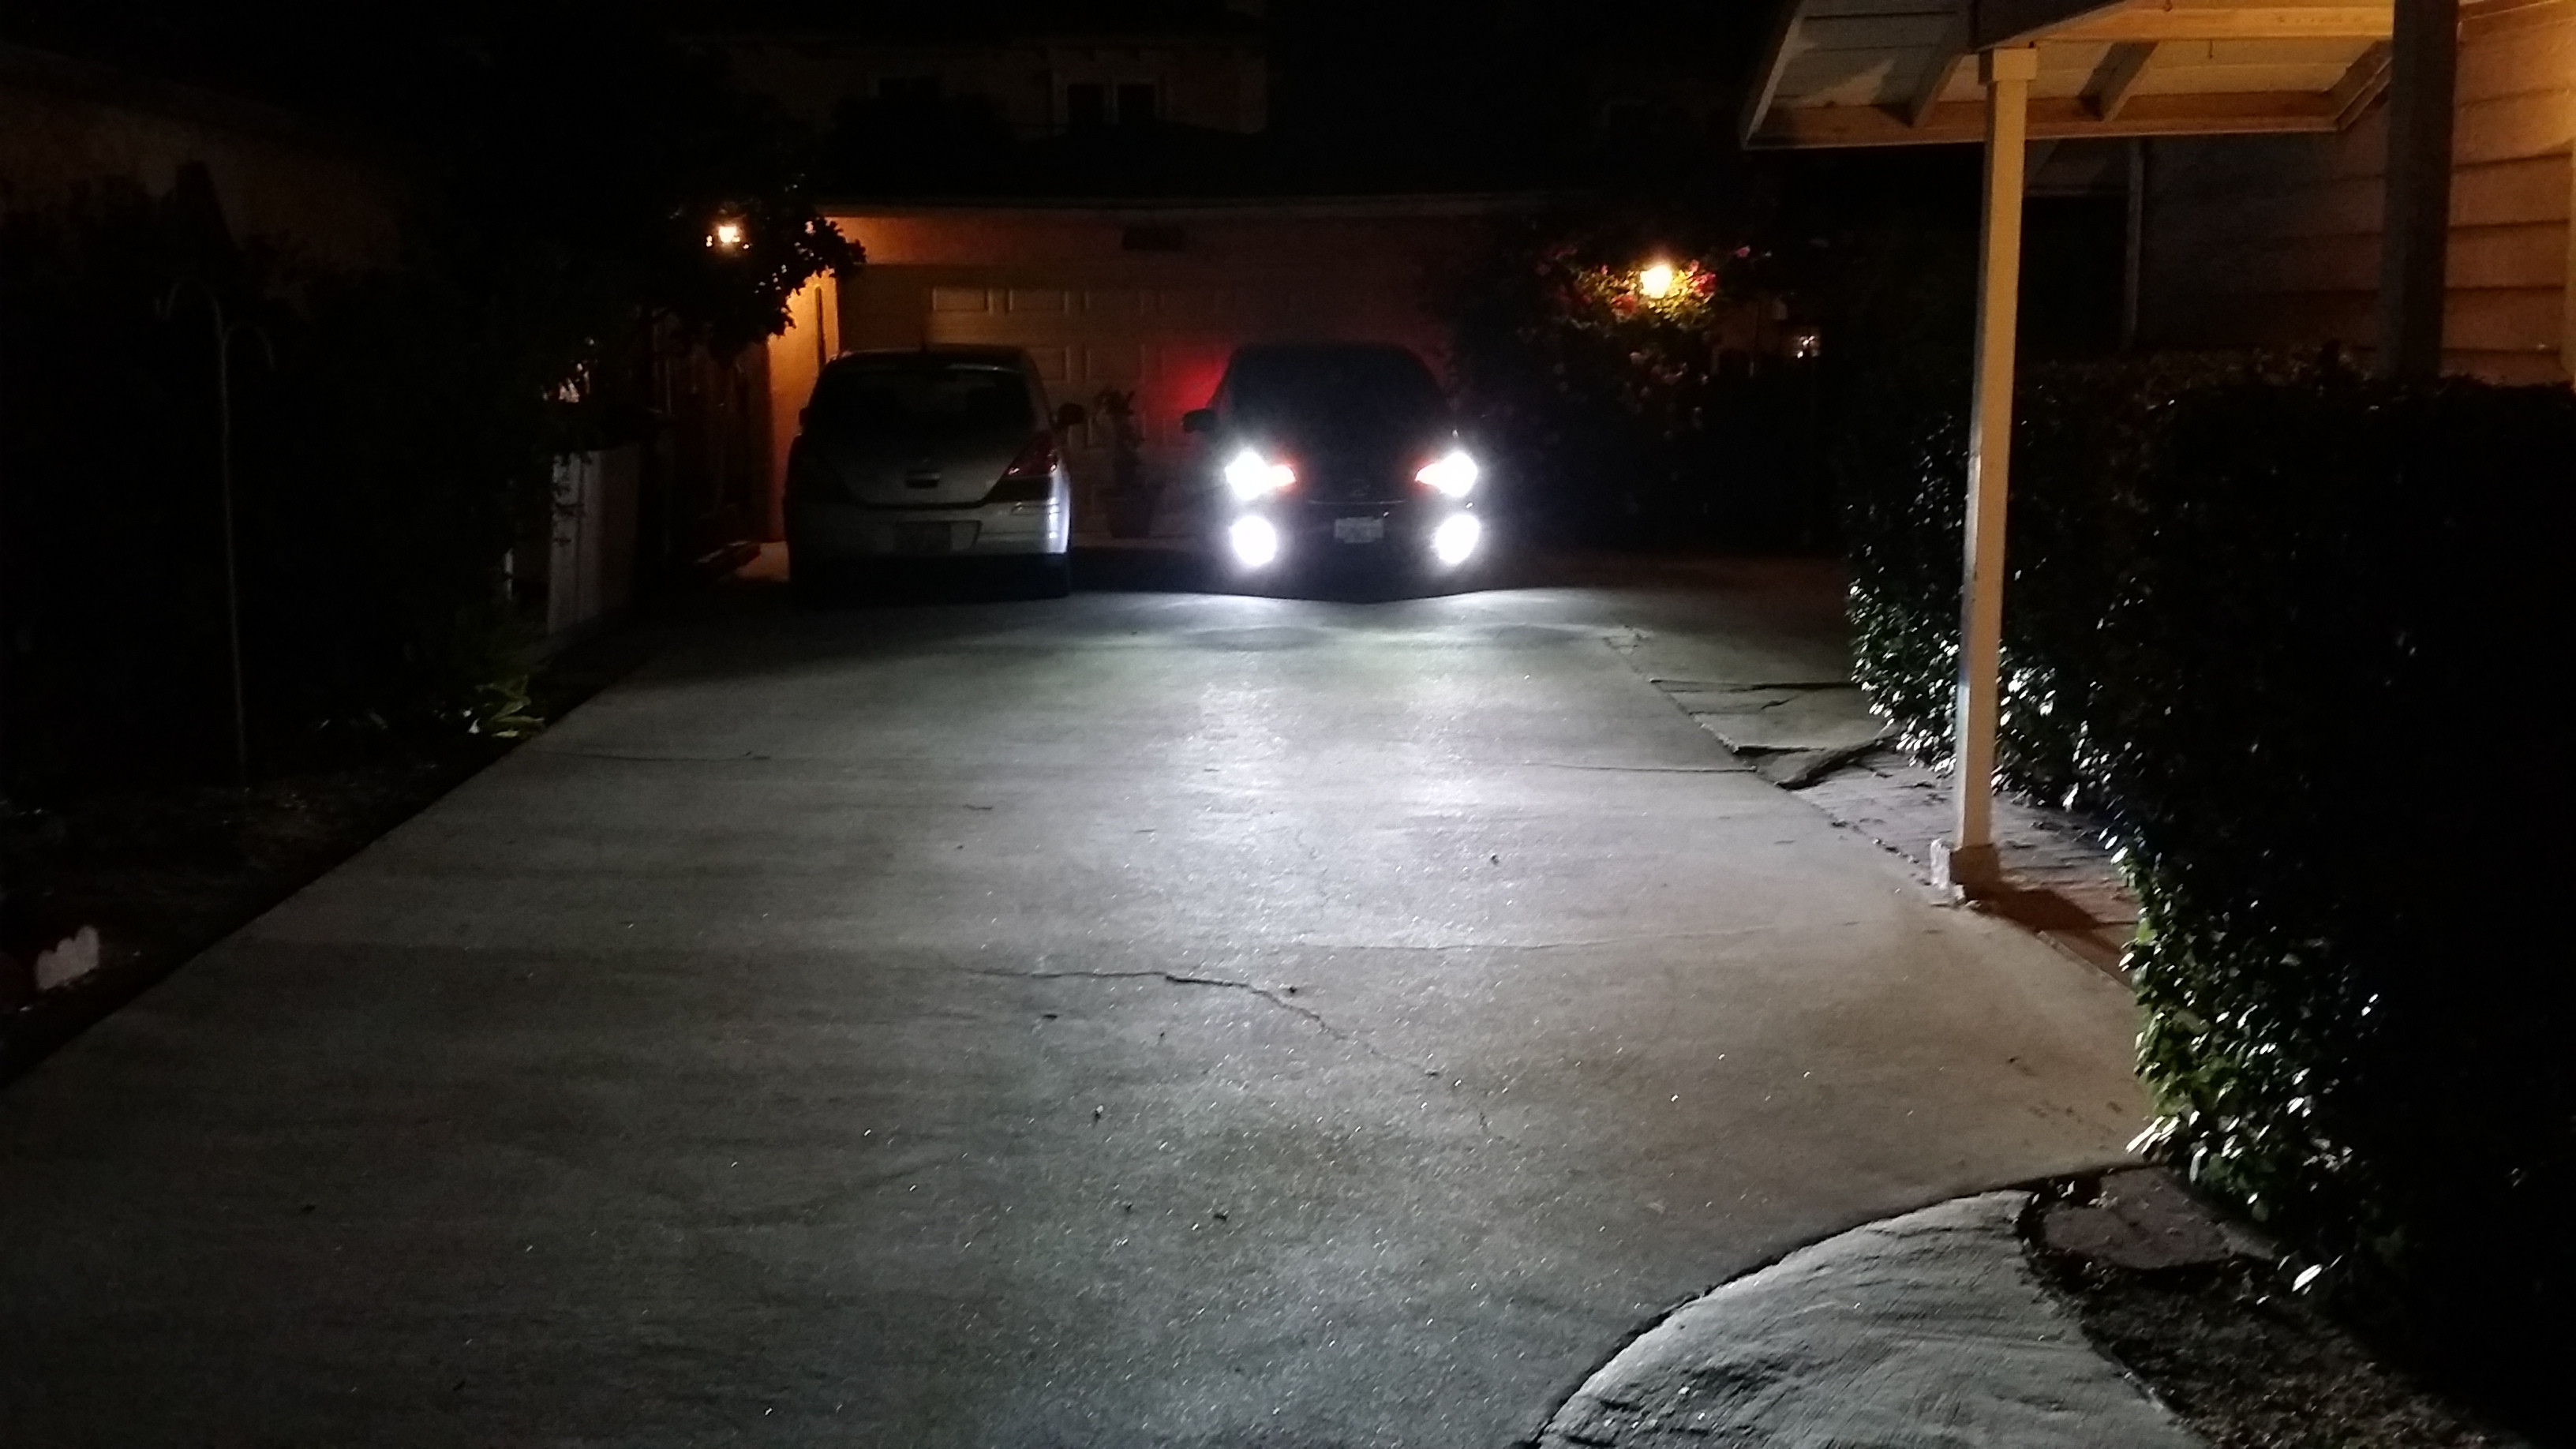
Headlights, DRL, and fog lights on. From the front, there's not much glare. However, it's VERY bright and I'm contemplating having the TRS Morimoto LED foglights off at night now. Or perhaps, have the XB LED strips dim when the headlights are on because the combination of the LED strips and foglights being on makes the Fit look too bright from the front and may be too annoying for other drivers.
You might notice a black dot to the left of the wooden post. There was a pile of ants picking away at a dead cricket, and three trails leading to it. I had the headlights on and it was bright enough for me to spray OrthoDefense all over them. Not a fan of ants.
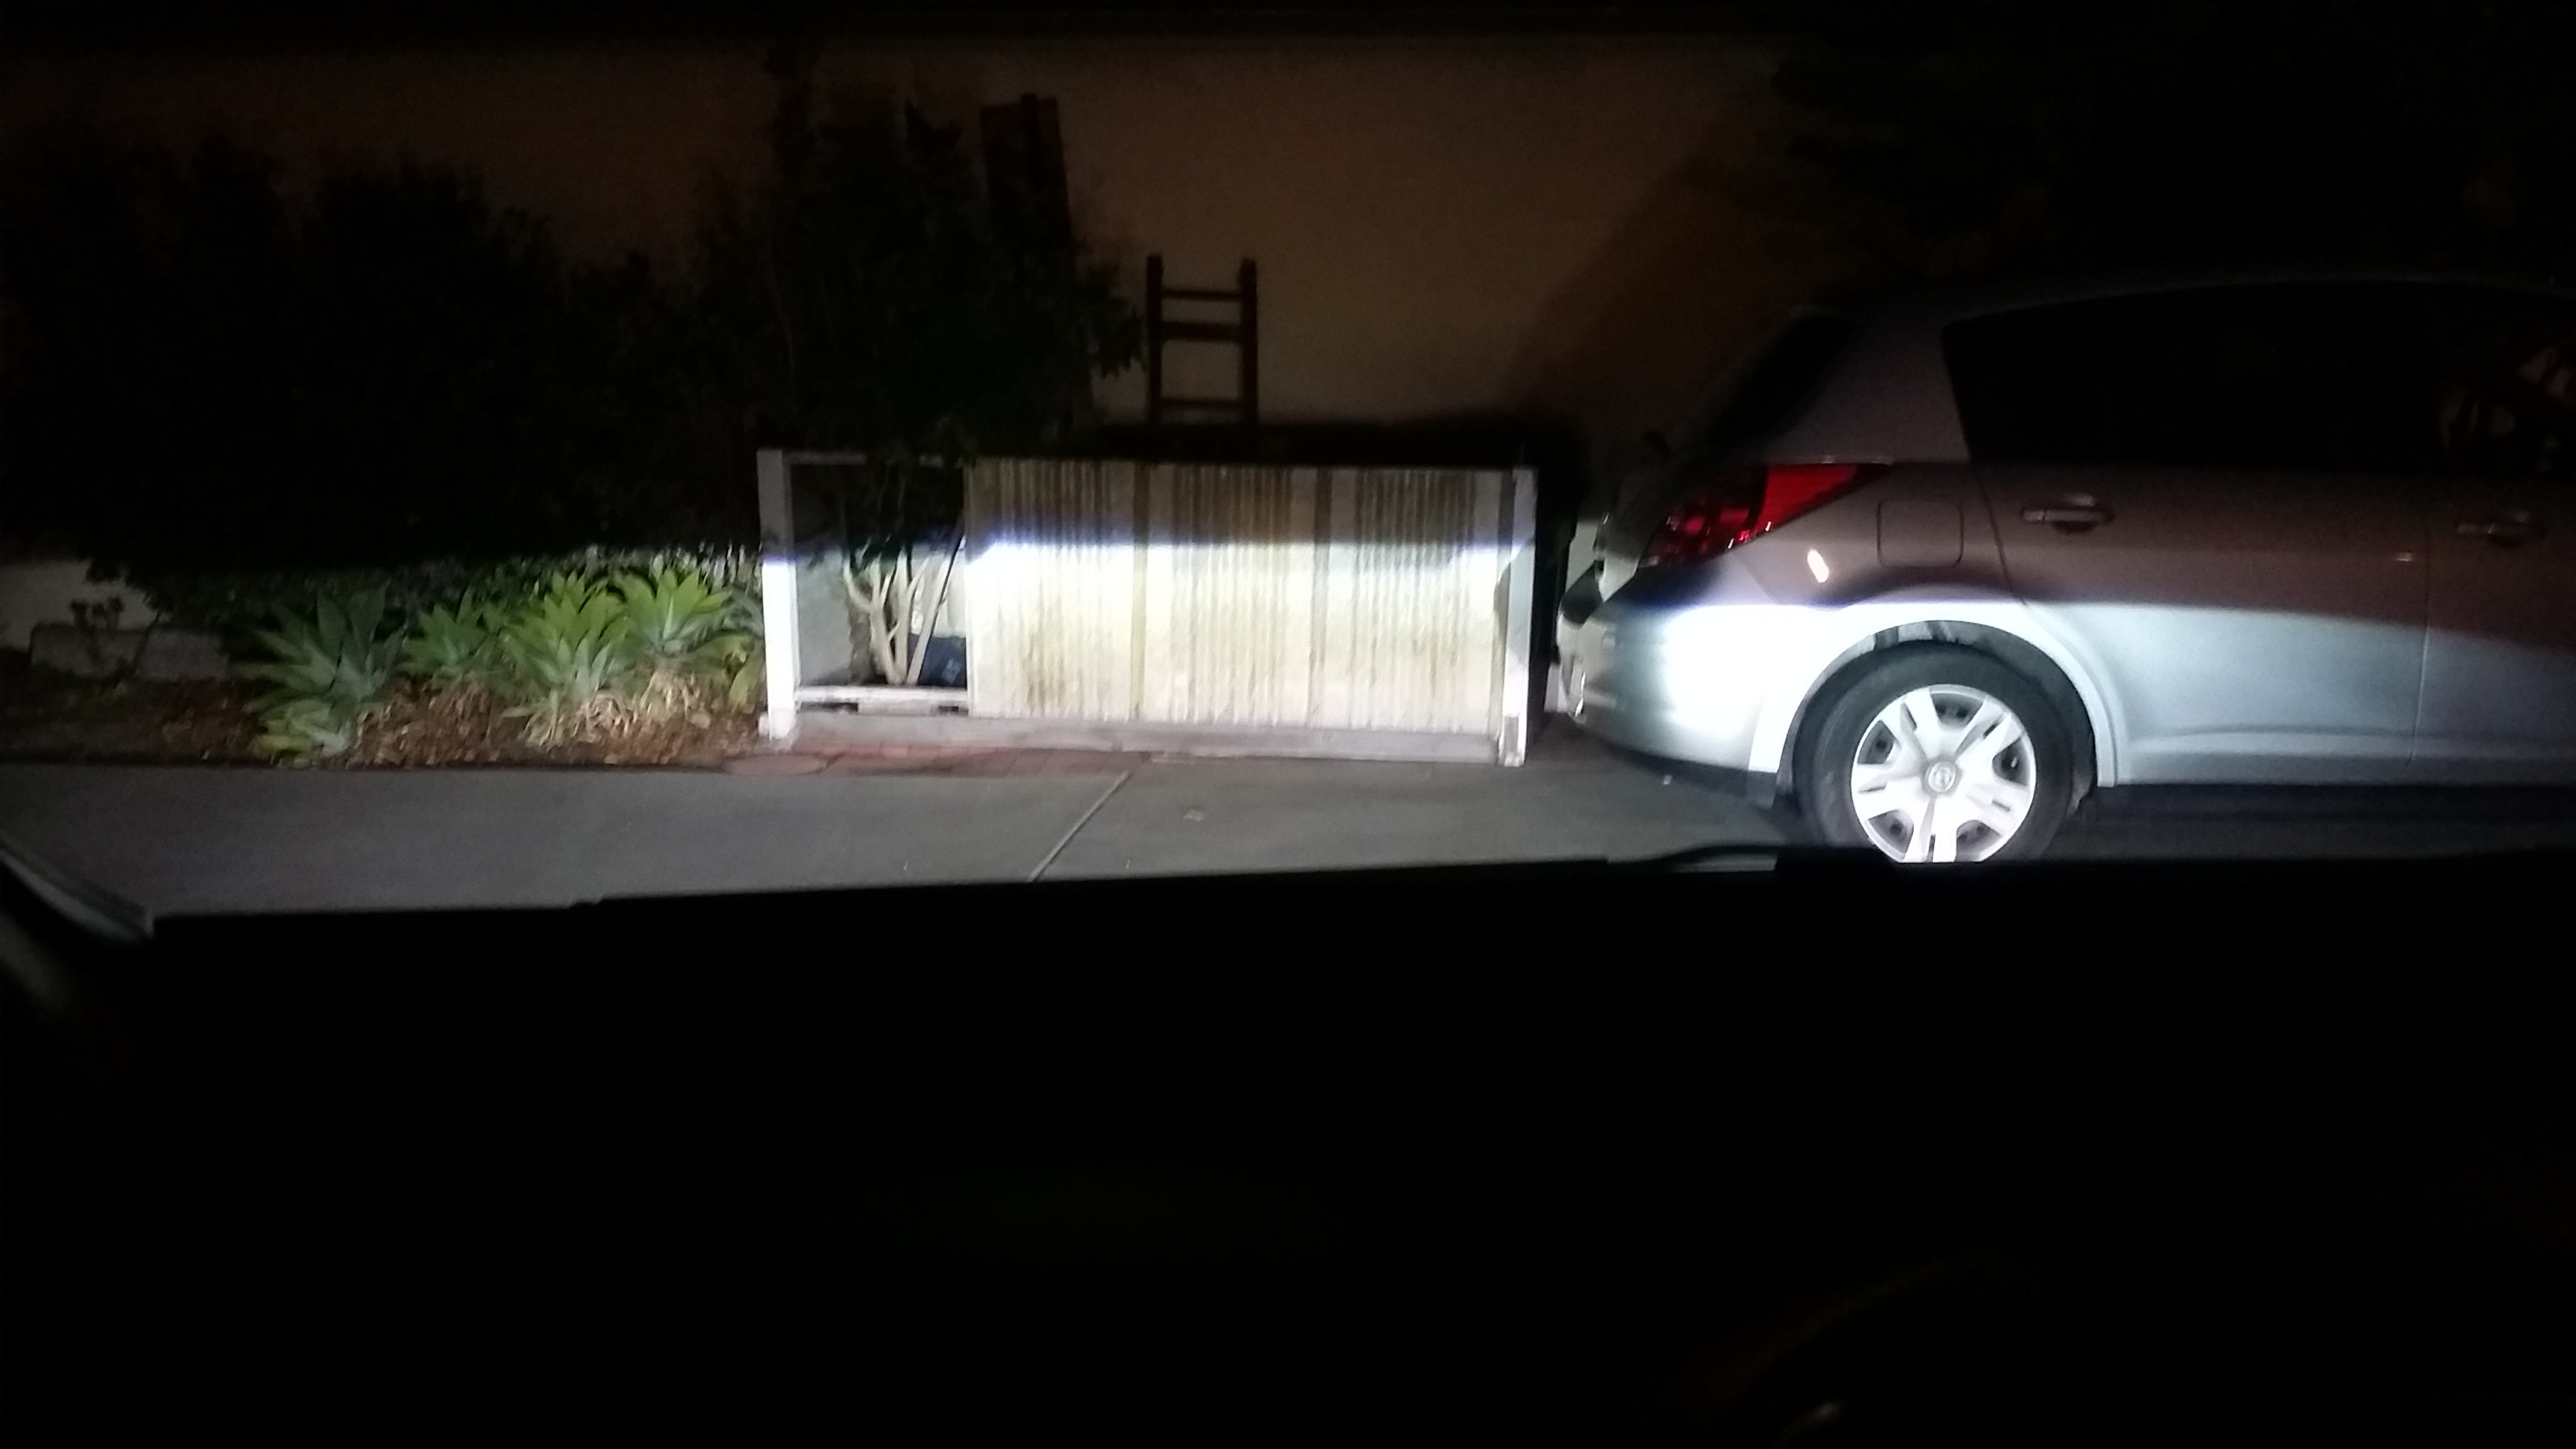
The most horizontally leveled ground I could find on the driveway with something to point the headlights at. The cutoff. It's faint, but you'll notice the ____/_____/
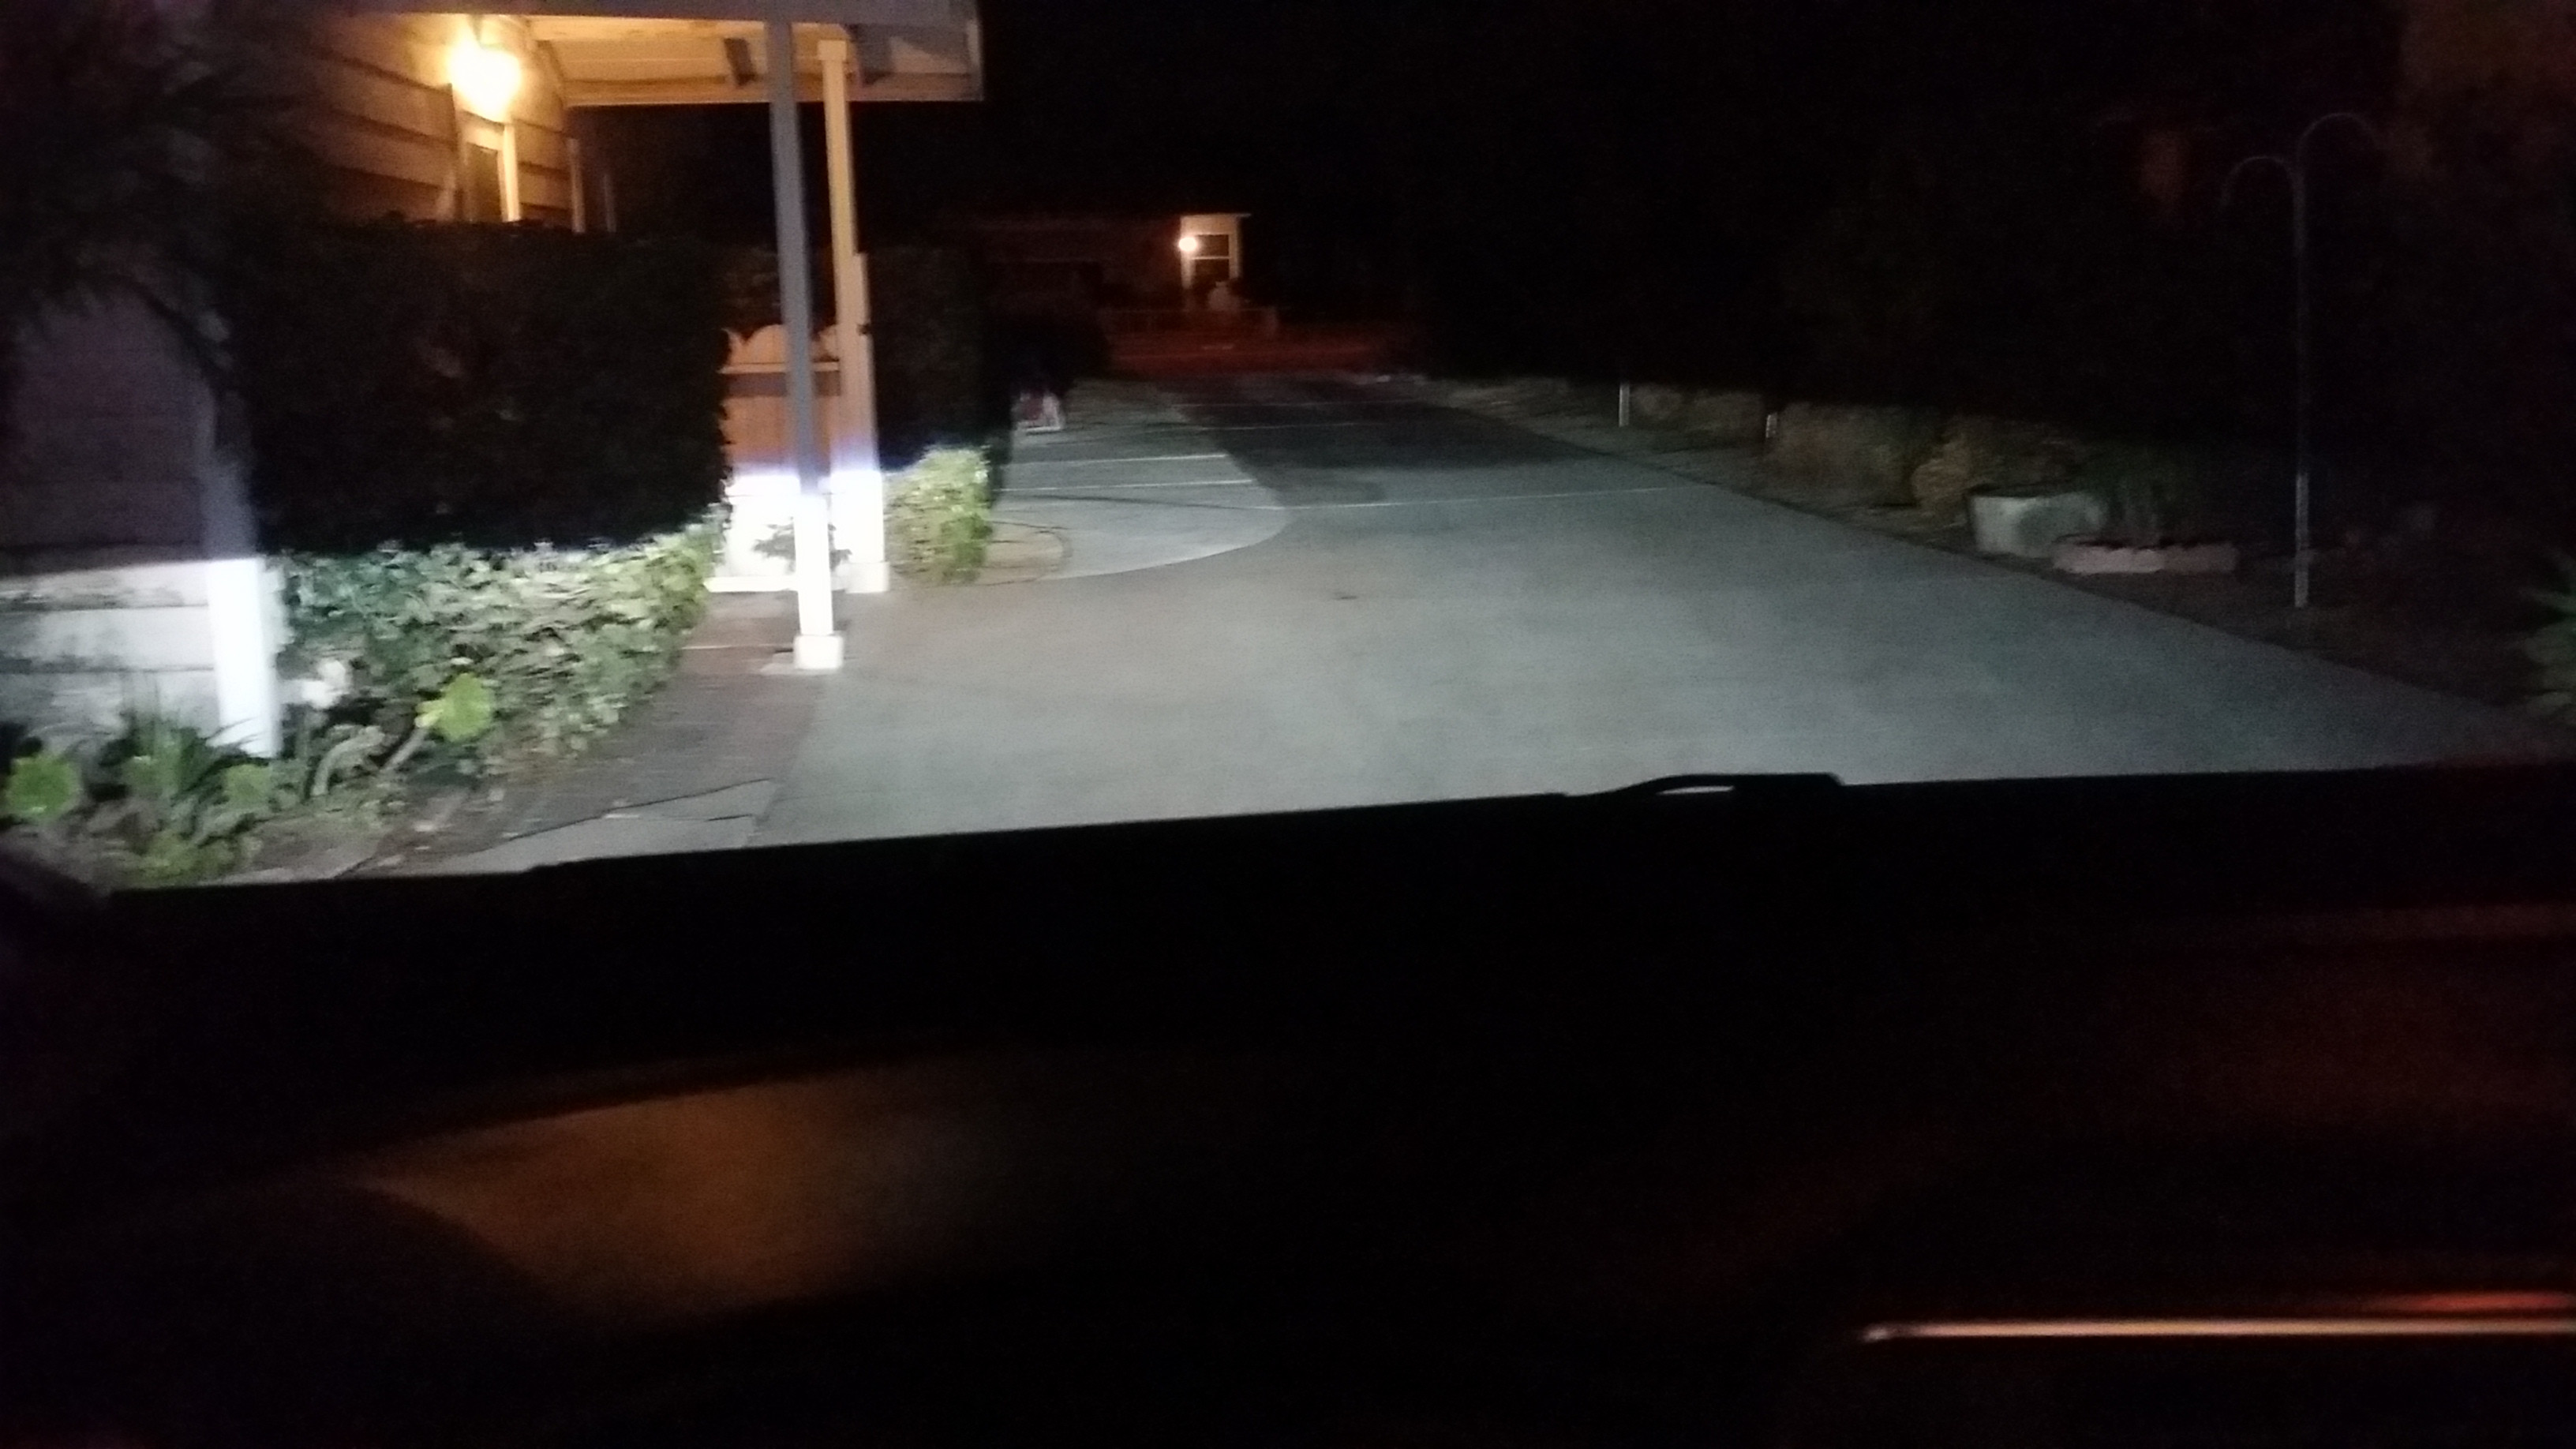
Headlights on. Foglights off. From the camera it looks bright, but in person it's not as well lit. Great coverage, but I'm just saying it's not as lit as the picture suggests. Probably because they're just the cheap 35w morimoto bulbs. Nothing great like the phillips or osrams. I also haven't adjusted my beam to the proper height yet. Was lazy, so it's pointing a bit low.
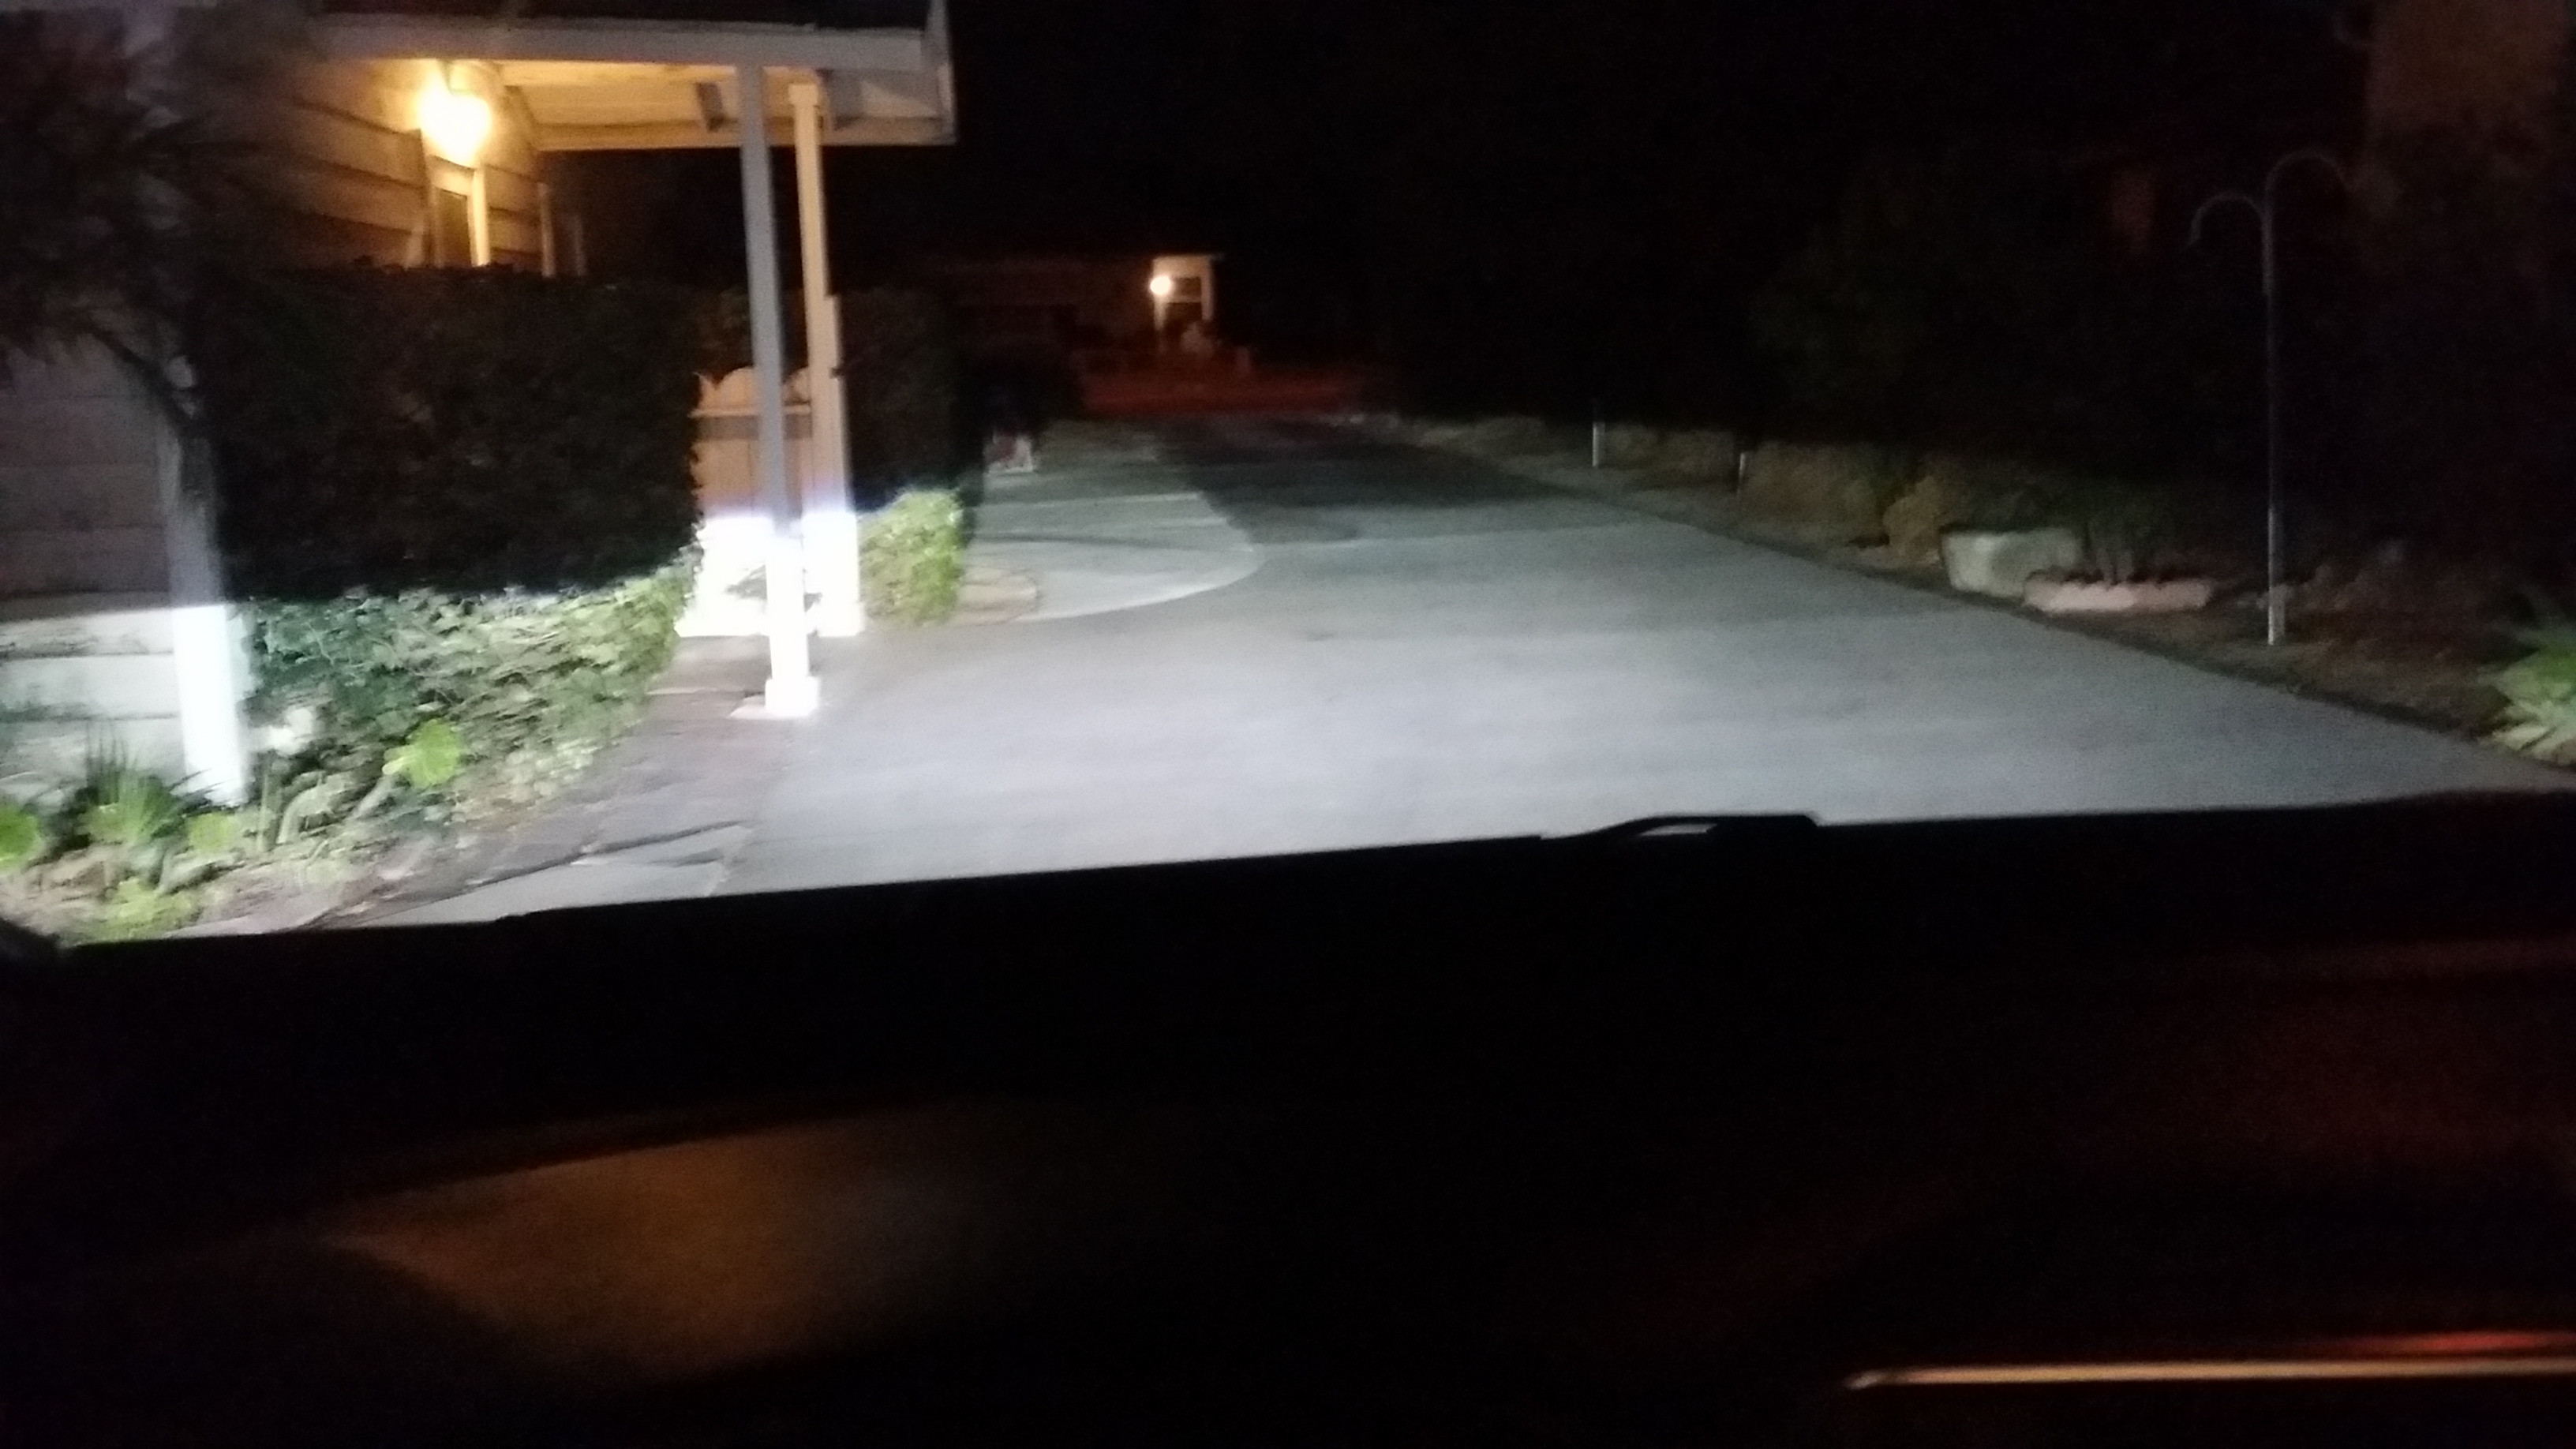
Headlights on. Fog lights on. The picture appears well lit and in person it is VERY well lit, which brings up the concern I had about being too bright for oncoming drivers. But it was nice and bright enough for me to put those ants to their doom.
Headlight off.

Headlights, DRL, and fog lights on. From the front, there's not much glare. However, it's VERY bright and I'm contemplating having the TRS Morimoto LED foglights off at night now. Or perhaps, have the XB LED strips dim when the headlights are on because the combination of the LED strips and foglights being on makes the Fit look too bright from the front and may be too annoying for other drivers.
You might notice a black dot to the left of the wooden post. There was a pile of ants picking away at a dead cricket, and three trails leading to it. I had the headlights on and it was bright enough for me to spray OrthoDefense all over them. Not a fan of ants.


The most horizontally leveled ground I could find on the driveway with something to point the headlights at. The cutoff. It's faint, but you'll notice the ____/_____/

Headlights on. Foglights off. From the camera it looks bright, but in person it's not as well lit. Great coverage, but I'm just saying it's not as lit as the picture suggests. Probably because they're just the cheap 35w morimoto bulbs. Nothing great like the phillips or osrams. I also haven't adjusted my beam to the proper height yet. Was lazy, so it's pointing a bit low.

Headlights on. Fog lights on. The picture appears well lit and in person it is VERY well lit, which brings up the concern I had about being too bright for oncoming drivers. But it was nice and bright enough for me to put those ants to their doom.


#10
Wow, that is some undertaking you and Superfly did. Big congrats and kudos for posting all the pics. The Fit ownership "sharing" is alive and prospering!!!! Keep posting cause I'll be watching!!!!


#16
I got the 35. The 55 u can run those 55 w bulbs or run the existing 35 higher but will burn them out sooner. Of course, the 55 would be brighter too. I'm gonna switch to the osrams when I get them, since the regular morimoto 35w bulbs are OK.
#19
Motocontrol bixenon h4. If u seethe pdf for the canbus one, you'll realize it's not the correct kit


