
Sound Deadening Project - Silencing the Jazz UK
#1
 11-23-2022, 05:55 AM


Sound Deadening Project - Silencing the Jazz UK
Made this thread over on the UK Jazz forum 3 years ago. But I thought I would repost it over here.
My only real gripe with the Jazz (apart from the lack of a decent powered version), is the road noise. The 2nd Gen is much better than the 1st Gen, but it's still very noticeable.
So I decided to embark on a mission to try and fix that.
Sound Deadening Part 1: The Floor
I had experimented with Dynamat sound deadening on my old Civic a decade ago.
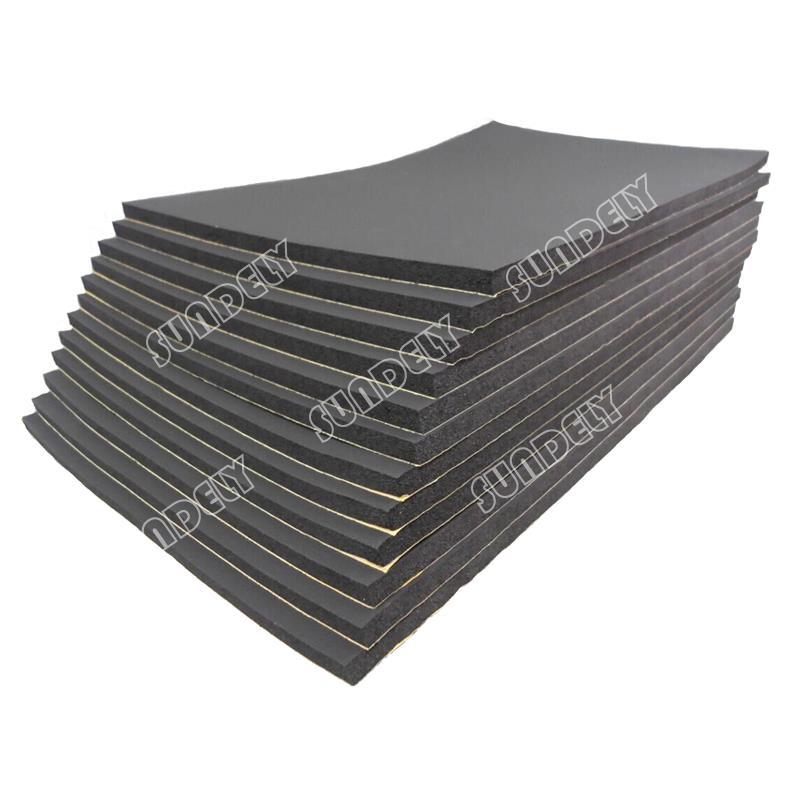
Prices of Dynamat have risen a lot, as it's a US product. But the UK has a version called Silent Coat which is basically the same, just a lot cheaper.
I bought two boxes of the 40 sheet bulk pack, and set to work on the Jazz, stripping the interior, which was surprisingly easy to remove.
I used this service manual to help me remove the interior properly without breaking anything: Honda Jazz / Honda Fit GE8 2009 onwards Online Repair Manual
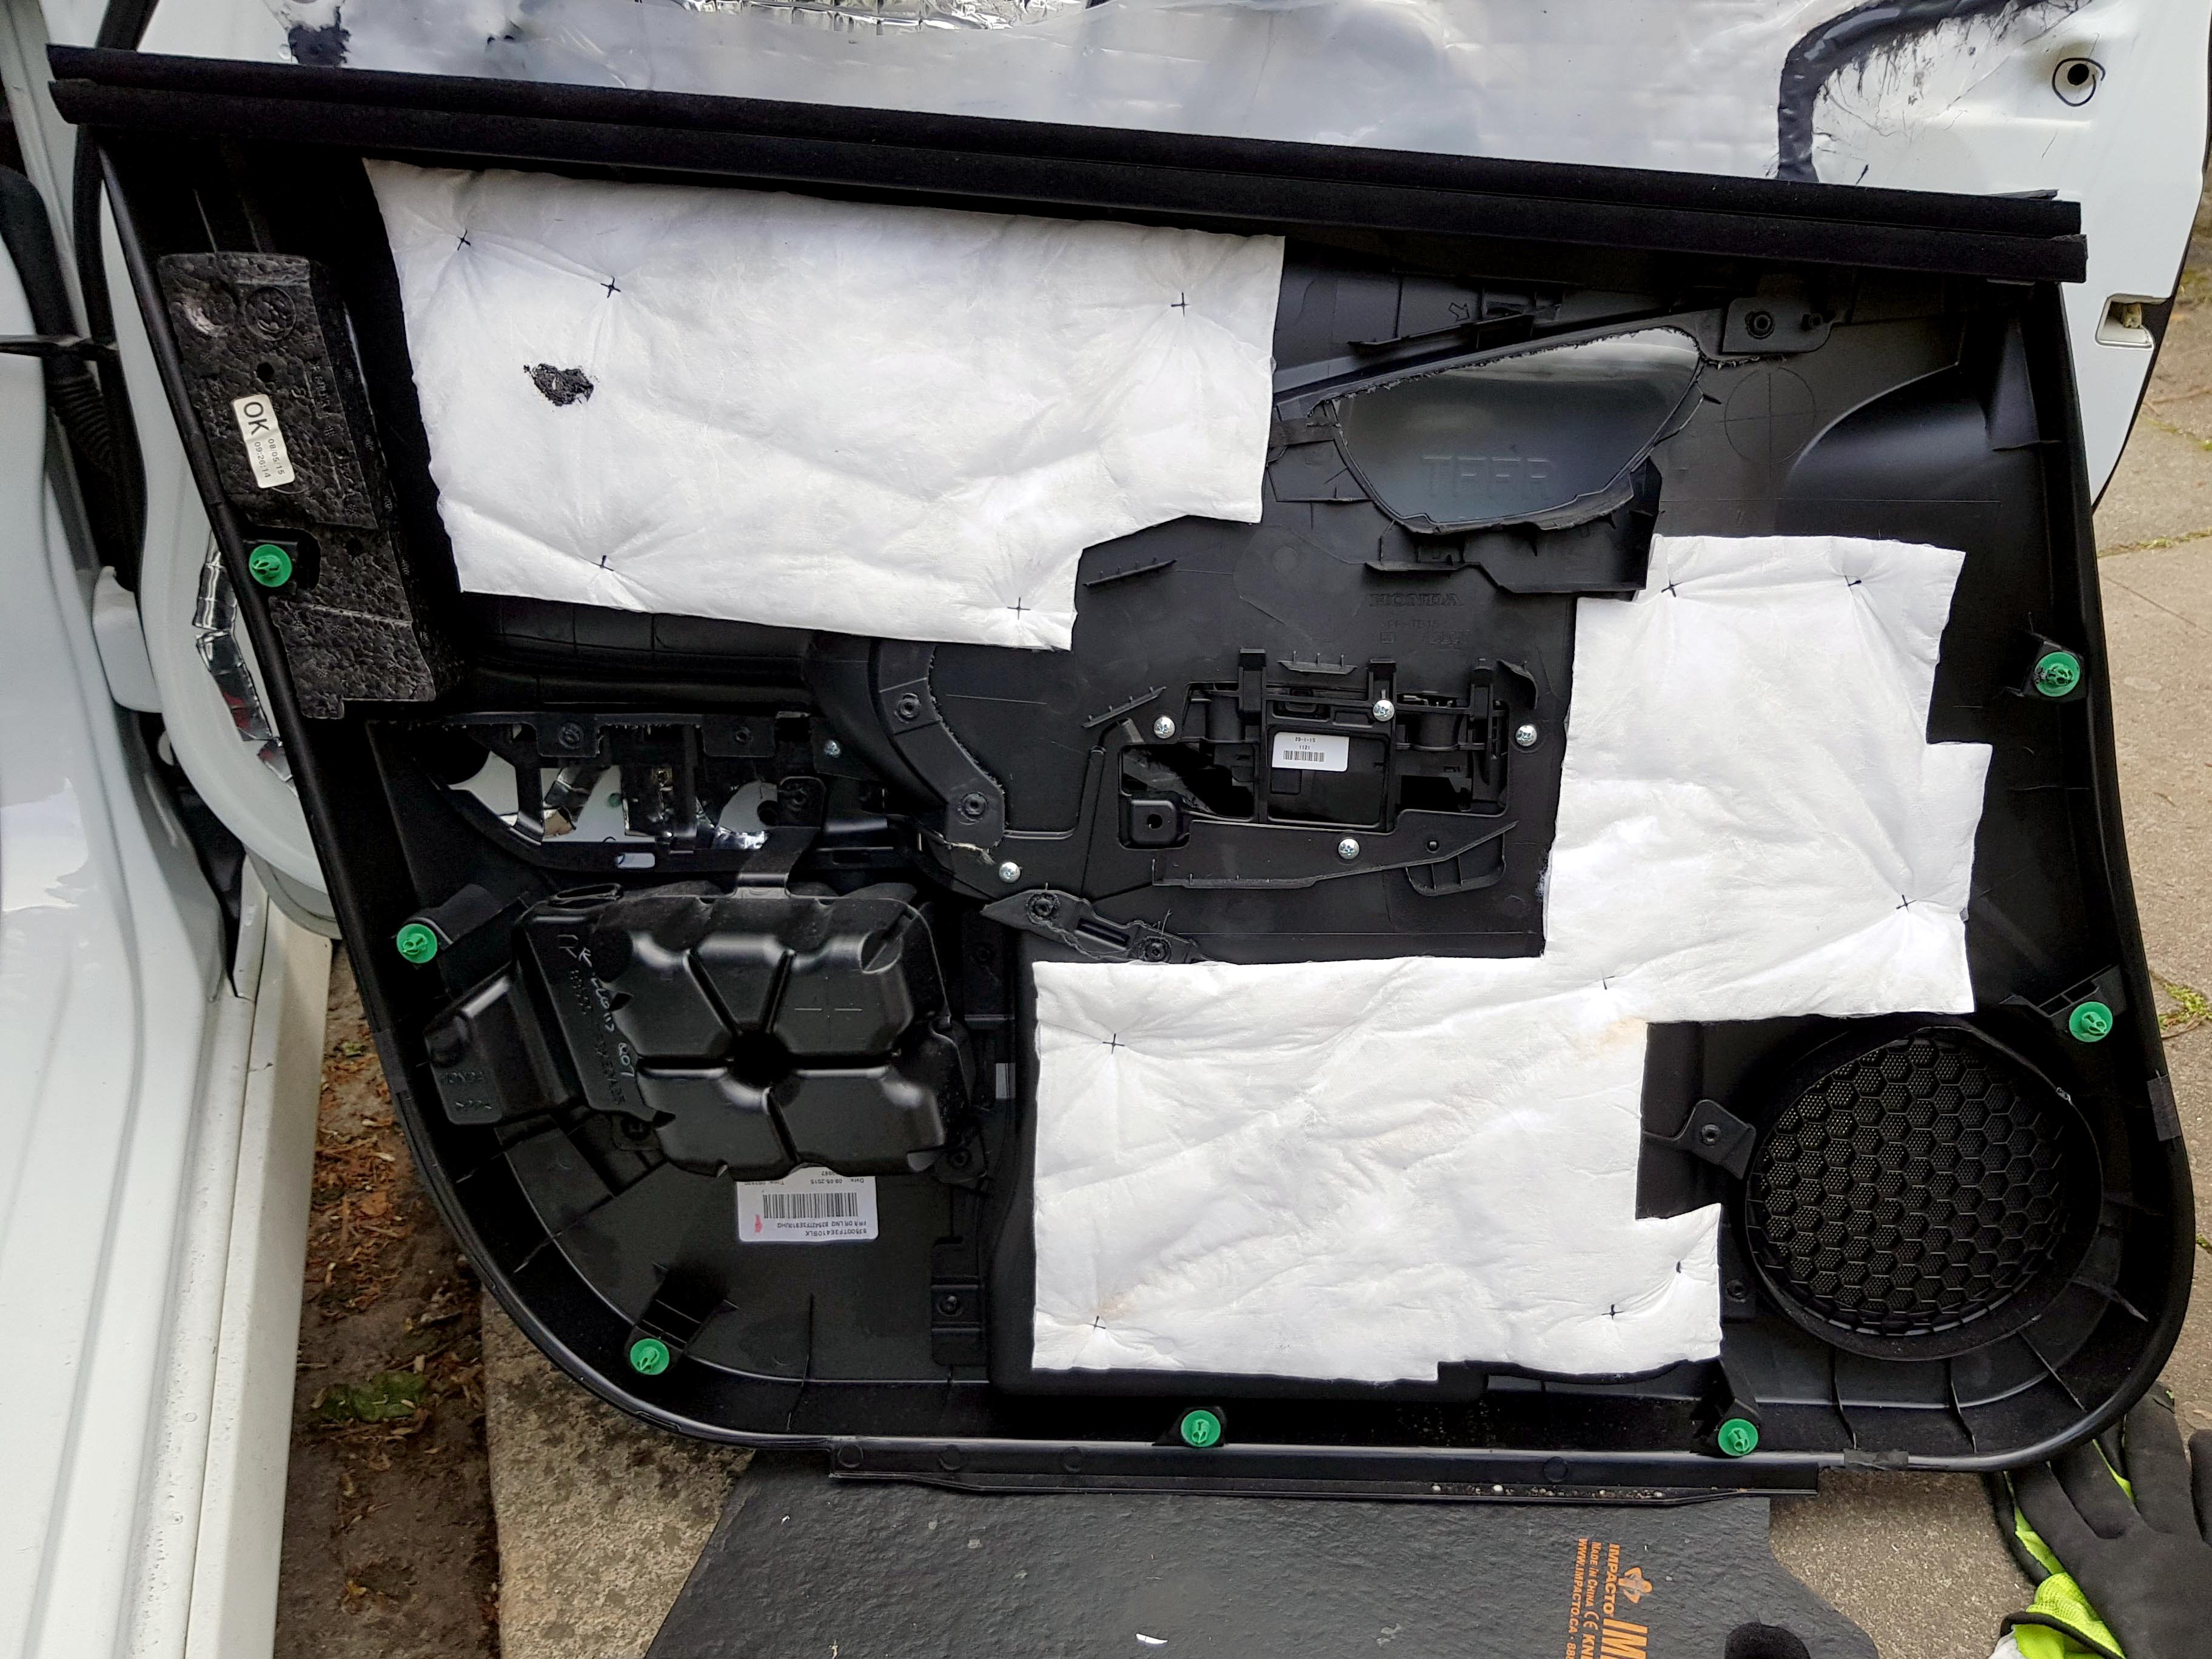
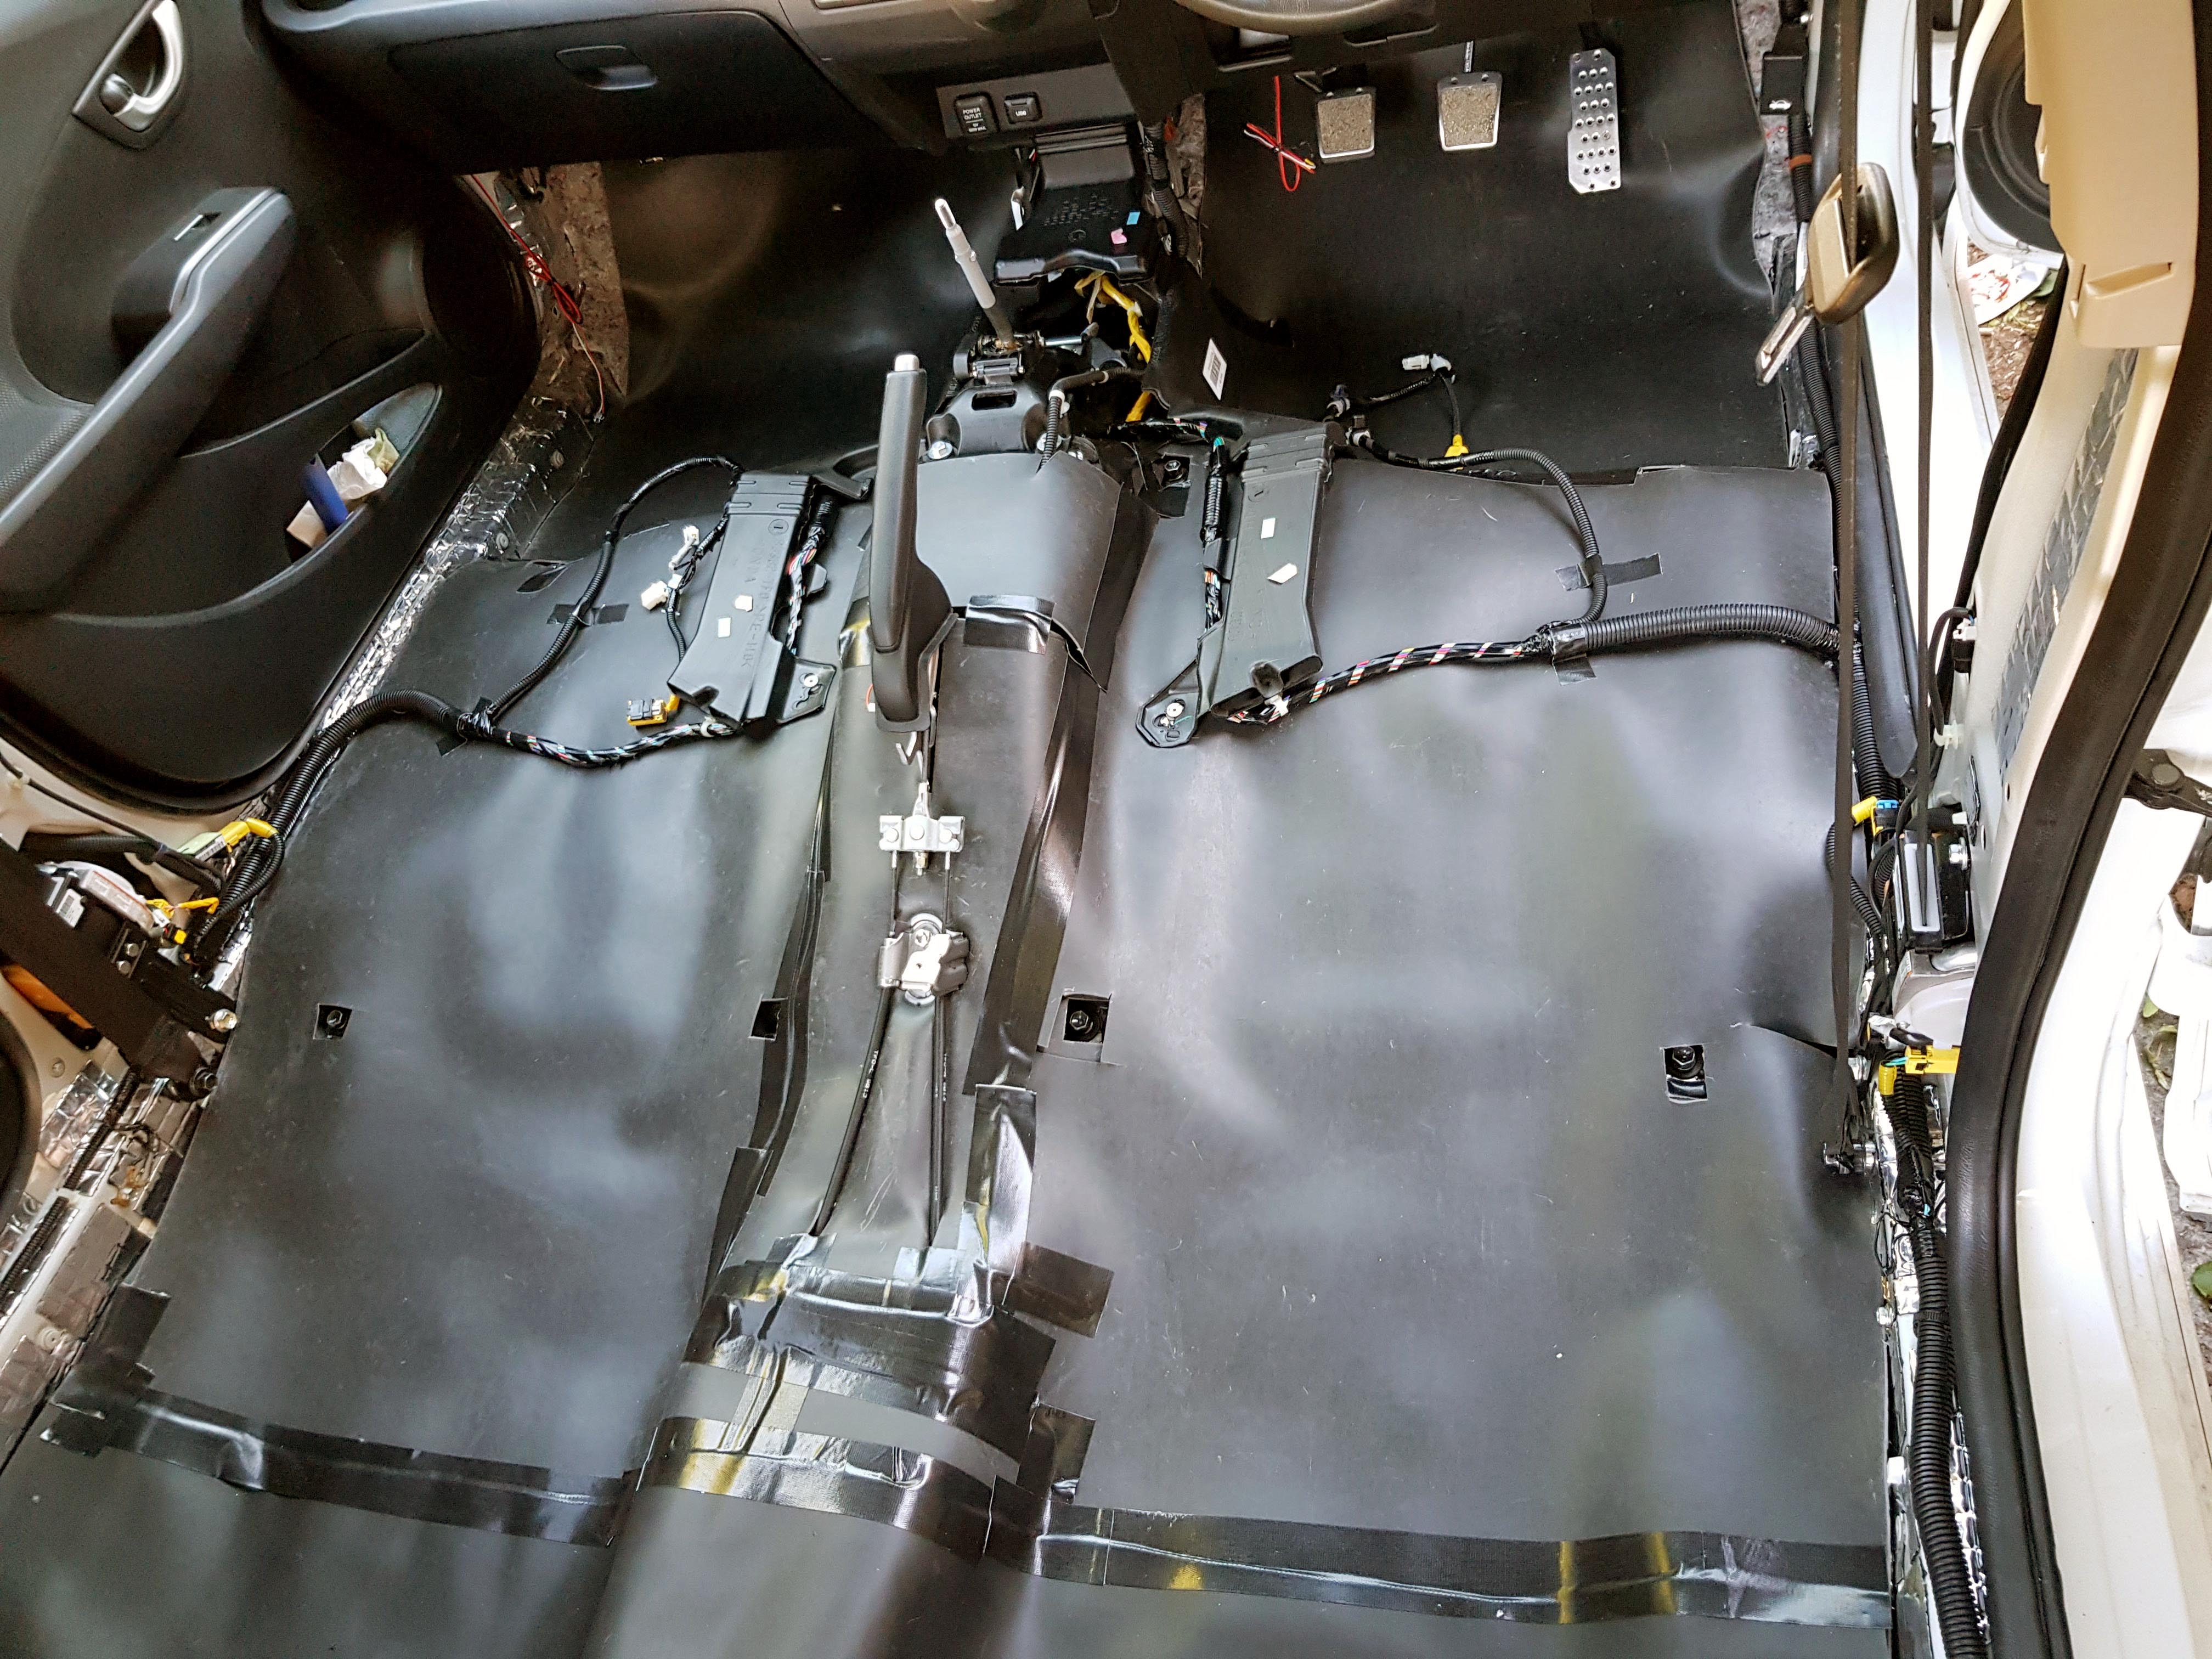
Main Interior removed apart from the dash, as I didn't want to open that can of worms!!
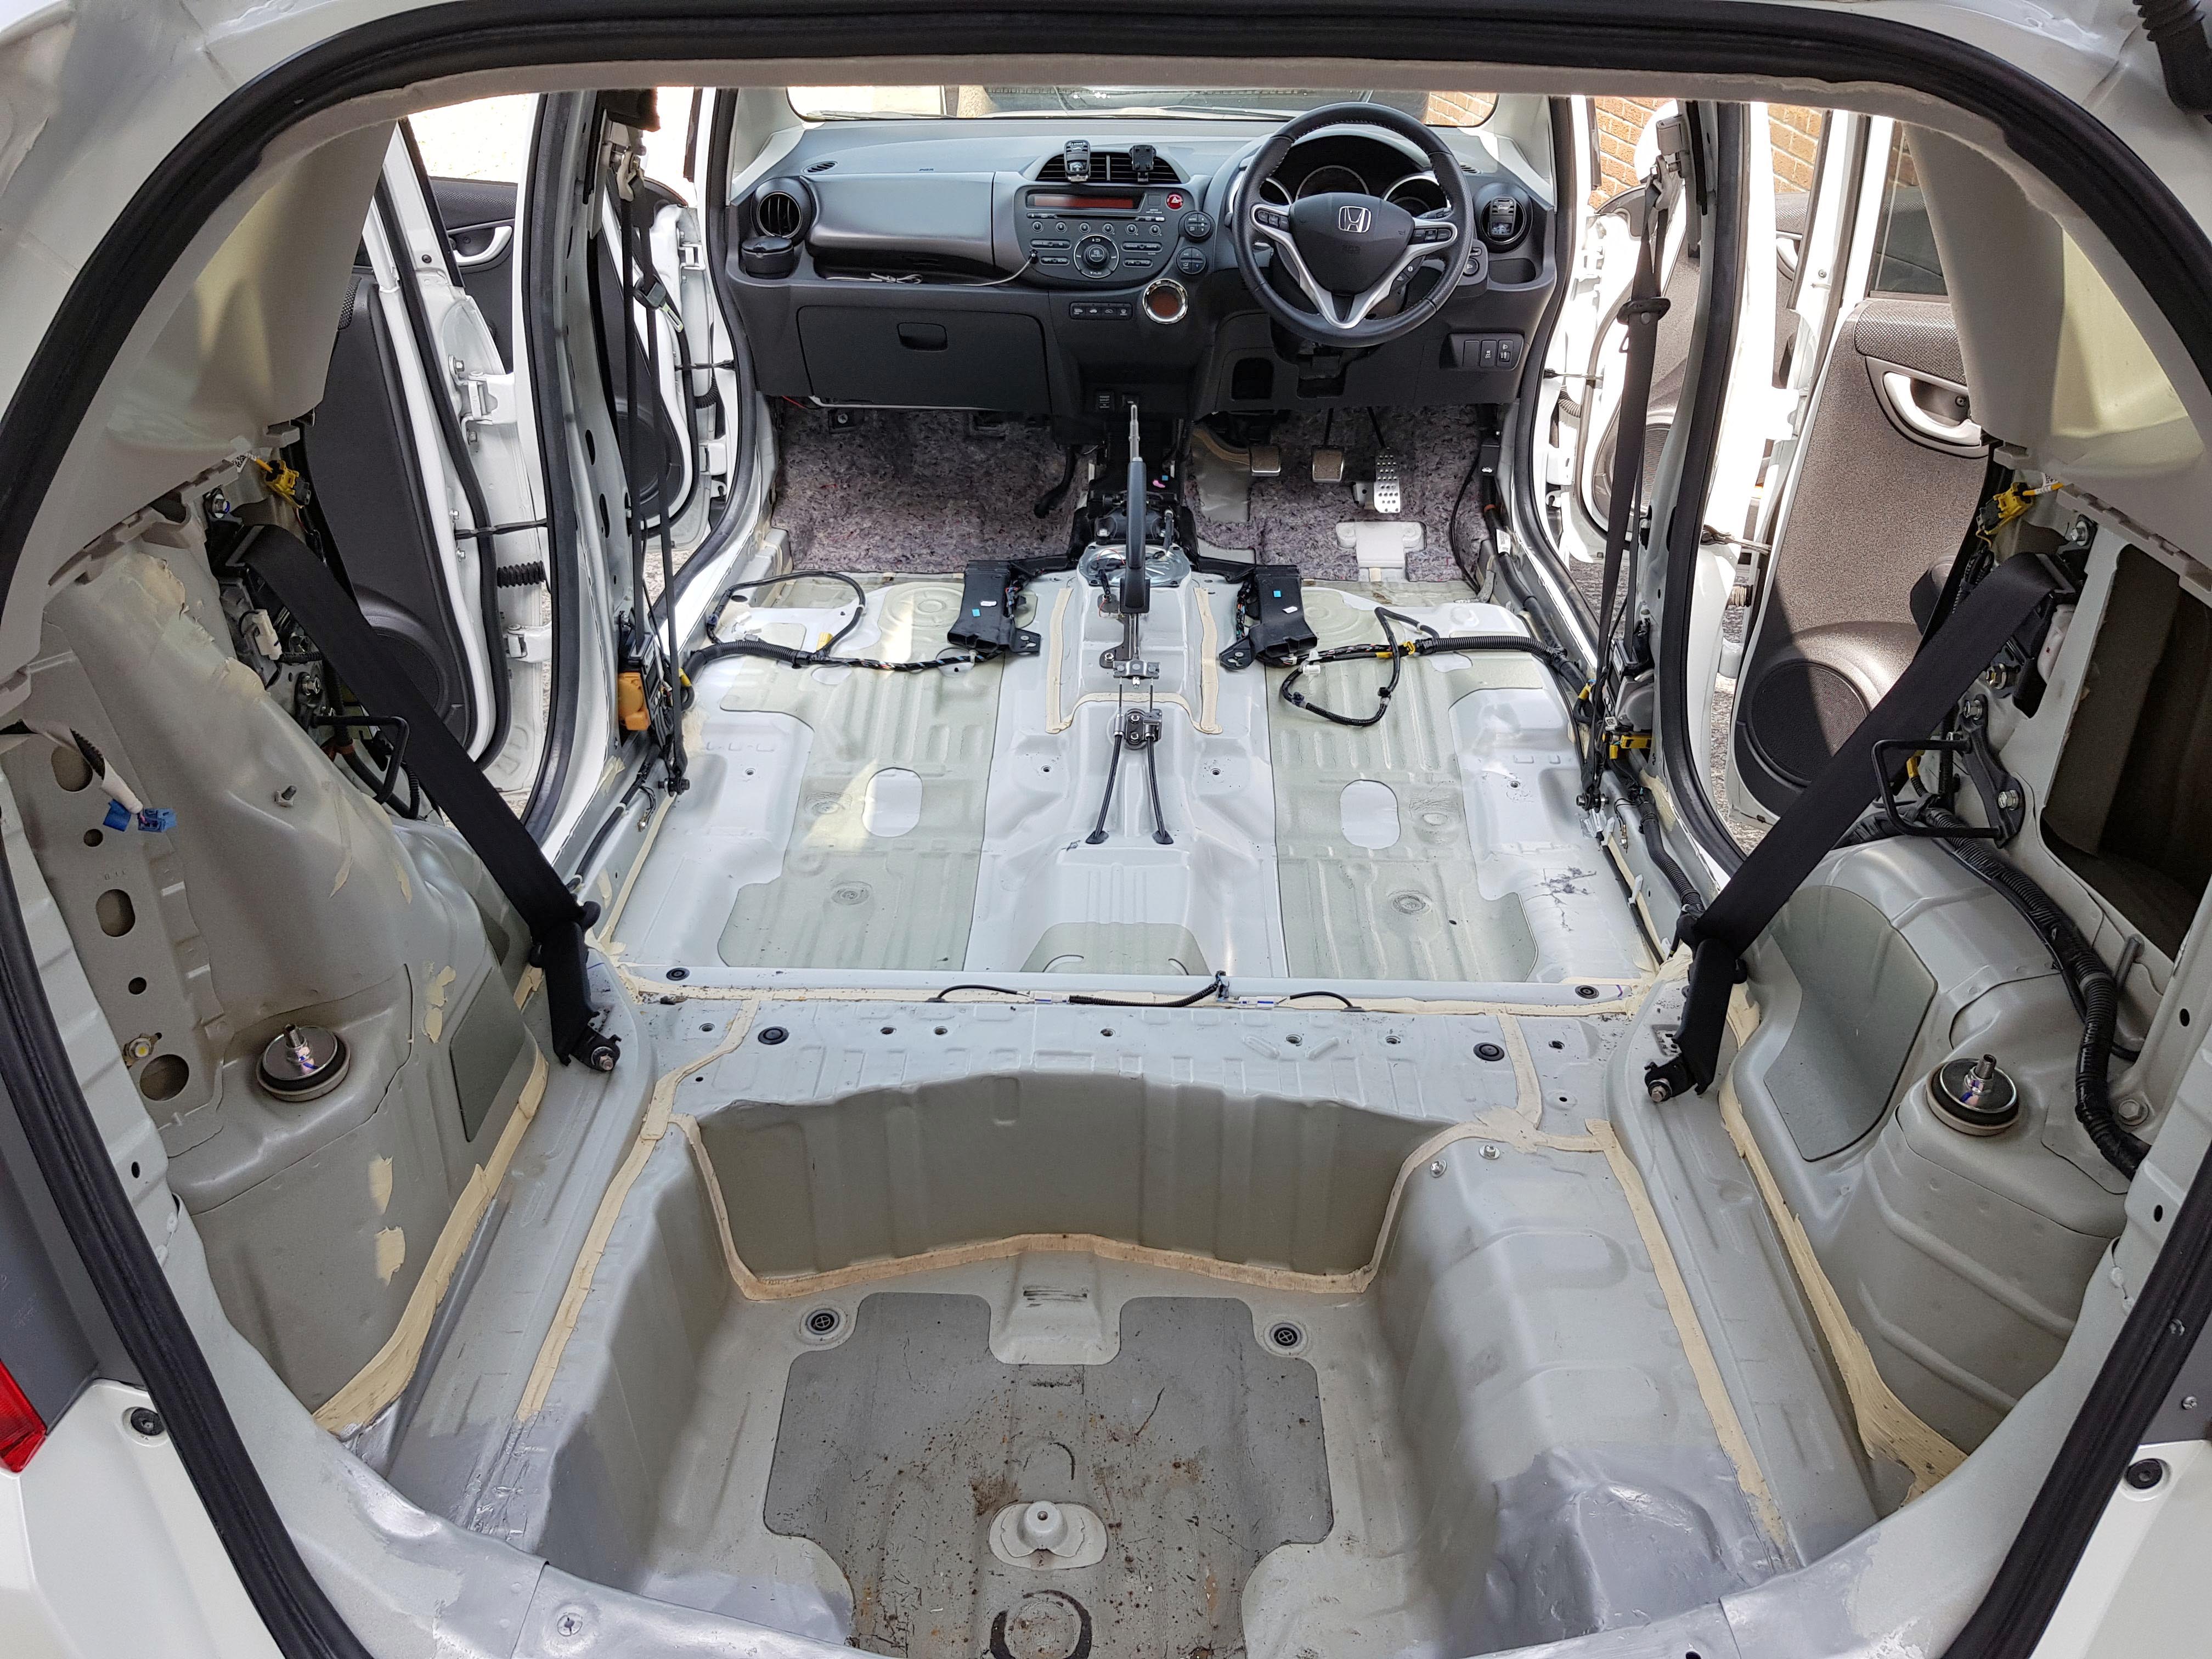
End of Day 1. Got the bulk of the sheets down:
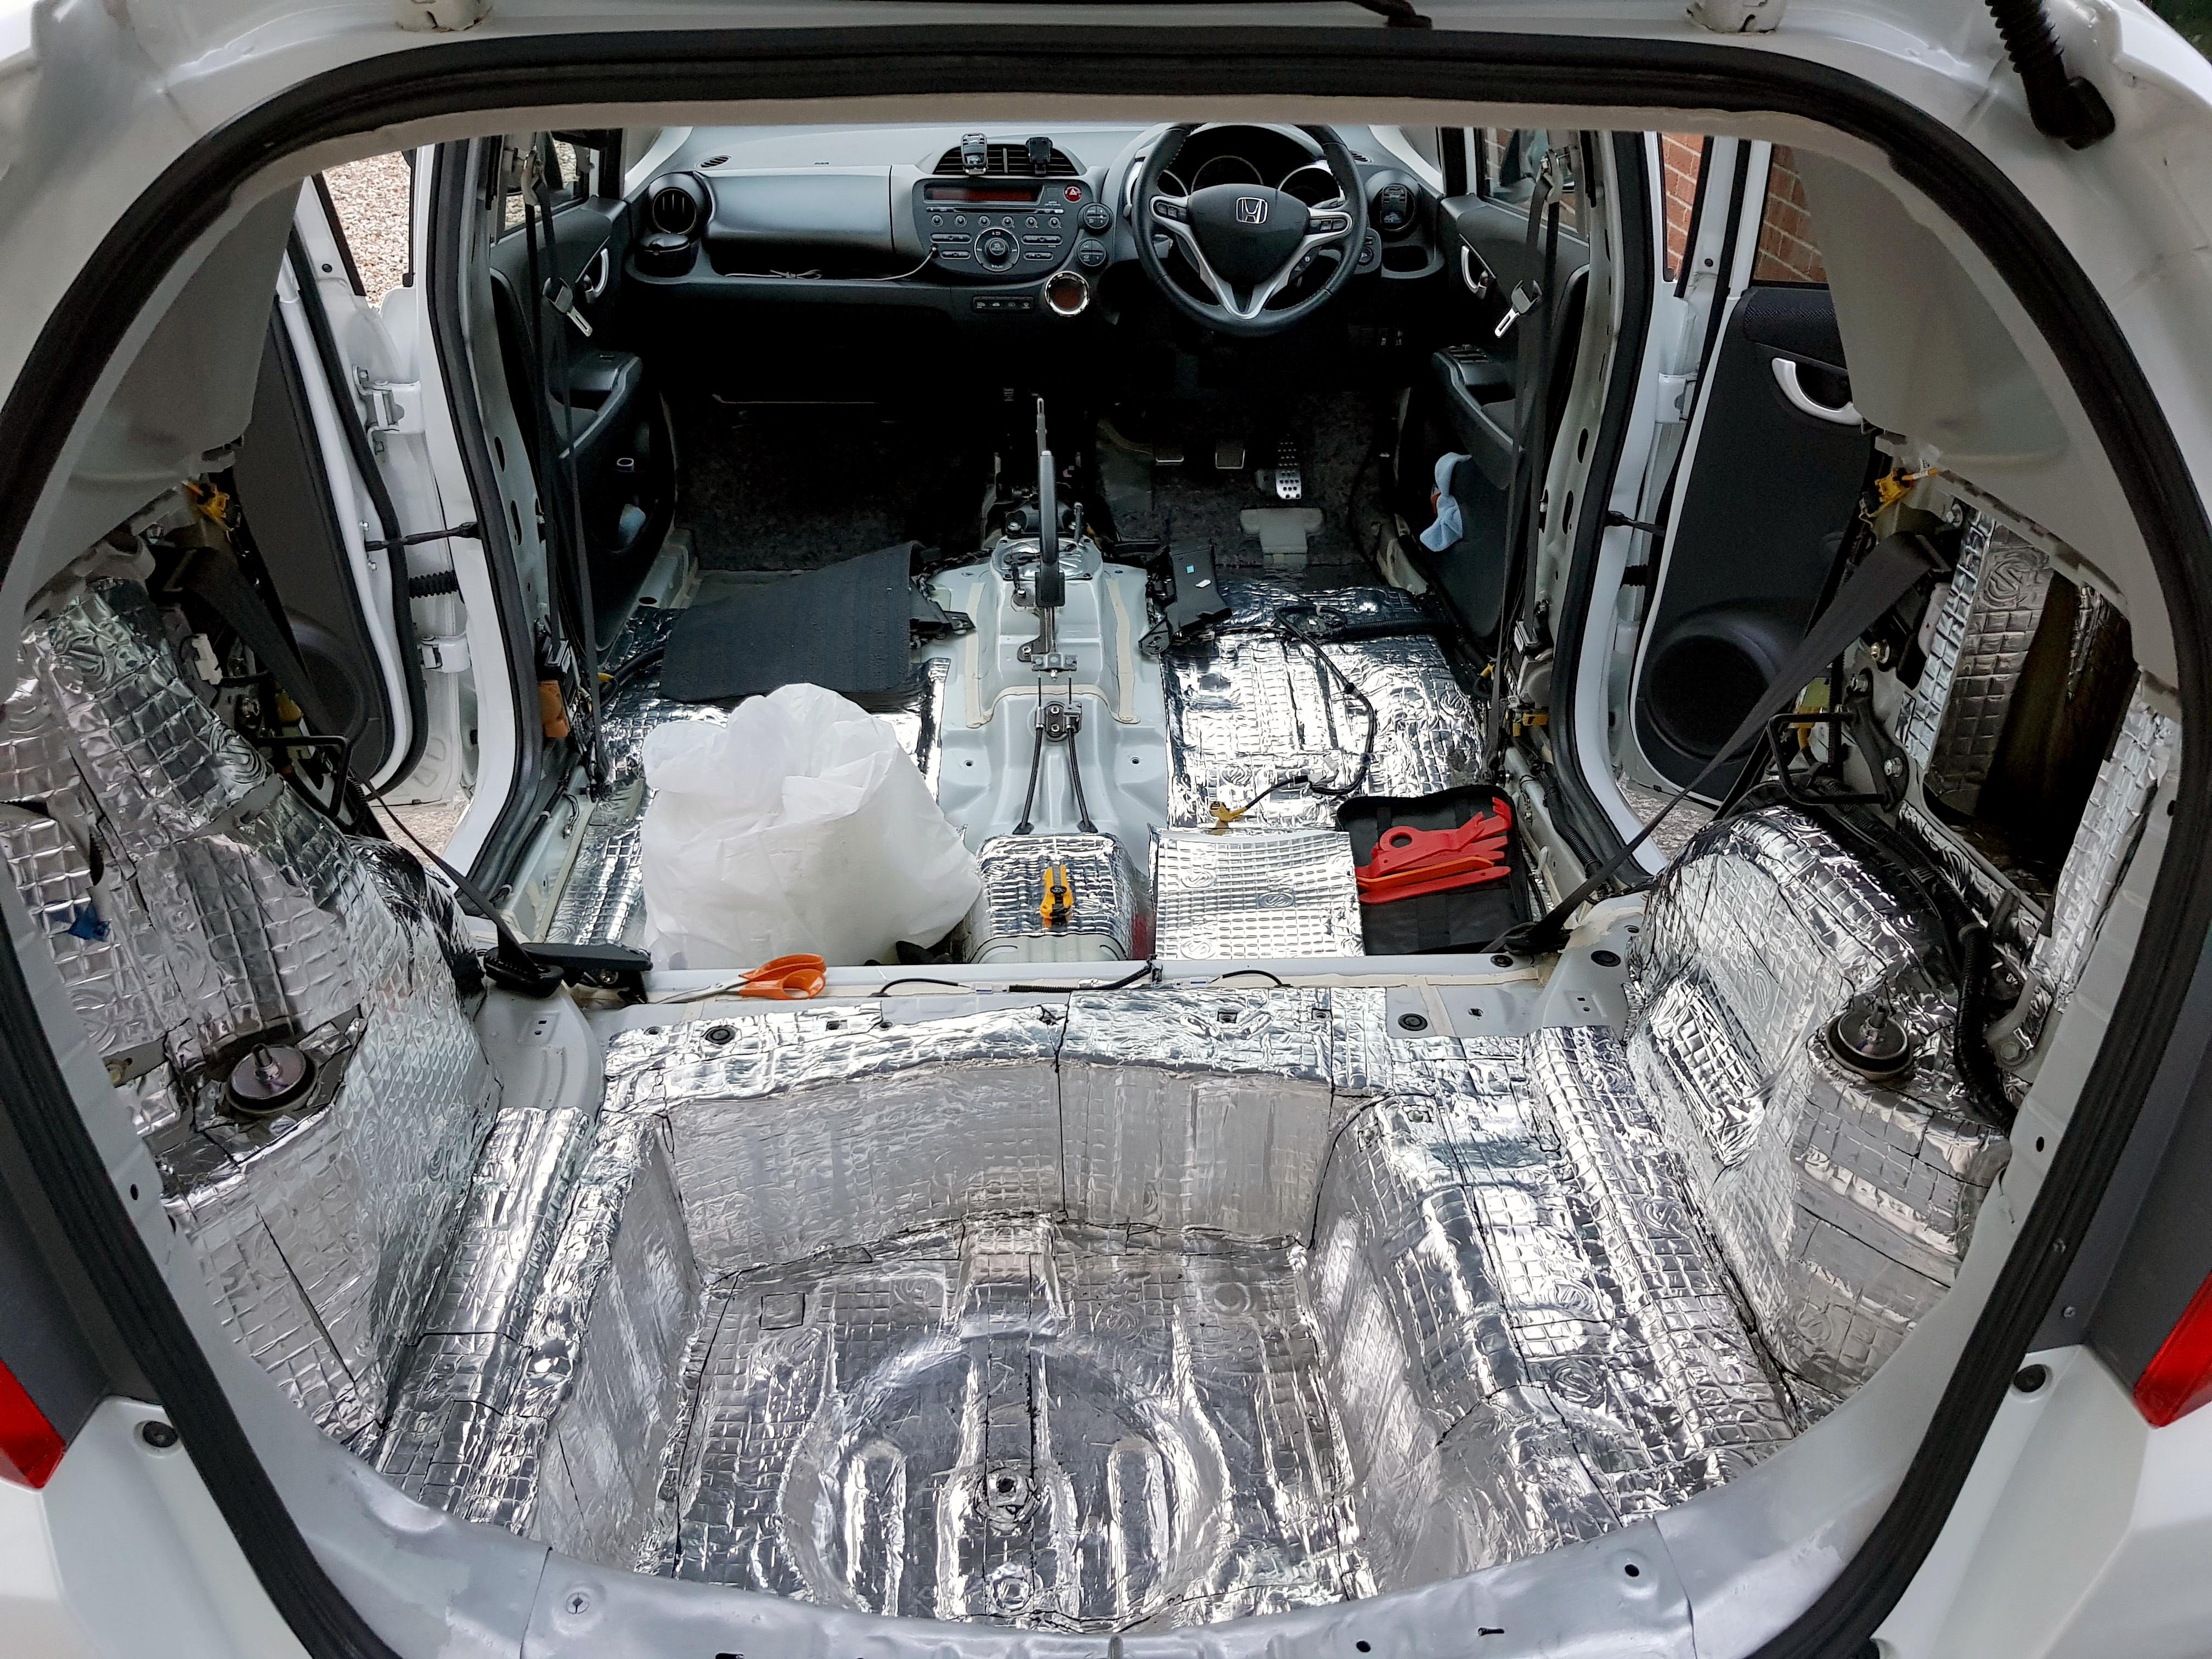
End of Day 2. All the gaps and fiddly bits done, and main interior complete:


Sound Deadening Part 2: Car Door Speaker Upgrade
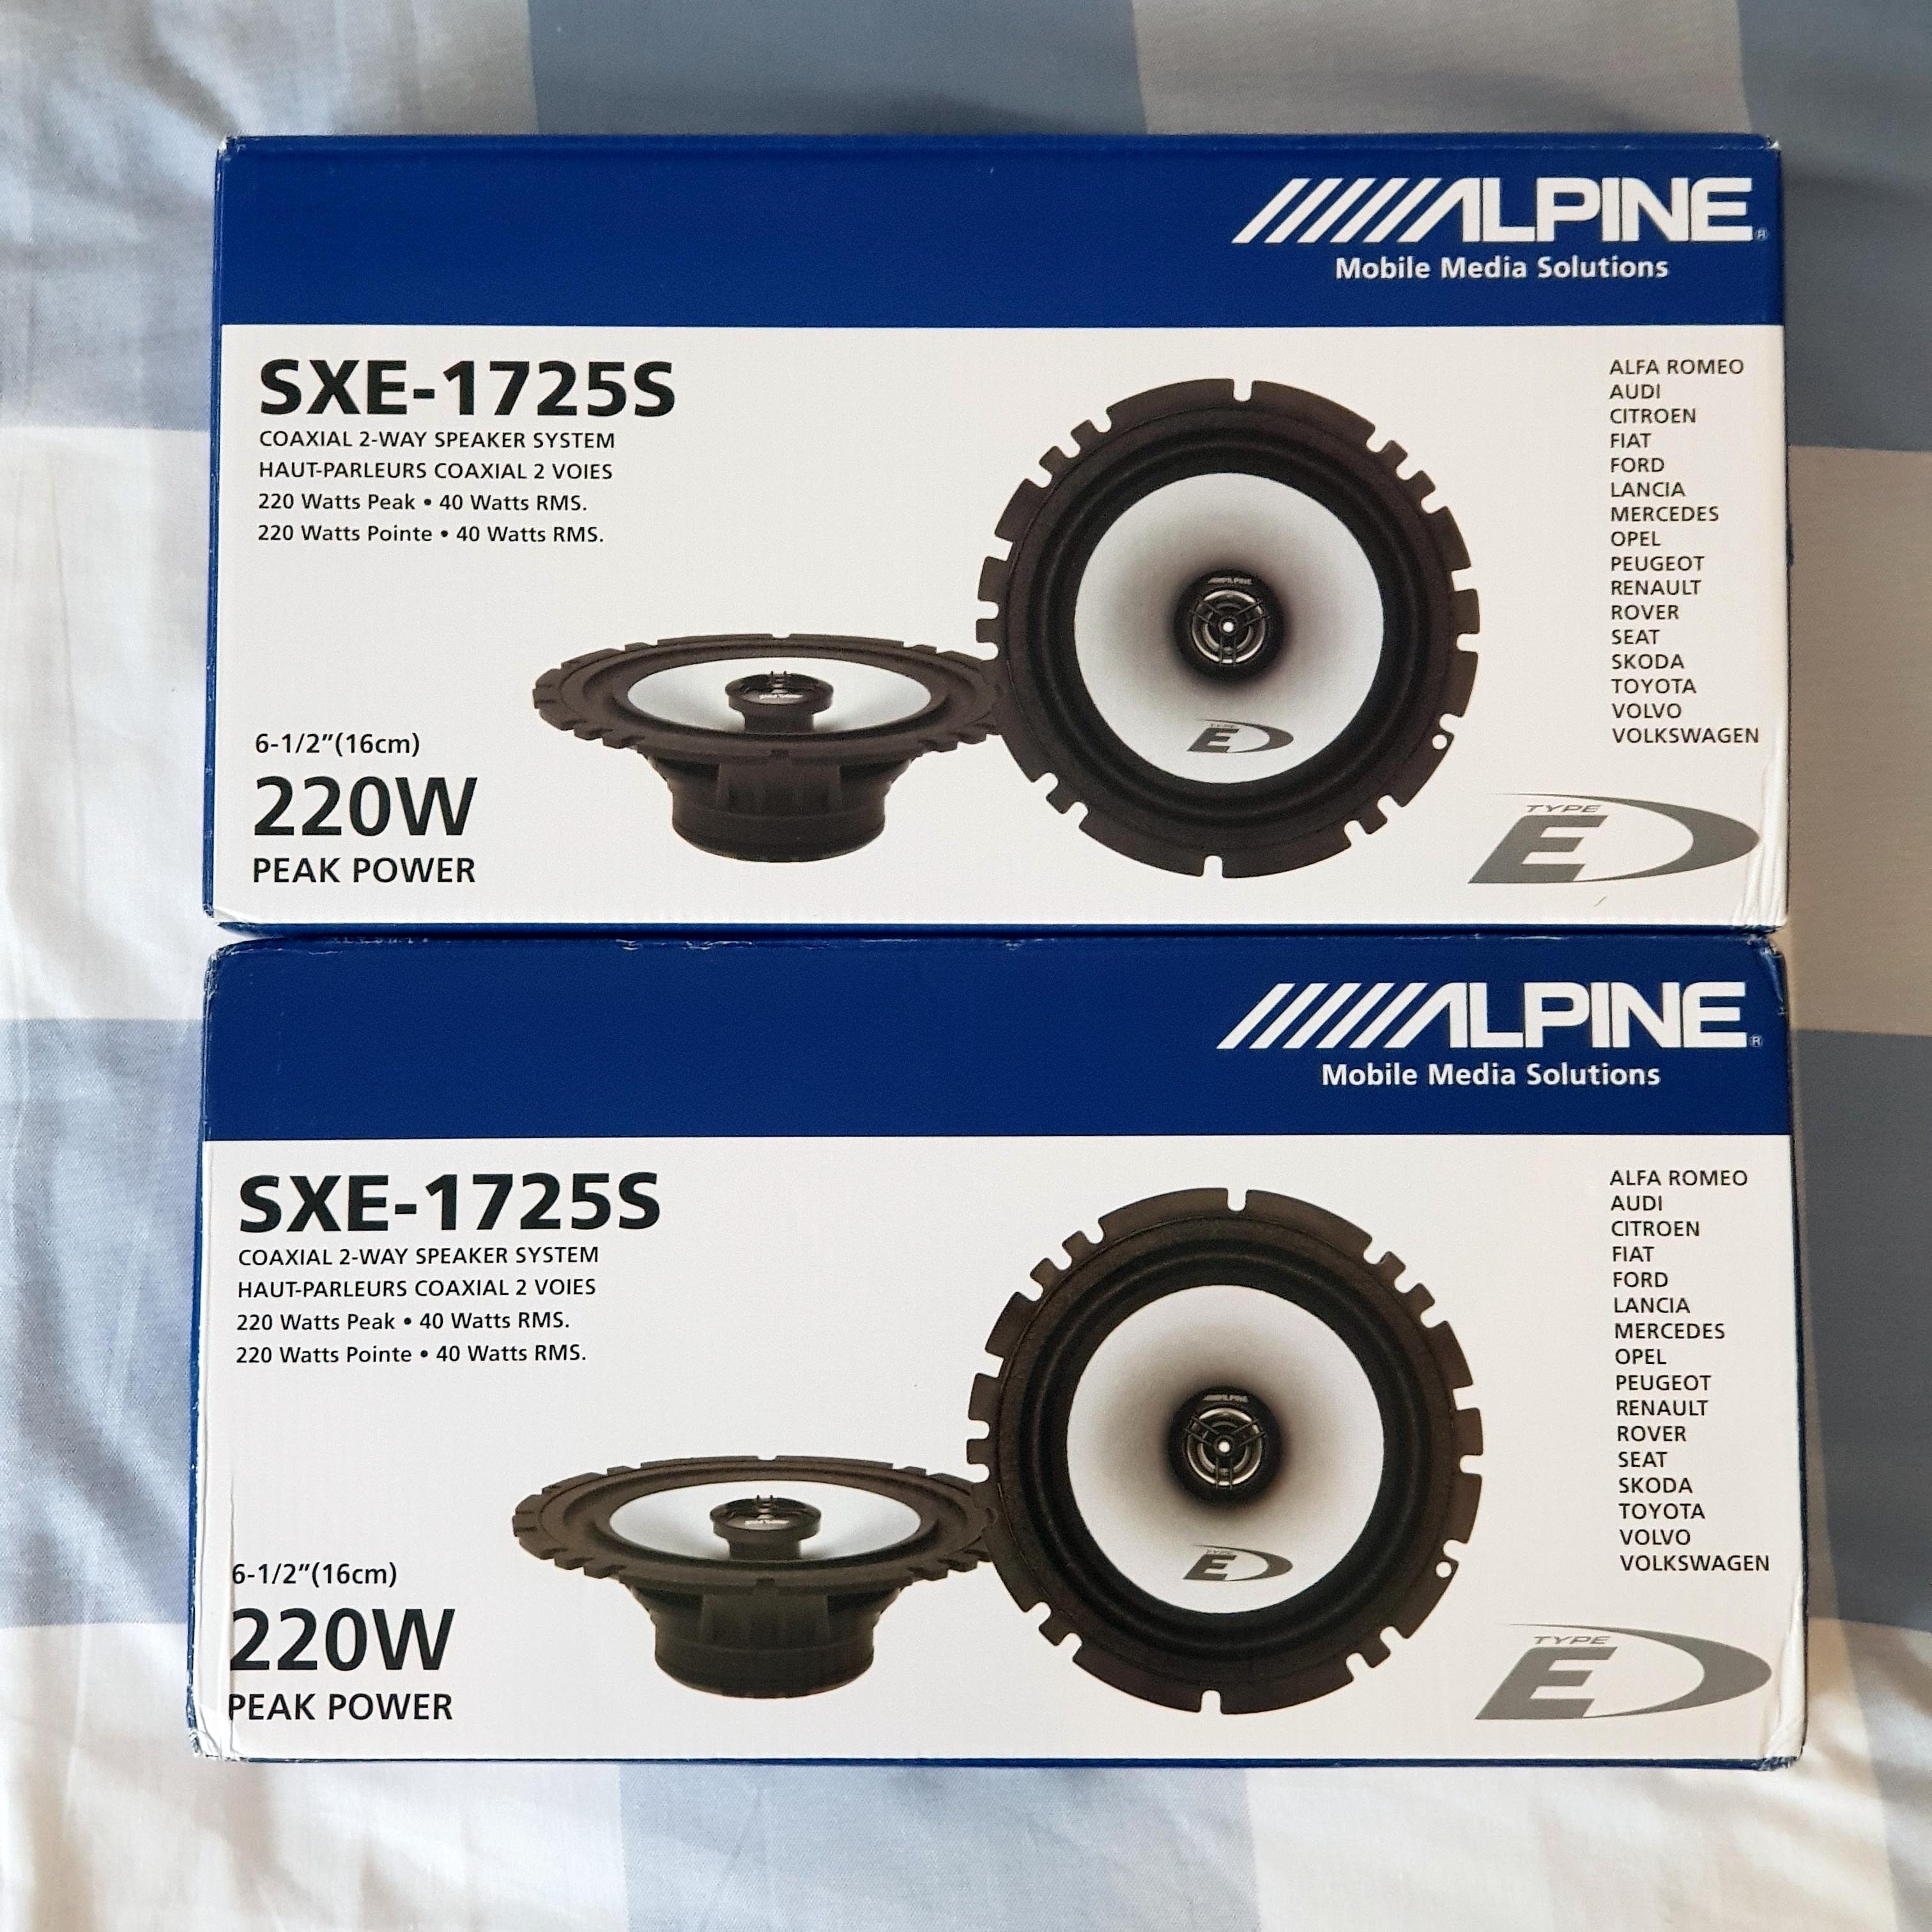
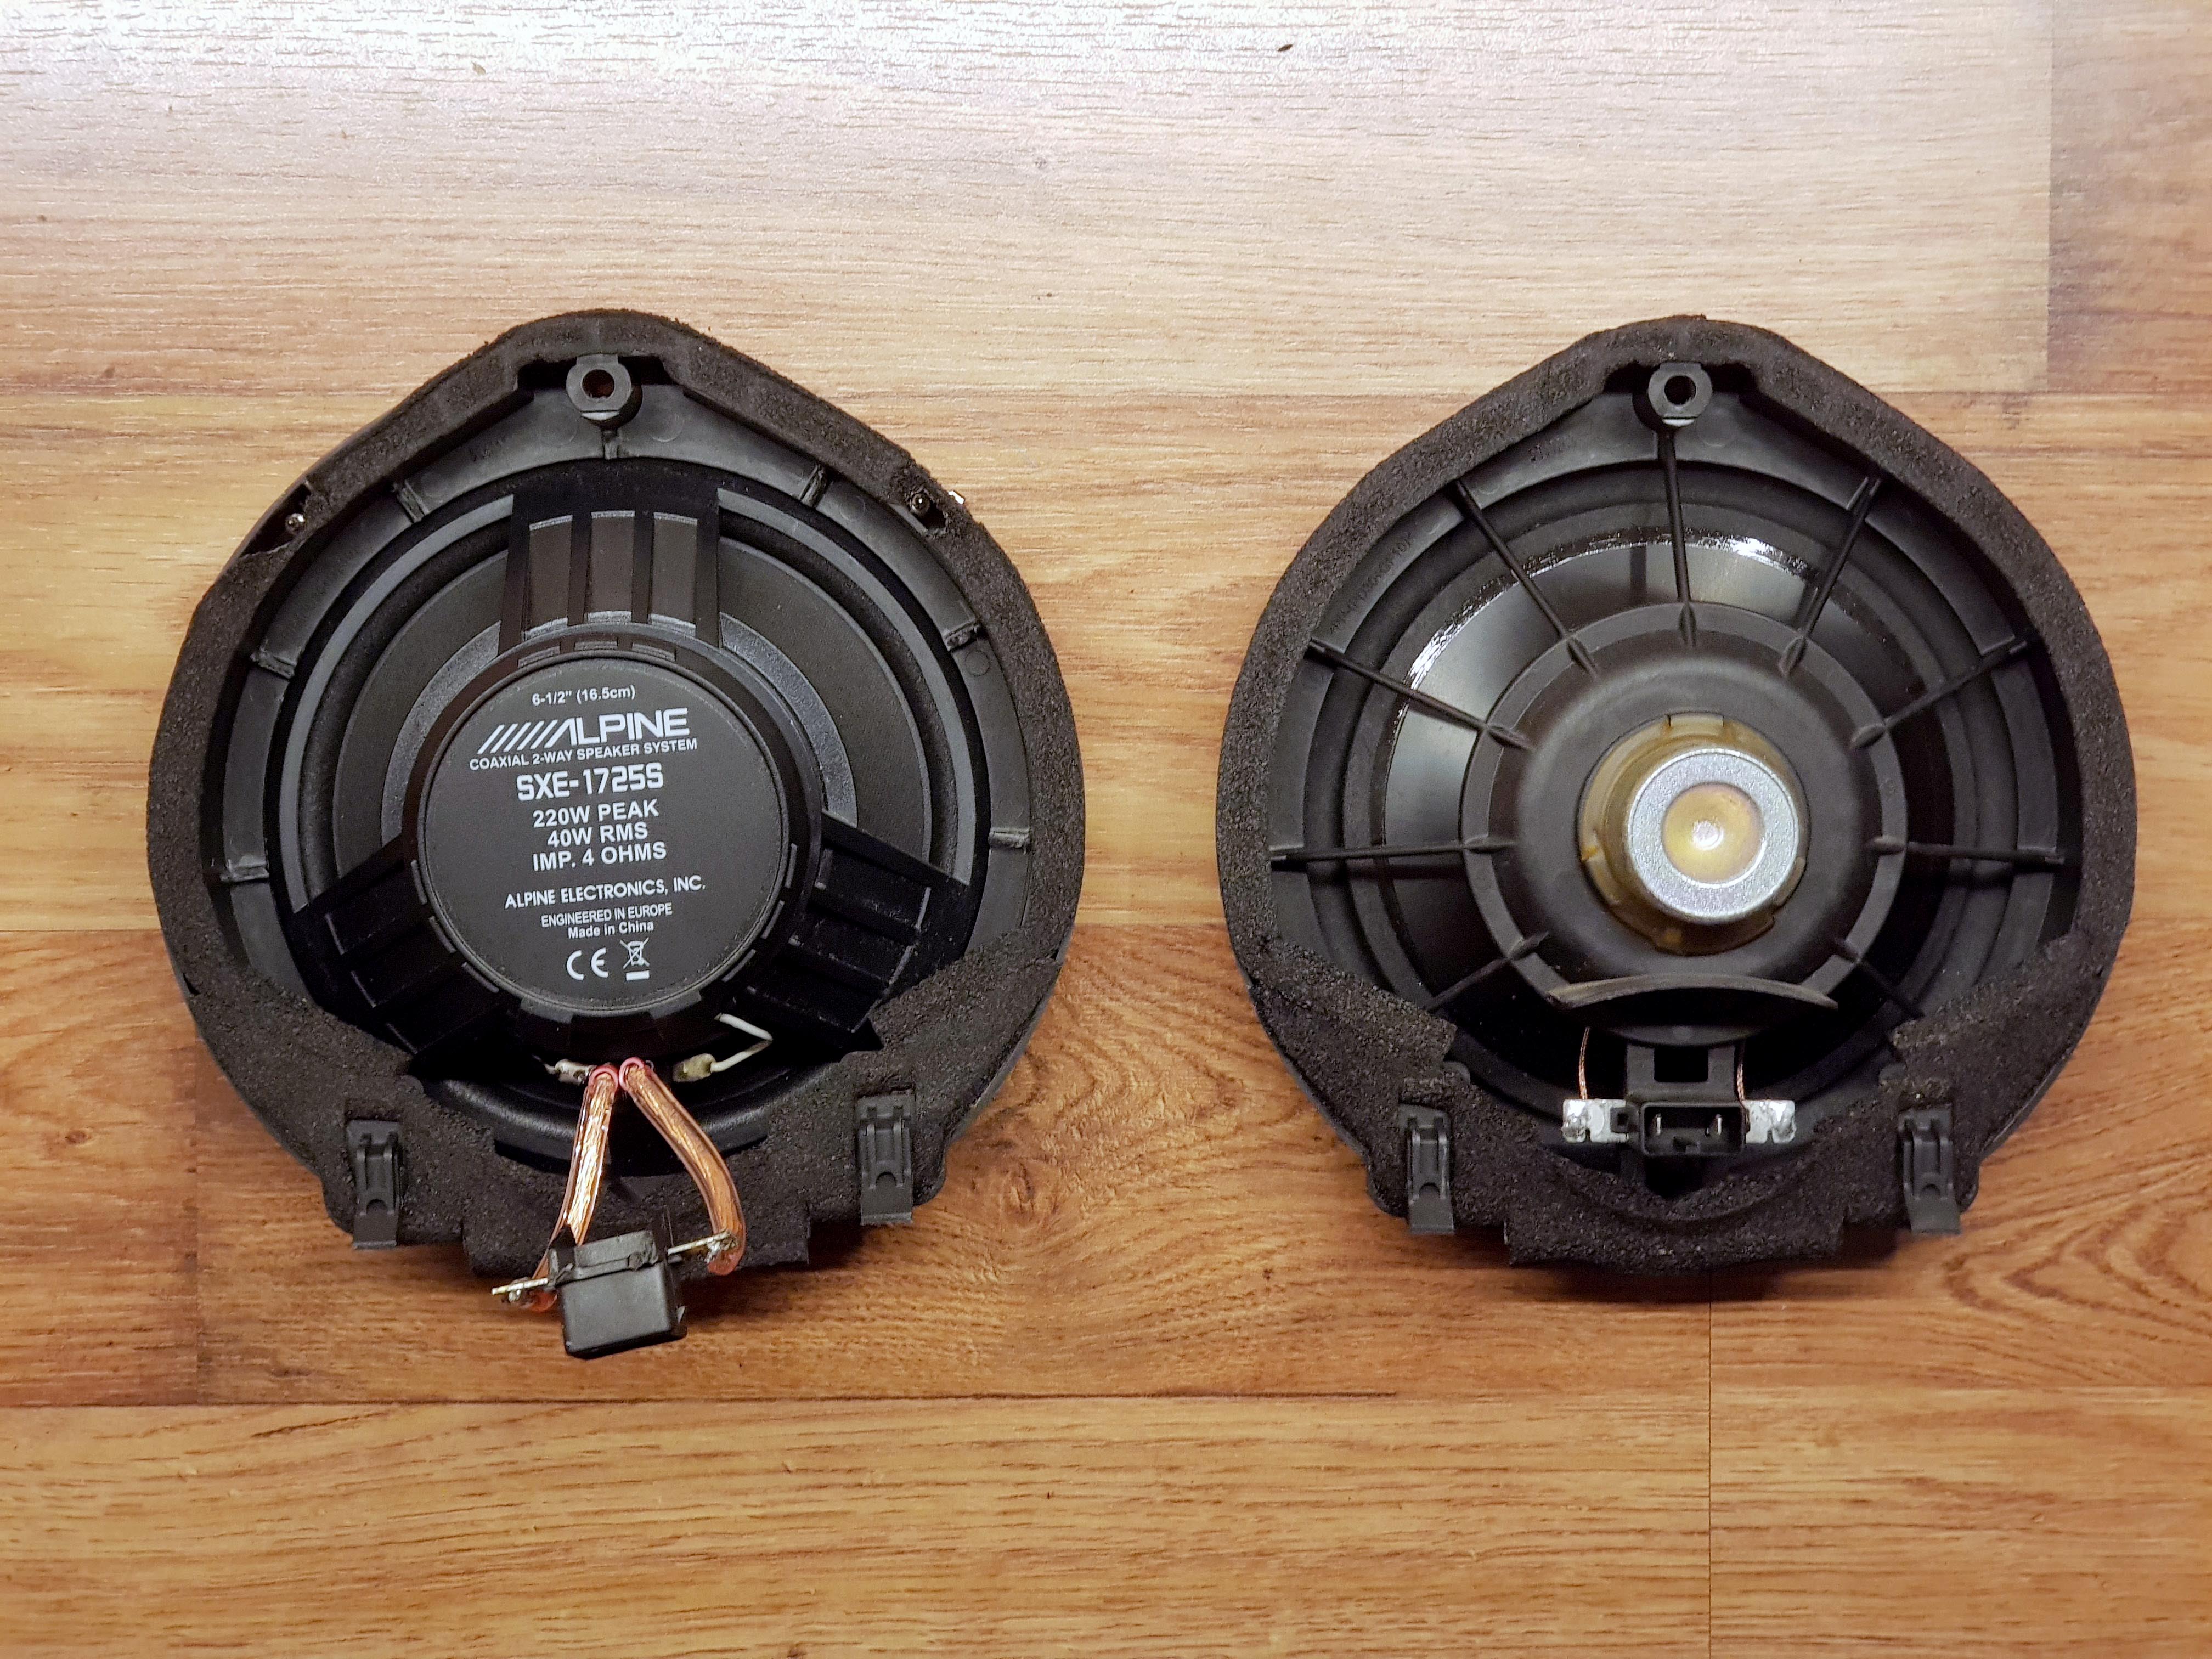
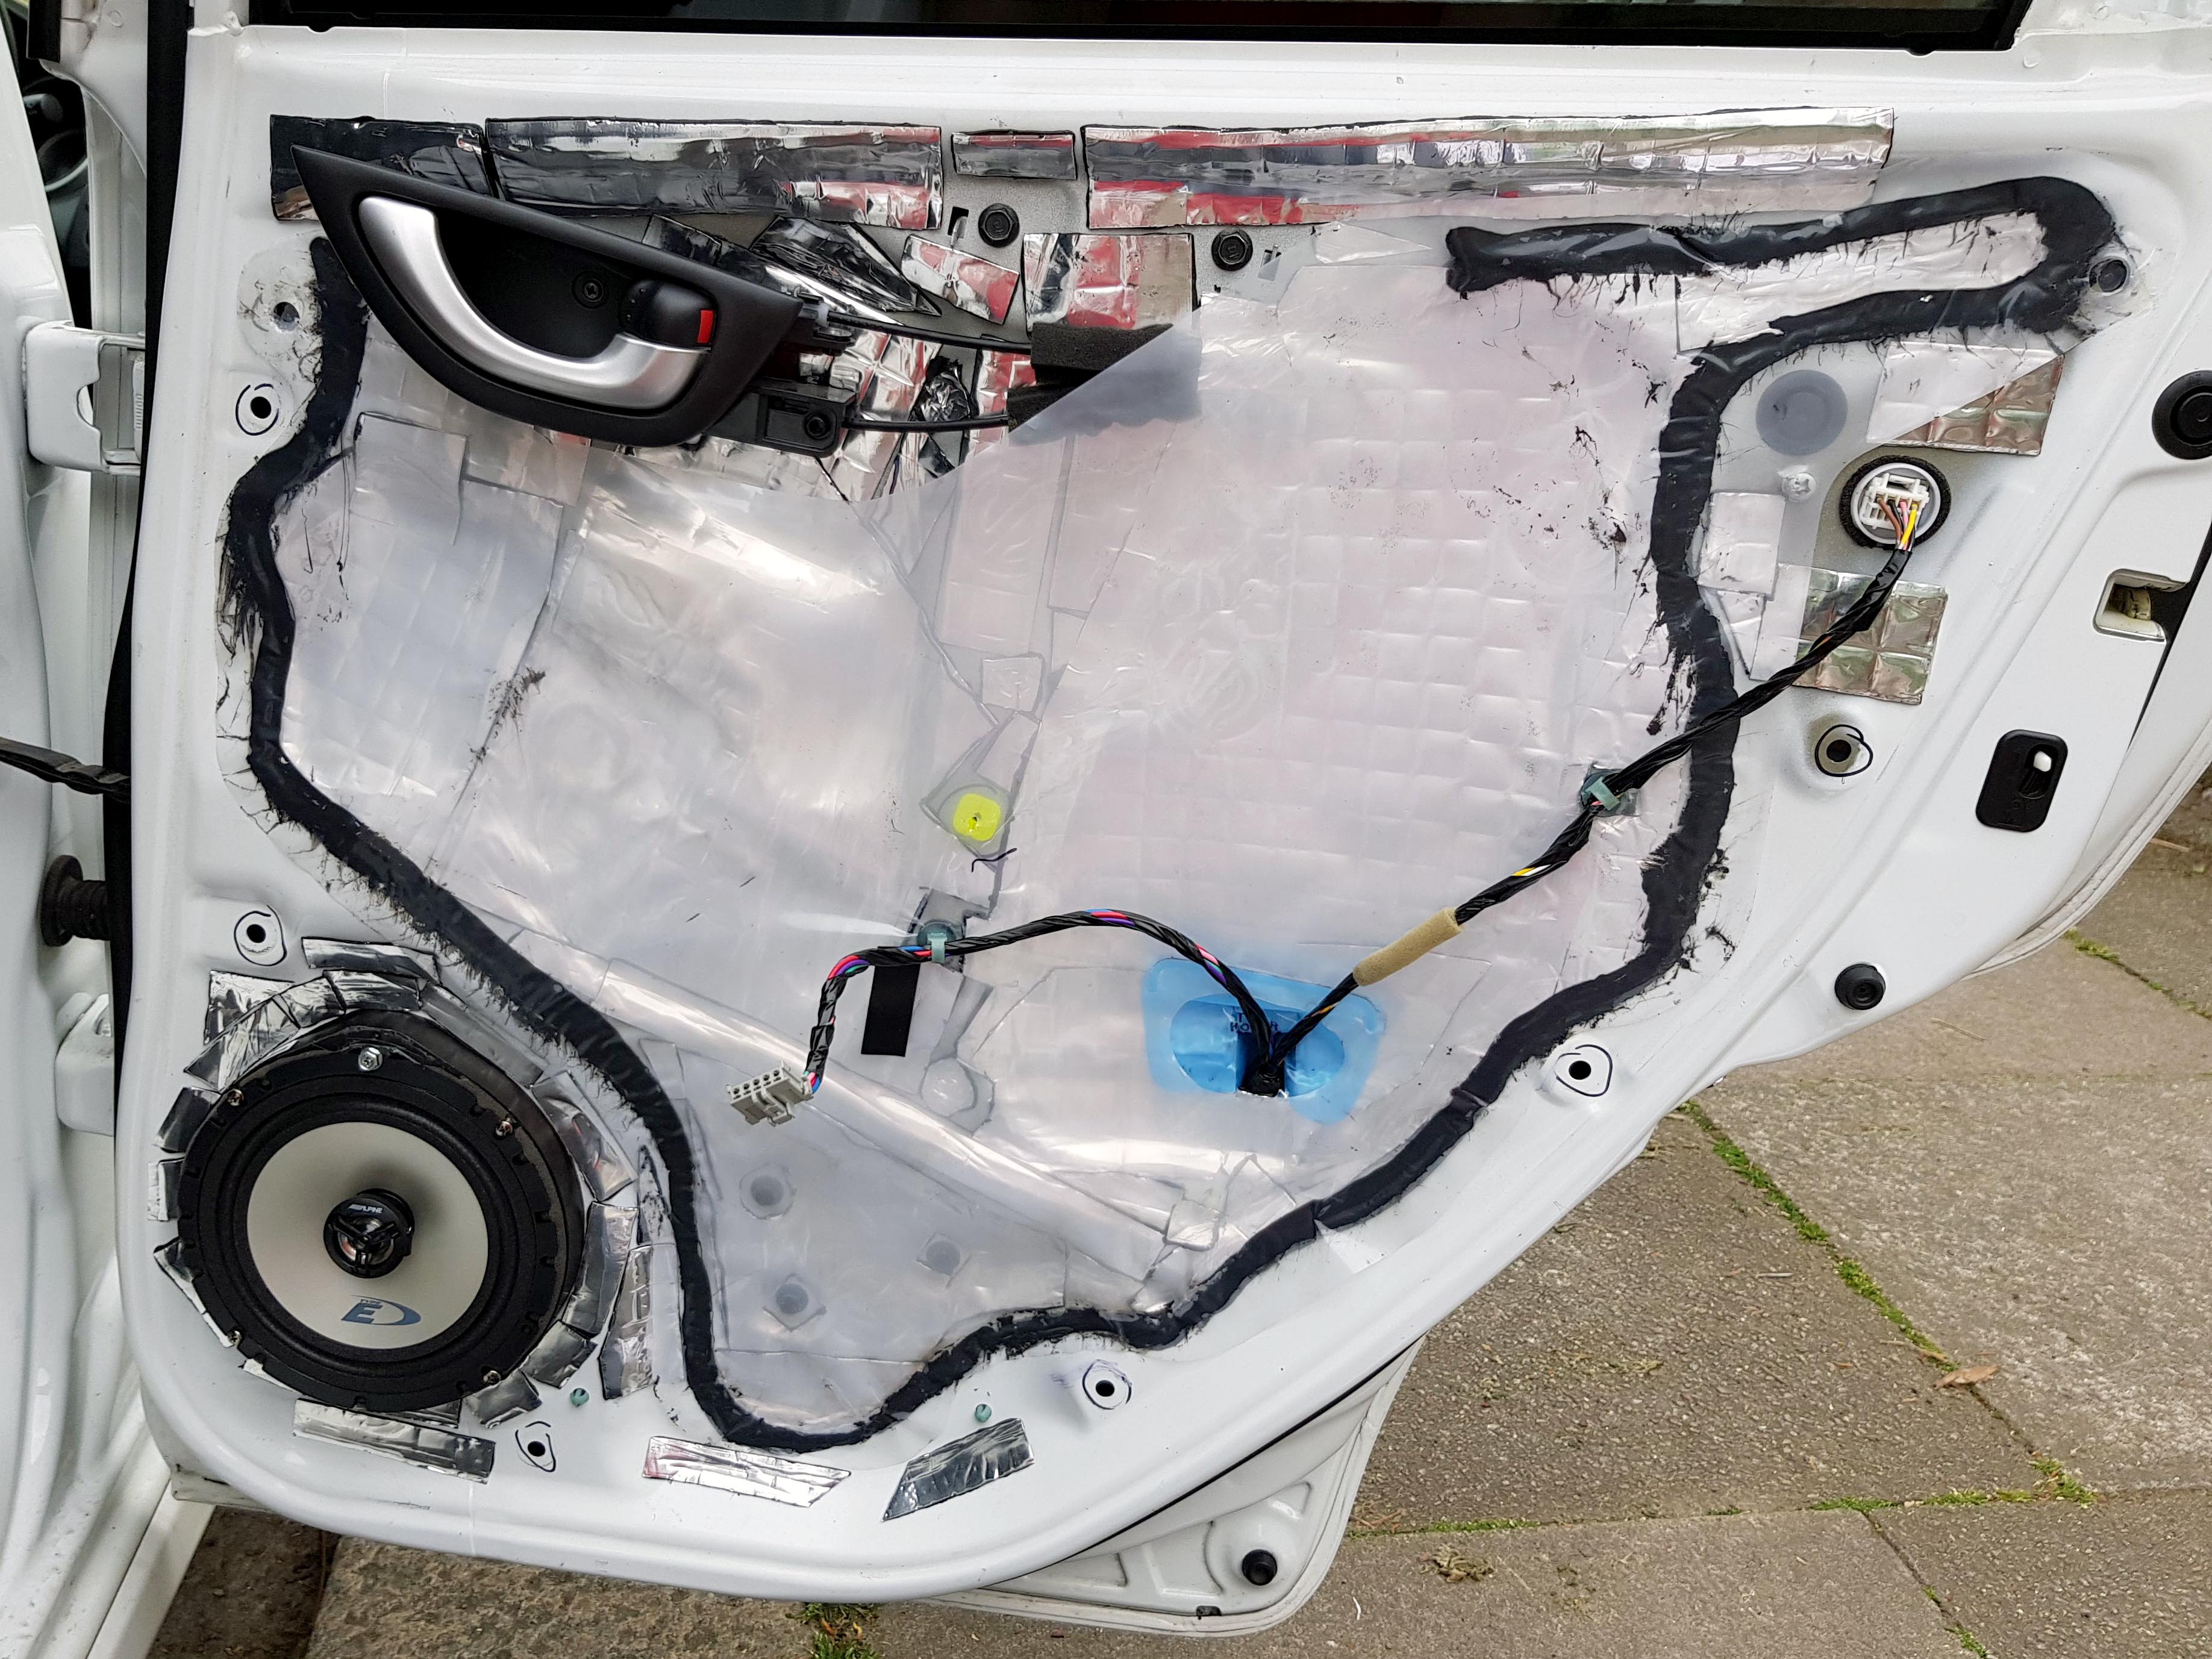
I thought this was a good time to upgrade the standard speakers. I didn't want to go too crazy, as theres no point in running anything too powerful if I'm still using the stock headunit. And I didn't want to spend money on a new headunit, amps and sub. So I got two pairs of Alpine SXE-1725S speakers, as recommended in this build: http://gafferlicious.com/jazz.html, cost me �55 for the pair from DynamicSounds.
I did a lot of experimenting with the speaker mounts to get them to work with the new speakers and fit the door card.
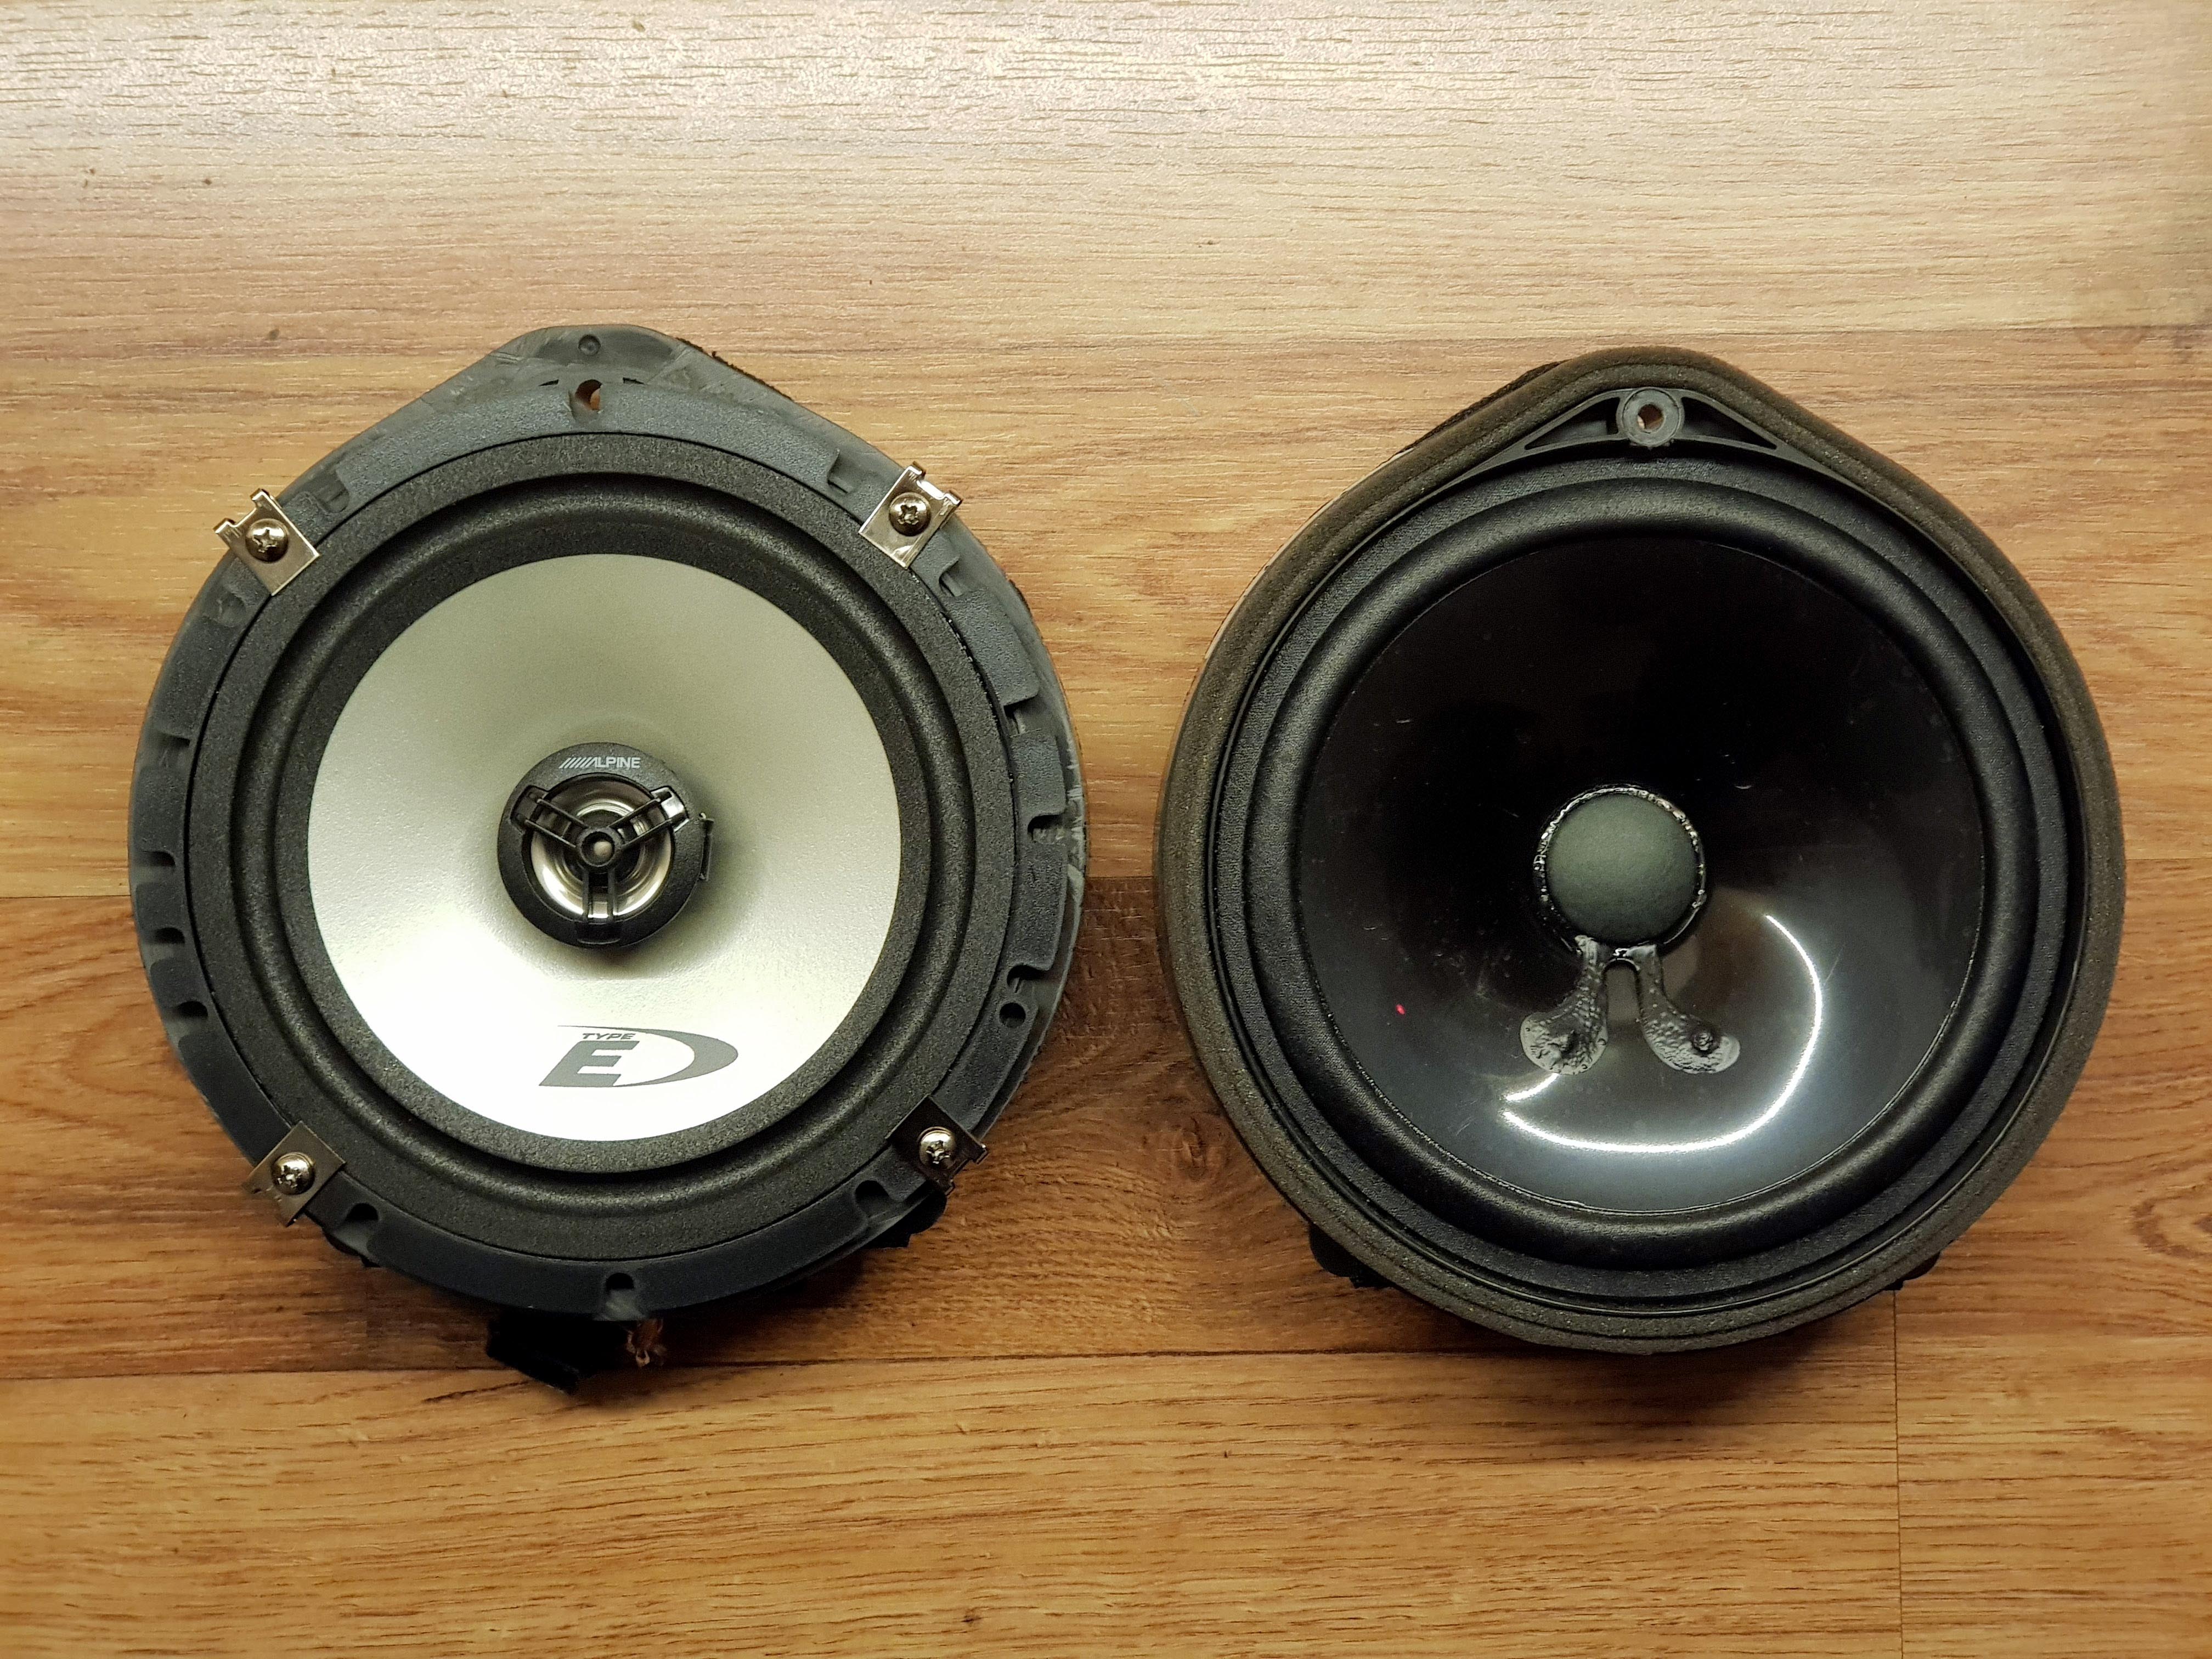
The guide above said to trim the Alpine speakers rather than the modify the stock speakers. But I felt that I would rather cut the stock speakers up than my brand new ones! Especially if I decided later on down the line that I wanted to go all out and get a better sound system, as I could at least sell them if I hadn't cut into them!
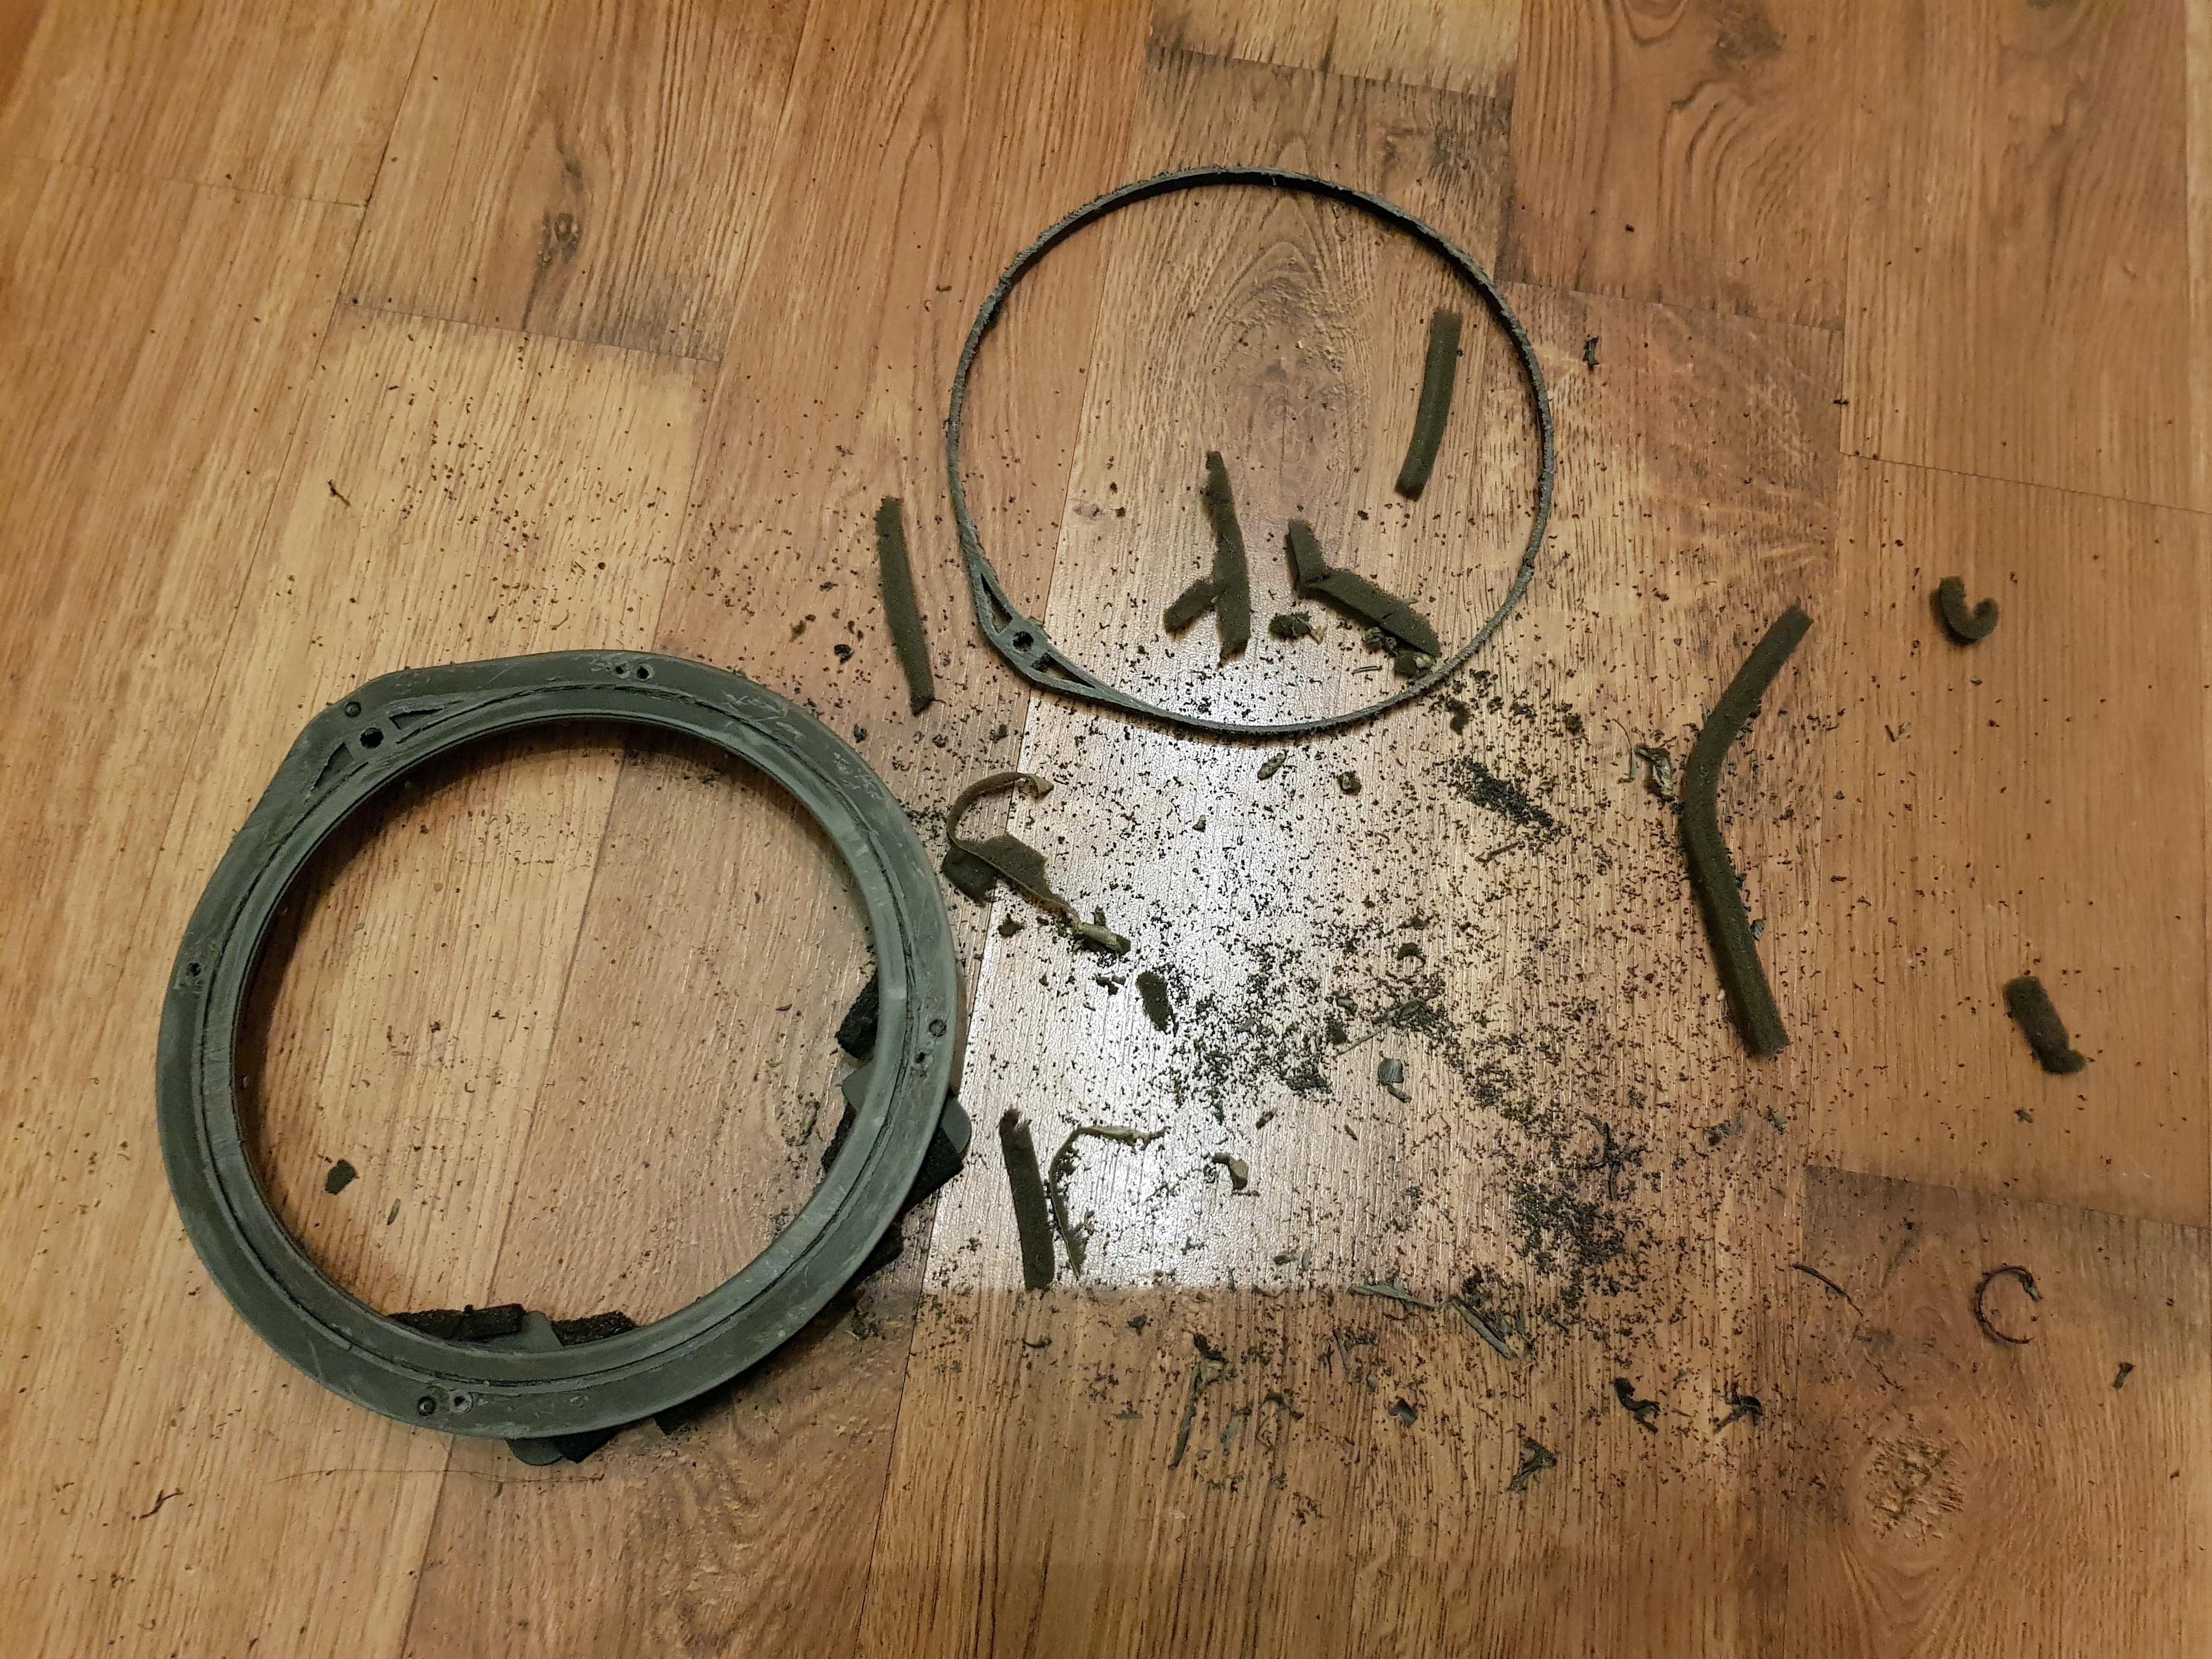
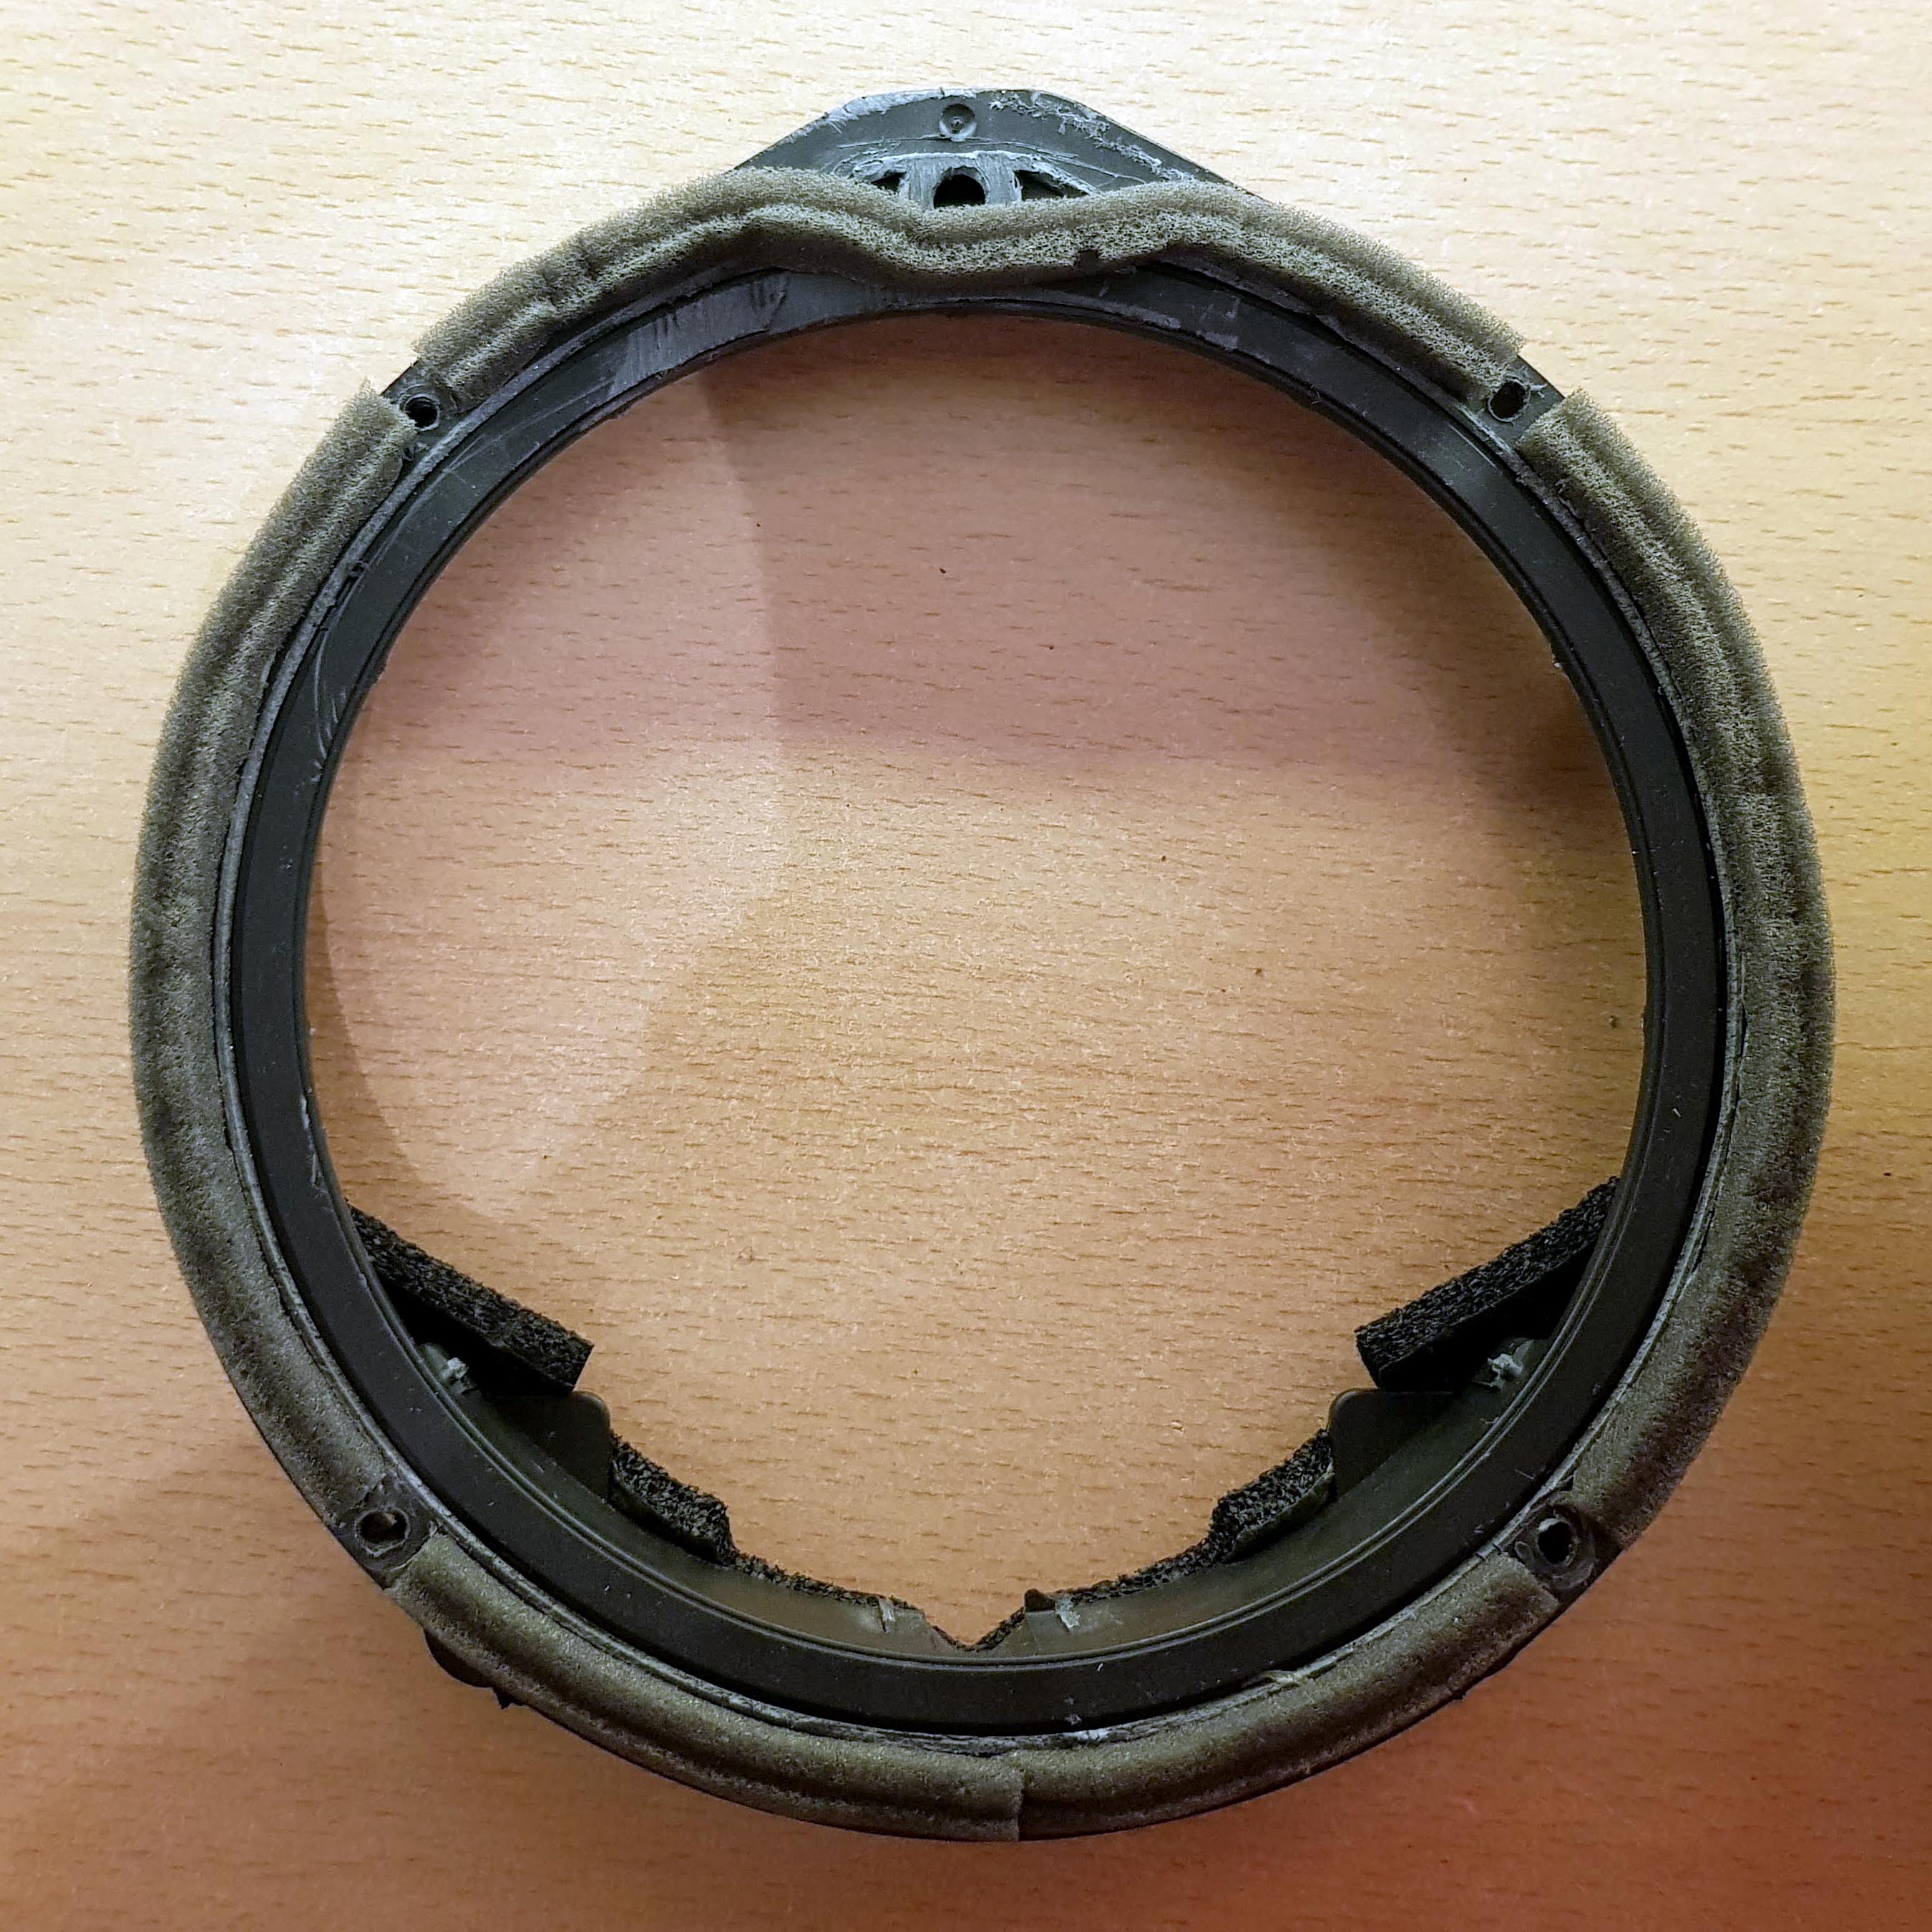
So I ripped out the original speaker cone, and to make it fit properly, i removed the foam and sawed off the plastic ring, so I could screw the new speaker into the plastic:
I then wired the original Honda plug to the speakers, to retain the use of original factory plugs:
I then quickly realised the door card wouldn't fit over the speakers with the metal screw spacers, so I had to come up with a different solution.
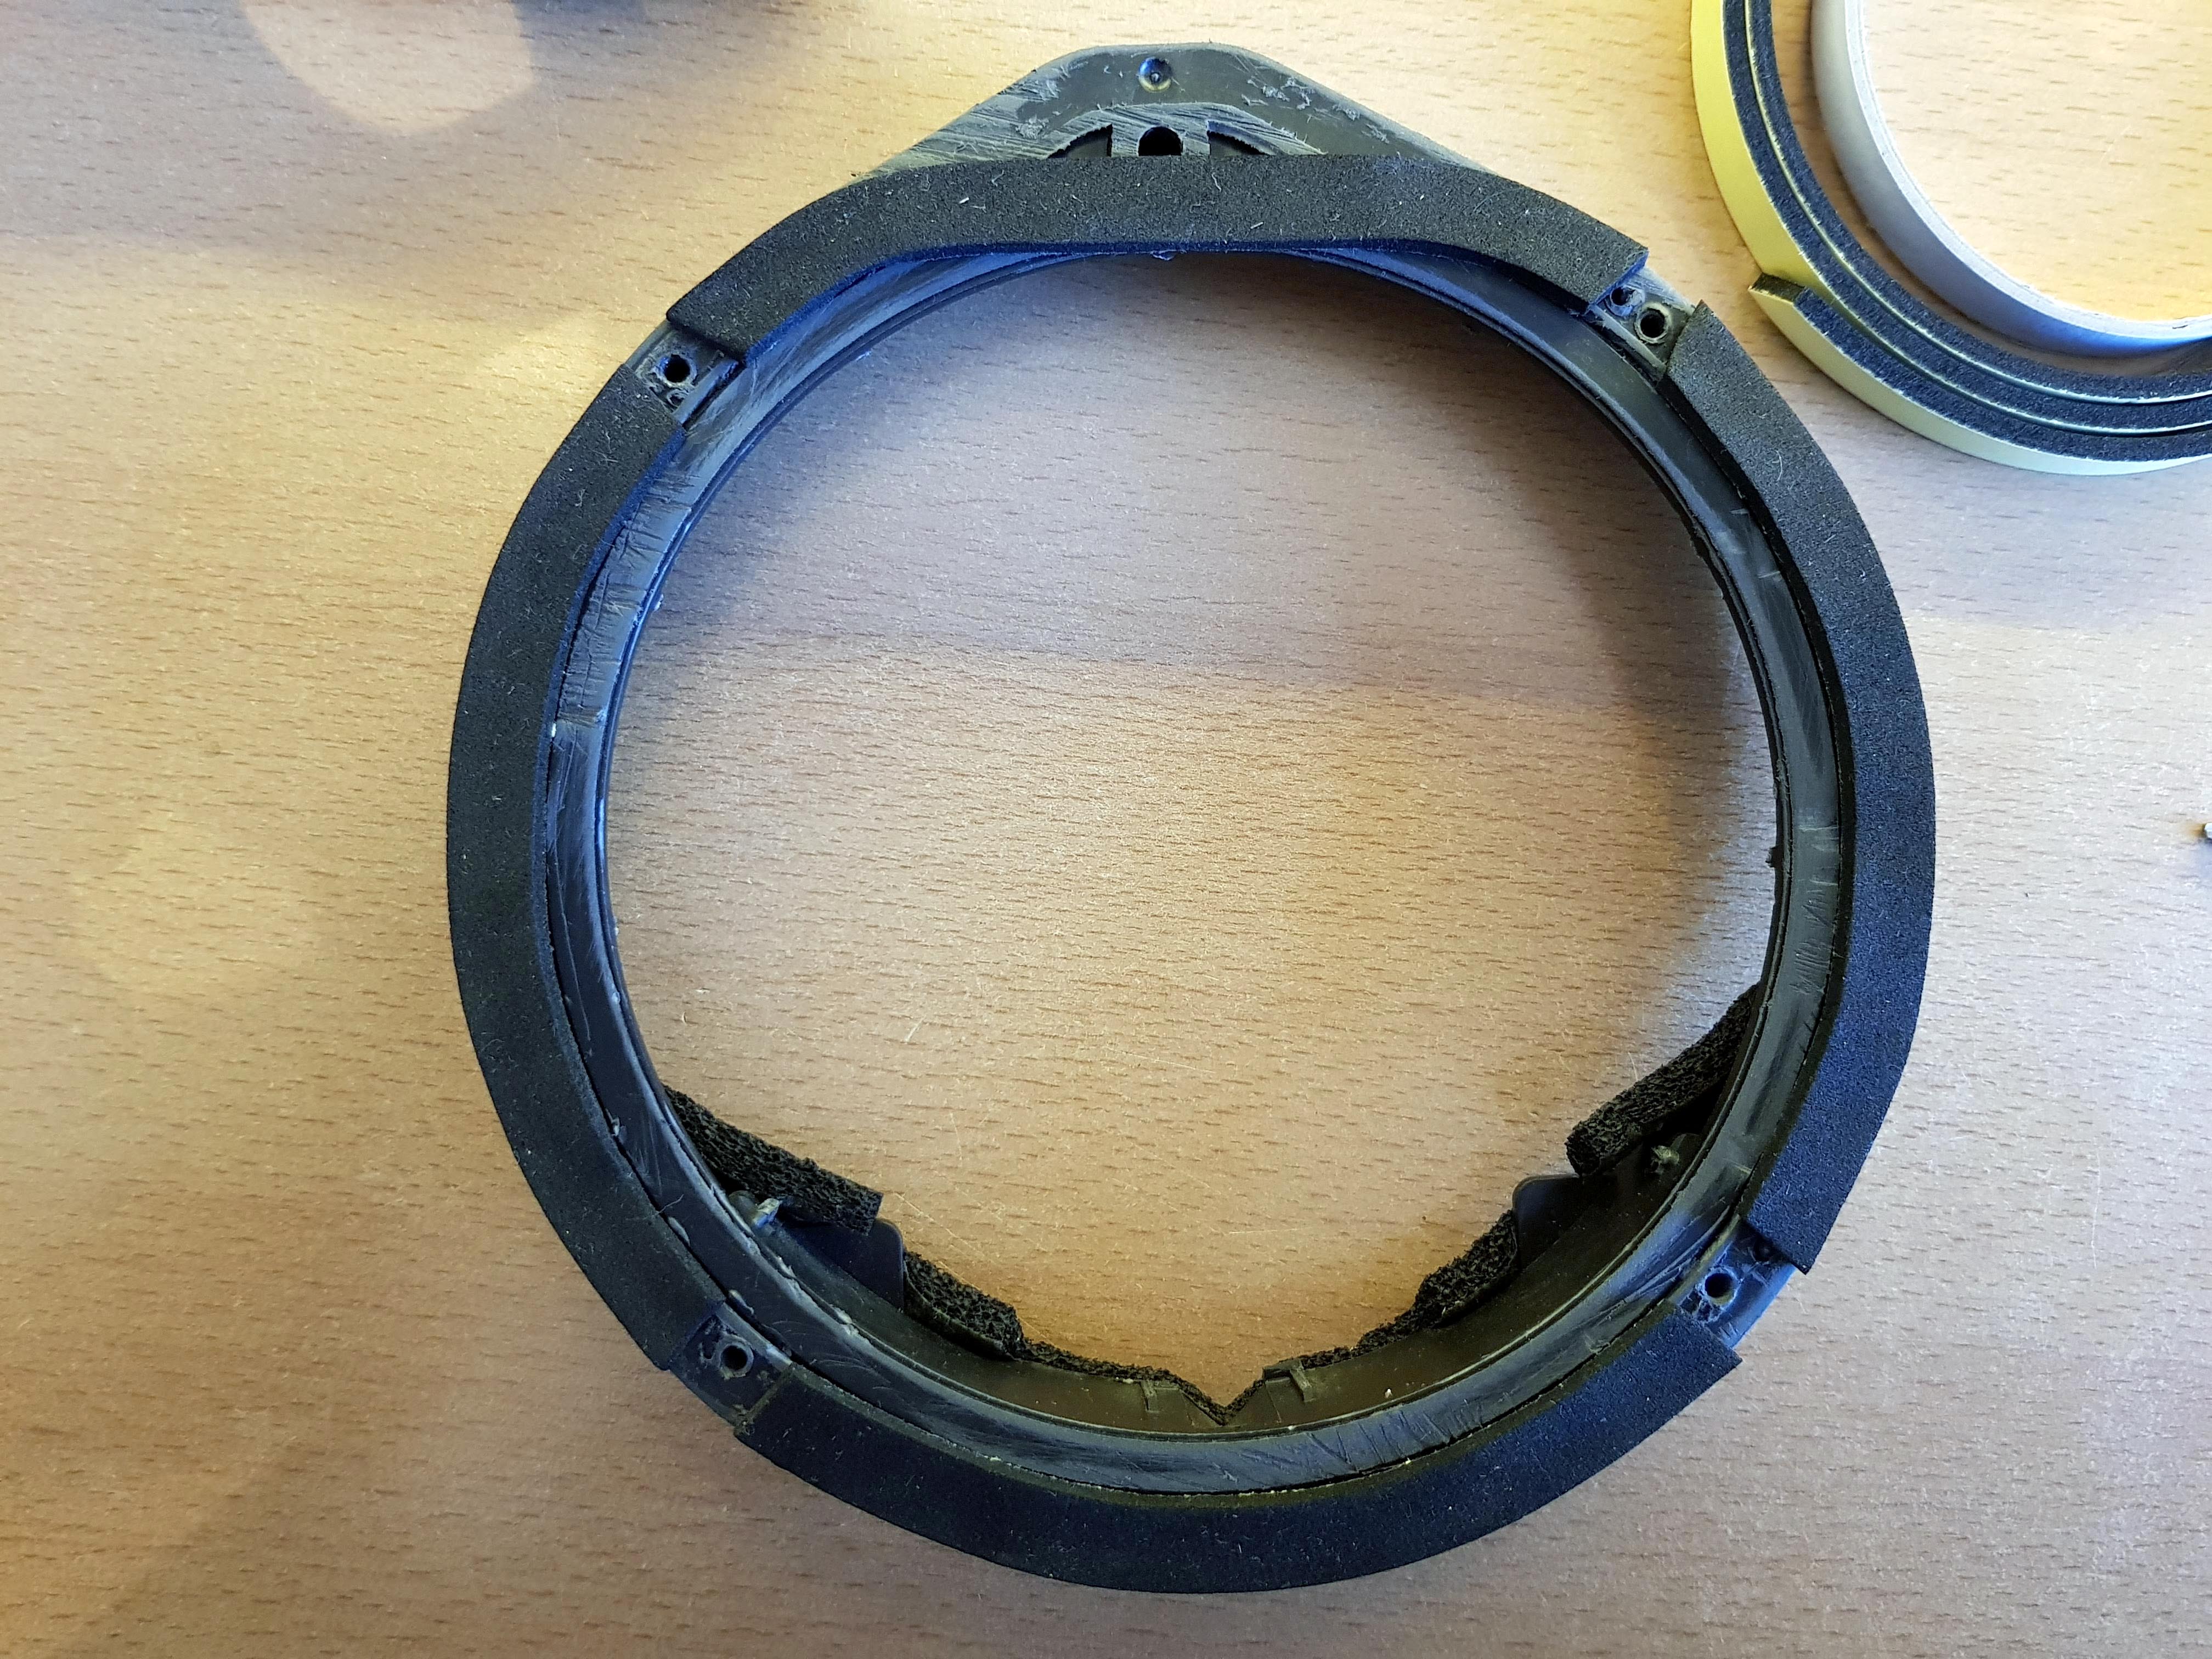
For the next two speakers, I snapped off the plastic ring, rather than using a saw, and I retained the original foam ring, and cut spaces for the screws, and I used a metal file to slightly shorten the screws, so they didn't poke out the other side.

As for the two I had already cut and thrown the original foam, I used some adhesive foam strip I had left over from my spoiler install, and I used it instead to make the spacer:
It doesn't look pretty, but it does the job!!
They sound much nicer than the stock speakers, but they could still be better! But I'm happy with them for now. I generally spend most of my time listening to audio books in the car, so for the times I do actually listen to music, these speakers will do!
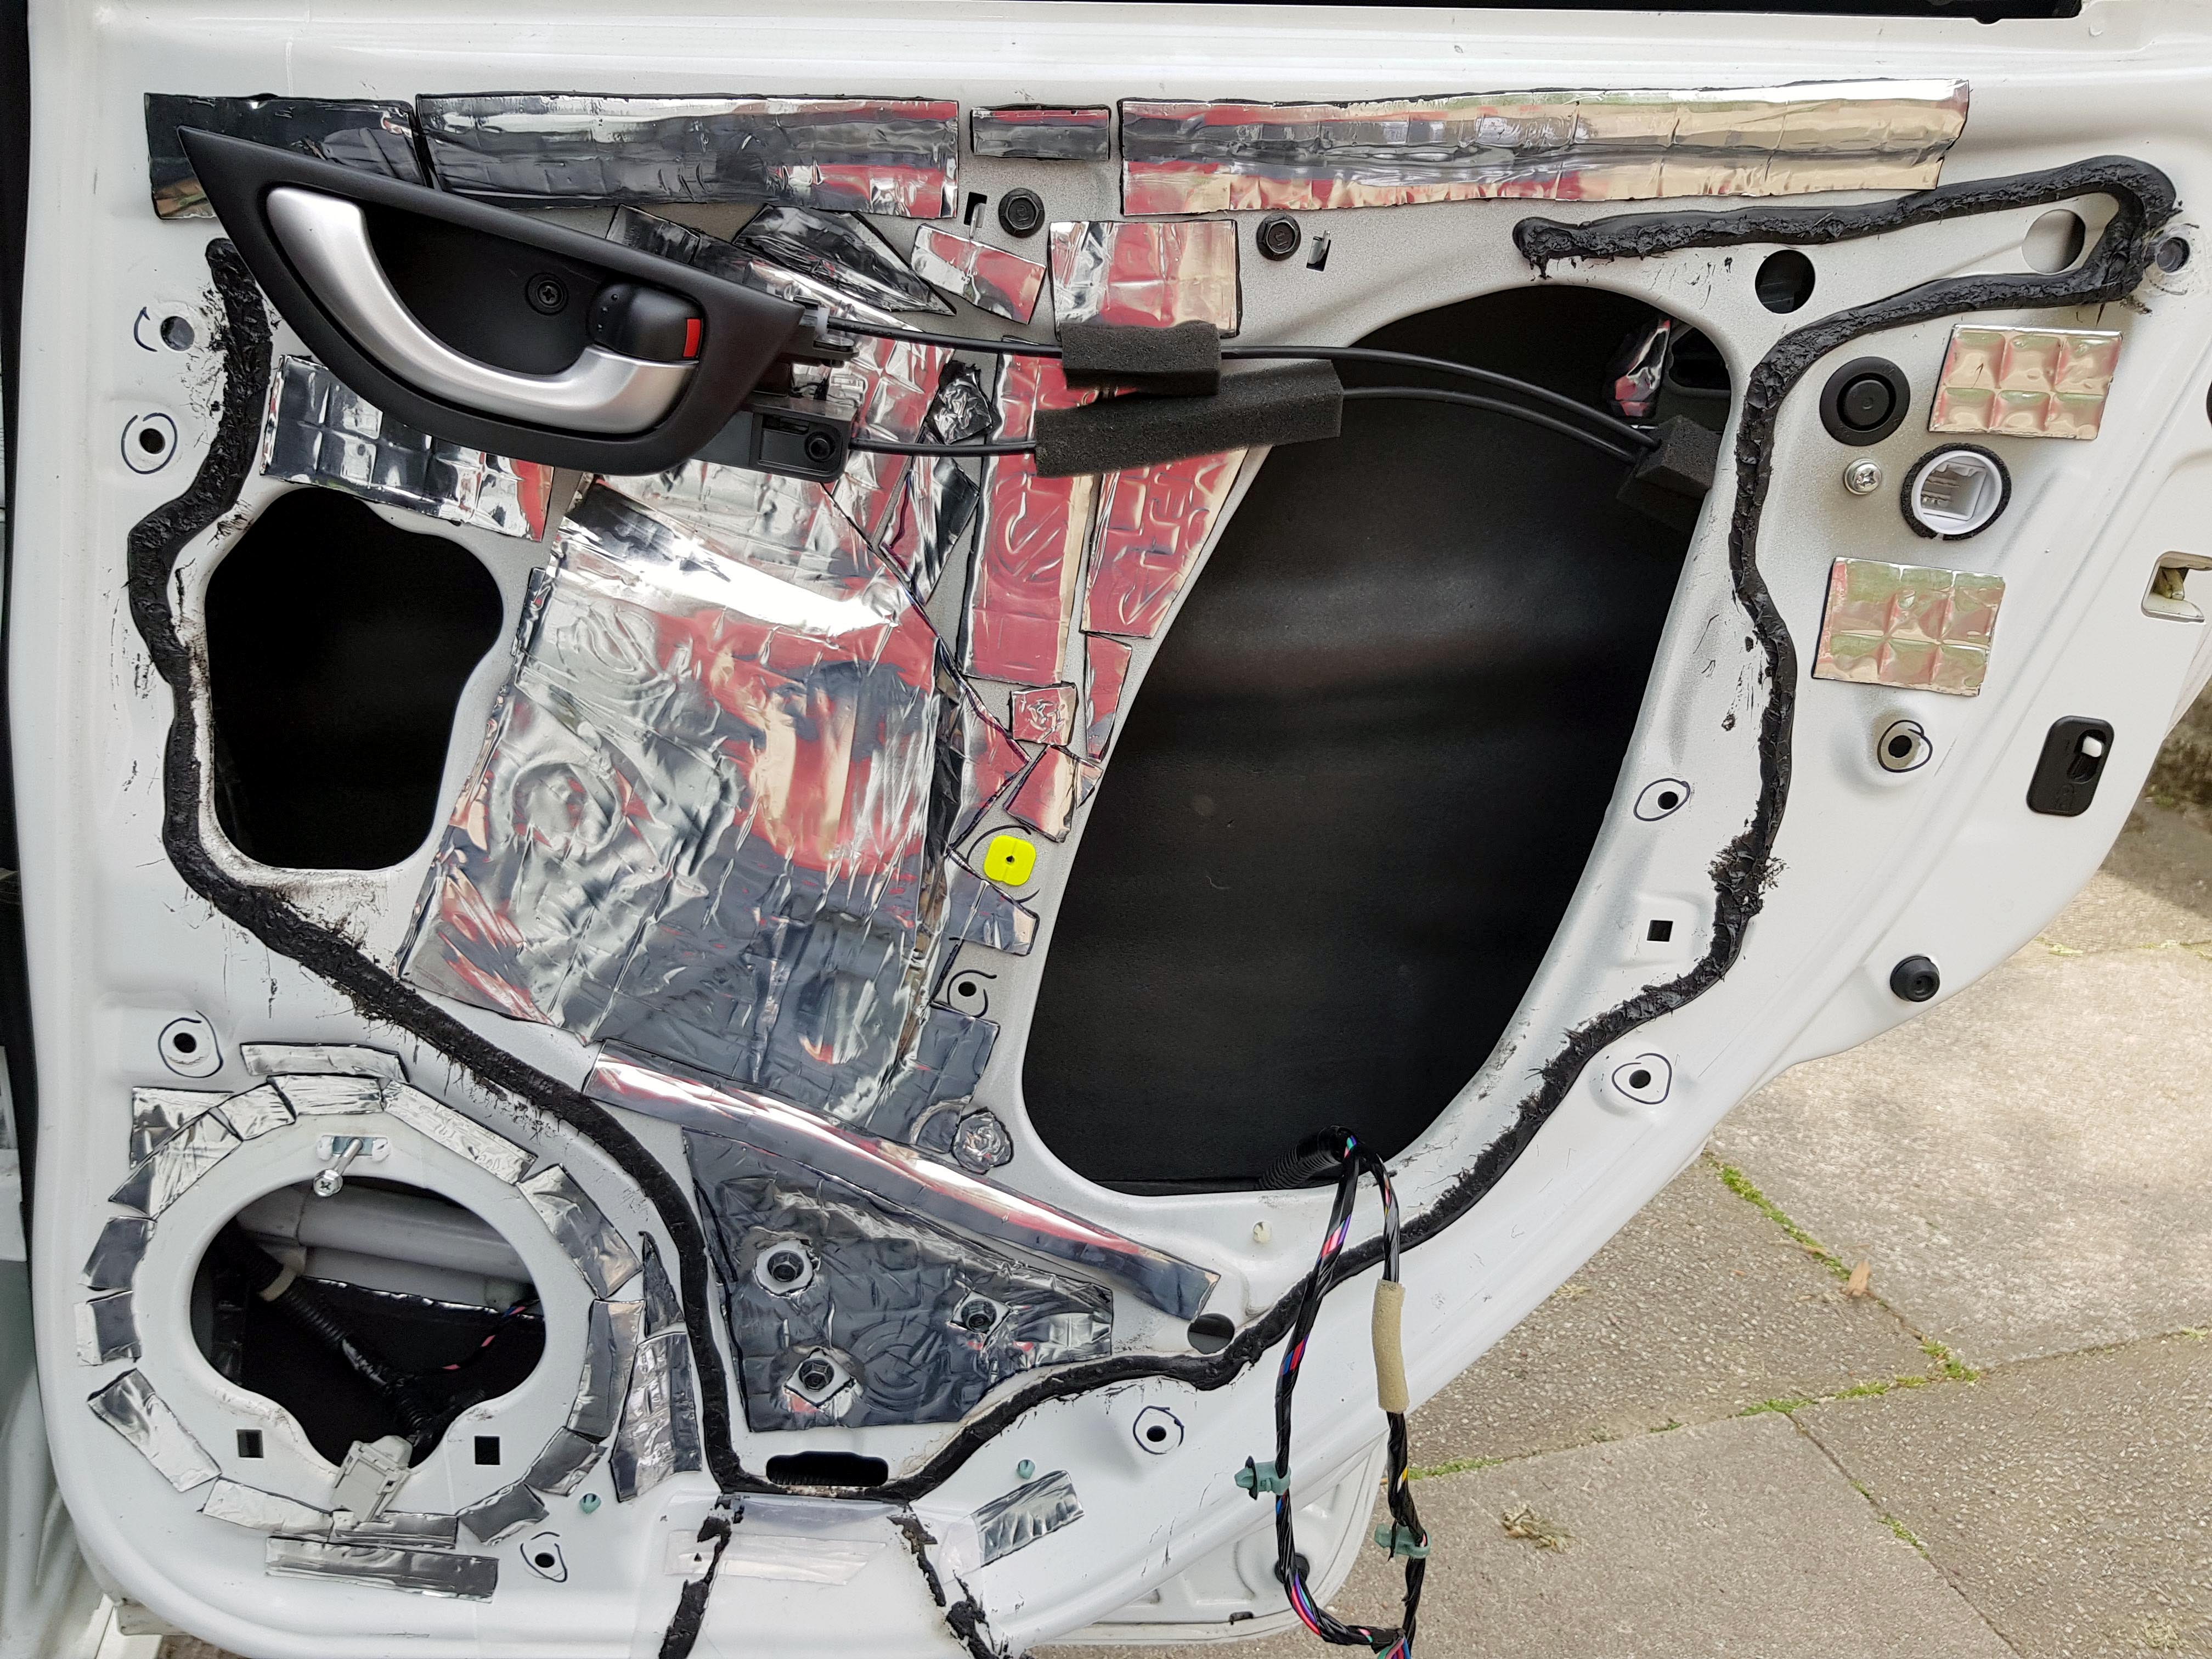
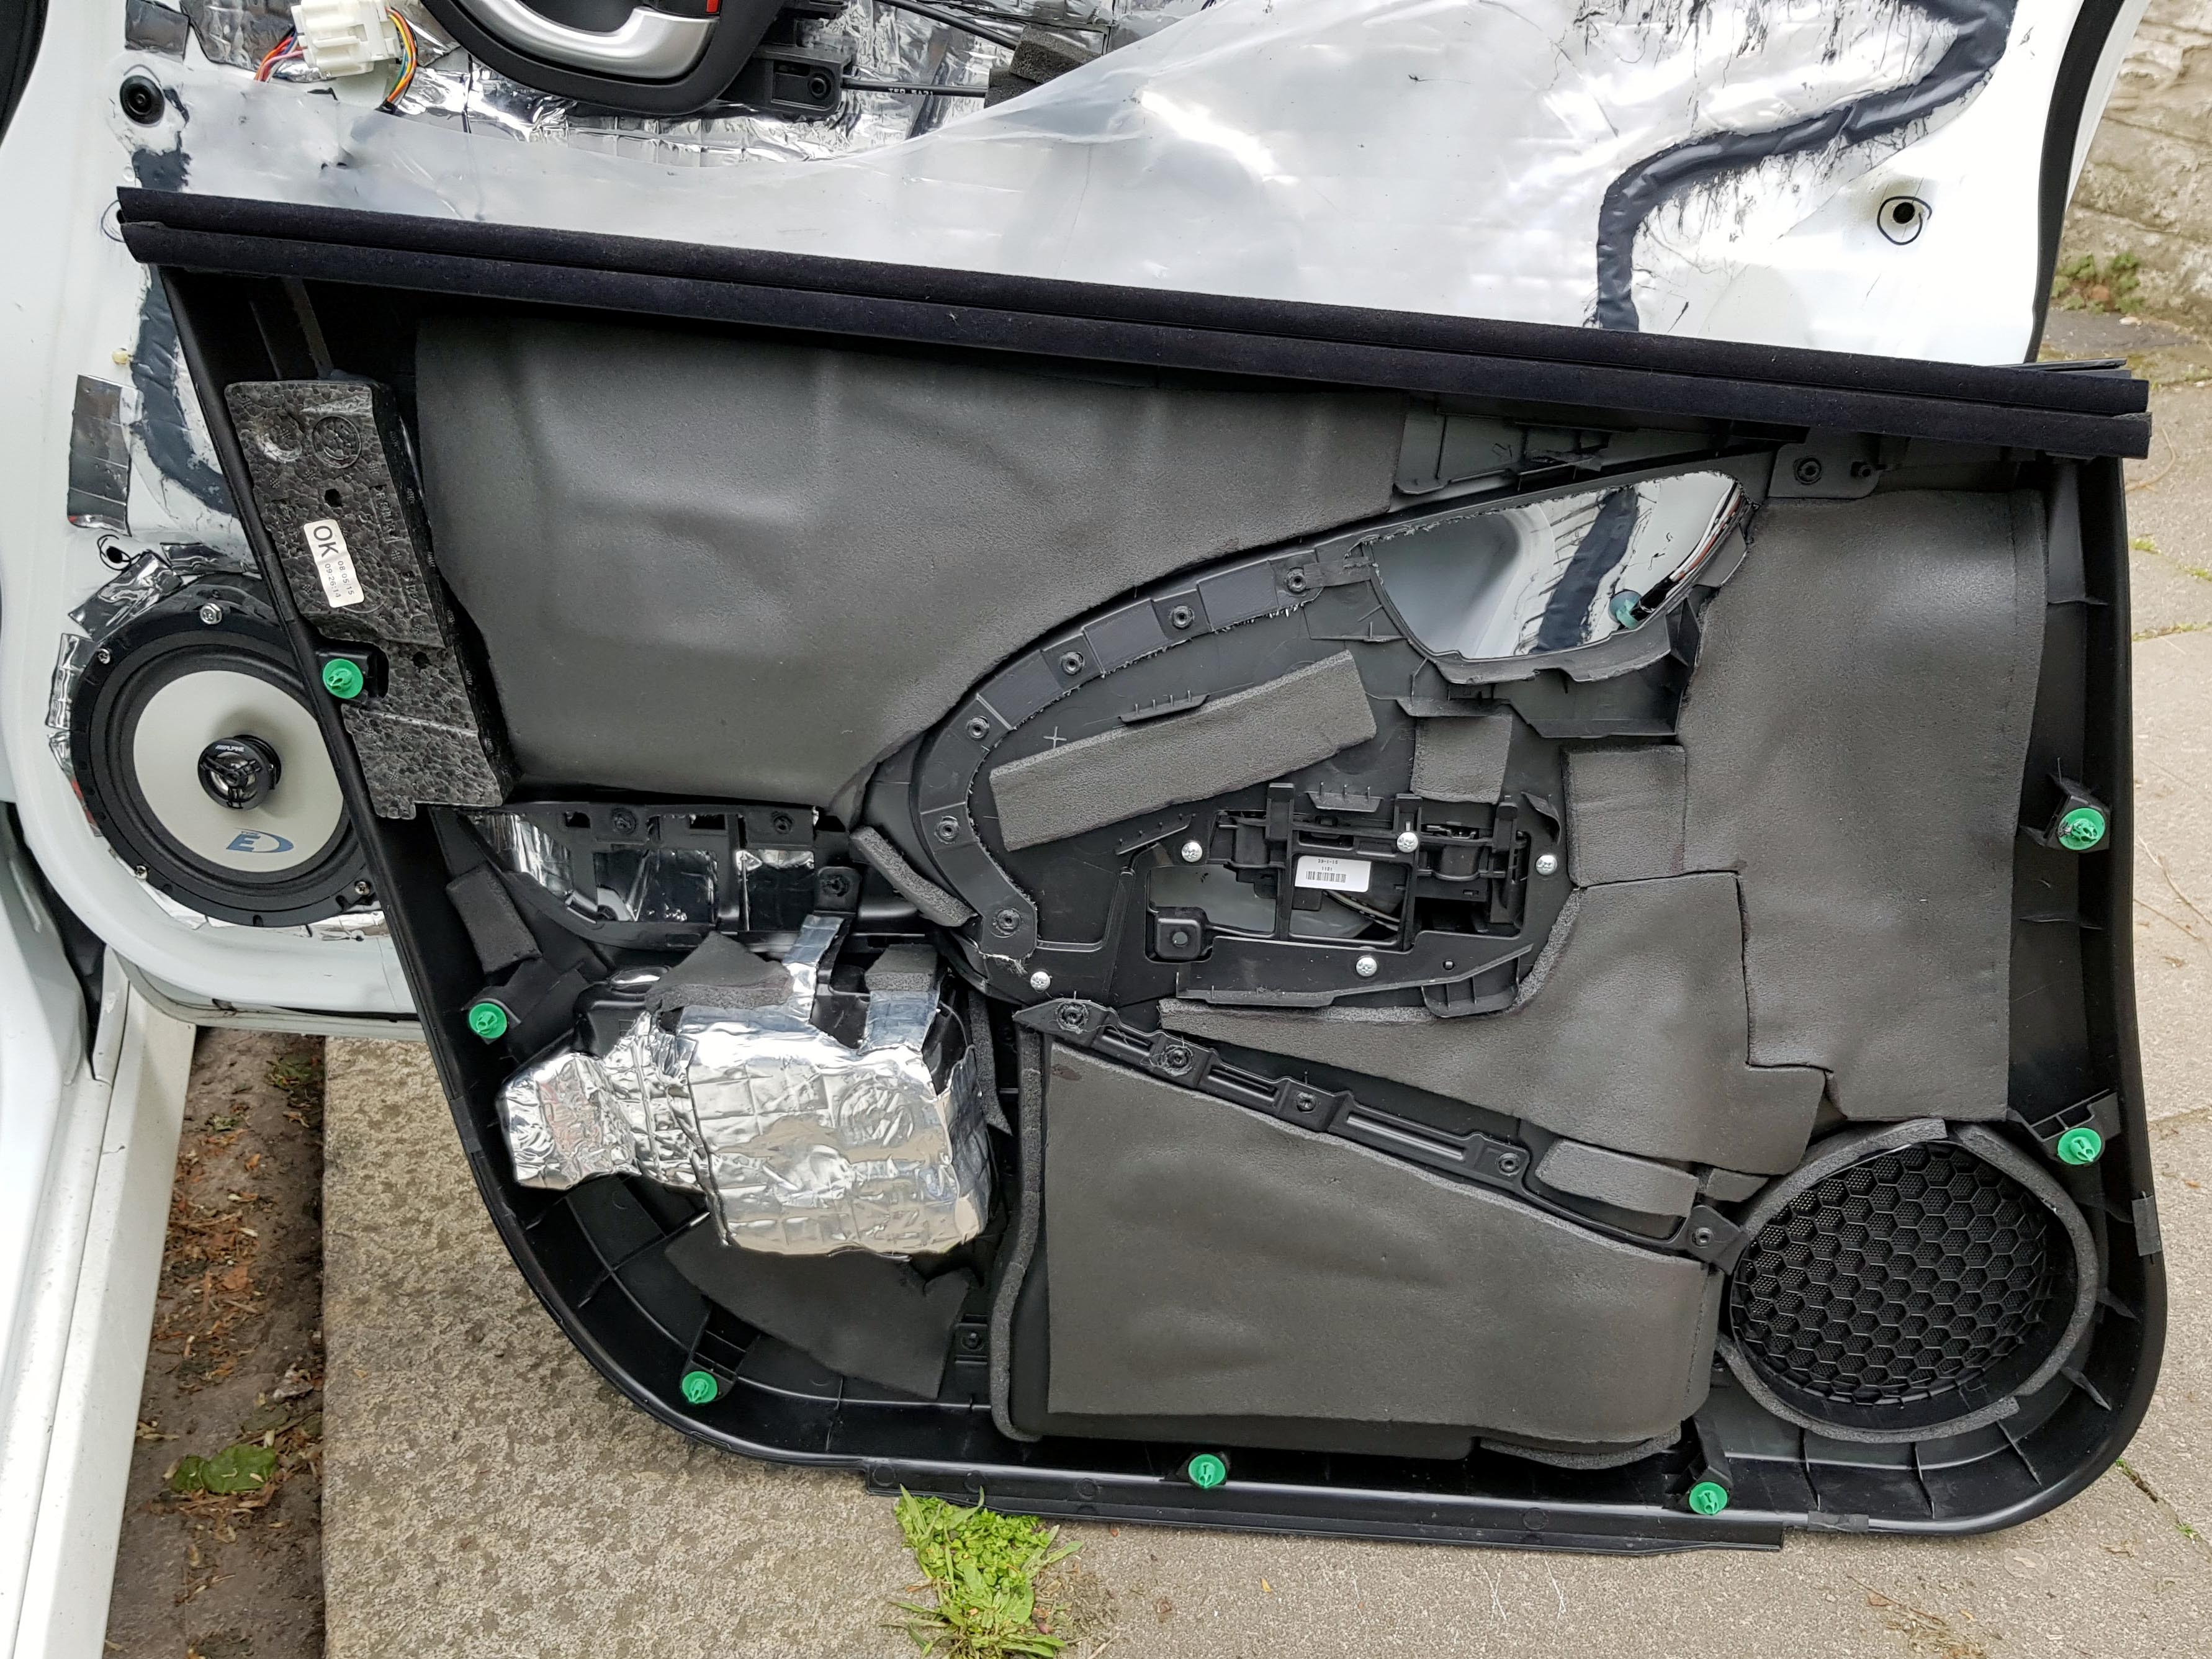
Sound Deadening Part 3: The Car Doors
After doing the main interior, I found myself not having enough Silent Coat left to do the doors and roof. So I had to order another bulk pack of 40 sheets.
To complement the dampening sheets, ordered 24 sheets of 10mm Closed Cell Foam for the second layer of sound deadening. Though I later found out it works out much cheaper to order them in big rolls rather than individual sheets.
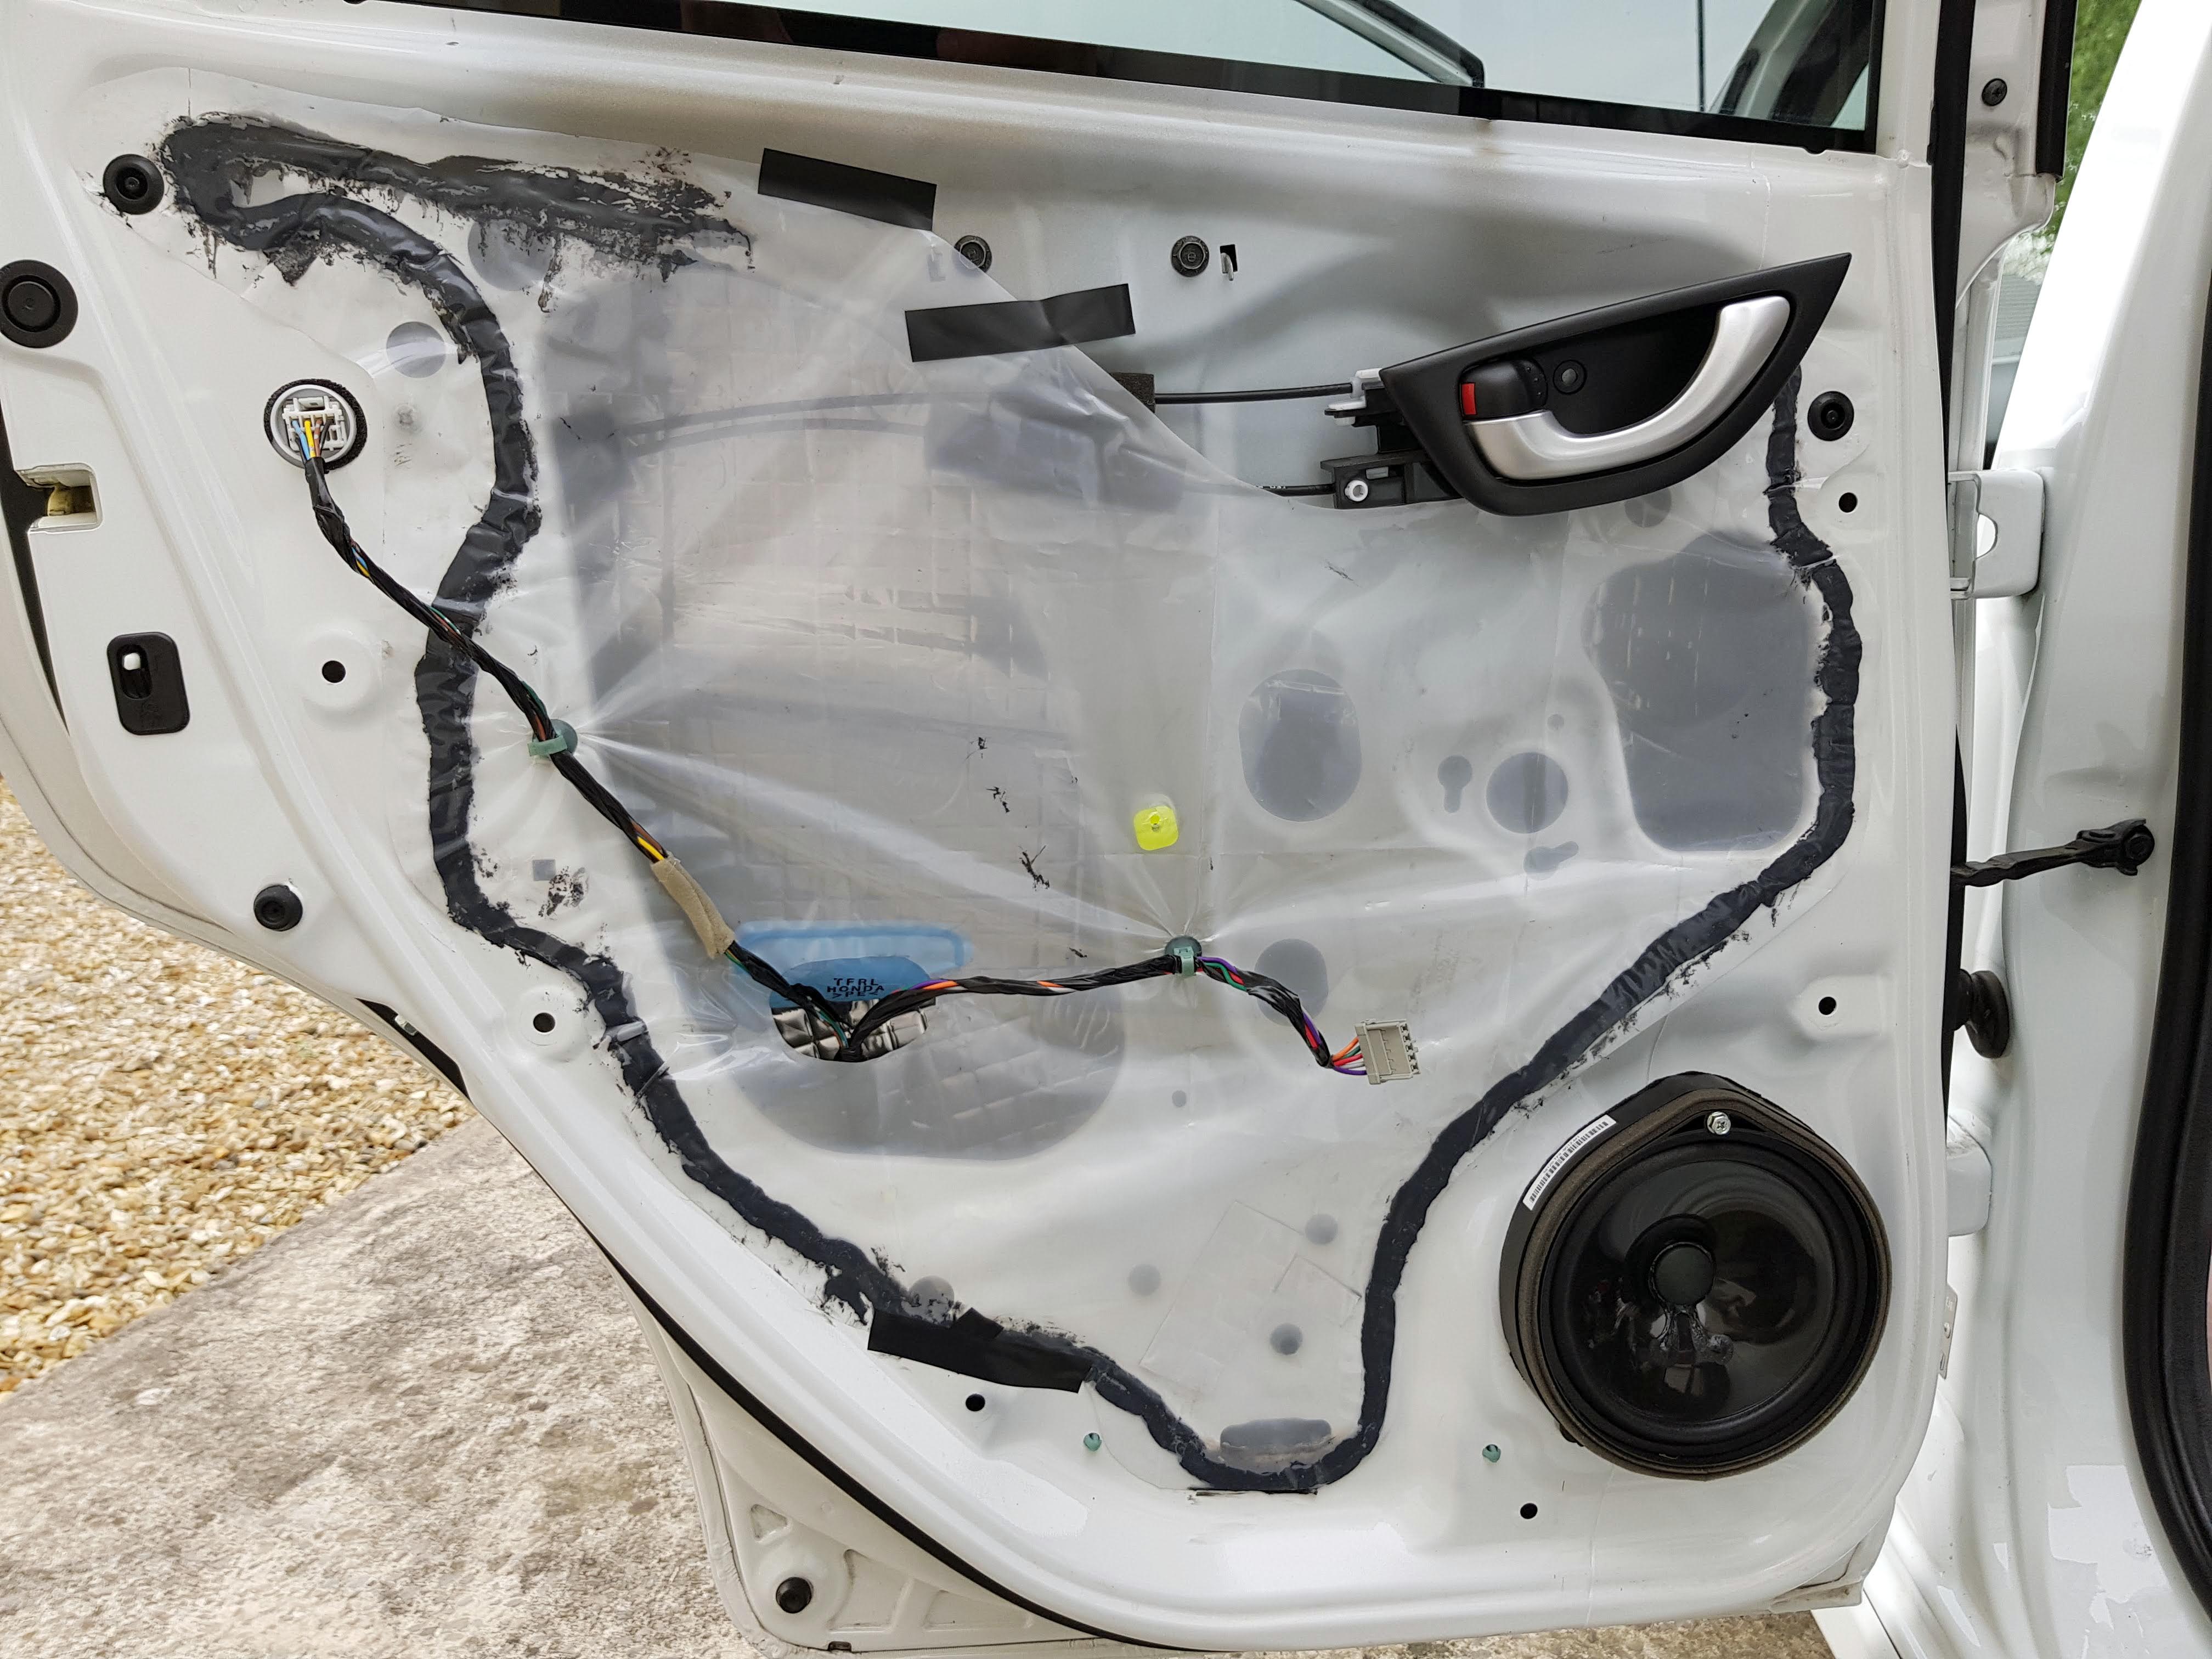
Getting the door cards off is fairly simple process, but working inside the doors wasn't!
It took me about 4-5 hours per door, so I spread them out over a few days, doing a door a day:
I started by doing the rear doors first, then did the front doors. So if I made any mistakes, at least they would be on the rears, and I would learn from them when it came to do the front doors.
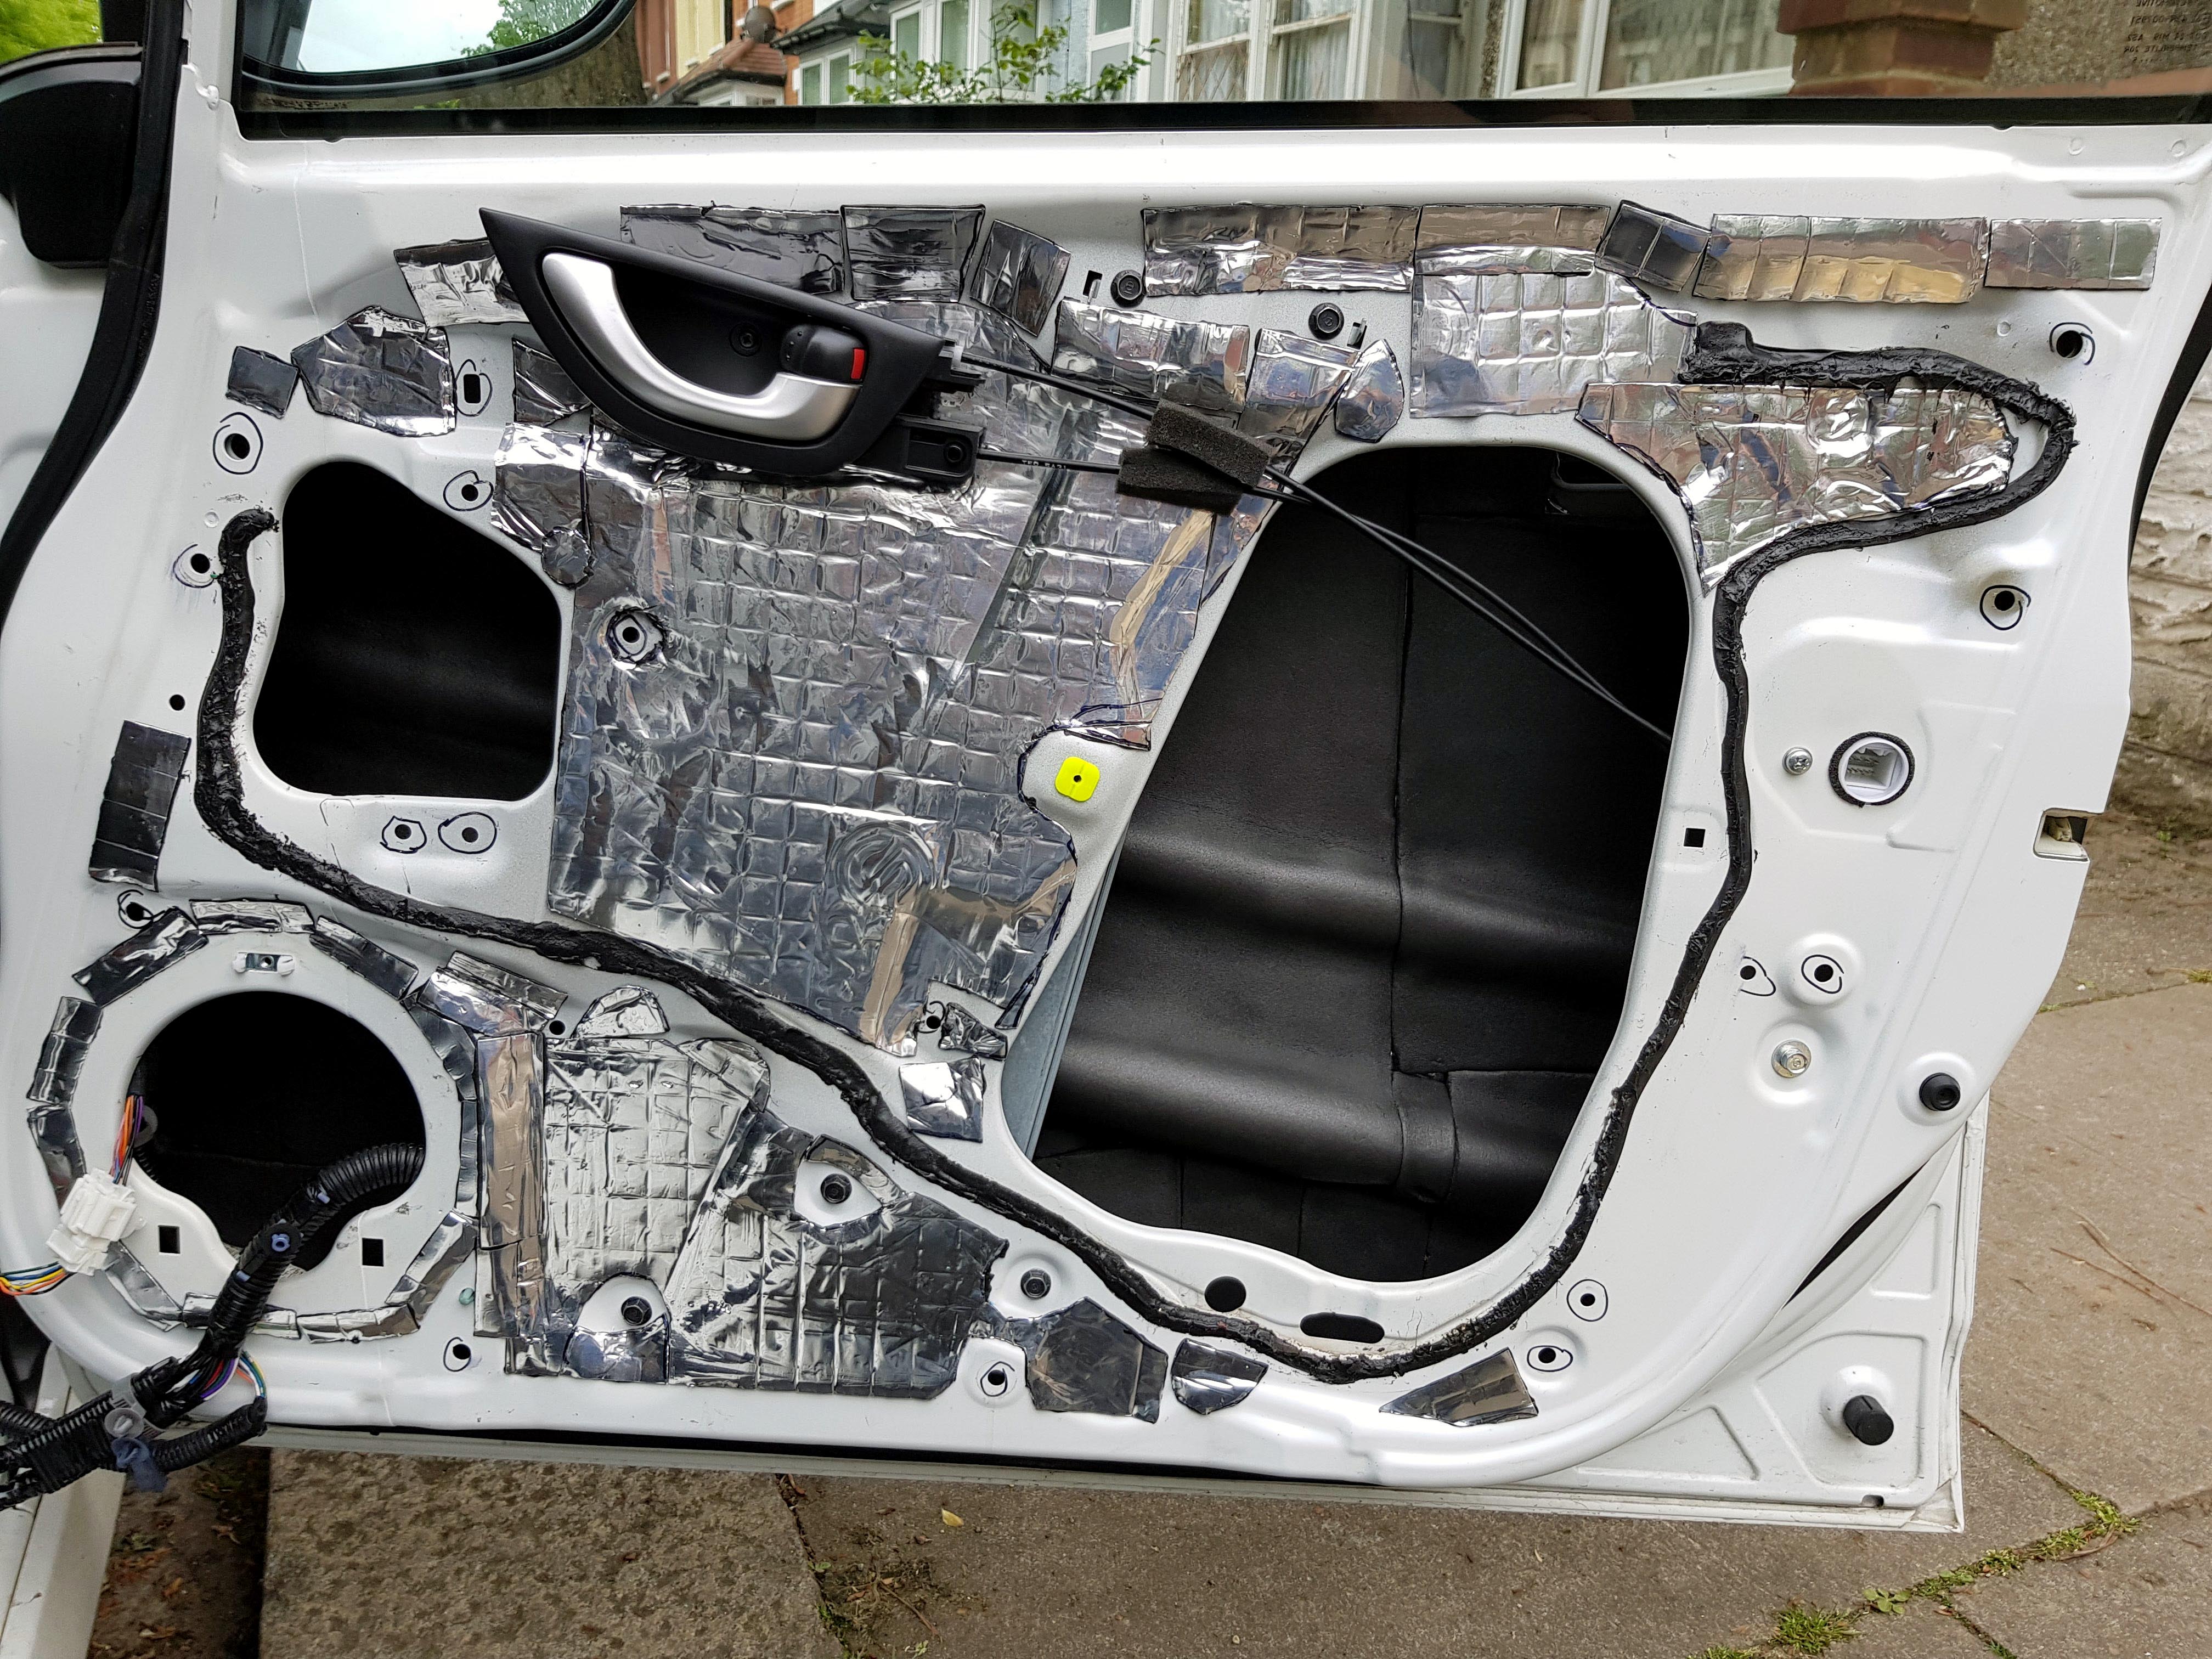
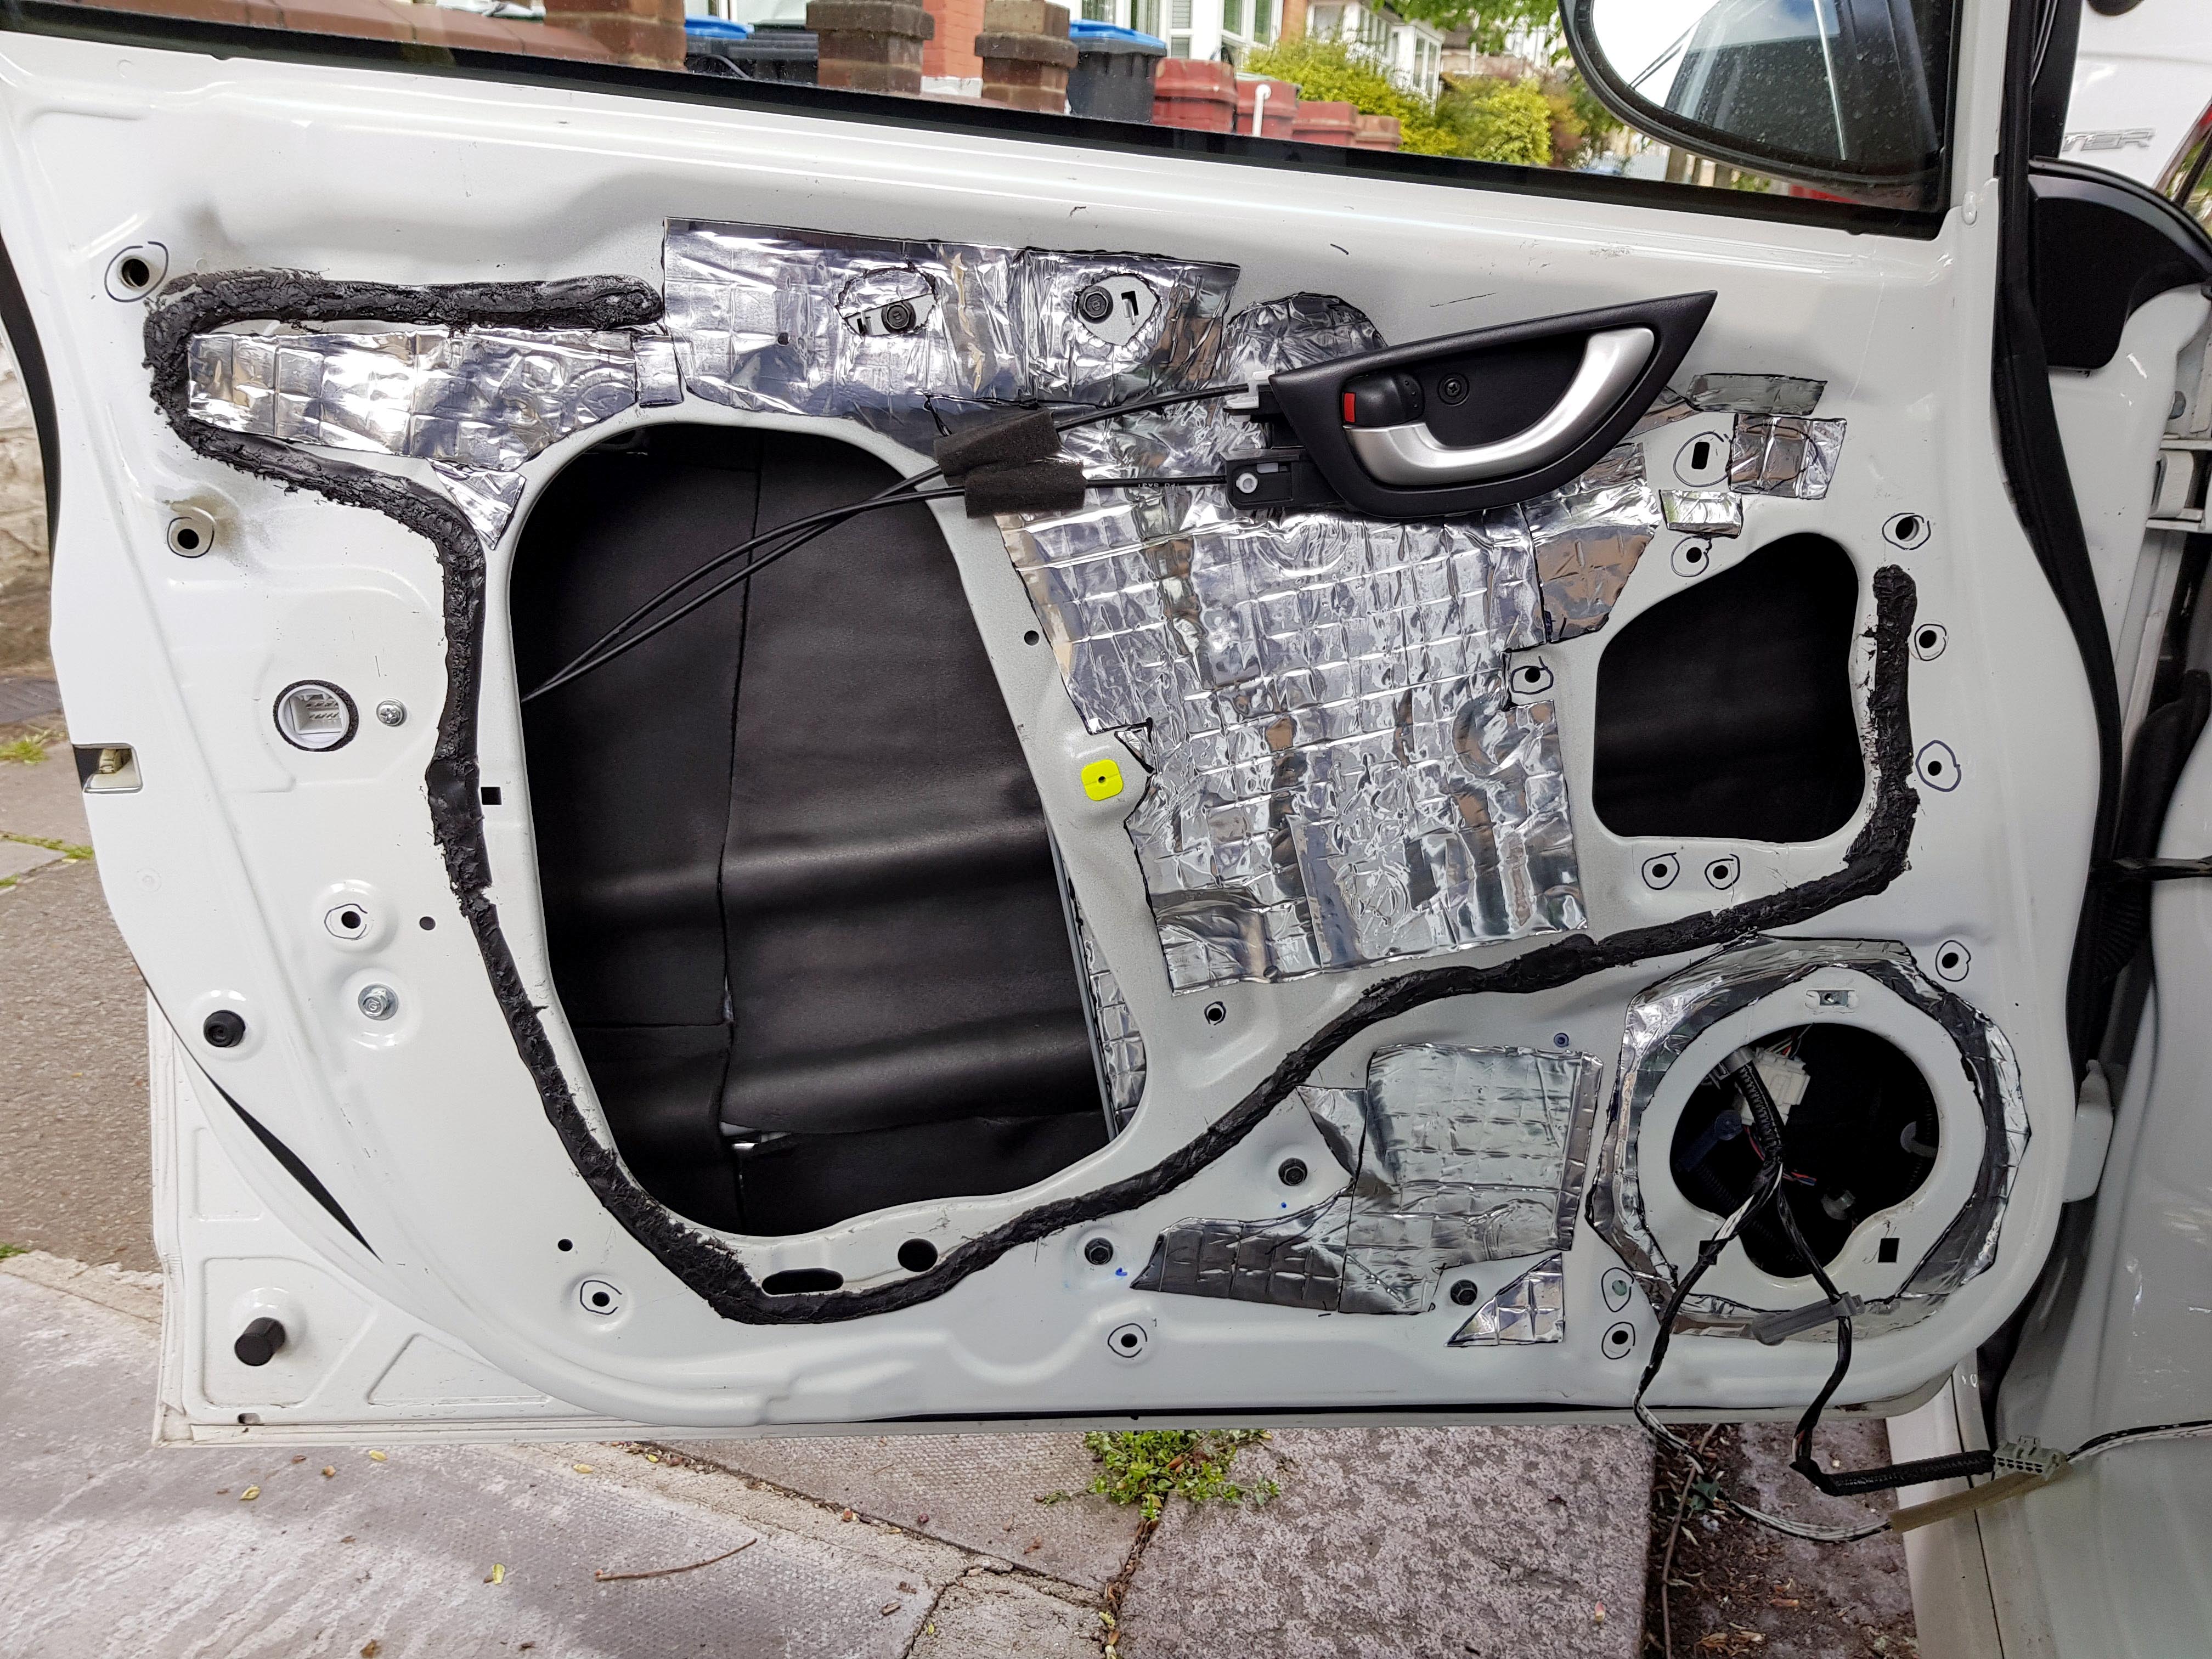
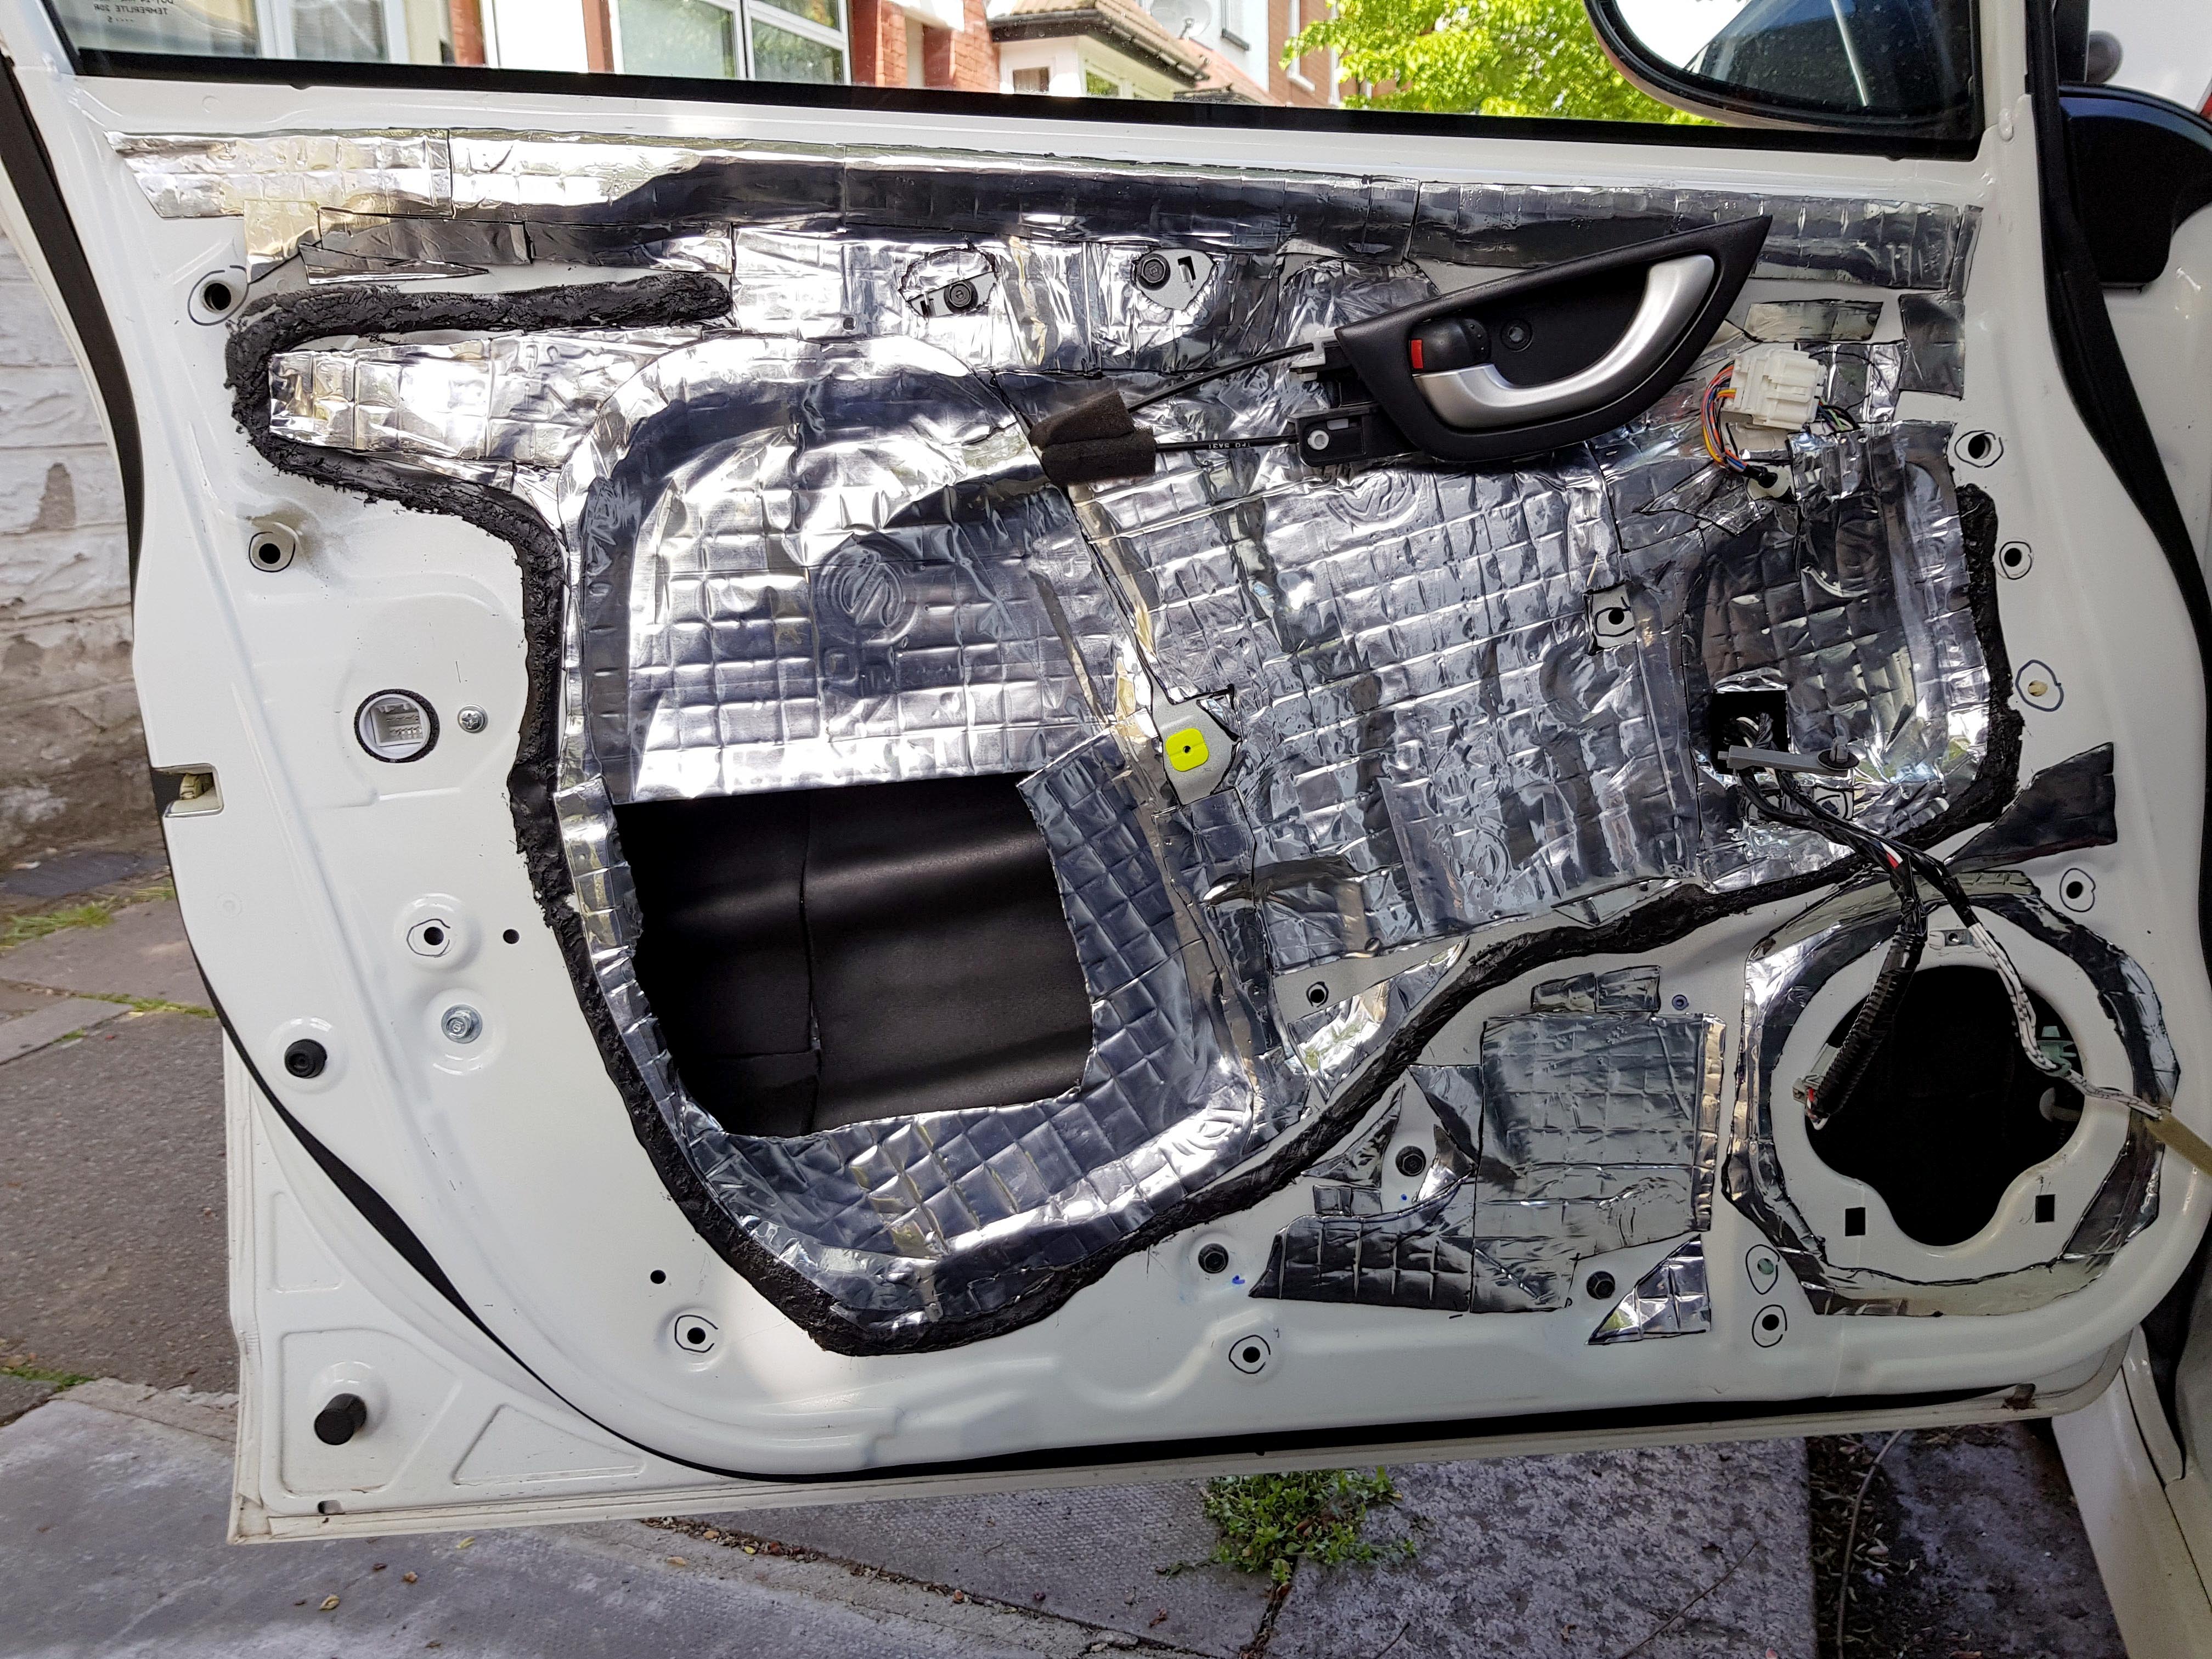
Outer layer of Silent Coat on first
Followed by the layer of Closed Cell Foam
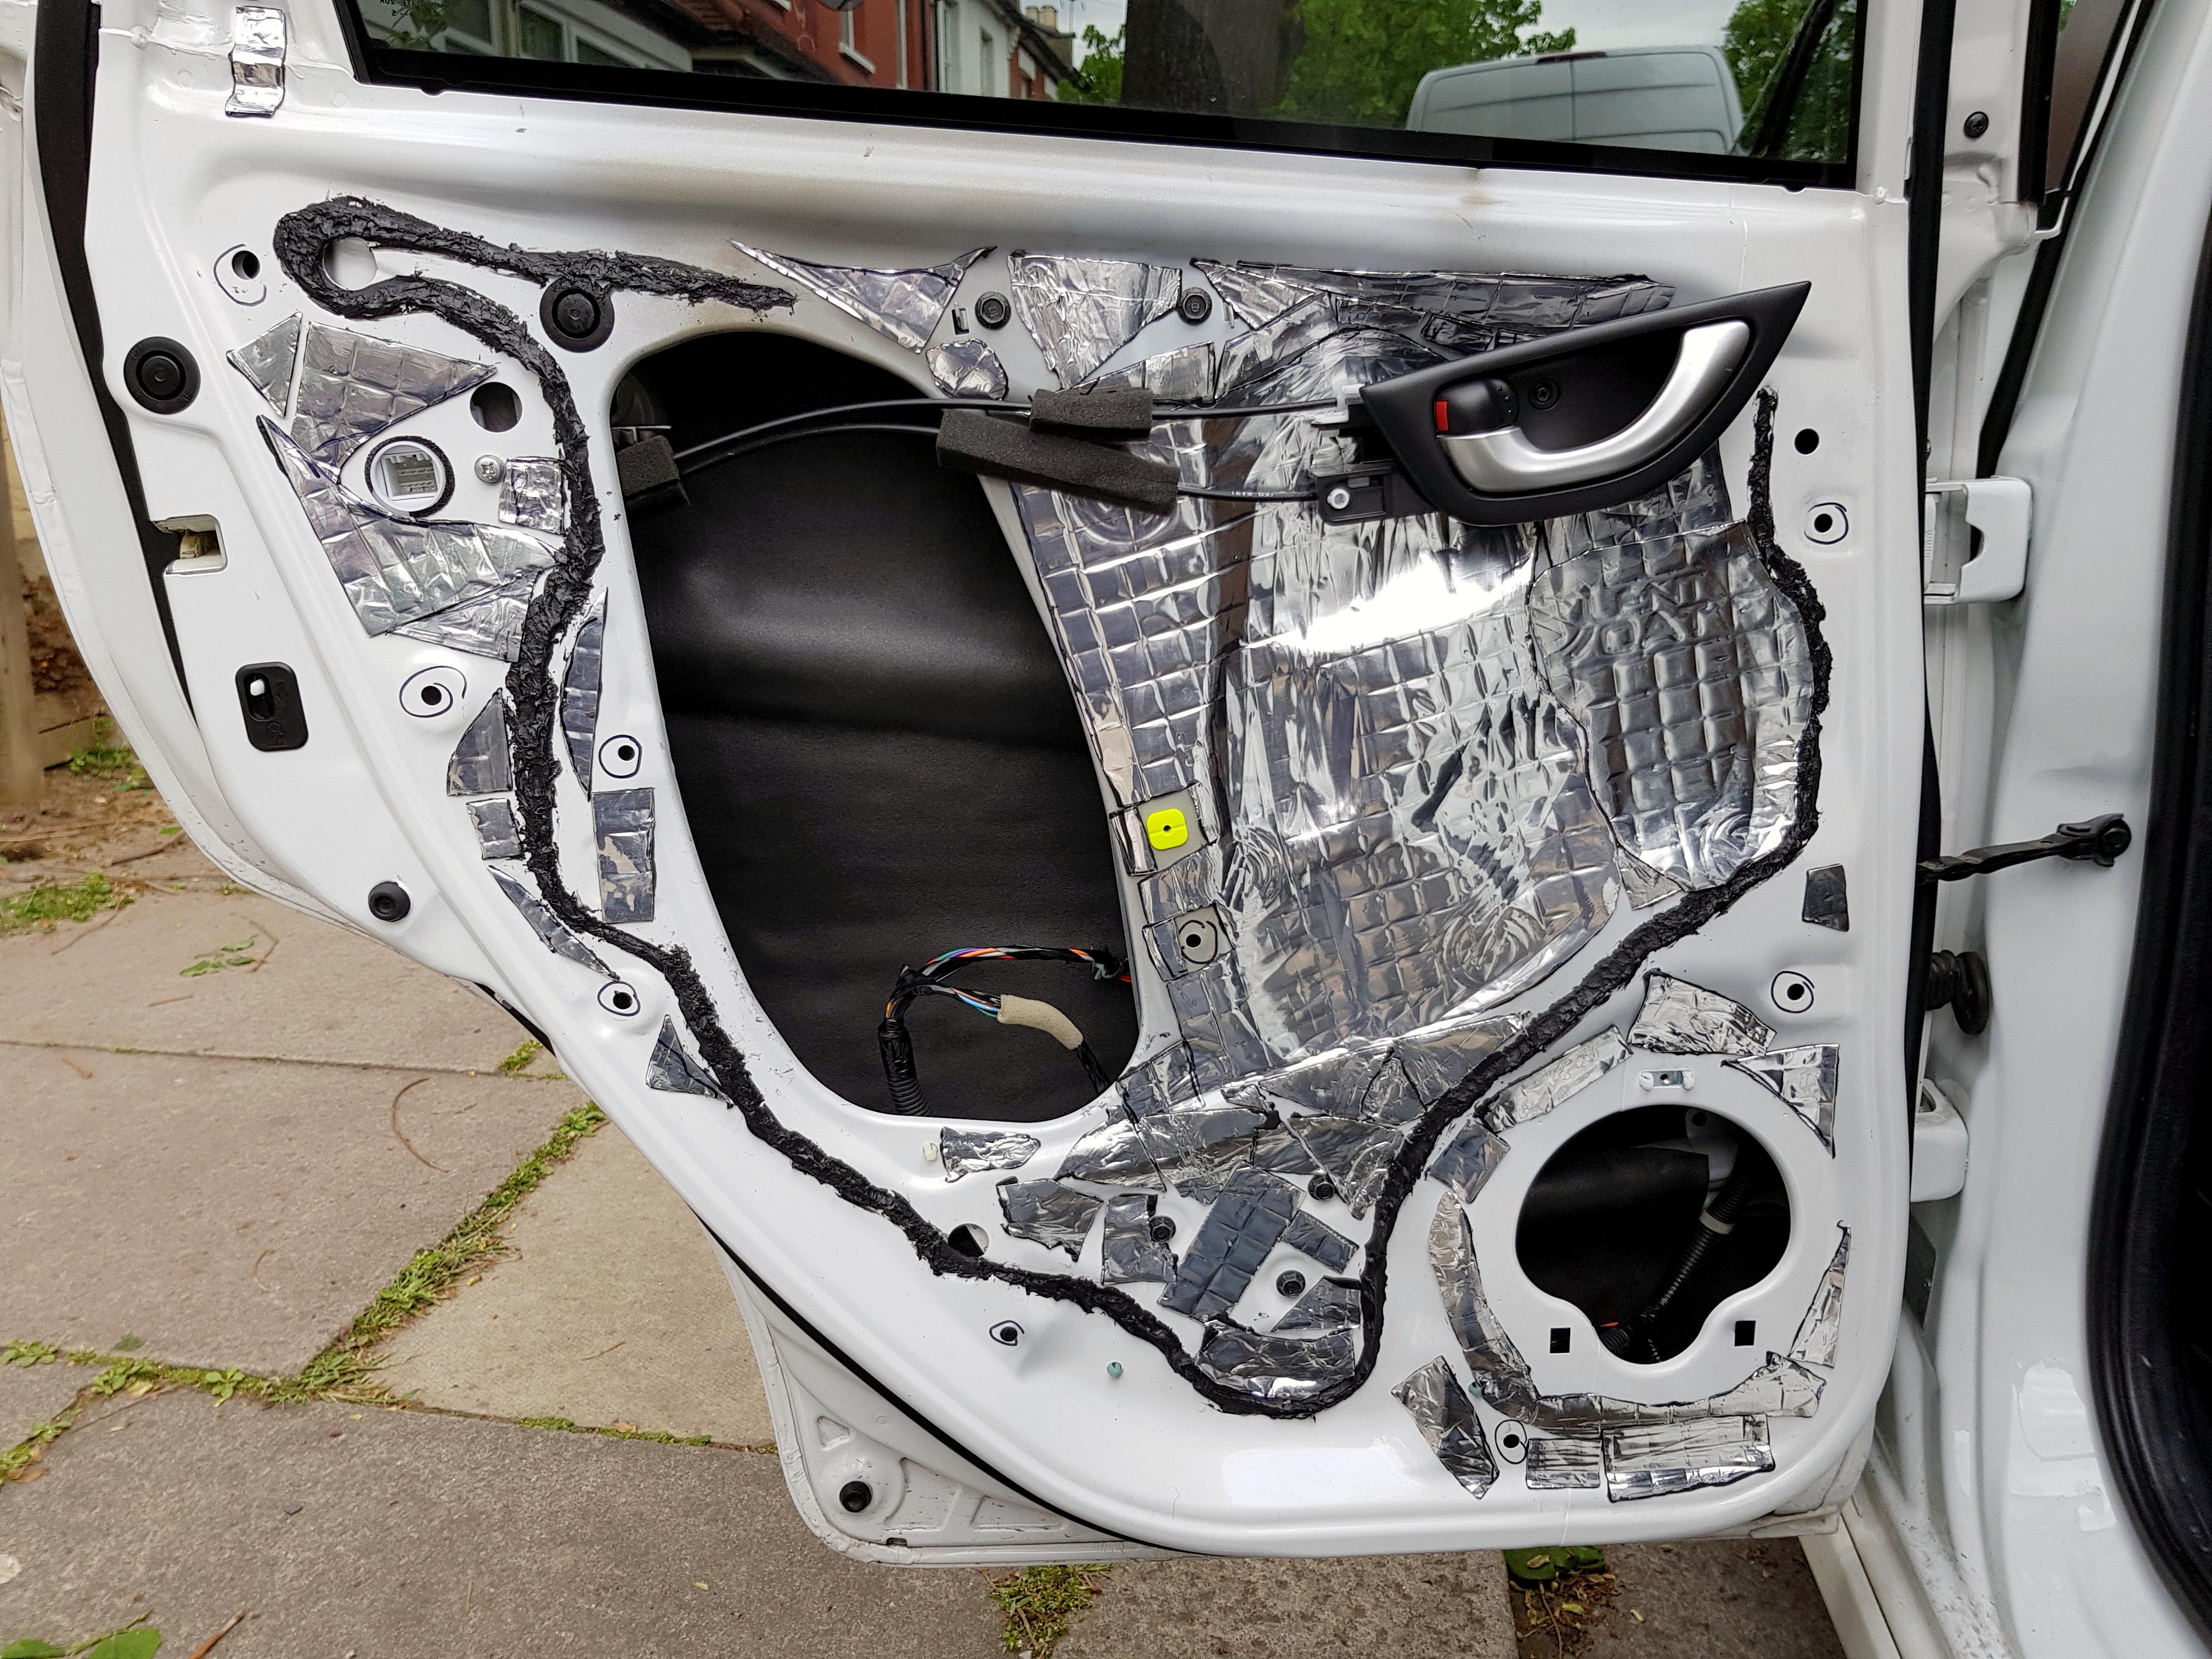
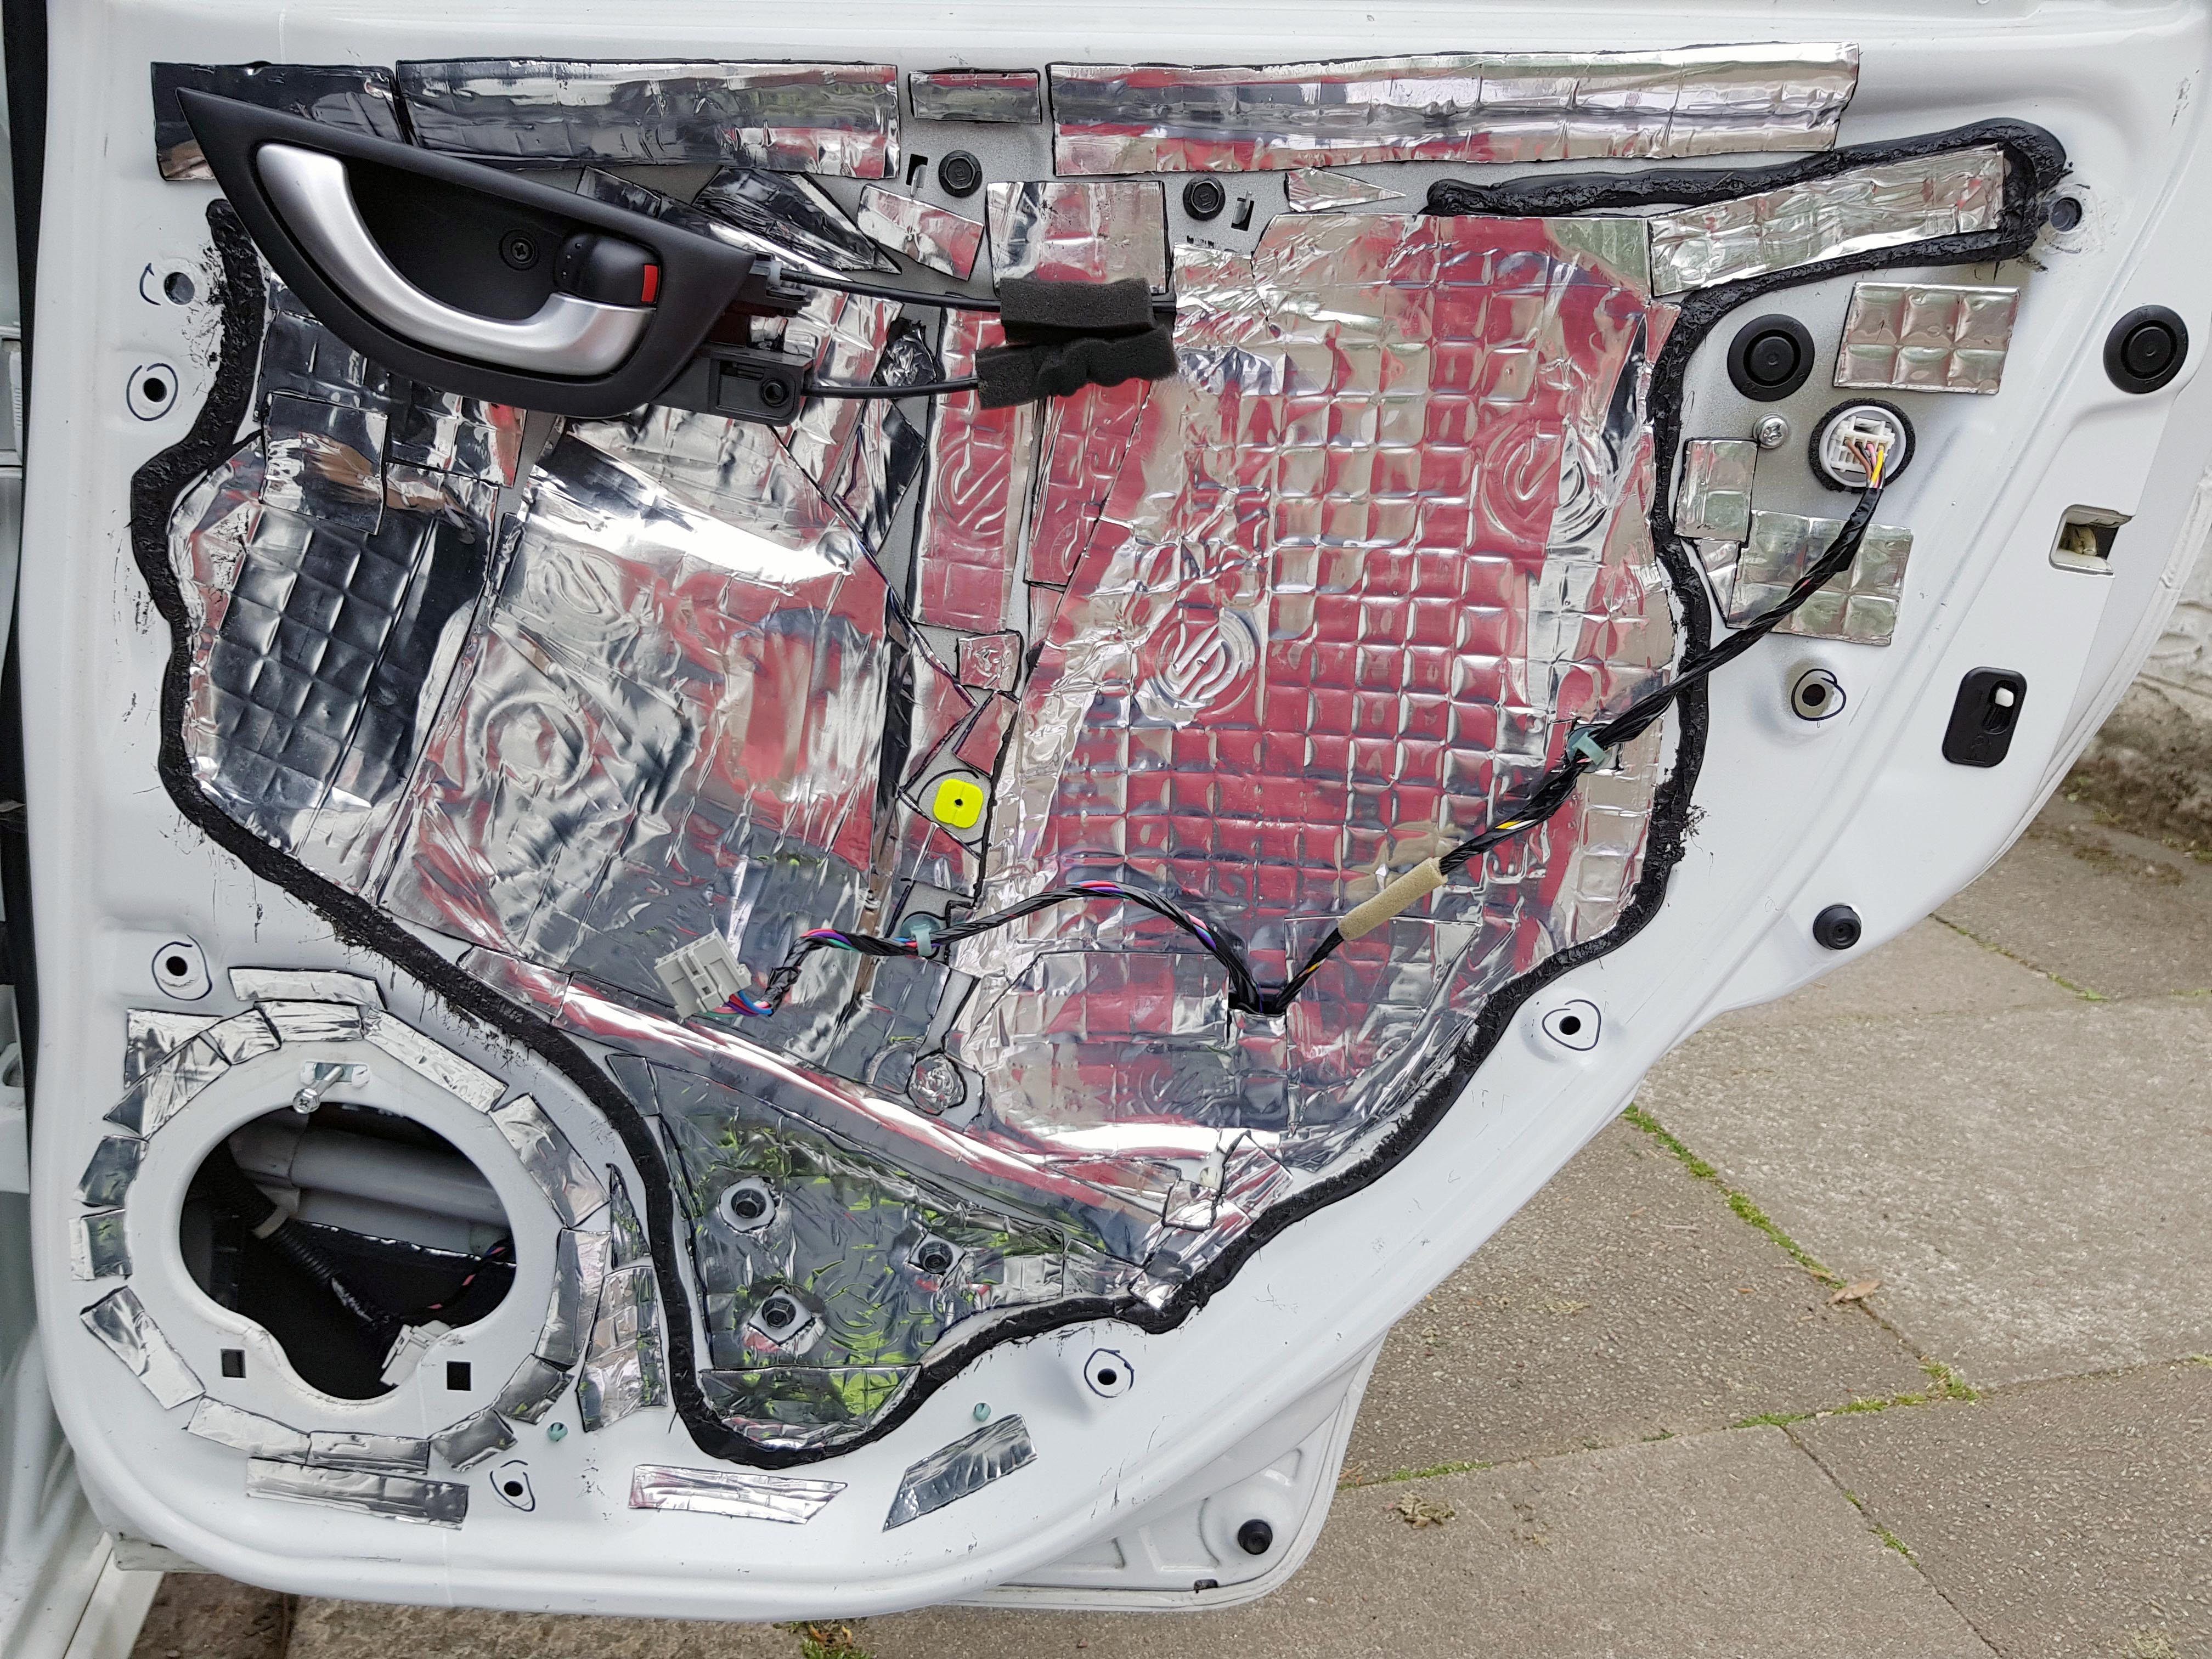
Then the inner layer of Silent Coat, covering any open gaps or holes (I circled all the holes I needed to keep with permanent marker to make it easier)
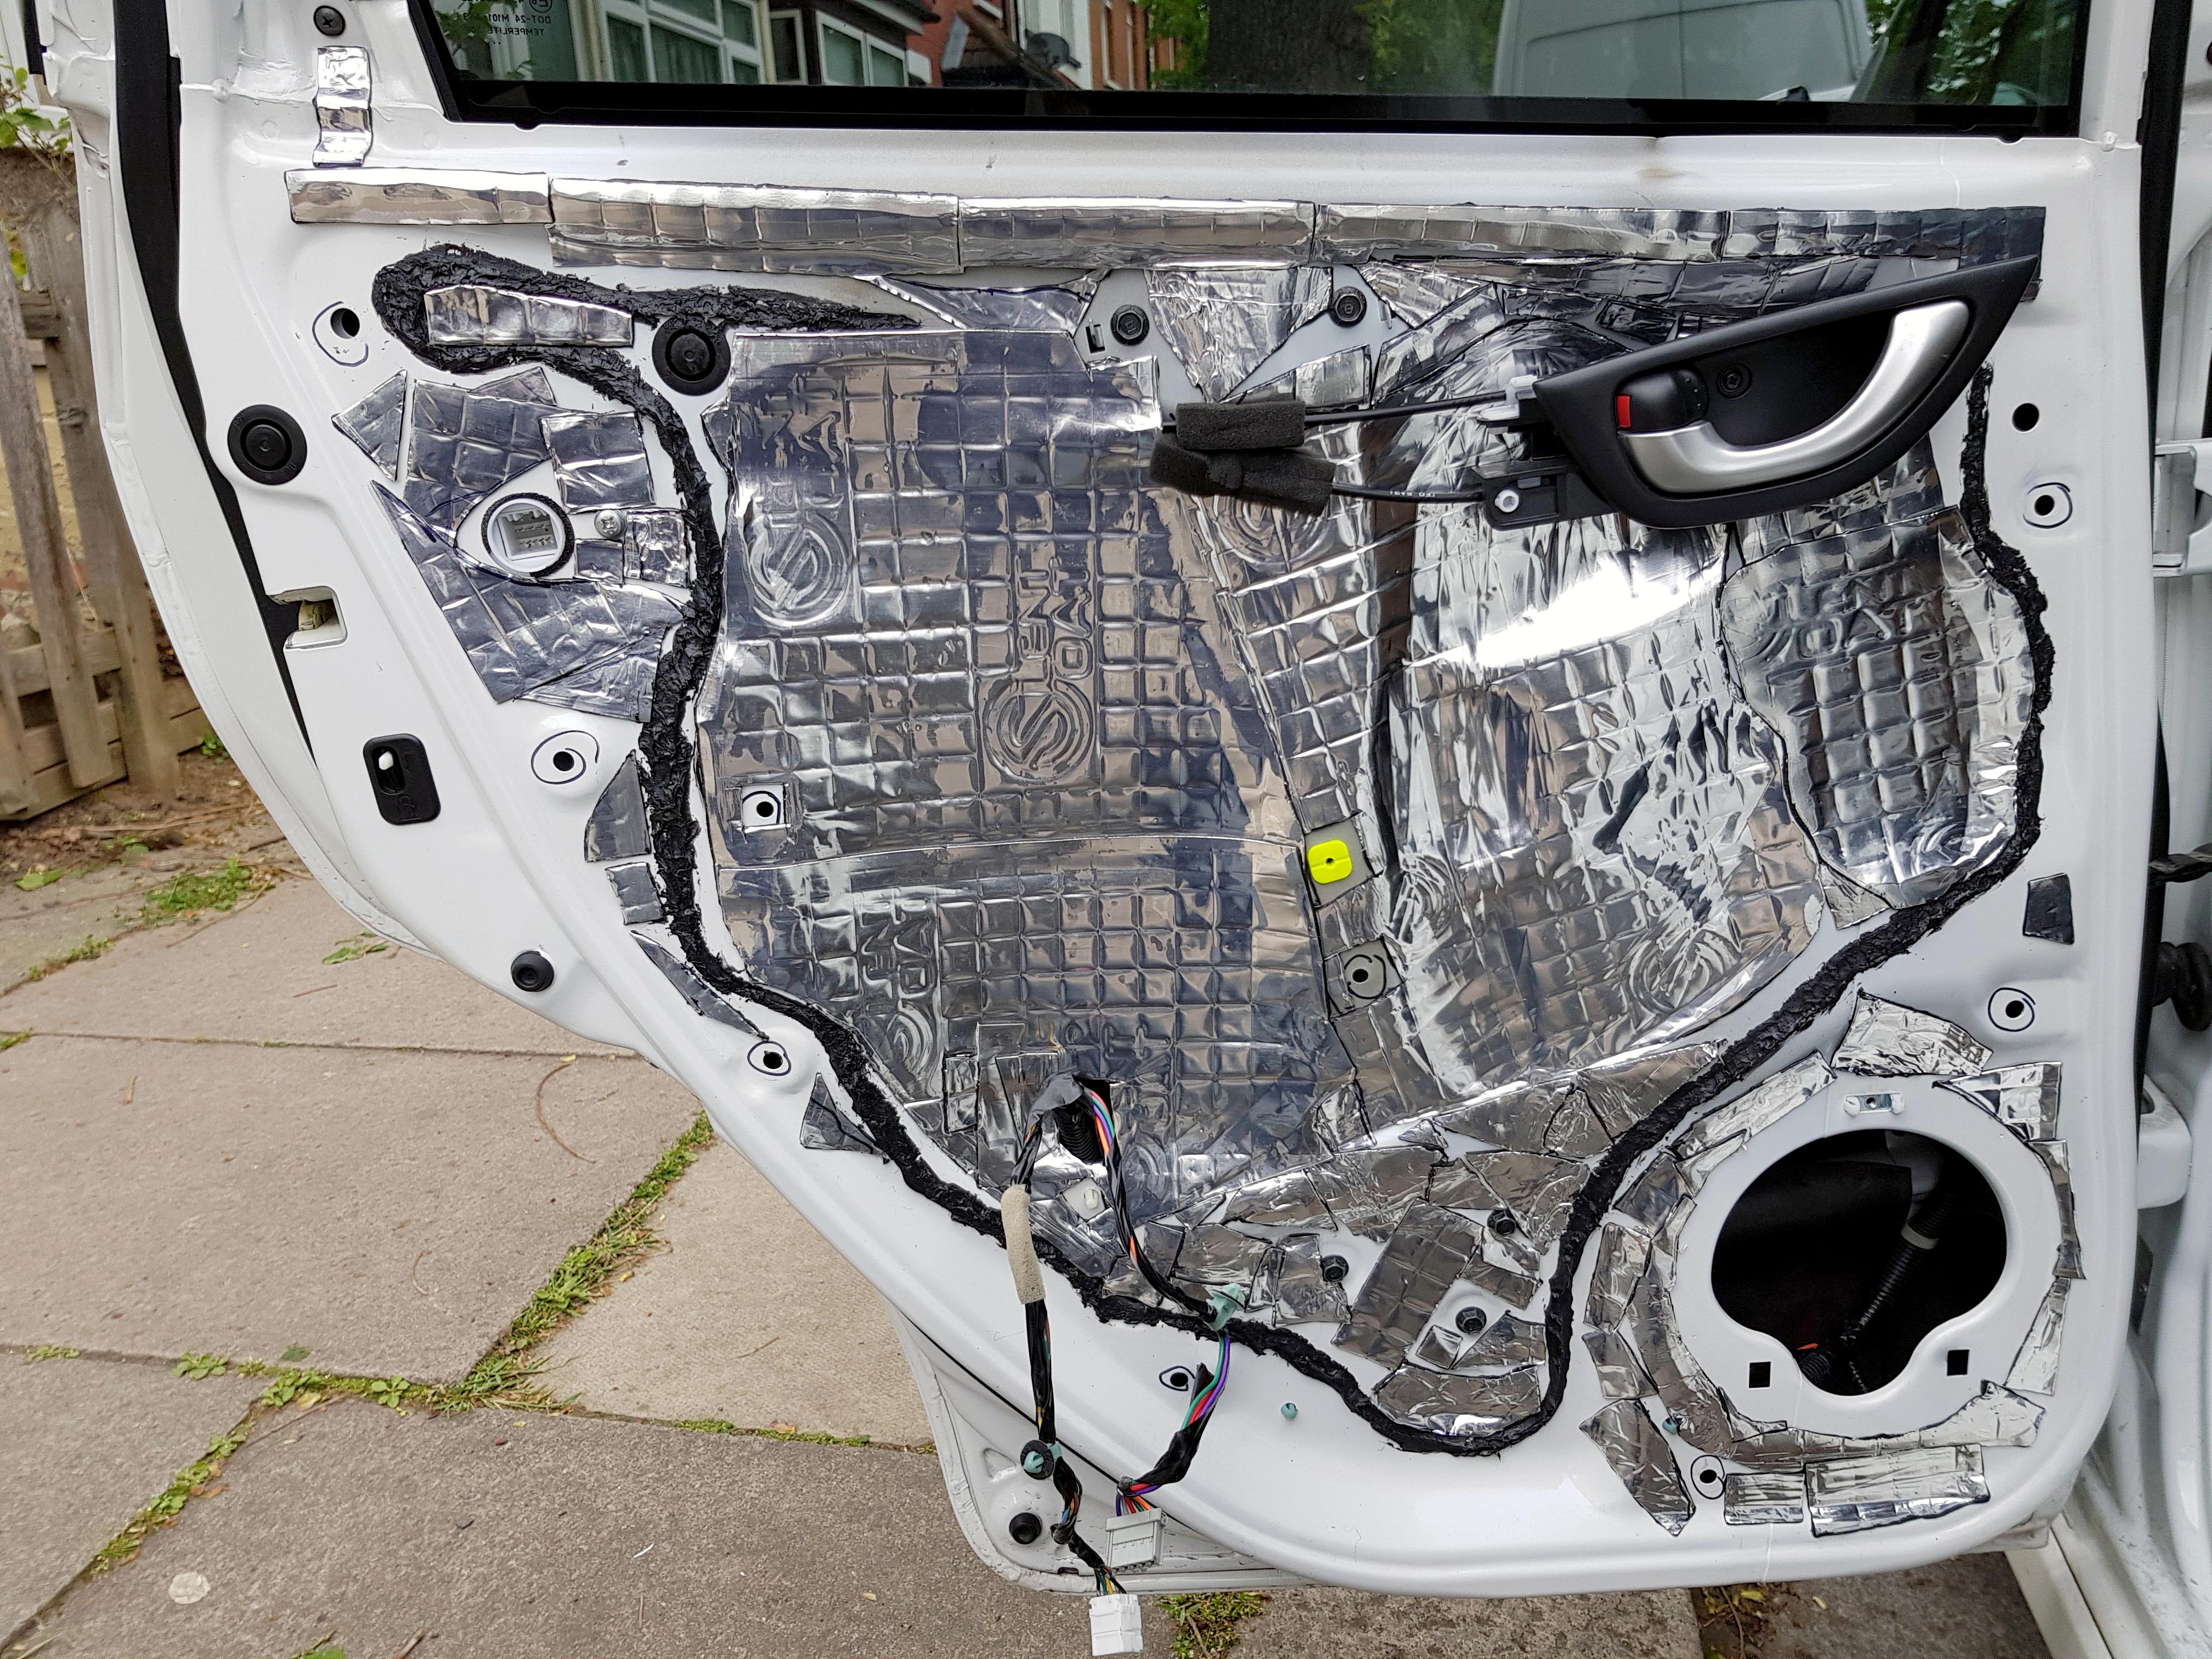
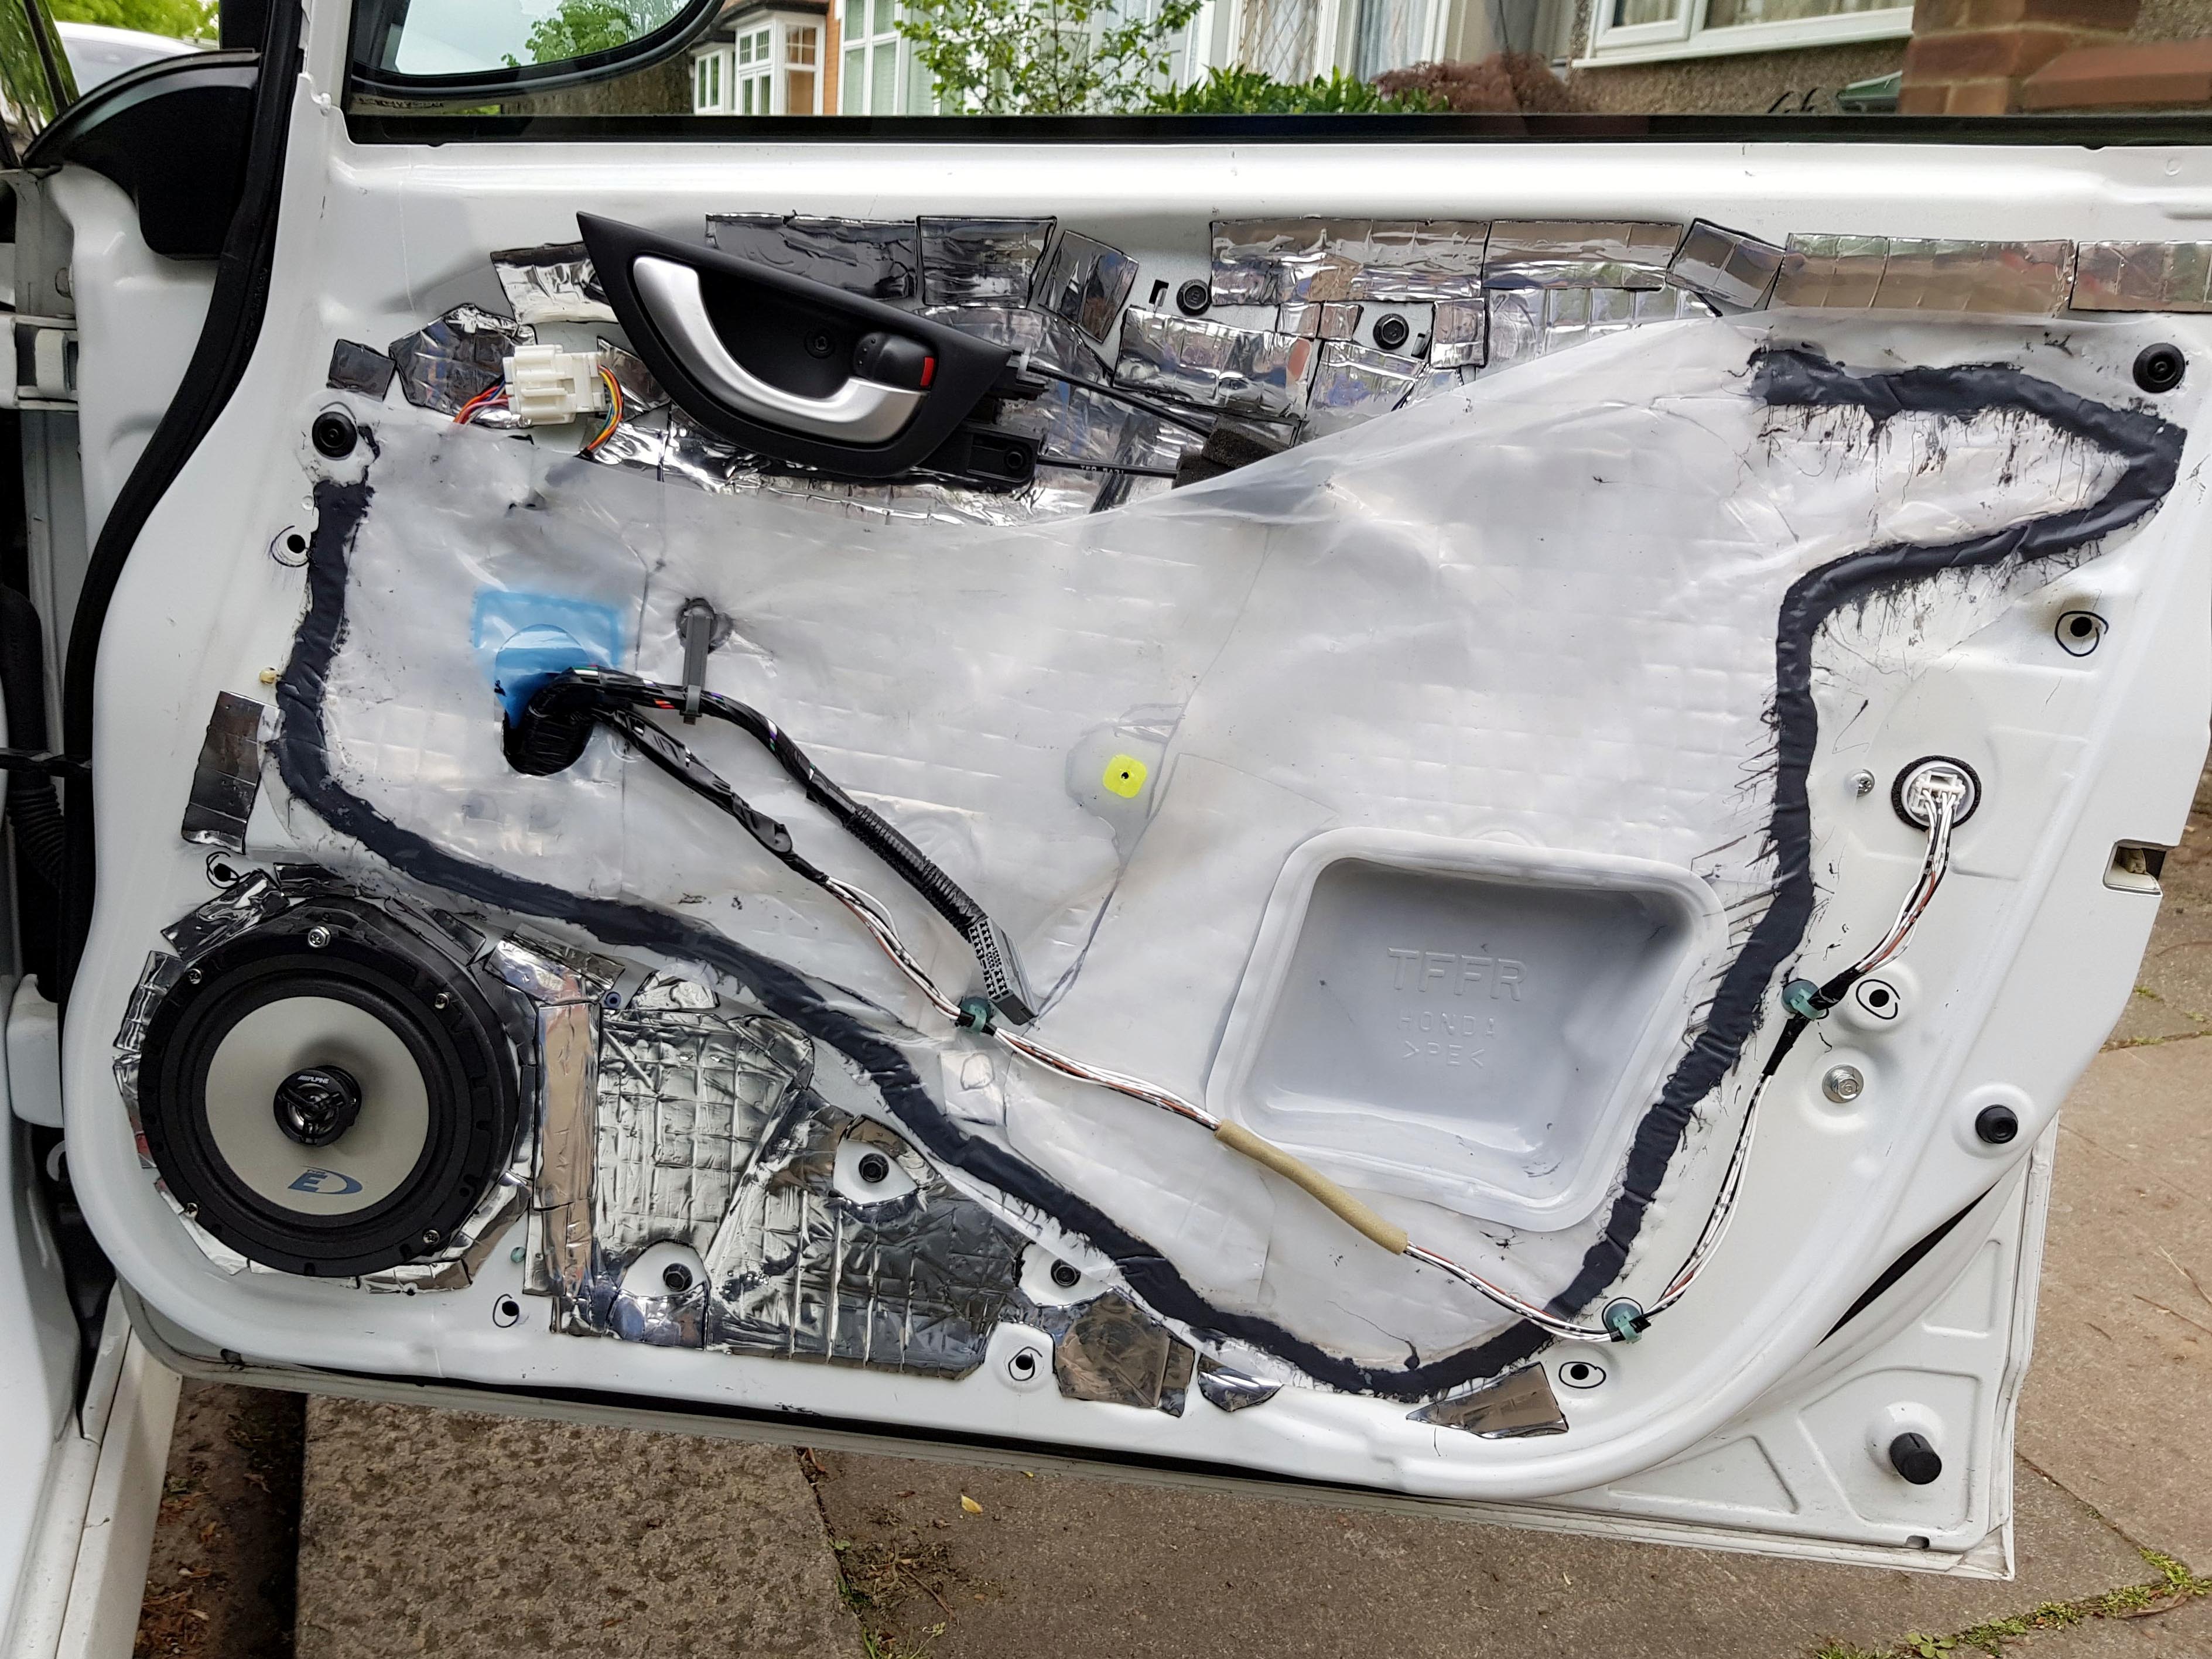
Then some Silent Coat and Closed Cell Foam applied to the door card for the final layer of Silence.
In a lot of the guides I've seen, it has said to replace the moisture barrier membrane with just using the sound dampening material, but I decided to keep it for two reasons. 1 it's a pain to clean that stuff off, and it's not causing any harm just leaving it there, and 2 if a window got broken, any company that replaces it, will have to cut the and remove the silent coat to get inside, and they mighty not put it back the same way, if at all, so by keeping the membrane, I know I won't be getting any leaks.

I then did the Rear Right door next:

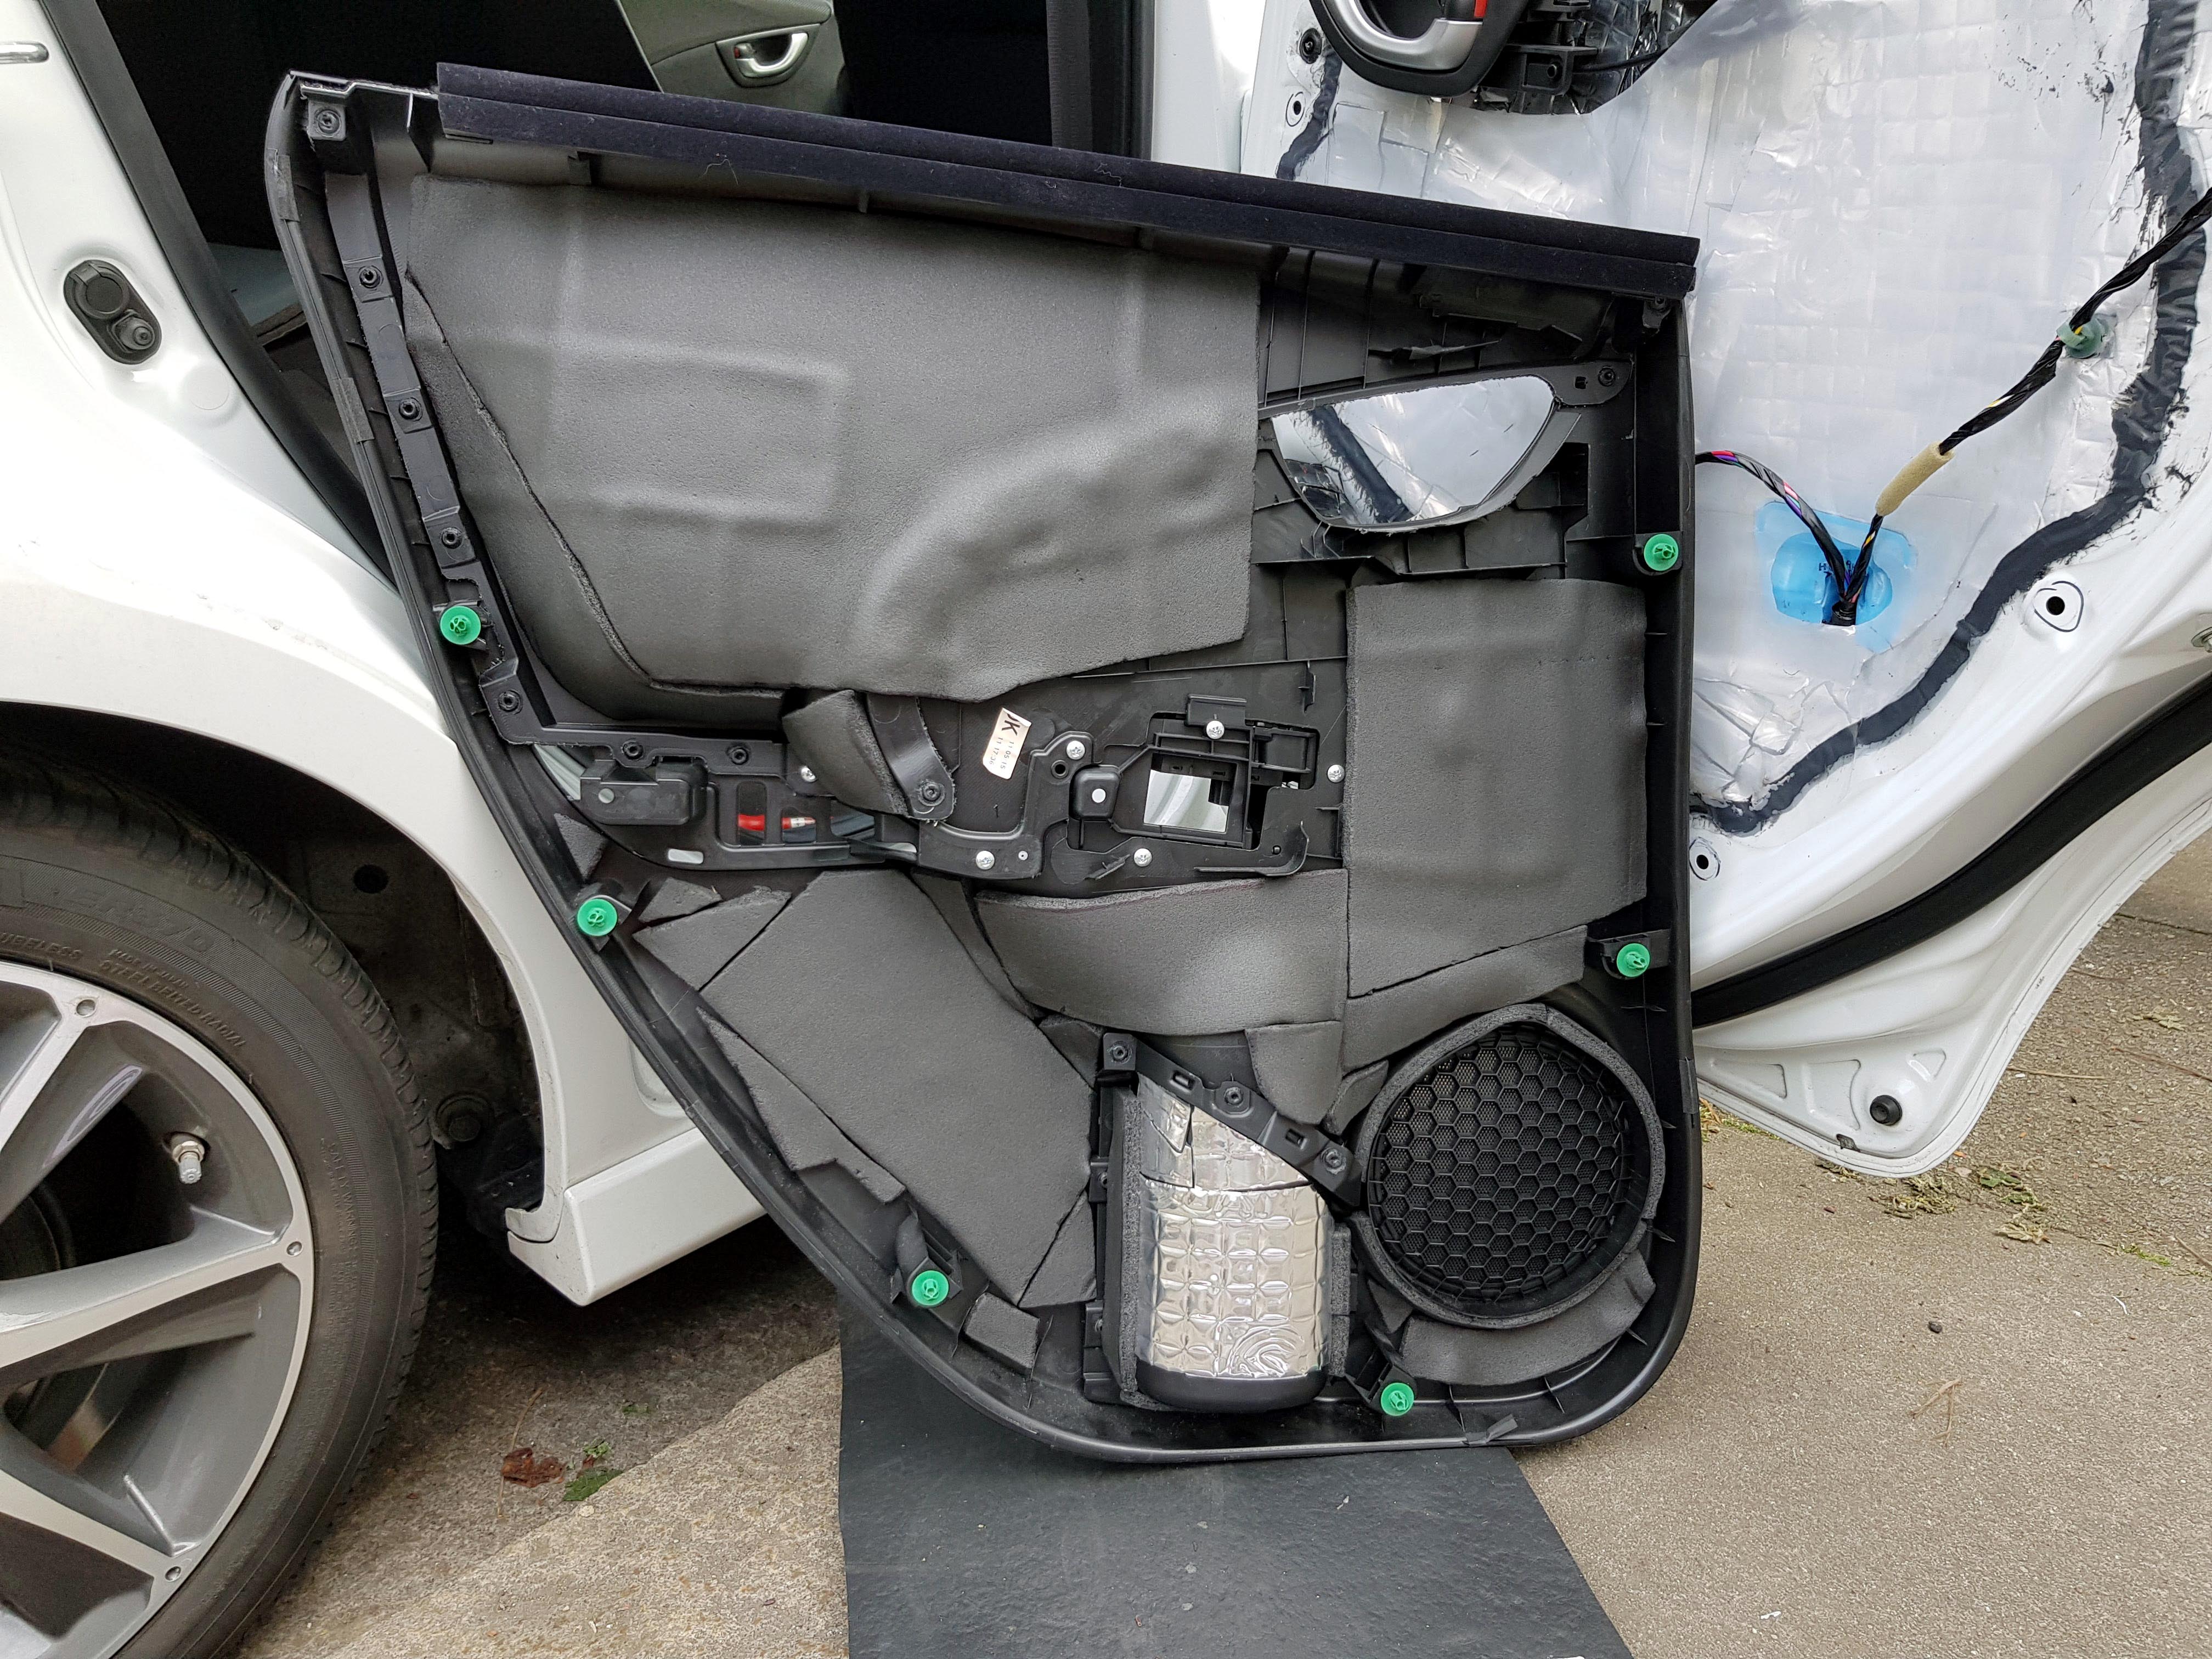
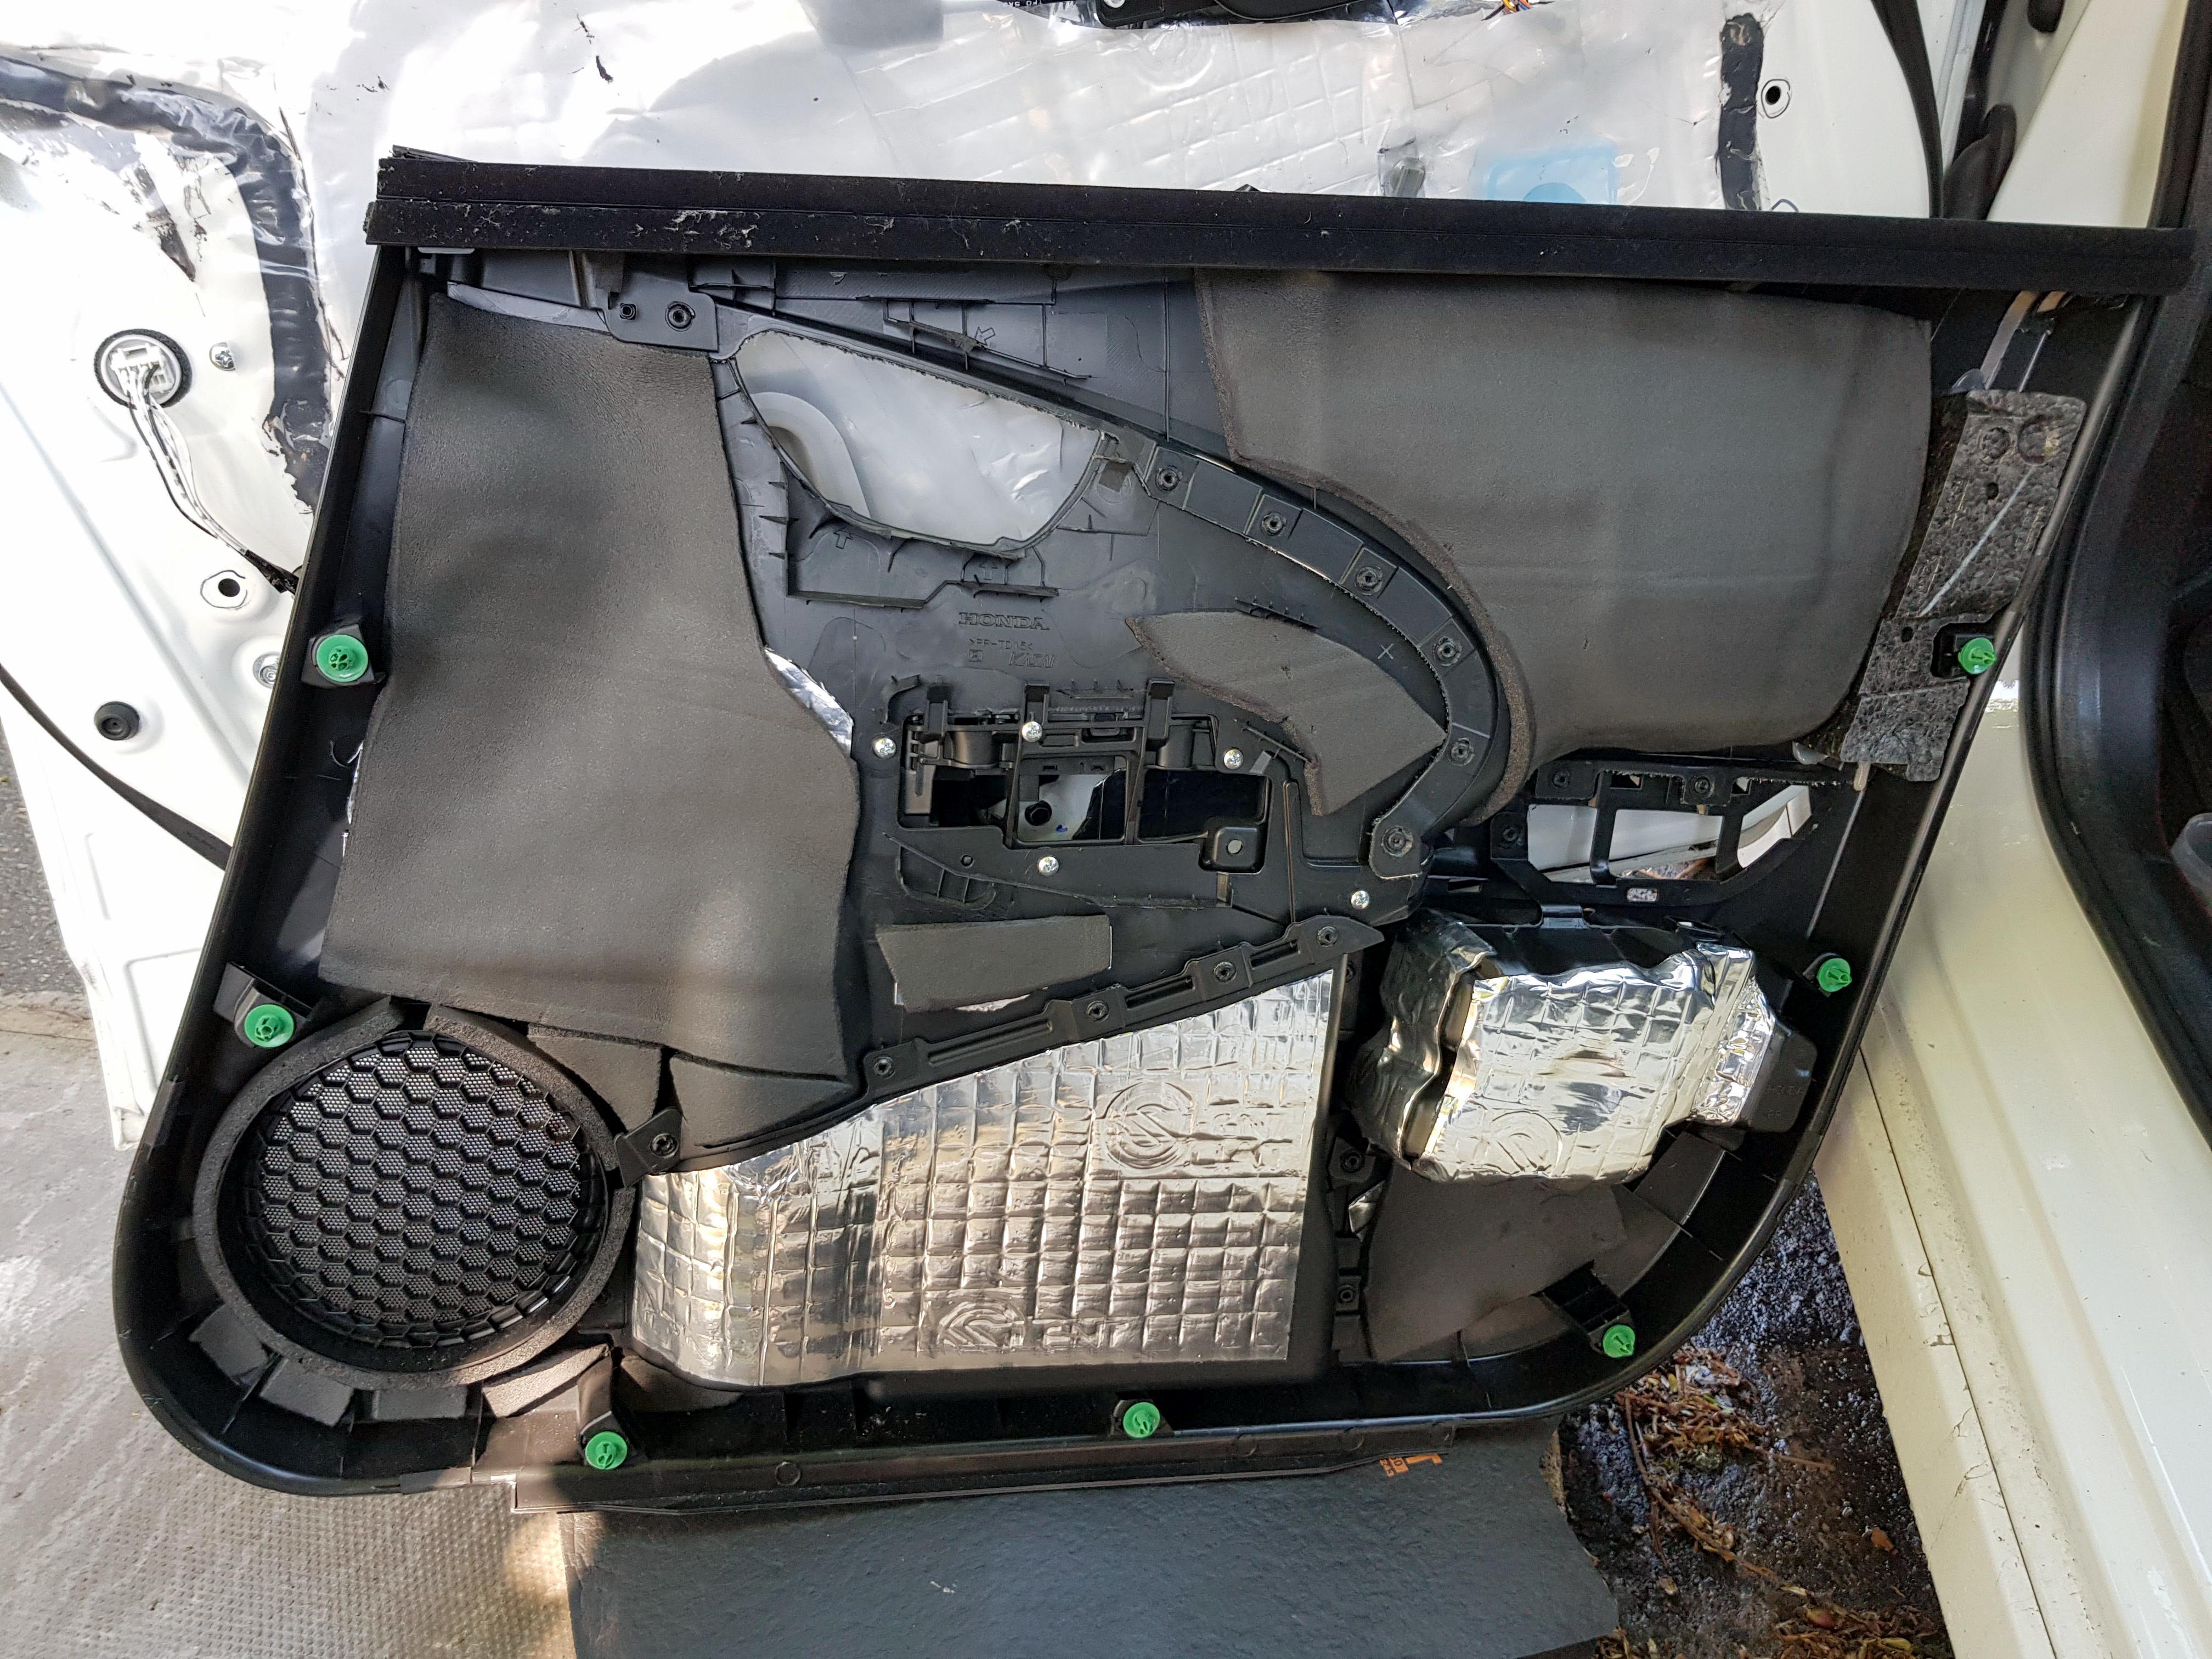
The Front doors were a little trickier, as there was this box in the door card, which I believe is for added strength, but I managed to work around it.
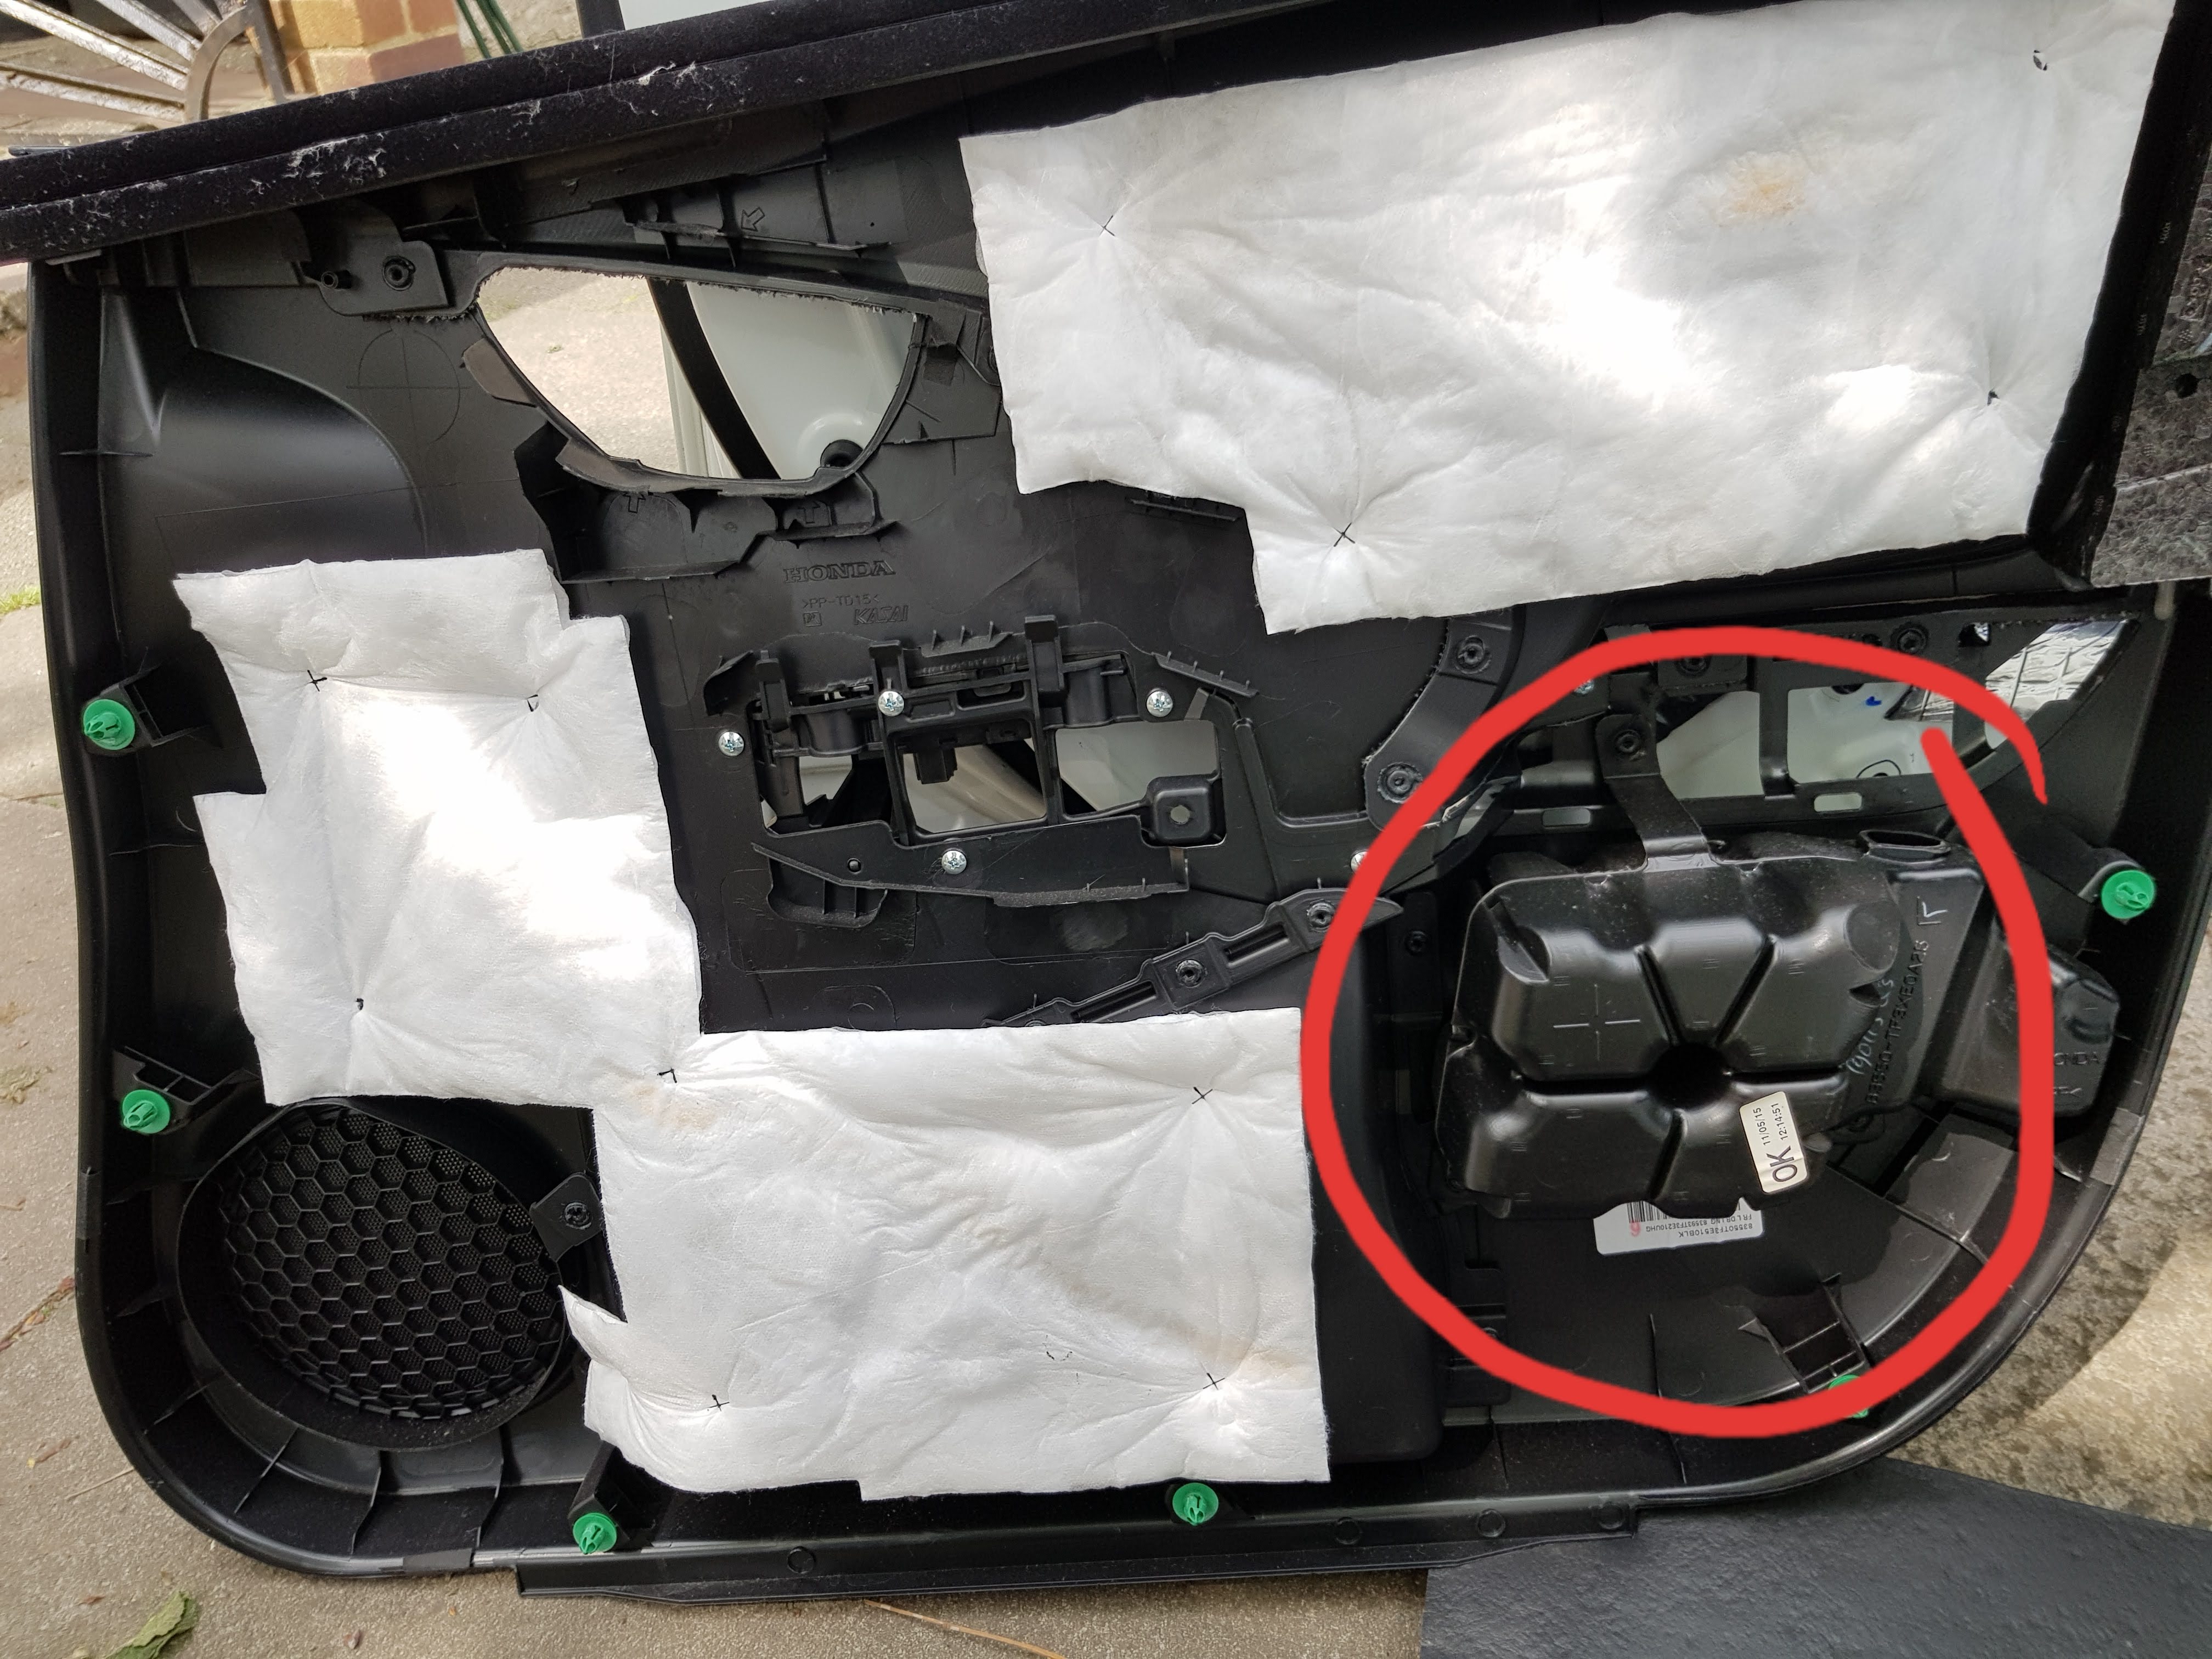

Front Right Door:

I used paper to make a template that would fit the hole exactly
Door Card Before:
Door Card After:
Though I did have to remove the big bit of foam in the lower part, as the door card wouldn't fit back with it on, so I used Silent coat instead.
I used the stock white sound deadening from the door card to fill the hollow boxes in the door cards, to stop any resonating, which worked a trick!
Front Left Door:


Didn't make the same mistake with the foam on this door card:
The doors made a really big difference to the sound in the car, and the audio quality was much better as well!
Sound Deadening Part 4: Firewall and Front Fenders
So I decided to go a bit further with the sound deadening and try and target the harder to get to areas I felt were letting in noise.
Those being behind the engine (firewall) letting in engine noise, and behind the front fenders letting in road noise.
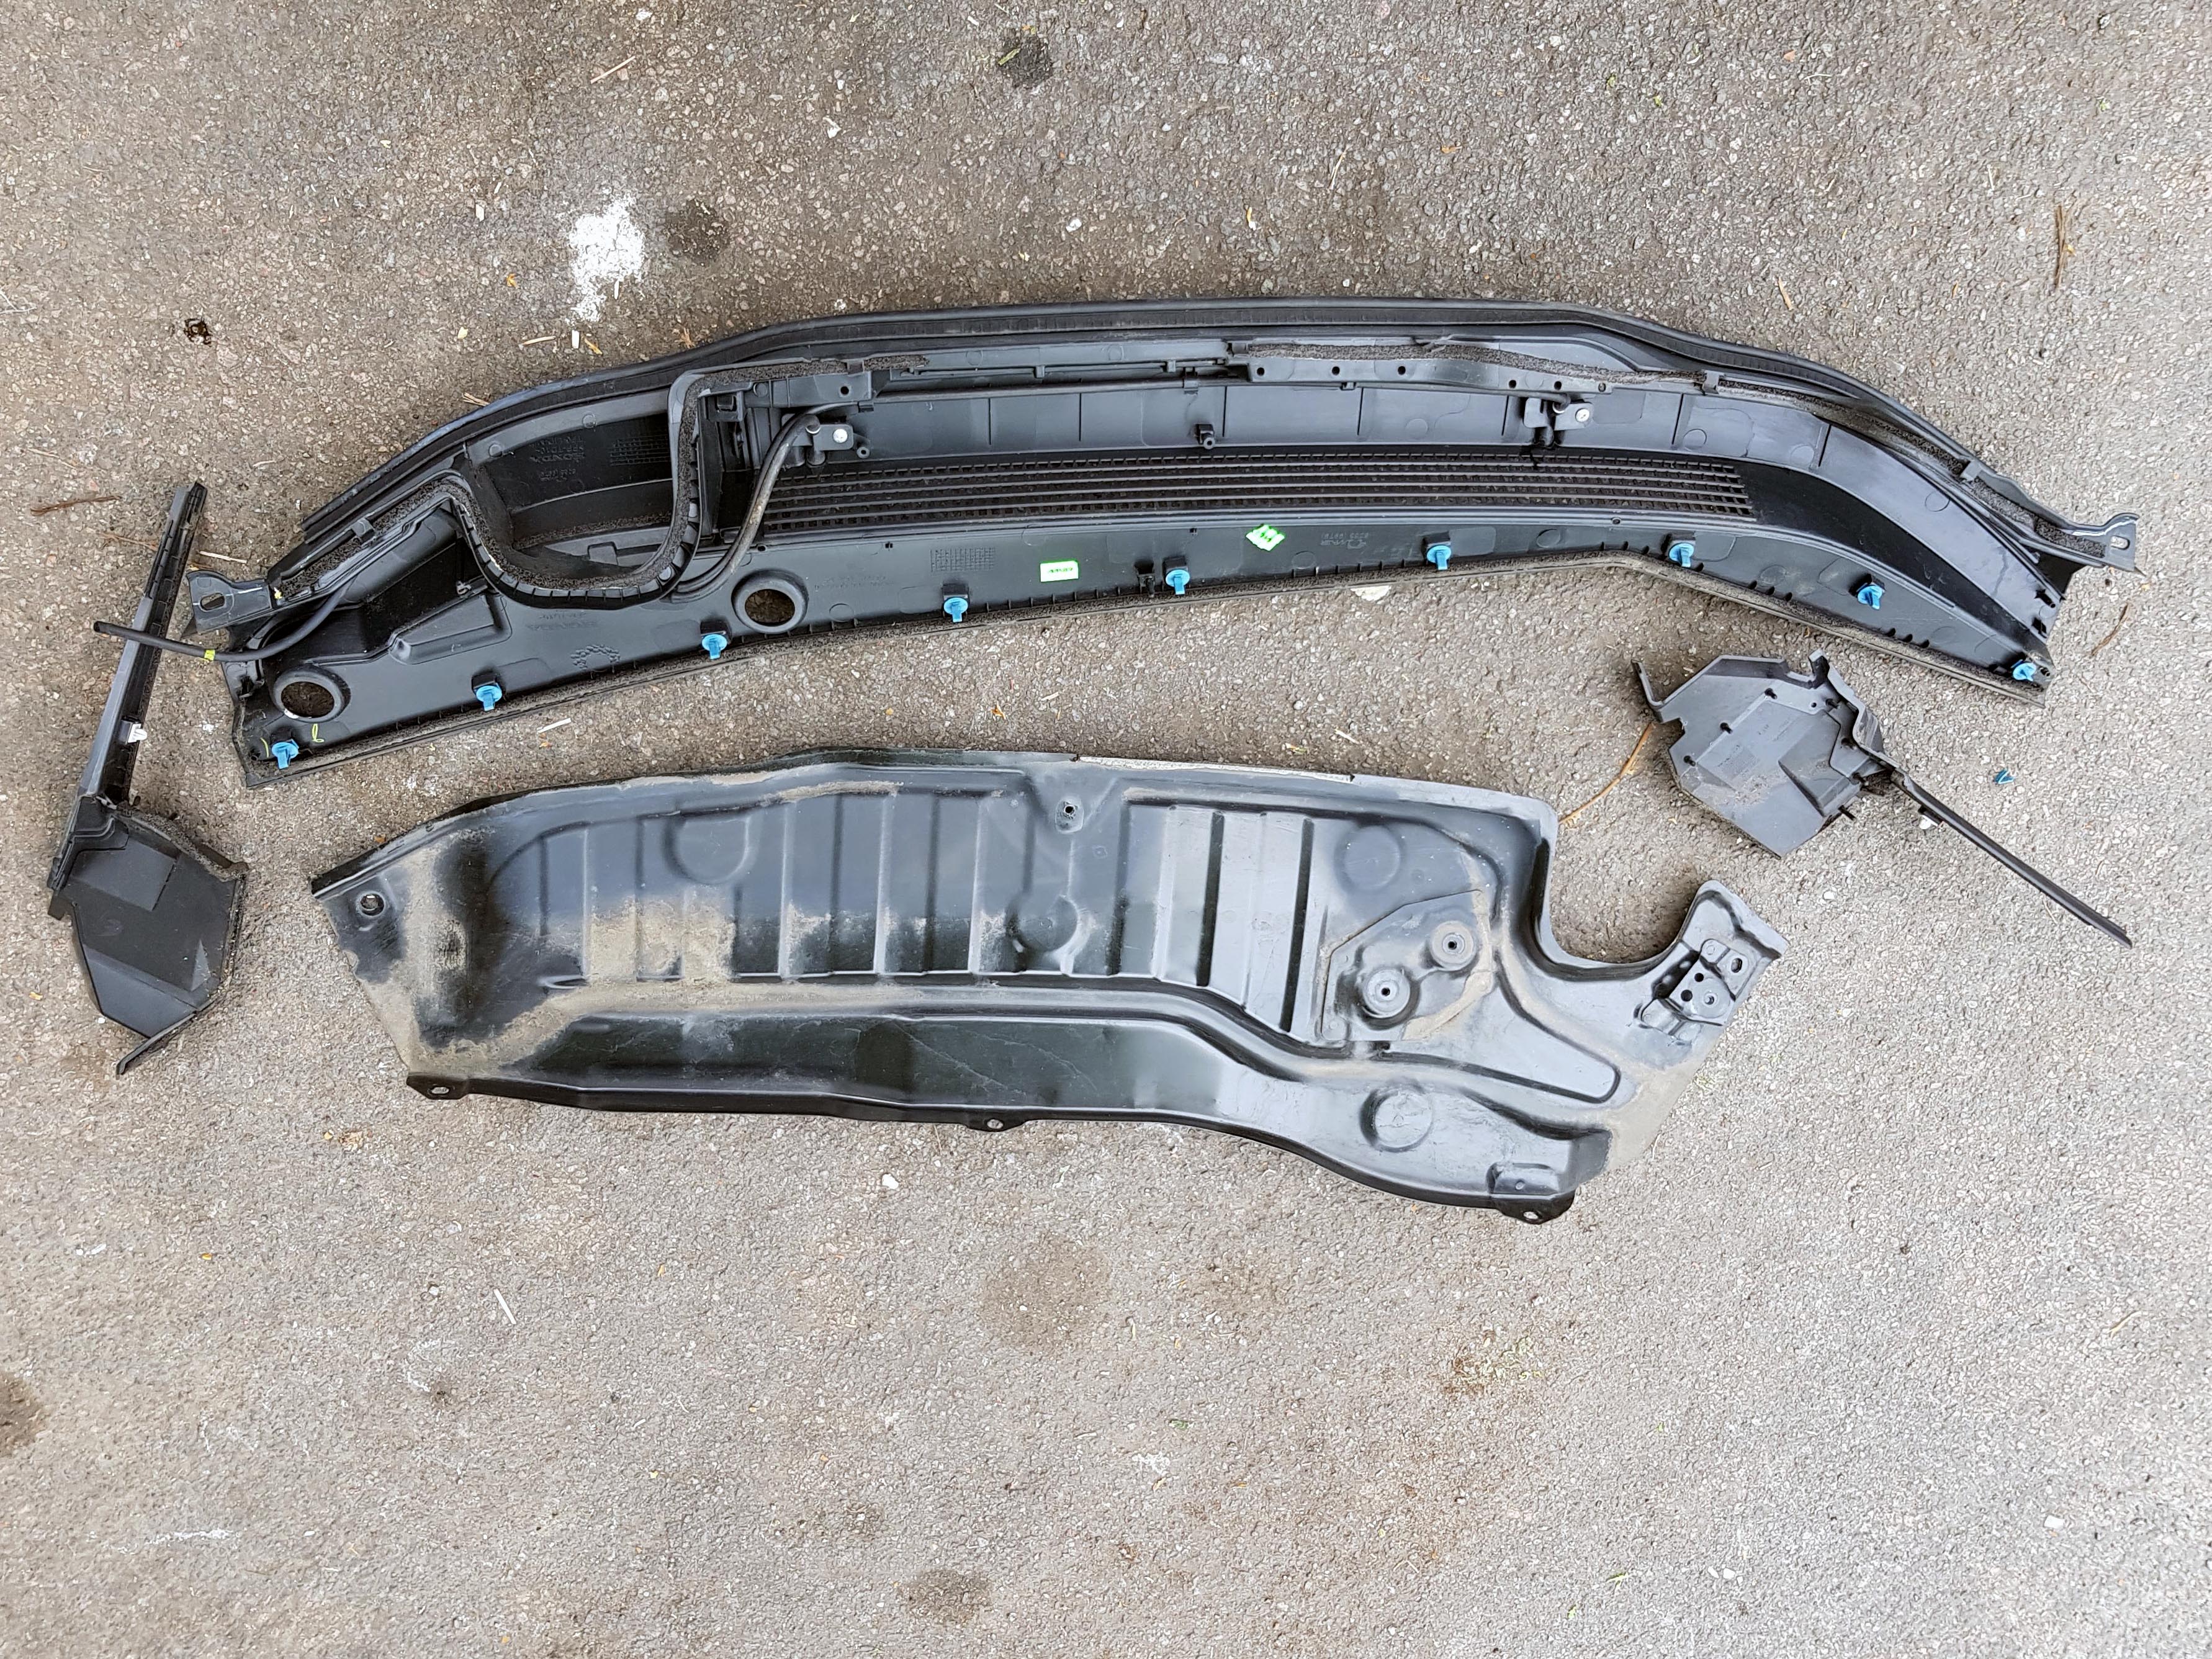
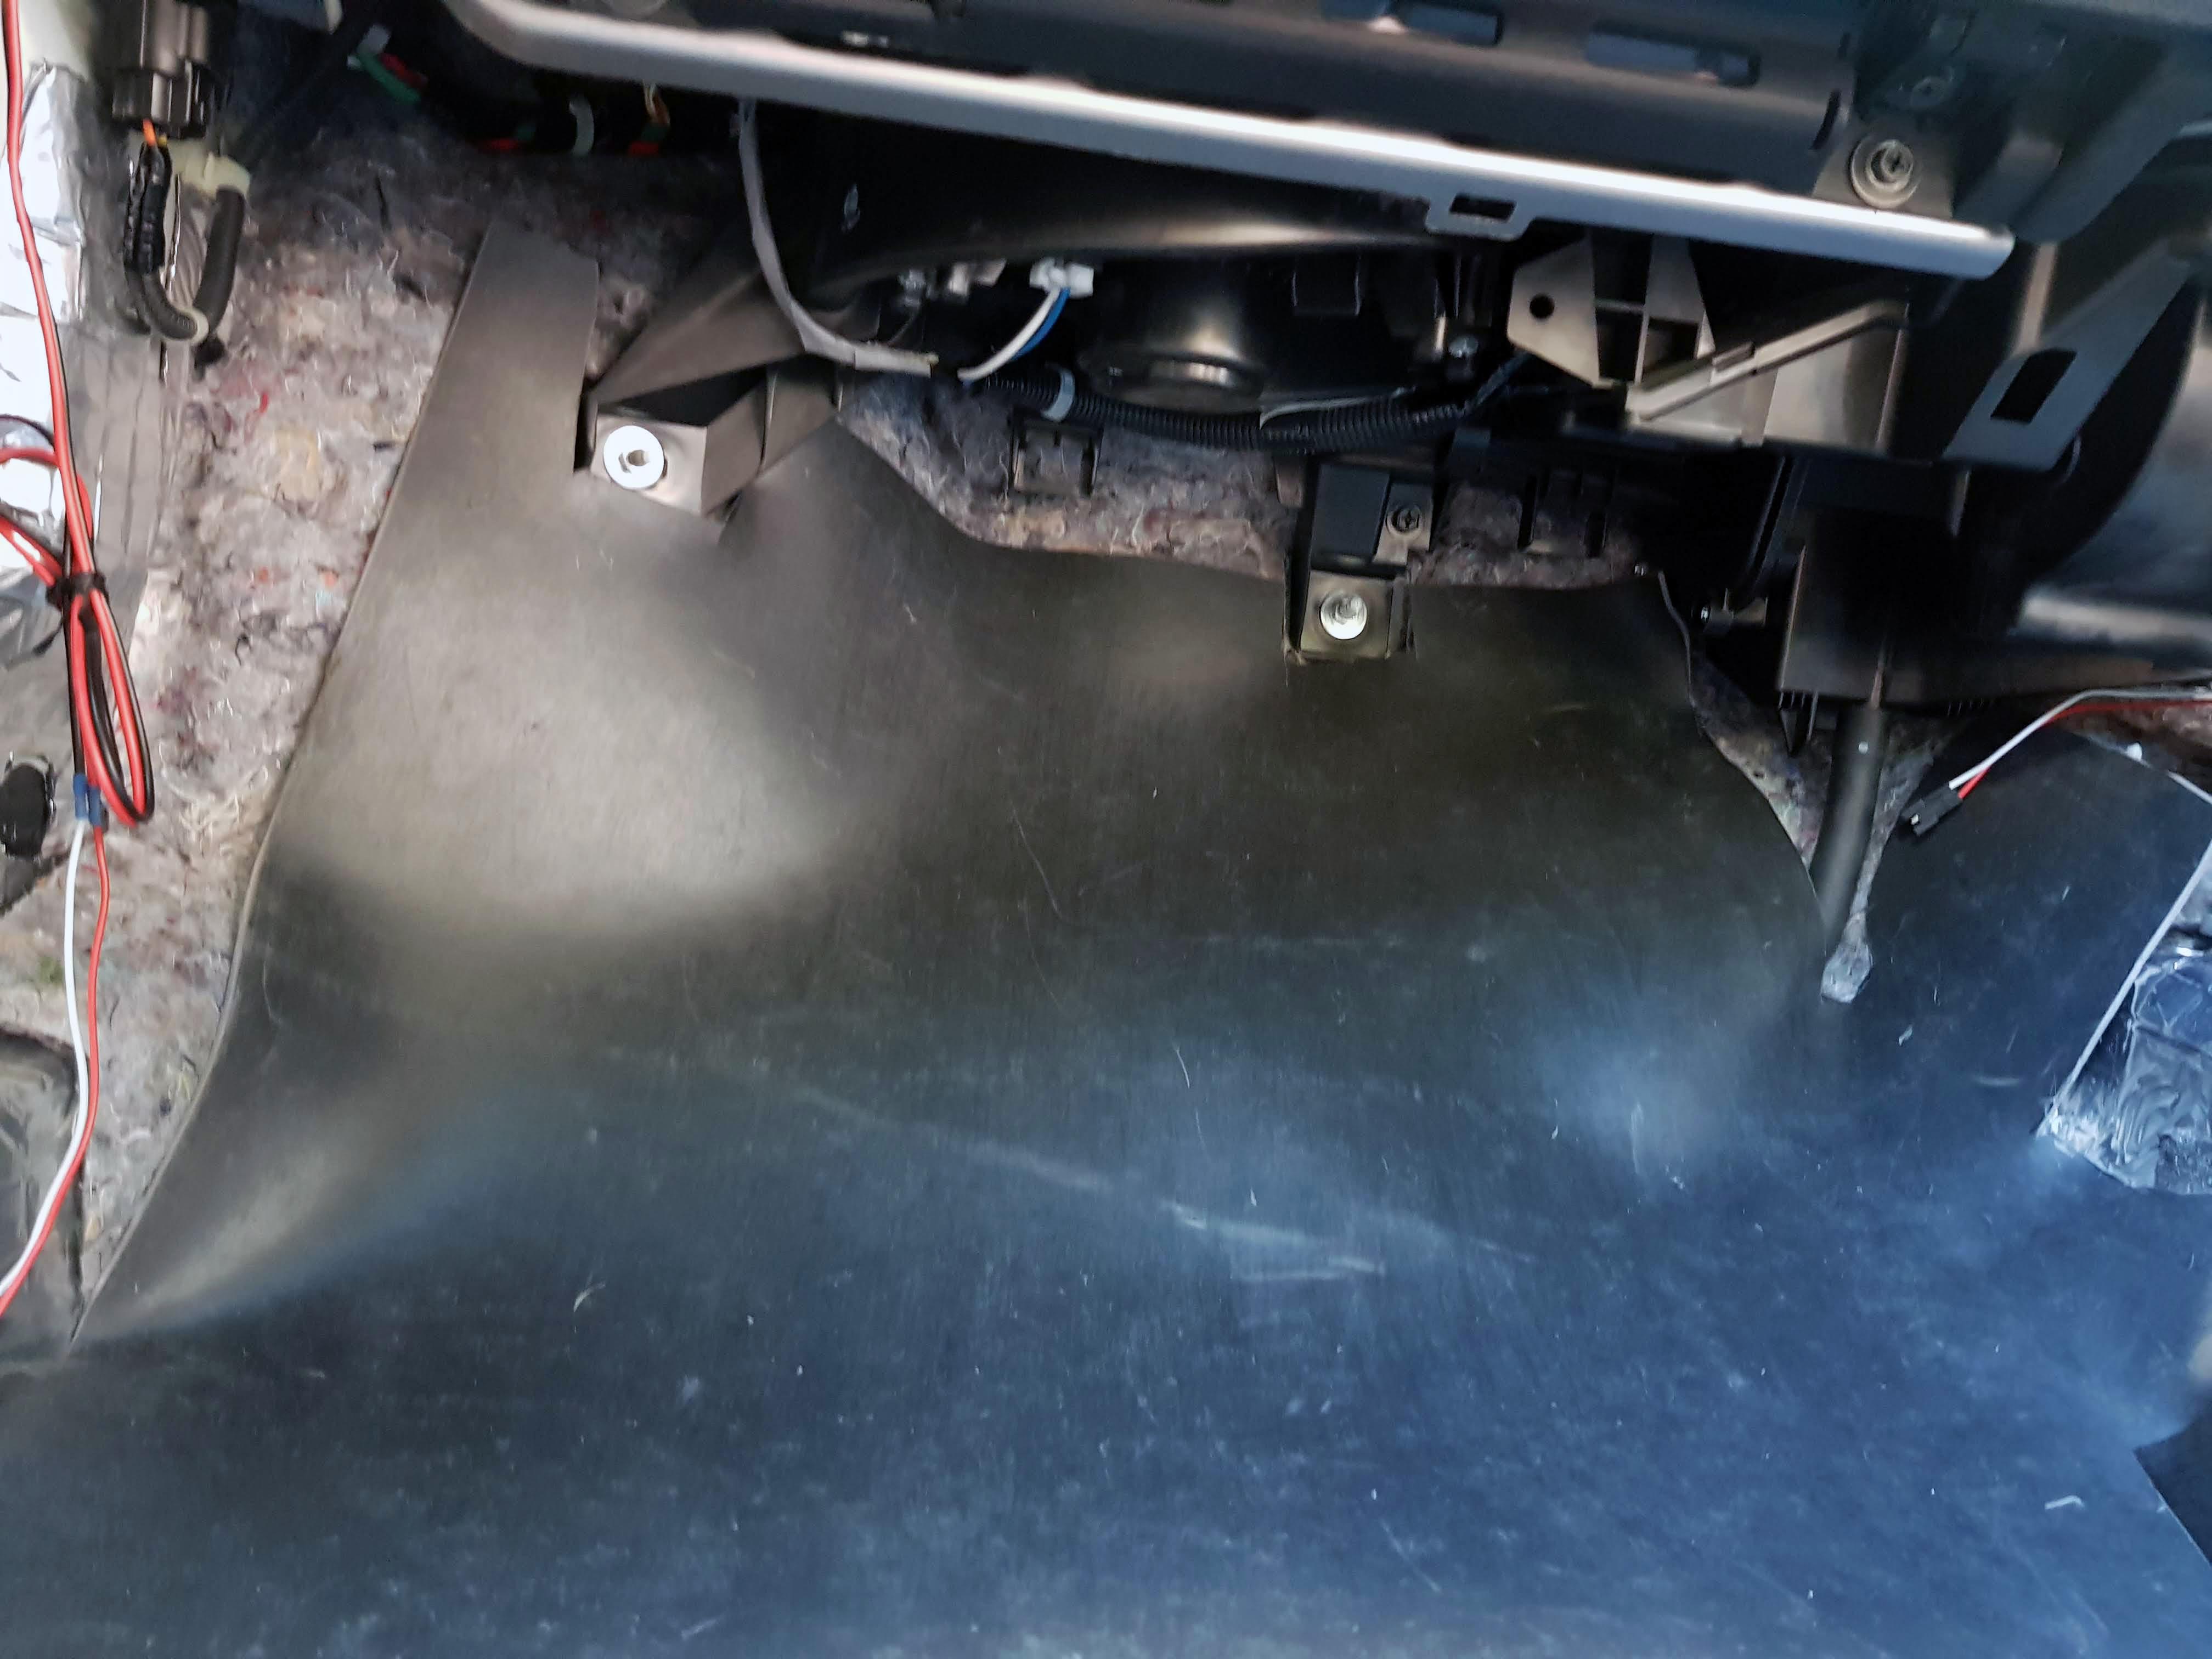
Getting to the firewall wasn't too hard to do, I just followed the guide on how to remove the cowl cover, it was reasonably easy. I still feel sorry for mechanics who have to work on the engine bay though!
Cover removed:
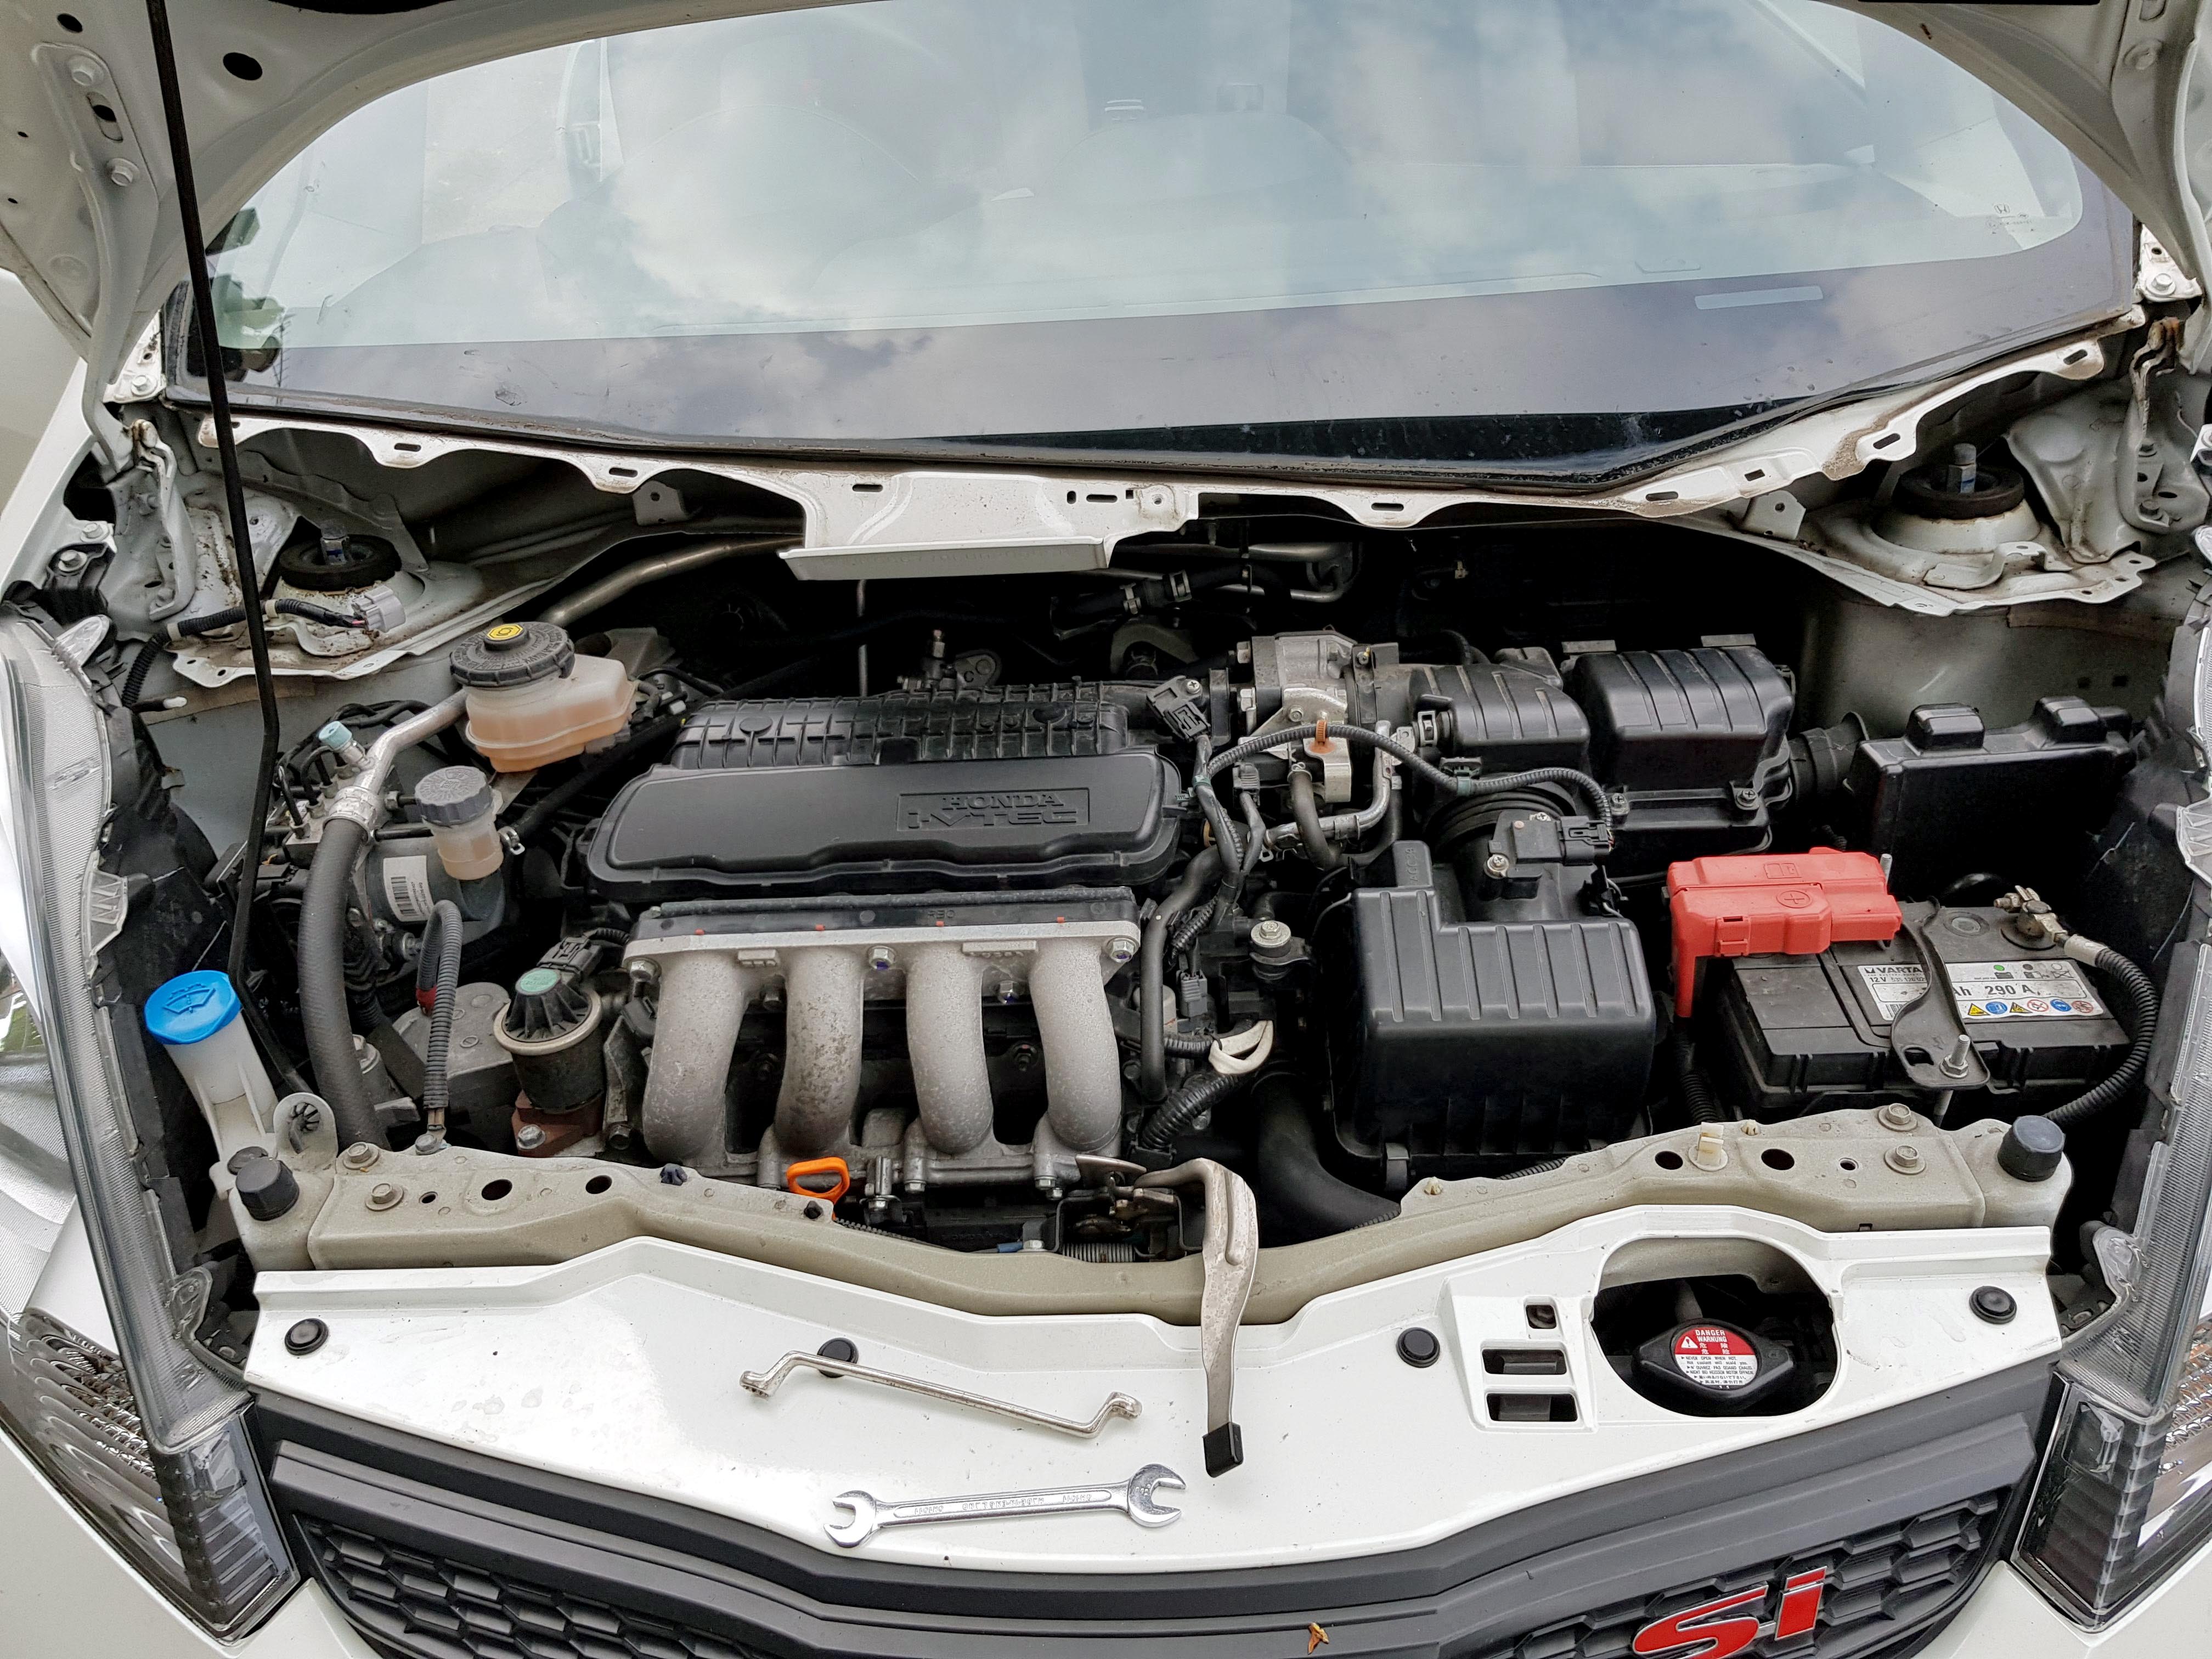
The removed parts which I will be giving a good clean before putting back!
The inner metal where I will be applying the sound deadening:
First stage with the Silent Coat:

Second stage with the 10mm Closed Cell Foam:
This actually made a noticeable improvement in reducing engine noise, but I feel for best results, I'd need to put it behind the dashboard, which I really don't want to have to do. But I might look into it and see if theres any easy way to do it by removing as little as possible. As no amount of quiet is worth the hassle of removing the dash!!
Next was behind the fenders, which was a much bigger task than I was expecting.
To get behind the fenders I had to remove the Front bumper, headlights, side skirts, part of the wheel well plastic, the plastic cover next to the tiny front window and part of the cowl cover. And I couldn't actually remove the fender completely, as the final bolt at the bottom was actually sealed on under all the underseal Honda put on from the factory, and I wasn't going to disturb that, so I had to do it with the fender still hanging on.
It was such a nightmare to do, and to be honest, only made a very slight difference to the road noise, so I kinda regret it, and wish I had put it inside the actual wheel well behind the plastic cover instead (something I will be doing at some point).
First stage with the Silent Coat:


Second stage with the 10mm Closed Cell Foam:

Next stage is the roof, then putting the closed cell foam in the main interior.
Then I will reassess the interior noise and take it from there.
I do notice noise coming though the door seals, so I'm going to look into how to improve that as well.
I feel like I'm trying to find a leak in a boat, and when I plug one hole, I notice another :
But hopefully others can learn from my trial and error!
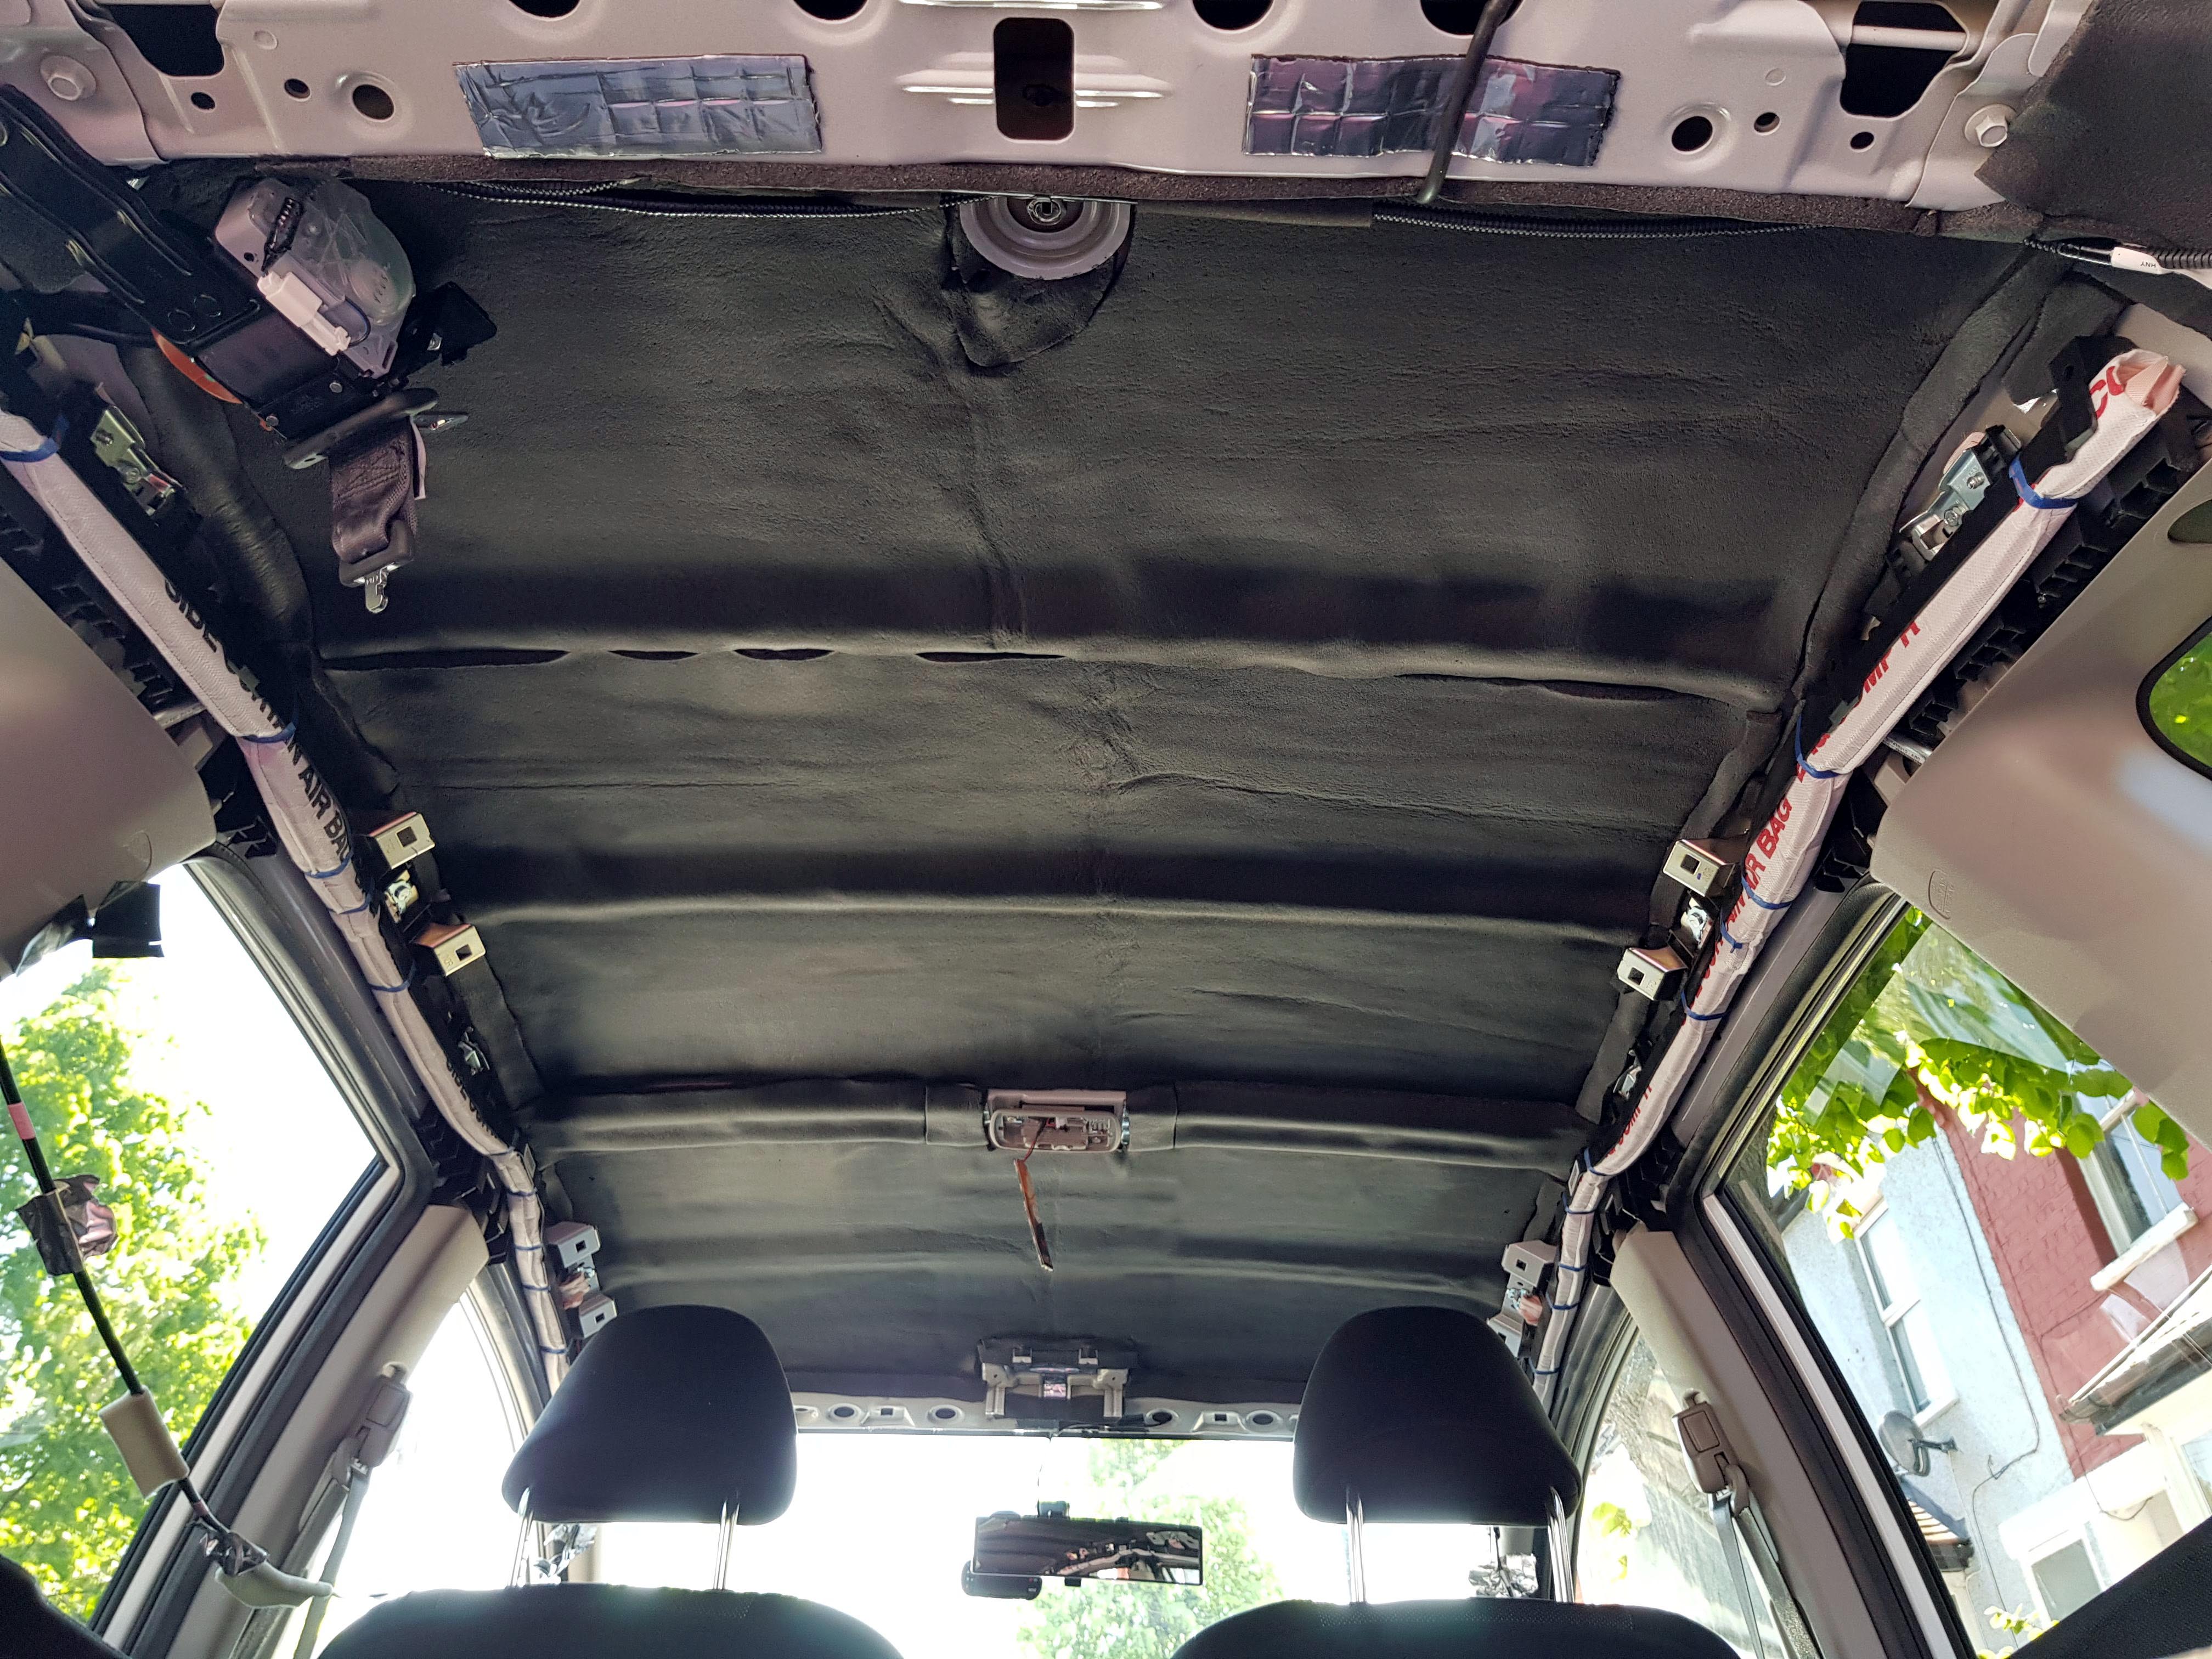
Sound Deadening Part 5: The Roof and Boot Lid
So the next big job was the roof (which turned out to be the easiest part to apply the sound deadening to).
In the service manual it says in order to remove the roof liner, you have to remove all the rear plastic trim, side trim, as well as the grab handles, sun visors and ceiling lights.
But seeing as it's fabric basically, I was convinced I could remove it by only doing the grab handles, visors and ceiling lights and jut pull the fabric over the plastics to actually remove it, saving me having to remove all the plastic panels again.
And it worked:
The roof was really easy to apply the Silent coat panels to, as it was basically one long flat panel:
I drove around like this for a few days until the closed cell foam sheets I had ordered arrived, and I hadn't realised just how much sound the roof liner on it's own actually removed.
10mm Closed Cell foam sheets arrived:
It actually worked out a lot more cost effective to order them in 1mx2m rolls. I ended up ordering 3 of them in total, which only cost me �36.
It was quite hard to work with them in large sheets compared to the smaller 50x30cm sheets I was ordering before. But I managed to get there in the end:
Putting the roof liner in was a lot harder than I was expecting.
Getting it off without removing the plastic panels was fairly easy, but getting it on was not.
I did end up slightly damaging part of the roof as I tried to bend it in to place:
But apart from that, there's not really any other damage.
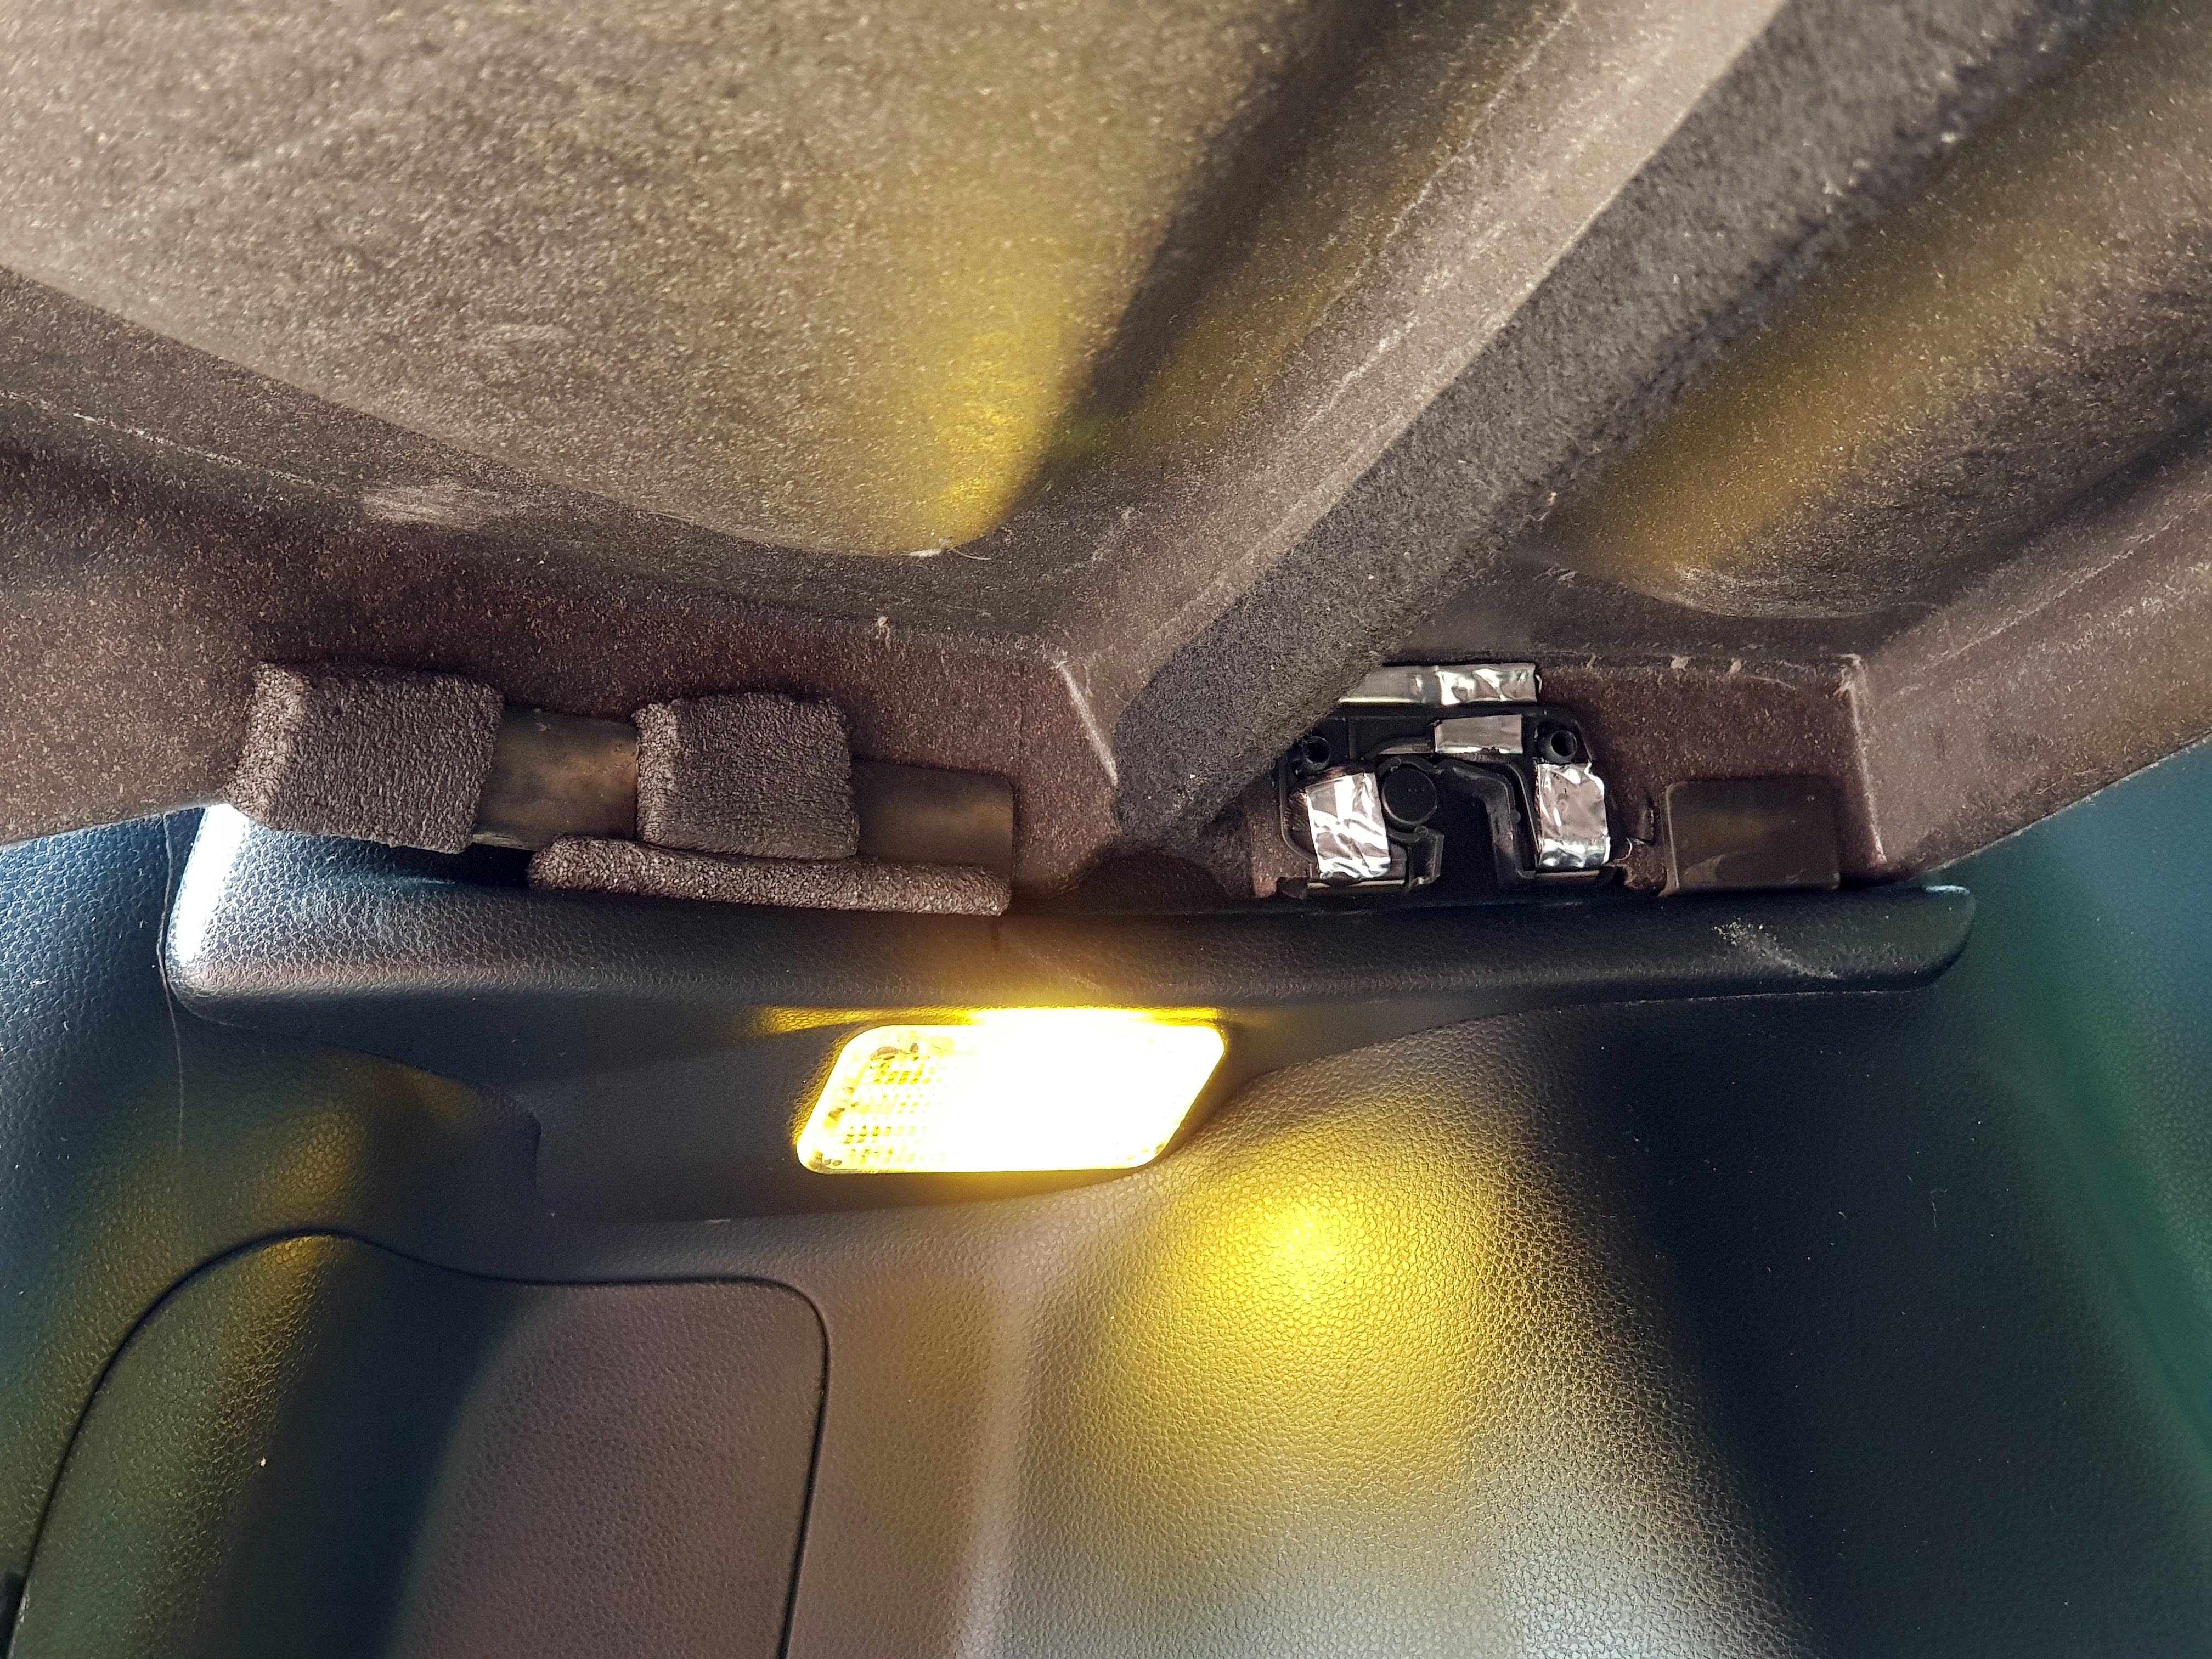
The only noticeable area where the liner doesn't fit quite right because of the foam underneath is around the main interior light, where there is some noticeable stretching:
I did notice quite a big difference after doing the roof, but it only seemed to make all the places noise was getting through more noticeable. But overall the car is a lot quieter.
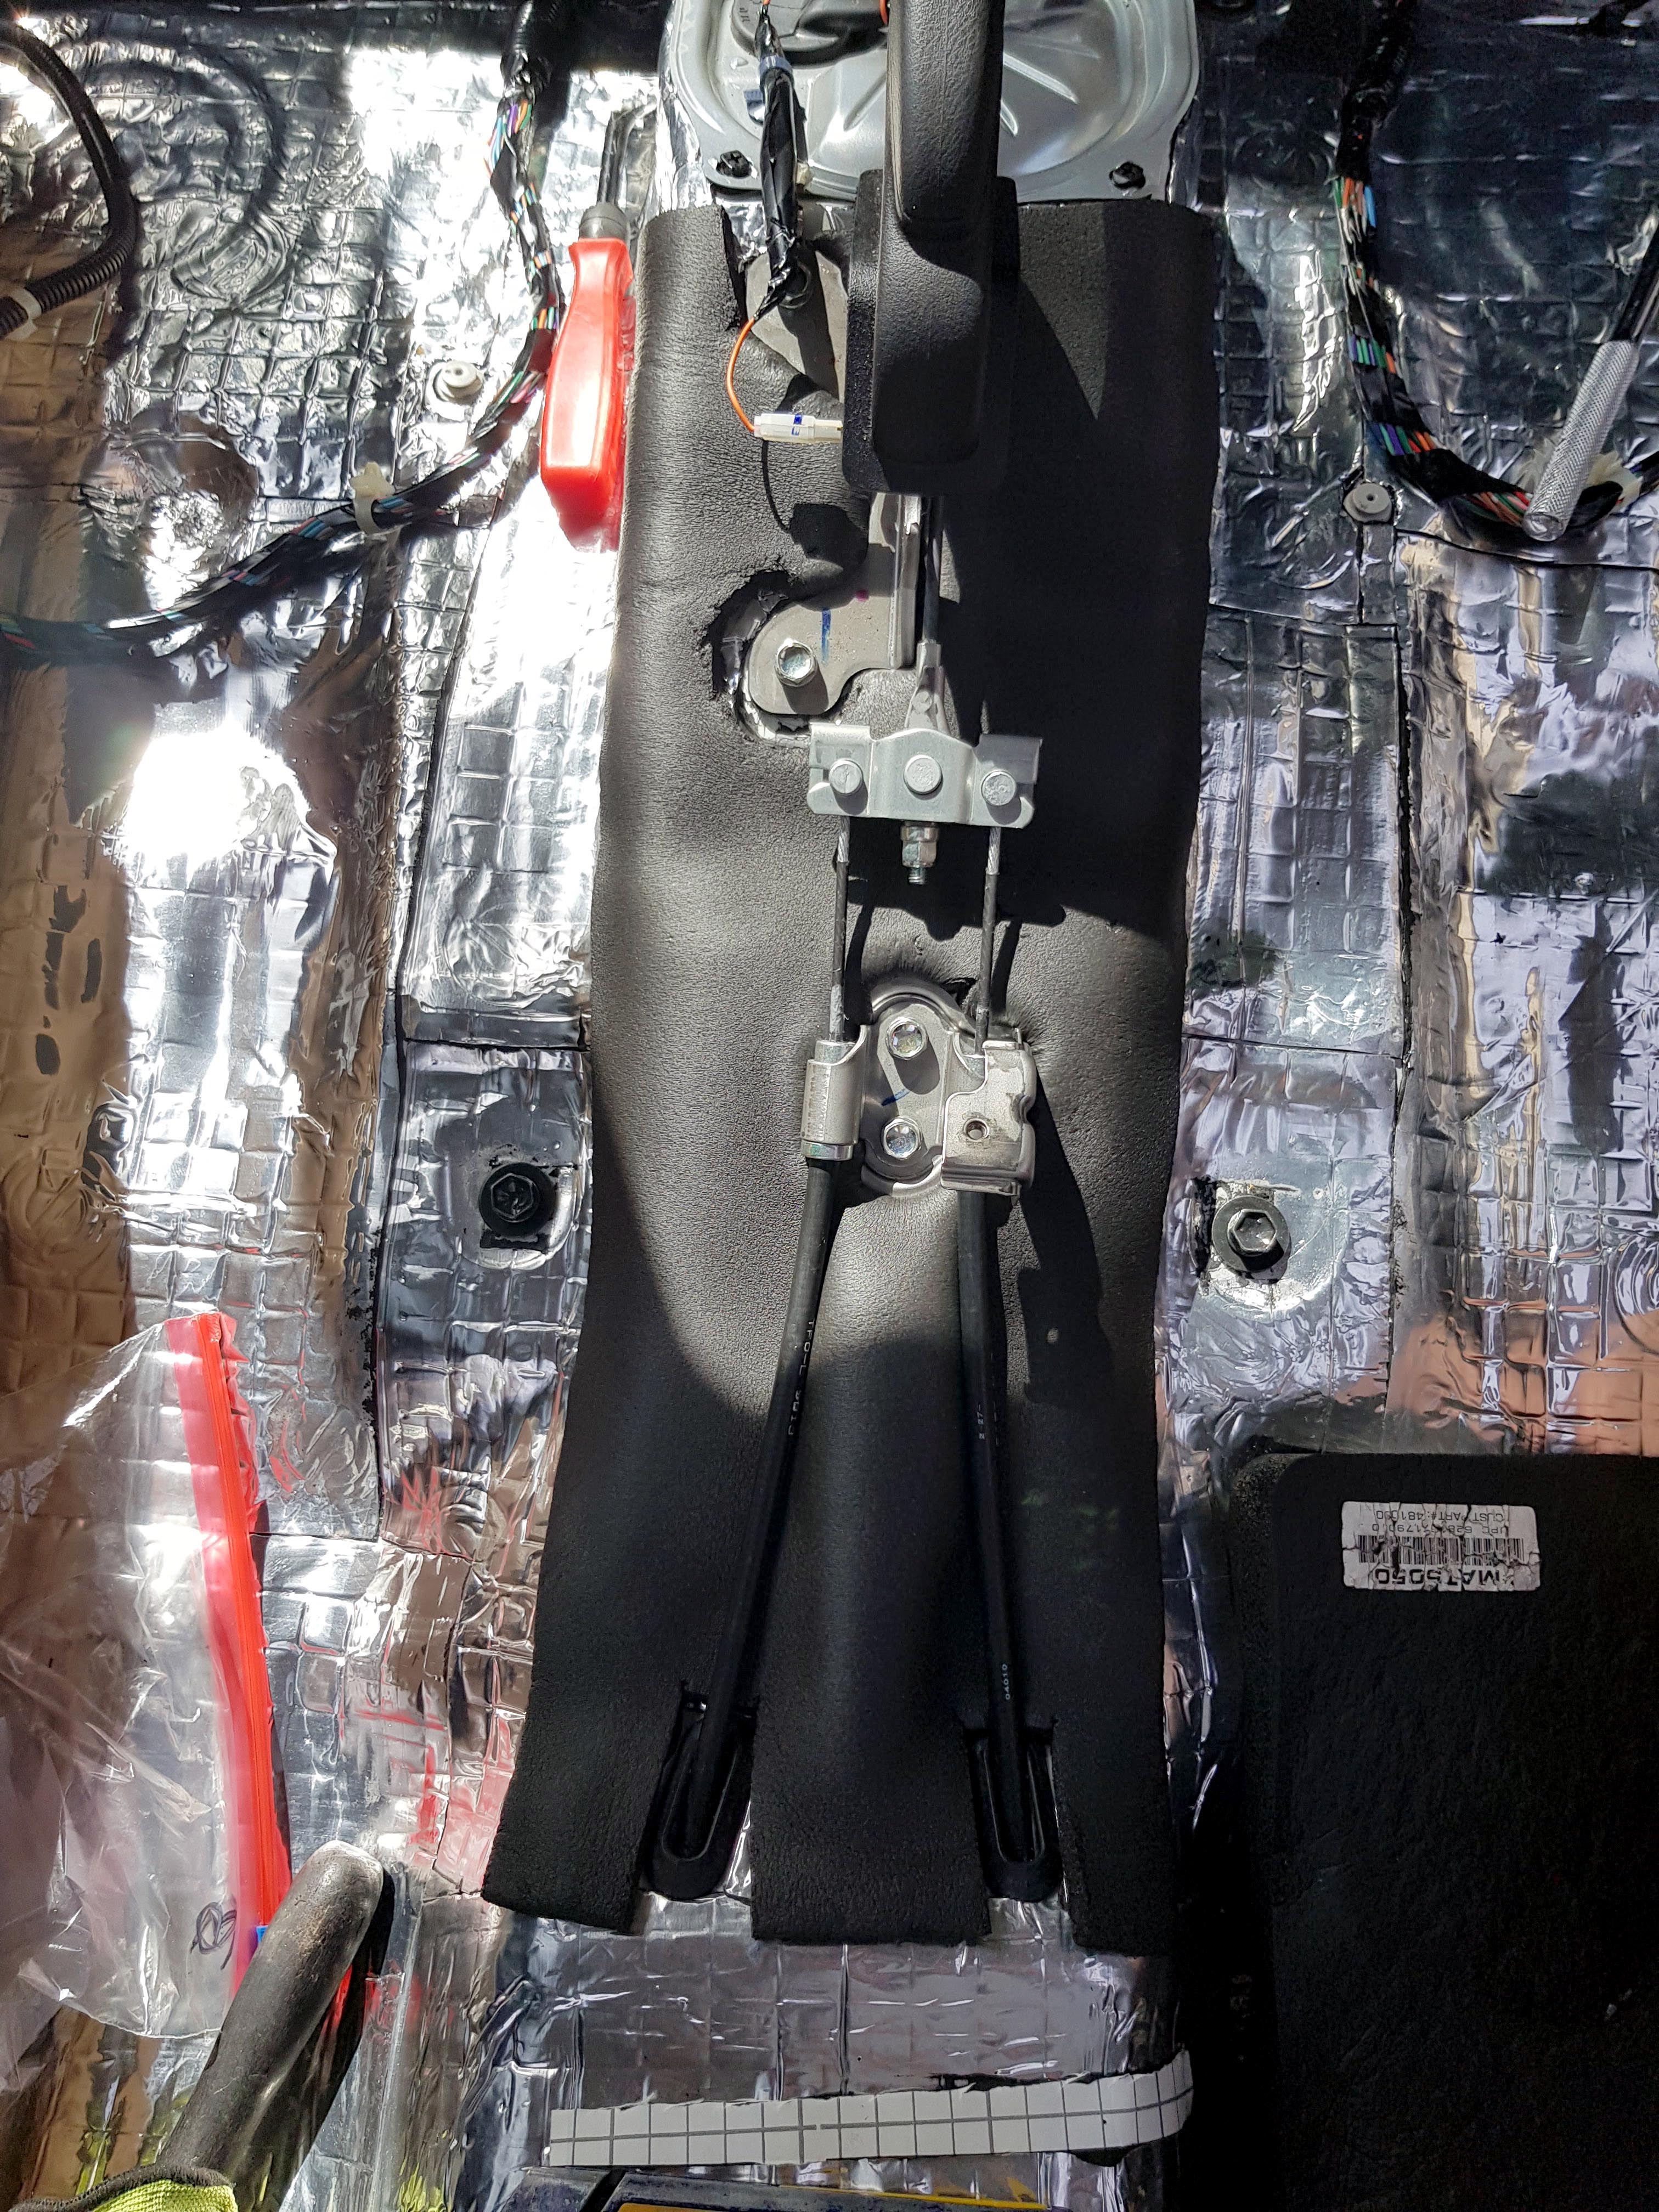
Next to do was the Boot lid.
It was easier to work on from the inside with the boot closed:
The Silent Coat added quite a bit of weight to the boot lid, and made the boot a lot harder to open. Luckily Honda installs a metal weight to the lid so it doesn't fly up too quickly, so I just removed that metal weight and it was basically back to normal again!
Next was the 10mm Closed Cell Foam
And then the foam installed to the plastic cover:
One small little detail that I really noticed and had to fix, was that the parcel shelf rattles when you go over bumpy surfaces, and I never really noticed it before until I made the car quieter, and now it drives me nuts, so I had to fix it!
I applied some silent coat to the areas causing the rattling, and added some closed cell foam to silence any rattling coming from the parcel shelf touching the rear plastic:
Slightly OCD I know, but it really stood out after the car became quieter and now it's rattle free!
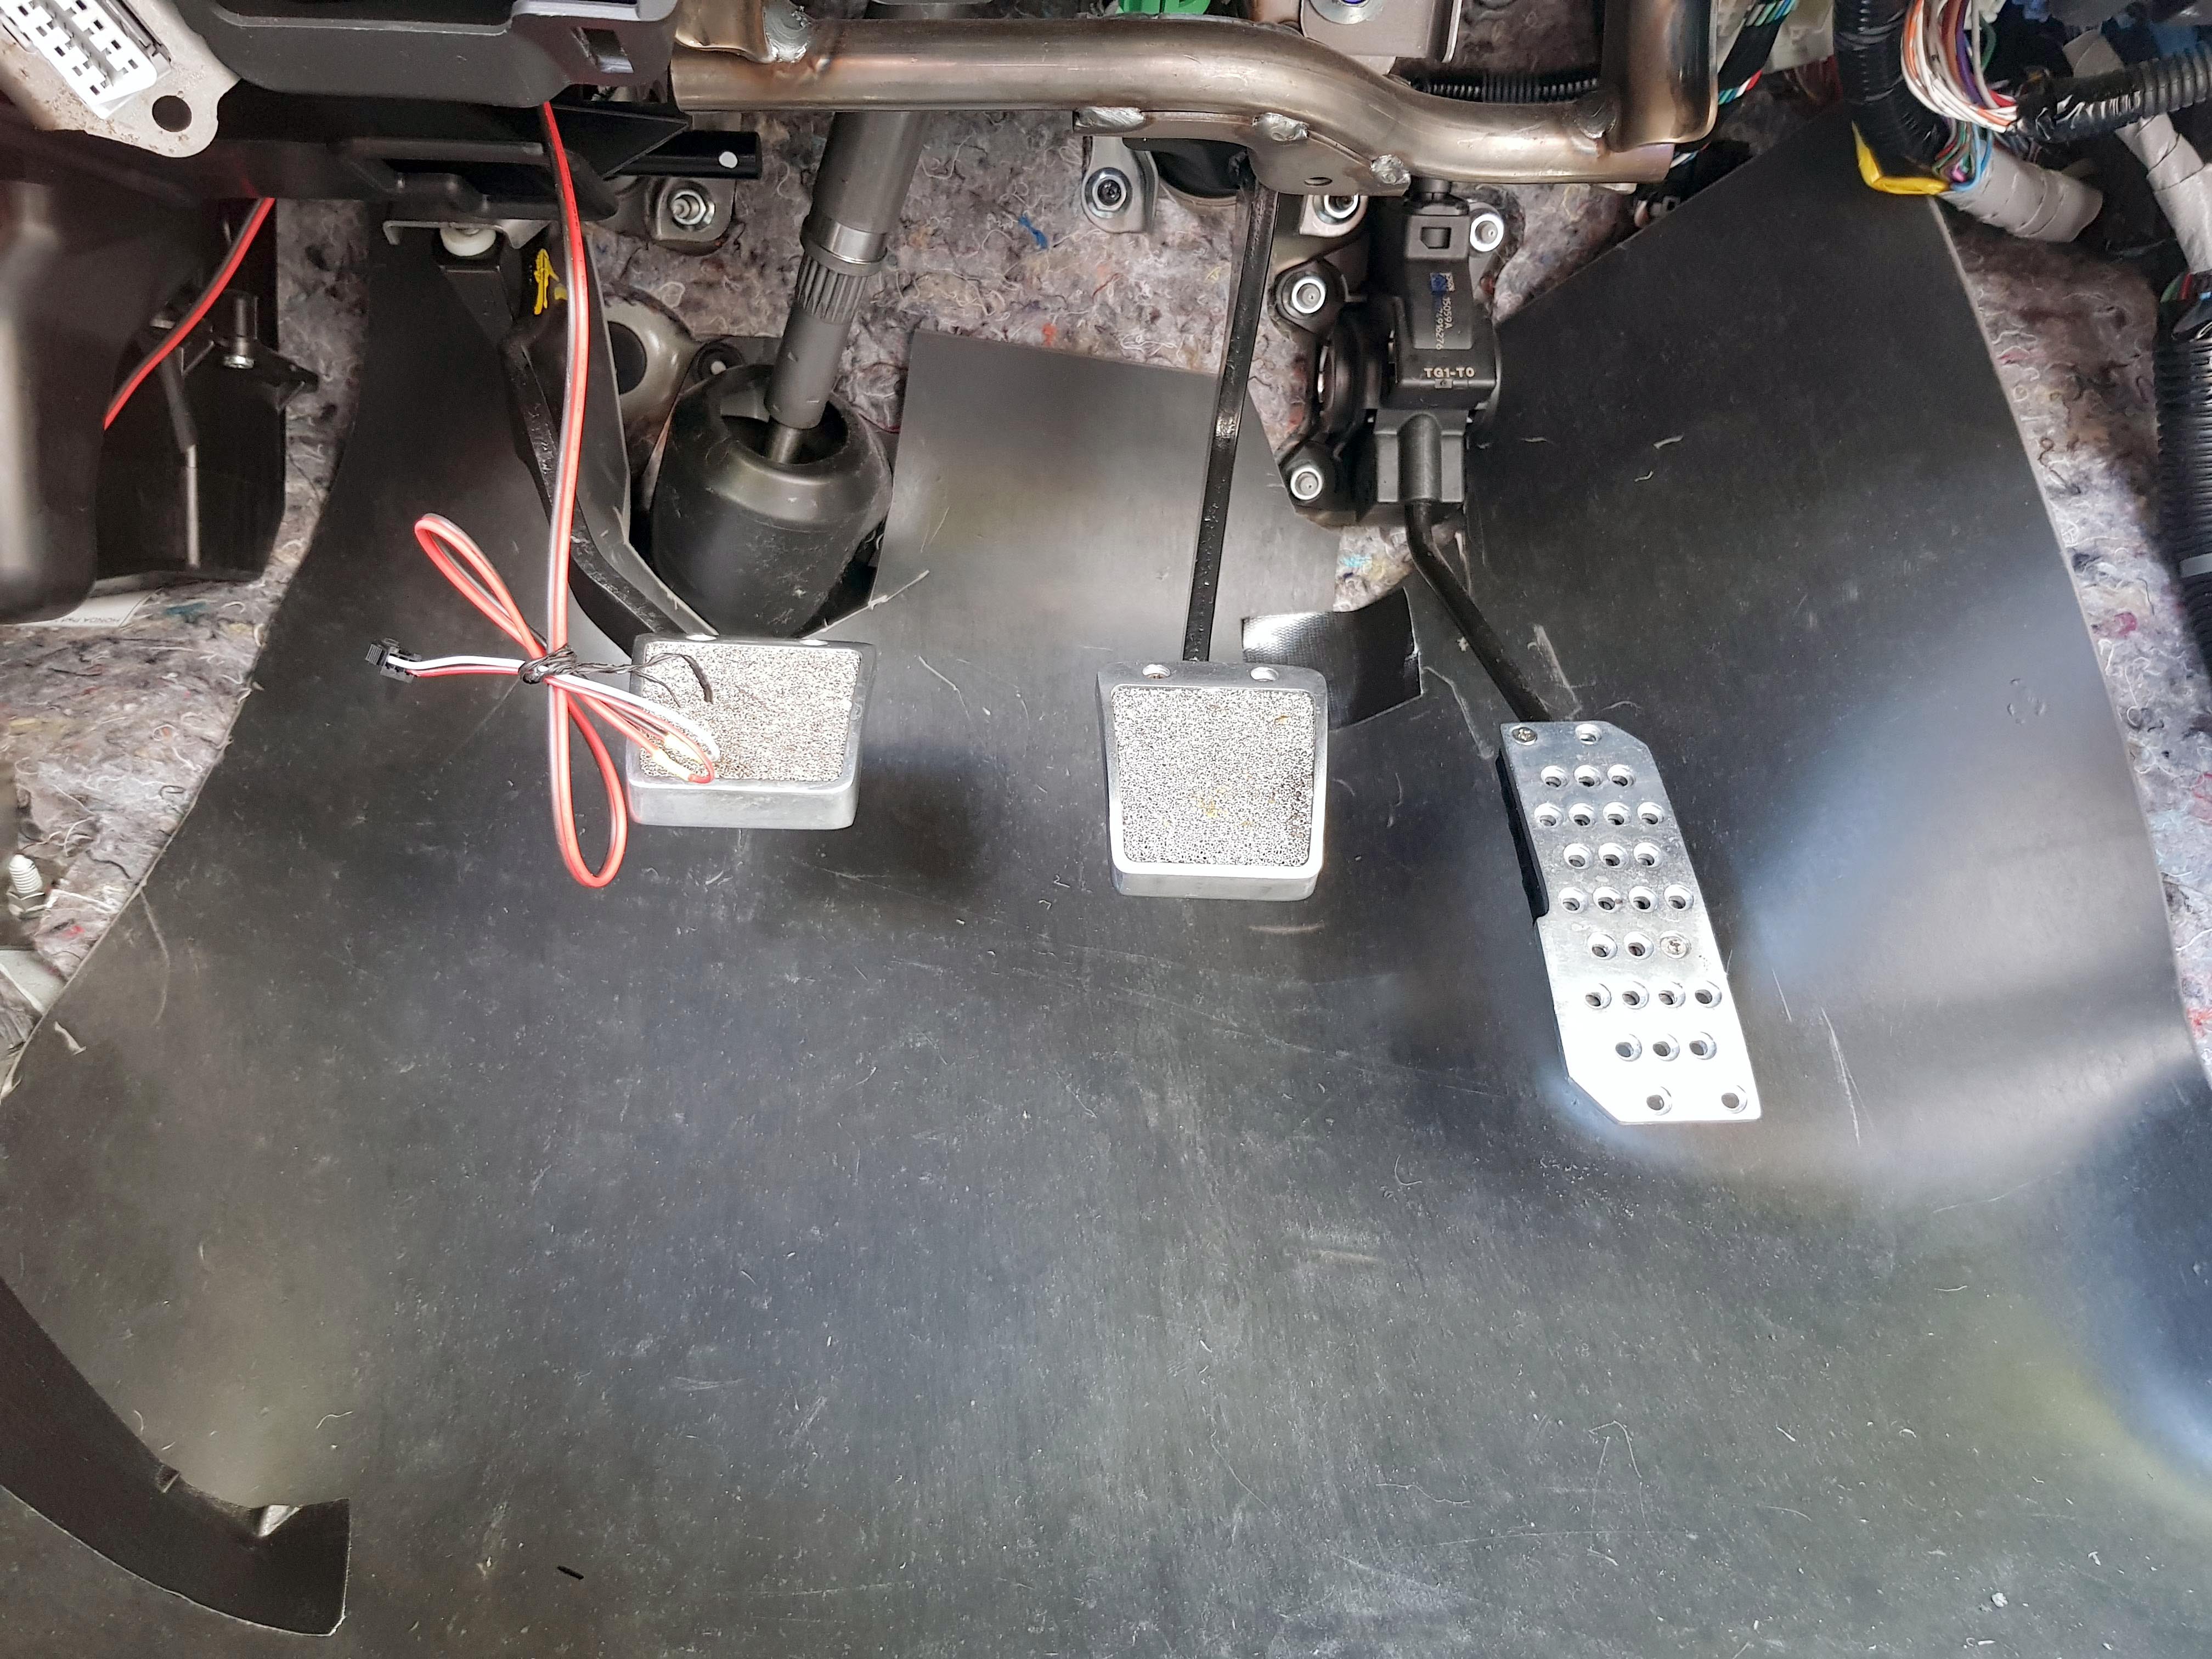
Next stage is going to be doing the front inner wheel arches from underneath. Which means removing the front wheels and the wheel arch plastic trim. As I still get a lot of road noise front the front wheel arches. I currently have Bridgestone Turanza ER370's on it, which came from the factory. They are rated at 68db, which seems the lowest rating I can find for tyres for the car, so I don't know if changing them for some Yokohama BluEarth ES32's (which are also rated at 68db) would make any difference to the road noise from the tyres or not.
And I'm going to try and remove the road noise caused by the door seals.
I did notice quite a difference by simply removing the door seals and re fitting them properly with a rubber mallet.
But I saw on another forum someone used some PVC rubber piping and ran it through the standard door seal to create a better seal when the door closes, and they added some extra adhesive rubber door seals to each door to get the gaps the standard ones don't get. So I've ordered some PVC rubber piping and some adhesive door seals and I will take it from there.
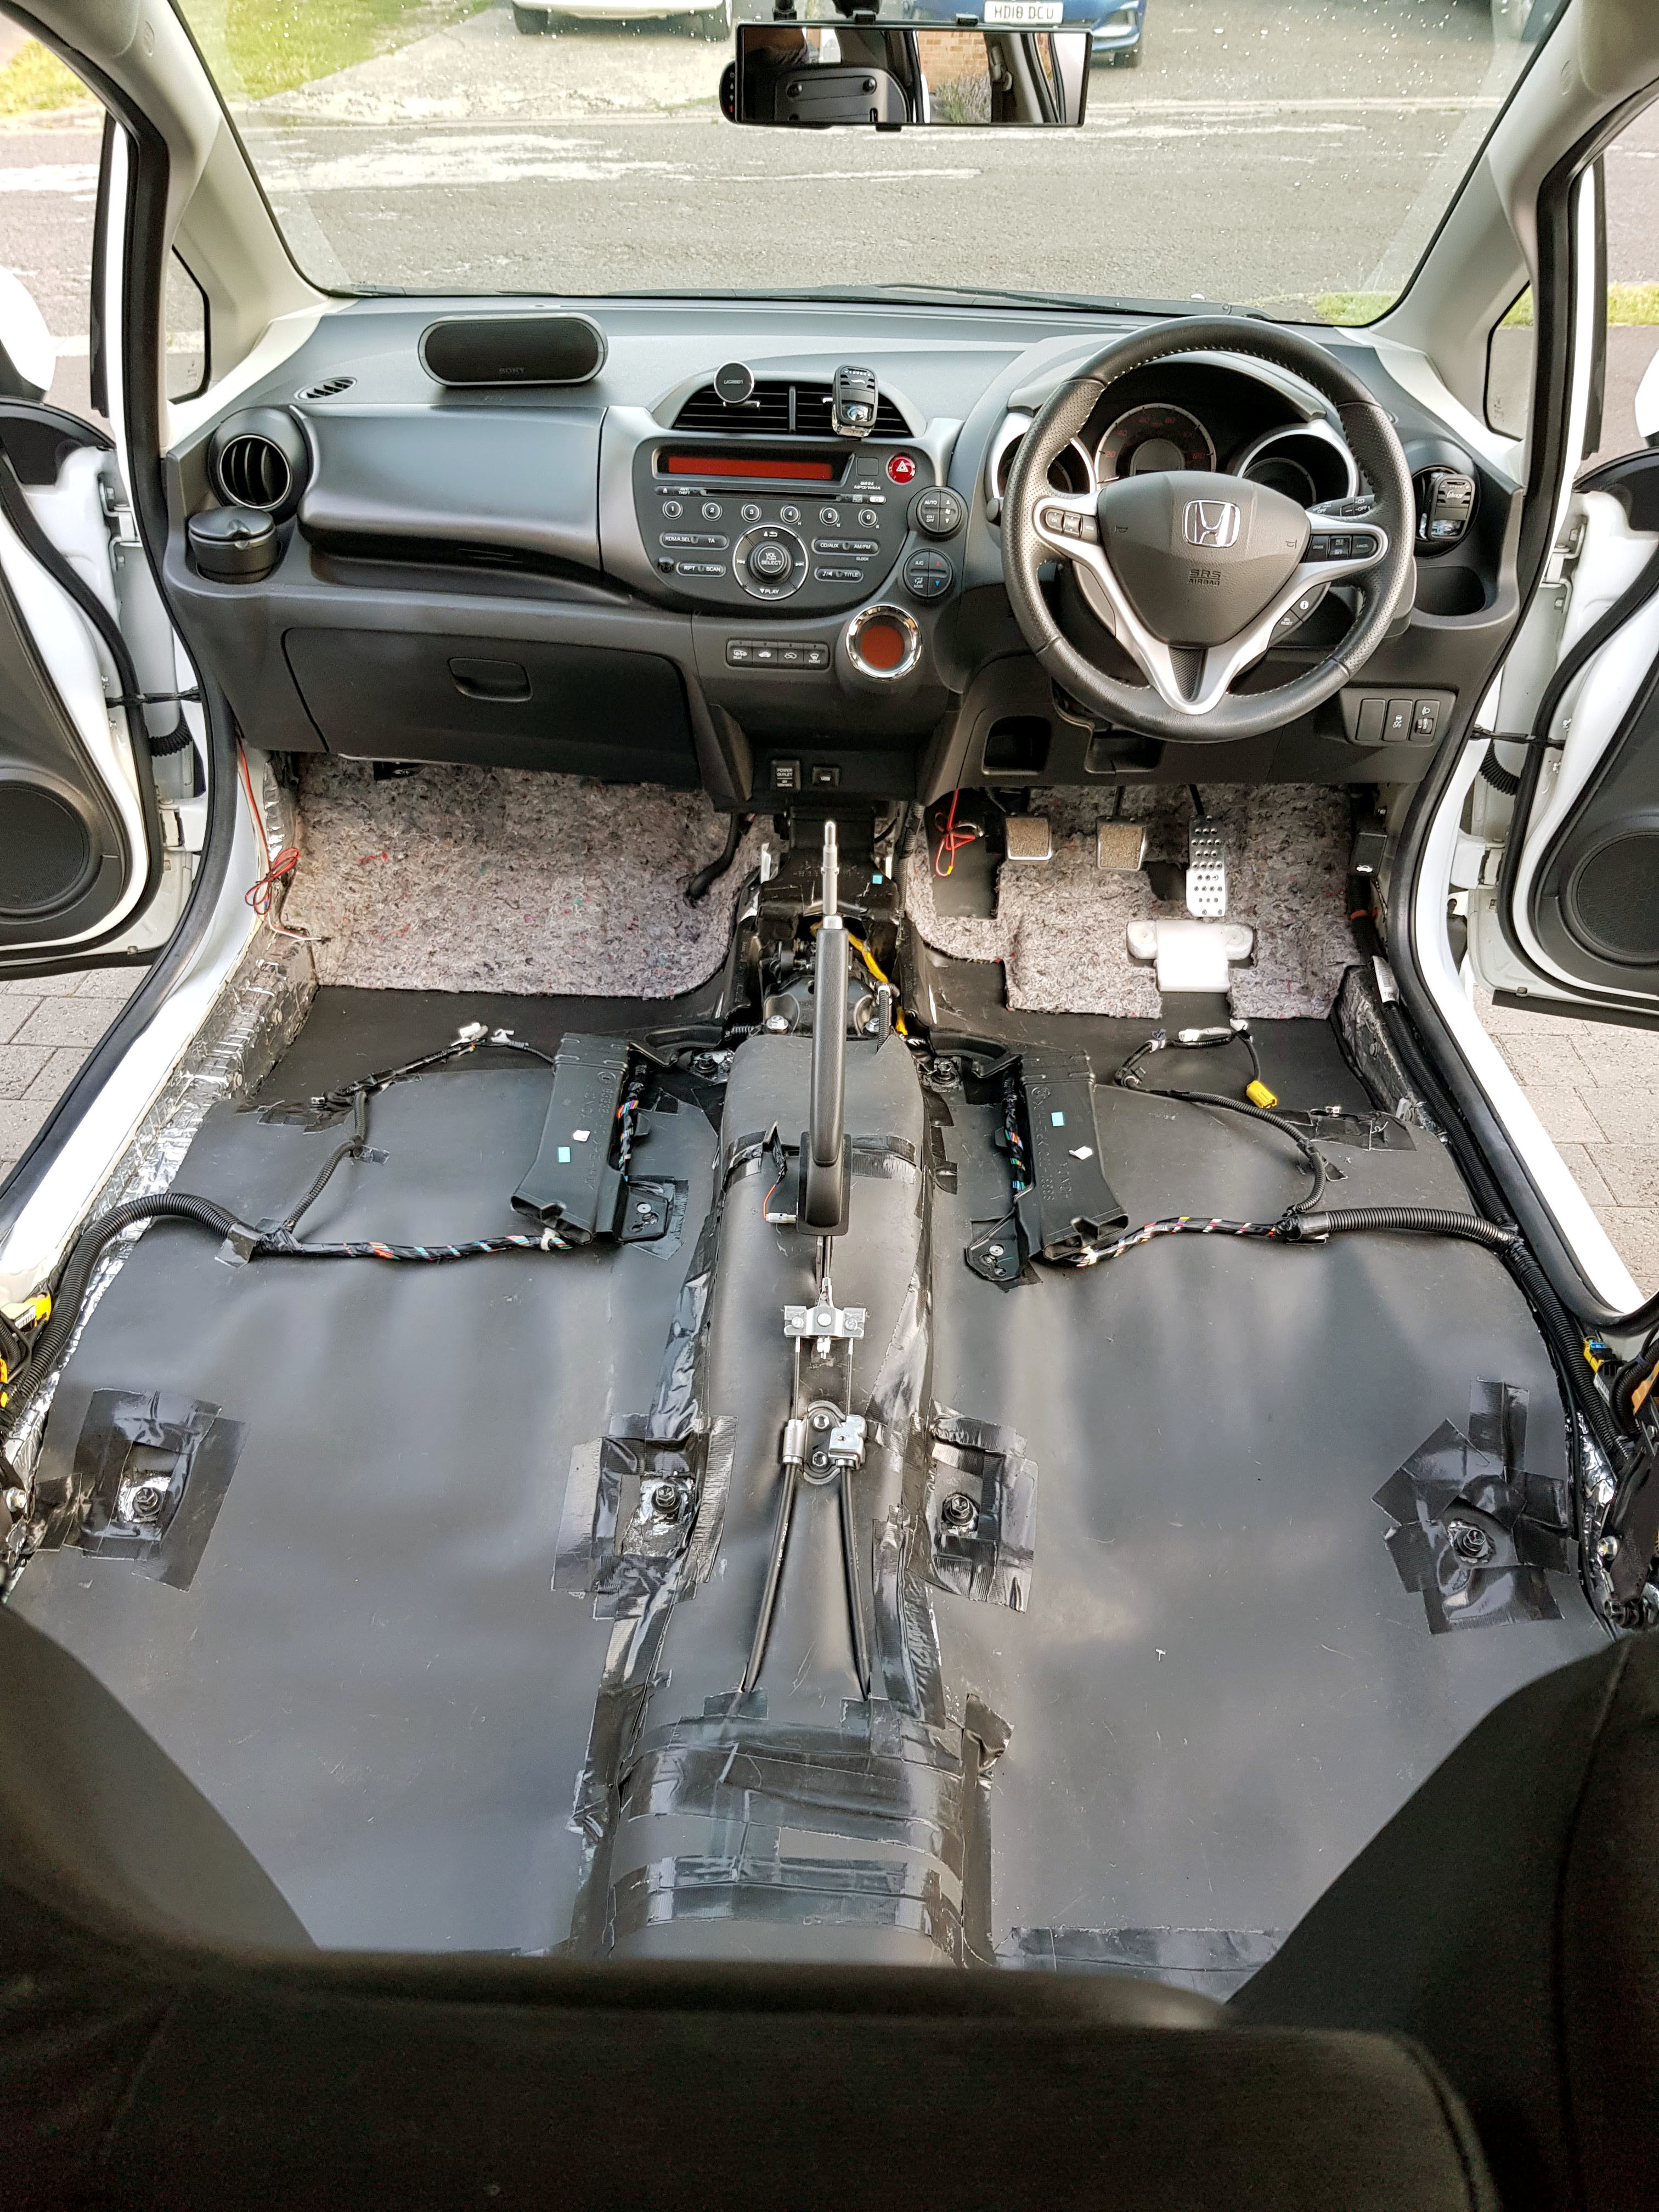
Sound Deadening Part 6: Main Interior Closed Cell Foam and Mass Loaded Vinyl
This stage has been one of the most painstaking ones, not just because I had to remove the whole interior again (twice), but also because of getting things to fit back afterwards.
This build really isn't for the faint hearted, and part of me is regretting even starting this build! But I've come this far, and it's all about learning and trying new things.
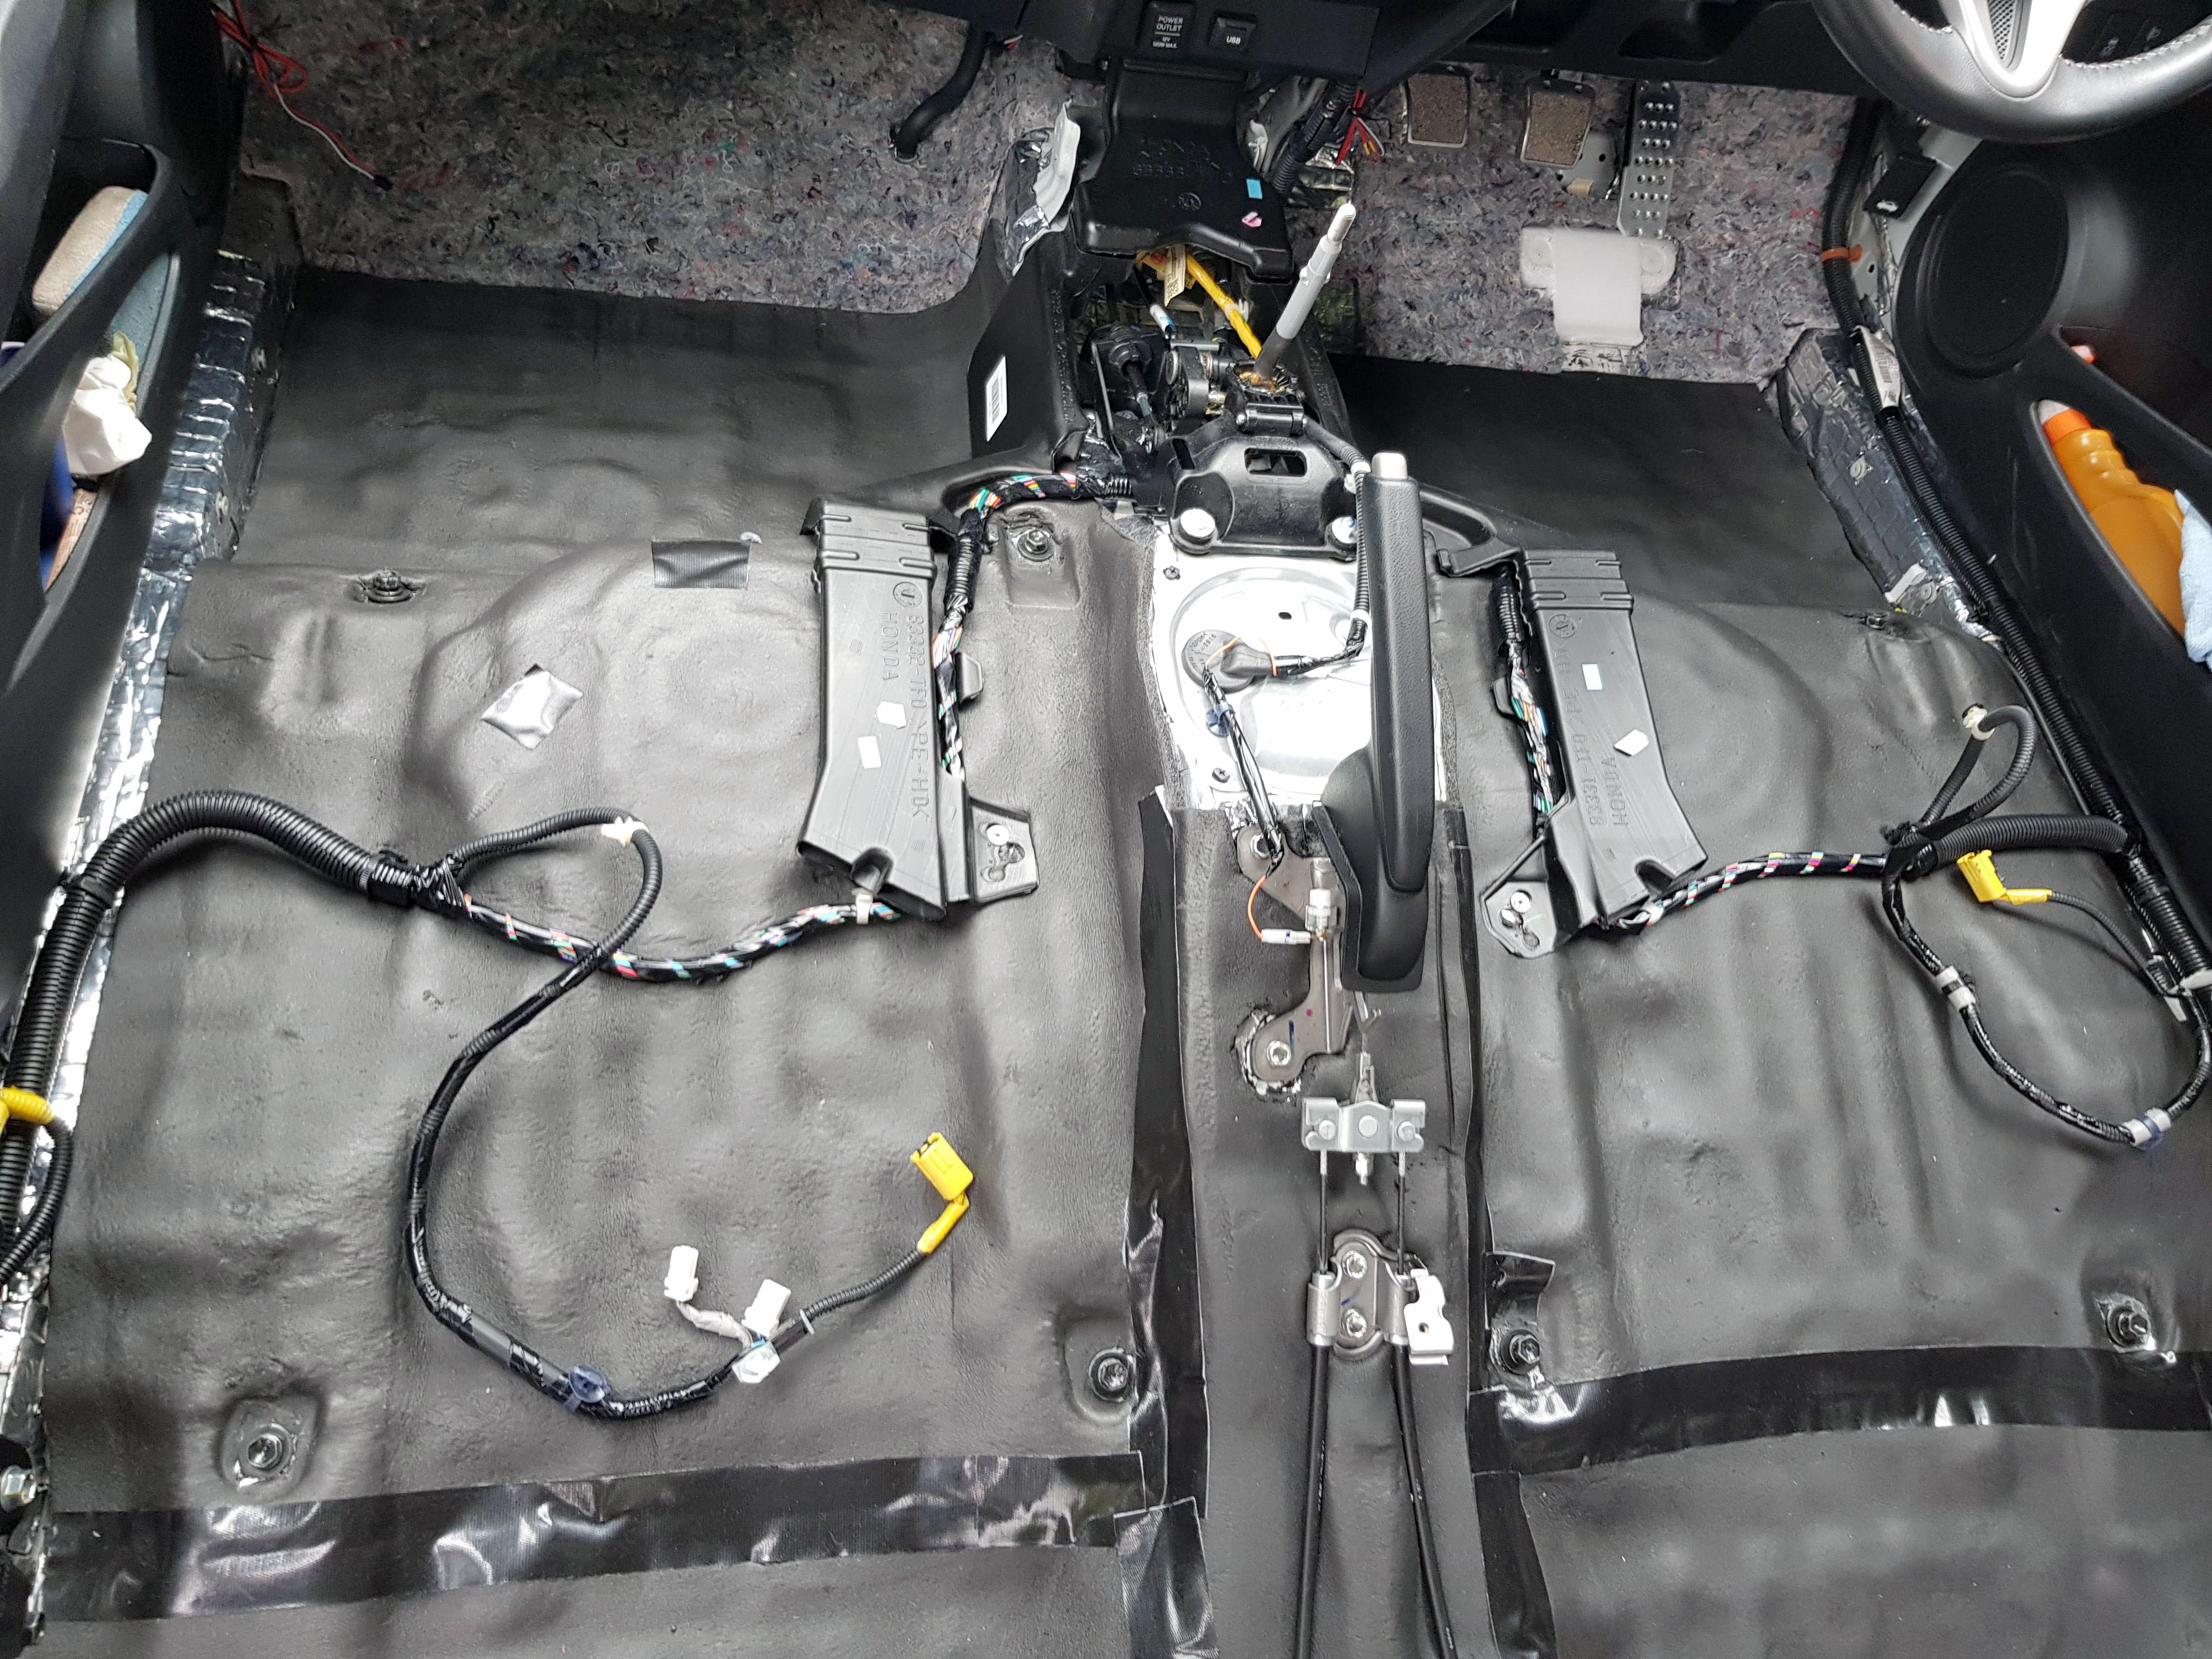
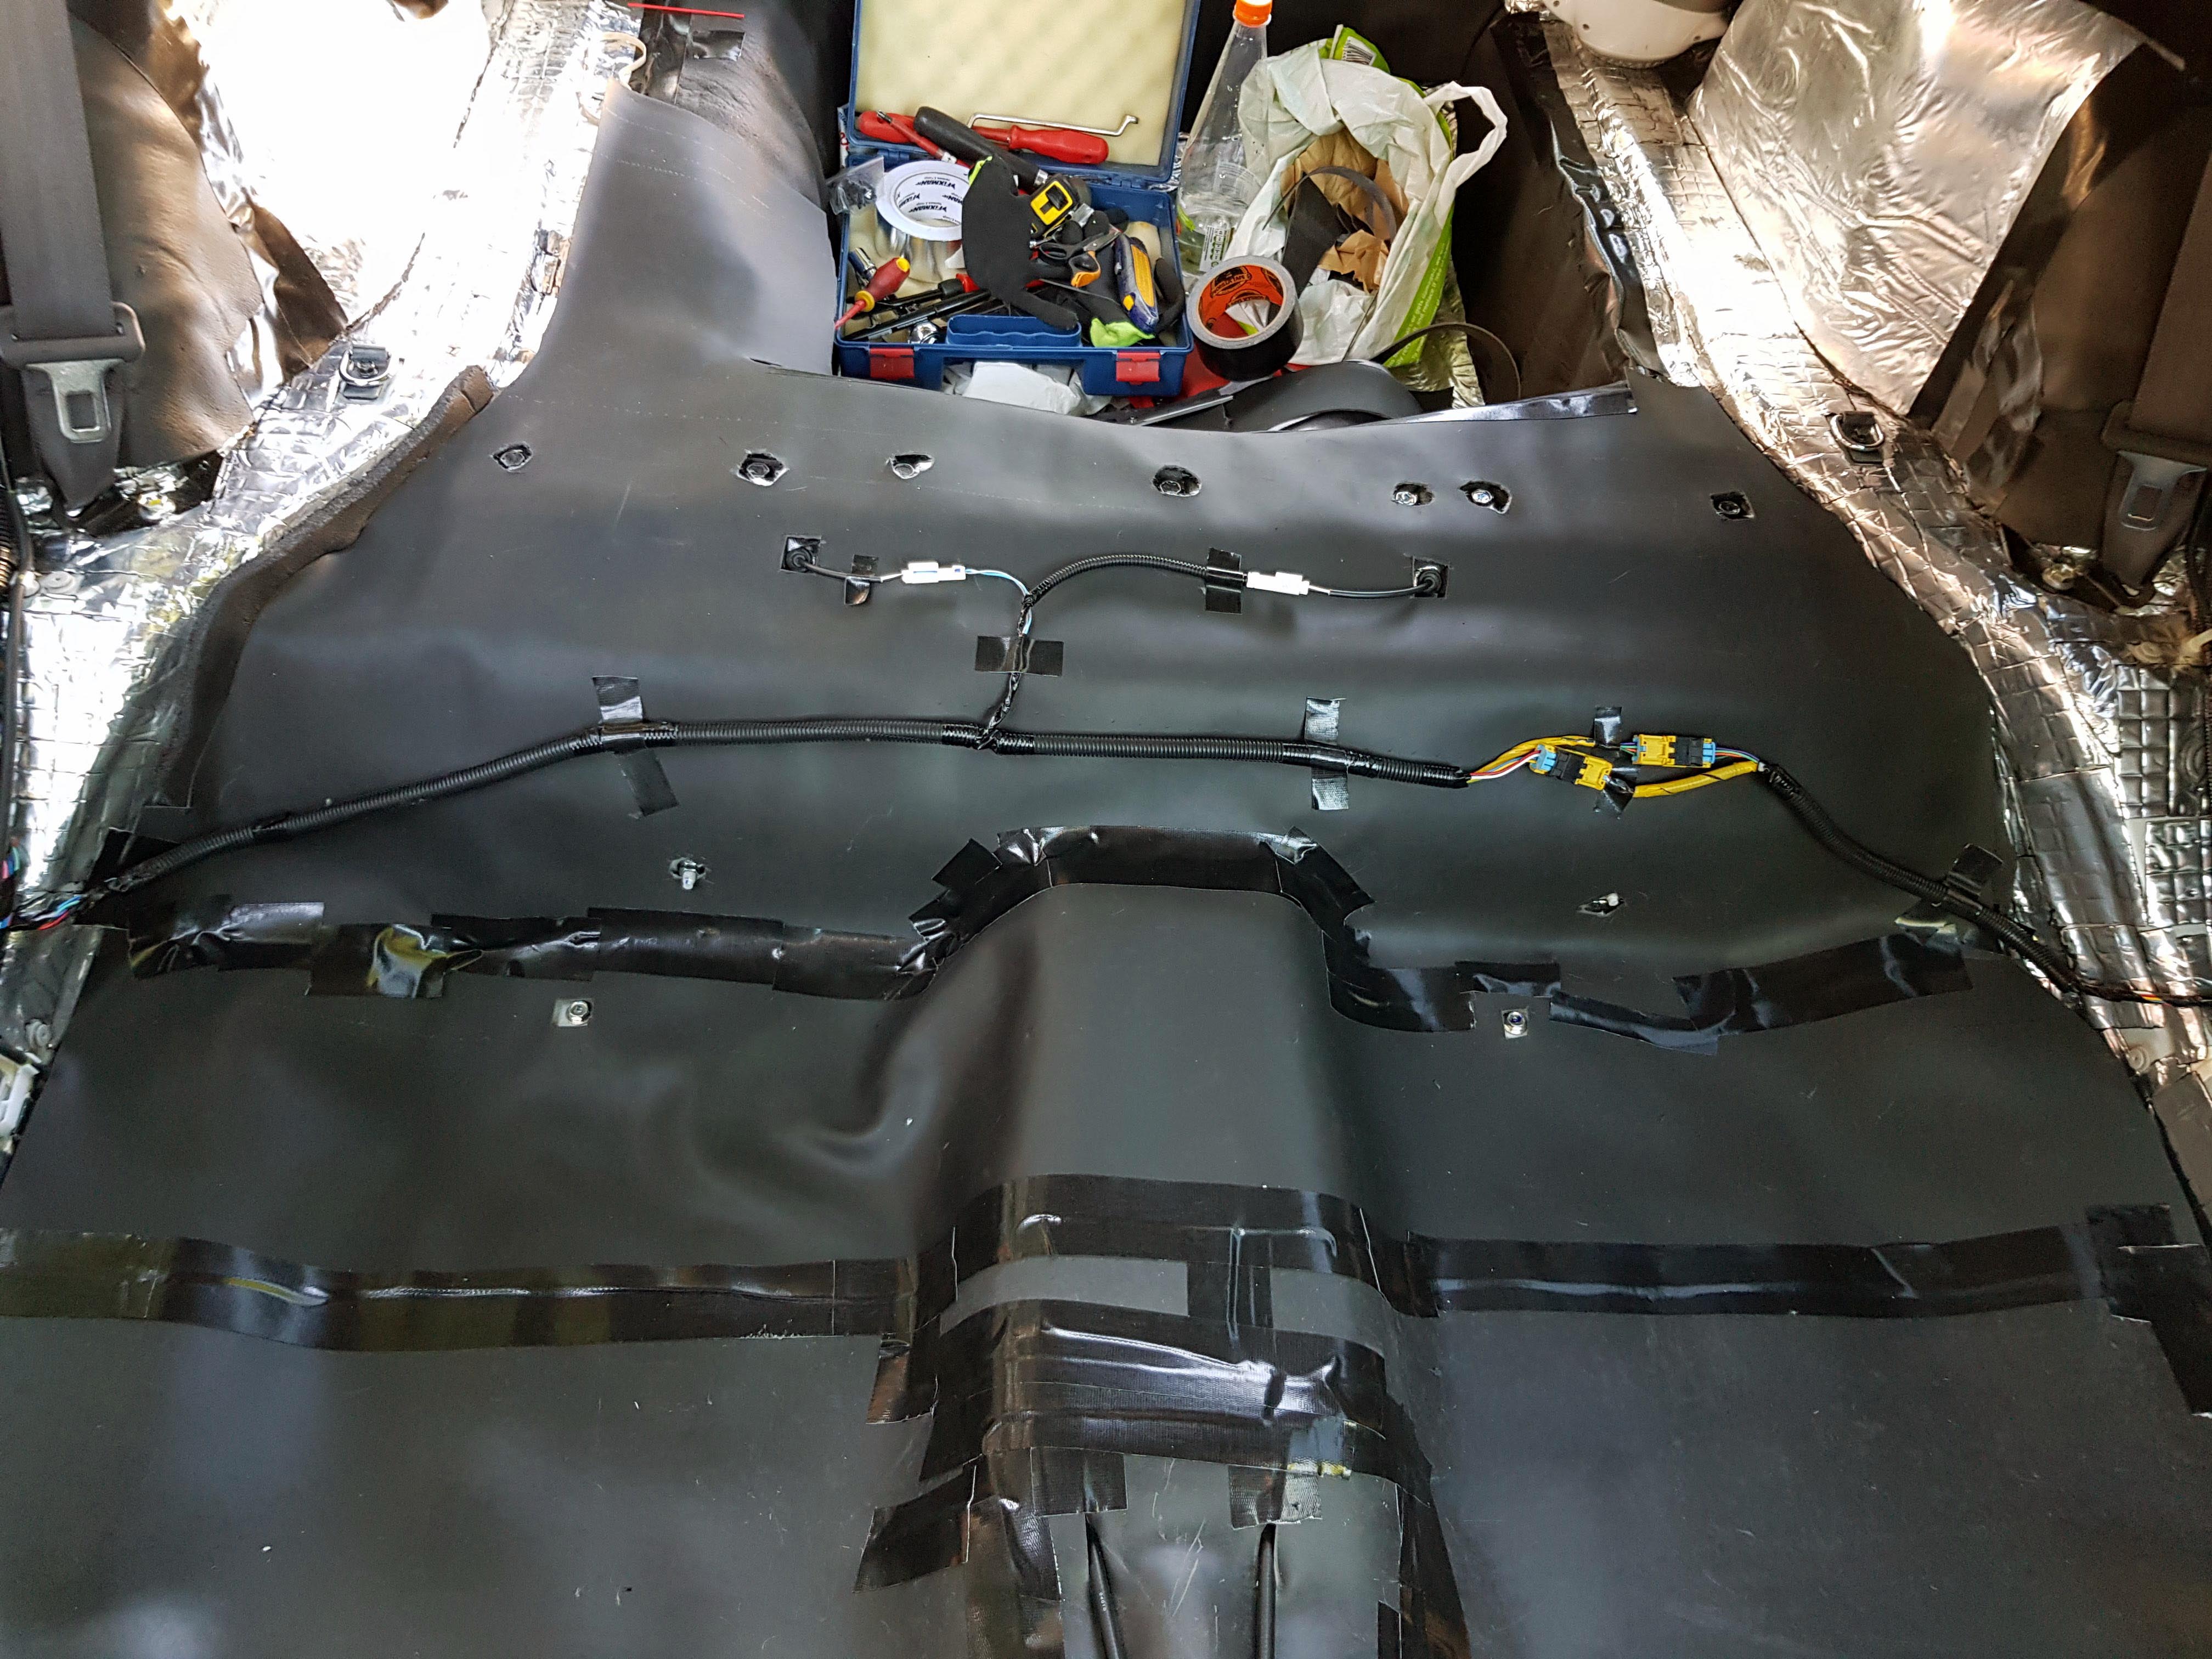
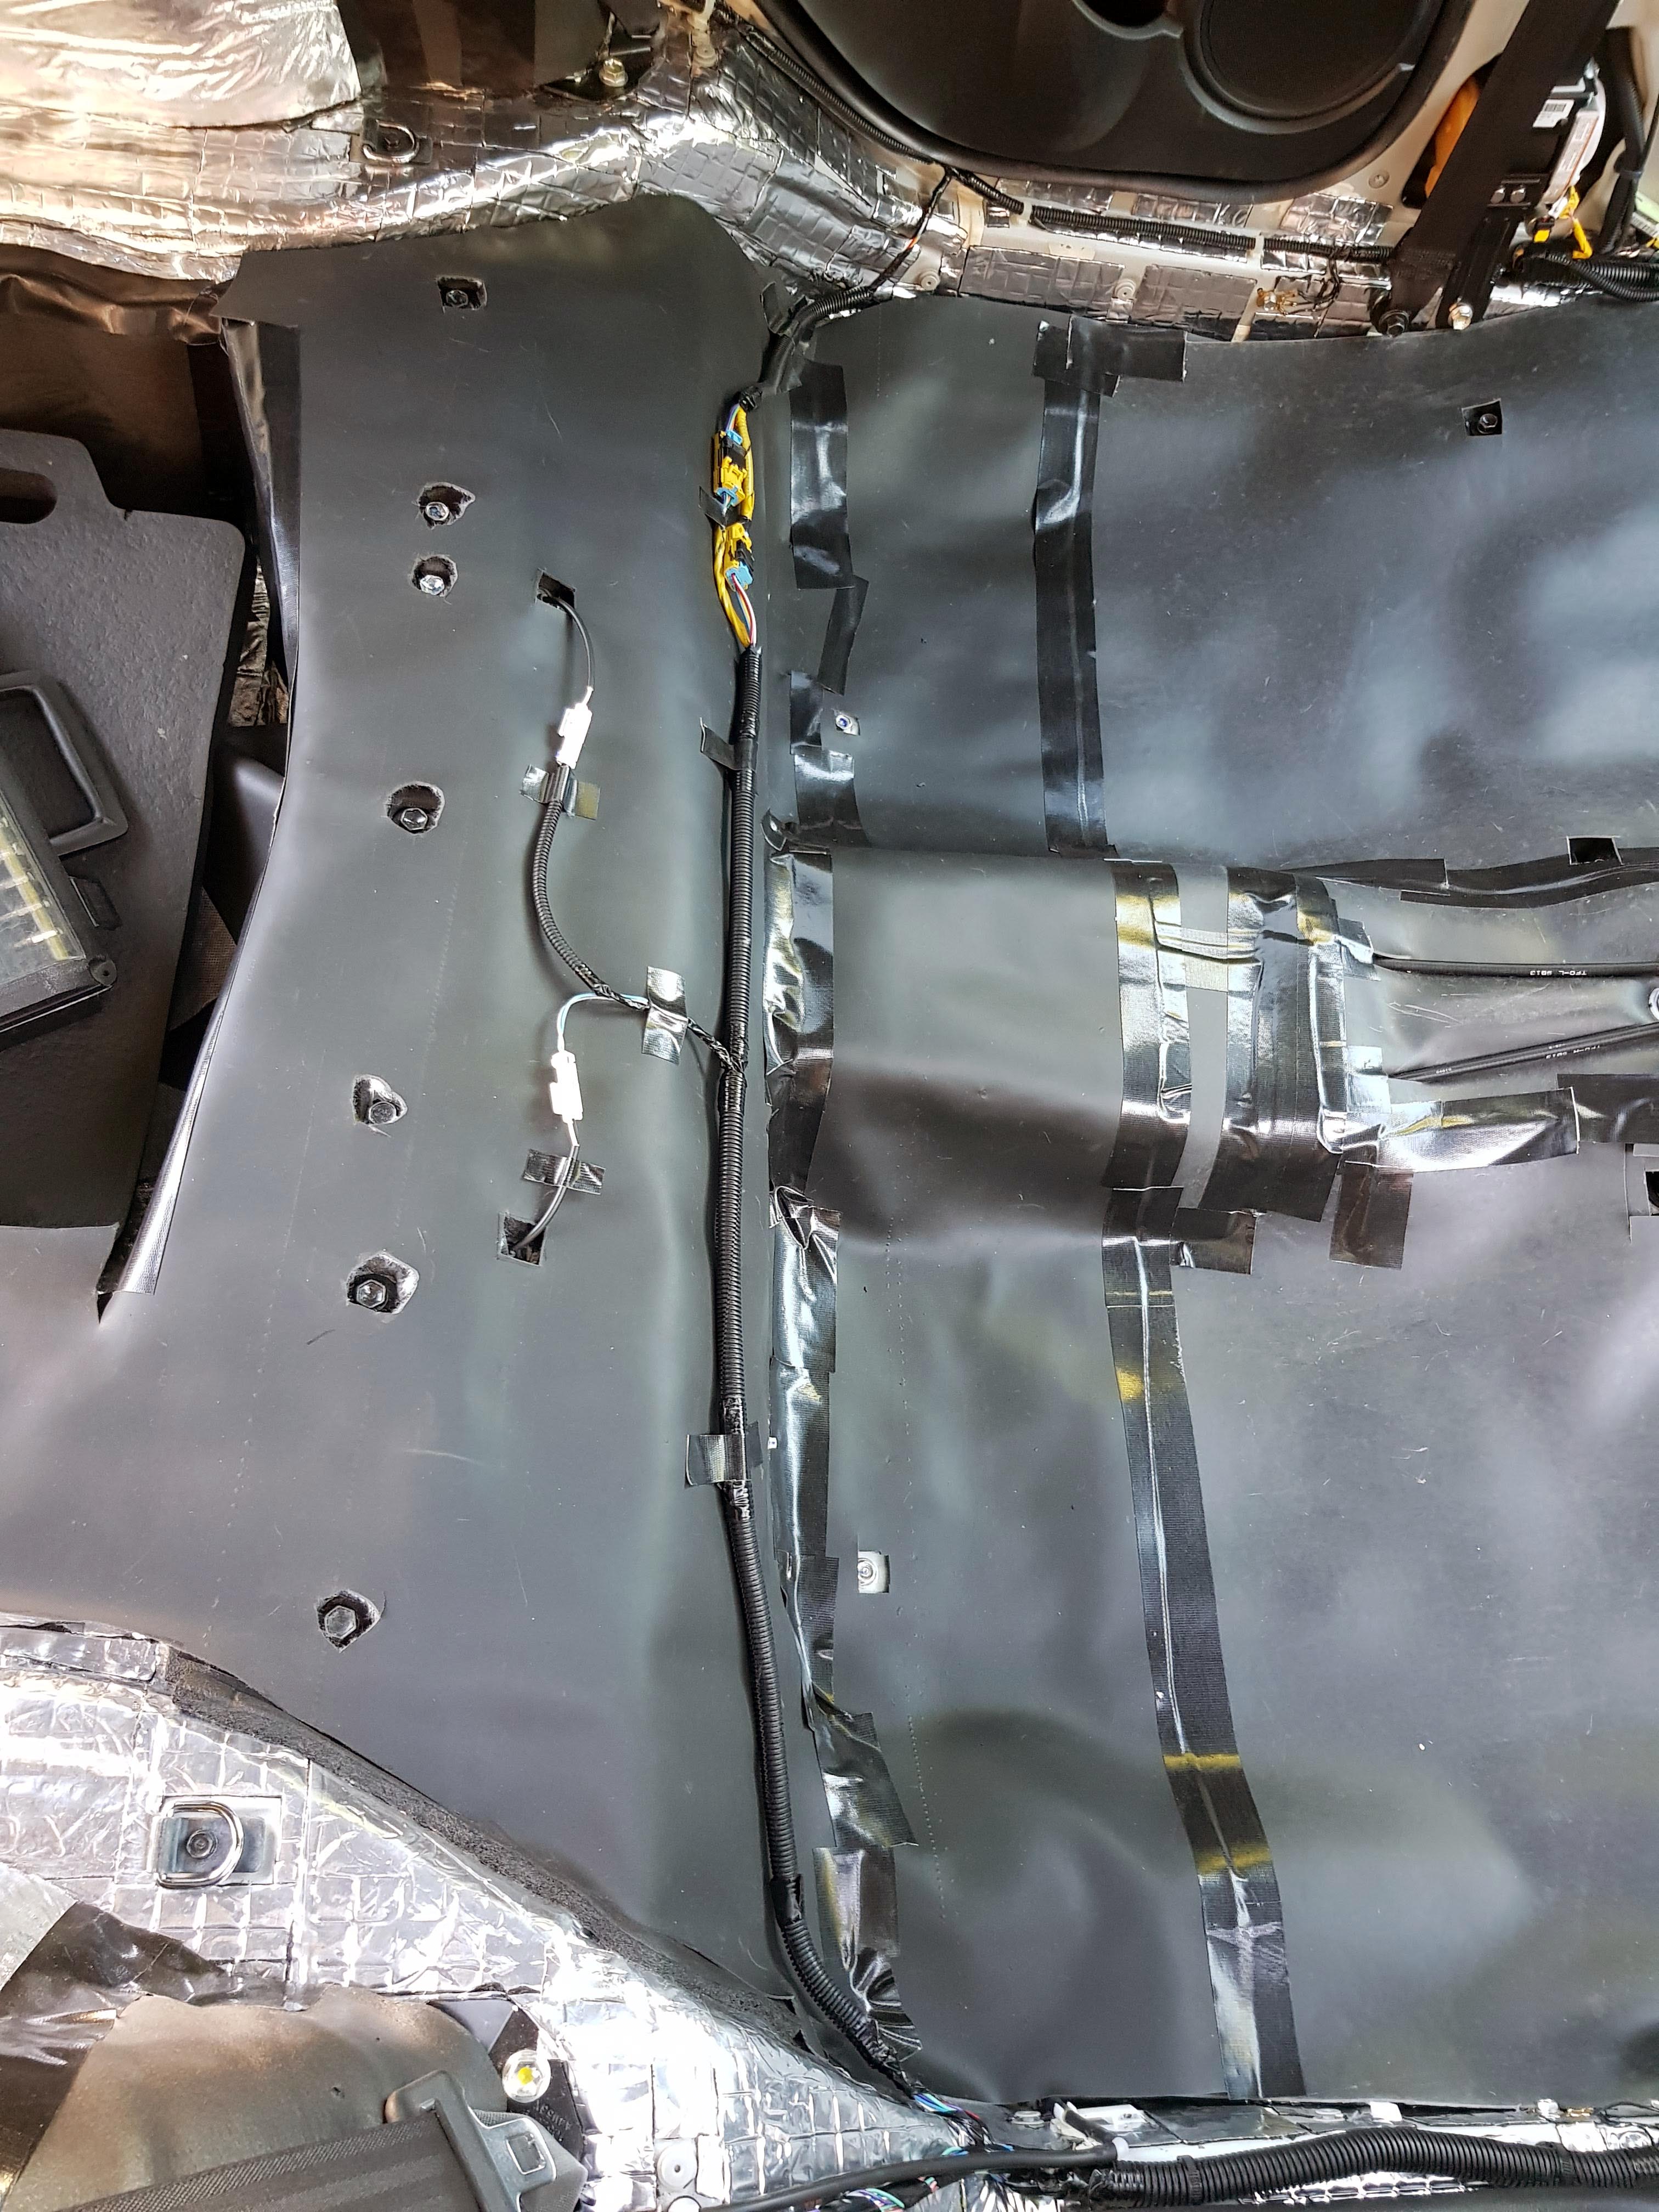
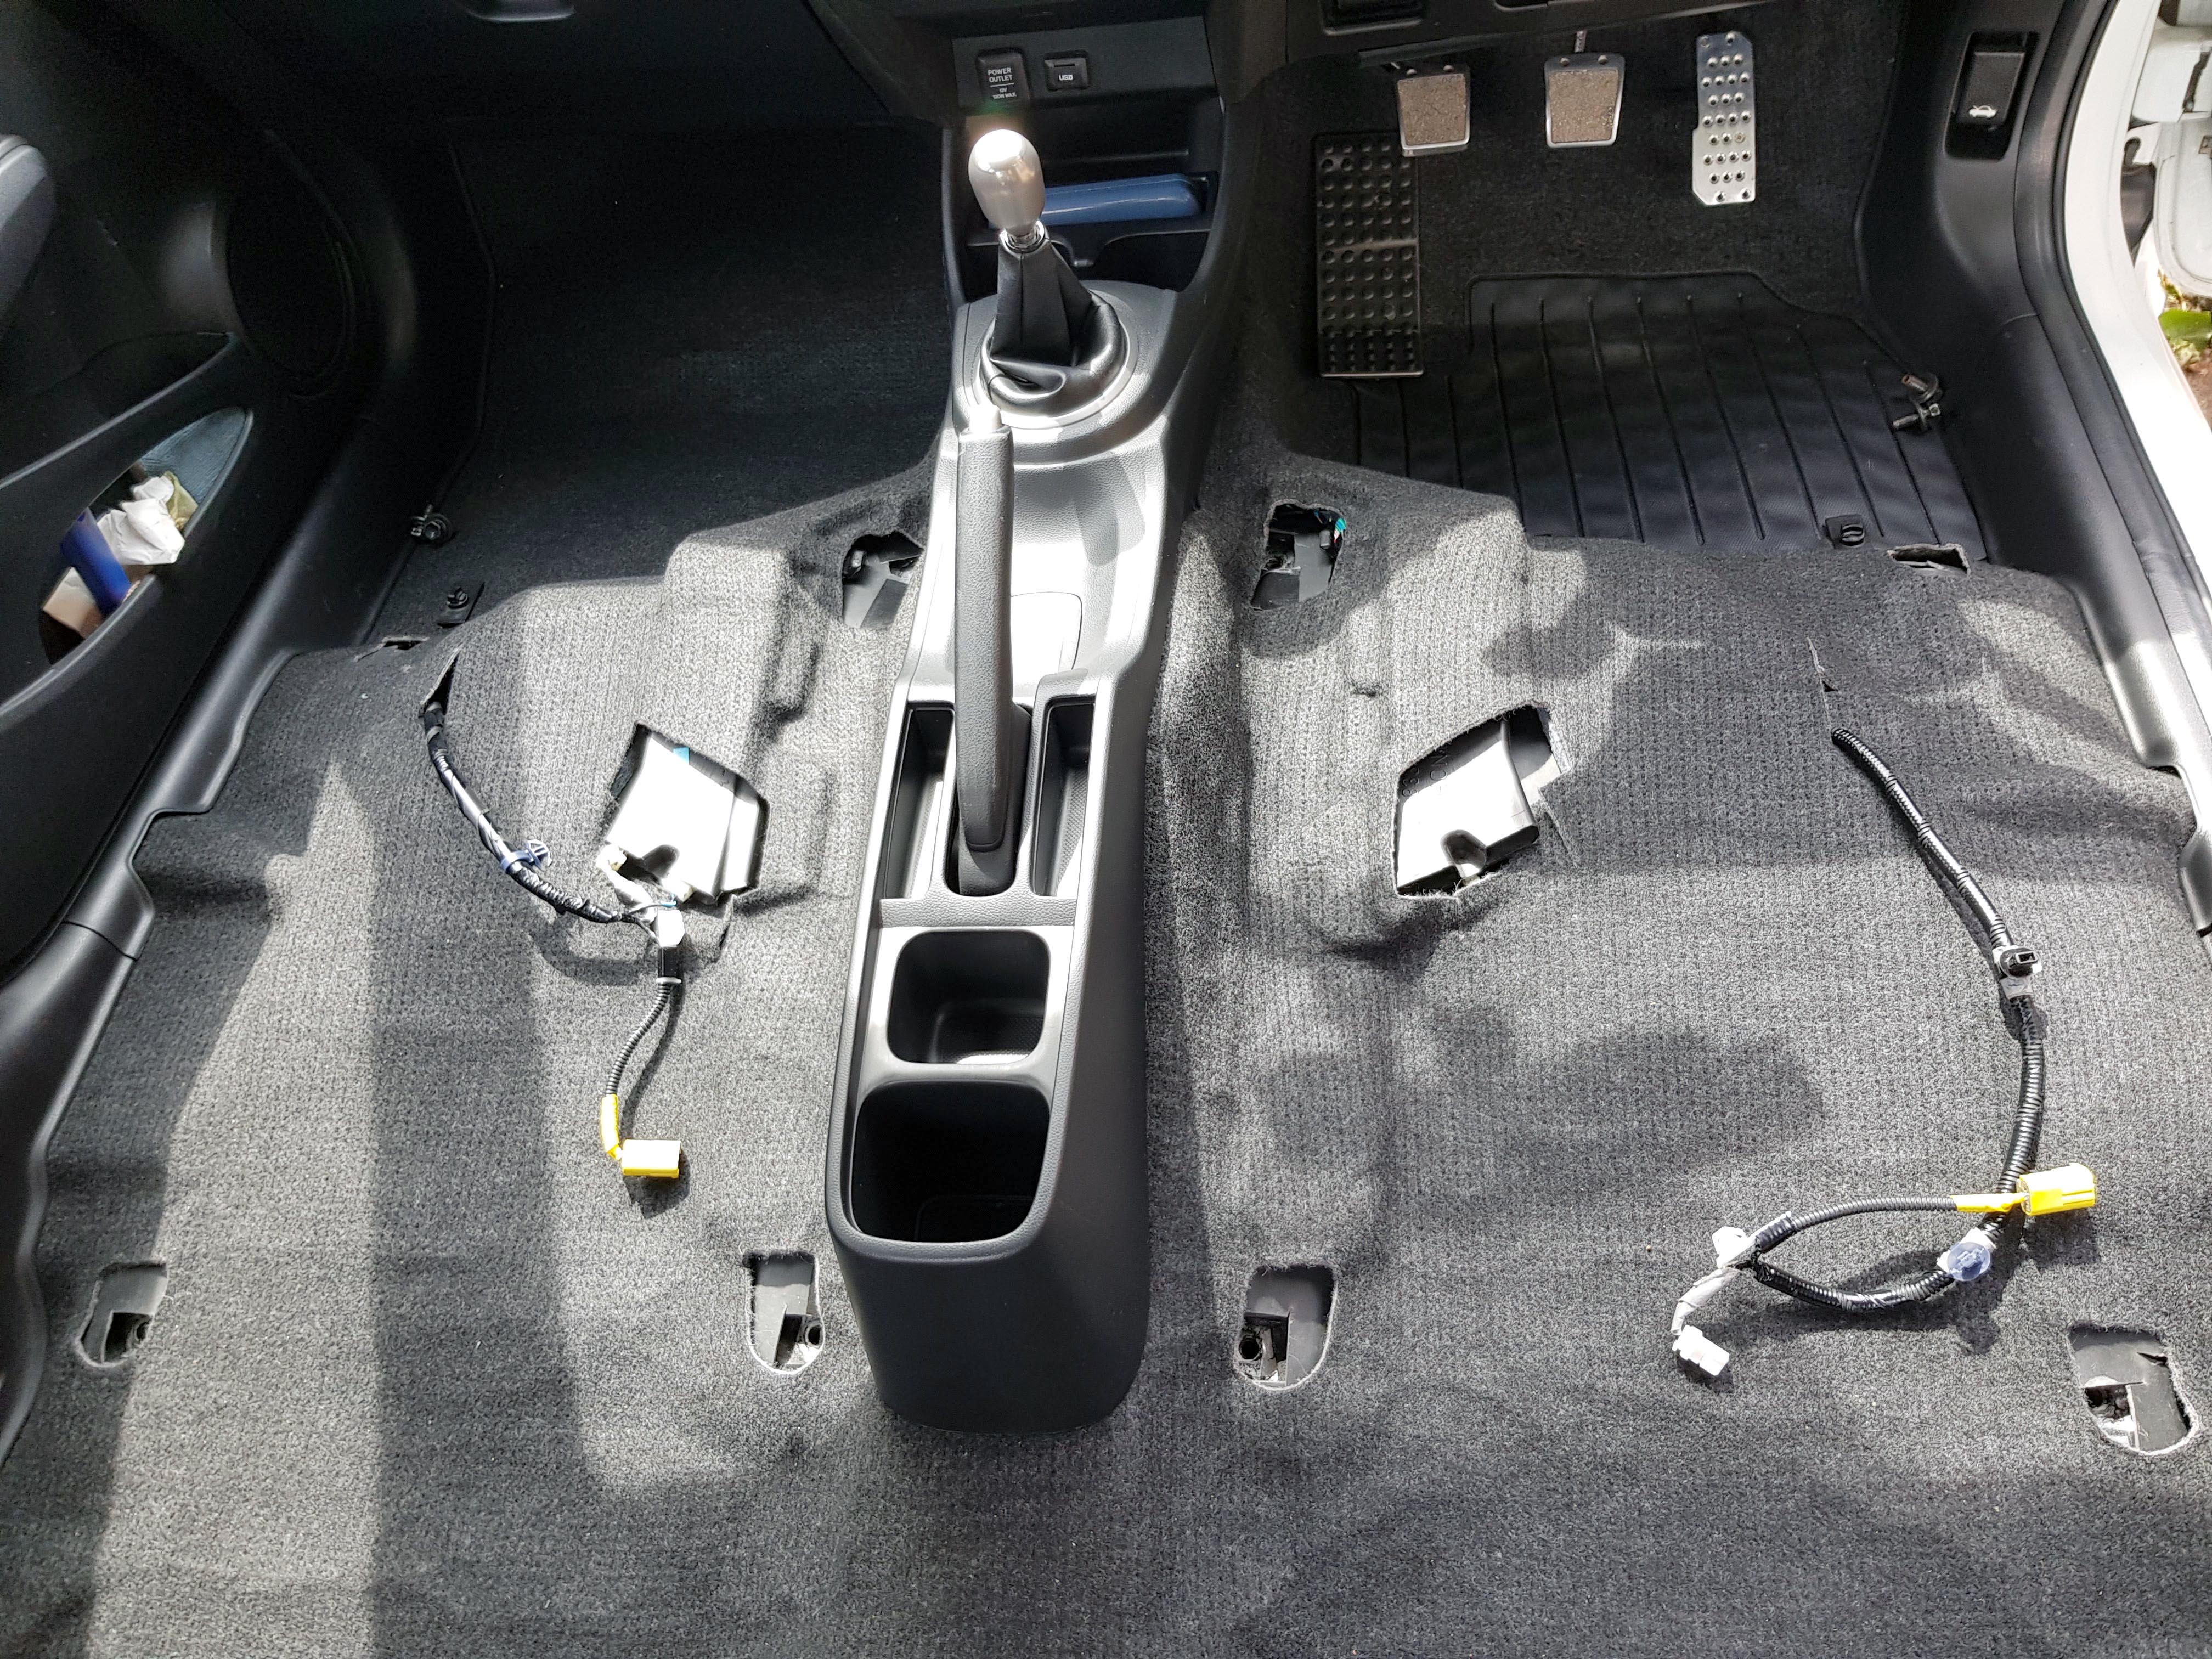
So first step was to completely remove the interior (again), and cover the floor/boot in Closed Cell Foam.
I wanted to try and get as close to 100% coverage as possible.
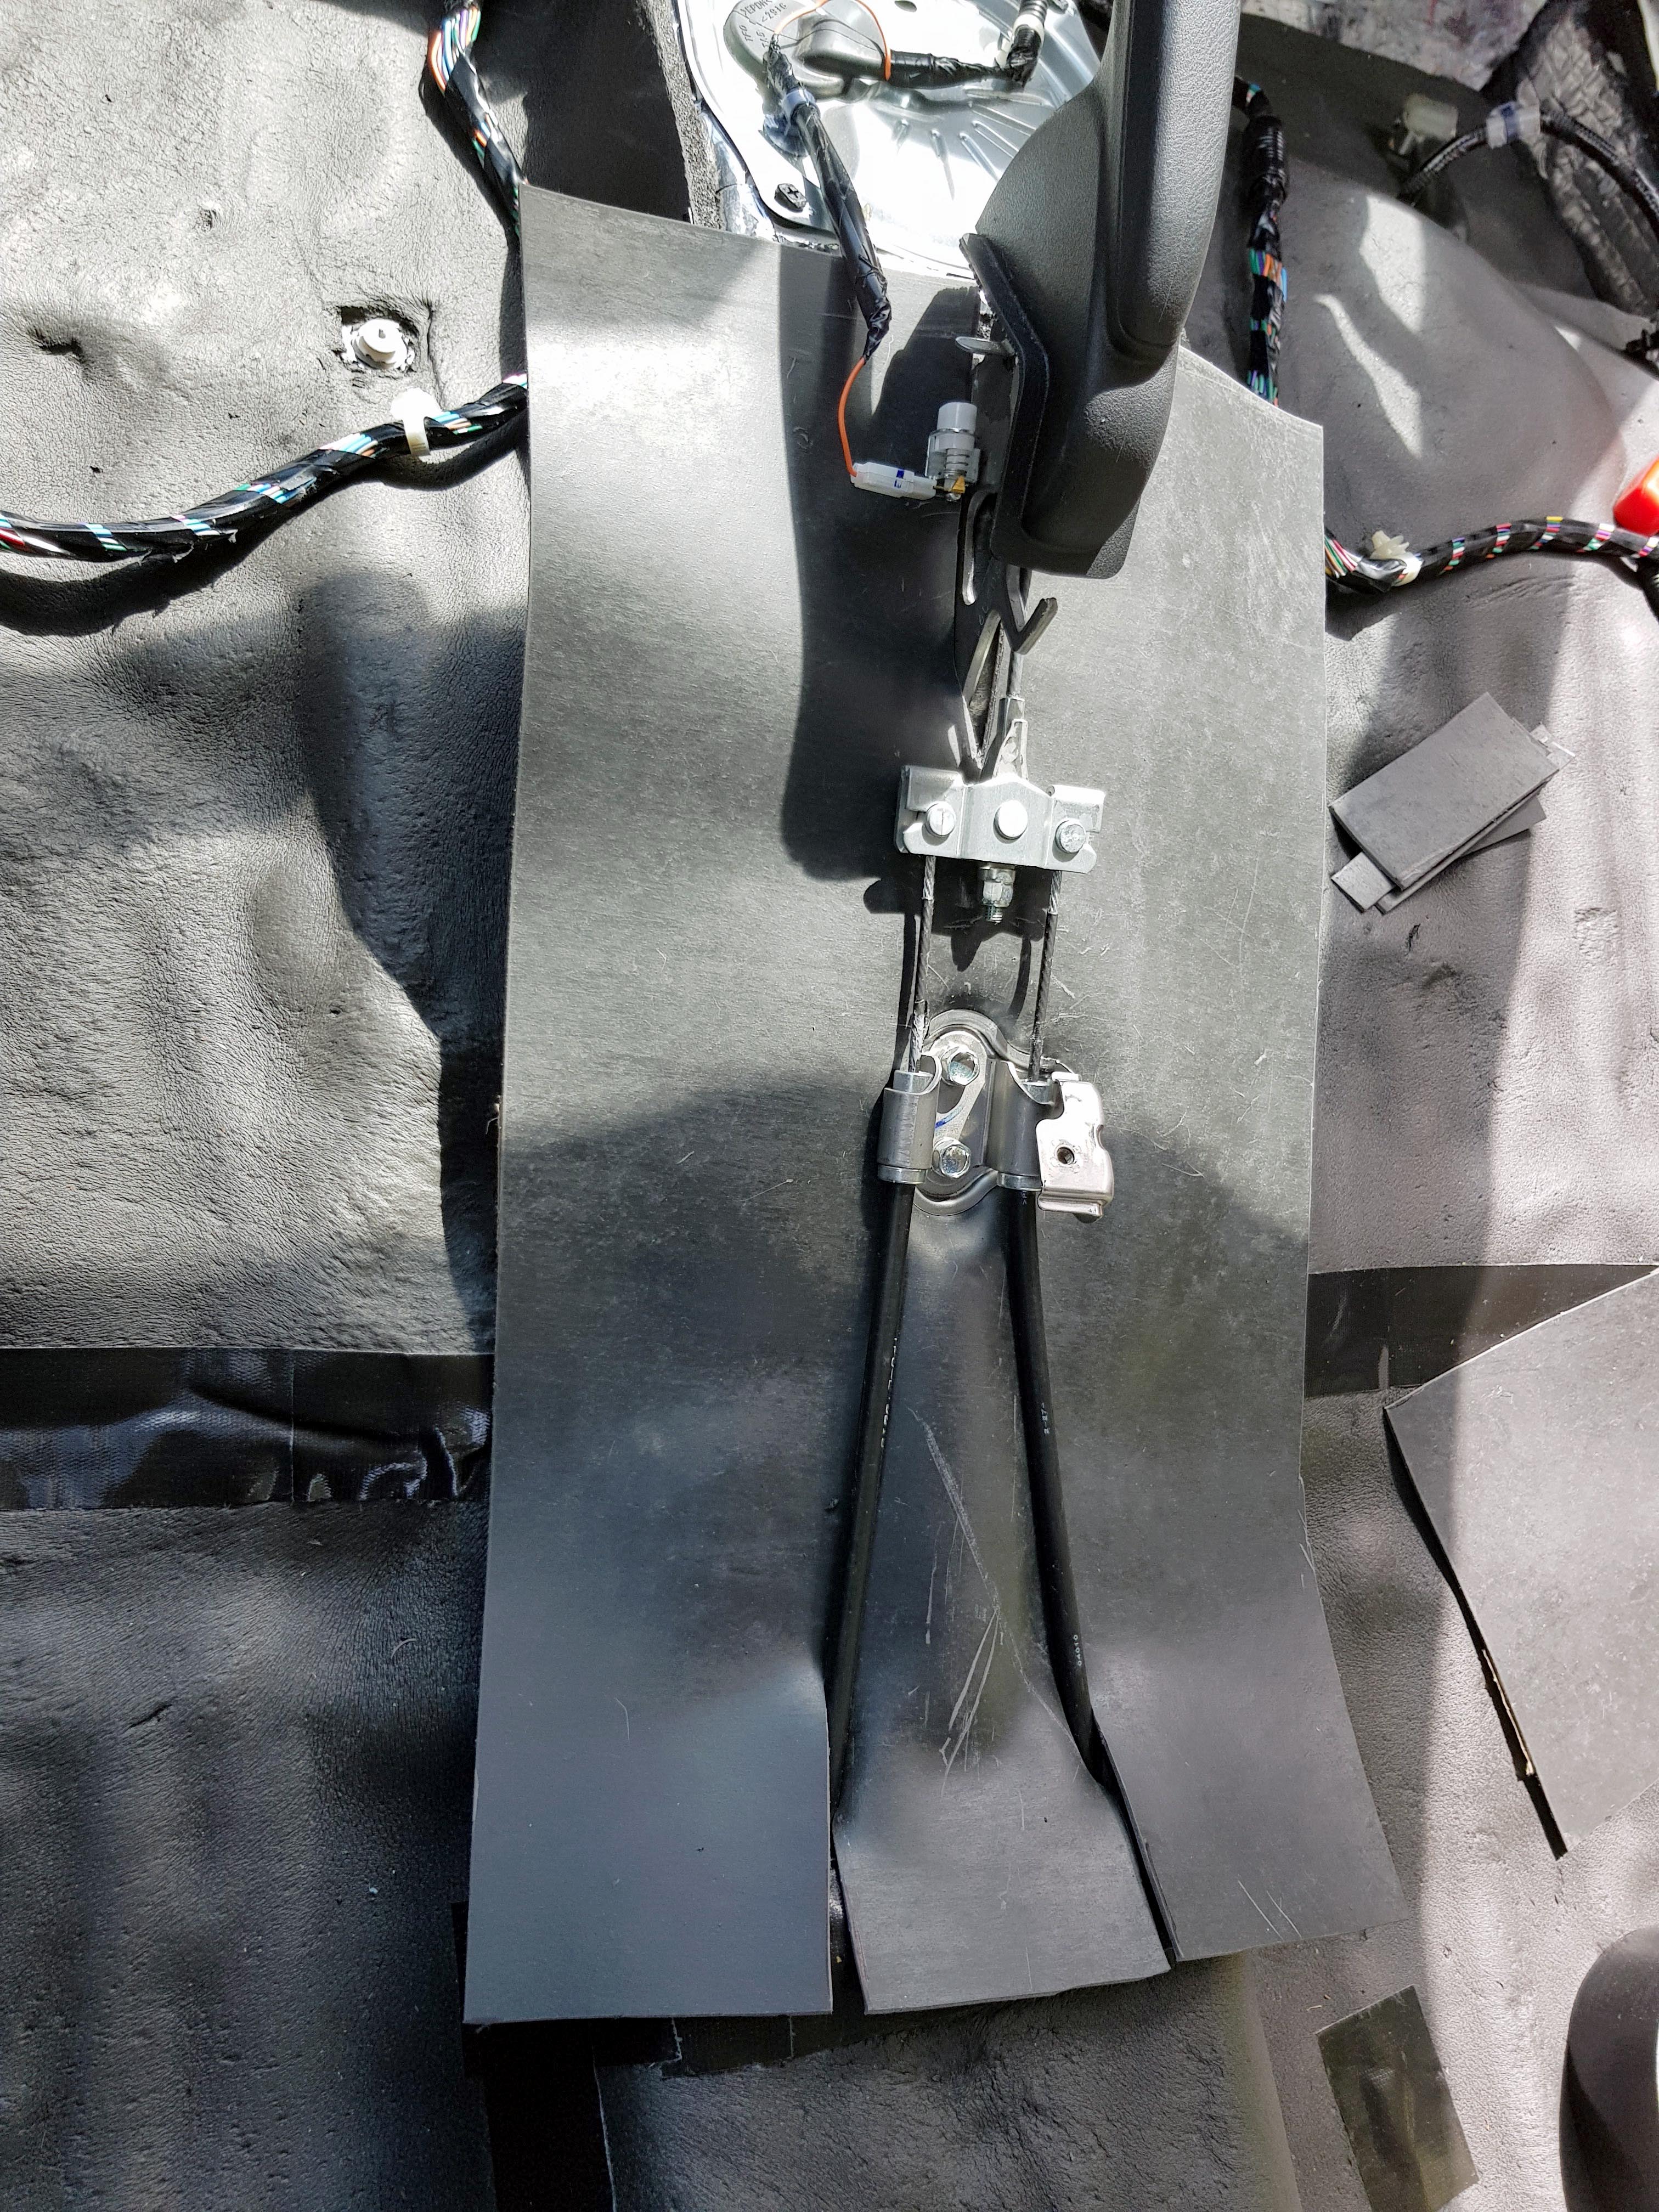
So I removed the hand brake and placed a sheet underneath and cut out the holes for the screws, paying special attention that the main handbrake surround was still touching bare metal (for the grounding):
I was hoping to fit the Closed Cell Foam and the Mass Loaded Vinyl both in one day, but as per usual, I underestimated how long things take! So I managed to get all the Closed Cell Foam done in a day, and had to put the interior back in (just the Carpet, centre console and seats), as I had work the next day and needed to drive the car:


I used Gorilla Tape to tape up the gaps in the CCF.
So fitting the MLV took a total of 1 and a half days to do. I did the main interior on Saturday, and finished the boot area the day after. This was such a pain in the arse, and made me want to give up the whole project because of how annoying the whole process was. None the less, I managed to get it done.
I used a sheet of Dodo Barrier MLV 1.25m x 2.05m for the main interior, and I purchased a 5m x 1m sheet of slightly thinner MLV from Car Insulation UK to do the rest of the interior (and possibly other areas depending on how much was left over). Total weight was about 26kg
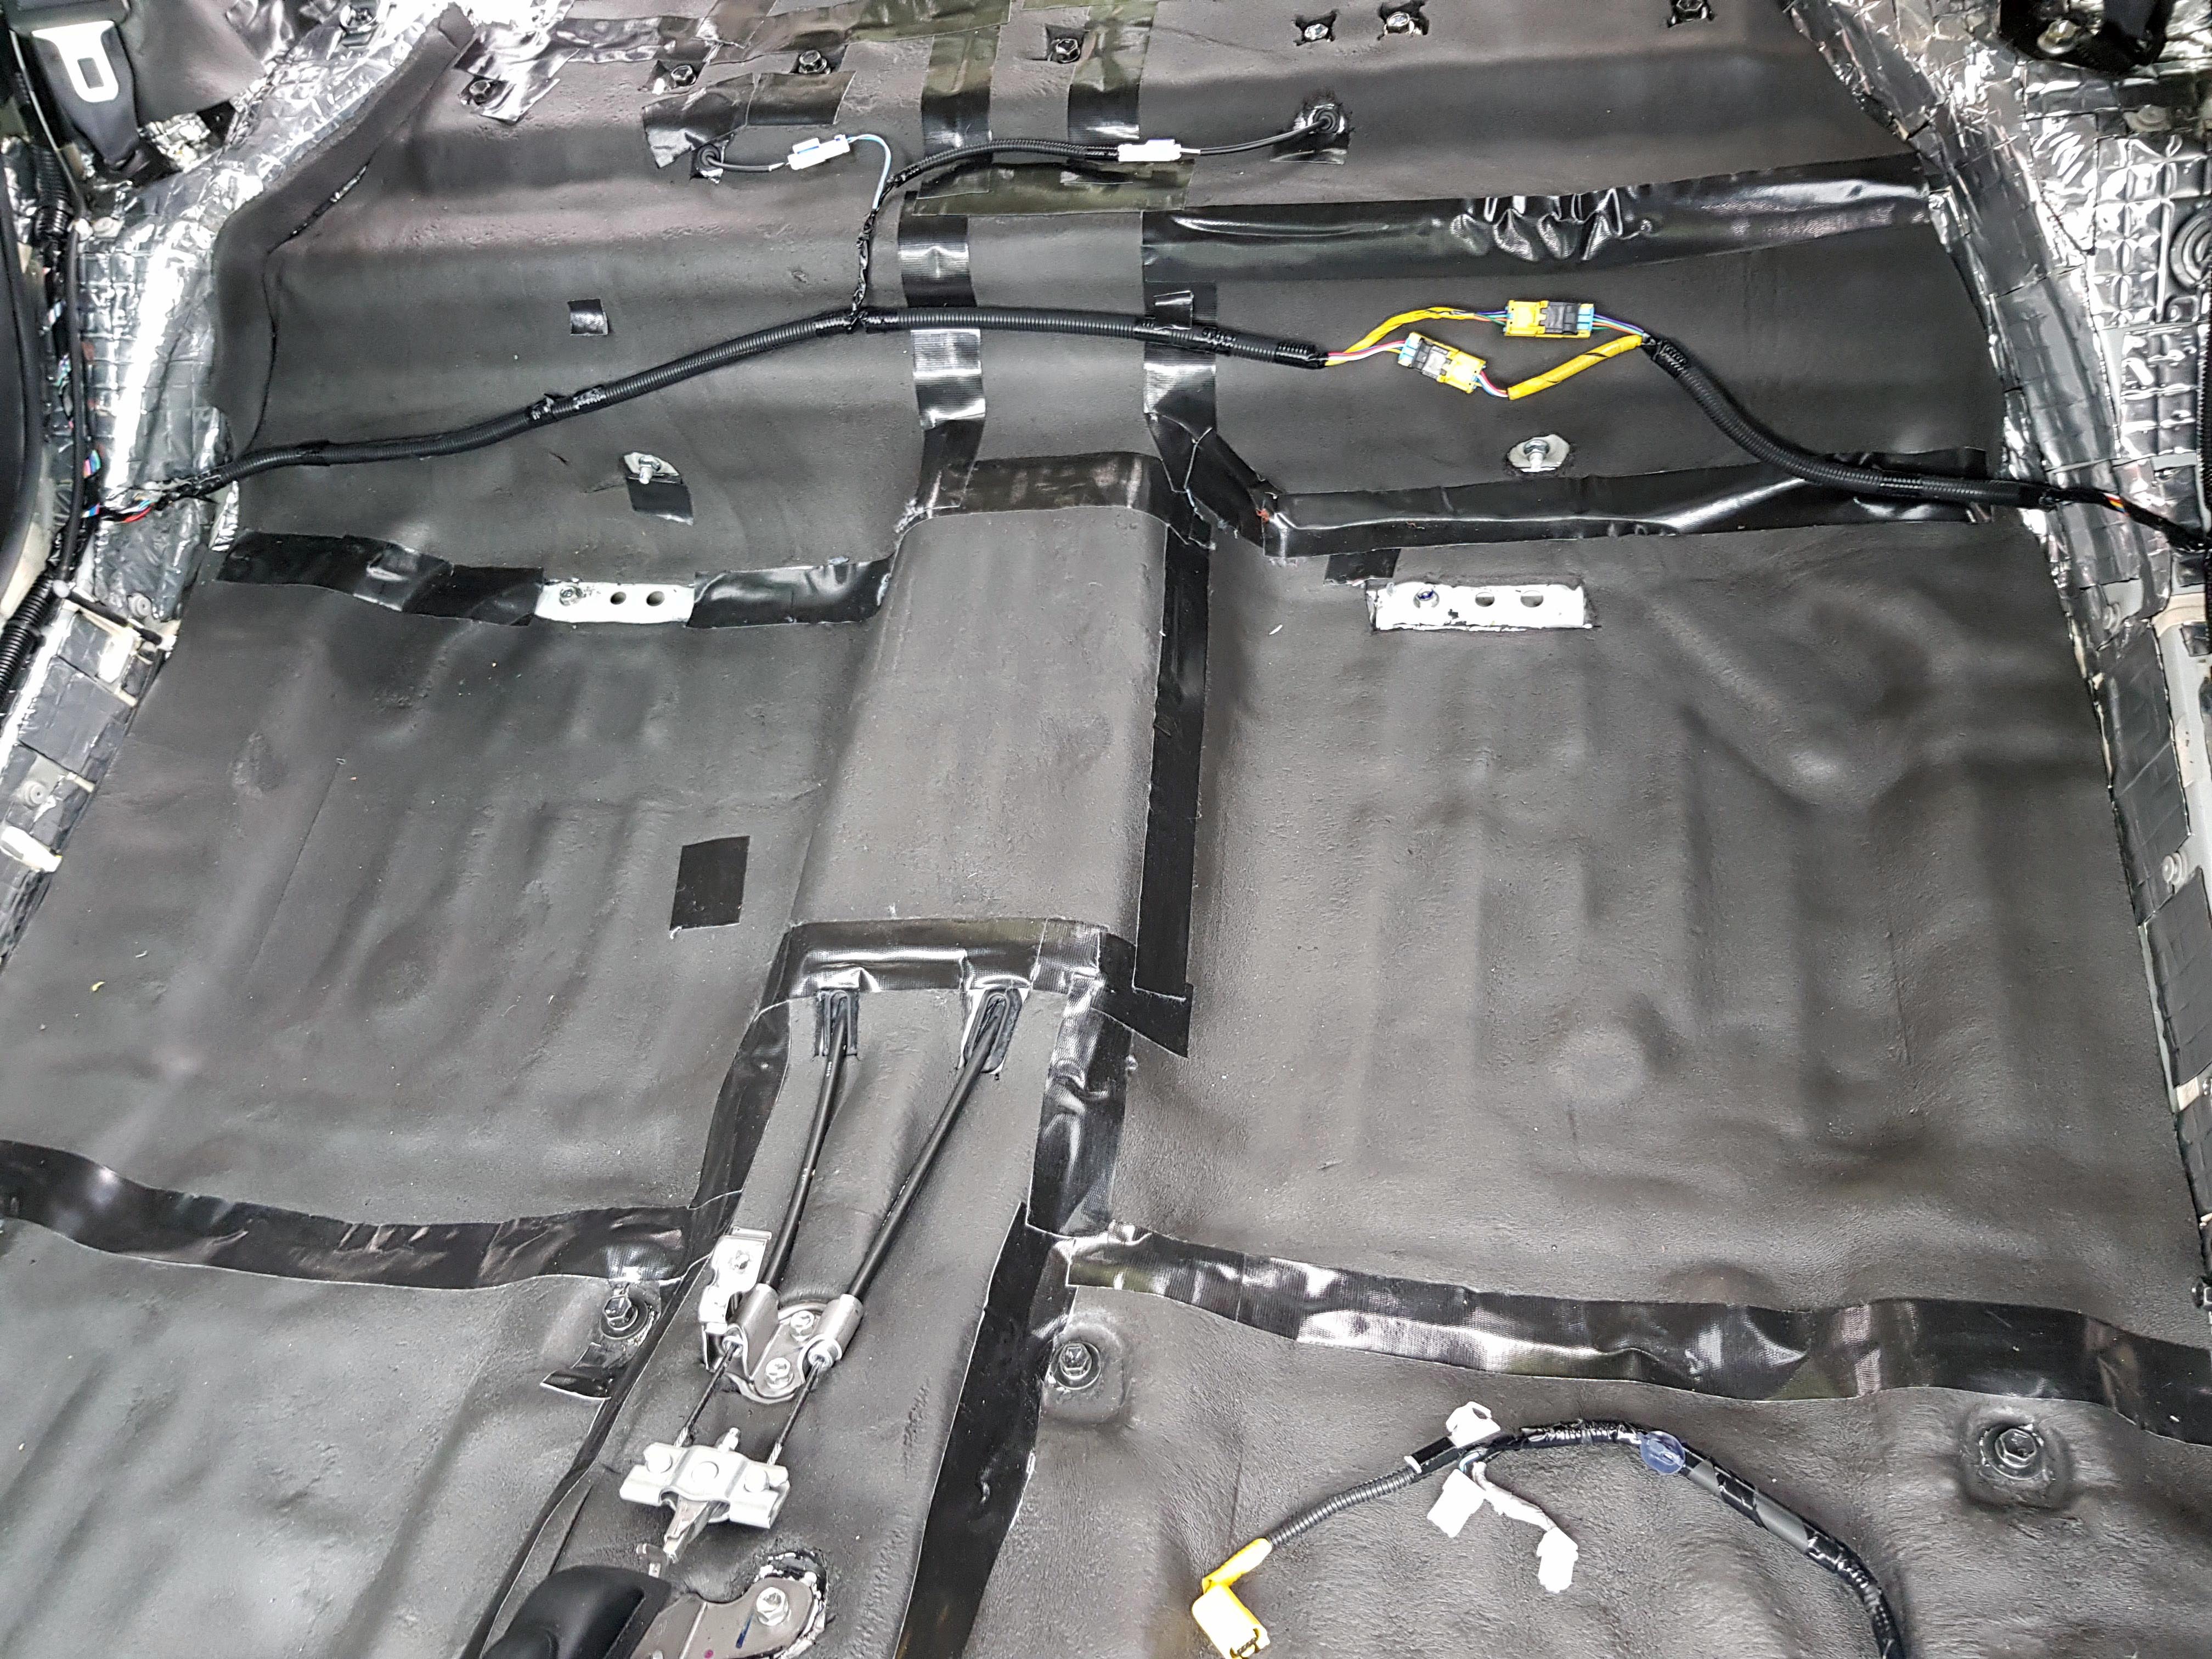
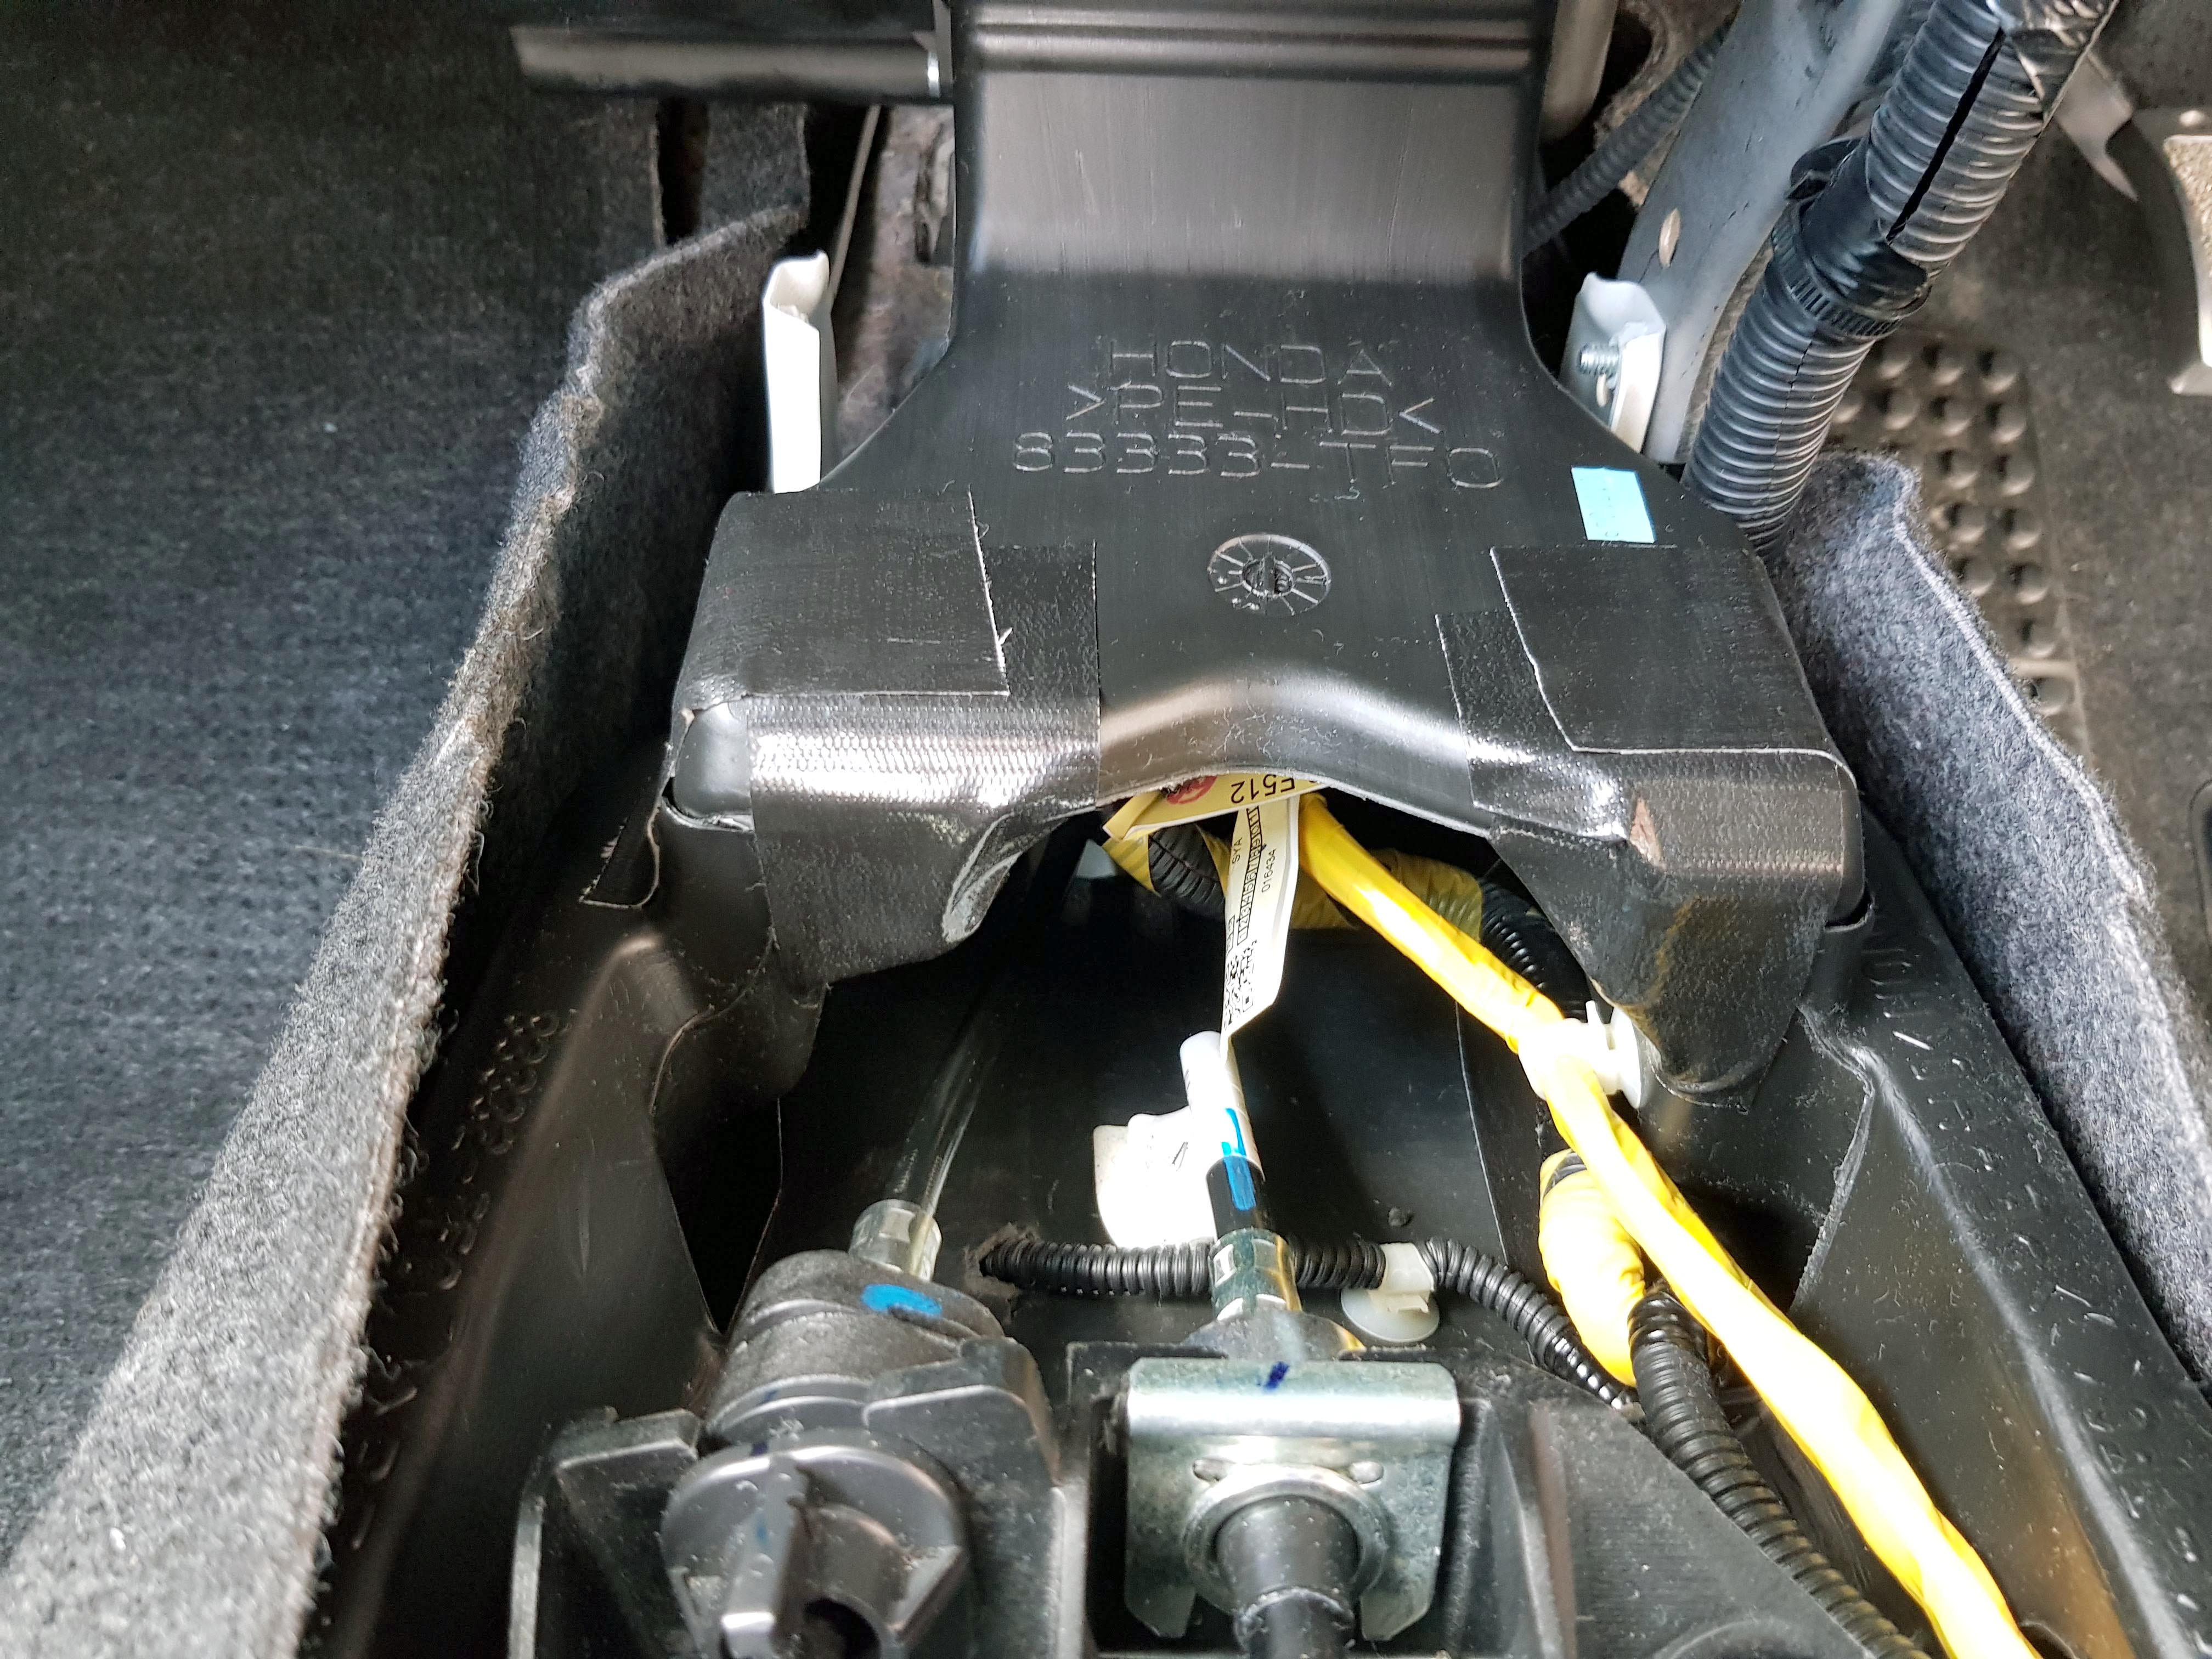
I wanted to cover as much as possible, as MLV works best with total coverage, and I noticed that there was a nice big gap where sound could come in under the gear linkage. So I followed the service manual very carefully and removed the gear linkage:
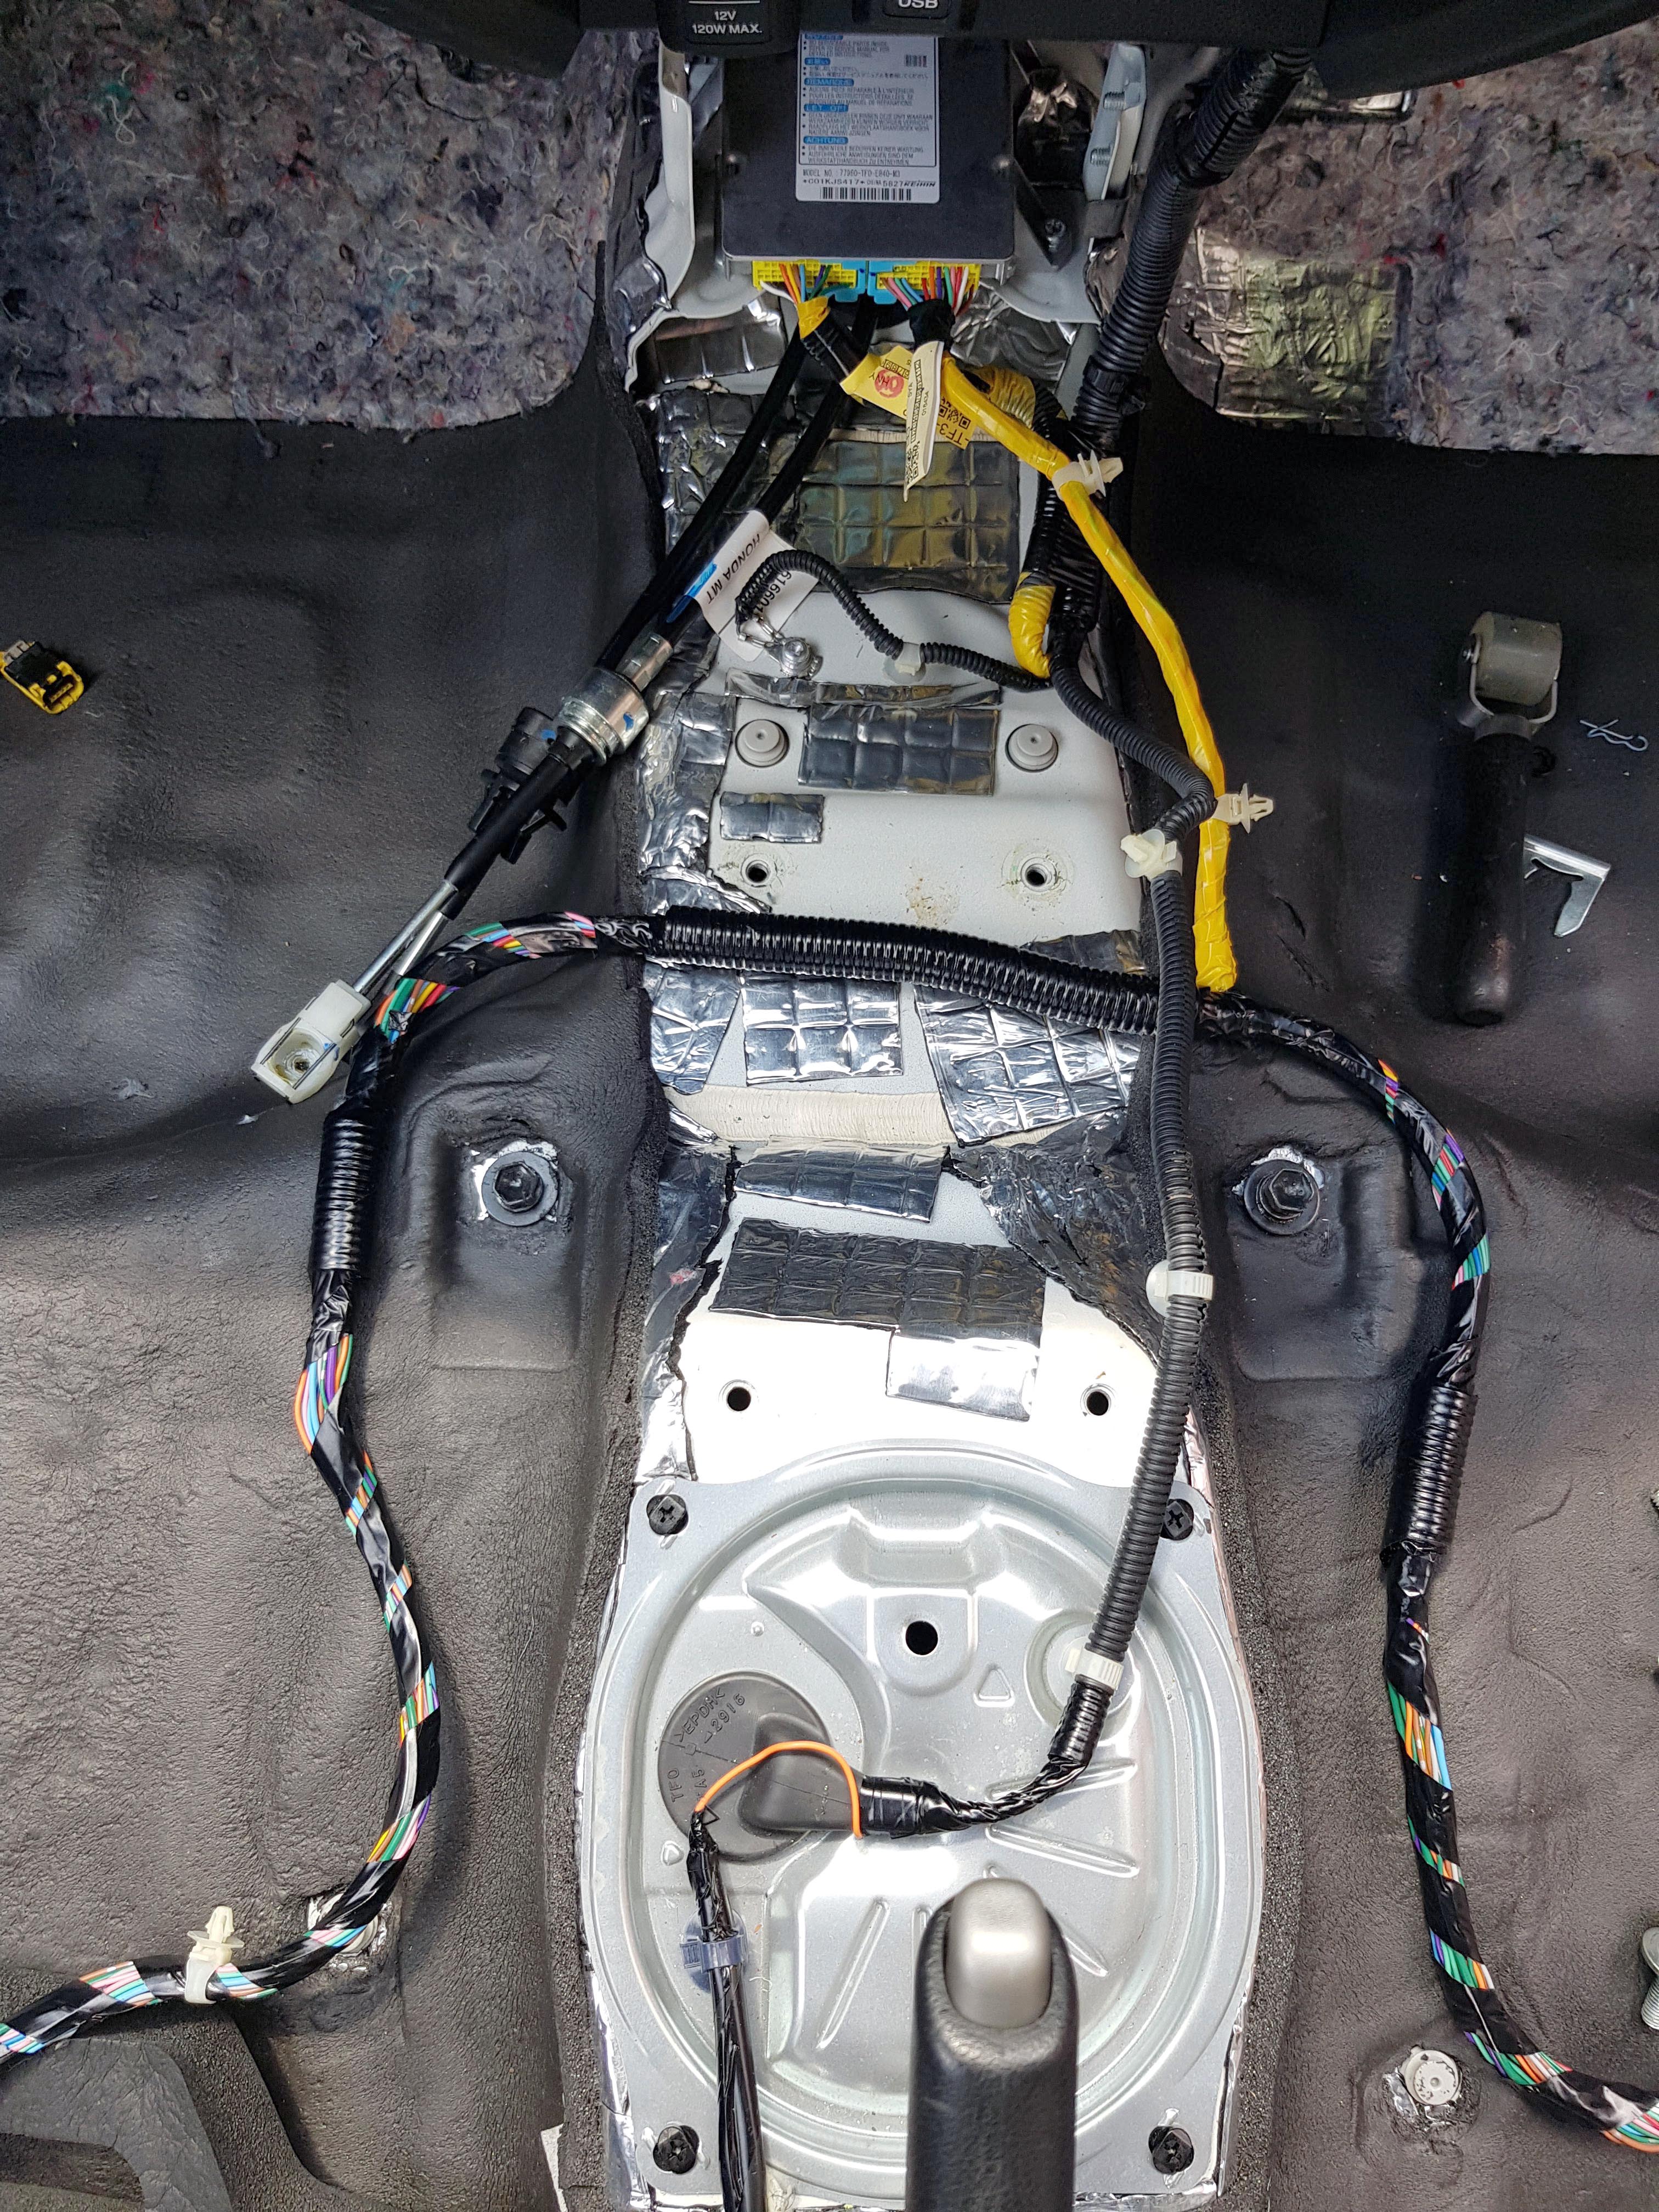
Then applied some Closed Cell Foam:
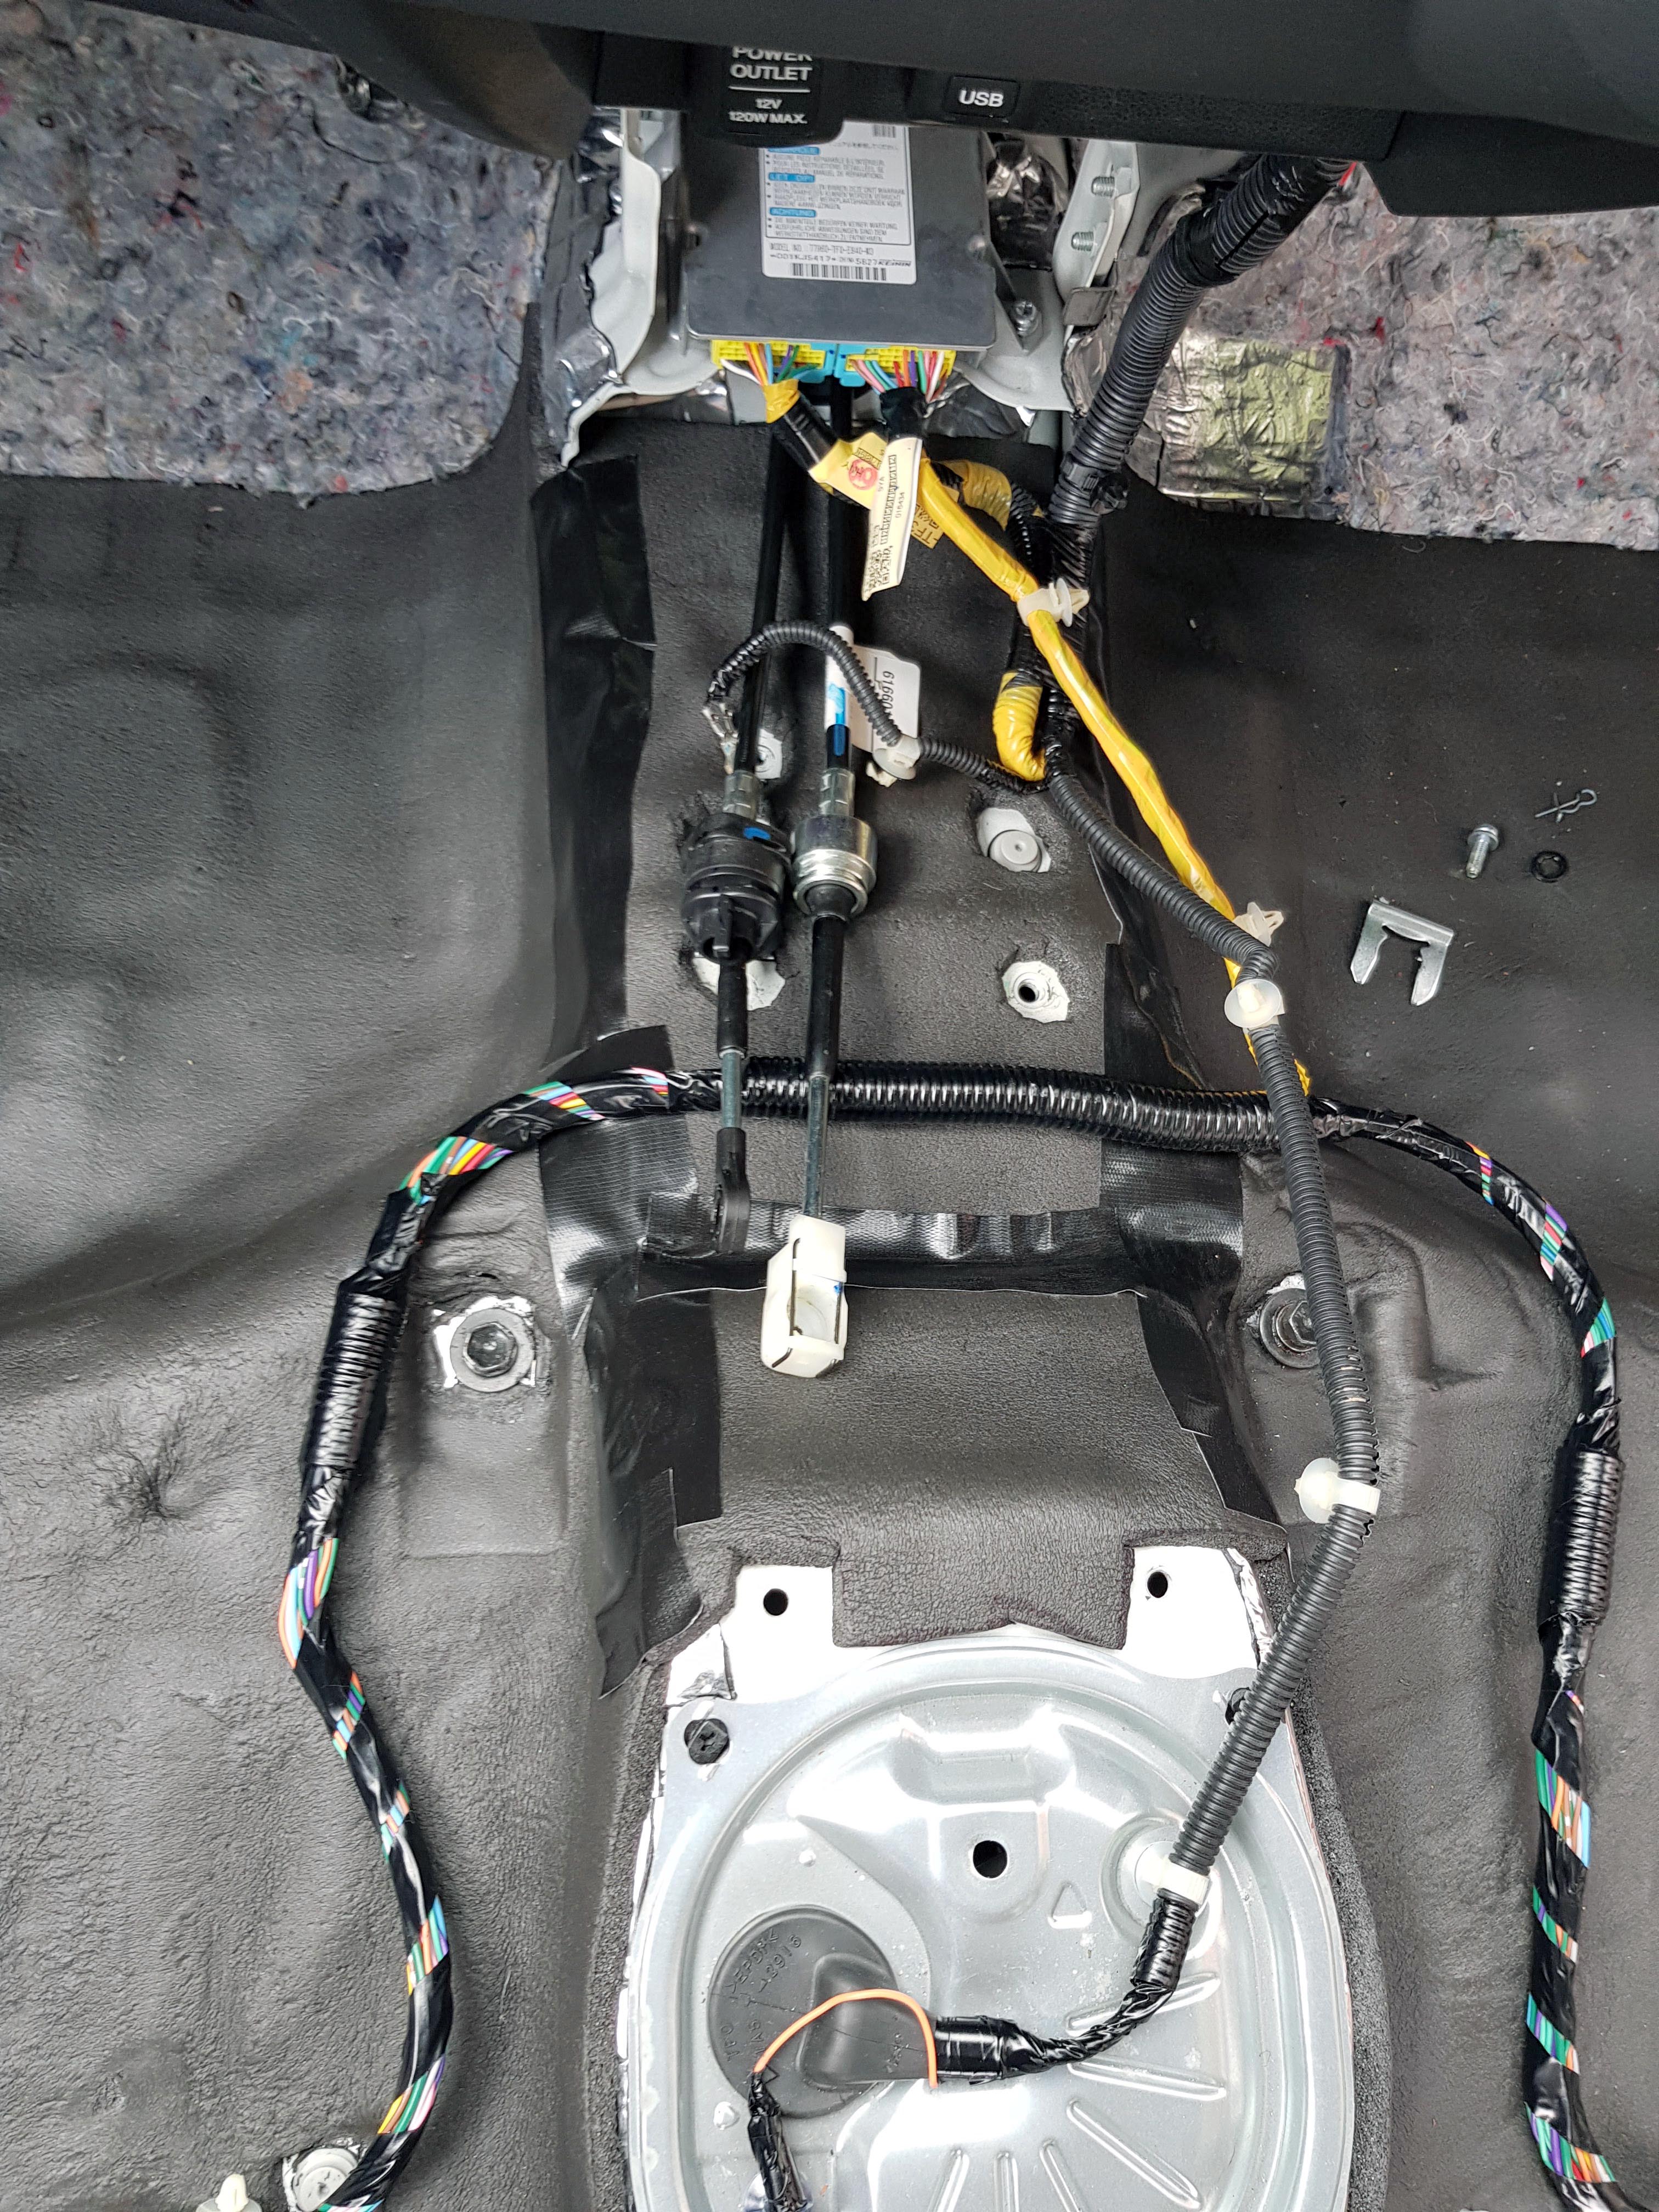
And finally a layer of MLV, and fitted everything back:
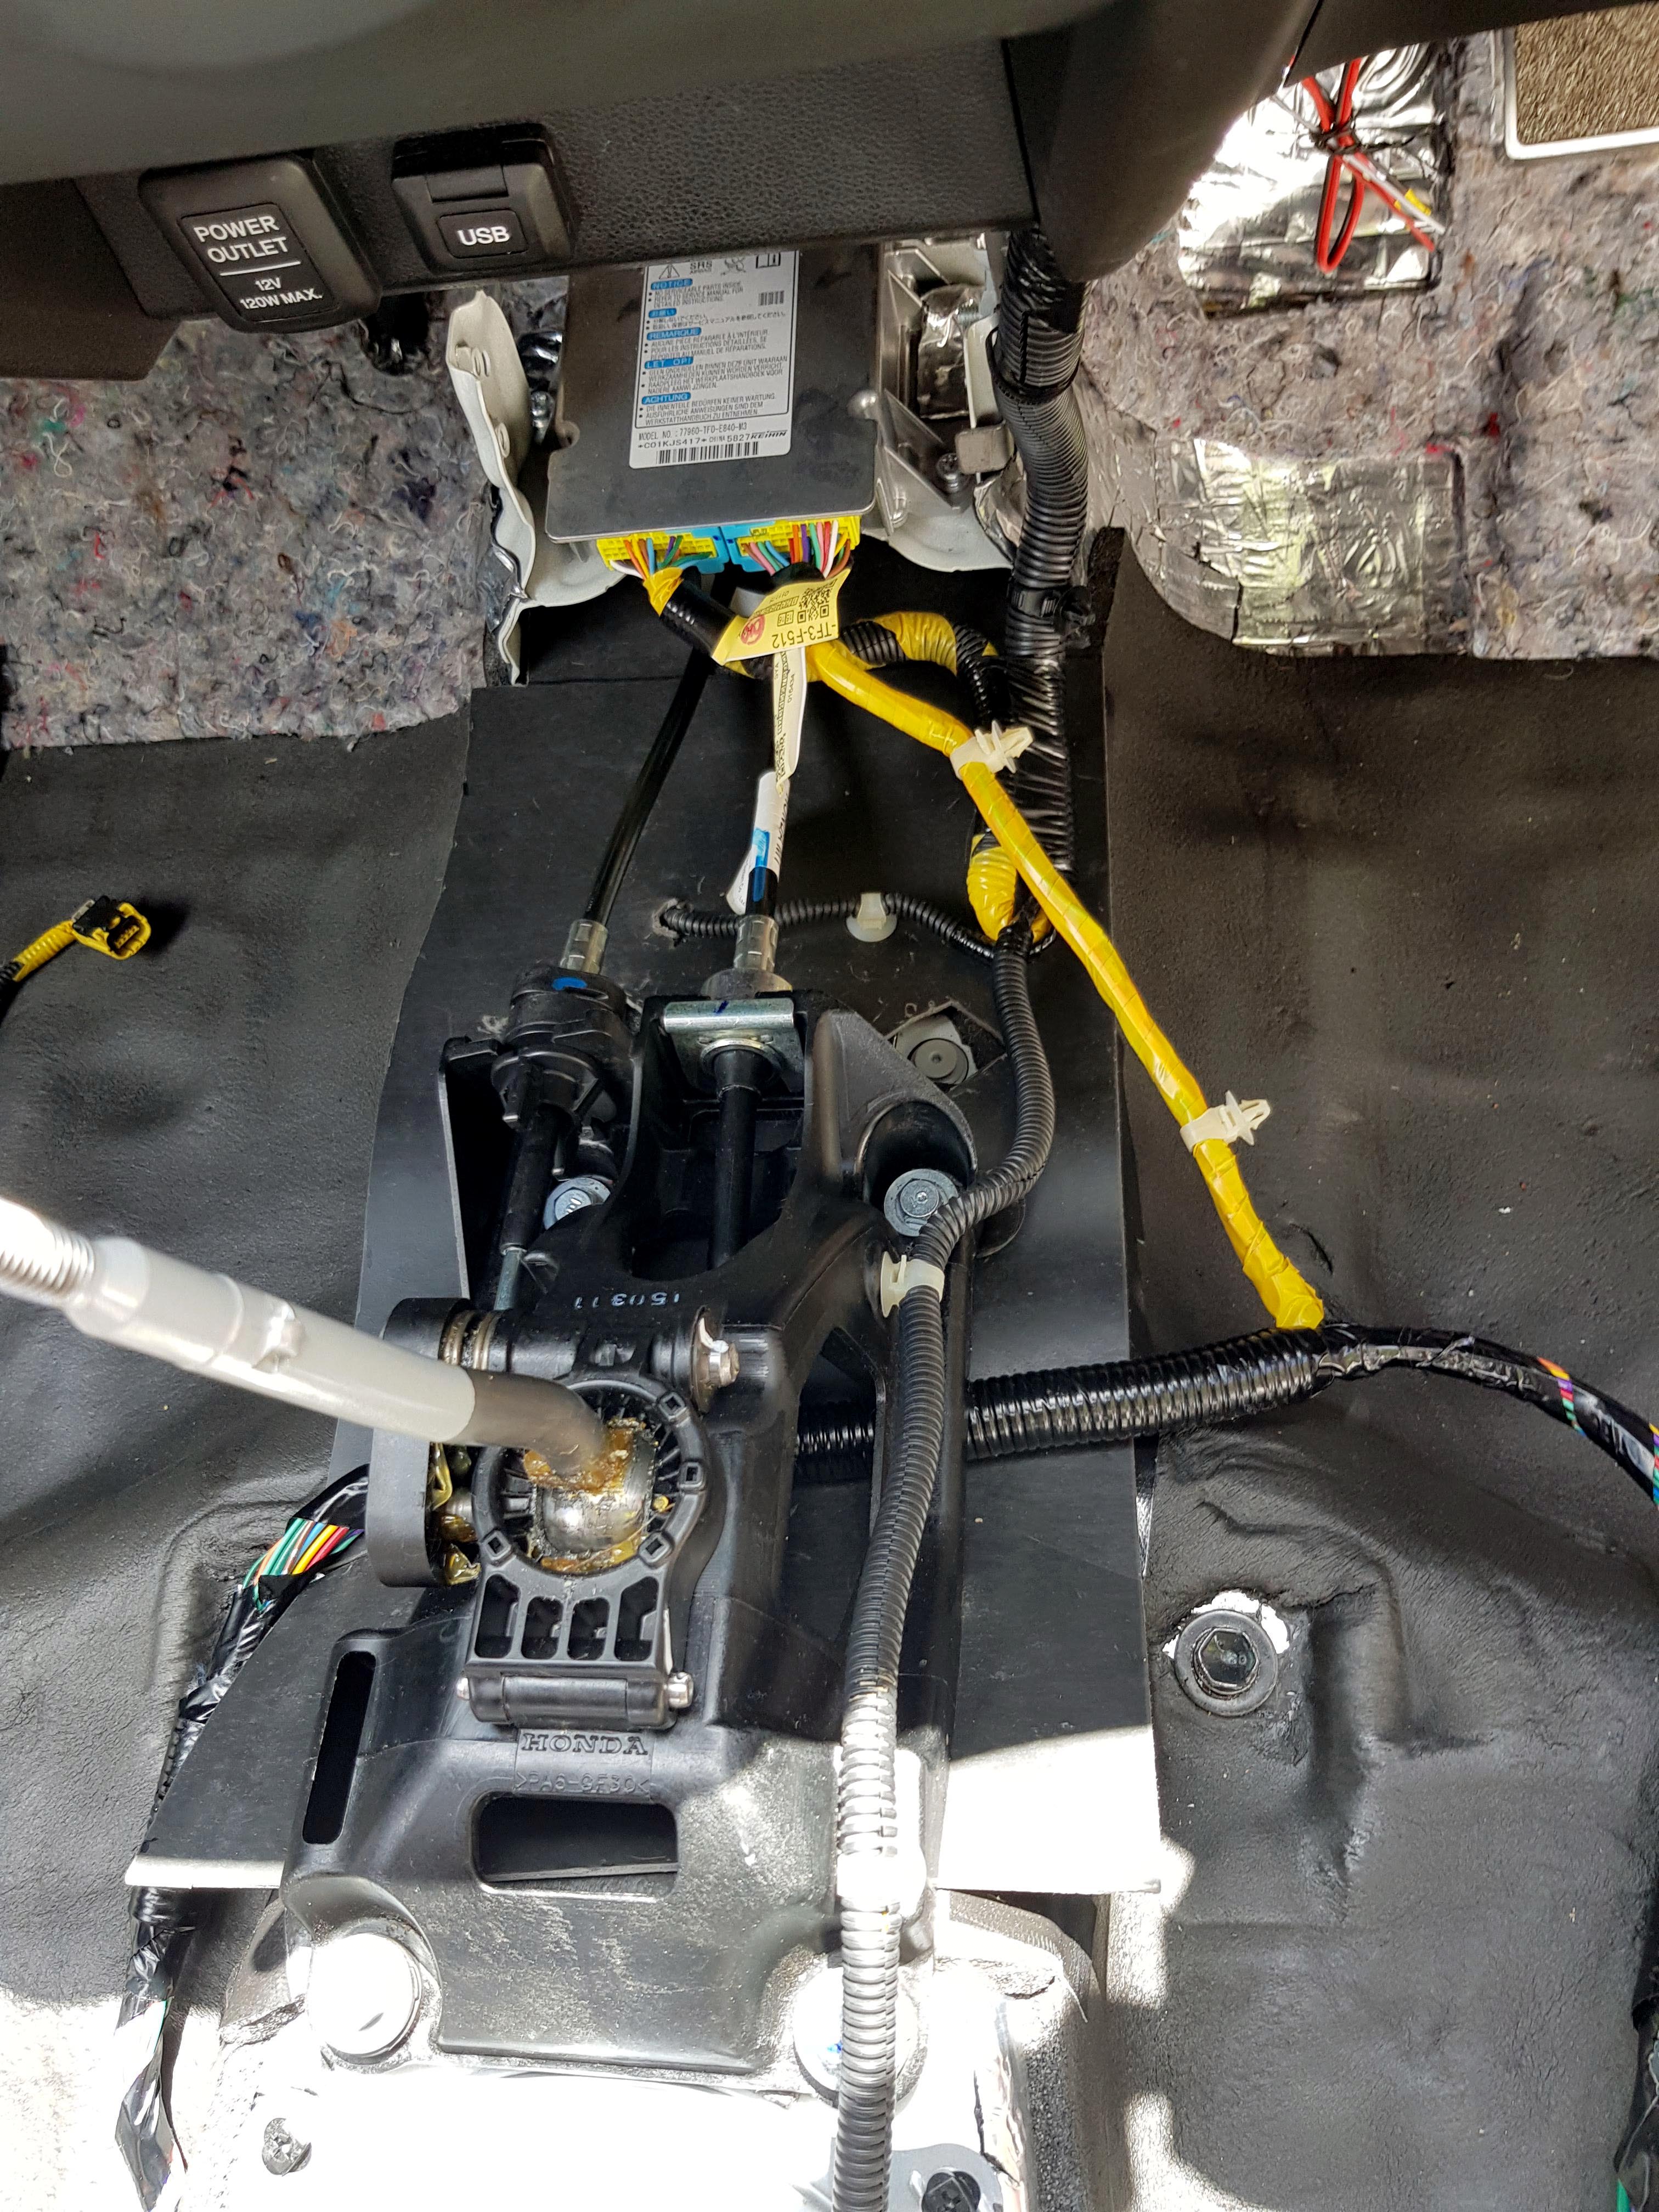
Next step was to do the same with the Hand Brake. I wanted to make sure everything was easy to access if it needed to be adjusted in the future:
I wanted to put sound proofing over the cover for the fuel pump, as sound could get through that way, but I didnt want to cover it with CCF then MLV and for it to then be hard to access when the eventual time comes to replace the fuel pump/fuel filter. So I cut out a square of CCF and a square of MLV to cover it, and then stuck the CCF to the MLV, and then placed it on top, so when the fuel pump/fuel filter eventually needs replacing, the sound proofing can be easily removed for access:

The MLV was a nightmare to fit, as it doesn't stretch, and isn't self adhesive. So I had to make lots of cuts to get it to wrap around the contours of the interior:

I tried to get the MLV as high up the firewall as possible, but it was a nightmare to work with, had to settle at this height:
After running out of the Dodo MLV, I switched to the other MLV, which was so much easier to work with, due to being thinner. Did the rear seat area first, then put the interior back in:

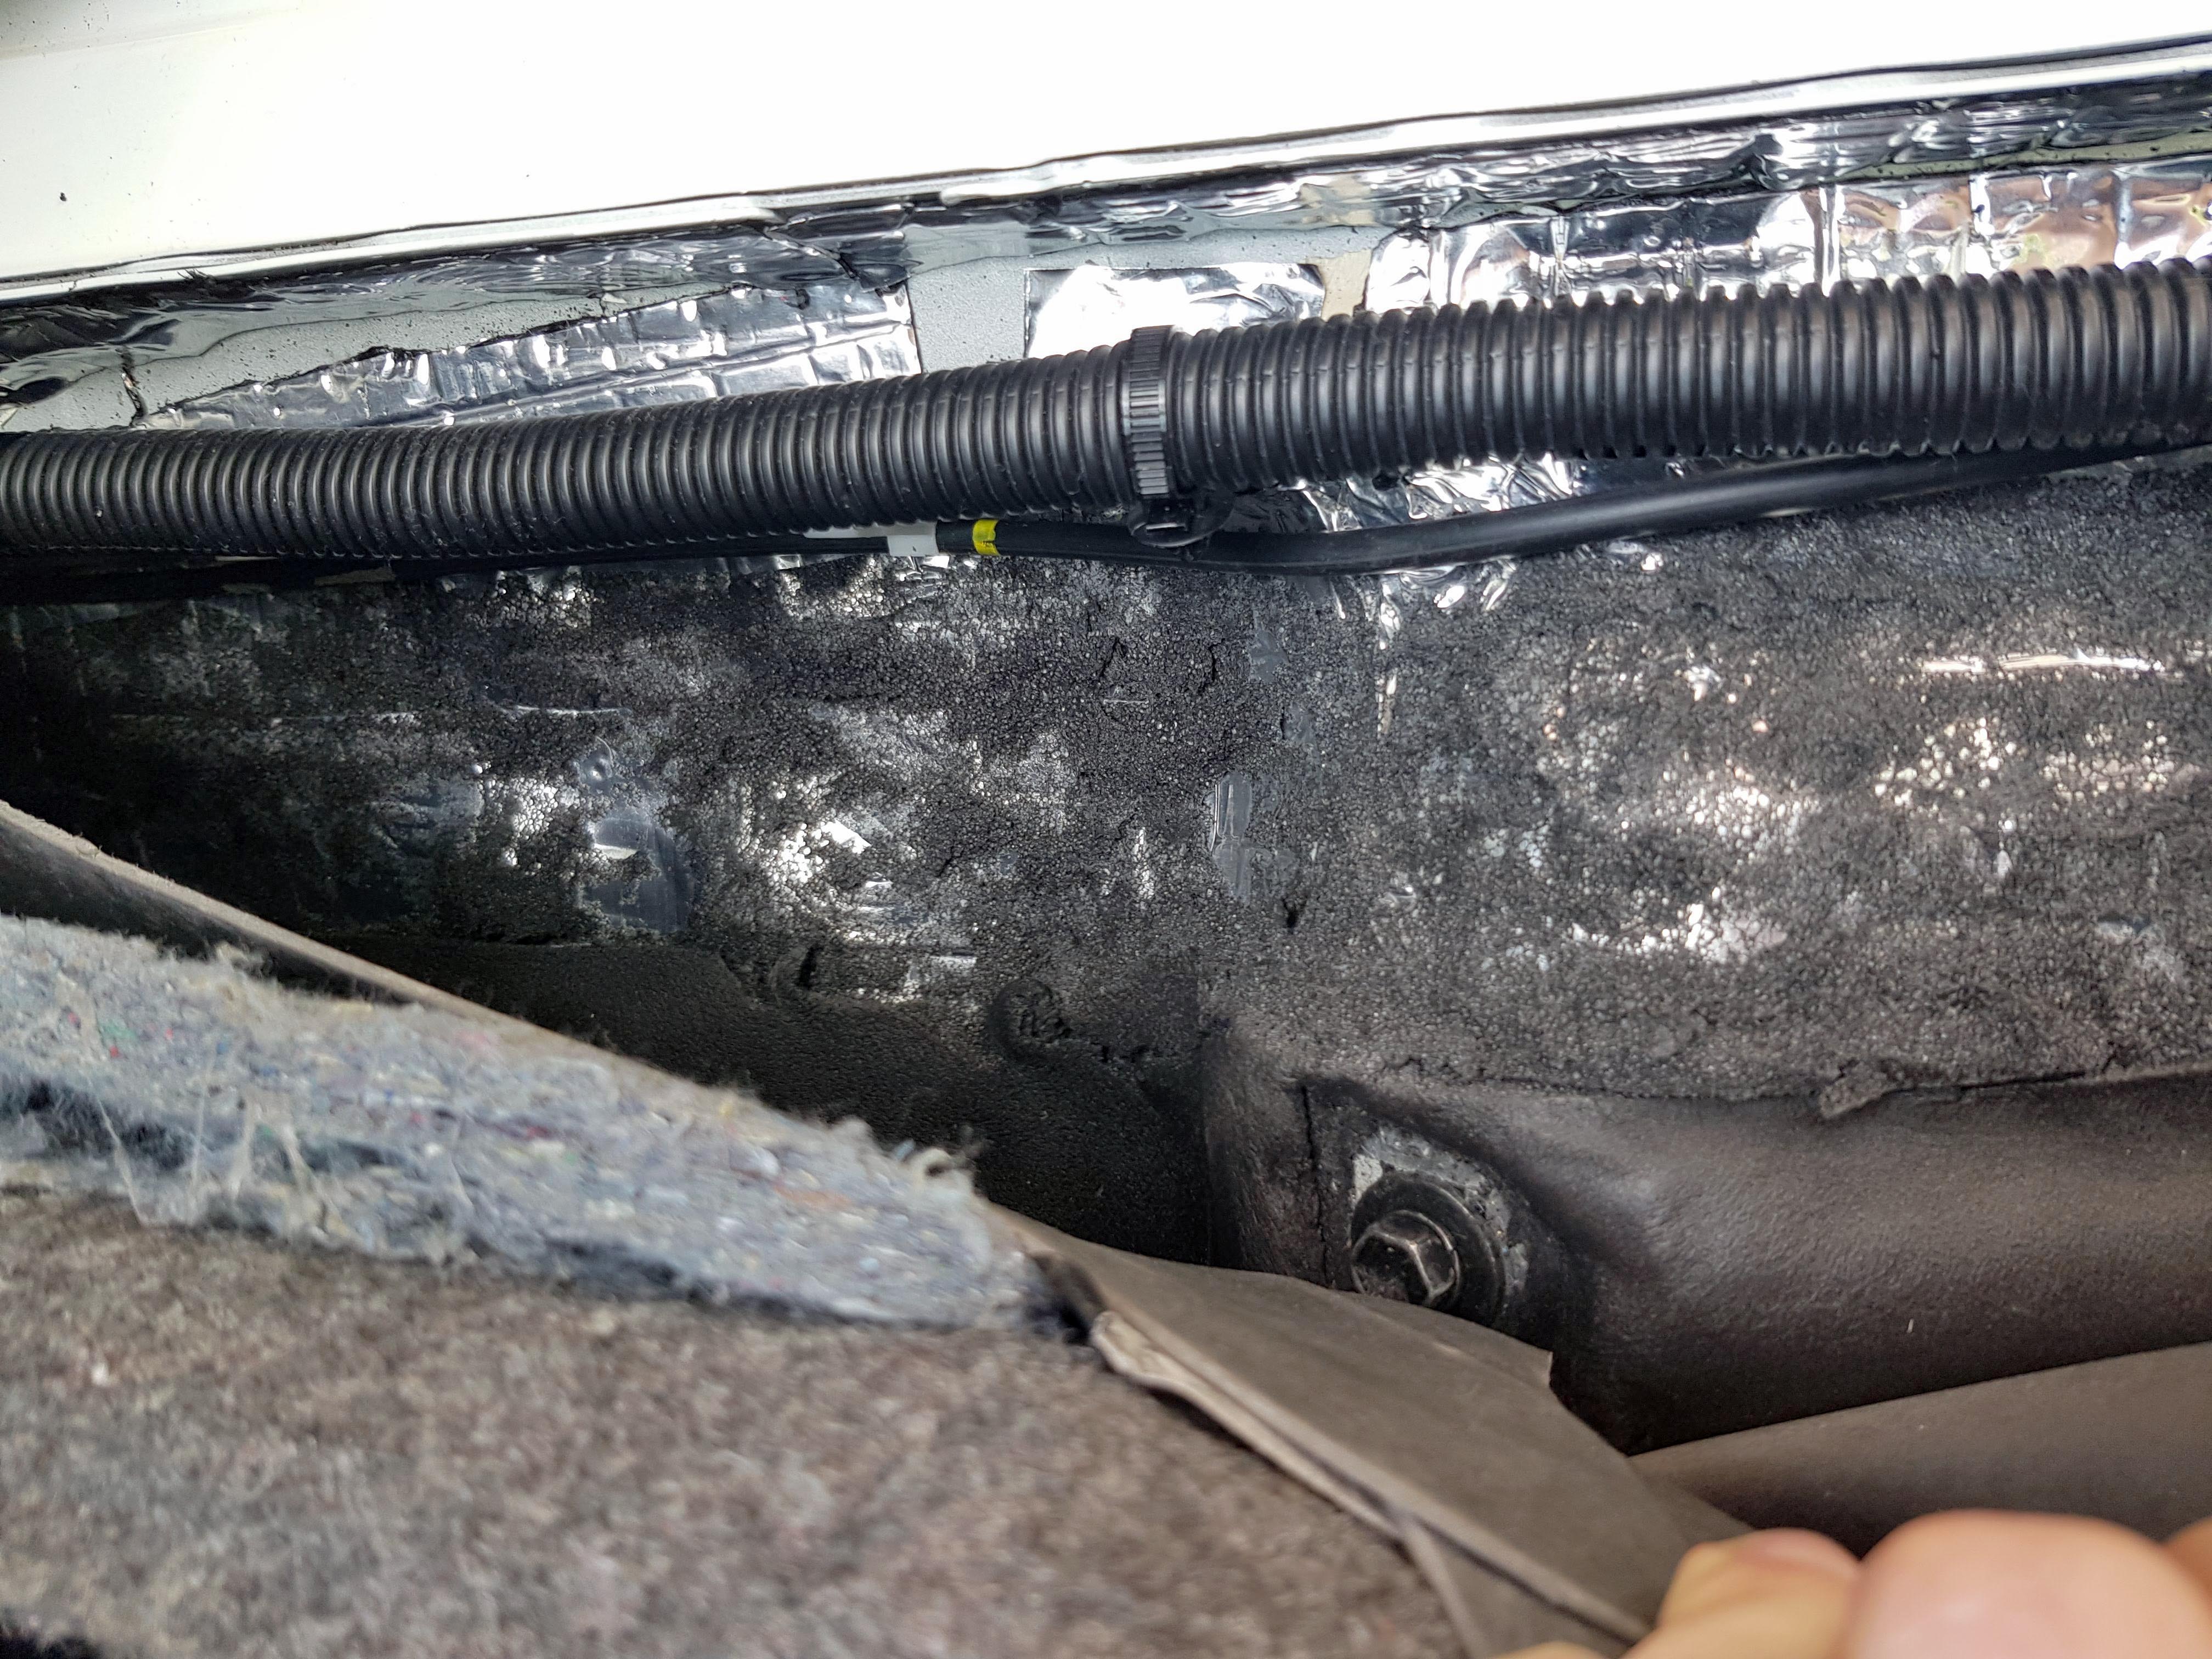
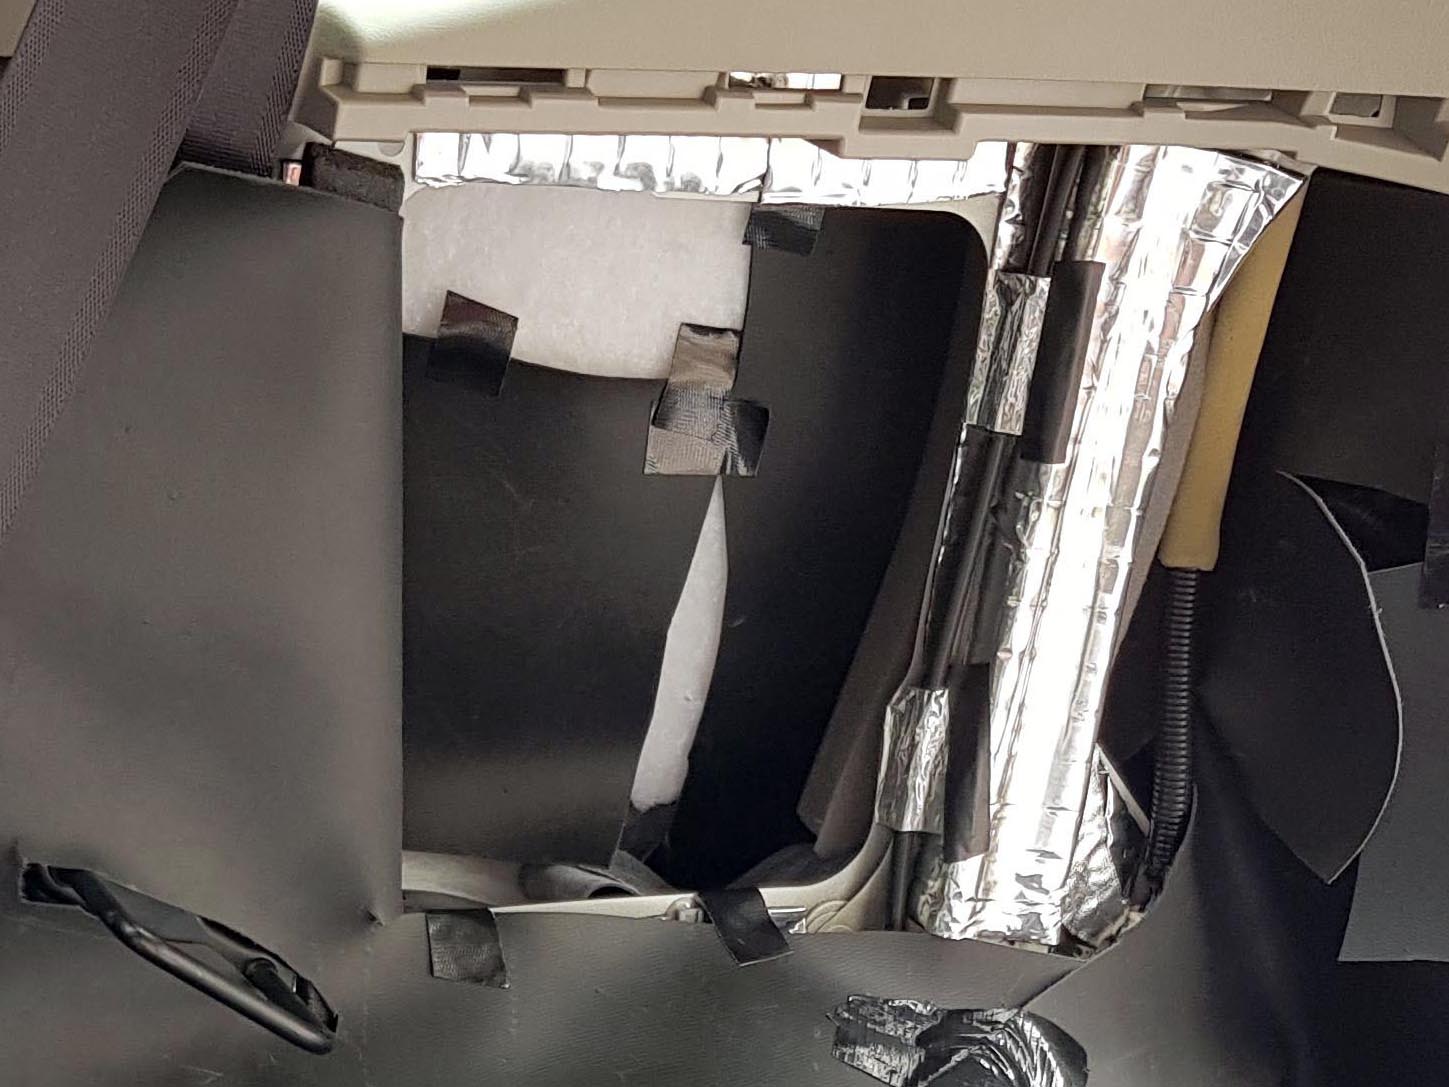
There was a noticeable gap on the air ducts, so I taped them up just to be safe:
I fitted the side plastics first, and I'm glad I did, as they wouldn't go back at all, I ended up having to lift up the carpet and remove a large strip of the CCF to have enough room for the plastics to fit back. I wish I had used a thinner CCF, something like 5mm or 3mm to do the interior in hindsight:
After removing some of the CCF, the plastics did eventually fit back on, but there are still some noticeable gaps that I will just have to live with. They aren't too bad, but they are just annoying because everything doesn't look flush and perfect:

Side plastics and centre console all fitted in. Centre console was difficult to fit back in, but I got there:

Next was the boot area. I may have rushed this area a bit, as I was pretty annoyed by this point and just wanted it over with, so I may go back and tidy it up a bit at a later date, but it seems to fit ok for now:
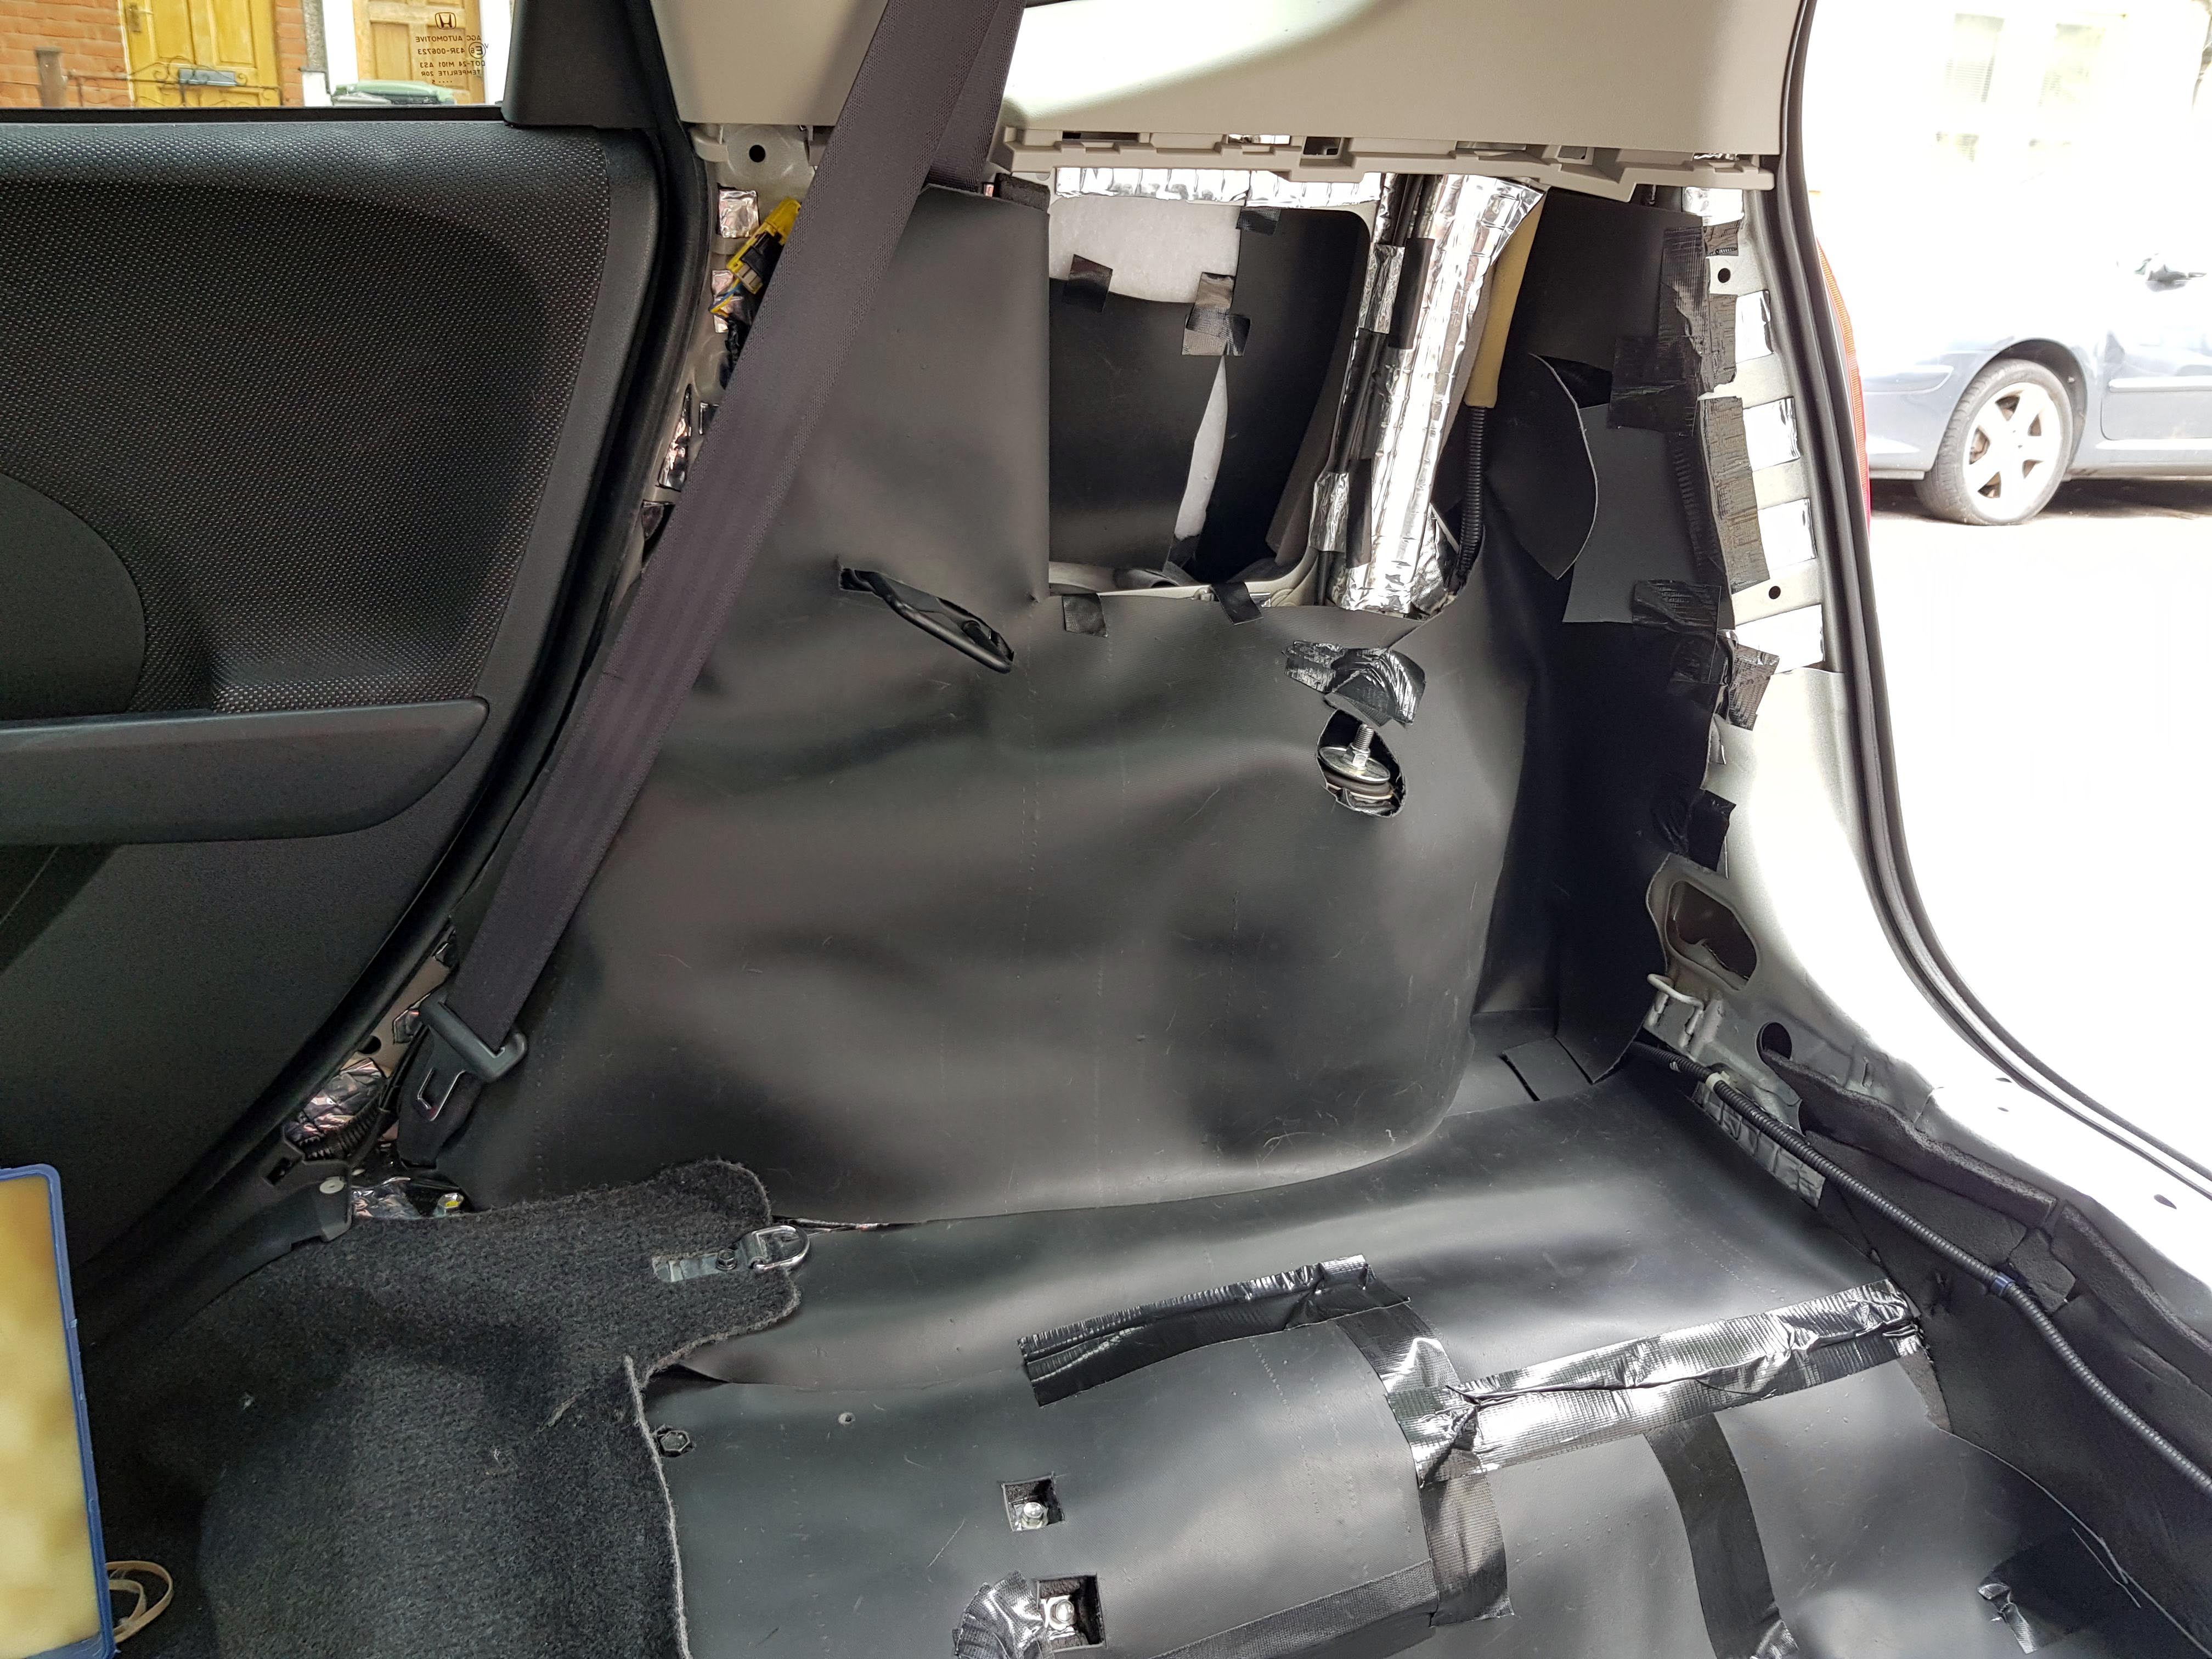

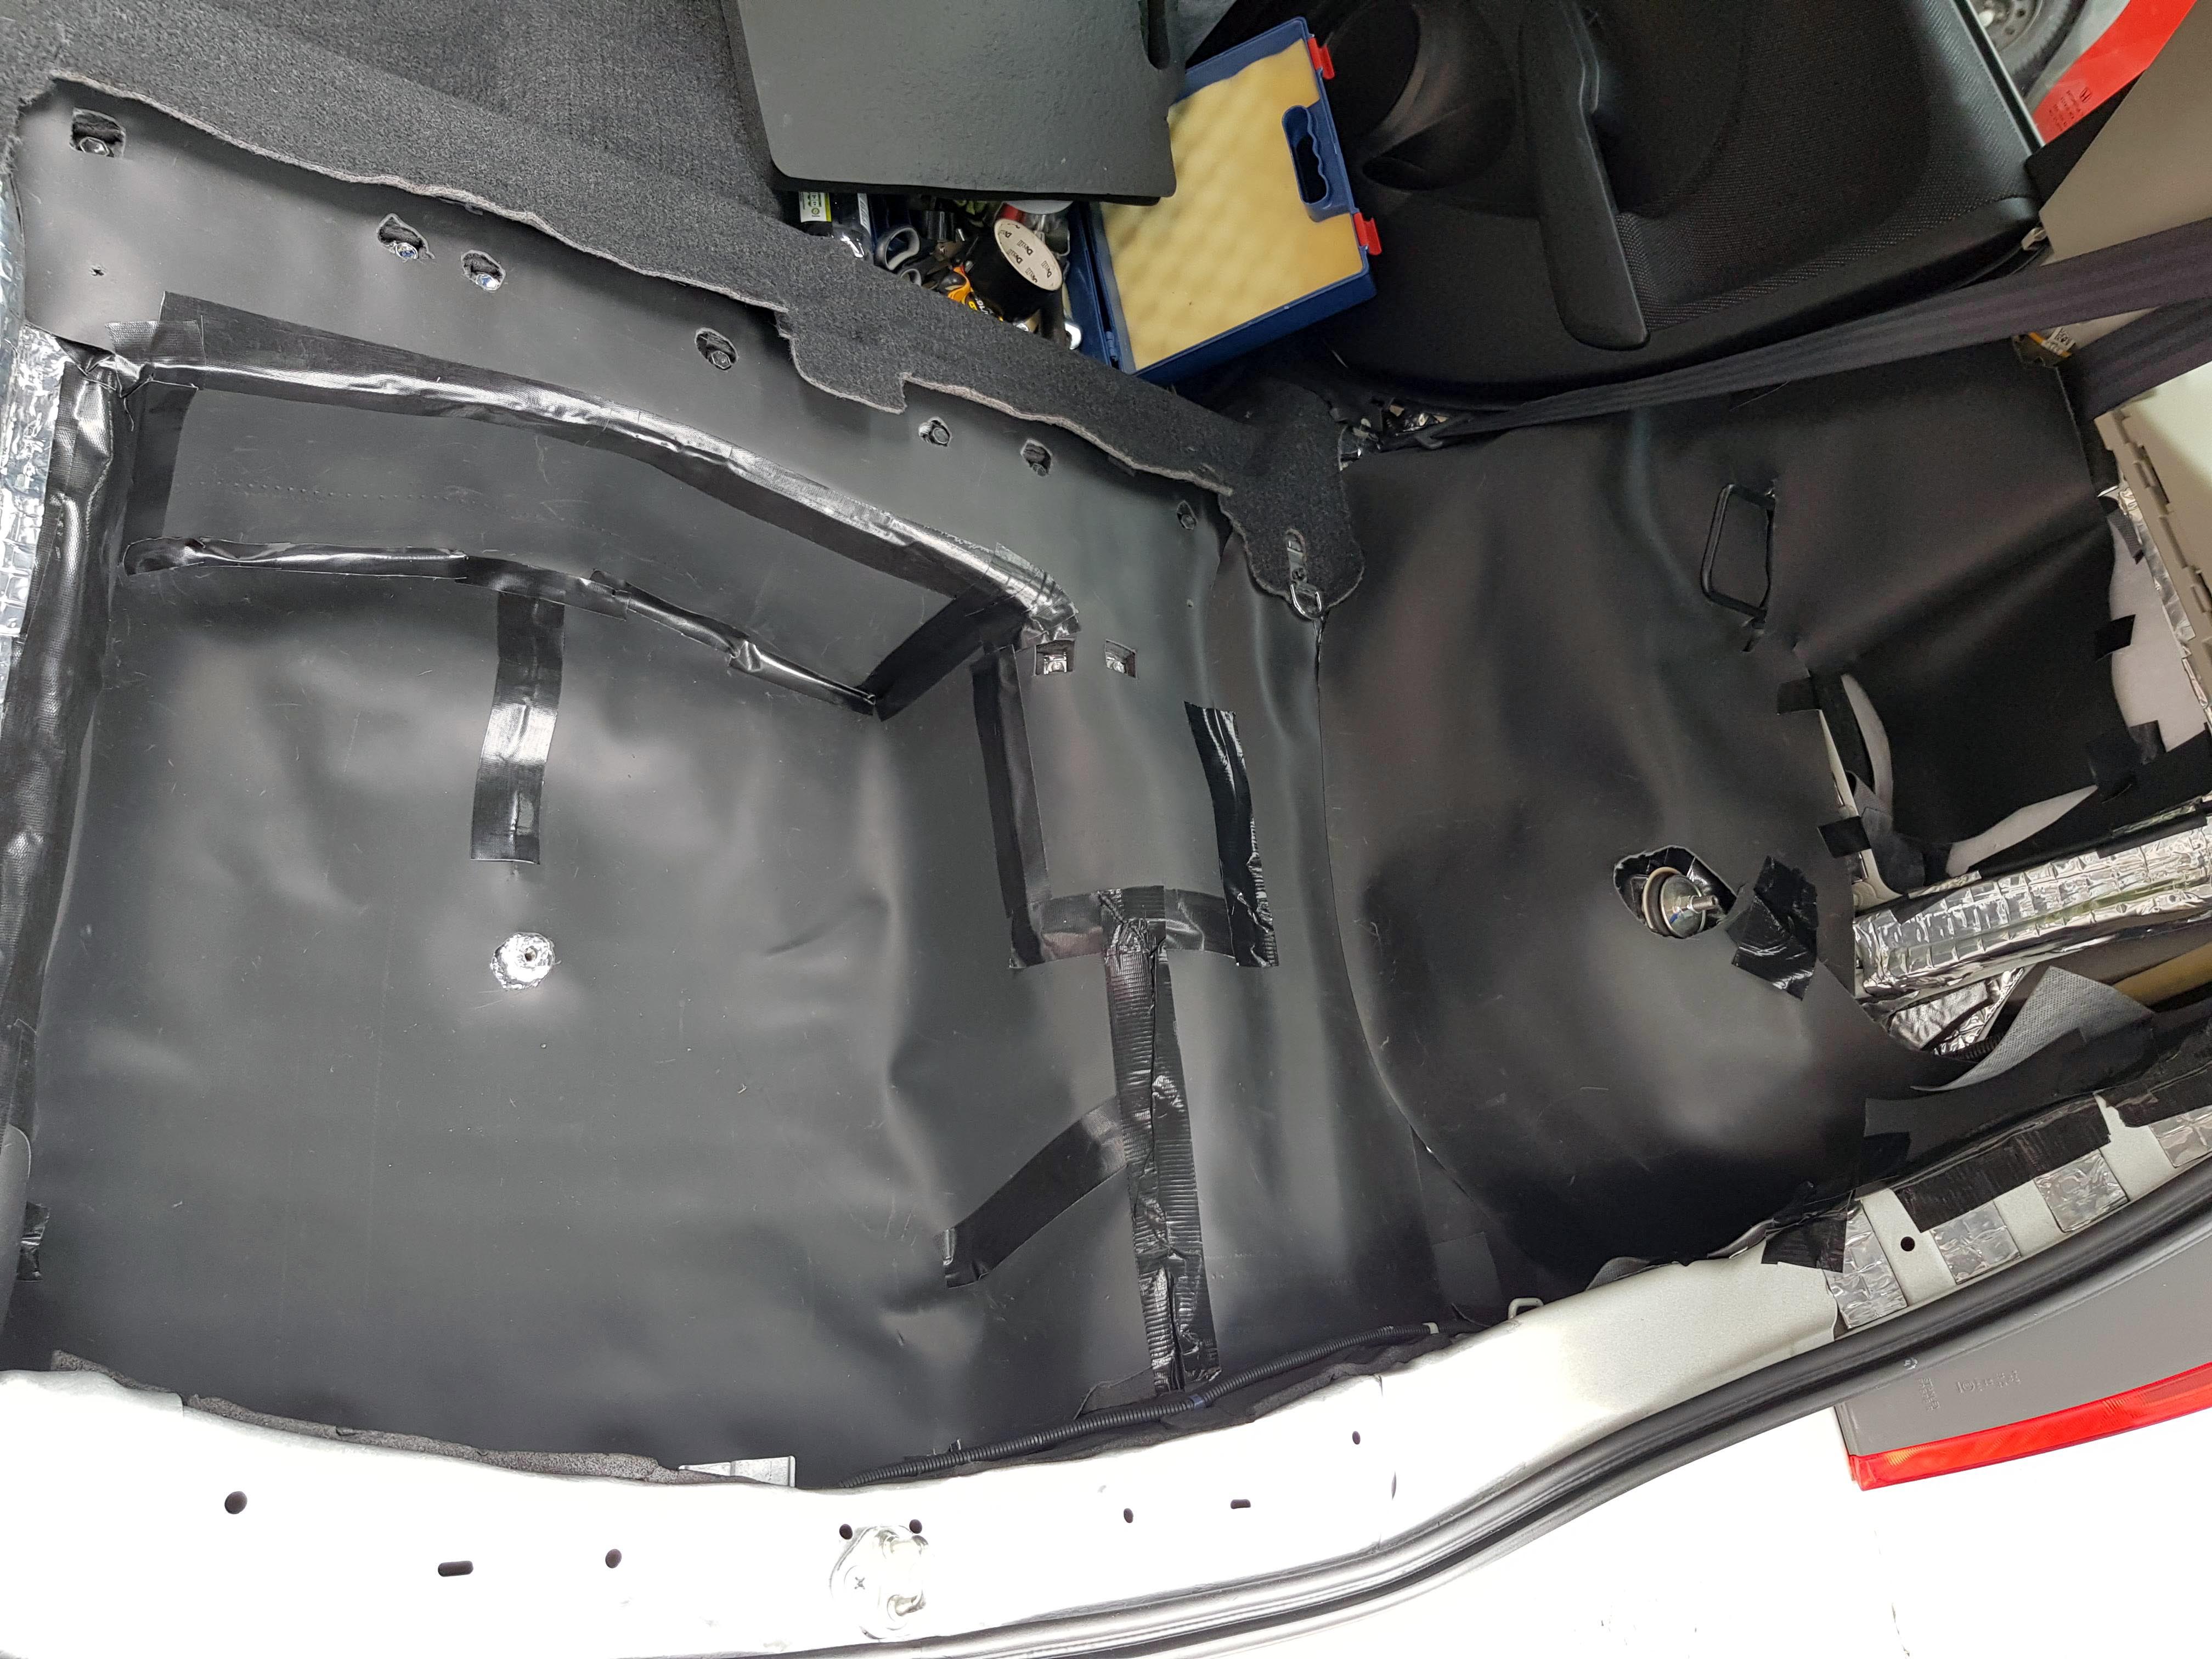

I used all the off cuts of MLV and some of the stock Honda sound insulation that I had removed from the Door cards and rear plastics to stuff the void gaps above the rear wheel well:
So at present everything fits back in "ok".
I am having an issue with the rear seats at the moment.
I couldn't fit the base plate that the rear seats lock into on the floor, so I had to completely remove all the sound deadening around that for it to sit flush again. But now the rear seats don't lock into place when you put the seat part down (in normal position). I think this is due to the carpet being slightly raised from the CCF and MLV underneath.
I don't know if this is an MOT fail or not, but my MOT is due in less than a month, so I don't want to risk it, and I'd feel safer in the knowledge that it locks down like it is suppose to, so I'm going to investigate this issue tomorrow and see if I can fix it.
Initial thoughts after installing the CCF and MLV in the interior:
So, driving it for the first time, I noticed when the car is stationary and driving at very low speeds (up to 10mph), the car is near silent, like luxury car silent. But then the moment you get above 10mph, then the road noise just comes straight through. It is slightly more muffled, but still really noticeably loud.
I put this down to the tyres. It has Bridgestone Turanza ER370 tyres on it, and they are the standard tyres it came with from the factory. The front ones are nearing their limit, so I would imagine they have gotten louder over time, and are at their loudest now they are nearing the end of their life. I am looking at replacing them with some Yokohama BluEarth ES32's, which seem like a good all round tyre, and have a noise rating of 68db. But I'm not going to do that until the tyres actually need replacing.
There is still a lot of engine noise and I have a few tricks up my sleeve that I'm going to try (Mostly a complete bonnet liner (20mm insulation) and putting some MLV on the fire wall under the cowl), but I'm not going to get my hopes up. We shall see.
I also notice that now I have basically eliminated all the places where noise can come through, there is noticeable noise coming through the windows (like when other cars drive past). This is something I think I'm just going to have to accept I cannot fix (bar thicker glass).
I am also going to go down the door seal route, and see if that makes a difference.
I think when I'm done, I'm going to go down to my local Honda Dealer and ask to test drive another Jazz Si so I can actually see the difference for myself. As I have done all this gradually, so I'm not going to notice that huge difference I would have if I had done it all at once.
I did get the chance to drive my Landlady's New(ish) Mini Cooper not long ago, and one of the things I noticed straight away (apart from how poor the visibility was), was how loud the interior was, so if that's anything to go by, the sound deadening seems to have worked well.
Sound Deadening Part 7: Under Bonnet insulation
After reading on this forum about a member getting noticeably quieter engine noise from installing a dynamat hoodliner, I looked into an equivalent product to buy in the UK. The hoodliner is basically 20mm thick Closed Cell Foam with a reflective surface for heat resistance.
So I bought some 1x1m 20mm thick Thermal Acoustic Foam Insulation from carinsulation.co.uk for �22.
My plan was to cover the entire underside of the bonnet.
I had some large sheets of white paper which I used for photo studio background, so I used that to make an outline of the bonnet to make a template:
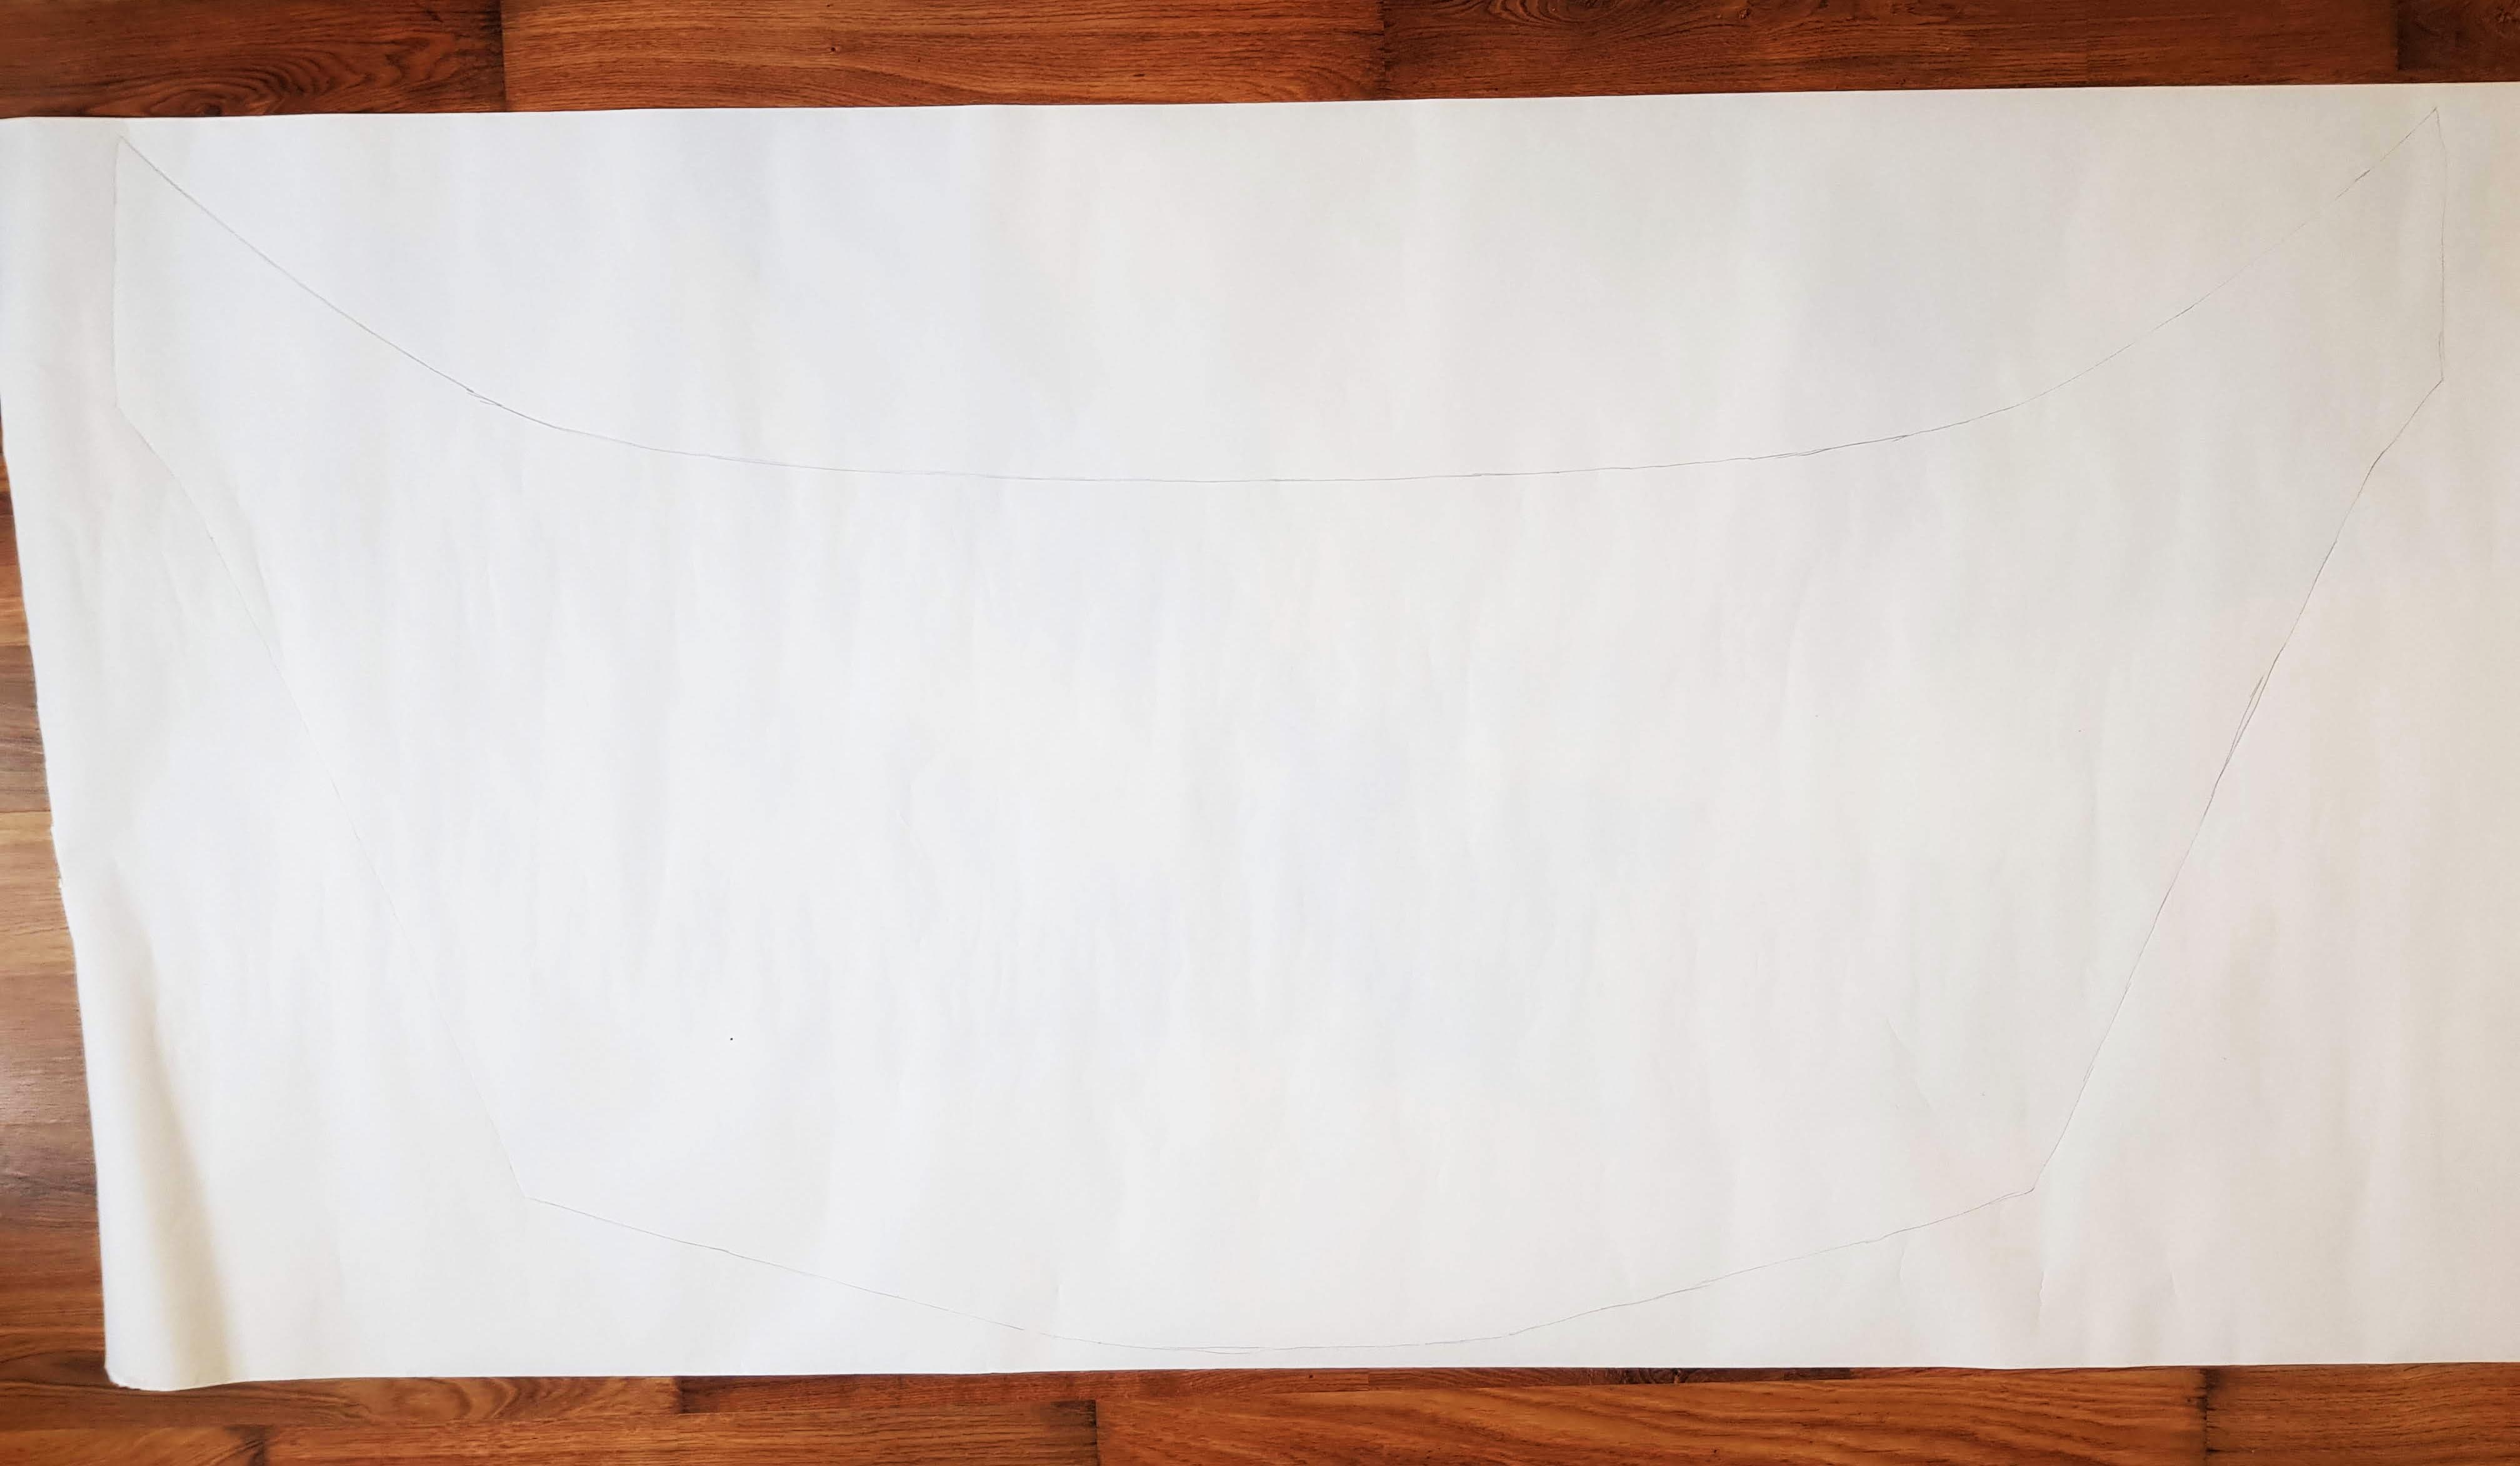
I then cut that out and used it underneath to draw out the final template.
Something I didn't take into account was the closing of the bonnet, and the gap at the front for air flow. So I ended up having to make a much smaller template than I originally planned:


I cut out the template and drew around it on the foam sheet:
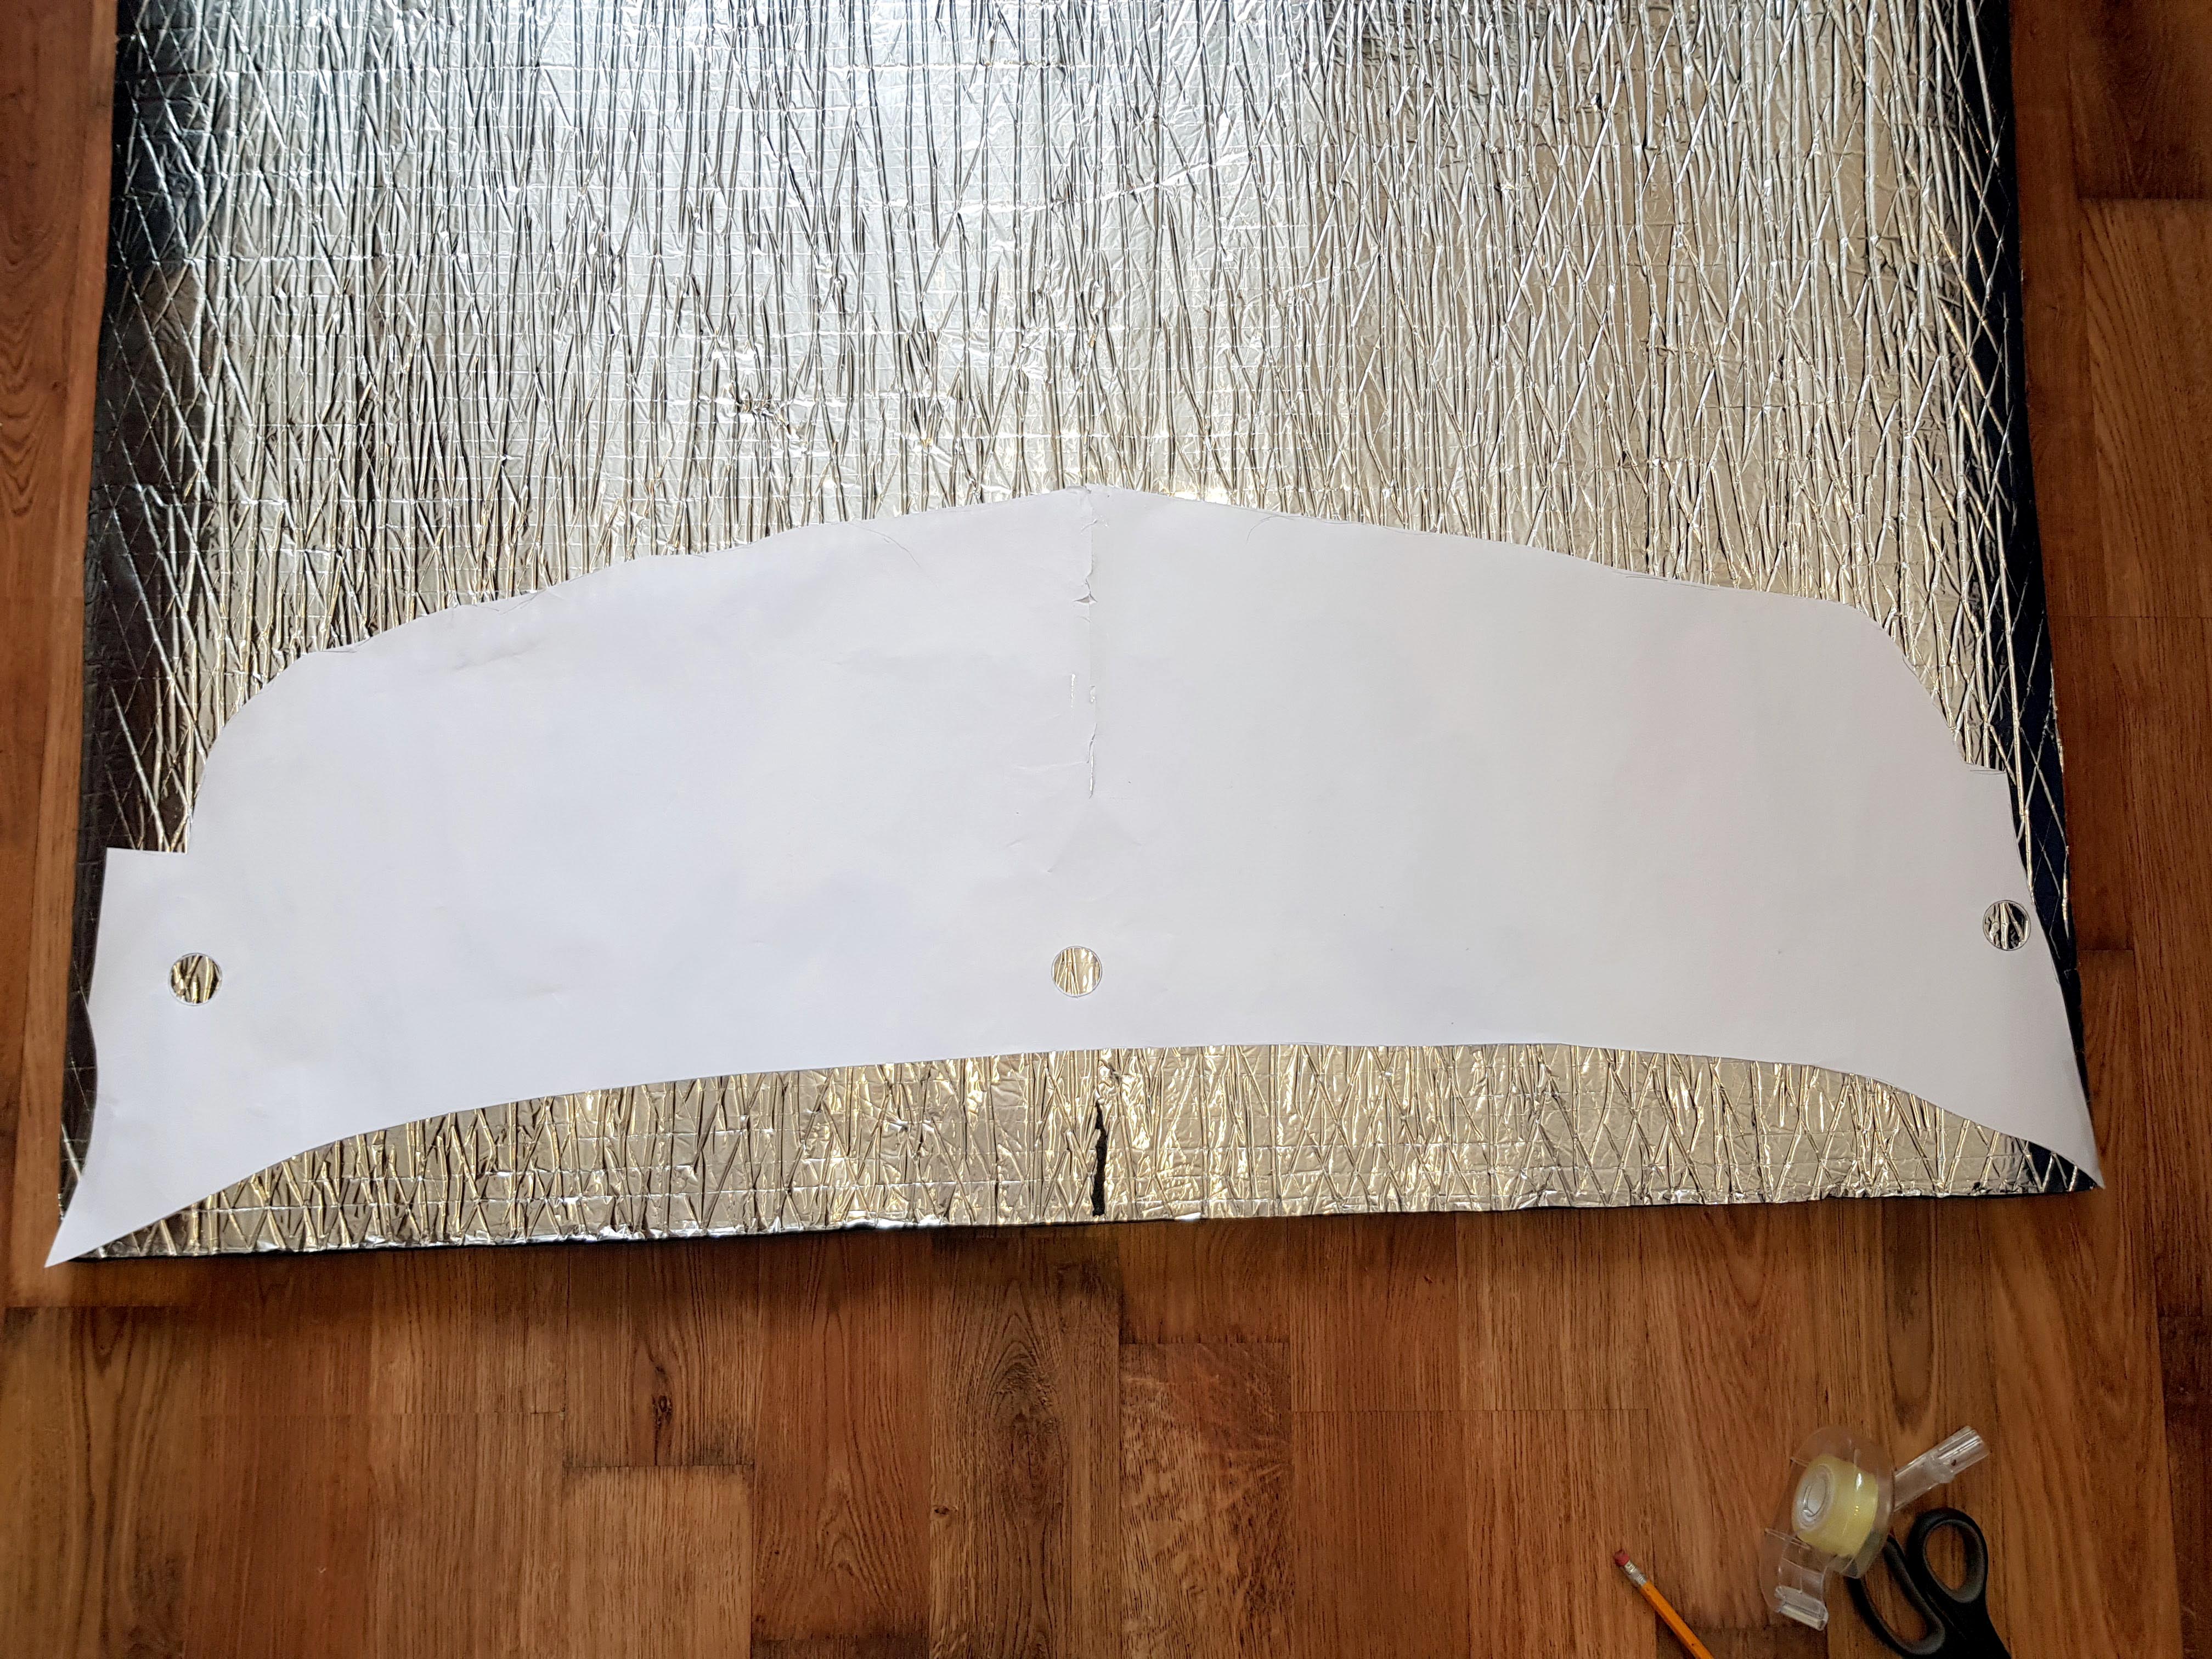

I decided not to keep the holes, as I didnt think the clips would be able to fit with the 20mm foam anyway:
I ended up having to trim a bit more off in order to it to fit better under the bonnet:
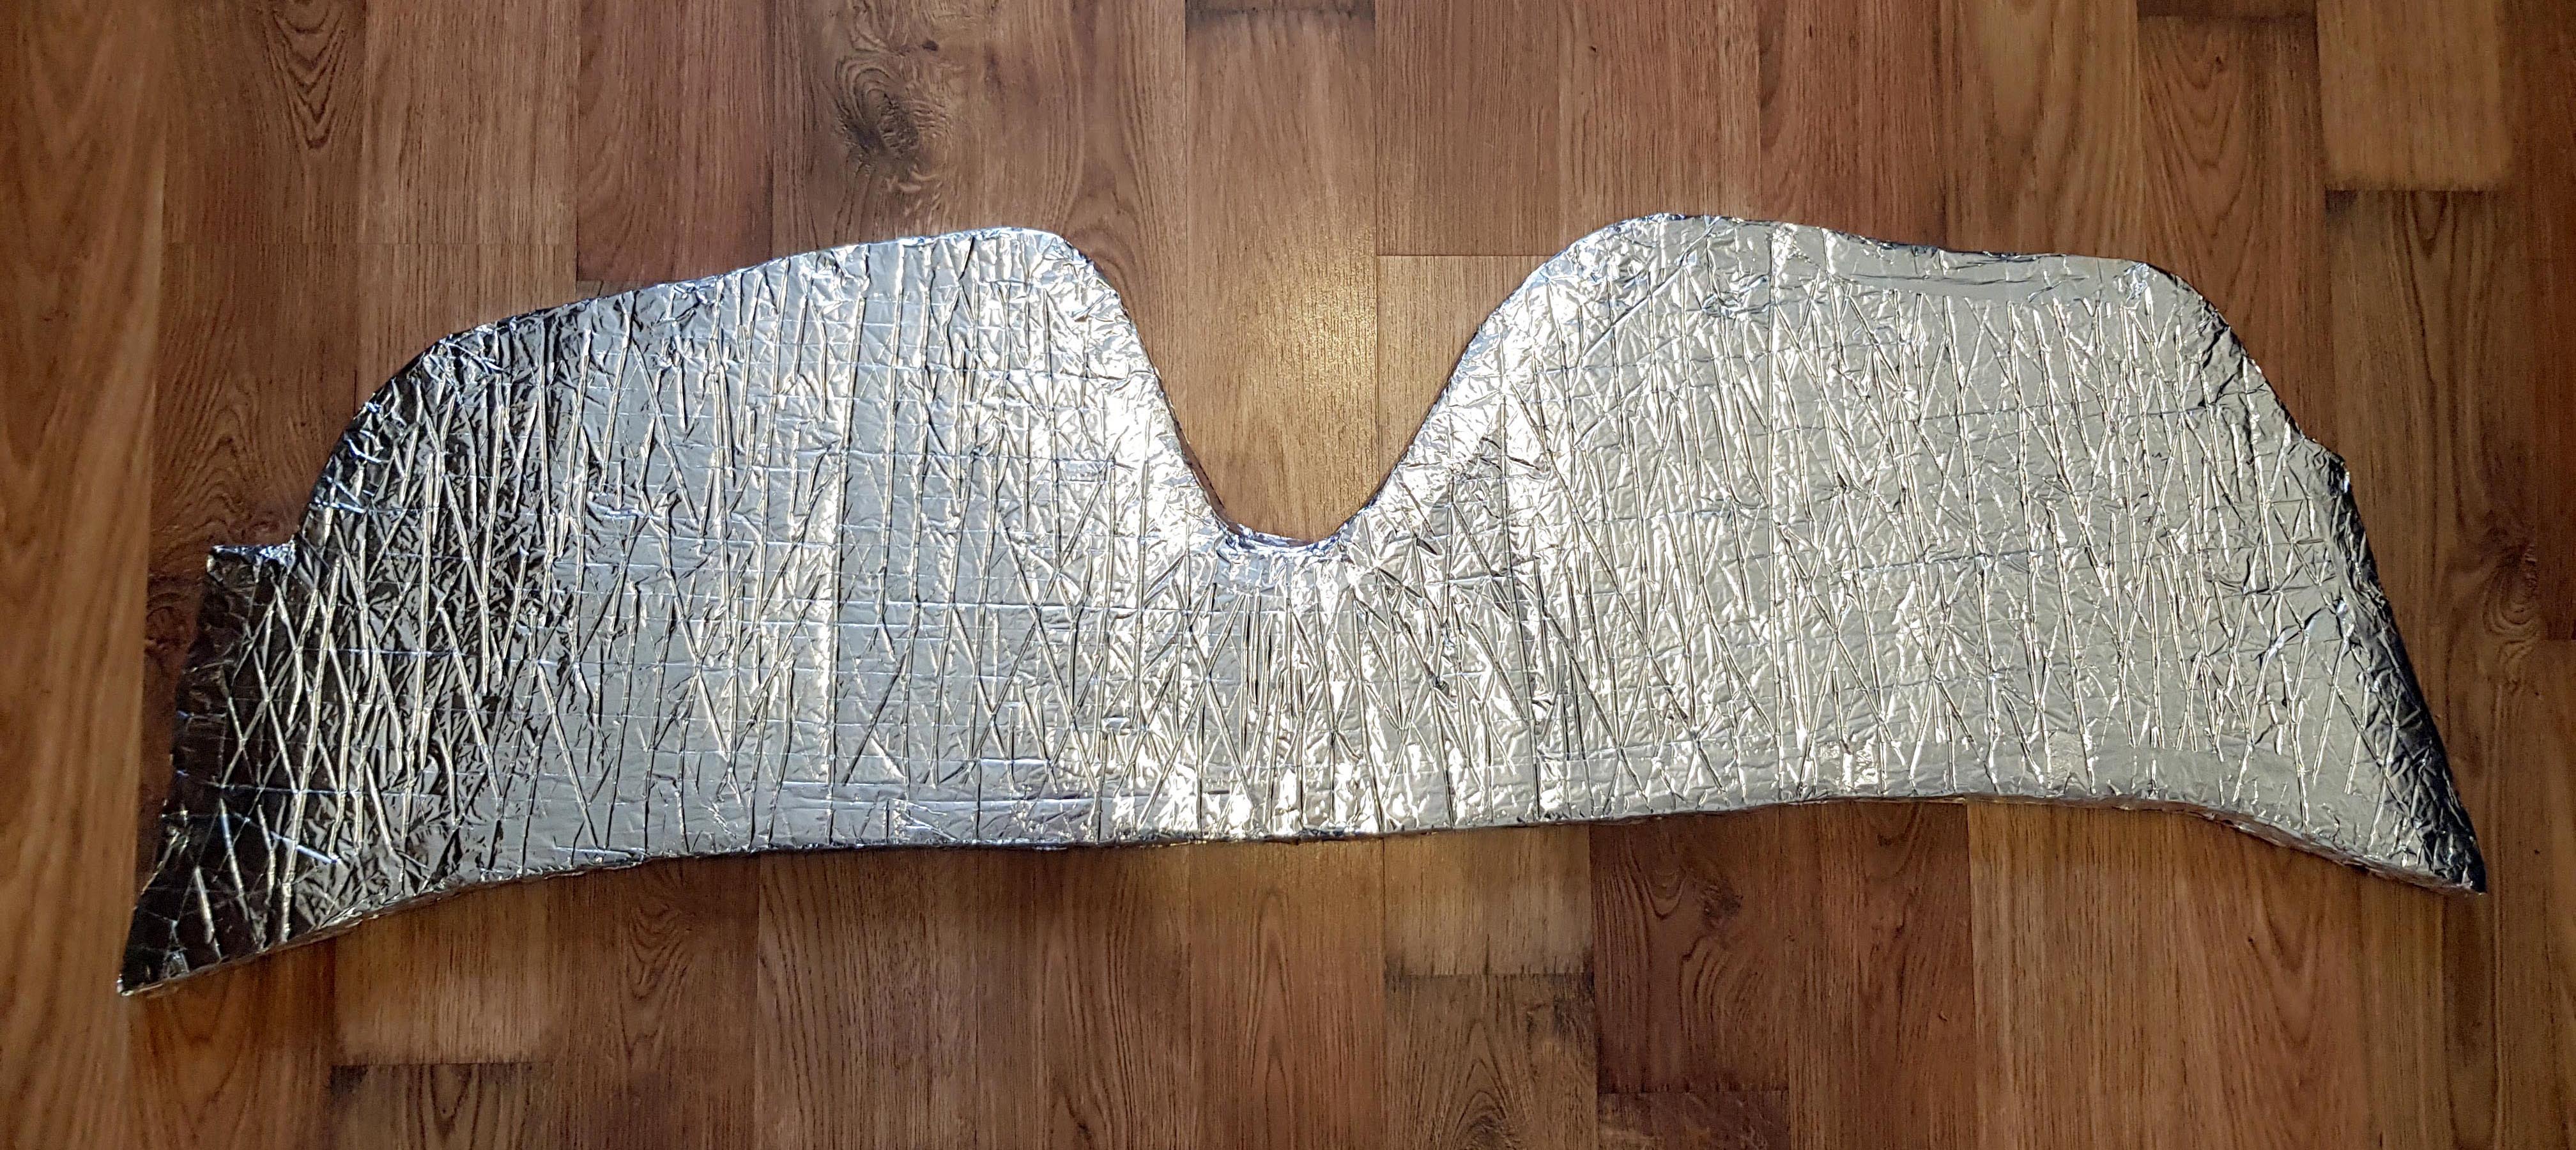
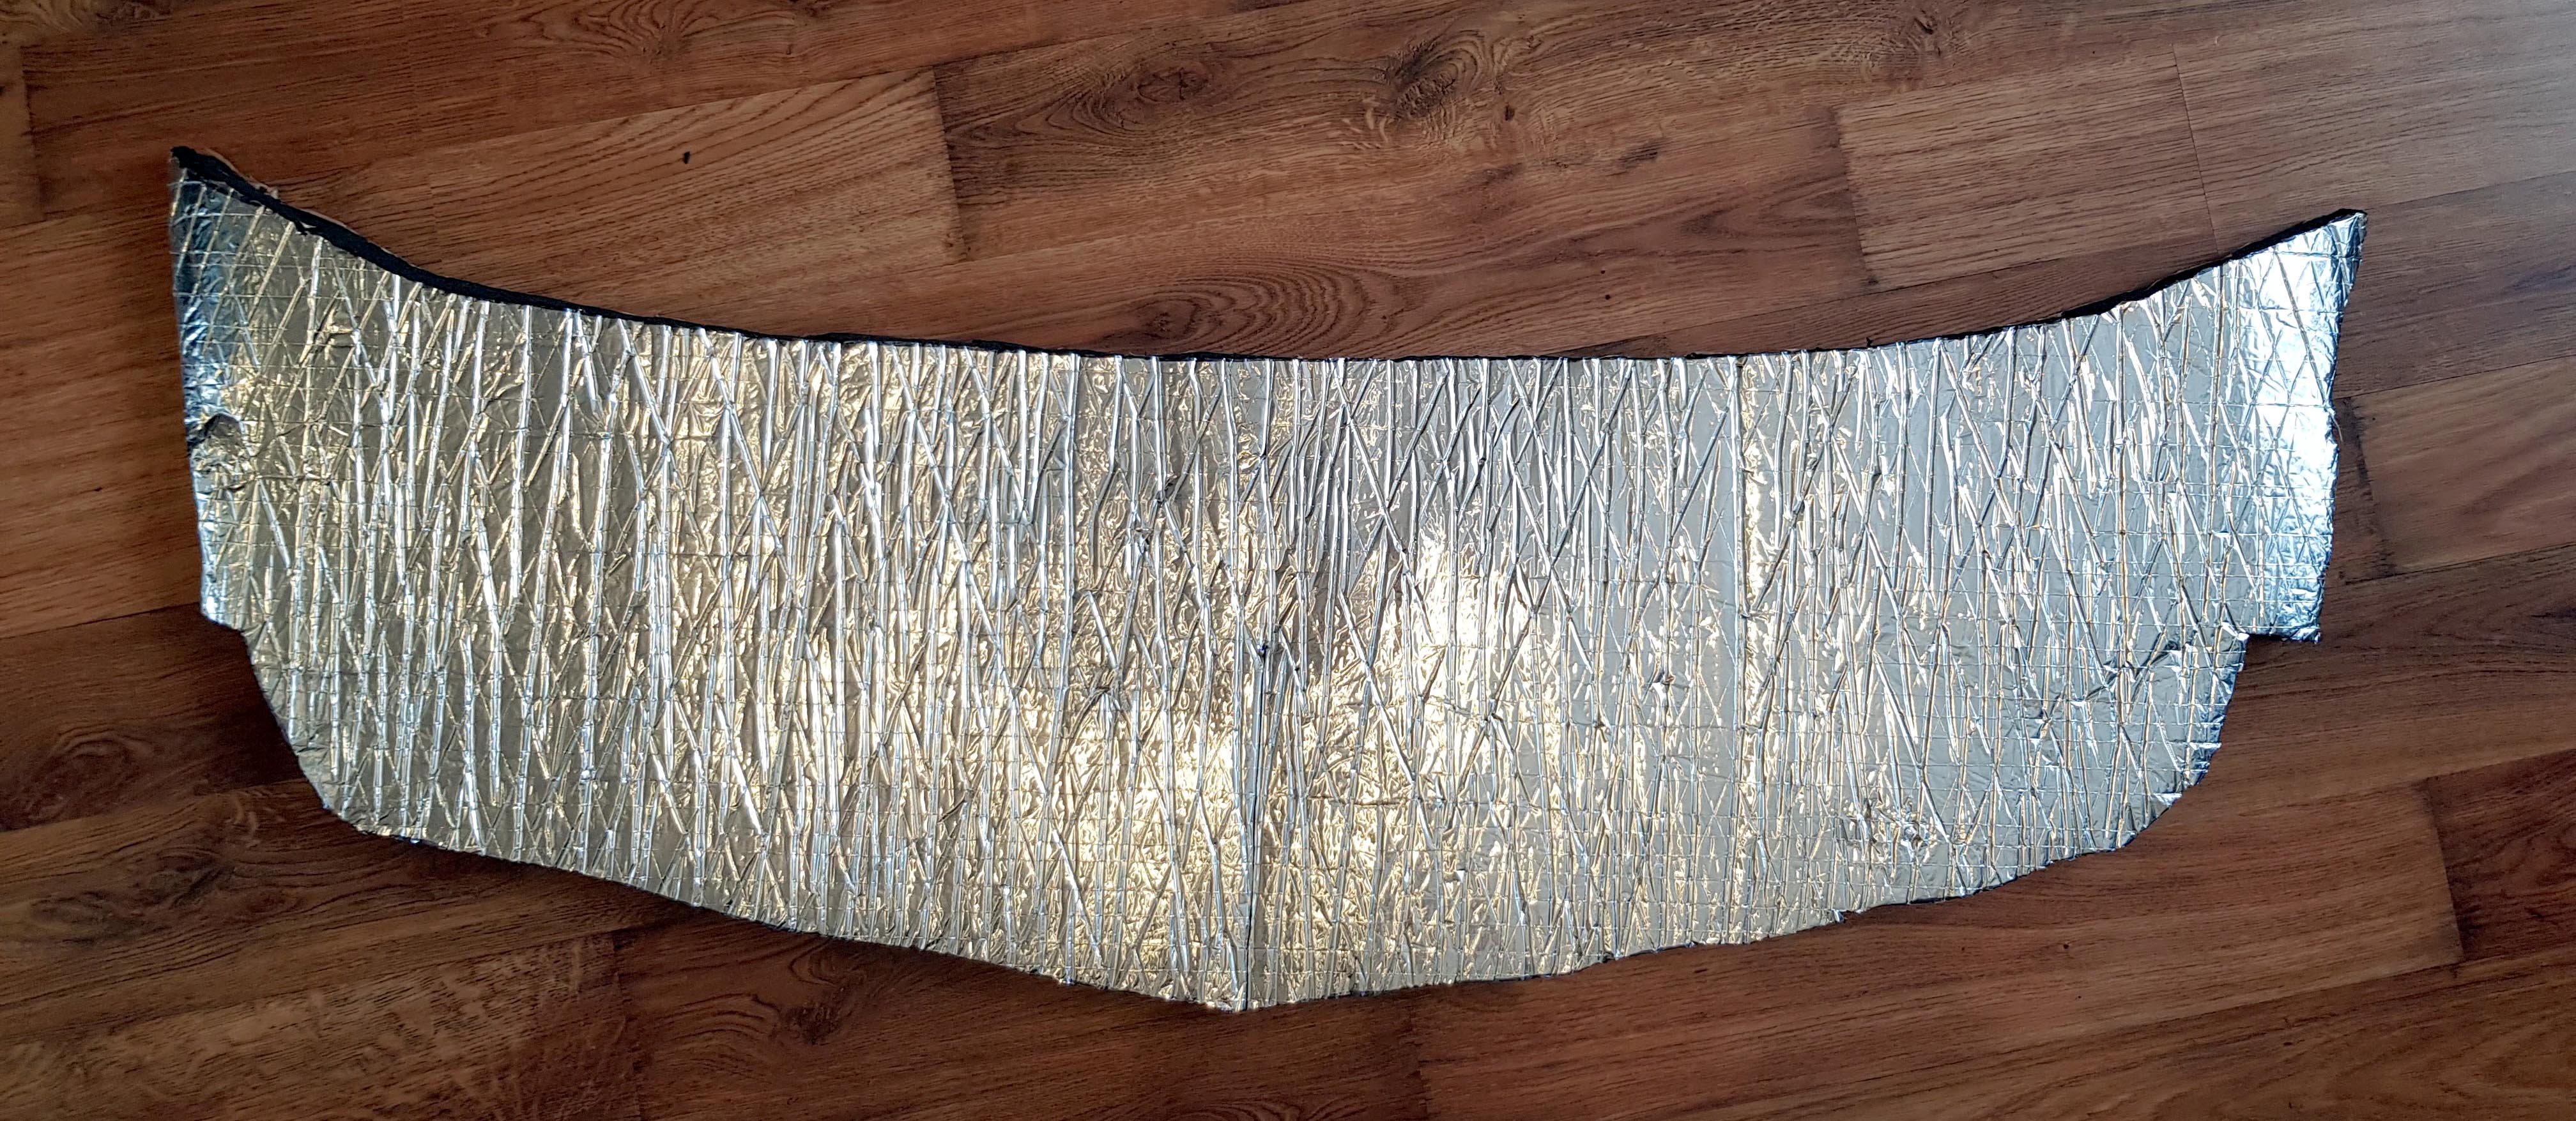
To clean up the rough foam edges, I used some aluminium tape, which I thought made it look more professional and factory fitted, rather than aftermarket:

And finally to the install. I decided to leave the small amount of sound insulation I had originally put there:
I wanted to keep the factory sound insulation, as I felt like the combination of the two made much more of a difference:
I used double sided foam tape to secure the bottom two clips, which seems to have done the job nicely.
I had to ditch the air duct that was on the other side, as it was hard to get it to fit back with the new sound deadening, but I don't really know exactly how much difference that was really making, I haven't noticed any difference not having it on.
The under bonnet sound deadening definitely made a noticeable difference to the engine noise, and it is much quieter.
As I have so much 20mm foam left, I'm going to try and fit the rest behind the engine on the firewall at some point. But this stuff is much harder to work with due to its thickness!
Sound Deadening Part 8: Wheel Arches

The factory sound deadening on the arch liner for comparison

I found that the combination of foam on the wheel arch and wheel arch liner meant the liner stuck out just a bit too far and rubbed on the wheel when I turned it full lock. So I had to take it off again and remove the foam from the liner and just have the foam on the arch instead.
I don't remember this making that much of difference to be honest, but that might be because of the extensive work I had already done making it quieter already.
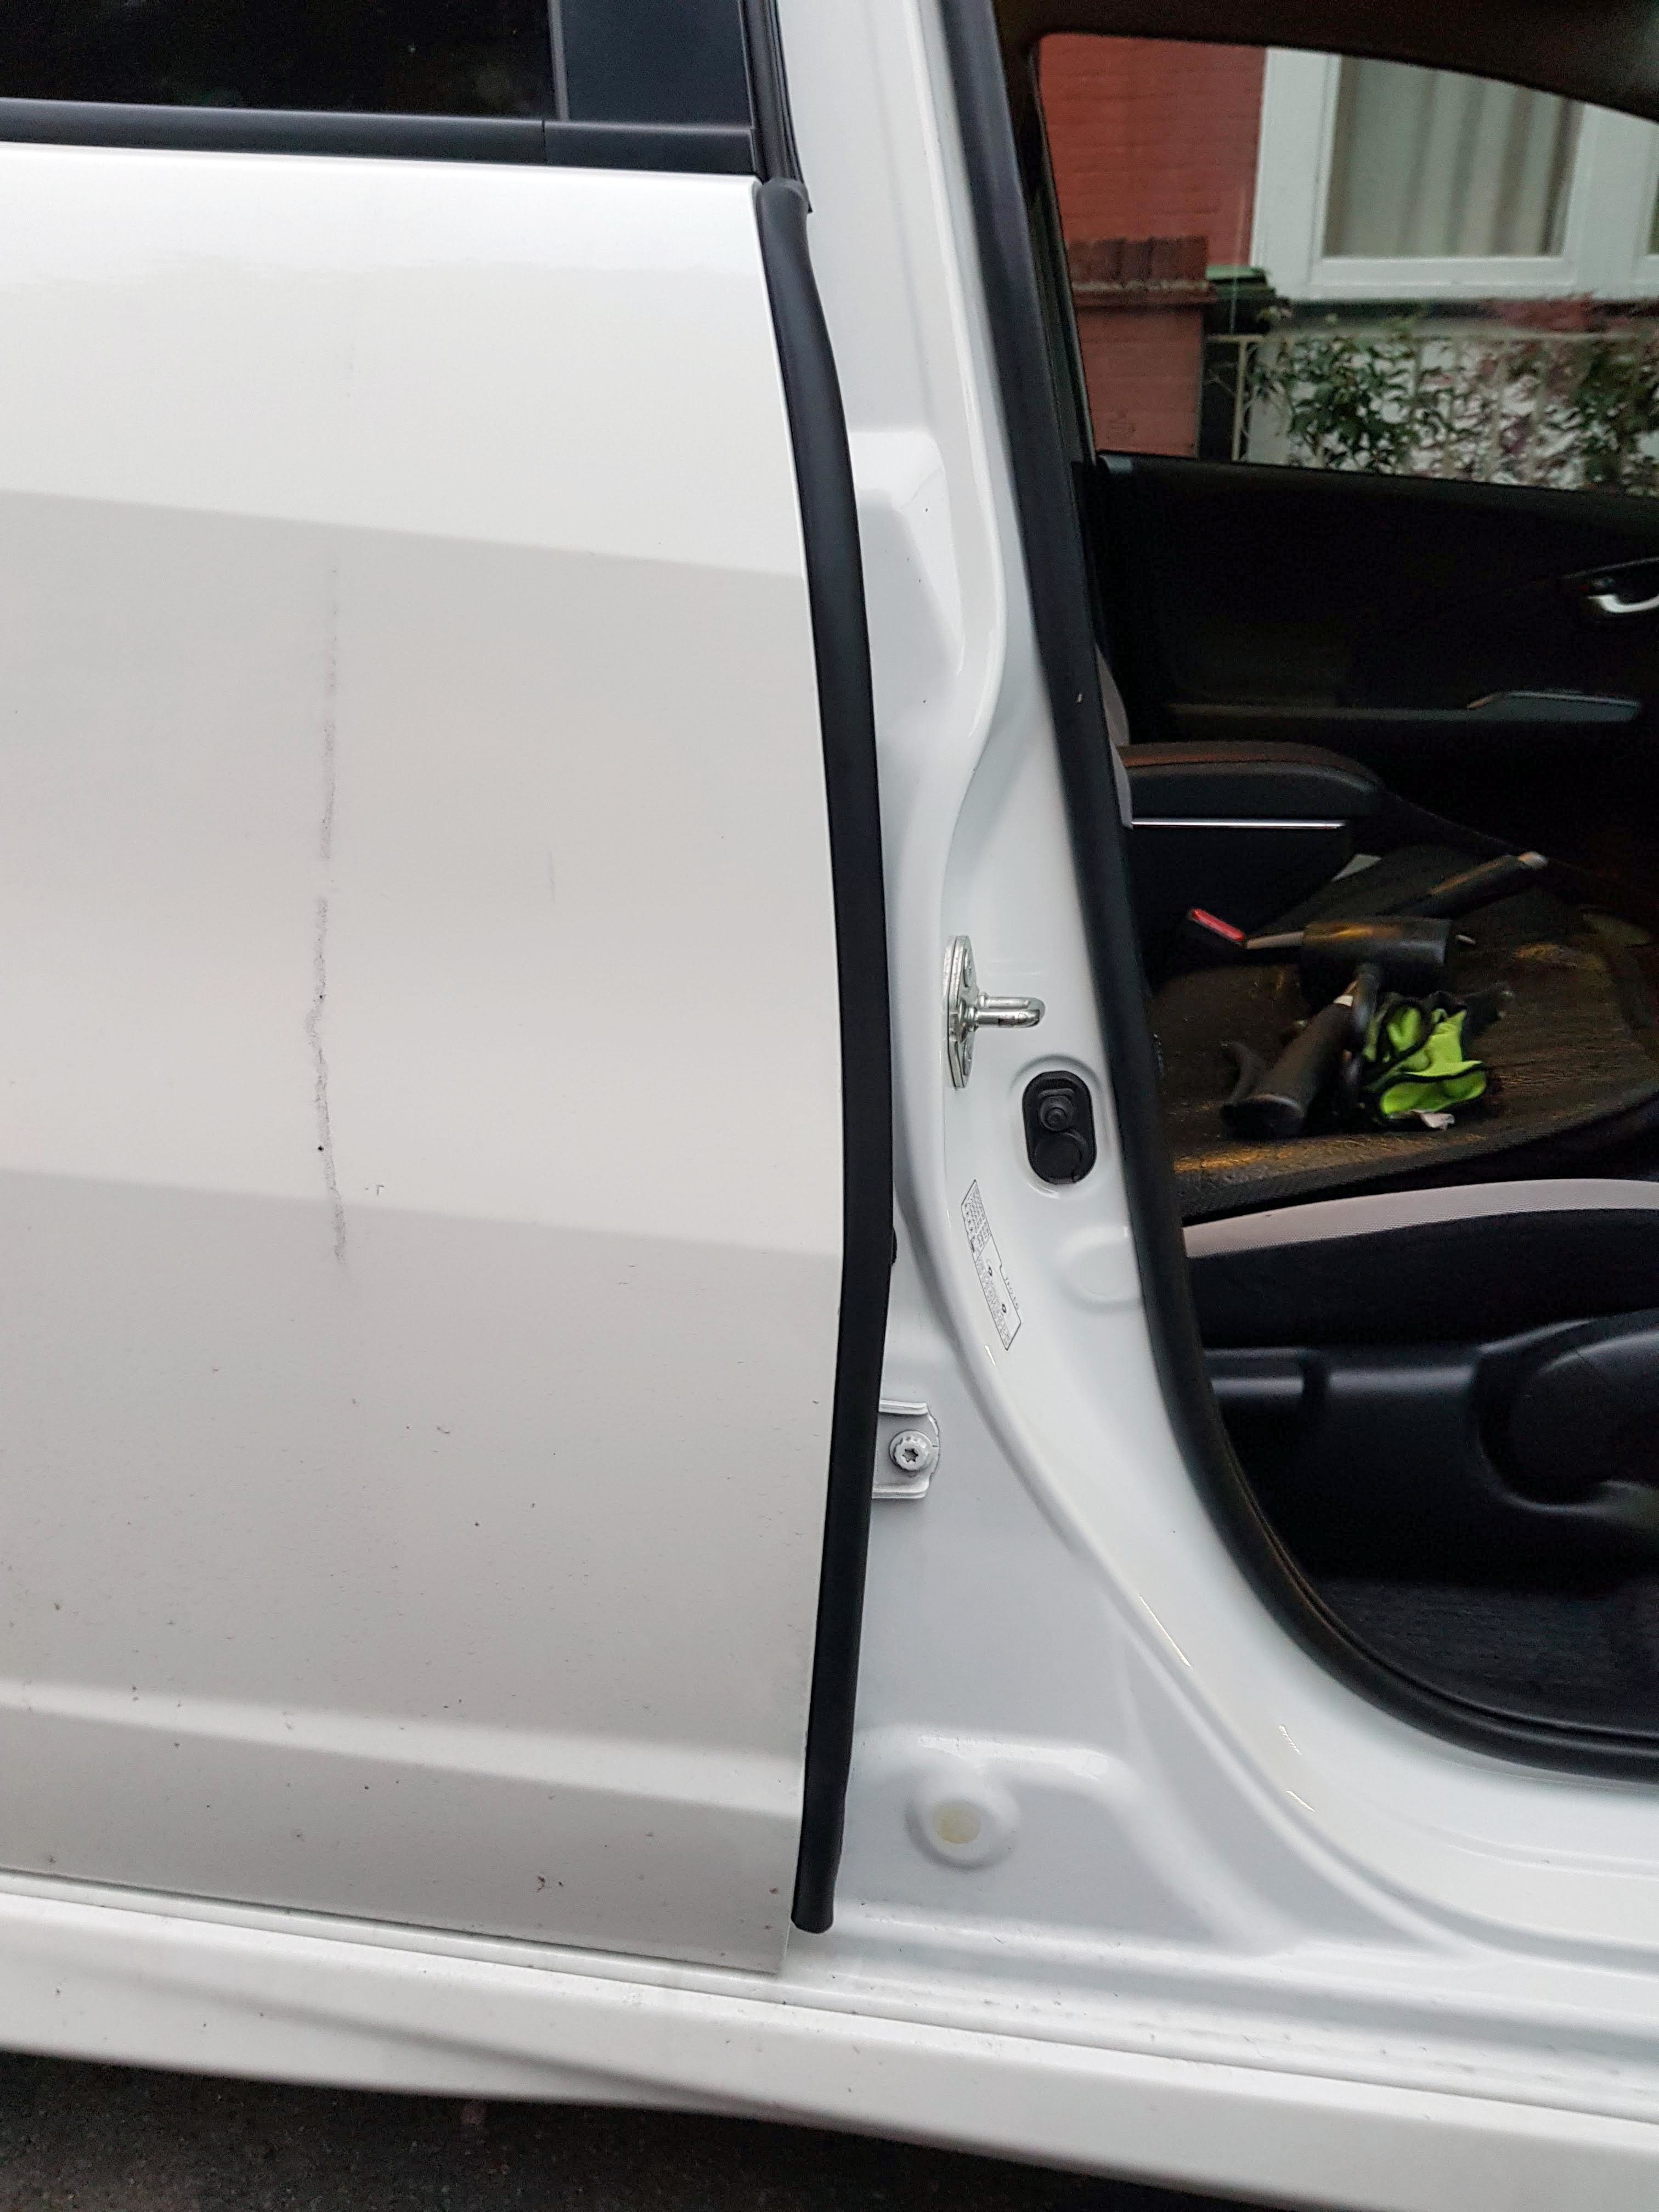
Sound Deadening Part 9: Door Seals
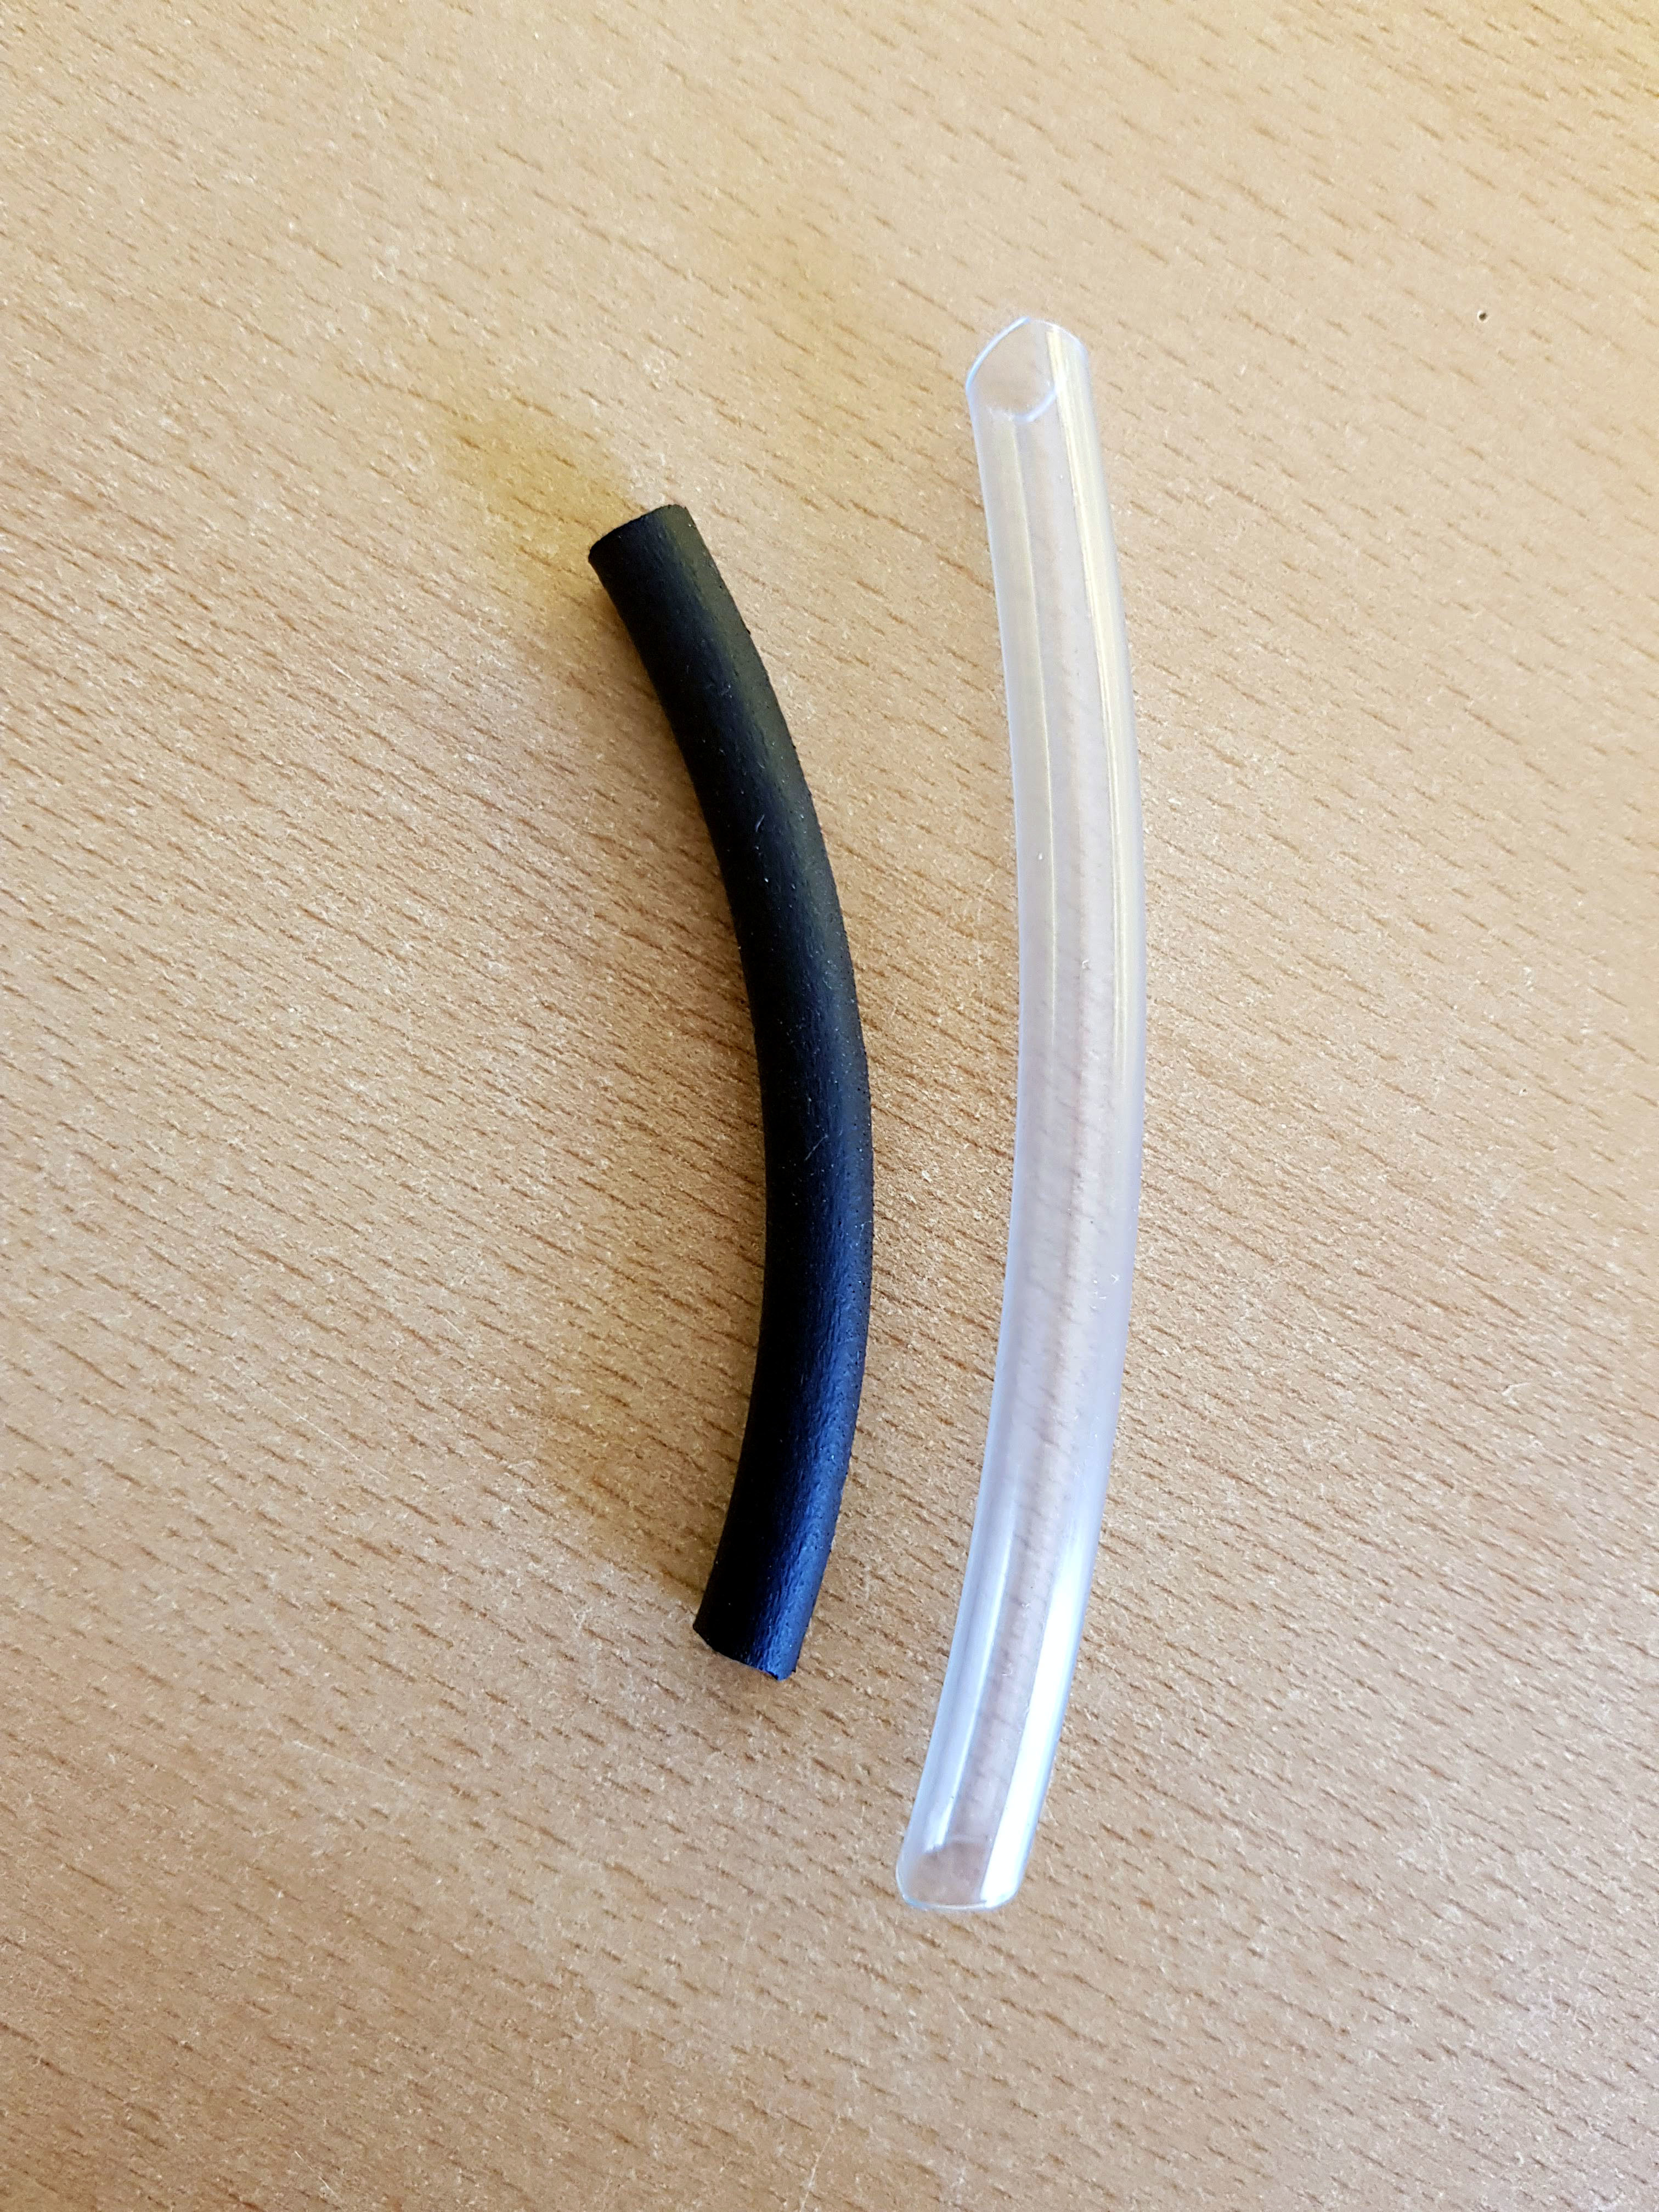
I can't remember where I got the idea from, but I bought some fish tank hose and some WD-40 silicone lubricant and fed the tube into the existing door seals to pack it out a bit more to create a tighter seal.
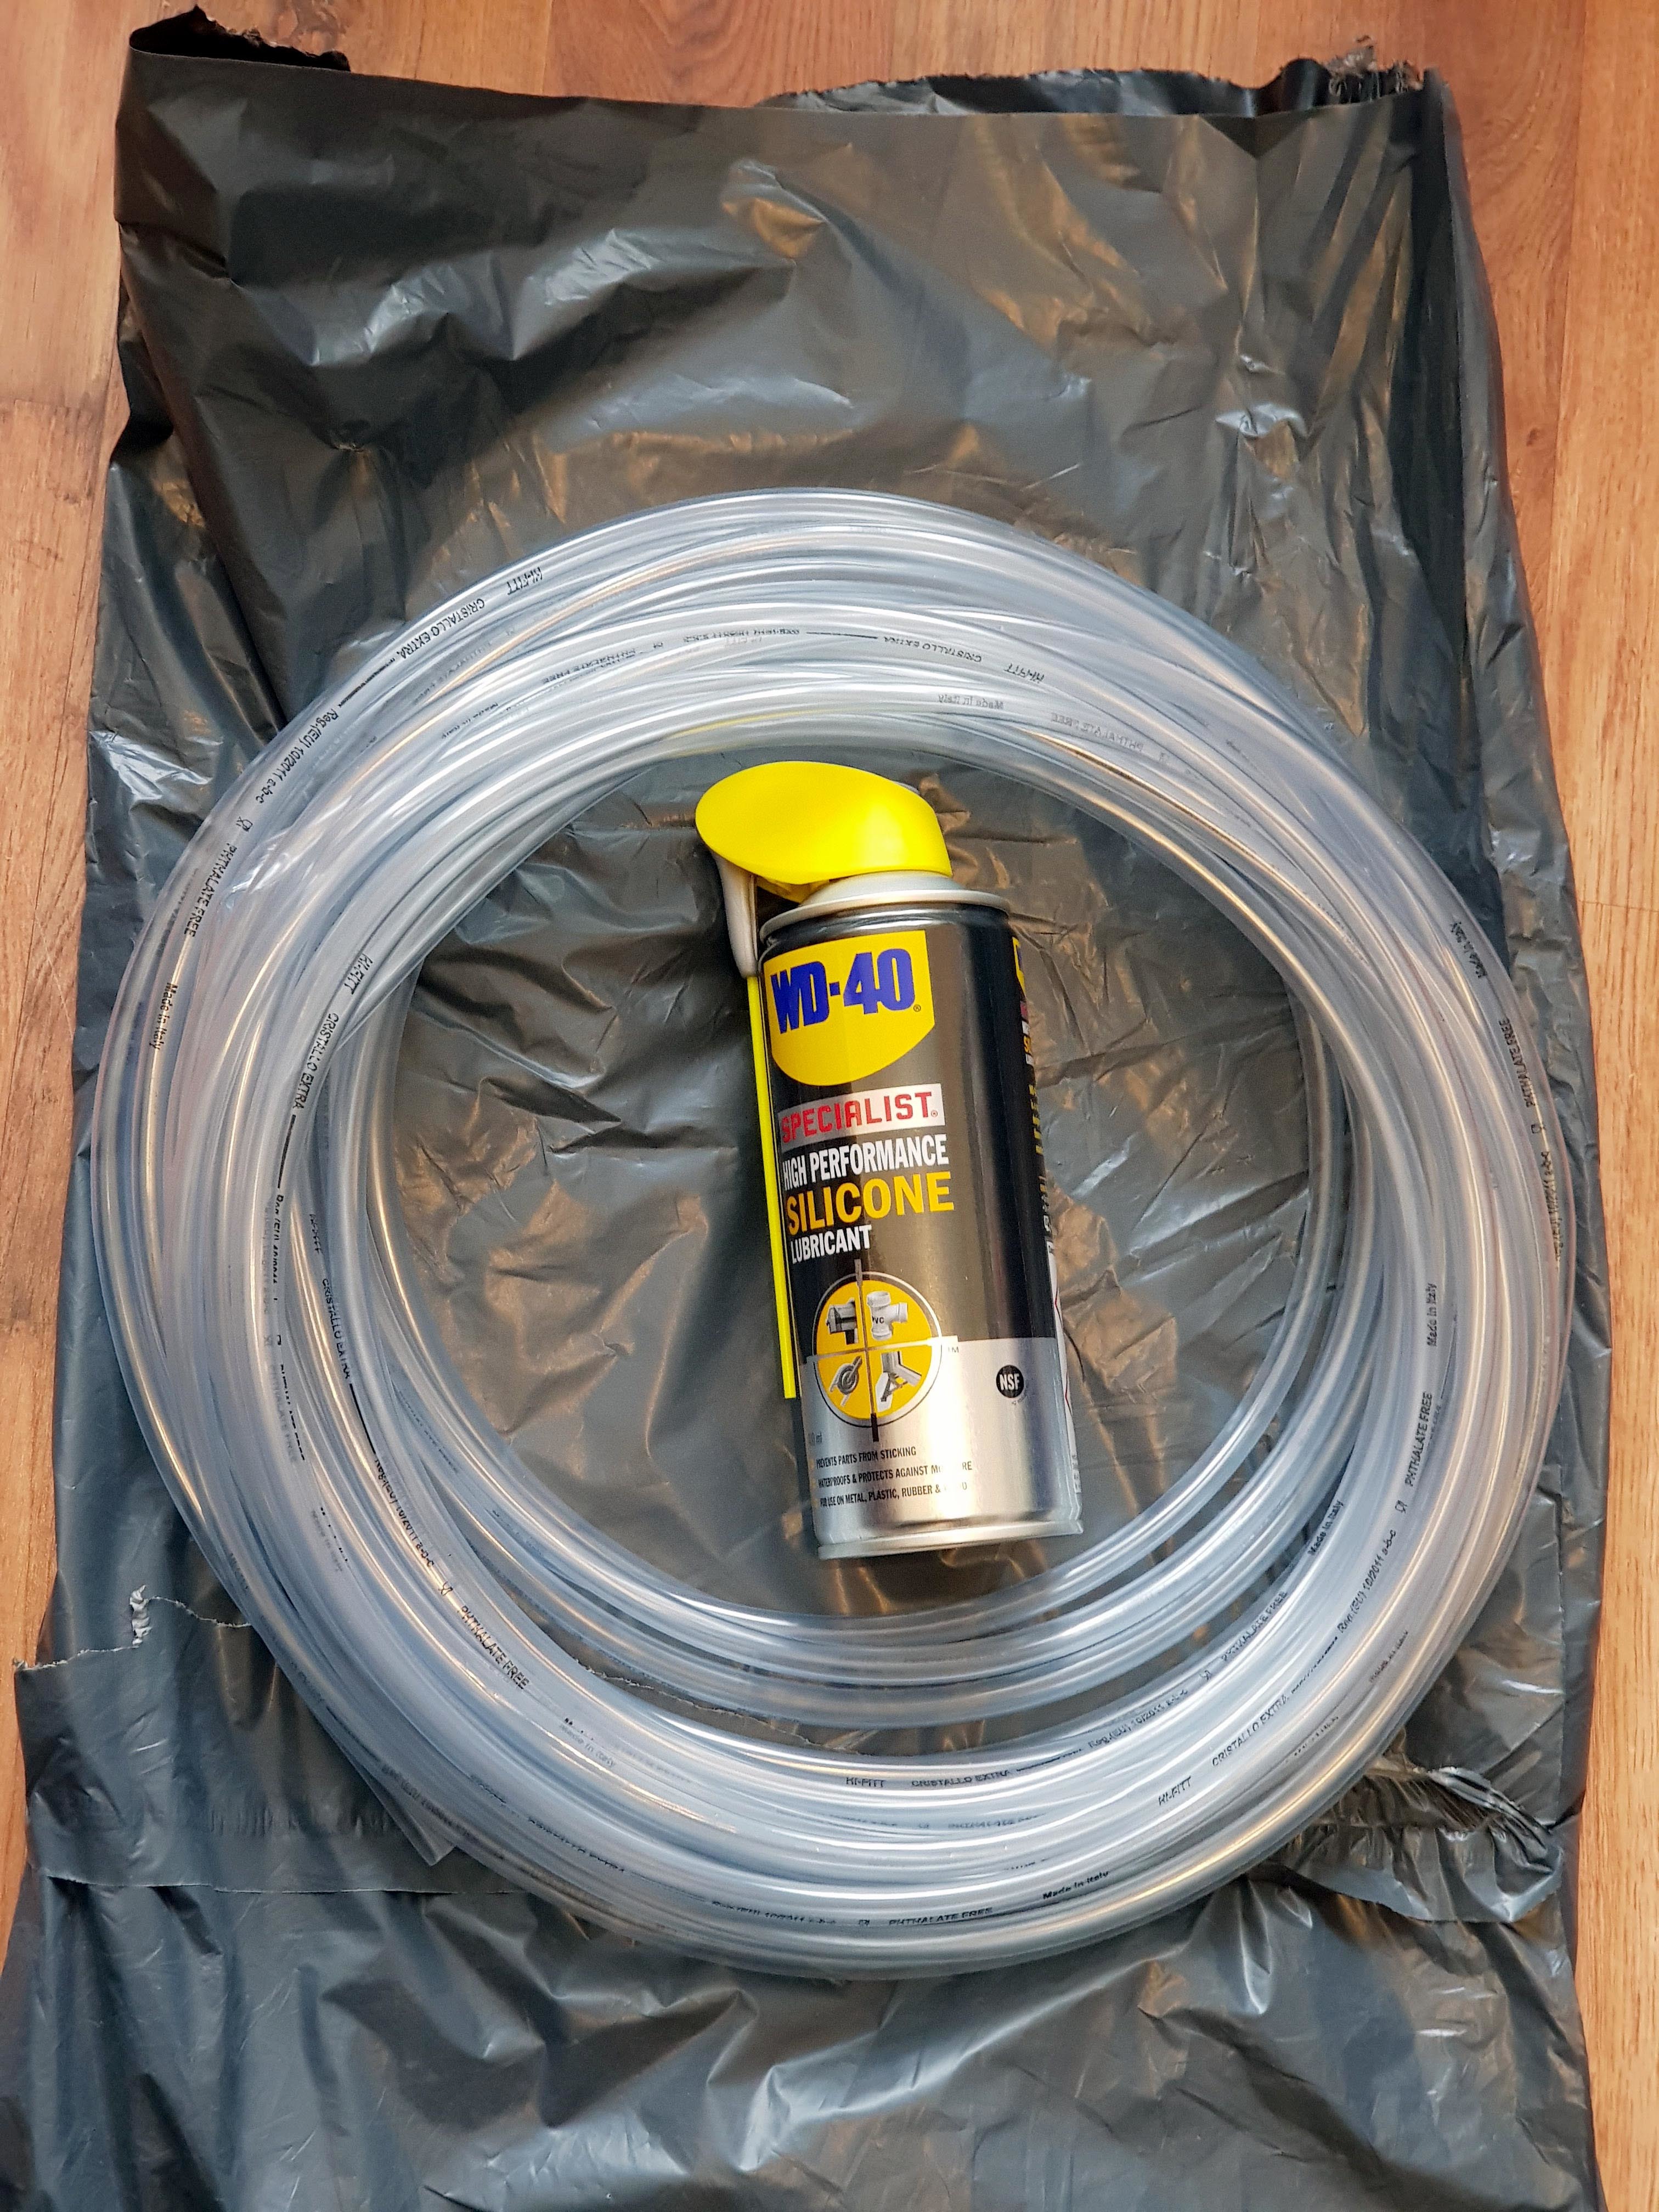
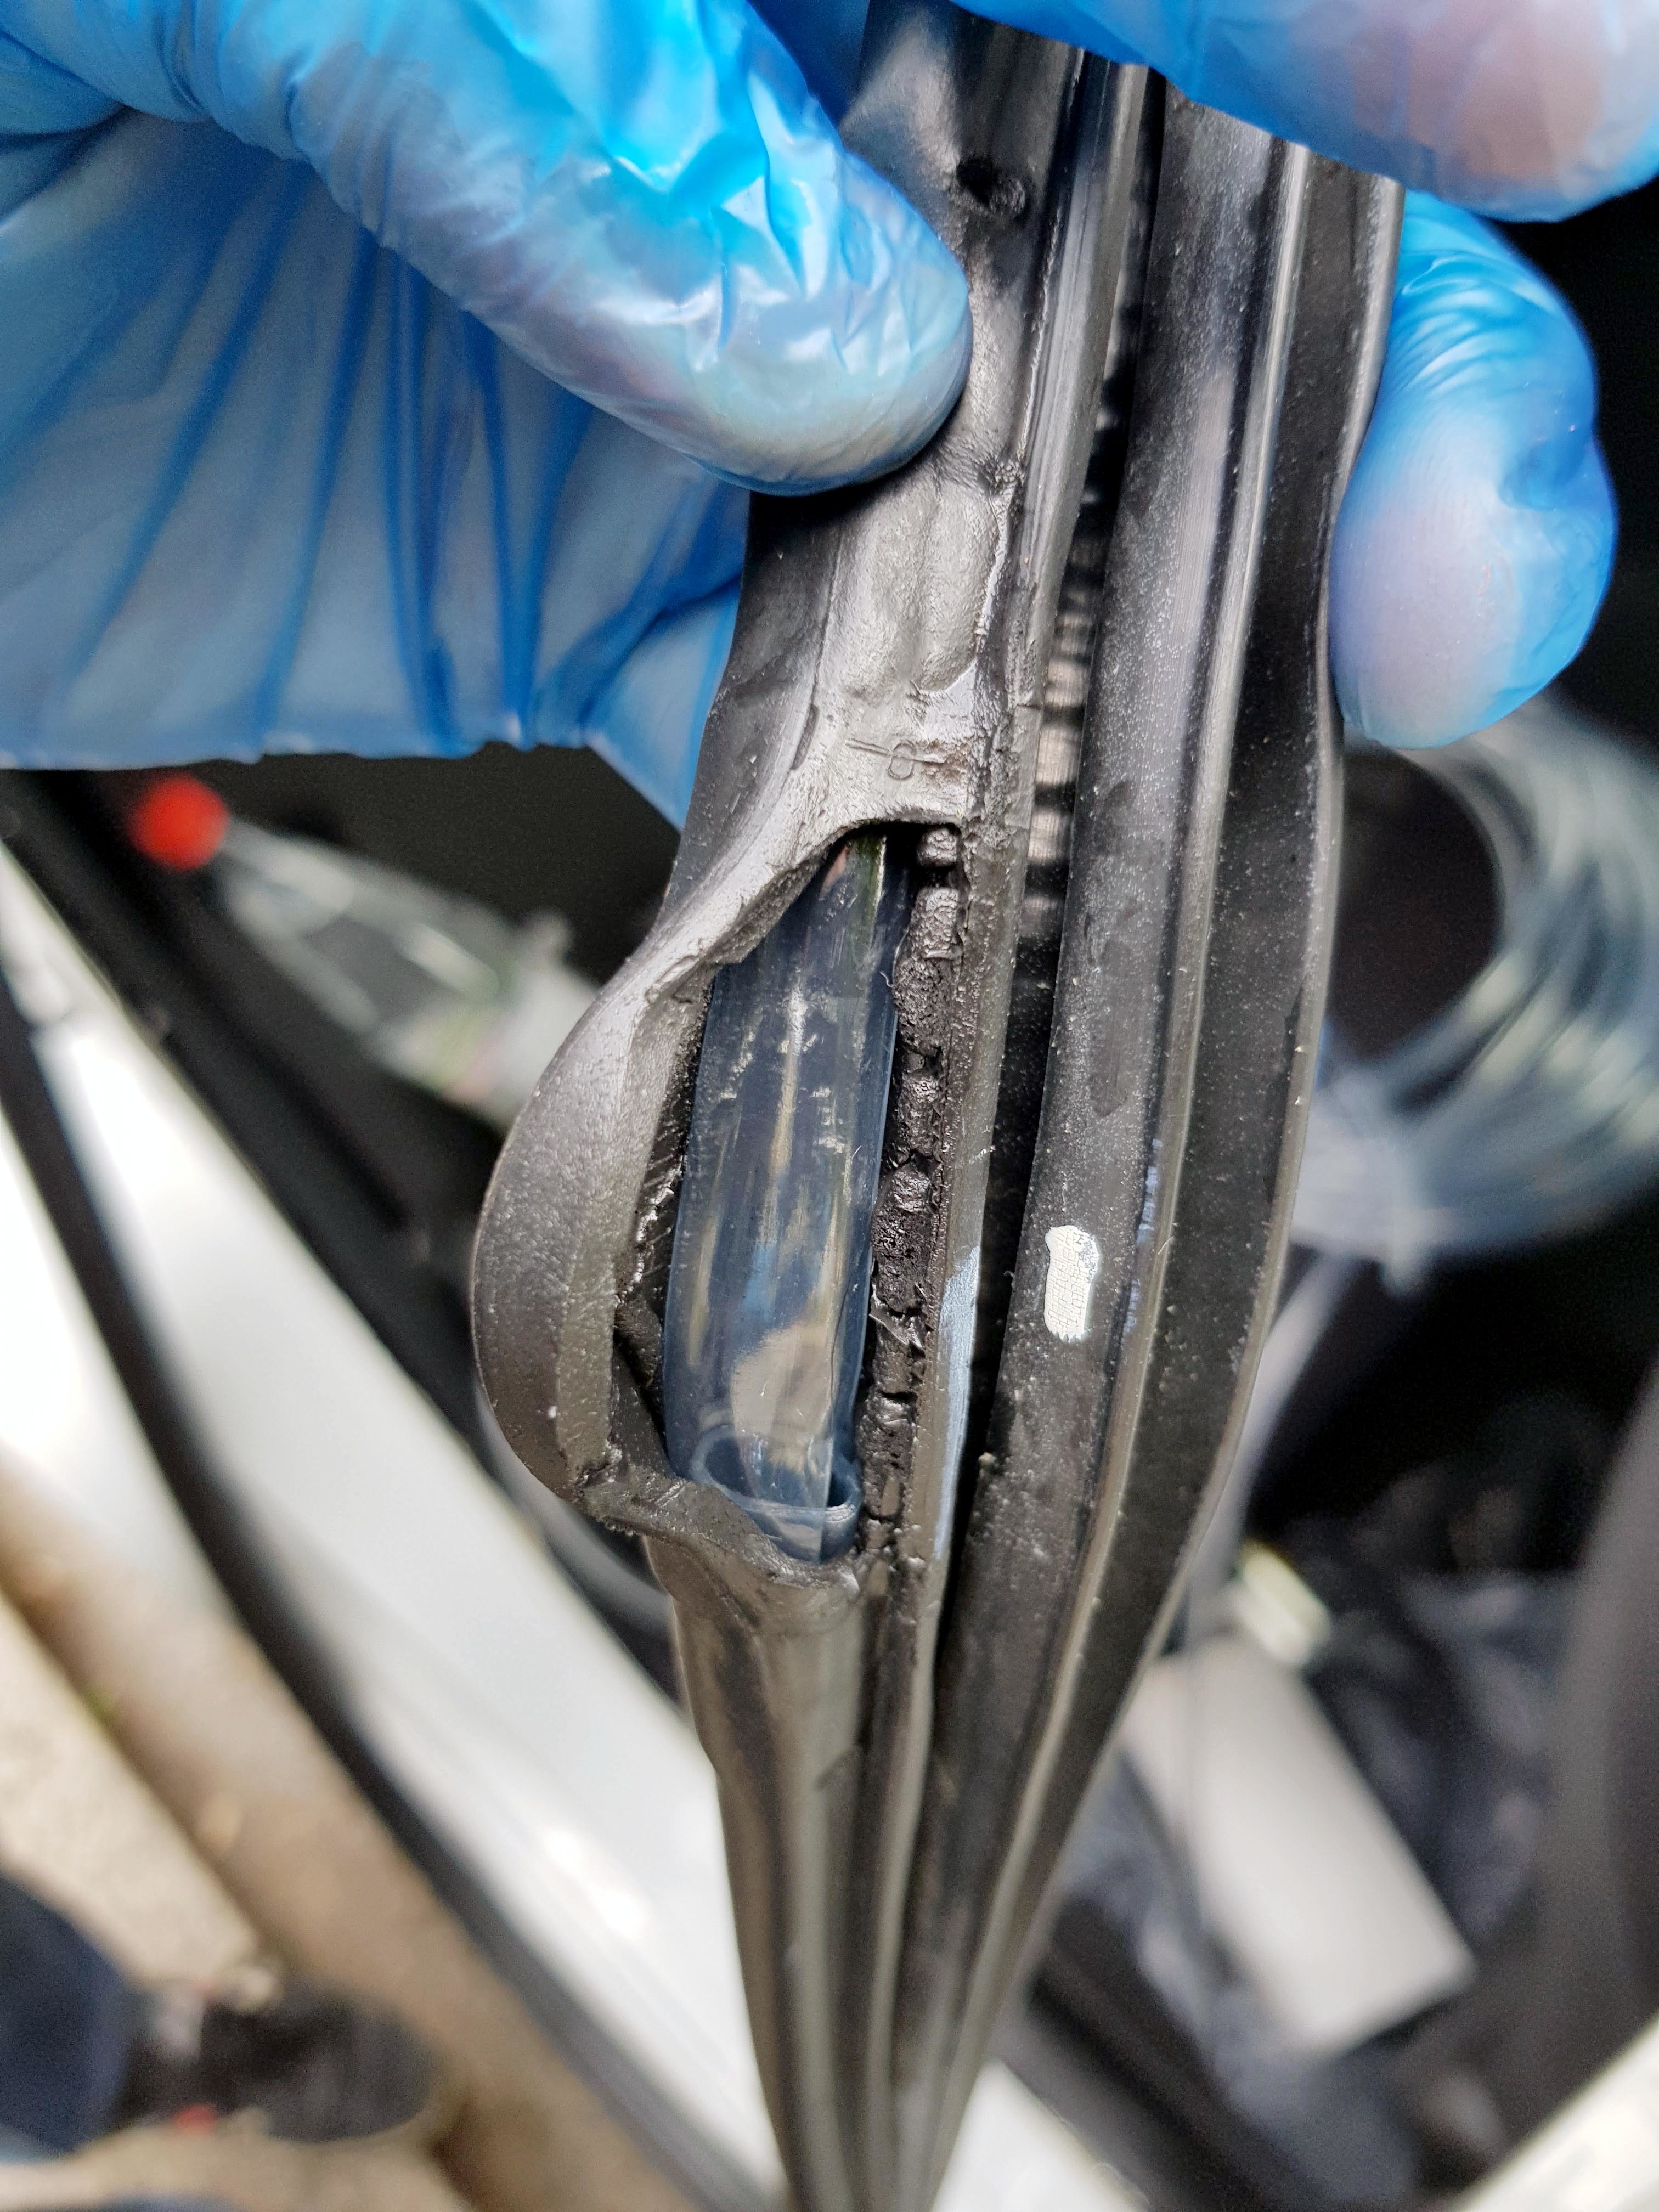
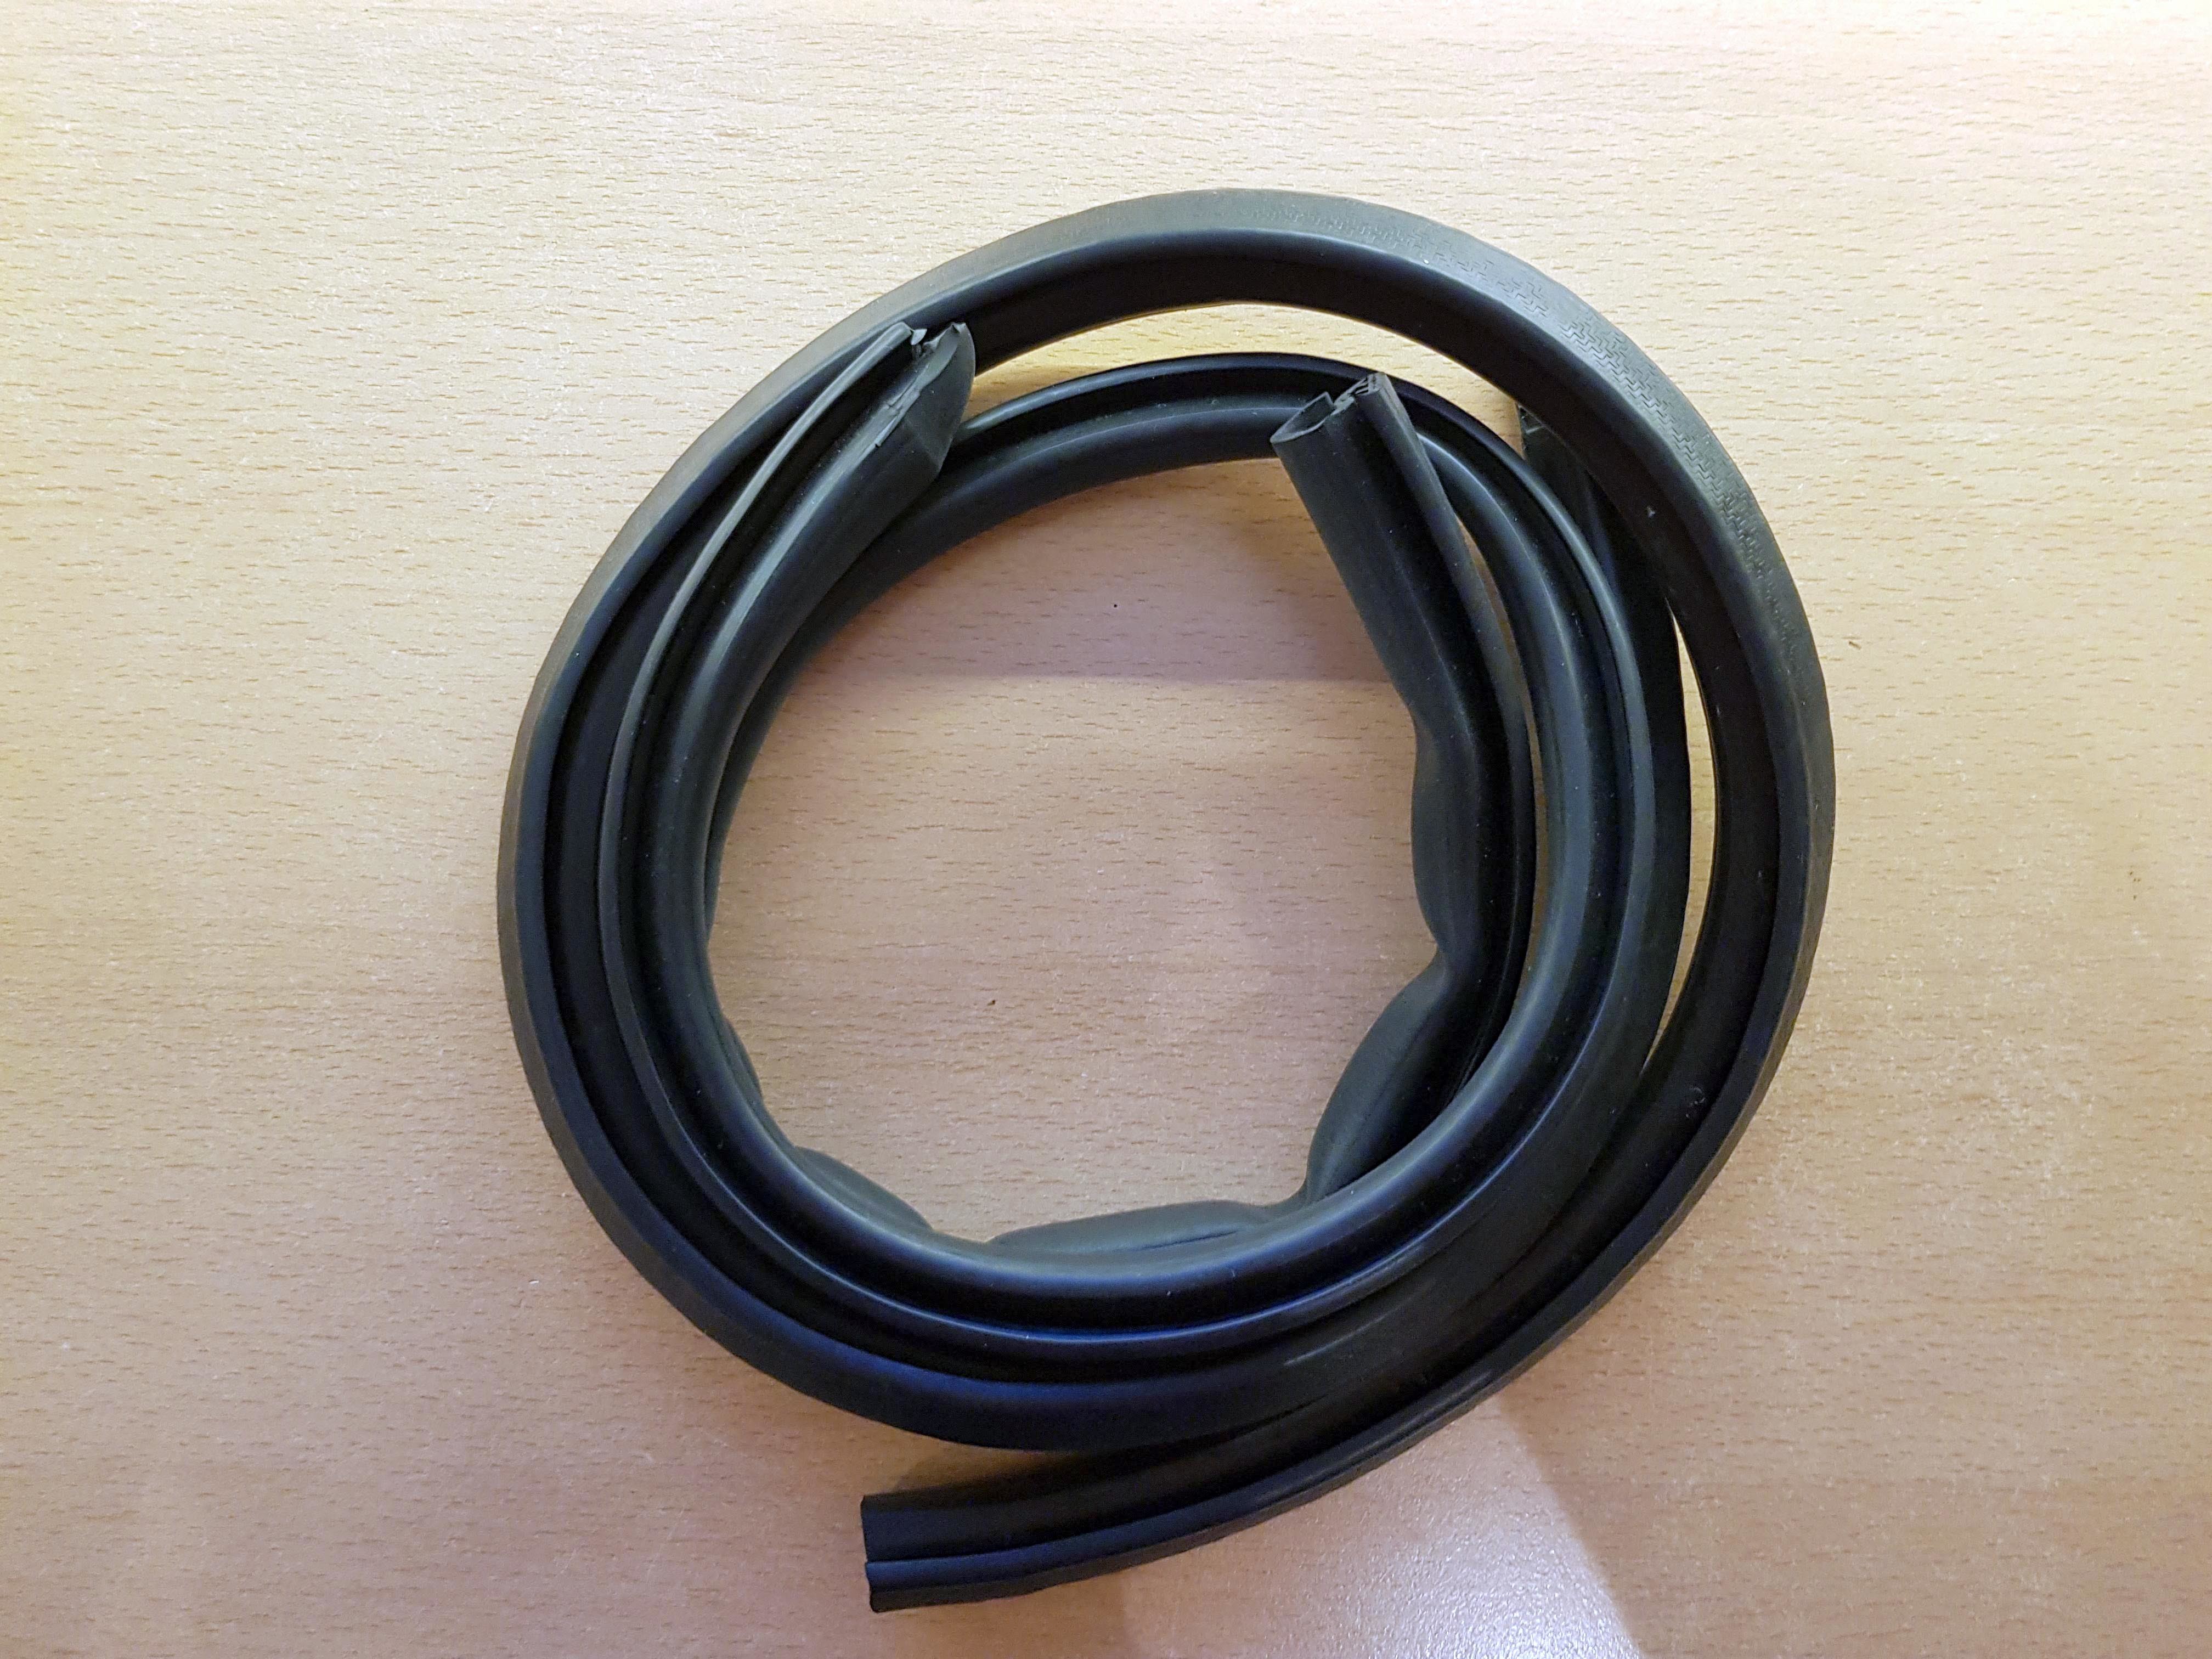
I think that either it didn't work well or I found a better solution, but I ended up buying 15 metres of 8mm thick Neoprene Sponge Black Cord and using the WD-40 silicone lubricant to feed it through the door seals.
I bought 8mm, but I think you could get away with 10mm


It worked great, and at first the door was a little hard to close, but after a bit of time the seal settled in and closed fine.
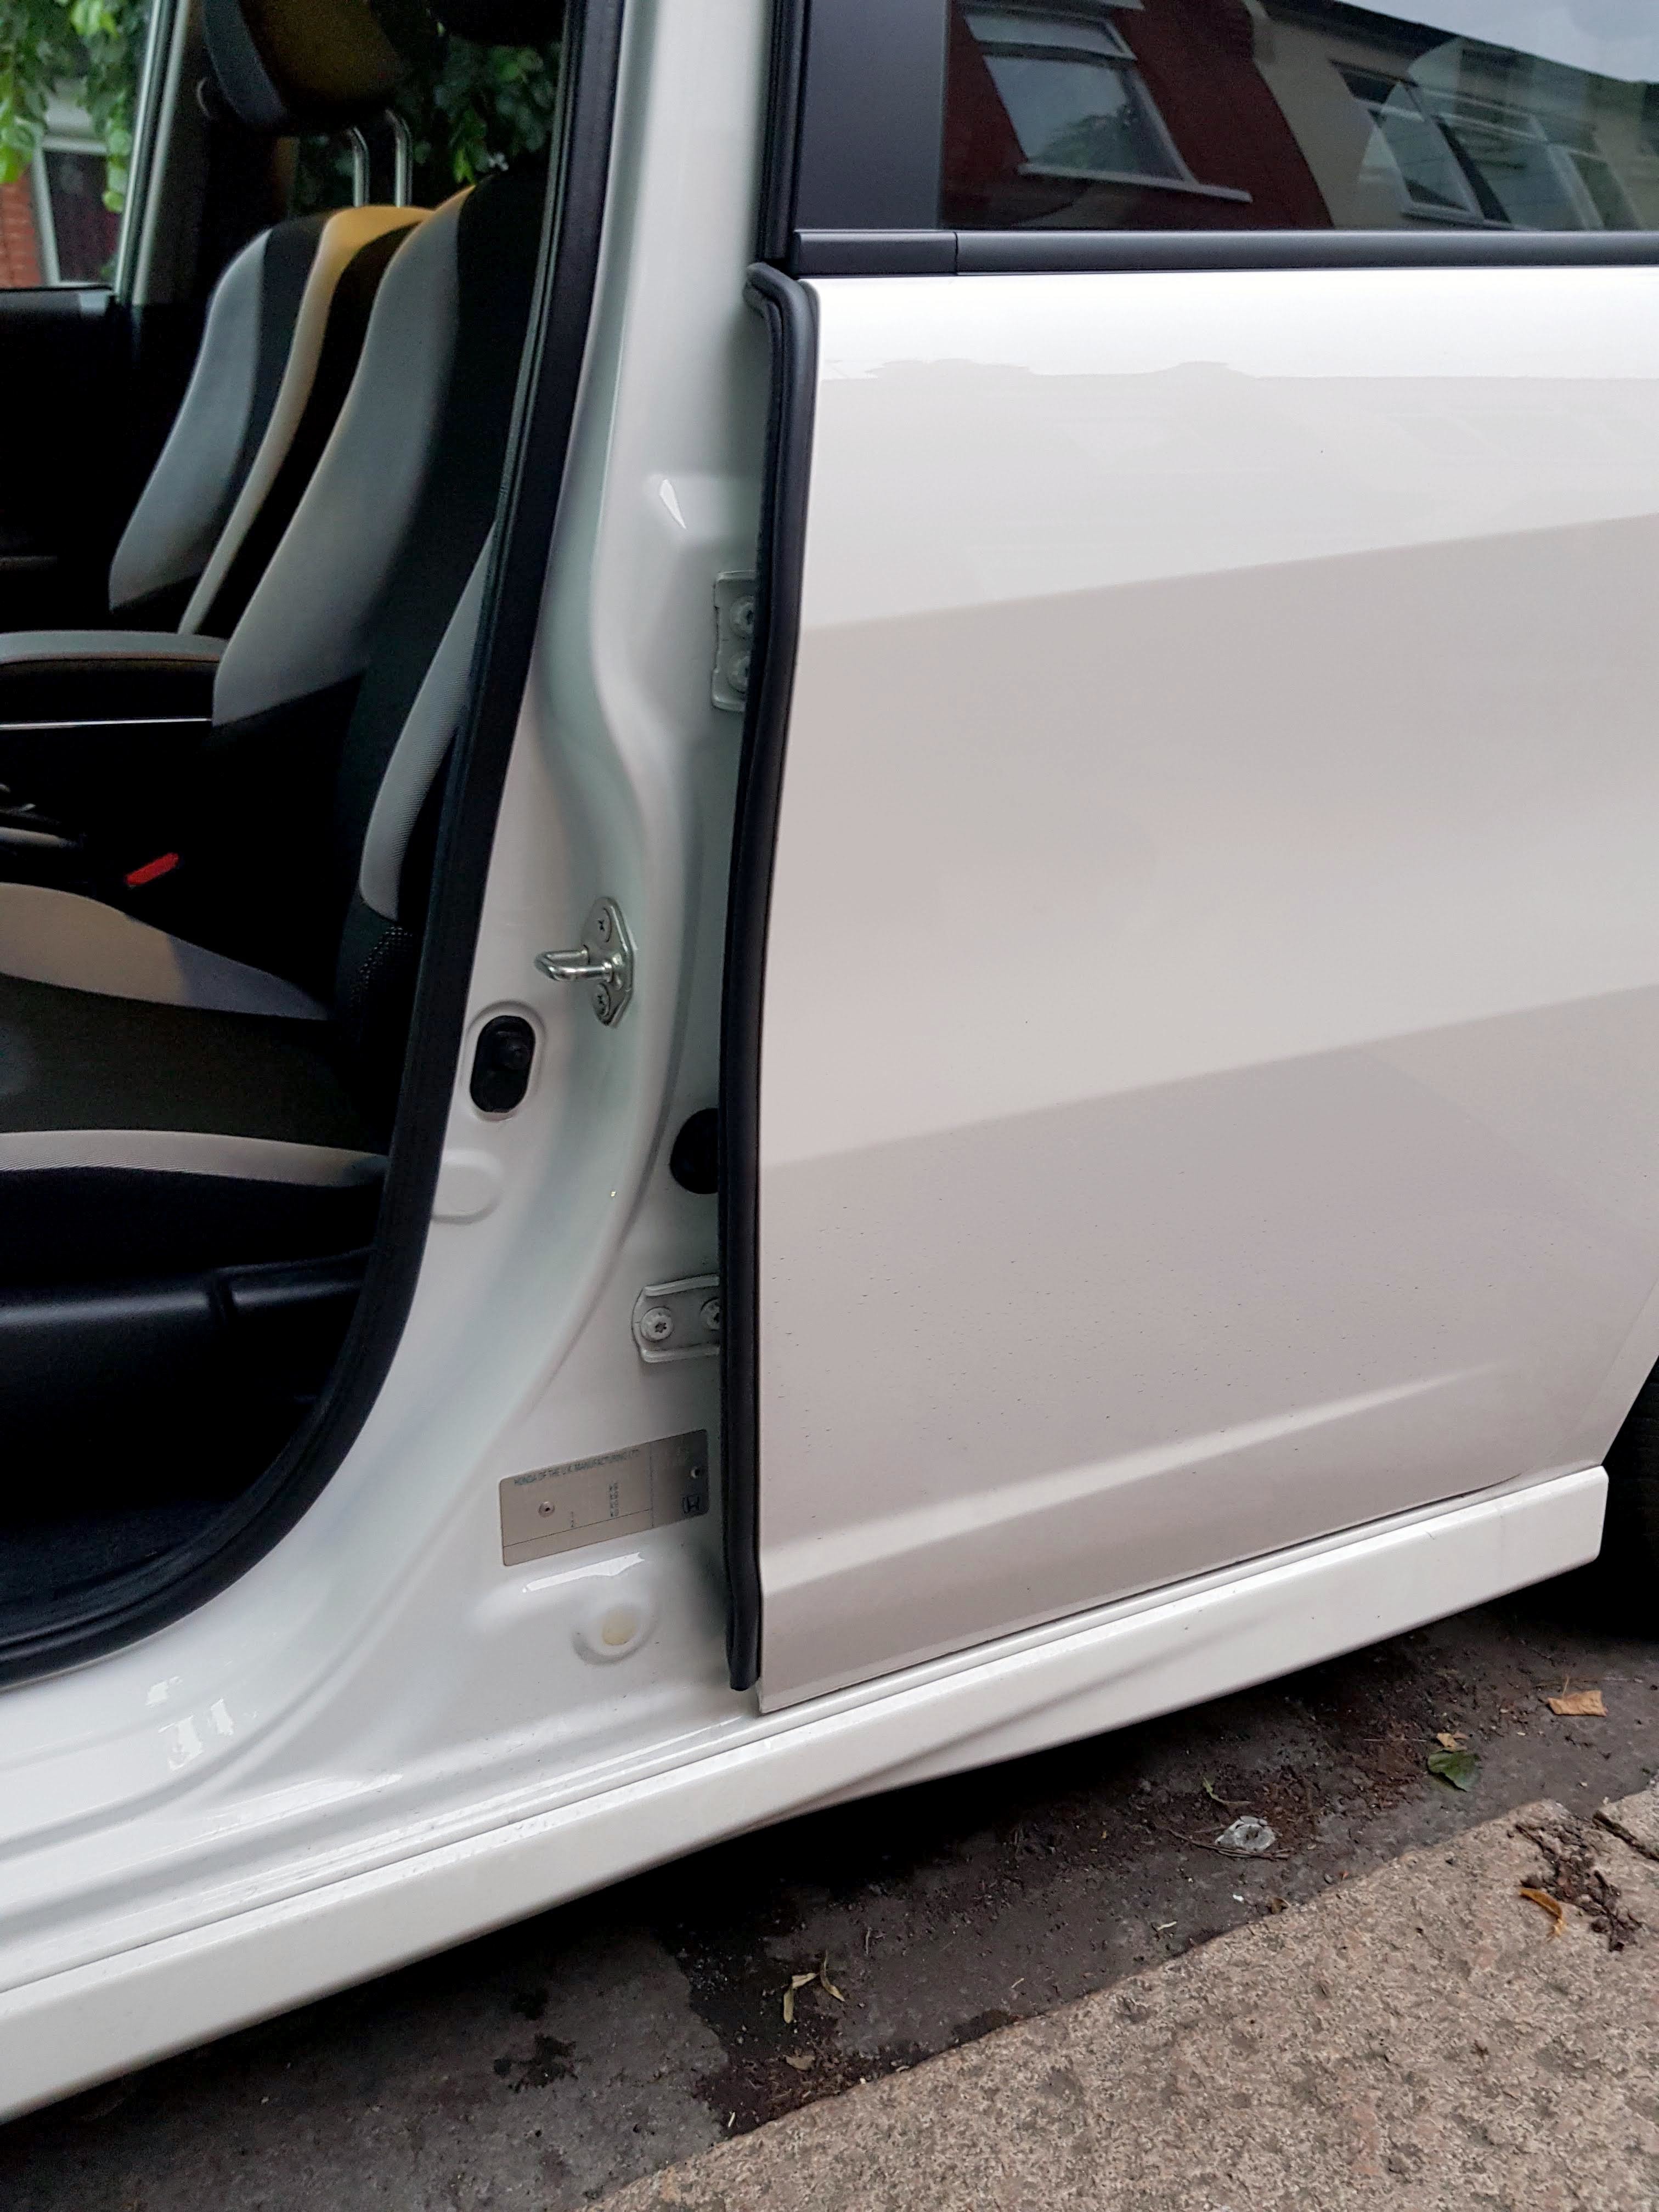
I also ordered a seal for the gap between the two doors. This was pretty easy to fit and is holding up well over 2 years later.

The one I purchased is no longer available, but this is basically the same product:
https://www.aliexpress.com/item/10000287853842.html
Sound Deadening Part 10: Making the plastics fit better
I ended up removing a some of the sound deadening because the plastics weren't fitting well. I think I ended up removing about 6kg worth.
I also removed the butyl that was on the pre existing sound deadening to save a bit of weight


The bucket full of removed sound deadening

Sound Deadening Part 11: The Final Verdict - What I learnt and Was it worth it?
There is surprisingly little official information about sound deadening online (mostly stuff from other DIY folk), and a lot of conflicting information as well.
So much I learnt from trial and error and just tonnes and tonnes of research. Including looking at Lexus car plans and seeing how they get their cars so quiet (mostly sound insulation, but also double paned windows, which I can't do anything about in the Jazz).
Here's the important stuff I learnt:
The Butyl layer doesn't need to cover everything. From research, only 33% coverage is really needed, anything more is just diminishing returns. So just putting squares on the areas that resonate most is all that is needed really.
Most of the people who need to cover every surface are people who enter professional car audio competitions, which is where most of the information on sound deadening largely comes from online. I found much better information when looking for sound deadening when converting a commercial Van into a mobile home.
The 3 layers of sound deadening:
Butyl: stops panel resonance/vibration
Closed Cell Foam: sound insulation absorber (and also a needed barrier between Butyl and MLV)
Mass Loaded Vinyl: Sound blocker (not absorber).
If I was doing it all over again, I would not use anywhere near as much Buytl, I would buy the thinnest Closed cell foam and focus on the coverage with the MLV, as the MLV is what really makes the difference when it comes to sound deadening, so the maximum amount of coverage with MLV is best, but MLV is the most expensive part, and it isn't self adhesive like butyl/CCF, so getting it to stick to surfaces is a pain.
Was it worth it?
No, no it wasn't worth it, given the cost (�500), time (100s of hours), added weight to the car (50-55kg) and amount of research and trial & error I had to go through to get to where I am now, it wasn't worth it.
But would I do it again with my next car, given what I now know and the experience I have?
Absolutely! The car is significantly quieter and nicer to drive and just feels so much more premium. Hearing the soft door thud every time I get in the car is so nice. And when I'm a passenger in any other car and hear the loud clang of the door closing and all the road noise that gets let it, it reinforces how much nicer it is with all the sound deadening. Motorway conversations are also so much nicer, no raised voices. The insulation also helps keep it warm in winter and cool in the summer.
So I guess it was worth it then! I just hope I don't have to do it all over again in a hurry that's all! I plan on keeping the Jazz for the foreseeable future.
Hopefully this wrapping up of the build helps anyone thinking of undertaking this themselves.
If anyone has any questions, please feel free to ask!
Hopefully it will notify me this time!
My only real gripe with the Jazz (apart from the lack of a decent powered version), is the road noise. The 2nd Gen is much better than the 1st Gen, but it's still very noticeable.
So I decided to embark on a mission to try and fix that.
Sound Deadening Part 1: The Floor
I had experimented with Dynamat sound deadening on my old Civic a decade ago.
Prices of Dynamat have risen a lot, as it's a US product. But the UK has a version called Silent Coat which is basically the same, just a lot cheaper.
I bought two boxes of the 40 sheet bulk pack, and set to work on the Jazz, stripping the interior, which was surprisingly easy to remove.
I used this service manual to help me remove the interior properly without breaking anything: Honda Jazz / Honda Fit GE8 2009 onwards Online Repair Manual
Main Interior removed apart from the dash, as I didn't want to open that can of worms!!
End of Day 1. Got the bulk of the sheets down:
End of Day 2. All the gaps and fiddly bits done, and main interior complete:
Sound Deadening Part 2: Car Door Speaker Upgrade
I thought this was a good time to upgrade the standard speakers. I didn't want to go too crazy, as theres no point in running anything too powerful if I'm still using the stock headunit. And I didn't want to spend money on a new headunit, amps and sub. So I got two pairs of Alpine SXE-1725S speakers, as recommended in this build: http://gafferlicious.com/jazz.html, cost me �55 for the pair from DynamicSounds.
I did a lot of experimenting with the speaker mounts to get them to work with the new speakers and fit the door card.
The guide above said to trim the Alpine speakers rather than the modify the stock speakers. But I felt that I would rather cut the stock speakers up than my brand new ones! Especially if I decided later on down the line that I wanted to go all out and get a better sound system, as I could at least sell them if I hadn't cut into them!
So I ripped out the original speaker cone, and to make it fit properly, i removed the foam and sawed off the plastic ring, so I could screw the new speaker into the plastic:
I then wired the original Honda plug to the speakers, to retain the use of original factory plugs:
I then quickly realised the door card wouldn't fit over the speakers with the metal screw spacers, so I had to come up with a different solution.
For the next two speakers, I snapped off the plastic ring, rather than using a saw, and I retained the original foam ring, and cut spaces for the screws, and I used a metal file to slightly shorten the screws, so they didn't poke out the other side.
As for the two I had already cut and thrown the original foam, I used some adhesive foam strip I had left over from my spoiler install, and I used it instead to make the spacer:
It doesn't look pretty, but it does the job!!
They sound much nicer than the stock speakers, but they could still be better! But I'm happy with them for now. I generally spend most of my time listening to audio books in the car, so for the times I do actually listen to music, these speakers will do!
Sound Deadening Part 3: The Car Doors
After doing the main interior, I found myself not having enough Silent Coat left to do the doors and roof. So I had to order another bulk pack of 40 sheets.
To complement the dampening sheets, ordered 24 sheets of 10mm Closed Cell Foam for the second layer of sound deadening. Though I later found out it works out much cheaper to order them in big rolls rather than individual sheets.
Getting the door cards off is fairly simple process, but working inside the doors wasn't!
It took me about 4-5 hours per door, so I spread them out over a few days, doing a door a day:
I started by doing the rear doors first, then did the front doors. So if I made any mistakes, at least they would be on the rears, and I would learn from them when it came to do the front doors.
Outer layer of Silent Coat on first
Followed by the layer of Closed Cell Foam
Then the inner layer of Silent Coat, covering any open gaps or holes (I circled all the holes I needed to keep with permanent marker to make it easier)
Then some Silent Coat and Closed Cell Foam applied to the door card for the final layer of Silence.
In a lot of the guides I've seen, it has said to replace the moisture barrier membrane with just using the sound dampening material, but I decided to keep it for two reasons. 1 it's a pain to clean that stuff off, and it's not causing any harm just leaving it there, and 2 if a window got broken, any company that replaces it, will have to cut the and remove the silent coat to get inside, and they mighty not put it back the same way, if at all, so by keeping the membrane, I know I won't be getting any leaks.
I then did the Rear Right door next:
The Front doors were a little trickier, as there was this box in the door card, which I believe is for added strength, but I managed to work around it.
Front Right Door:
I used paper to make a template that would fit the hole exactly
Door Card Before:
Door Card After:
Though I did have to remove the big bit of foam in the lower part, as the door card wouldn't fit back with it on, so I used Silent coat instead.
I used the stock white sound deadening from the door card to fill the hollow boxes in the door cards, to stop any resonating, which worked a trick!
Front Left Door:
Didn't make the same mistake with the foam on this door card:
The doors made a really big difference to the sound in the car, and the audio quality was much better as well!
Sound Deadening Part 4: Firewall and Front Fenders
So I decided to go a bit further with the sound deadening and try and target the harder to get to areas I felt were letting in noise.
Those being behind the engine (firewall) letting in engine noise, and behind the front fenders letting in road noise.
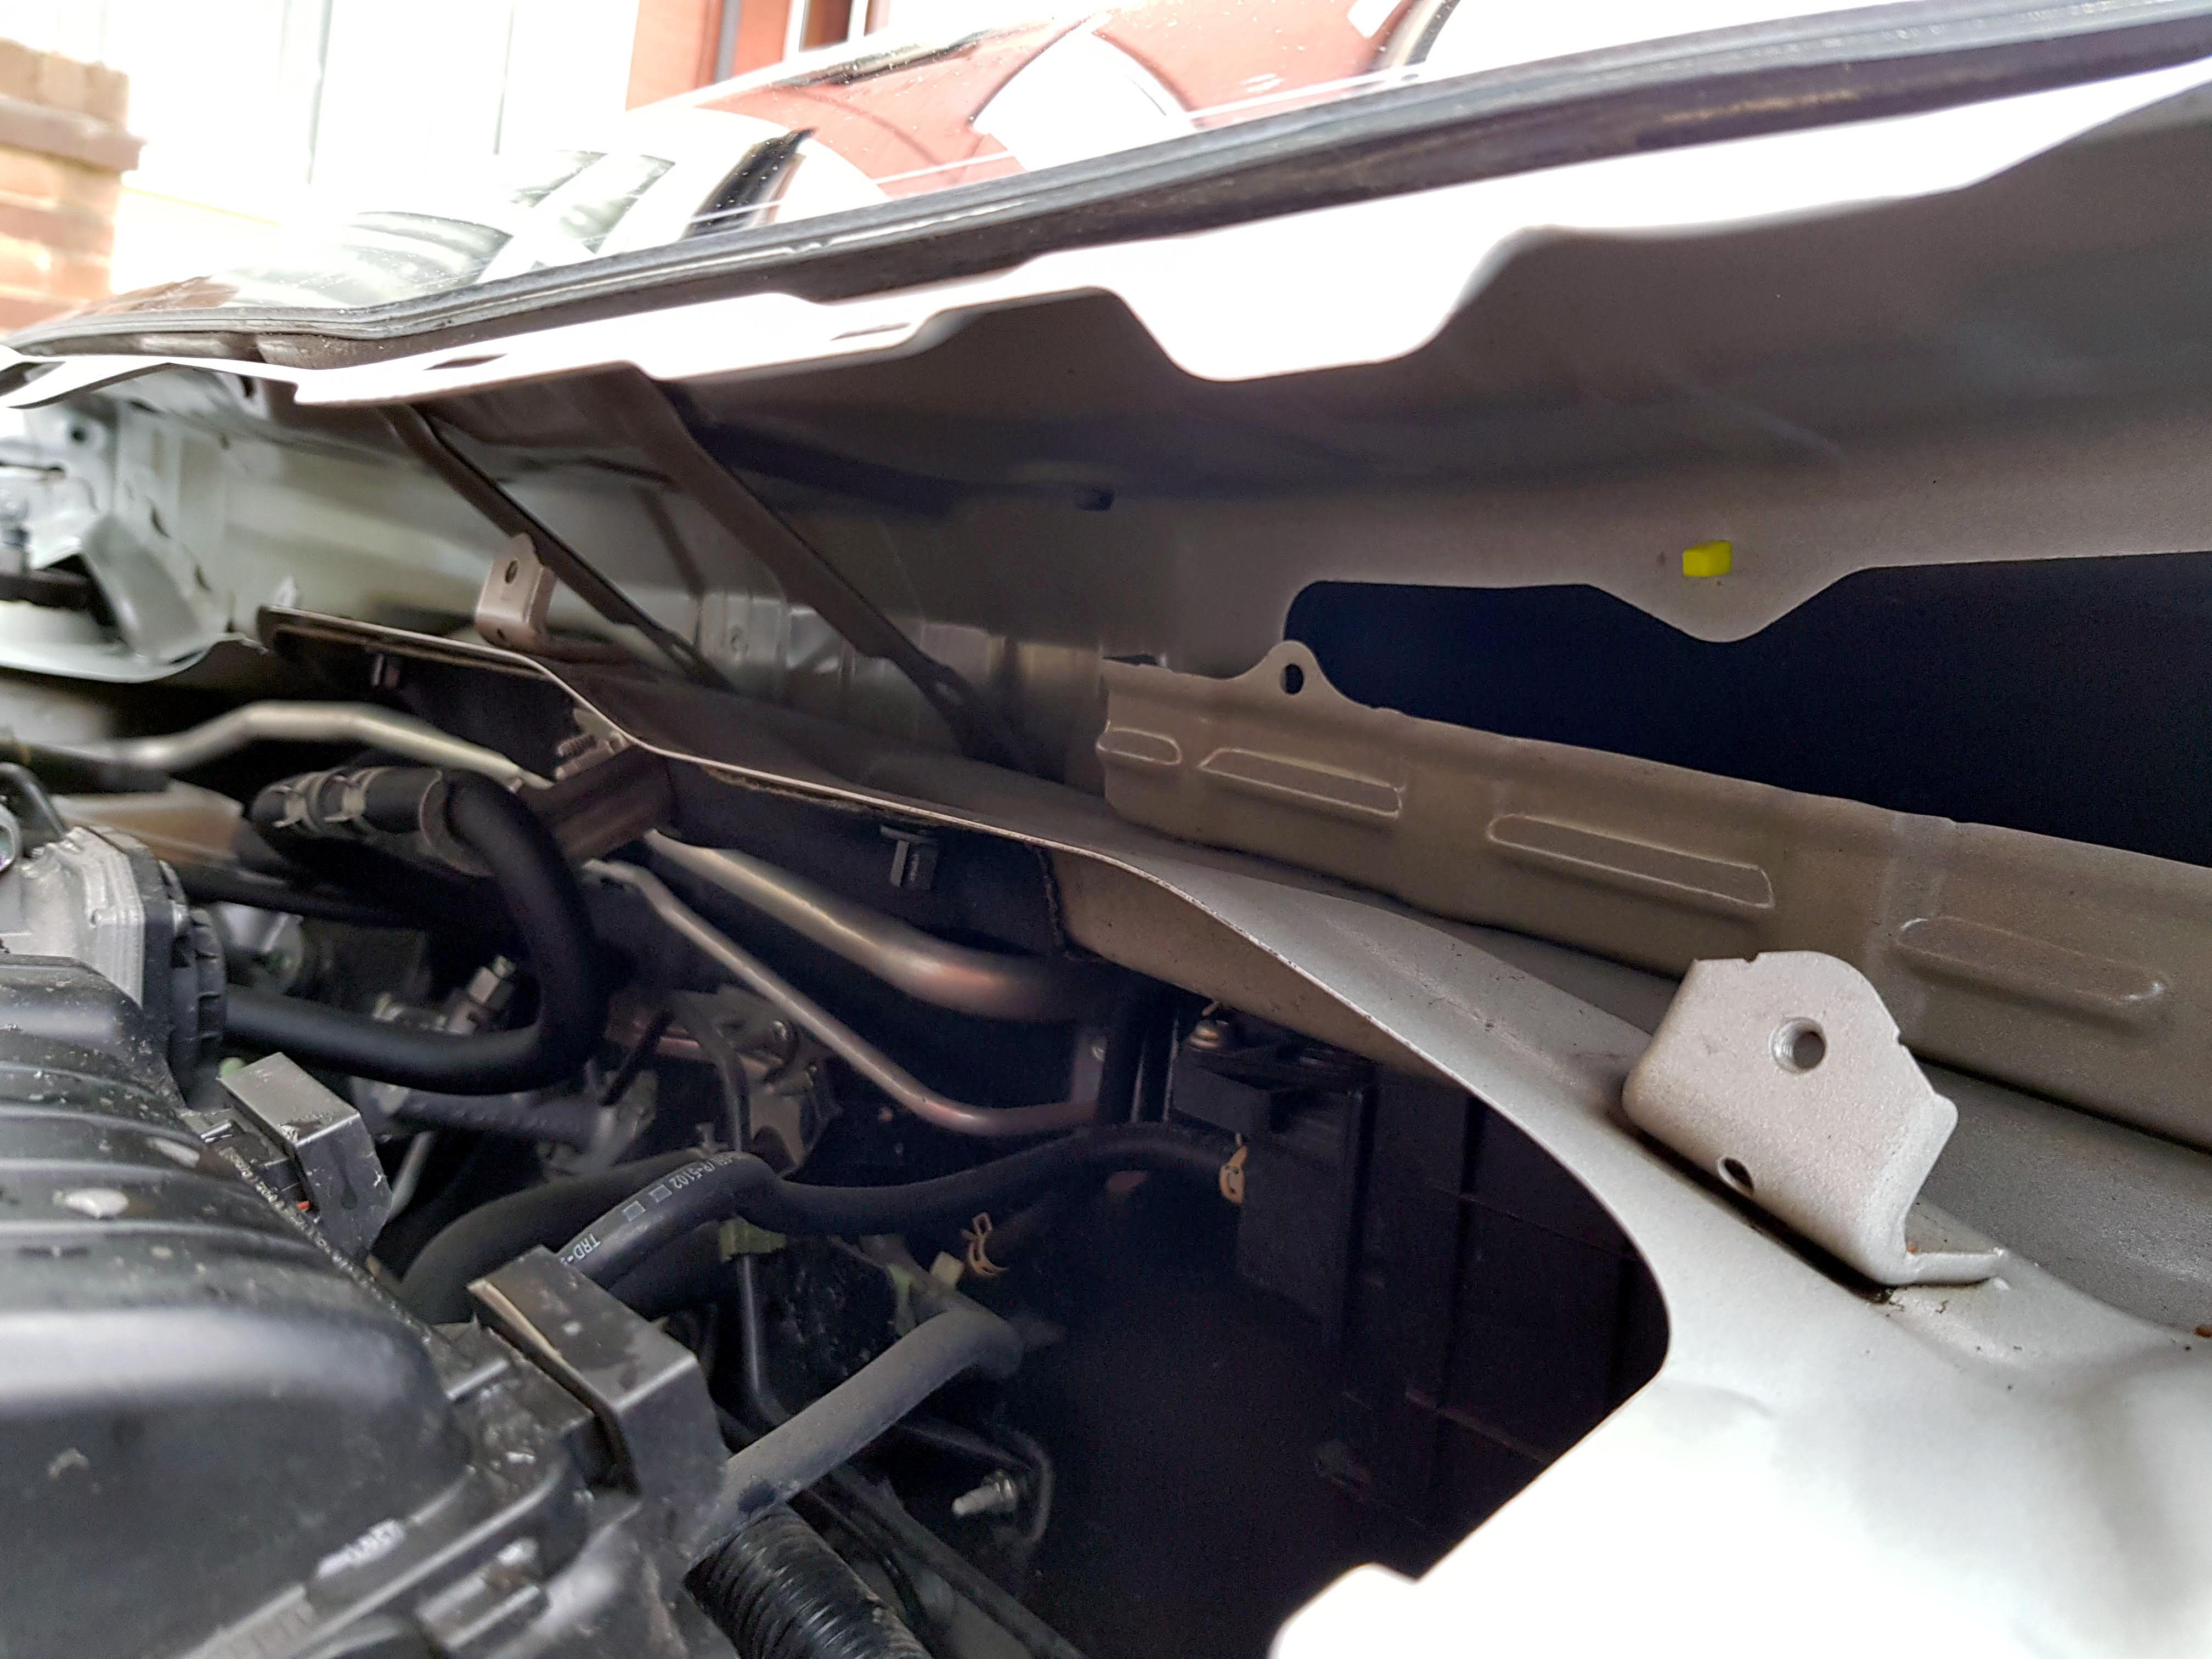
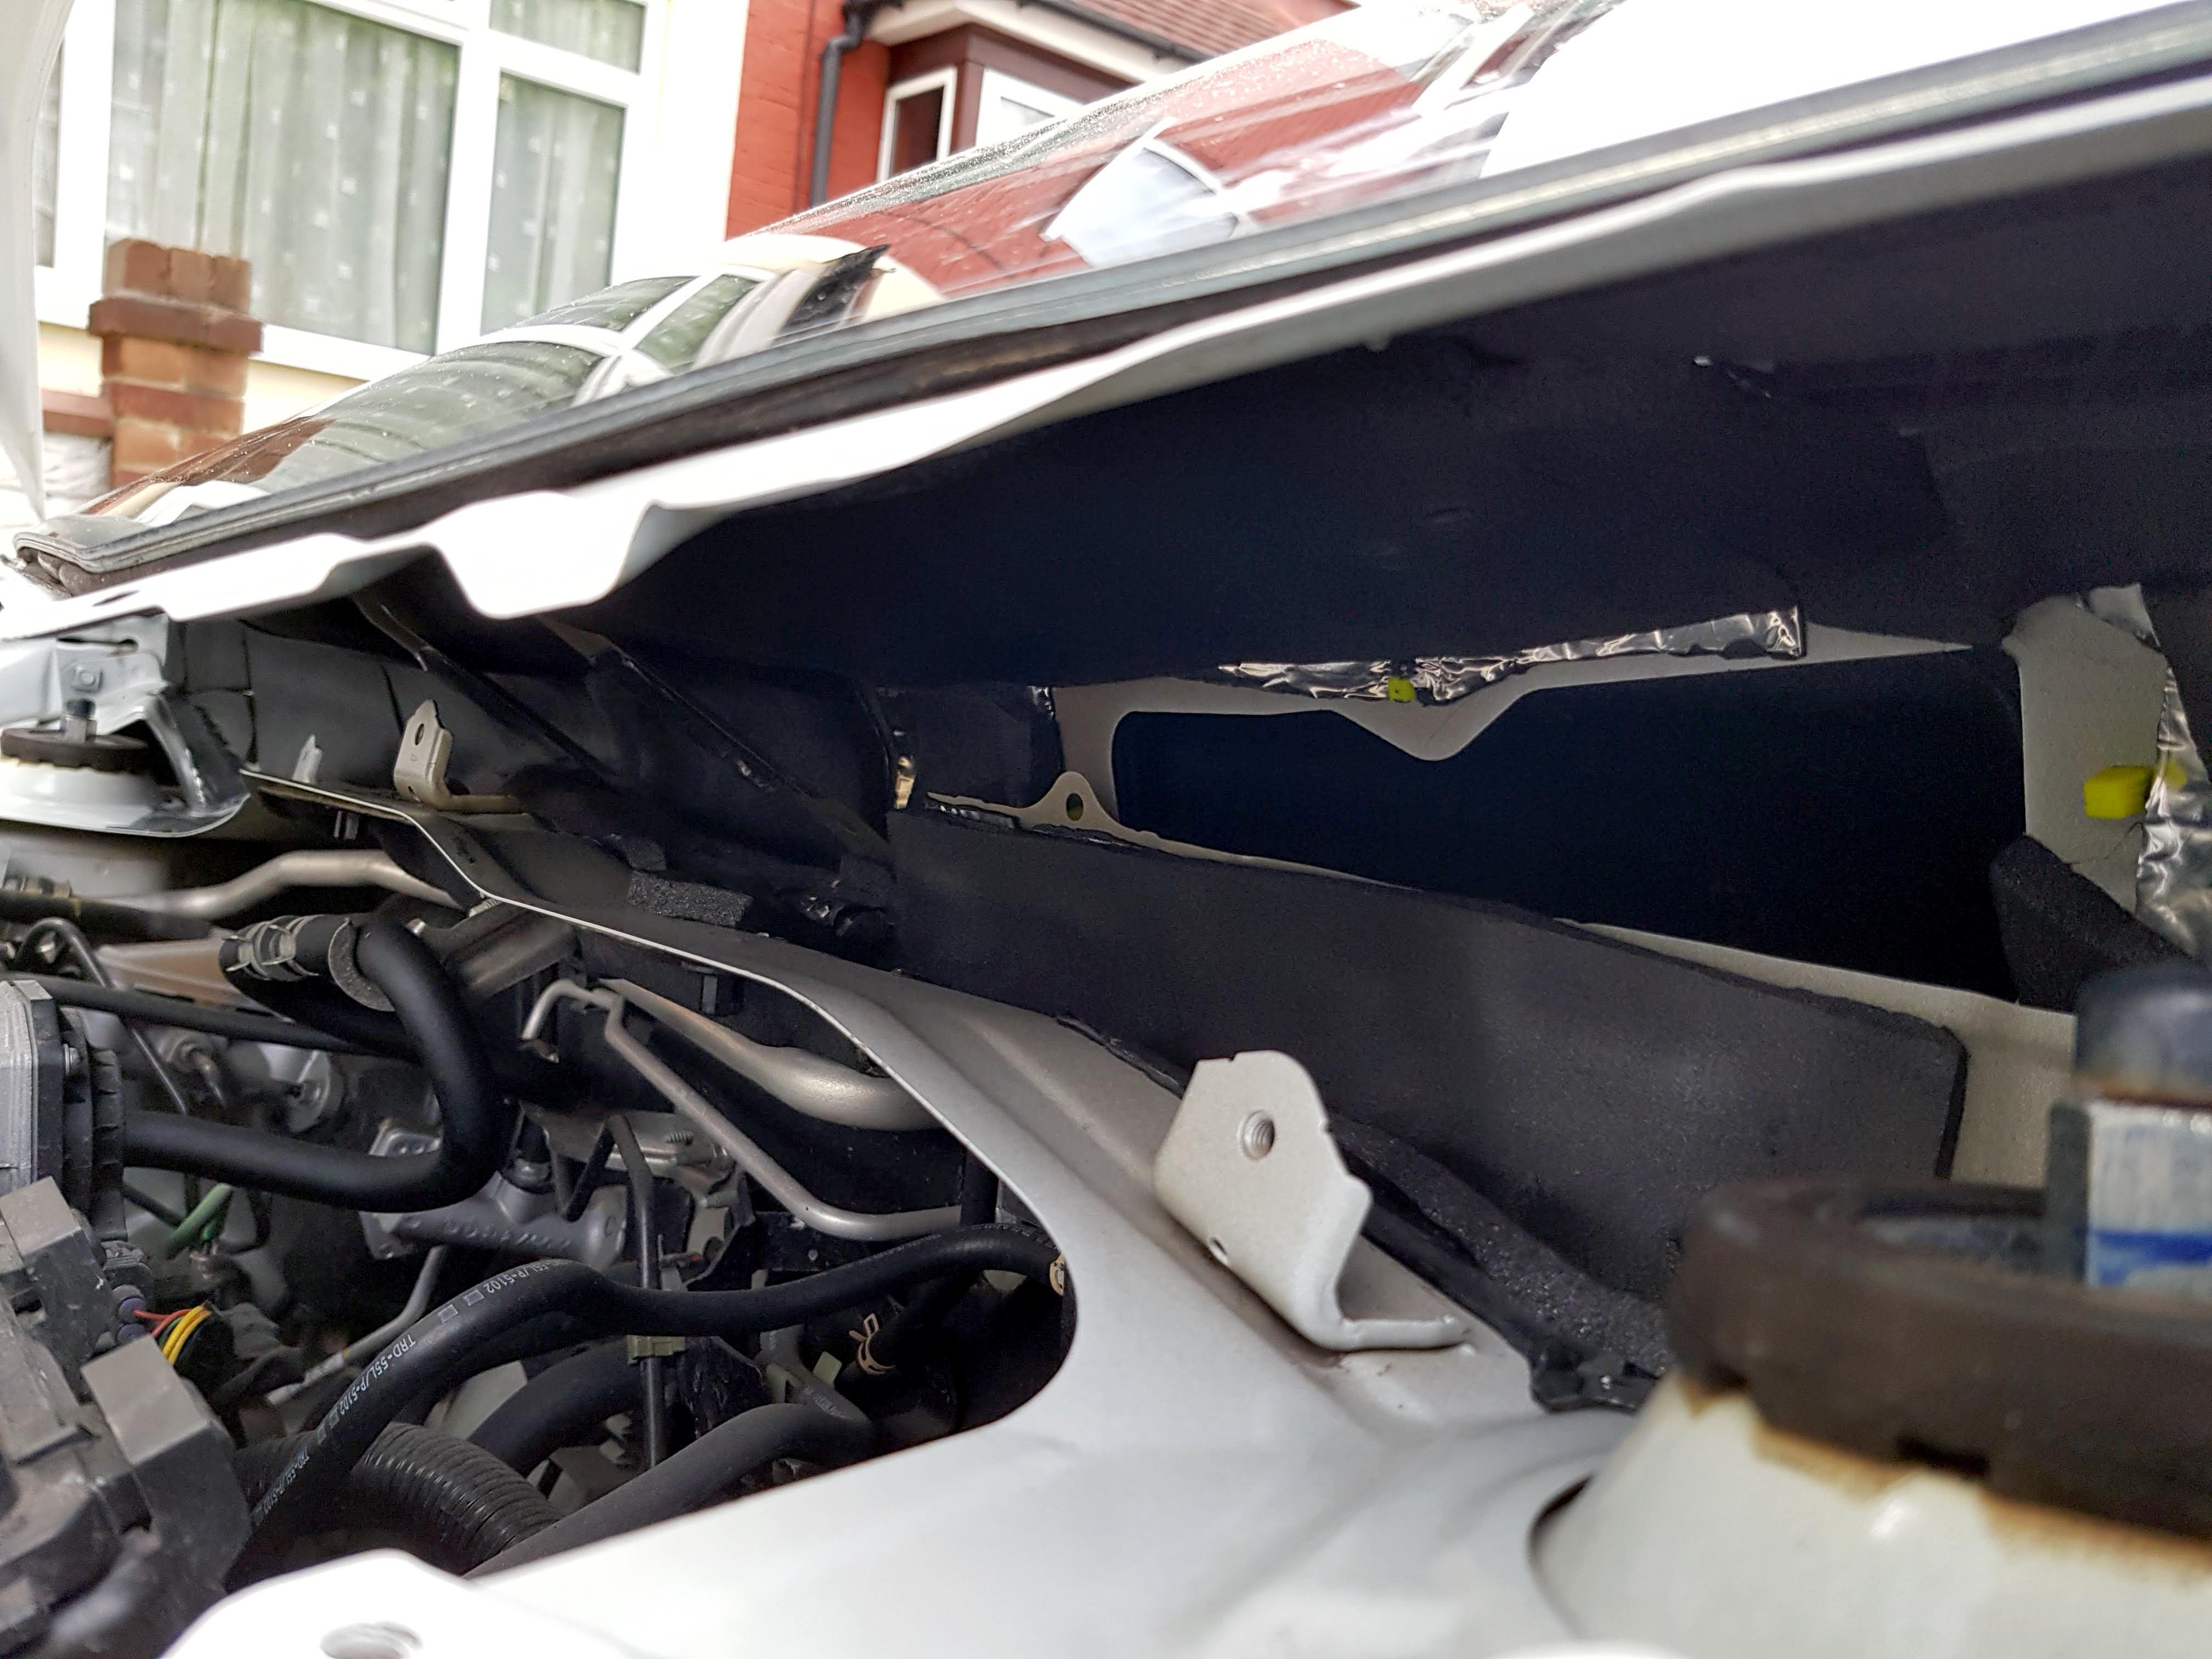
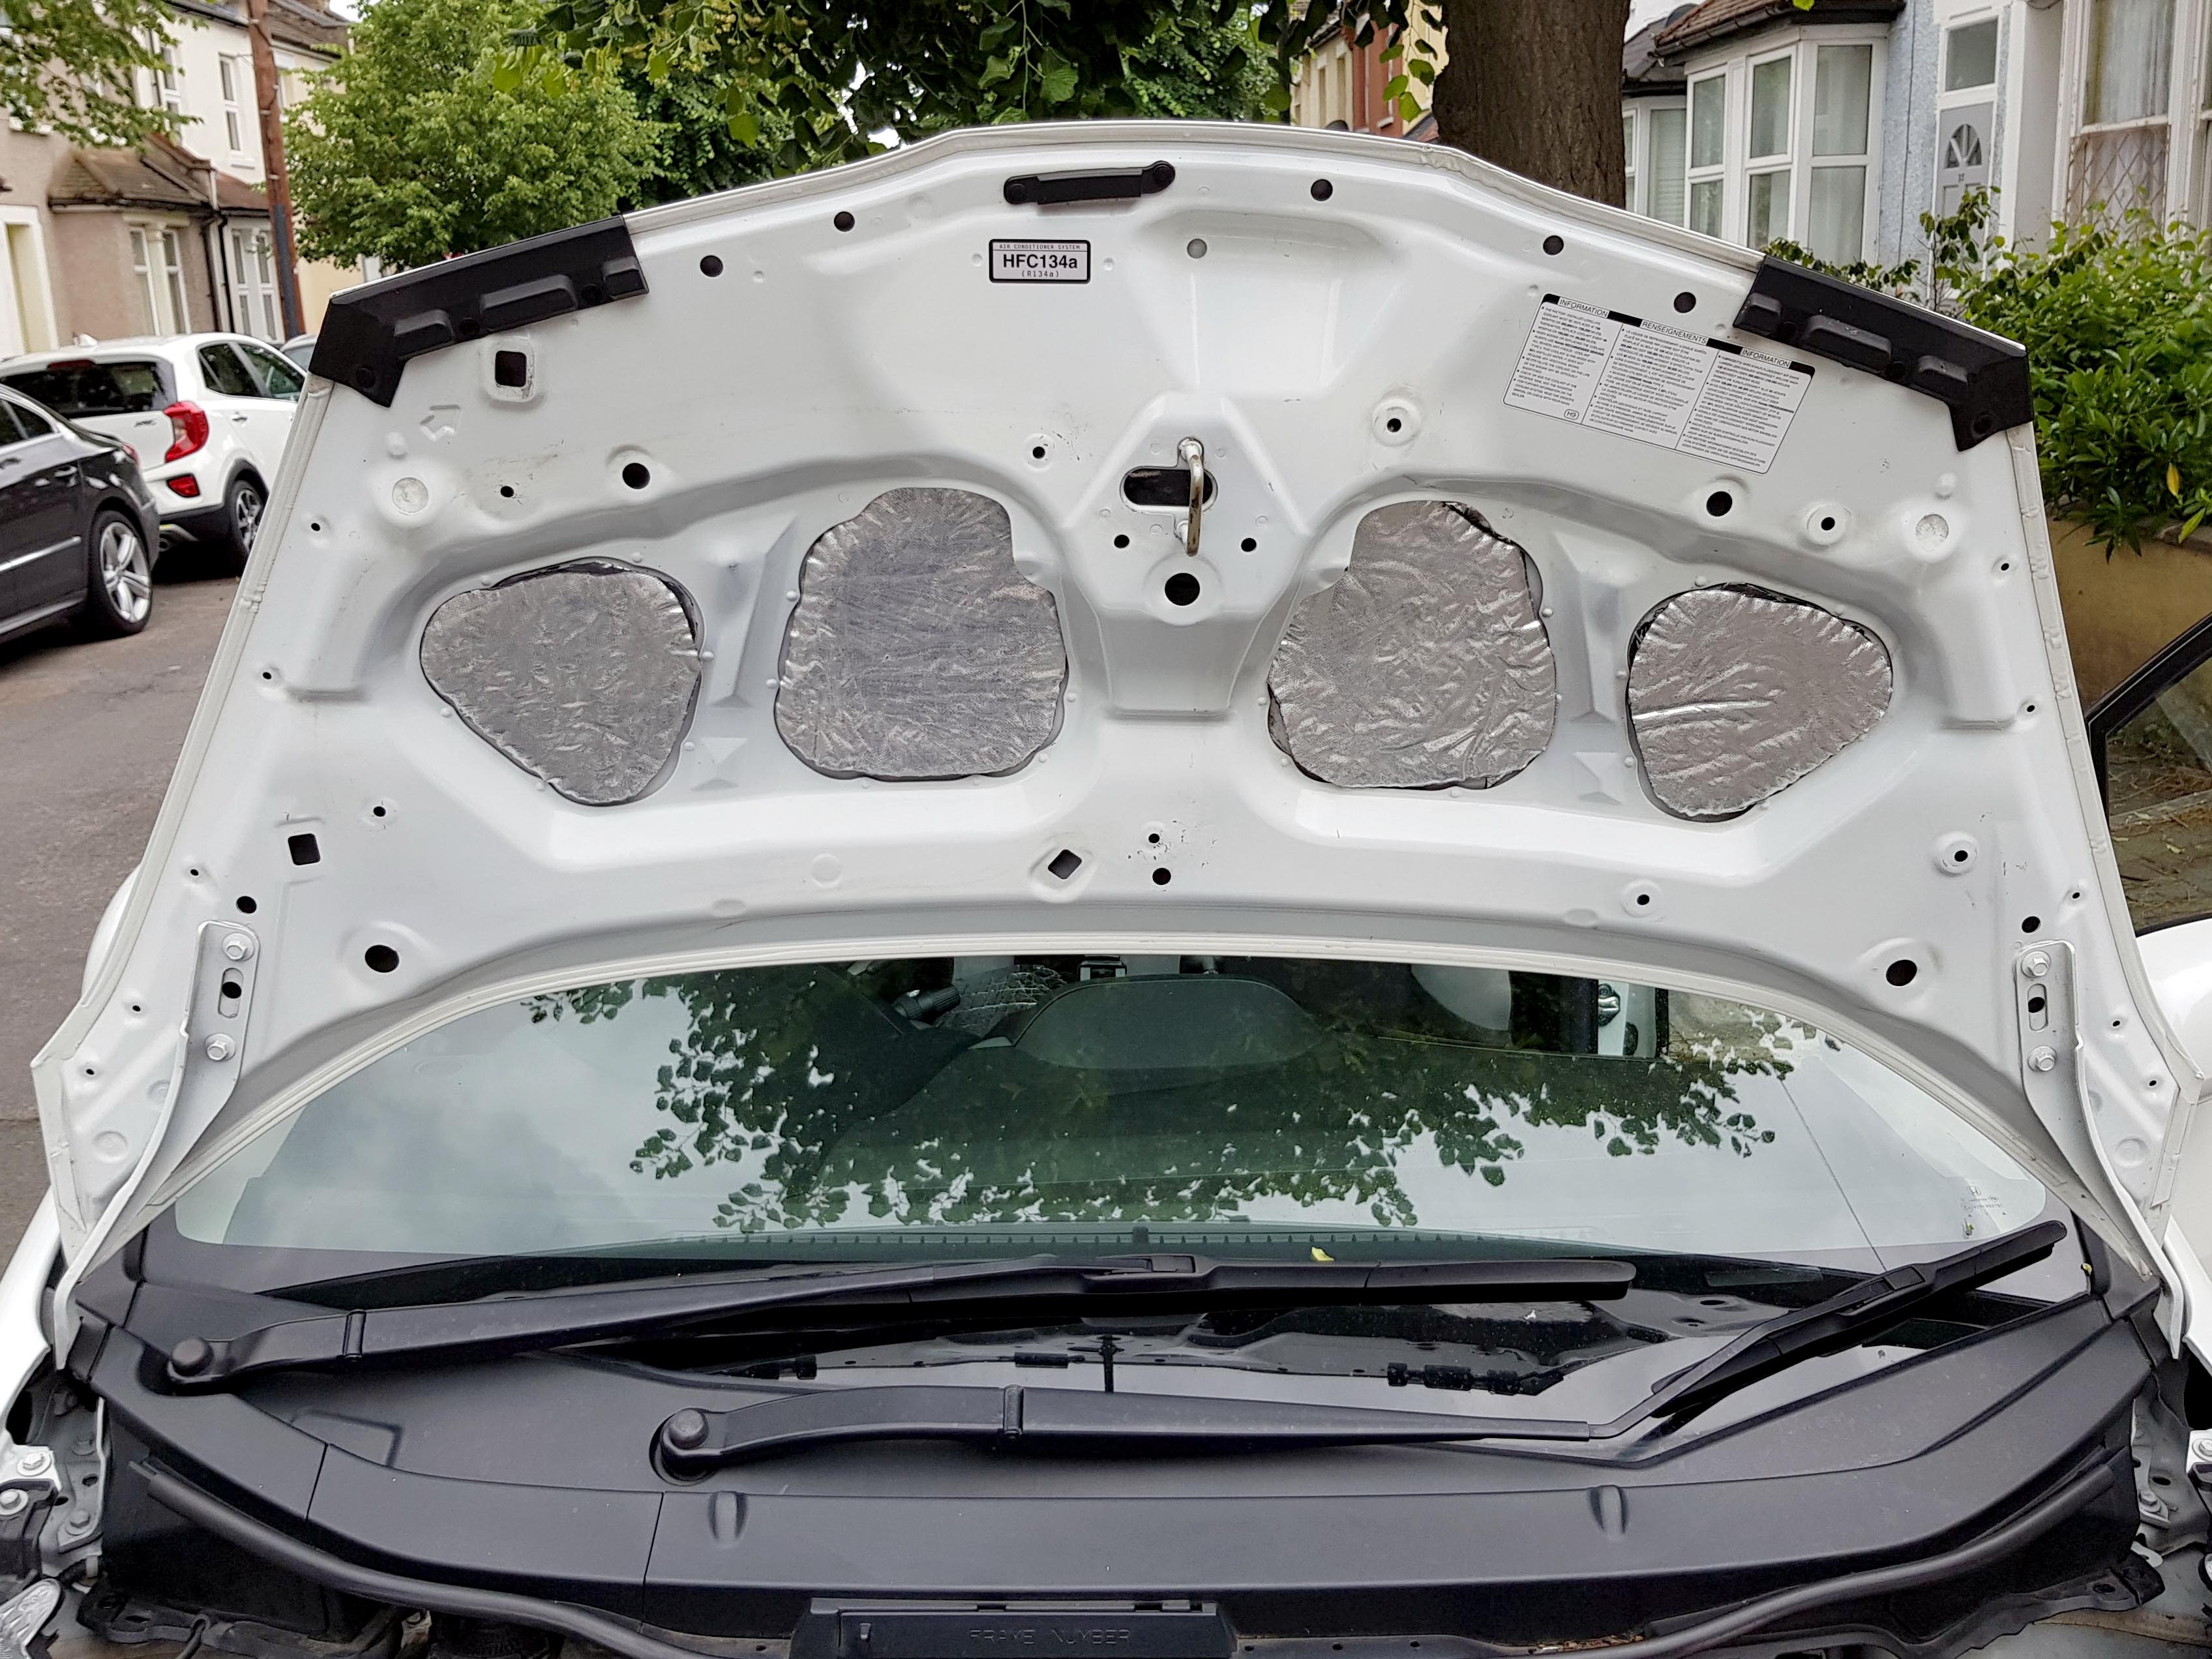
Getting to the firewall wasn't too hard to do, I just followed the guide on how to remove the cowl cover, it was reasonably easy. I still feel sorry for mechanics who have to work on the engine bay though!
Cover removed:
The removed parts which I will be giving a good clean before putting back!
The inner metal where I will be applying the sound deadening:
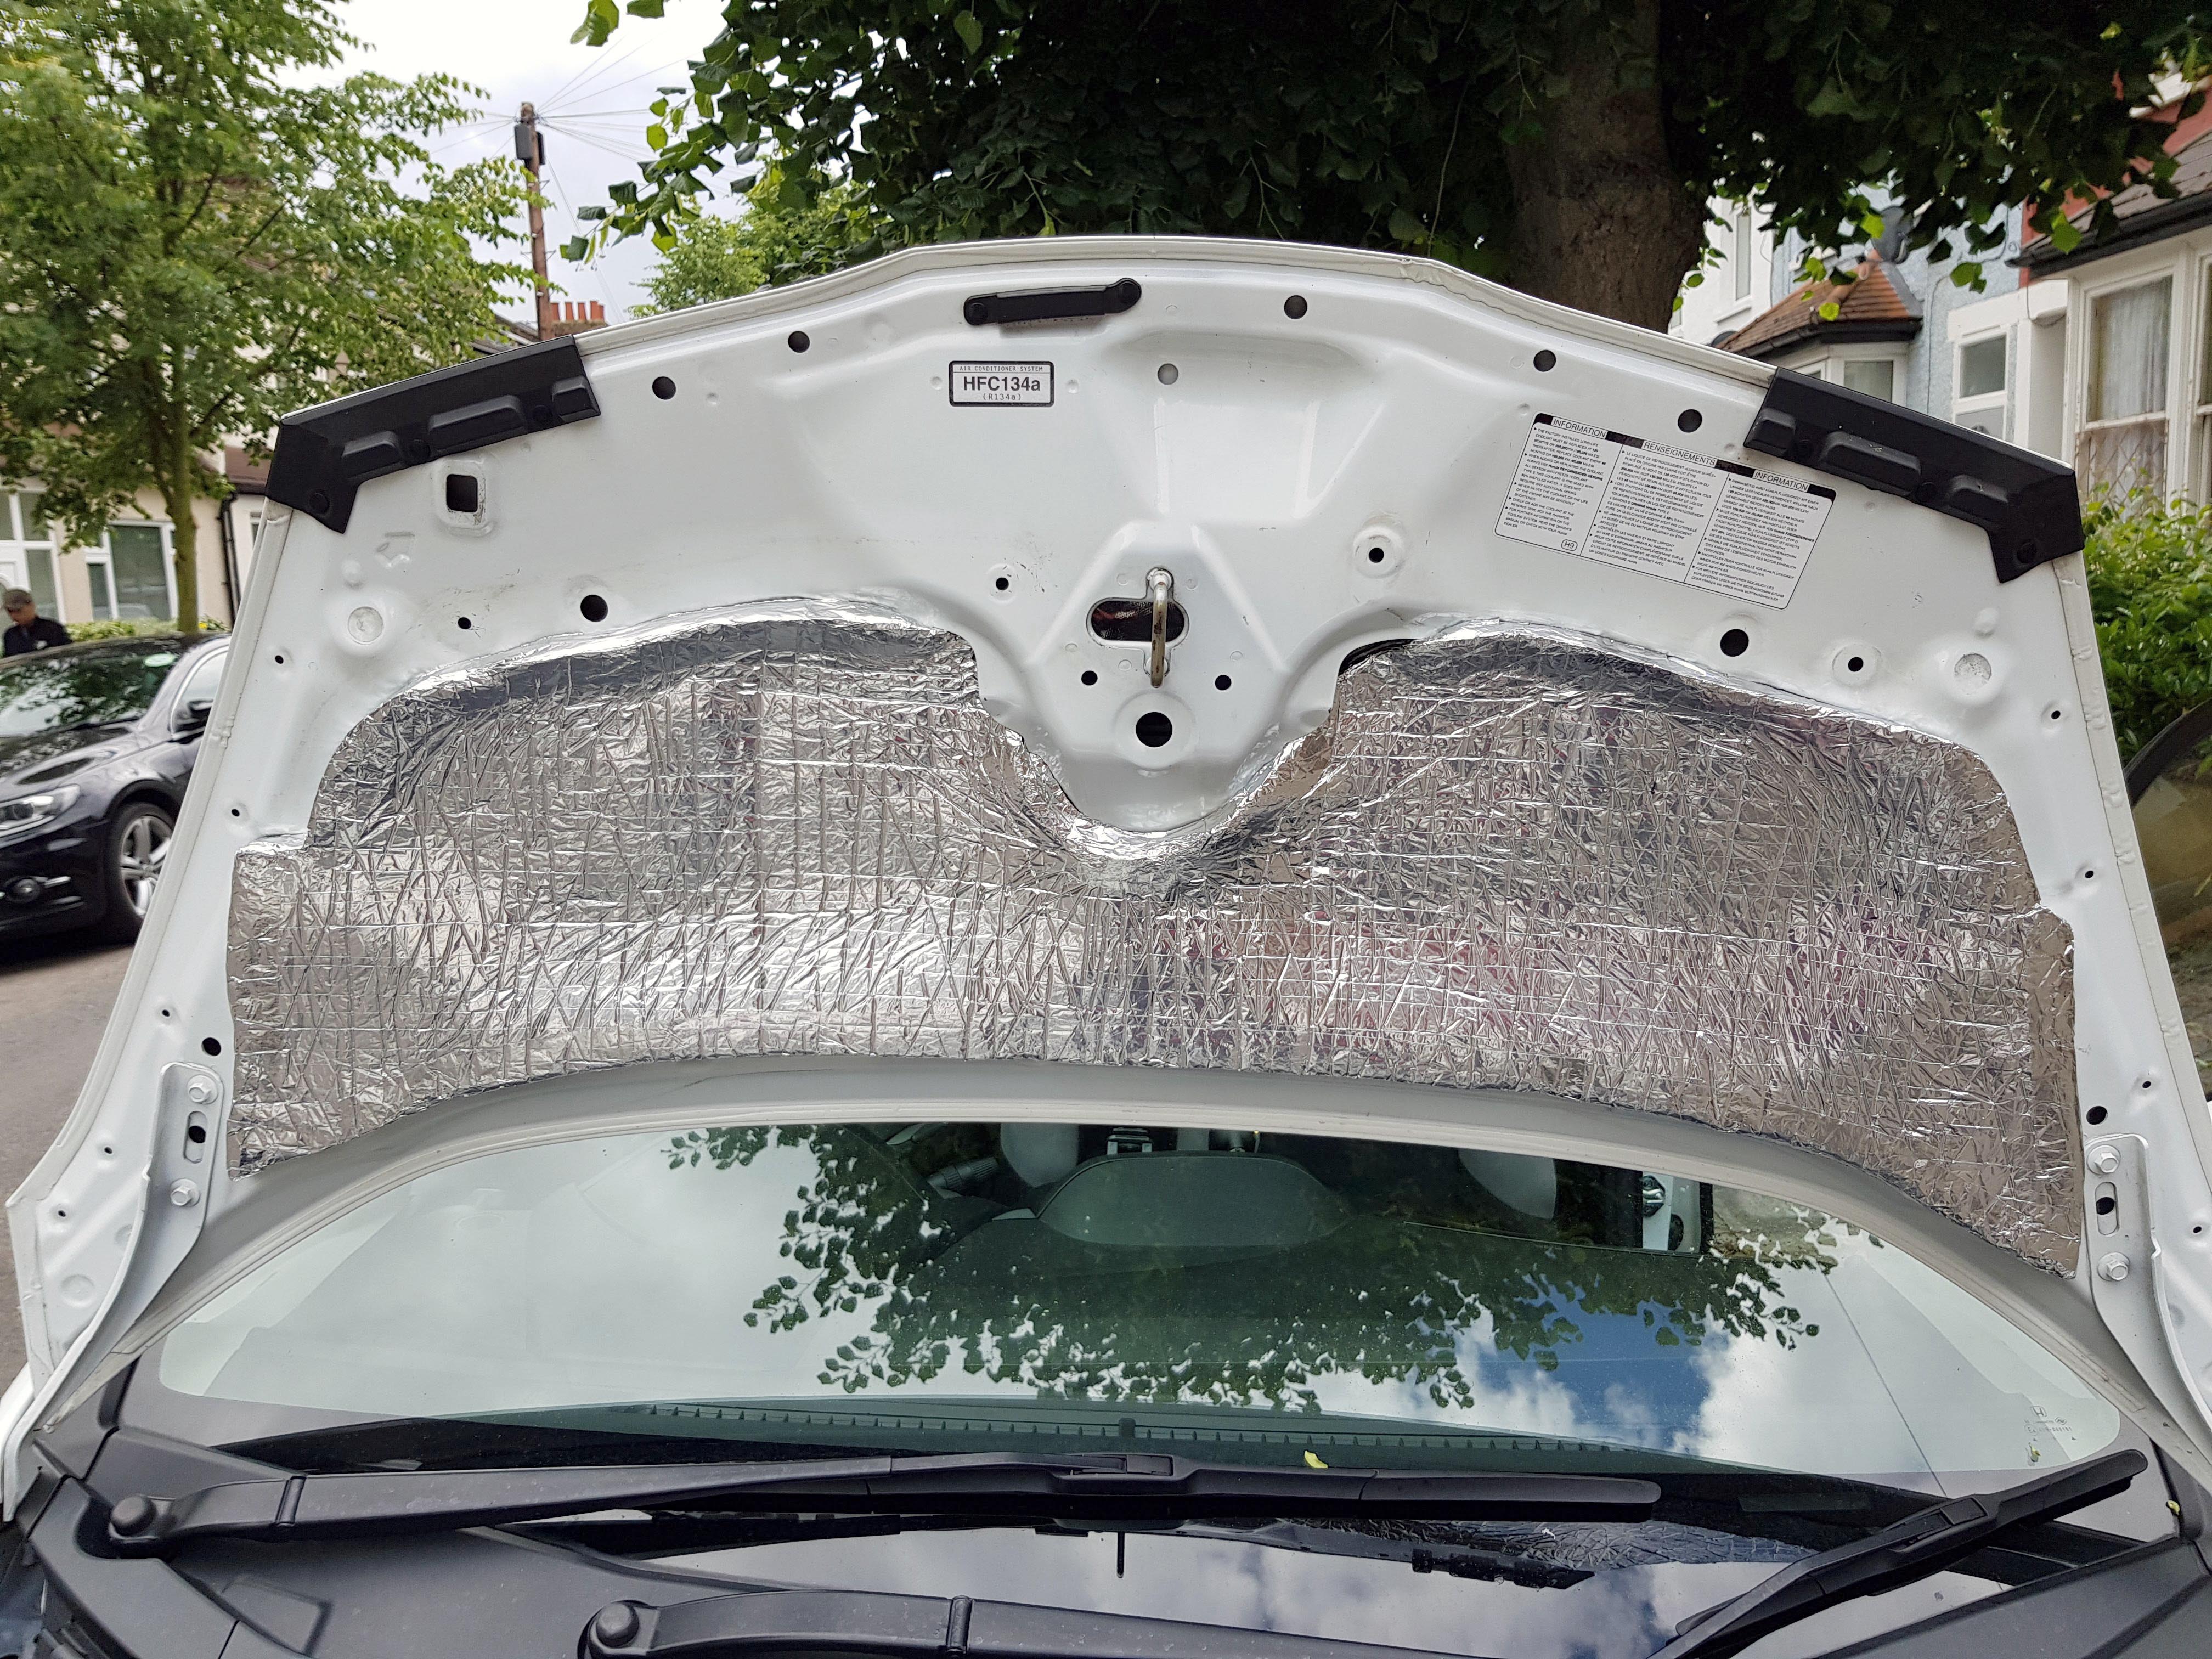
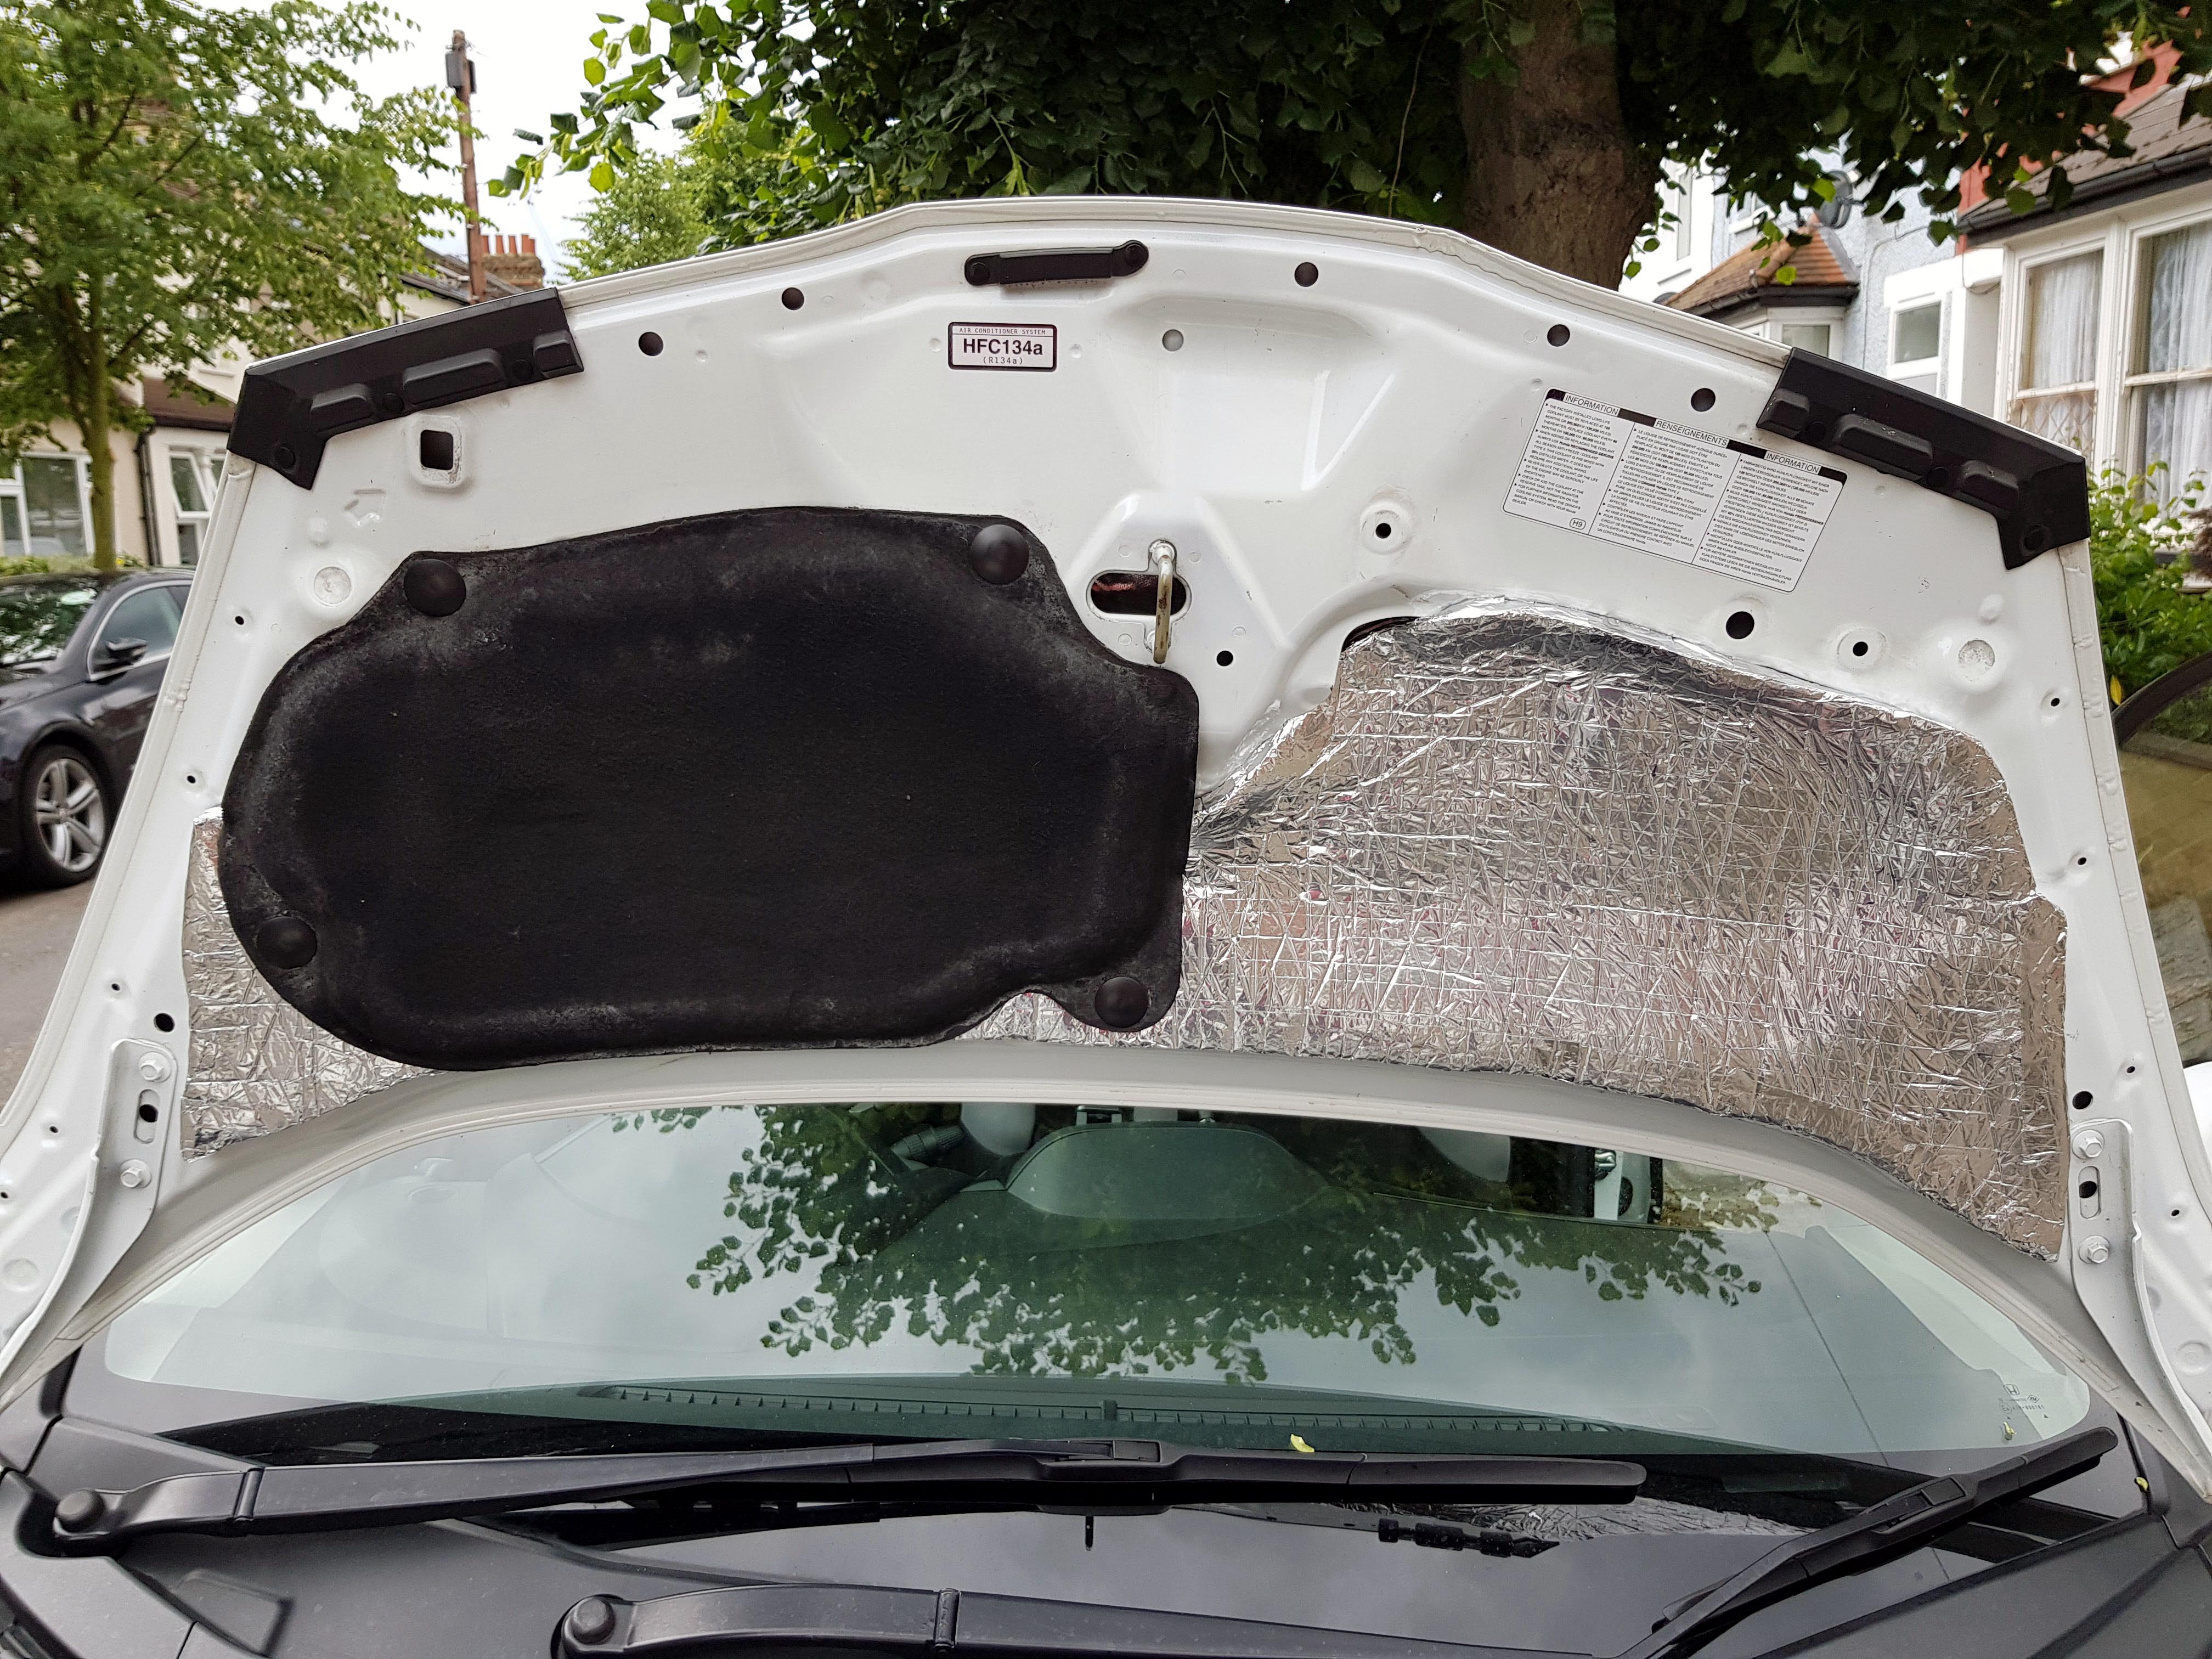
First stage with the Silent Coat:
Second stage with the 10mm Closed Cell Foam:
This actually made a noticeable improvement in reducing engine noise, but I feel for best results, I'd need to put it behind the dashboard, which I really don't want to have to do. But I might look into it and see if theres any easy way to do it by removing as little as possible. As no amount of quiet is worth the hassle of removing the dash!!
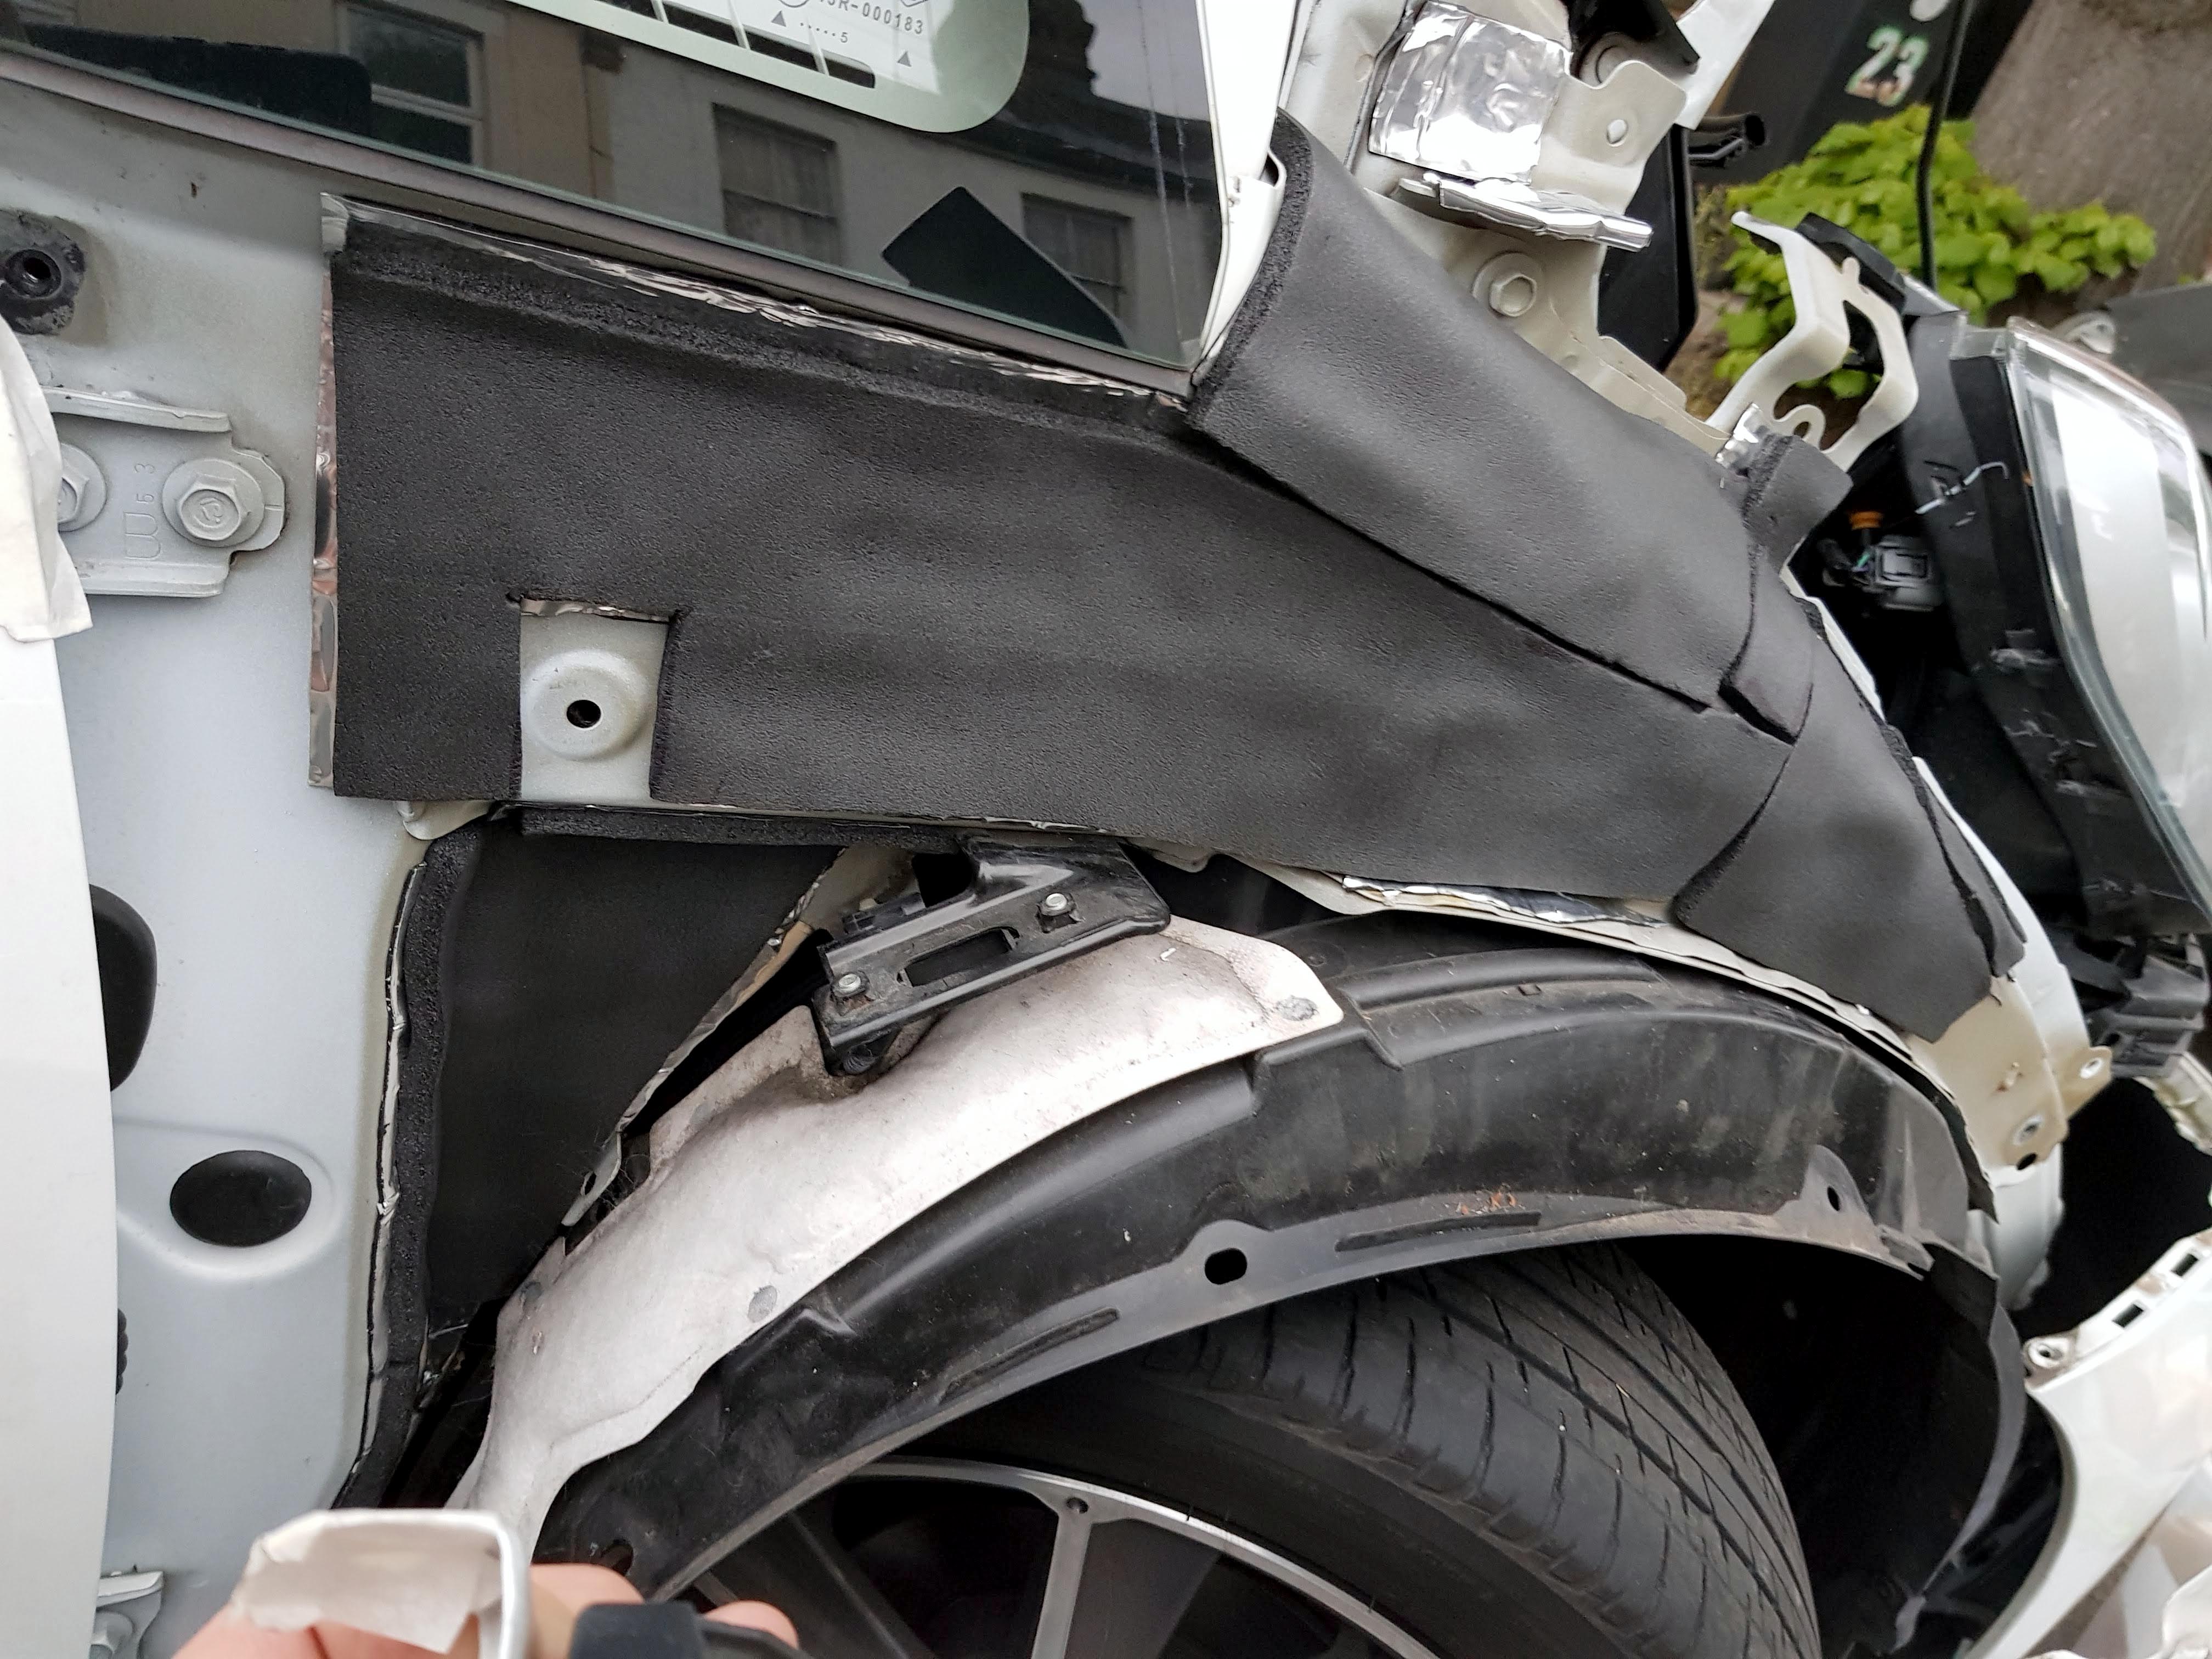
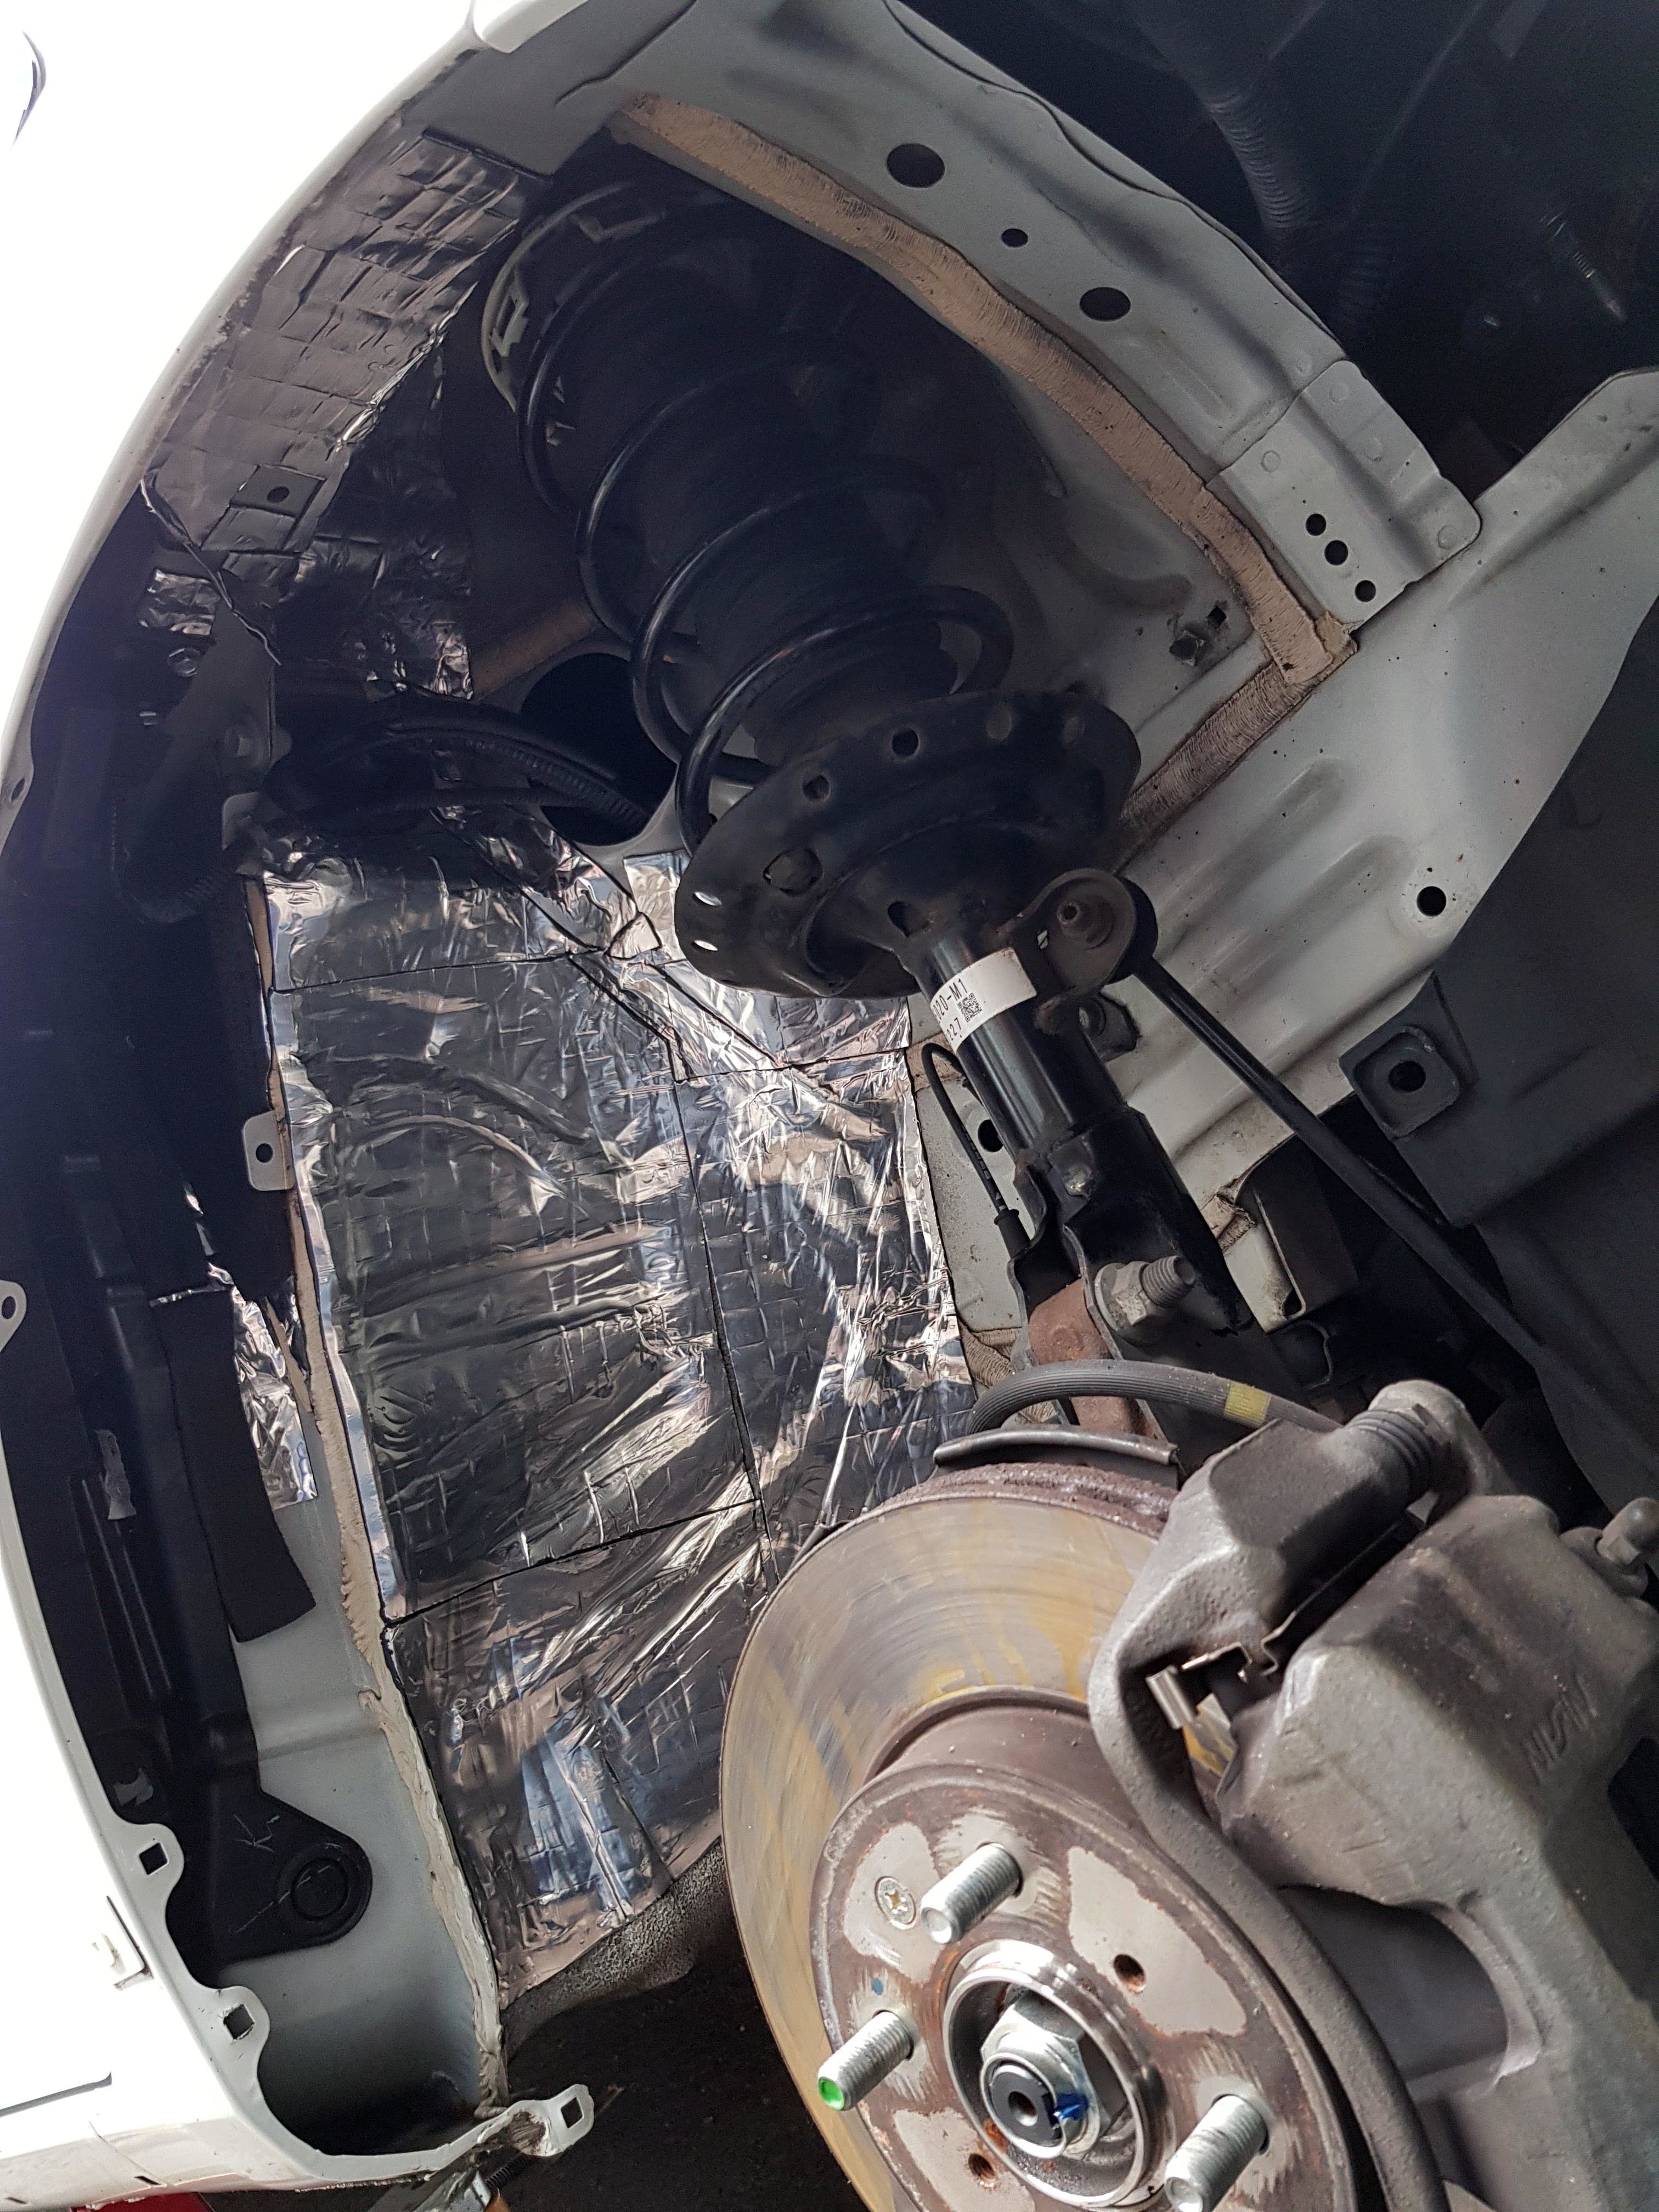
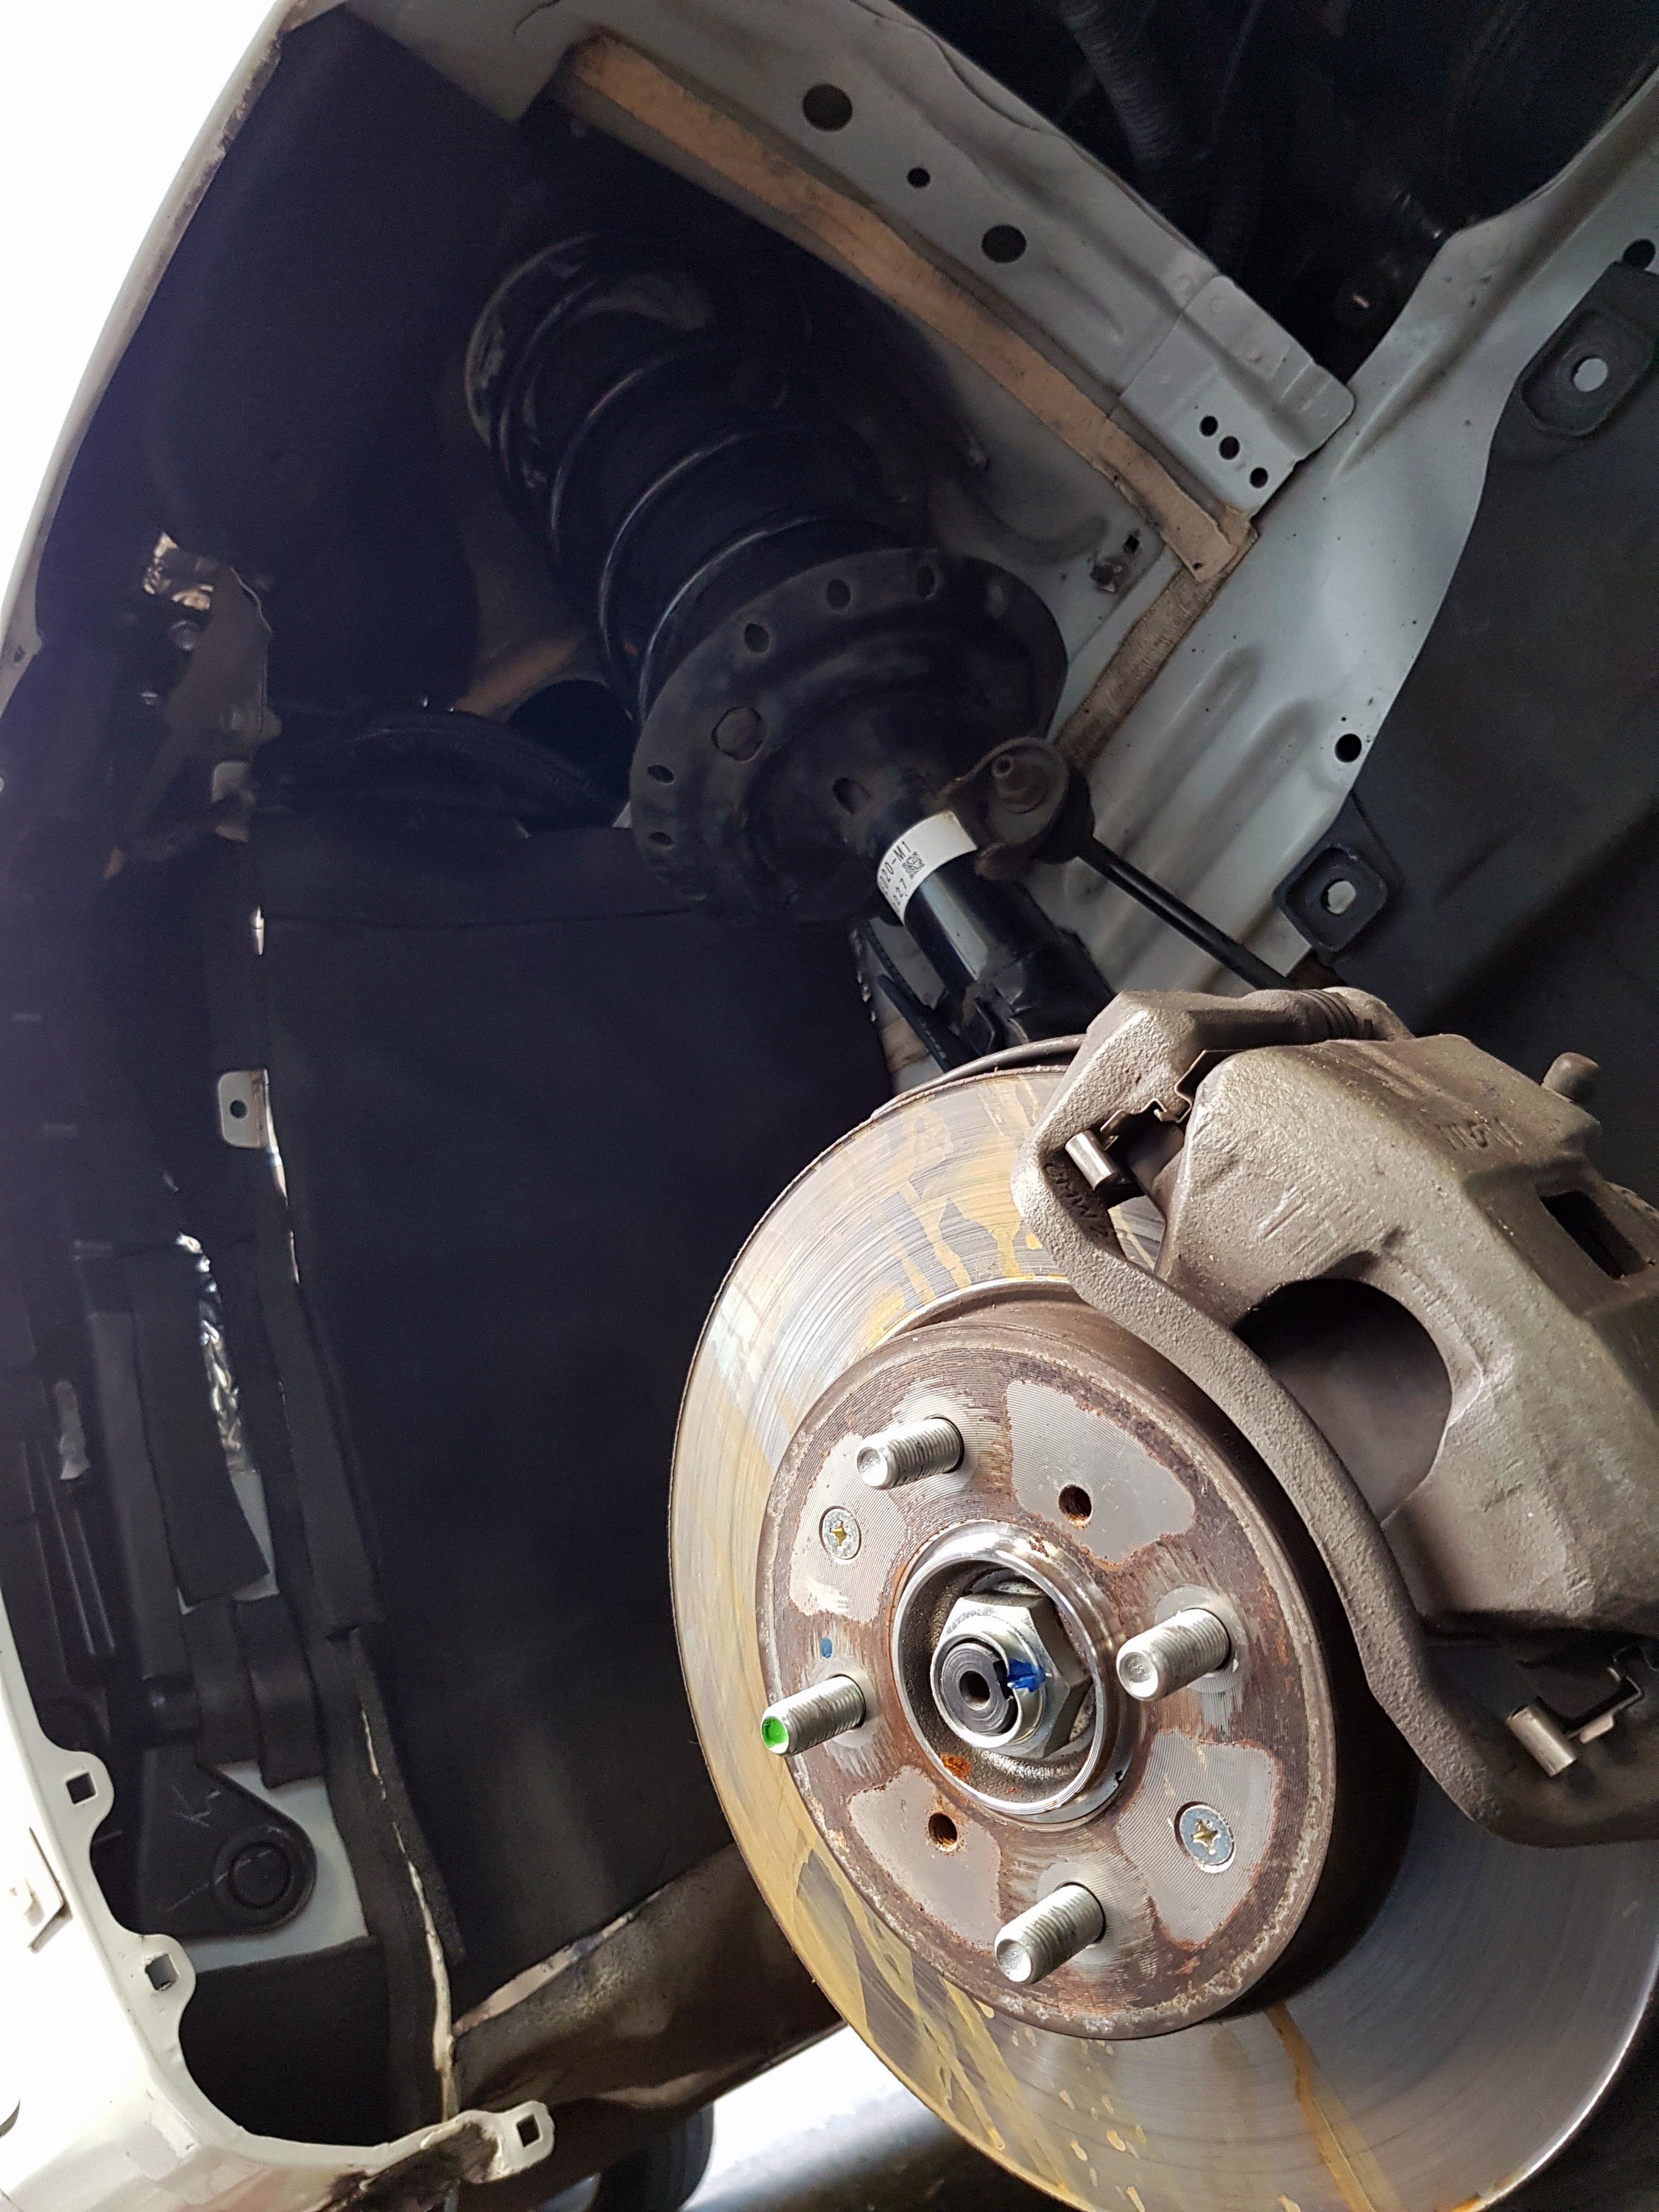
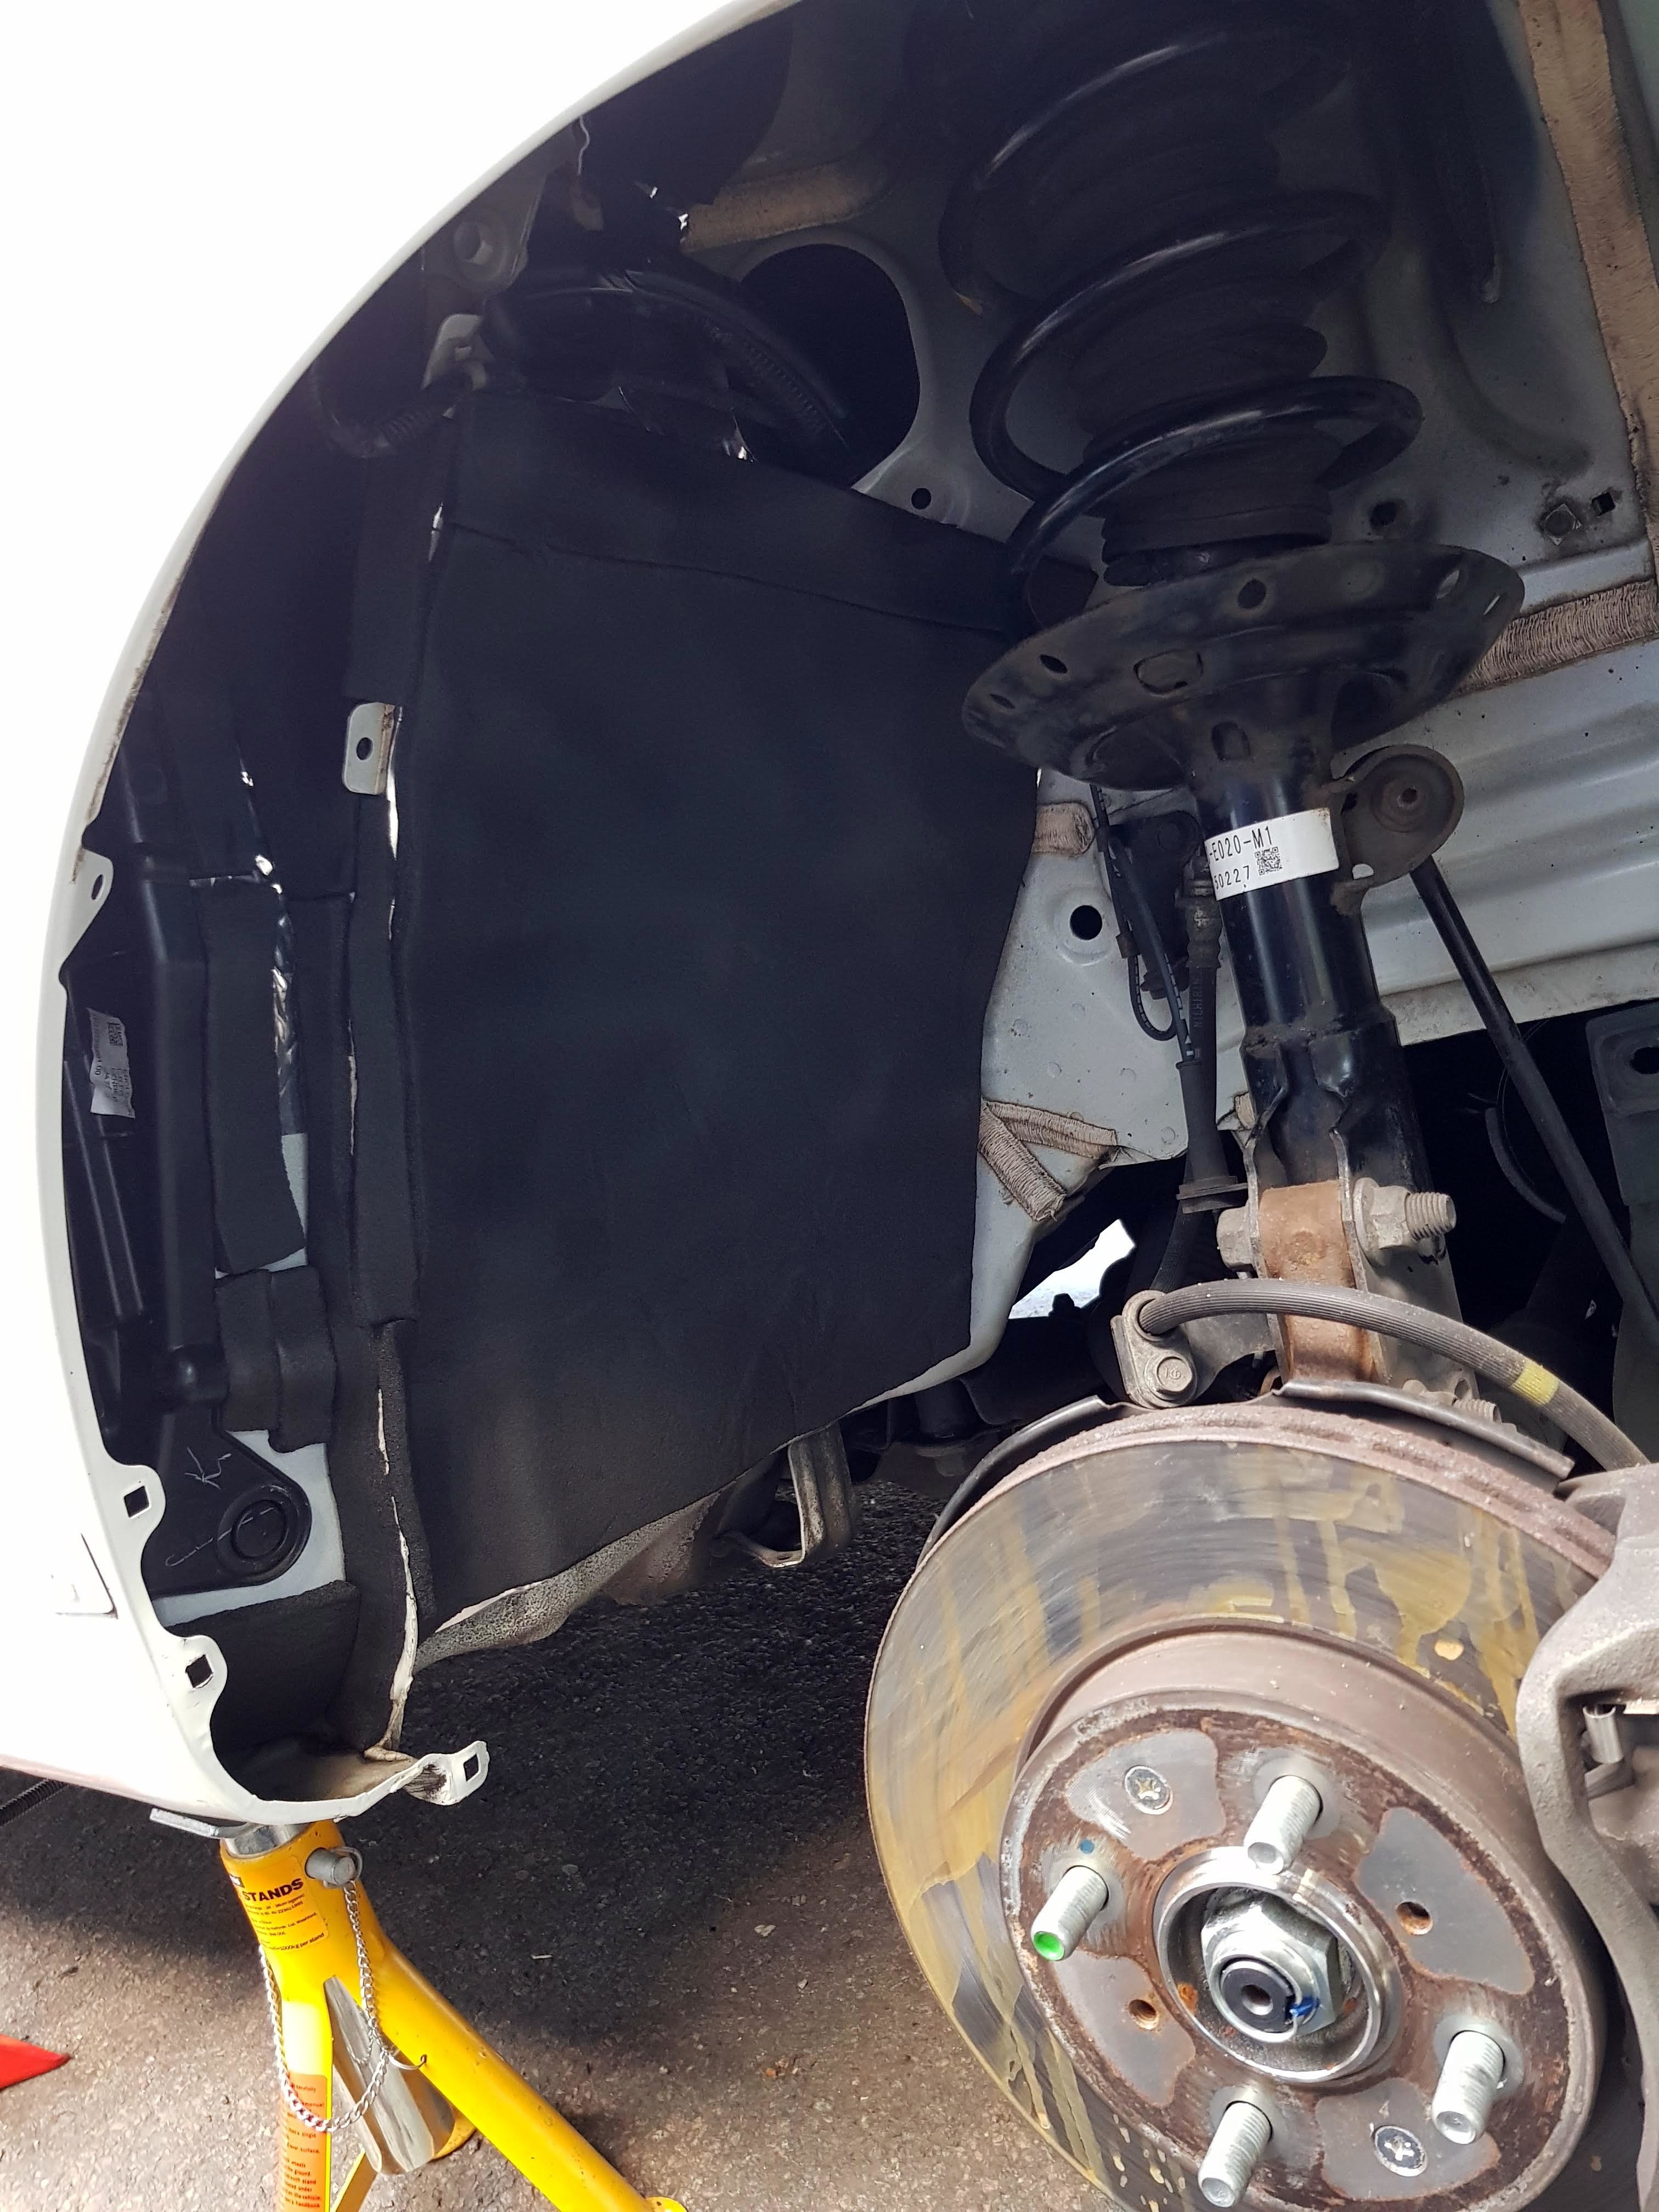
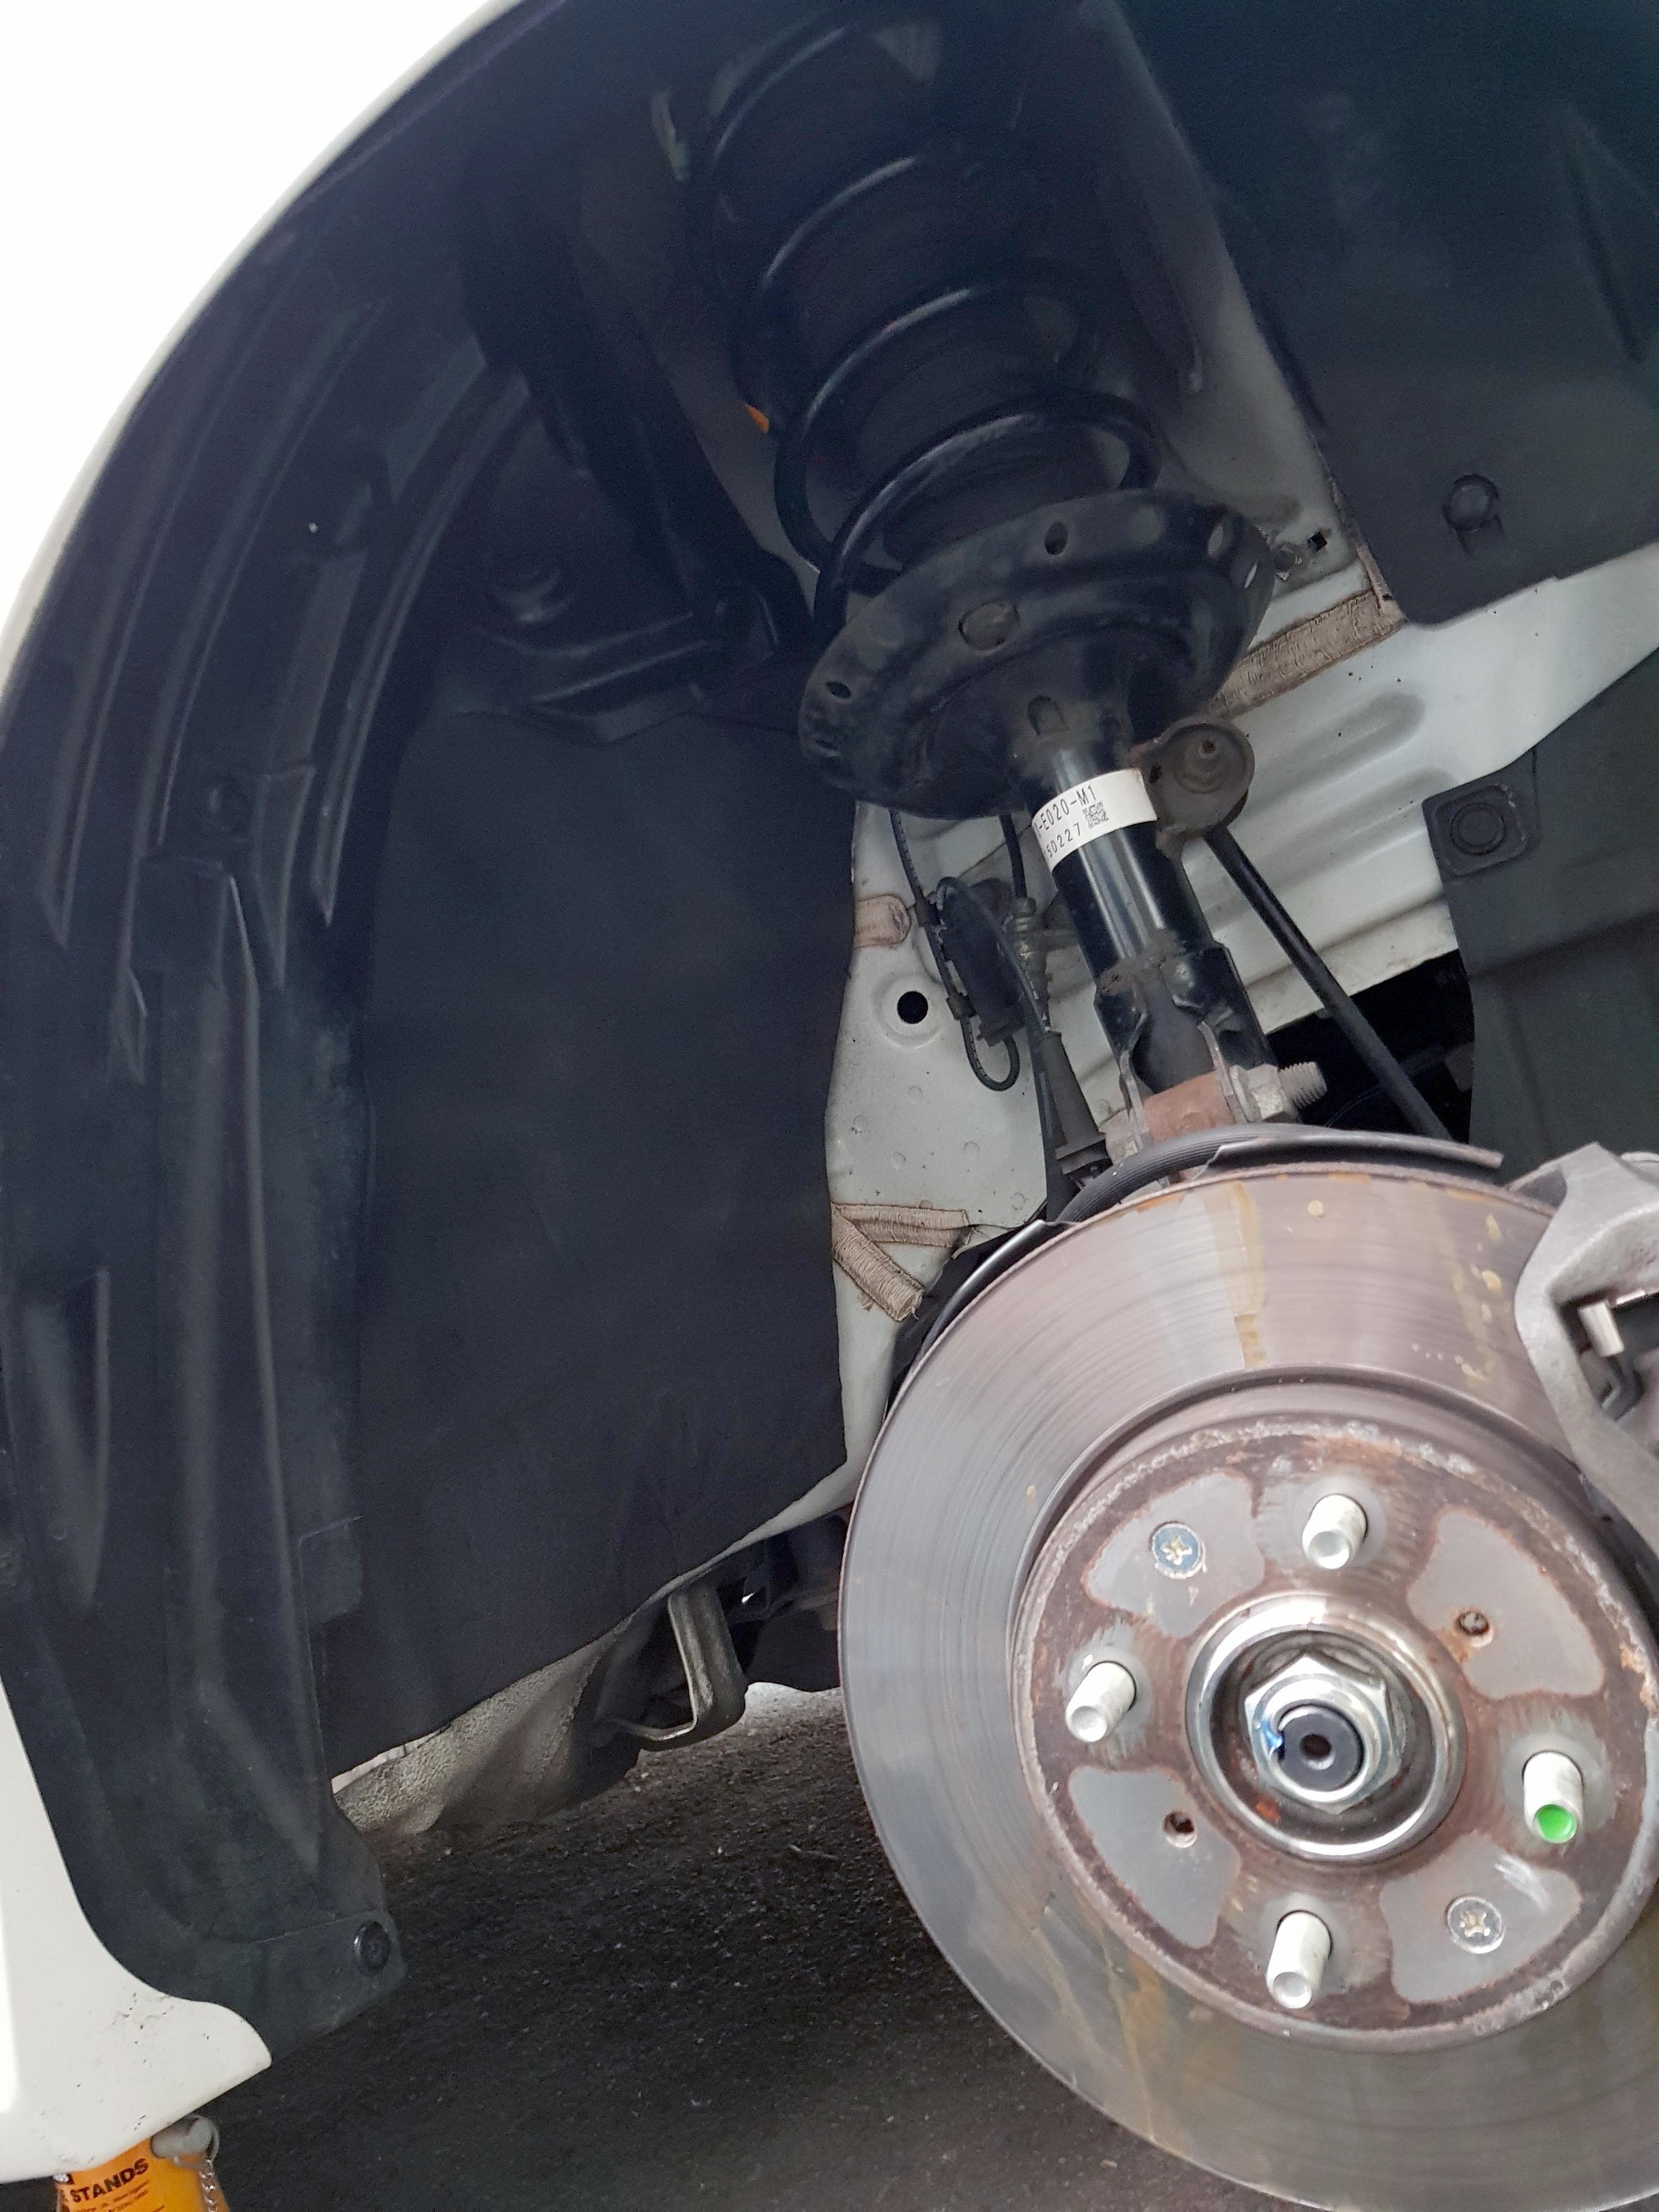
Next was behind the fenders, which was a much bigger task than I was expecting.
To get behind the fenders I had to remove the Front bumper, headlights, side skirts, part of the wheel well plastic, the plastic cover next to the tiny front window and part of the cowl cover. And I couldn't actually remove the fender completely, as the final bolt at the bottom was actually sealed on under all the underseal Honda put on from the factory, and I wasn't going to disturb that, so I had to do it with the fender still hanging on.
It was such a nightmare to do, and to be honest, only made a very slight difference to the road noise, so I kinda regret it, and wish I had put it inside the actual wheel well behind the plastic cover instead (something I will be doing at some point).
First stage with the Silent Coat:
Second stage with the 10mm Closed Cell Foam:
Next stage is the roof, then putting the closed cell foam in the main interior.
Then I will reassess the interior noise and take it from there.
I do notice noise coming though the door seals, so I'm going to look into how to improve that as well.
I feel like I'm trying to find a leak in a boat, and when I plug one hole, I notice another :
But hopefully others can learn from my trial and error!
Sound Deadening Part 5: The Roof and Boot Lid
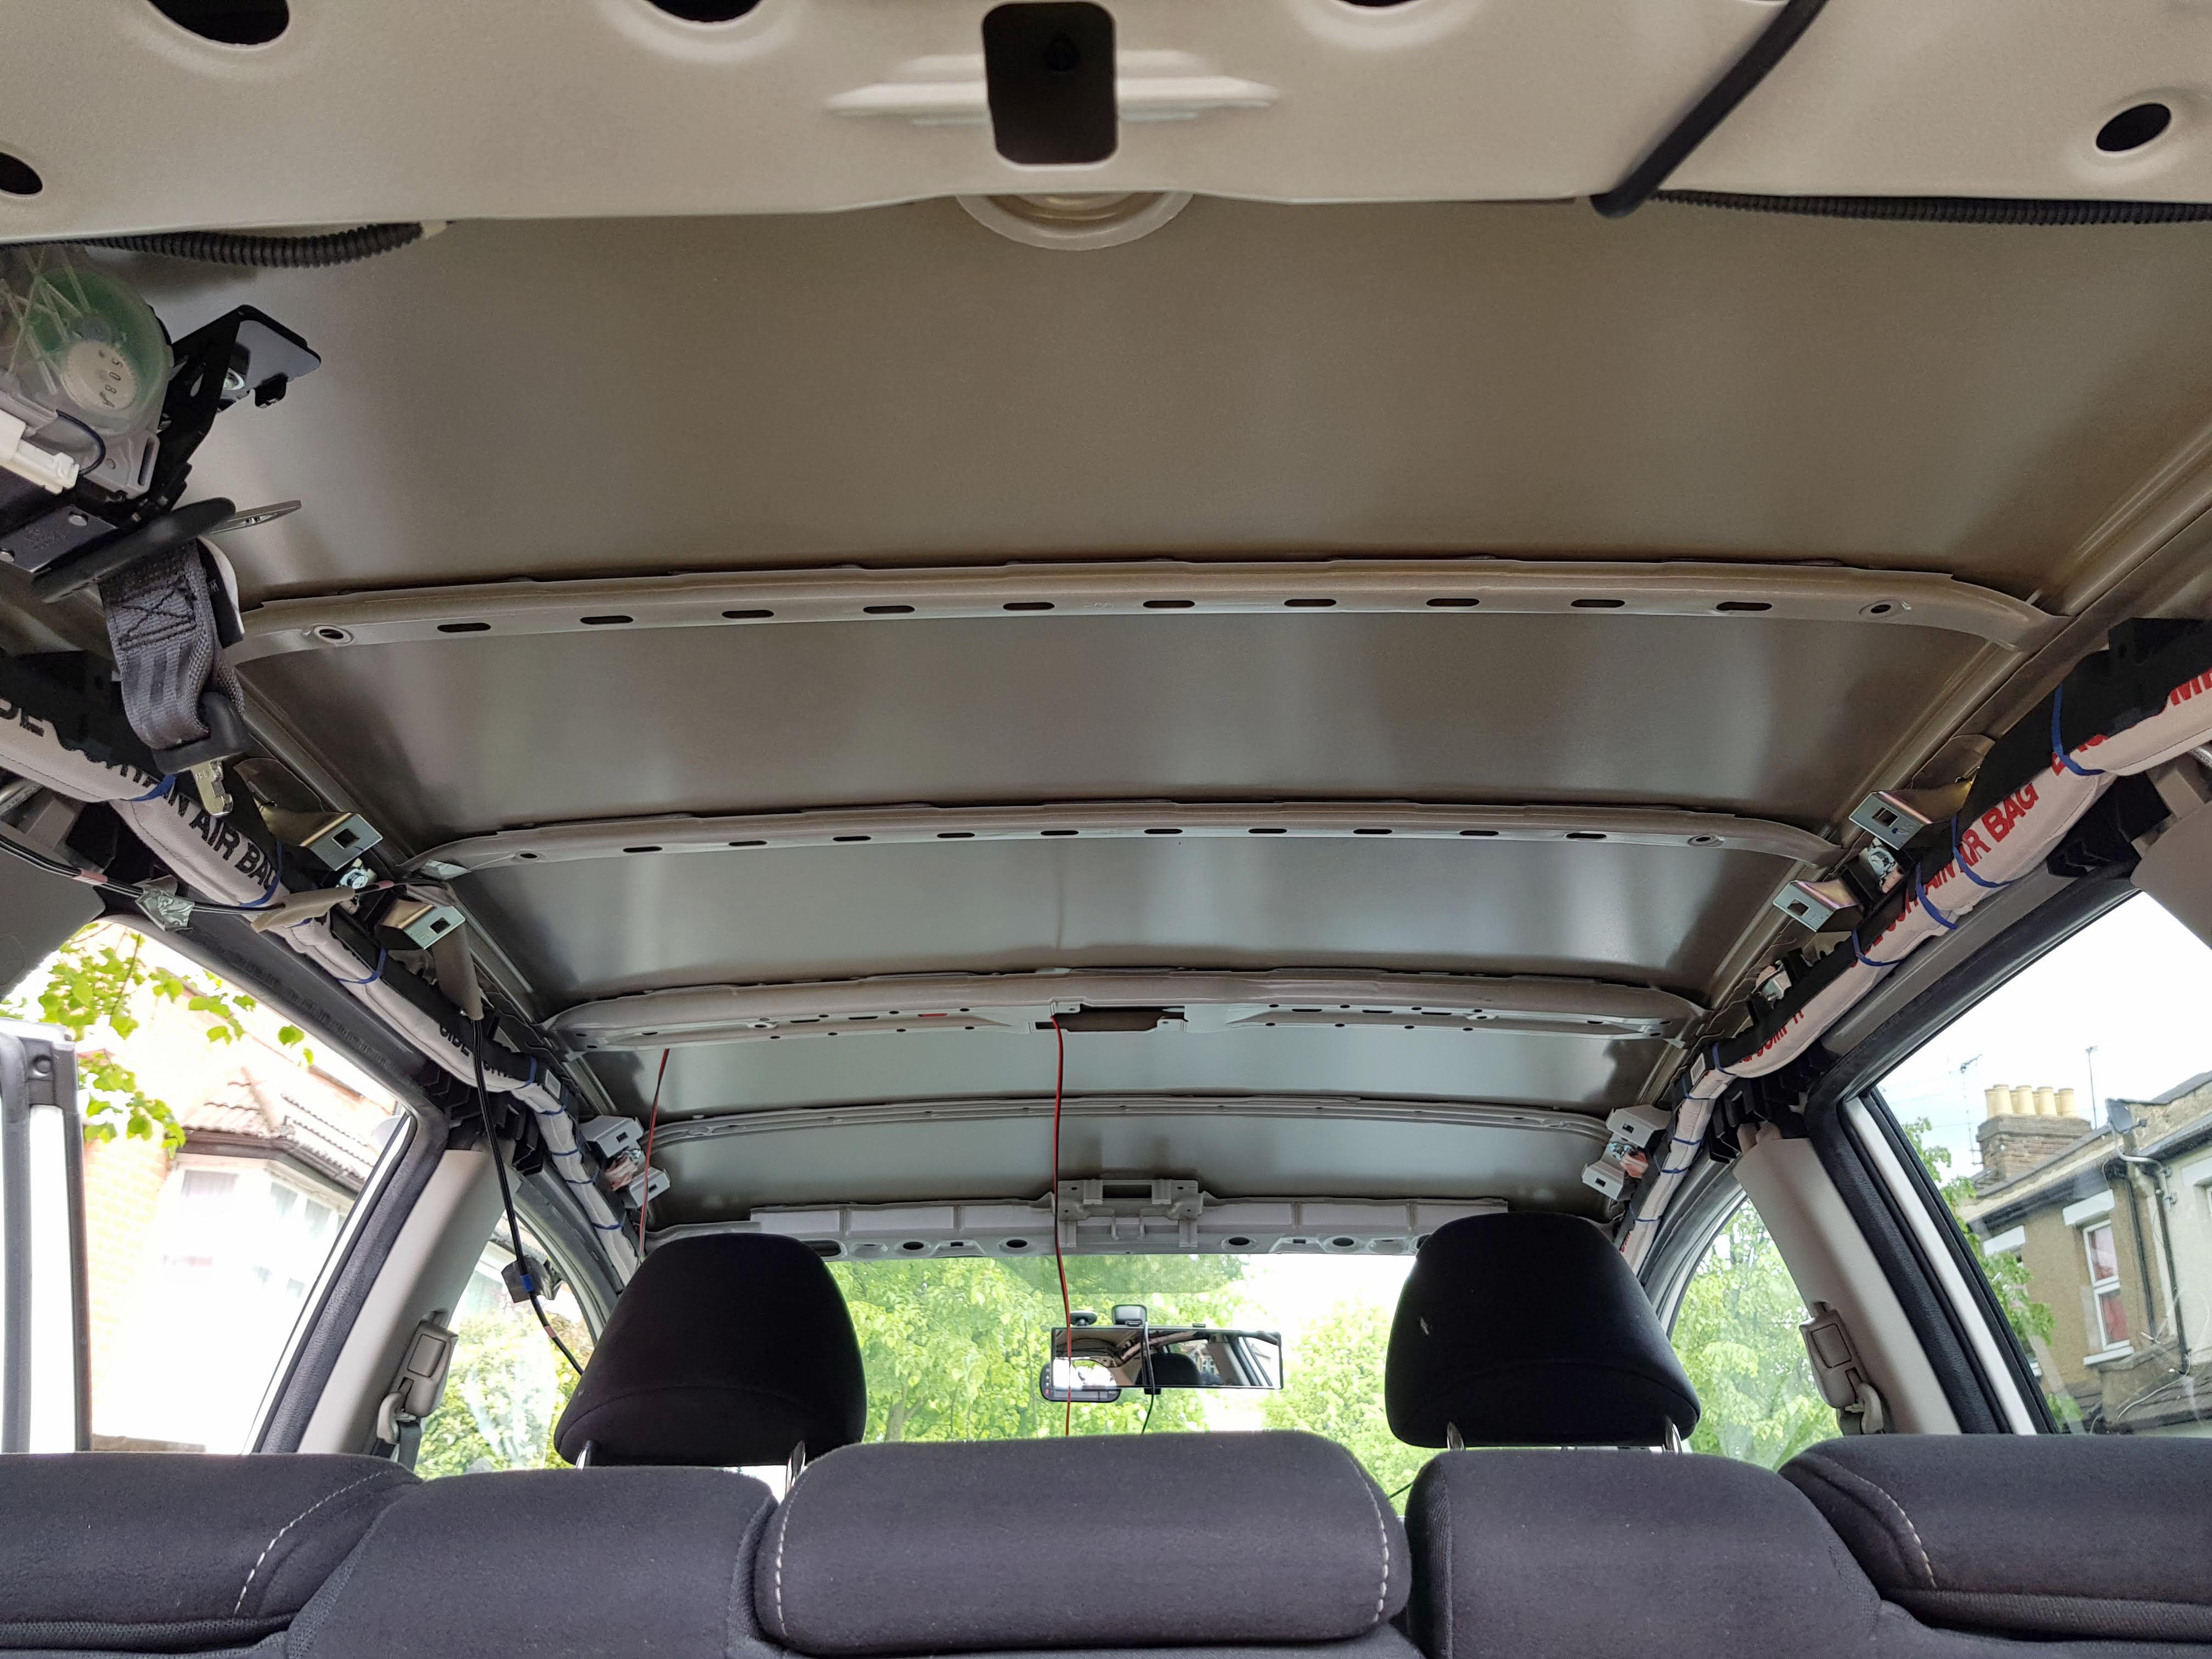
So the next big job was the roof (which turned out to be the easiest part to apply the sound deadening to).
In the service manual it says in order to remove the roof liner, you have to remove all the rear plastic trim, side trim, as well as the grab handles, sun visors and ceiling lights.
But seeing as it's fabric basically, I was convinced I could remove it by only doing the grab handles, visors and ceiling lights and jut pull the fabric over the plastics to actually remove it, saving me having to remove all the plastic panels again.
And it worked:
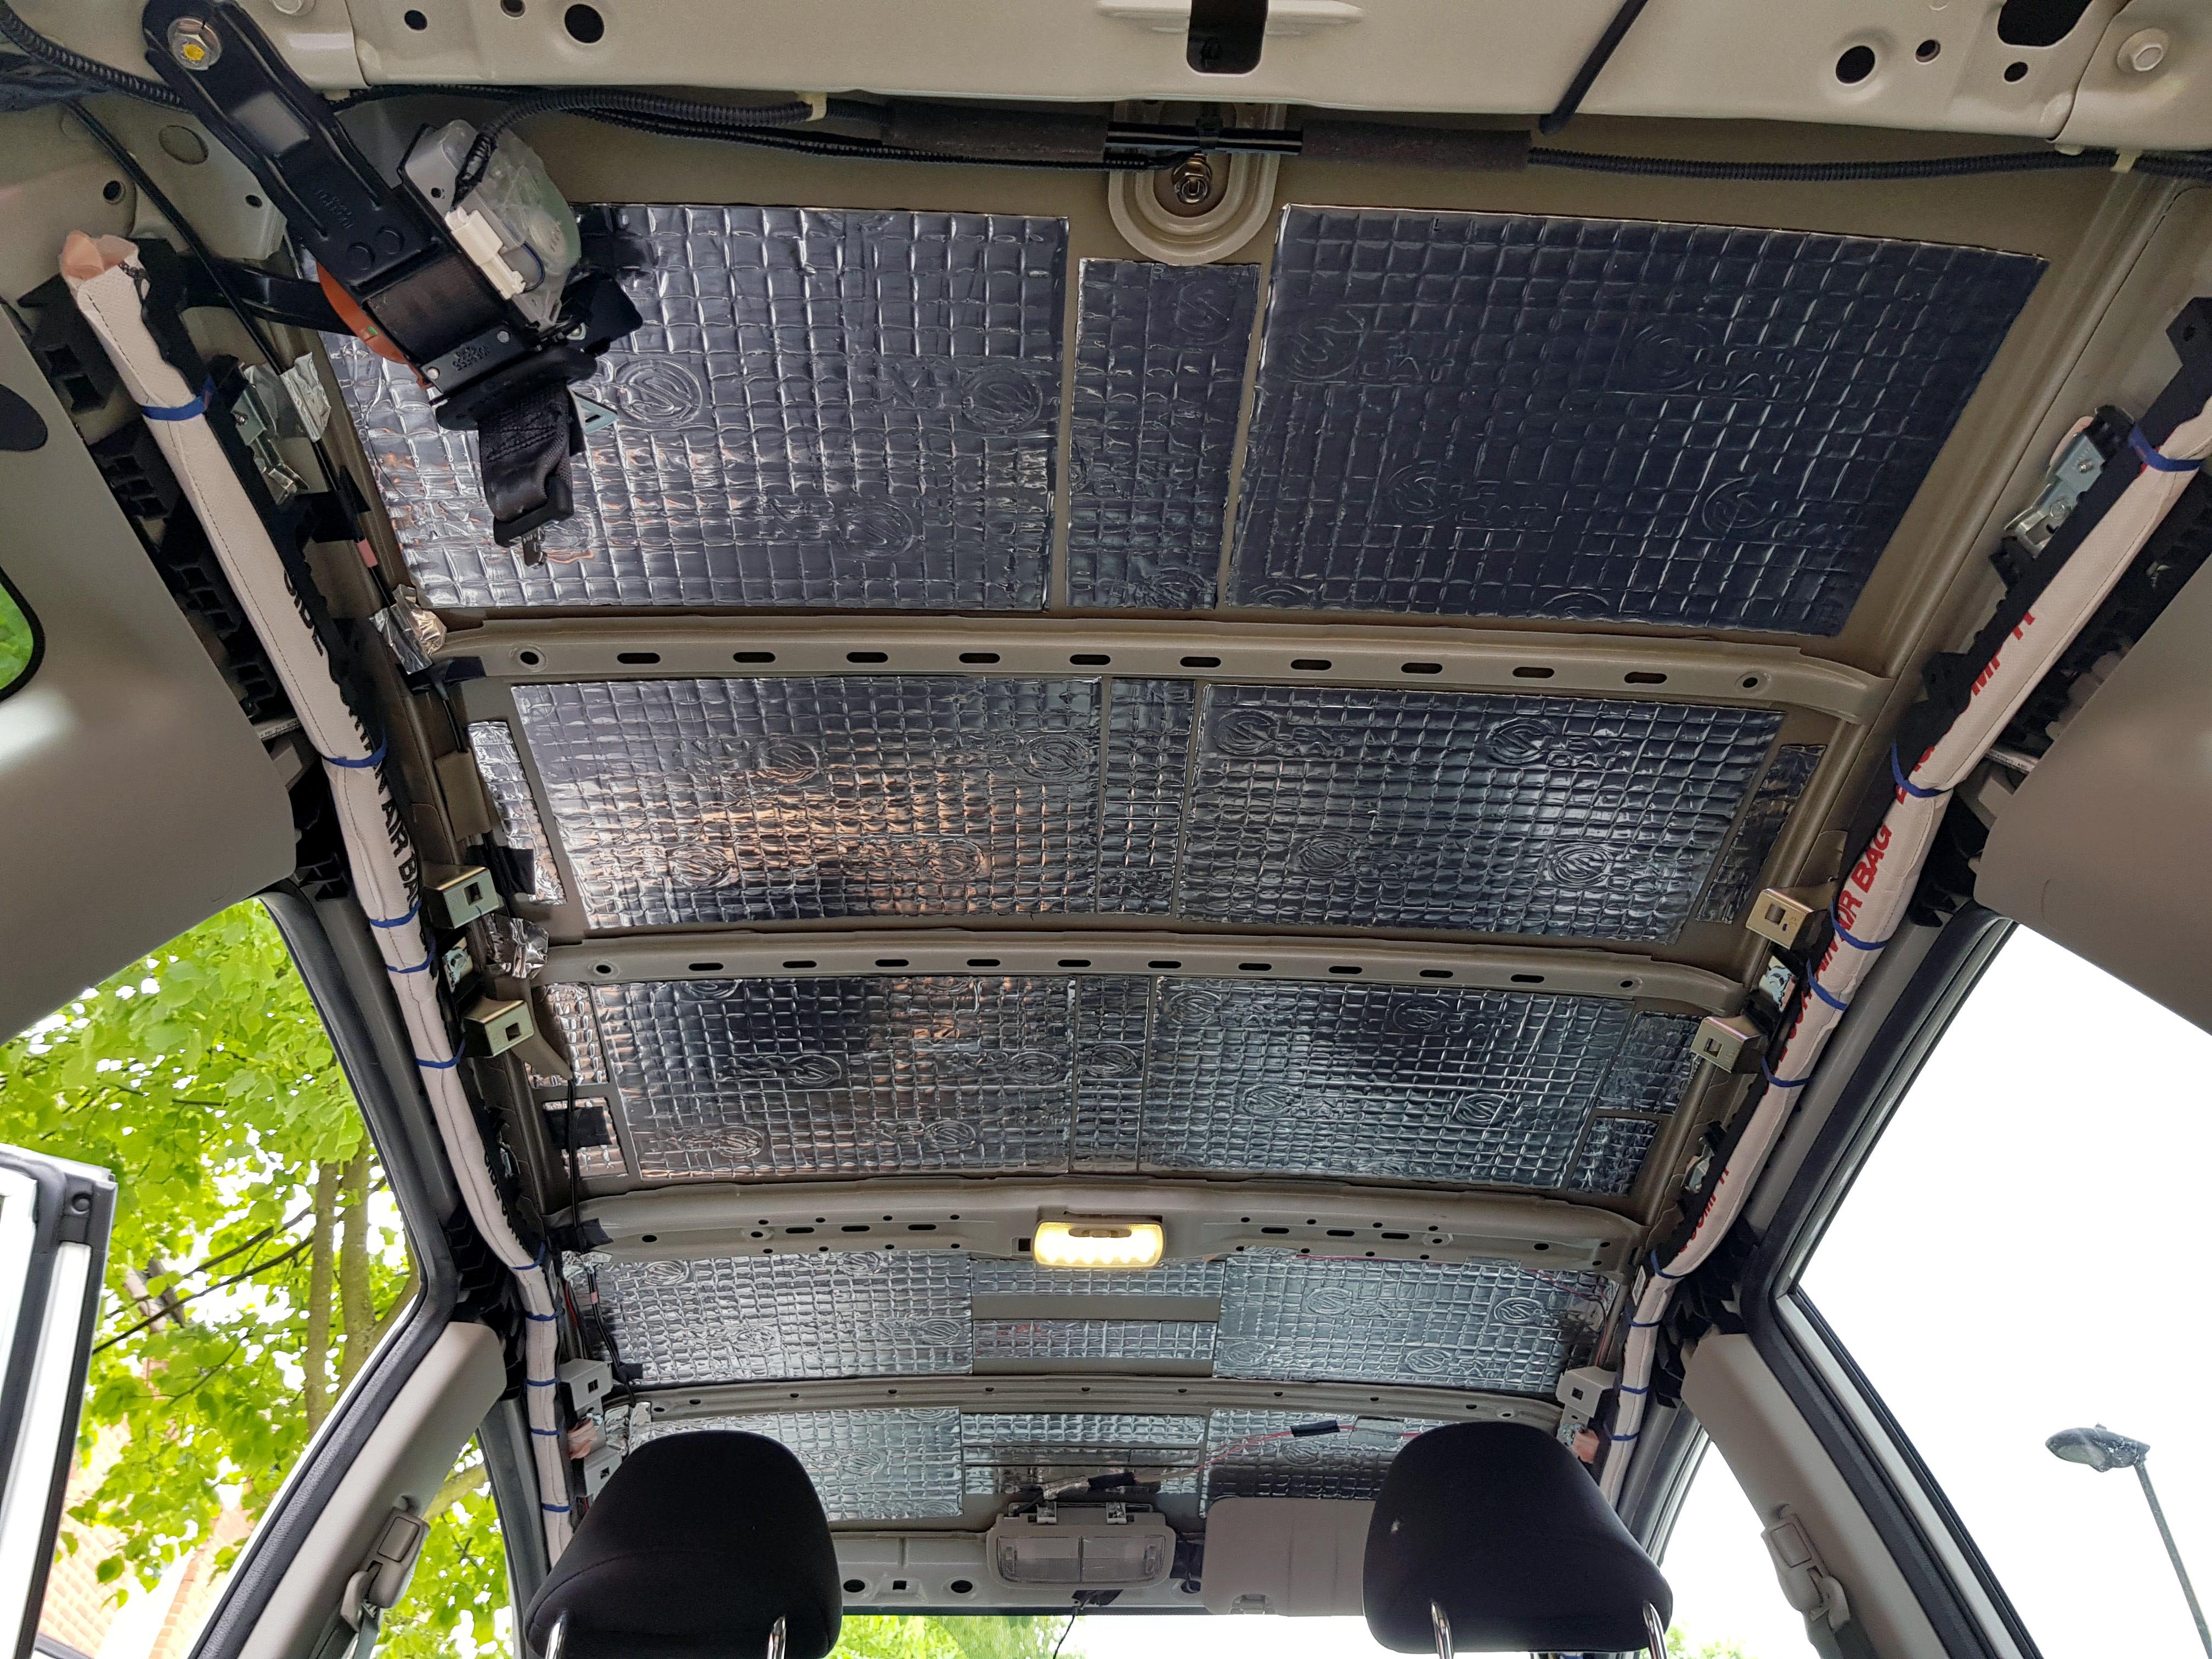
The roof was really easy to apply the Silent coat panels to, as it was basically one long flat panel:
I drove around like this for a few days until the closed cell foam sheets I had ordered arrived, and I hadn't realised just how much sound the roof liner on it's own actually removed.
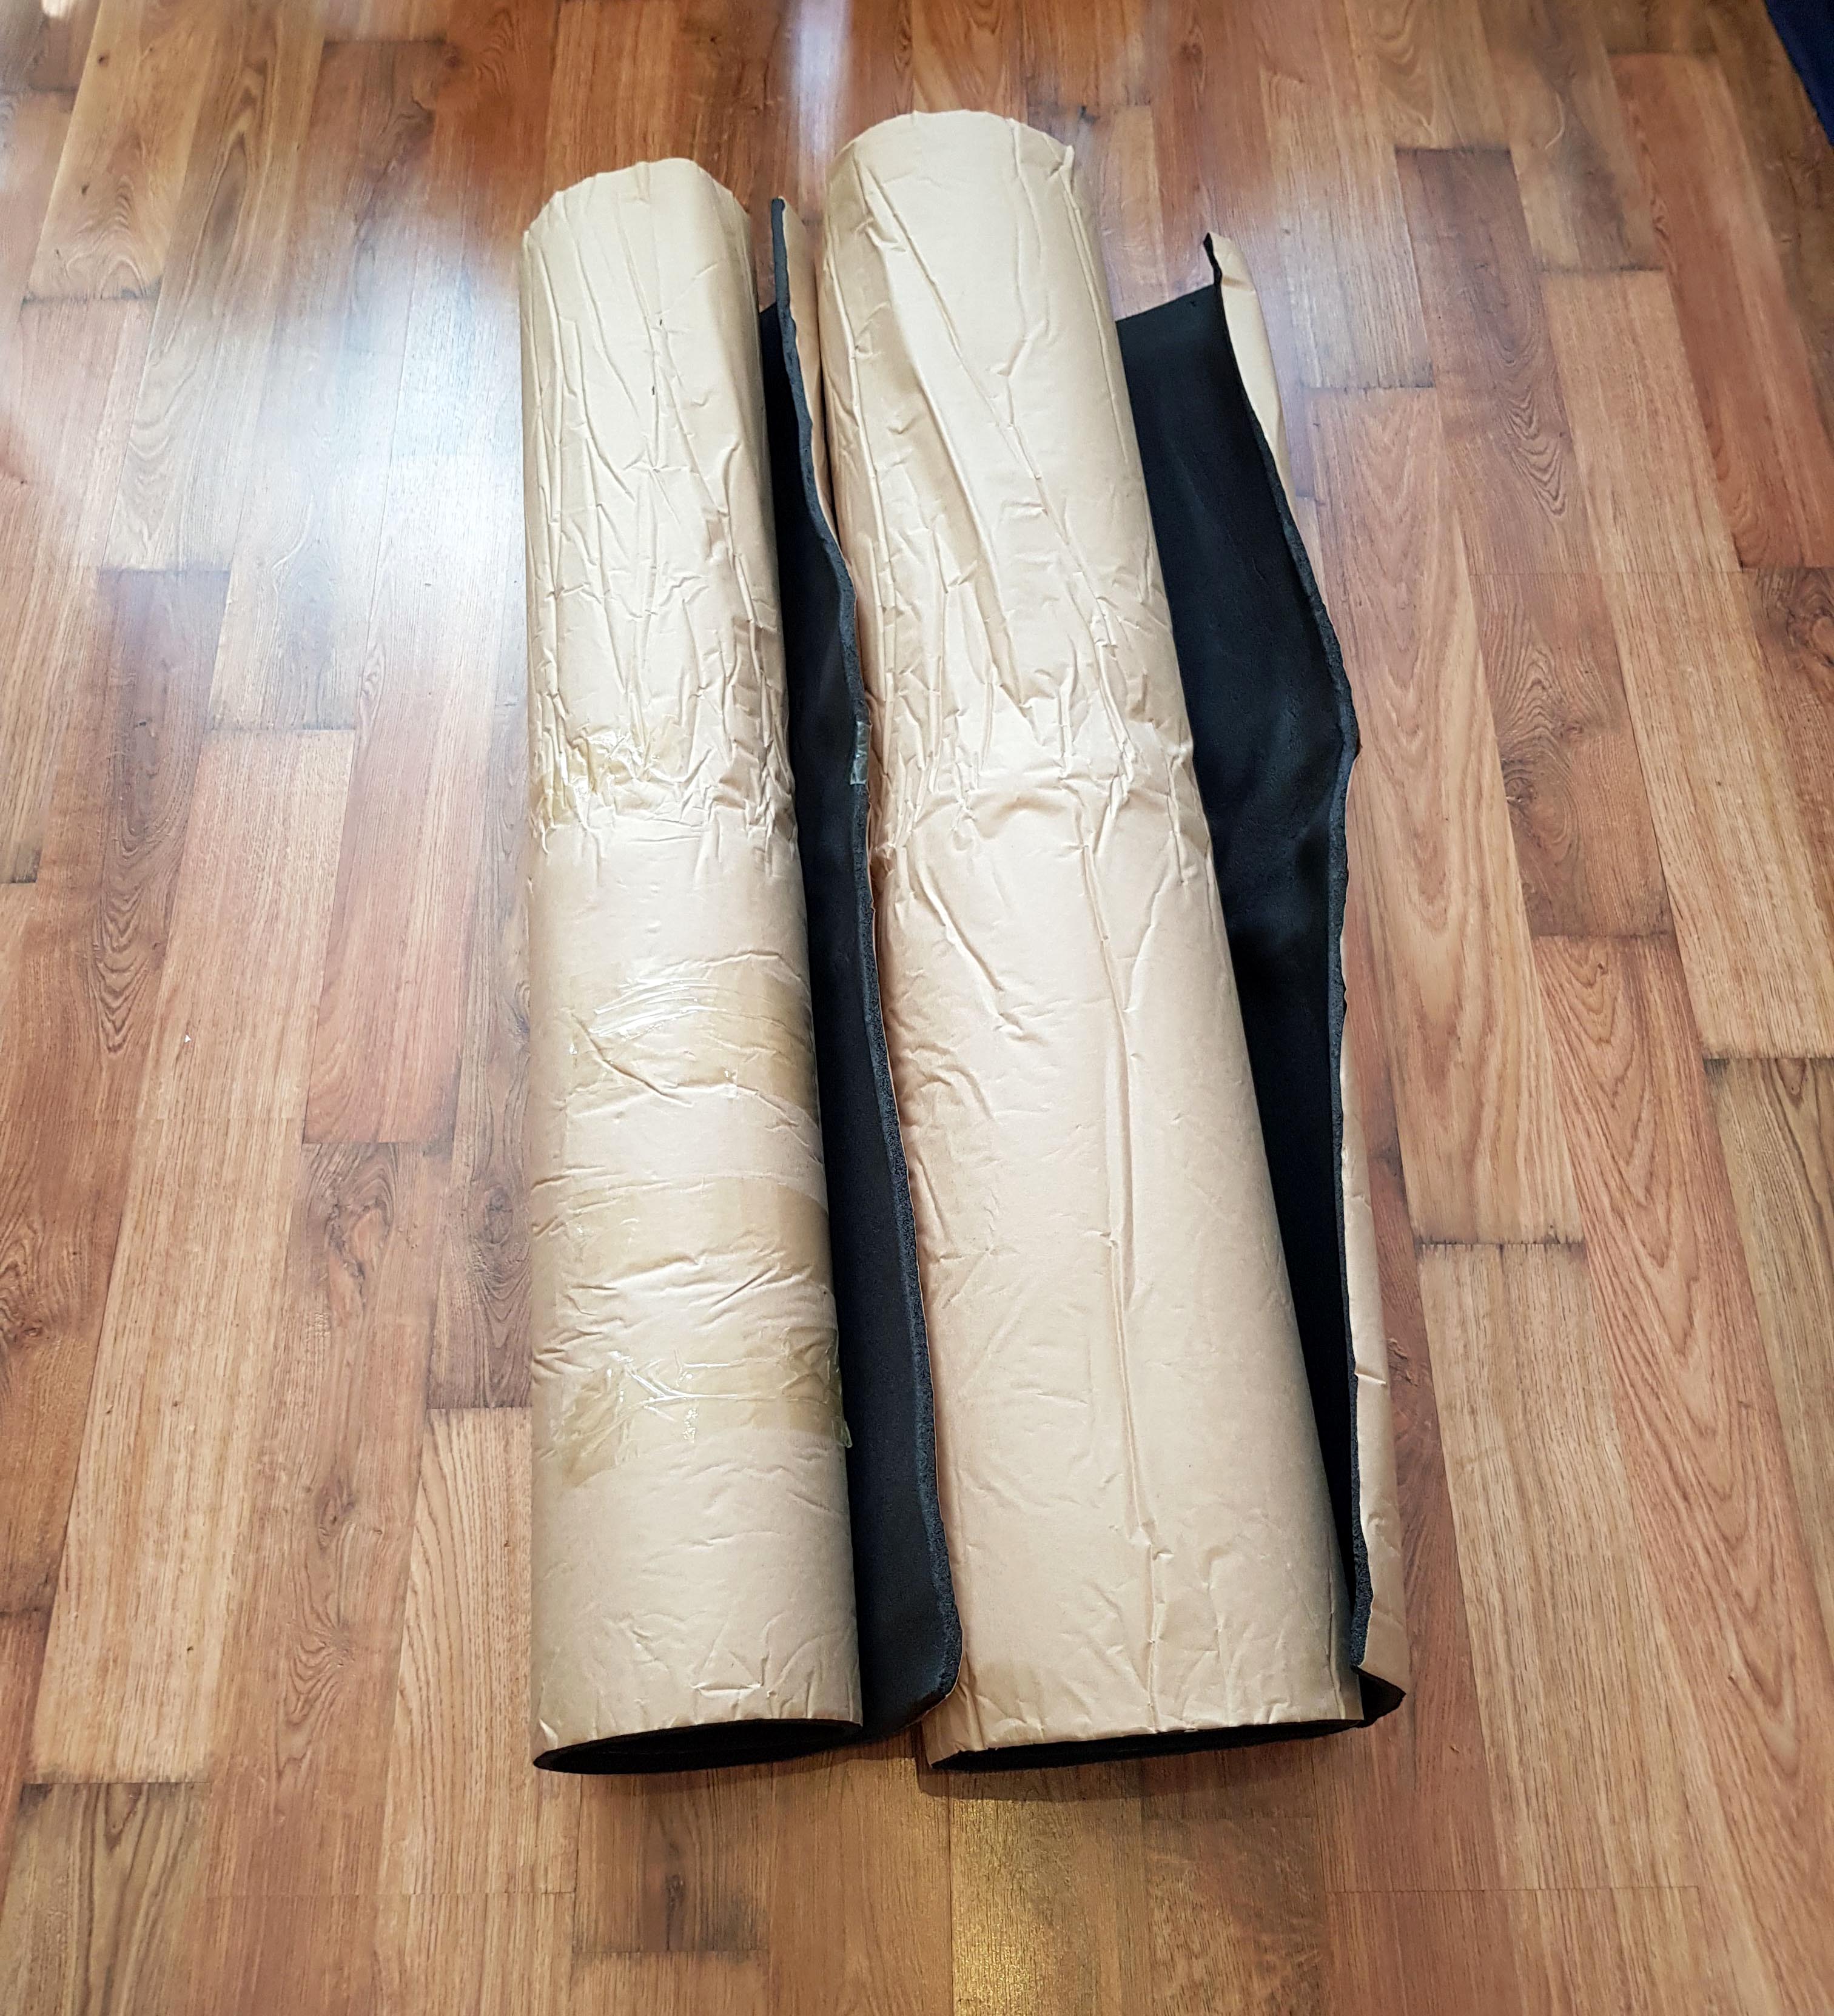
10mm Closed Cell foam sheets arrived:
It actually worked out a lot more cost effective to order them in 1mx2m rolls. I ended up ordering 3 of them in total, which only cost me �36.
It was quite hard to work with them in large sheets compared to the smaller 50x30cm sheets I was ordering before. But I managed to get there in the end:
Putting the roof liner in was a lot harder than I was expecting.
Getting it off without removing the plastic panels was fairly easy, but getting it on was not.
I did end up slightly damaging part of the roof as I tried to bend it in to place:
But apart from that, there's not really any other damage.
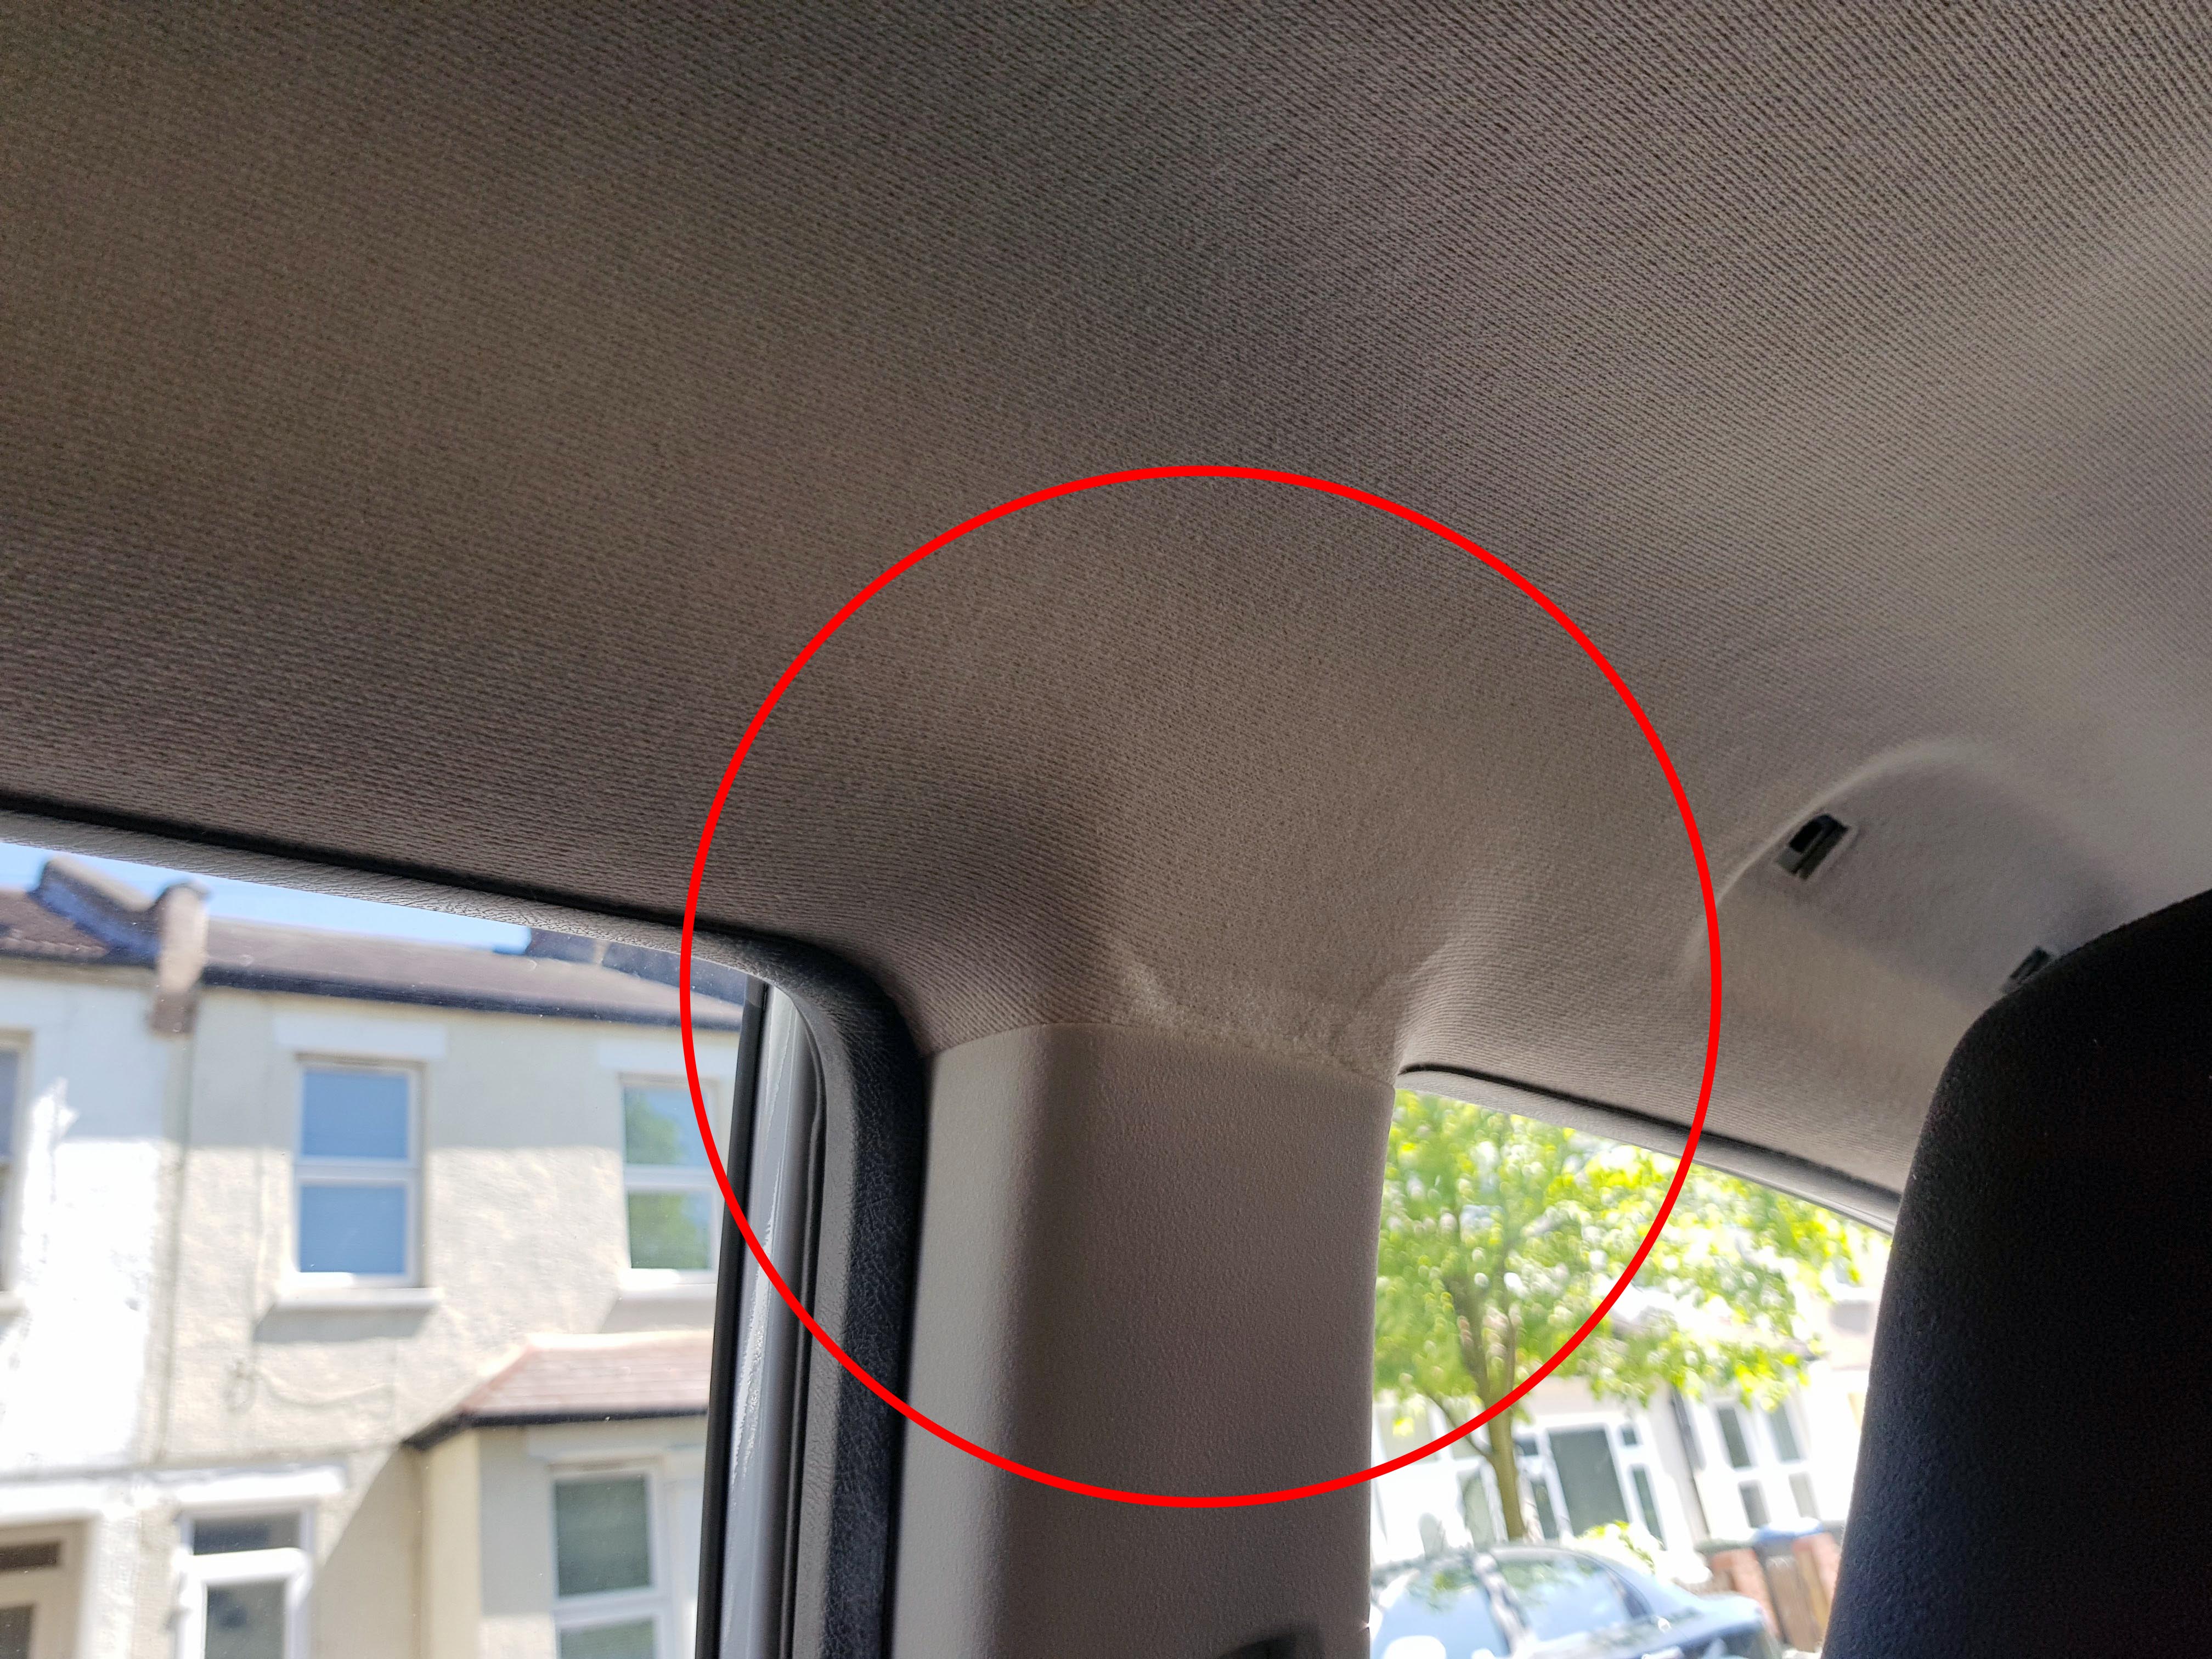
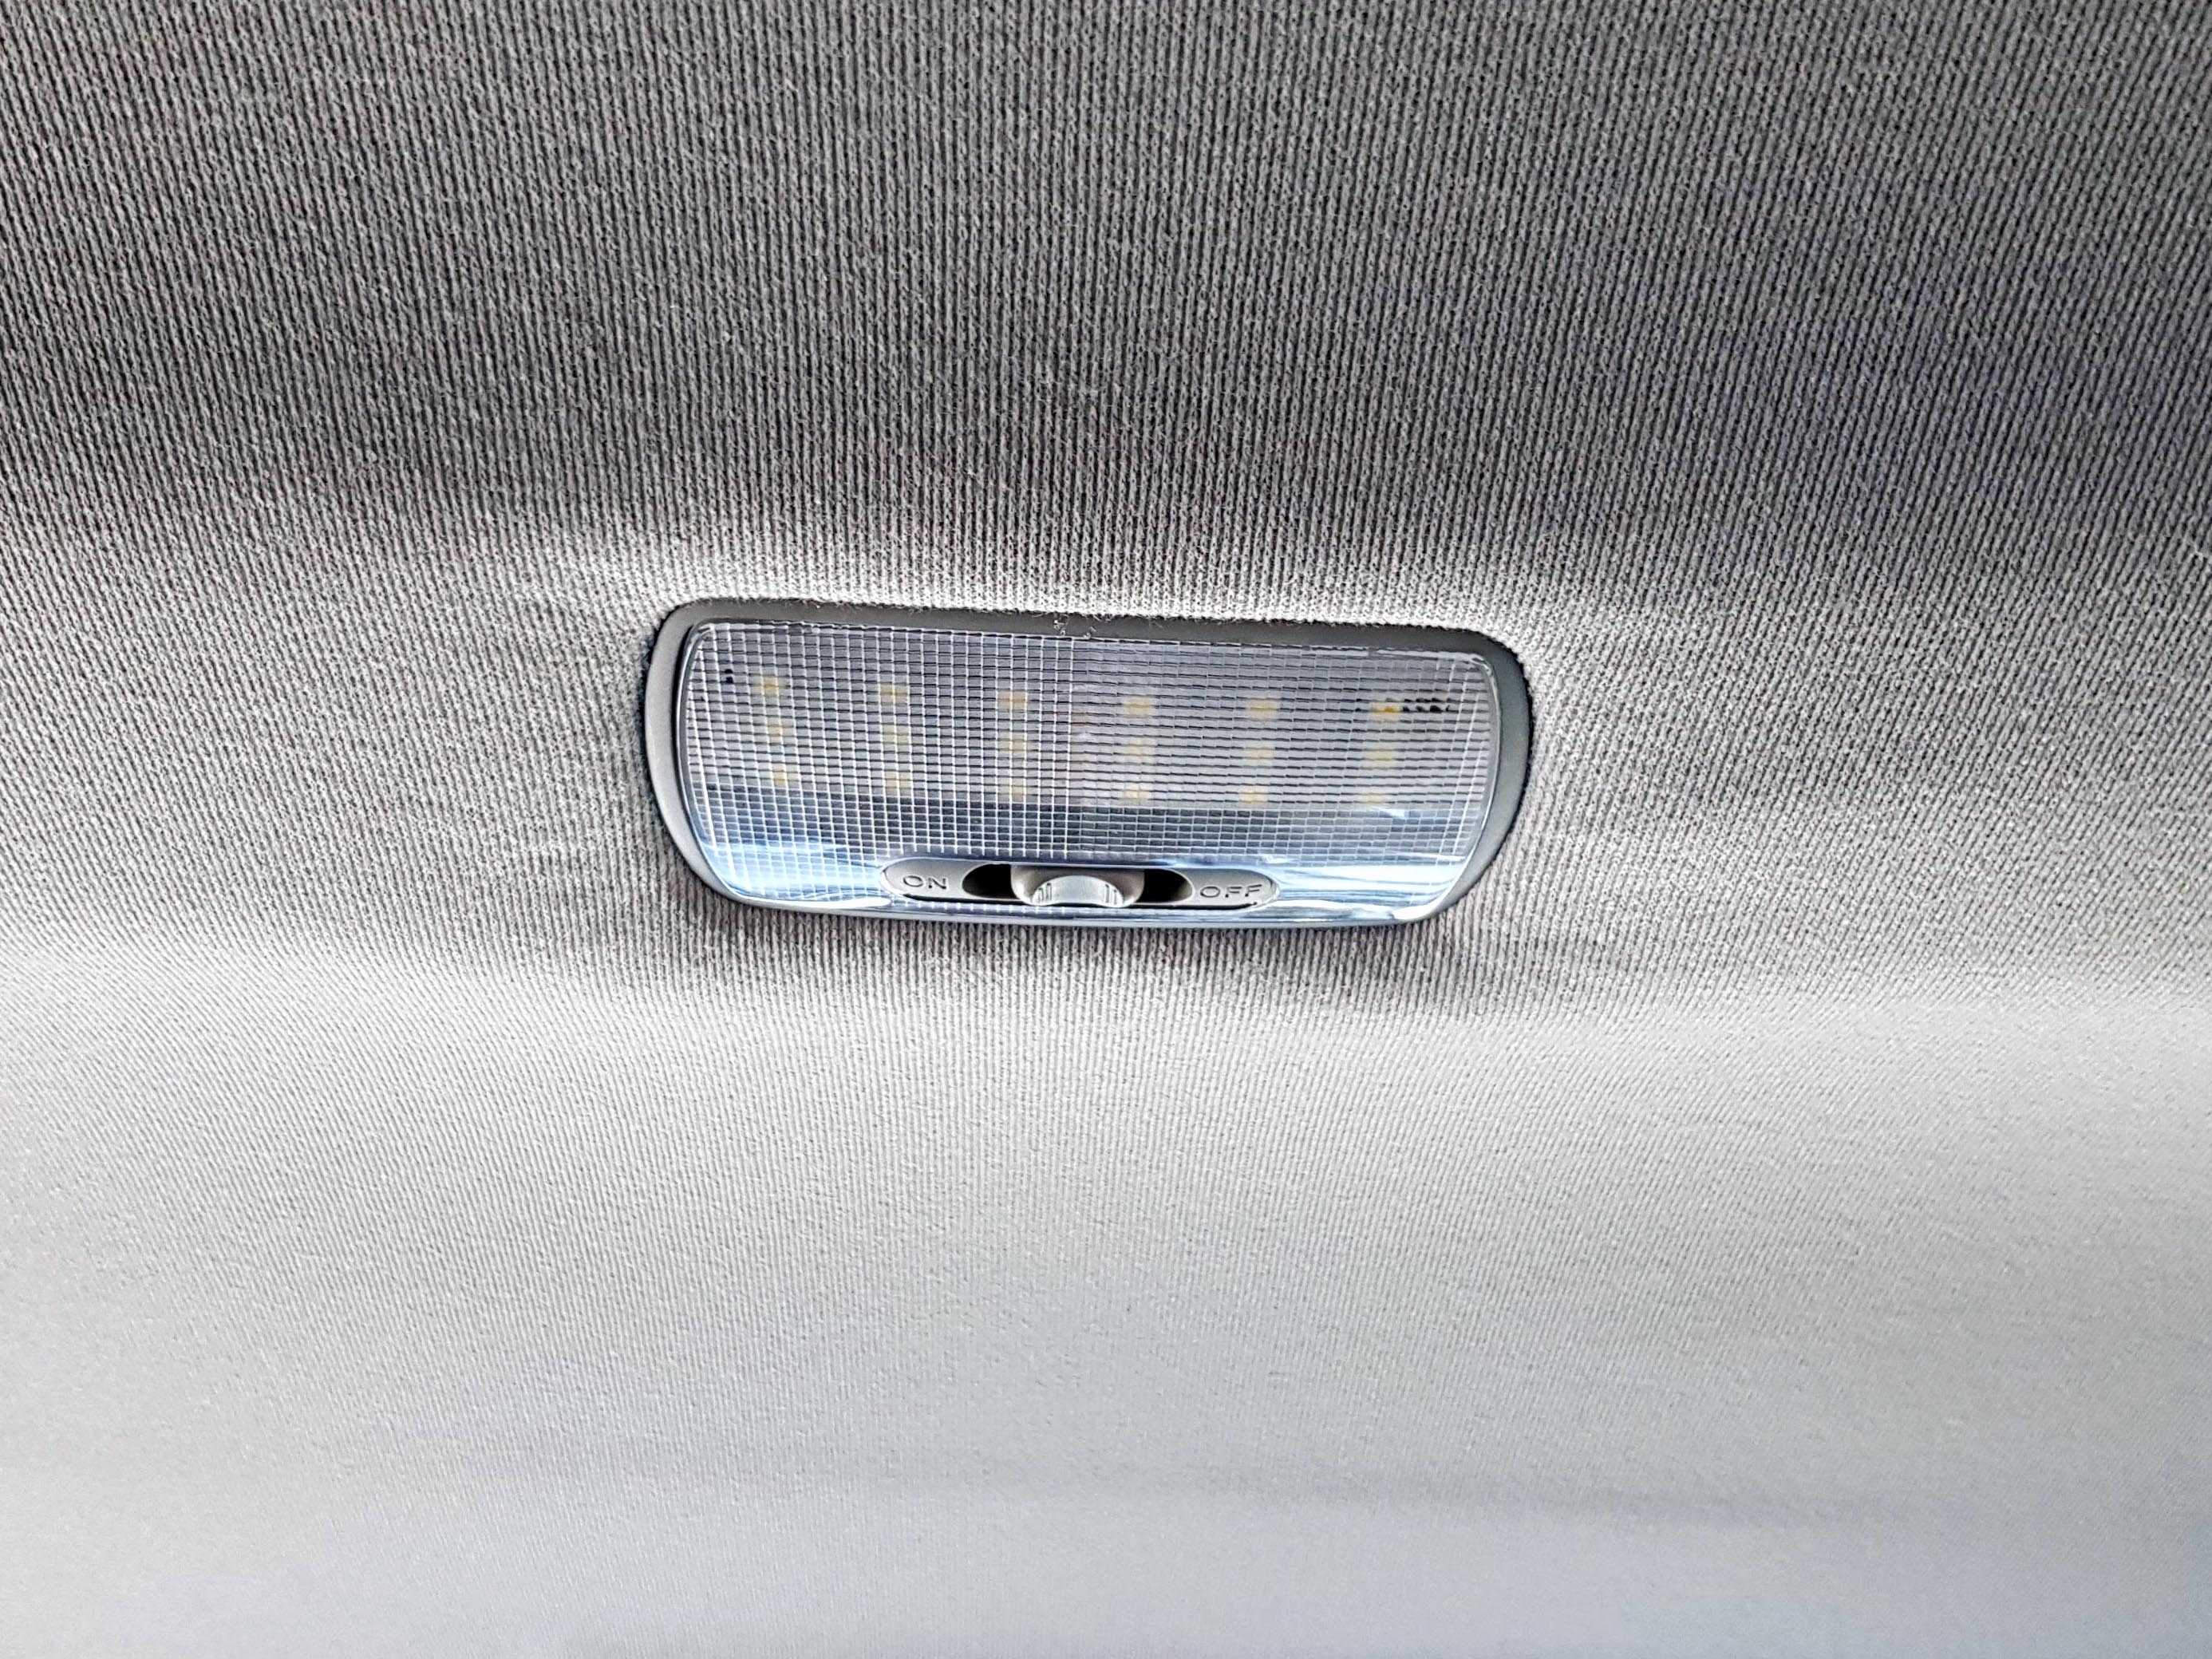
The only noticeable area where the liner doesn't fit quite right because of the foam underneath is around the main interior light, where there is some noticeable stretching:
I did notice quite a big difference after doing the roof, but it only seemed to make all the places noise was getting through more noticeable. But overall the car is a lot quieter.
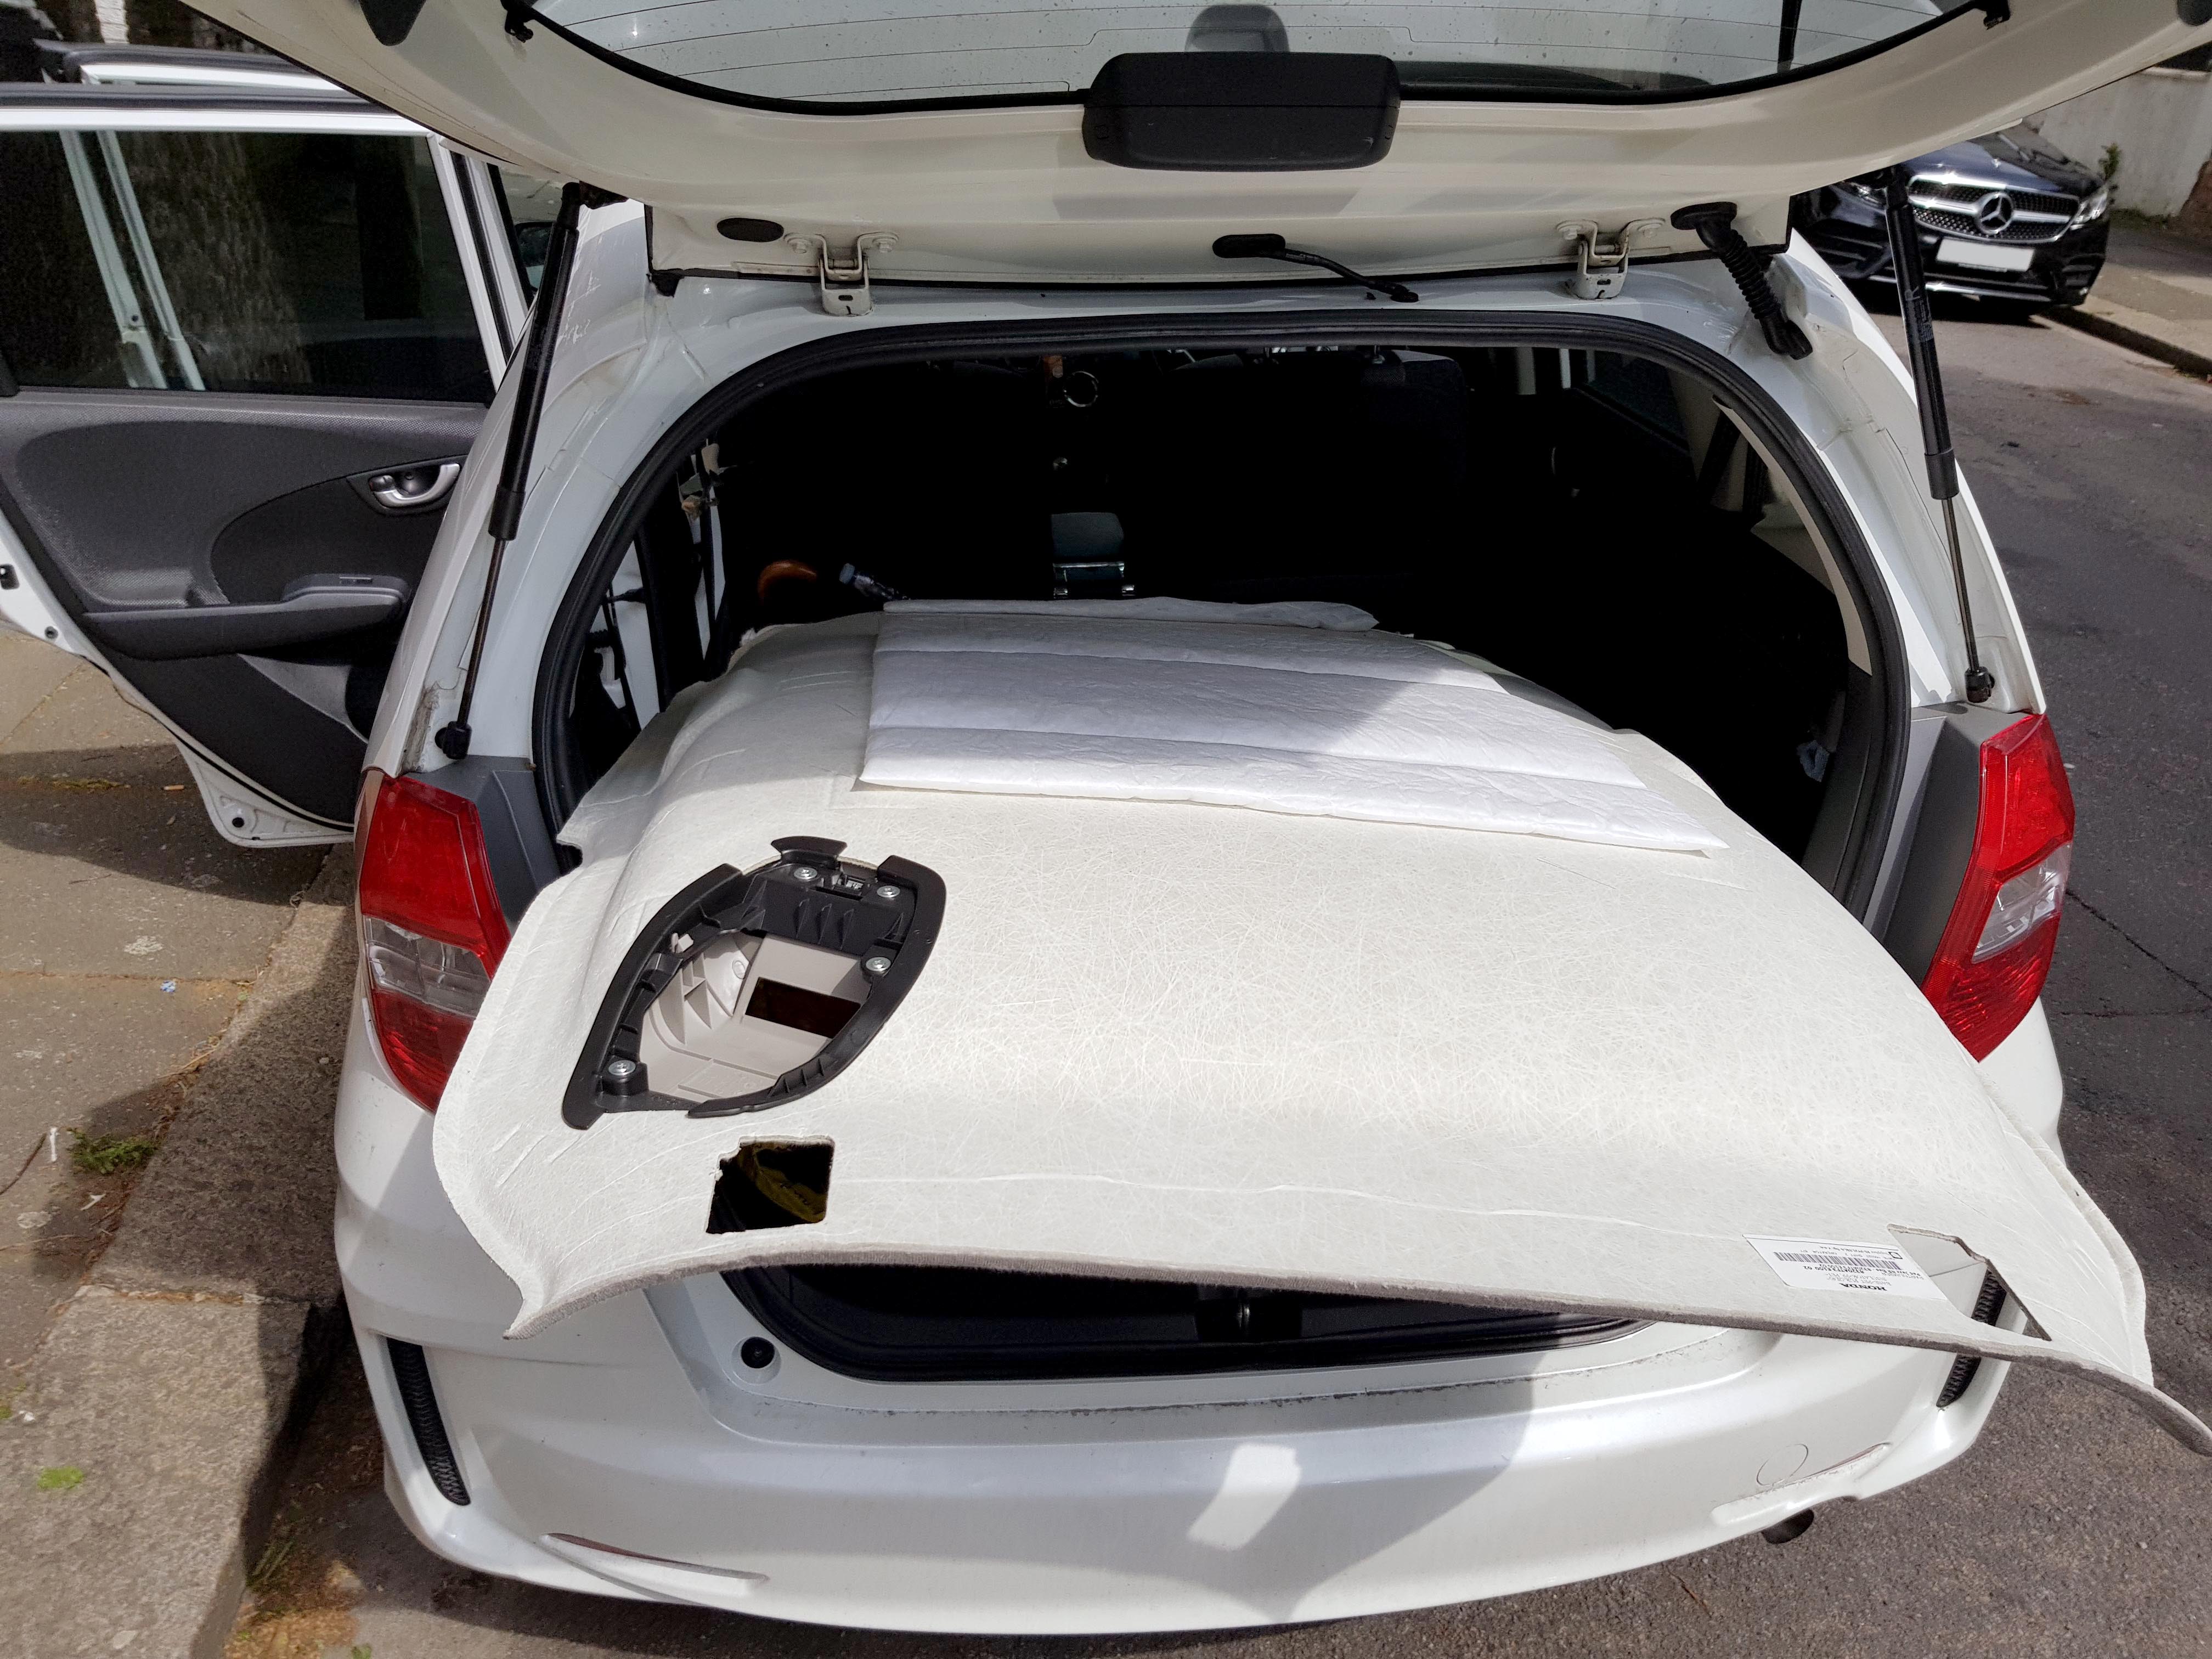
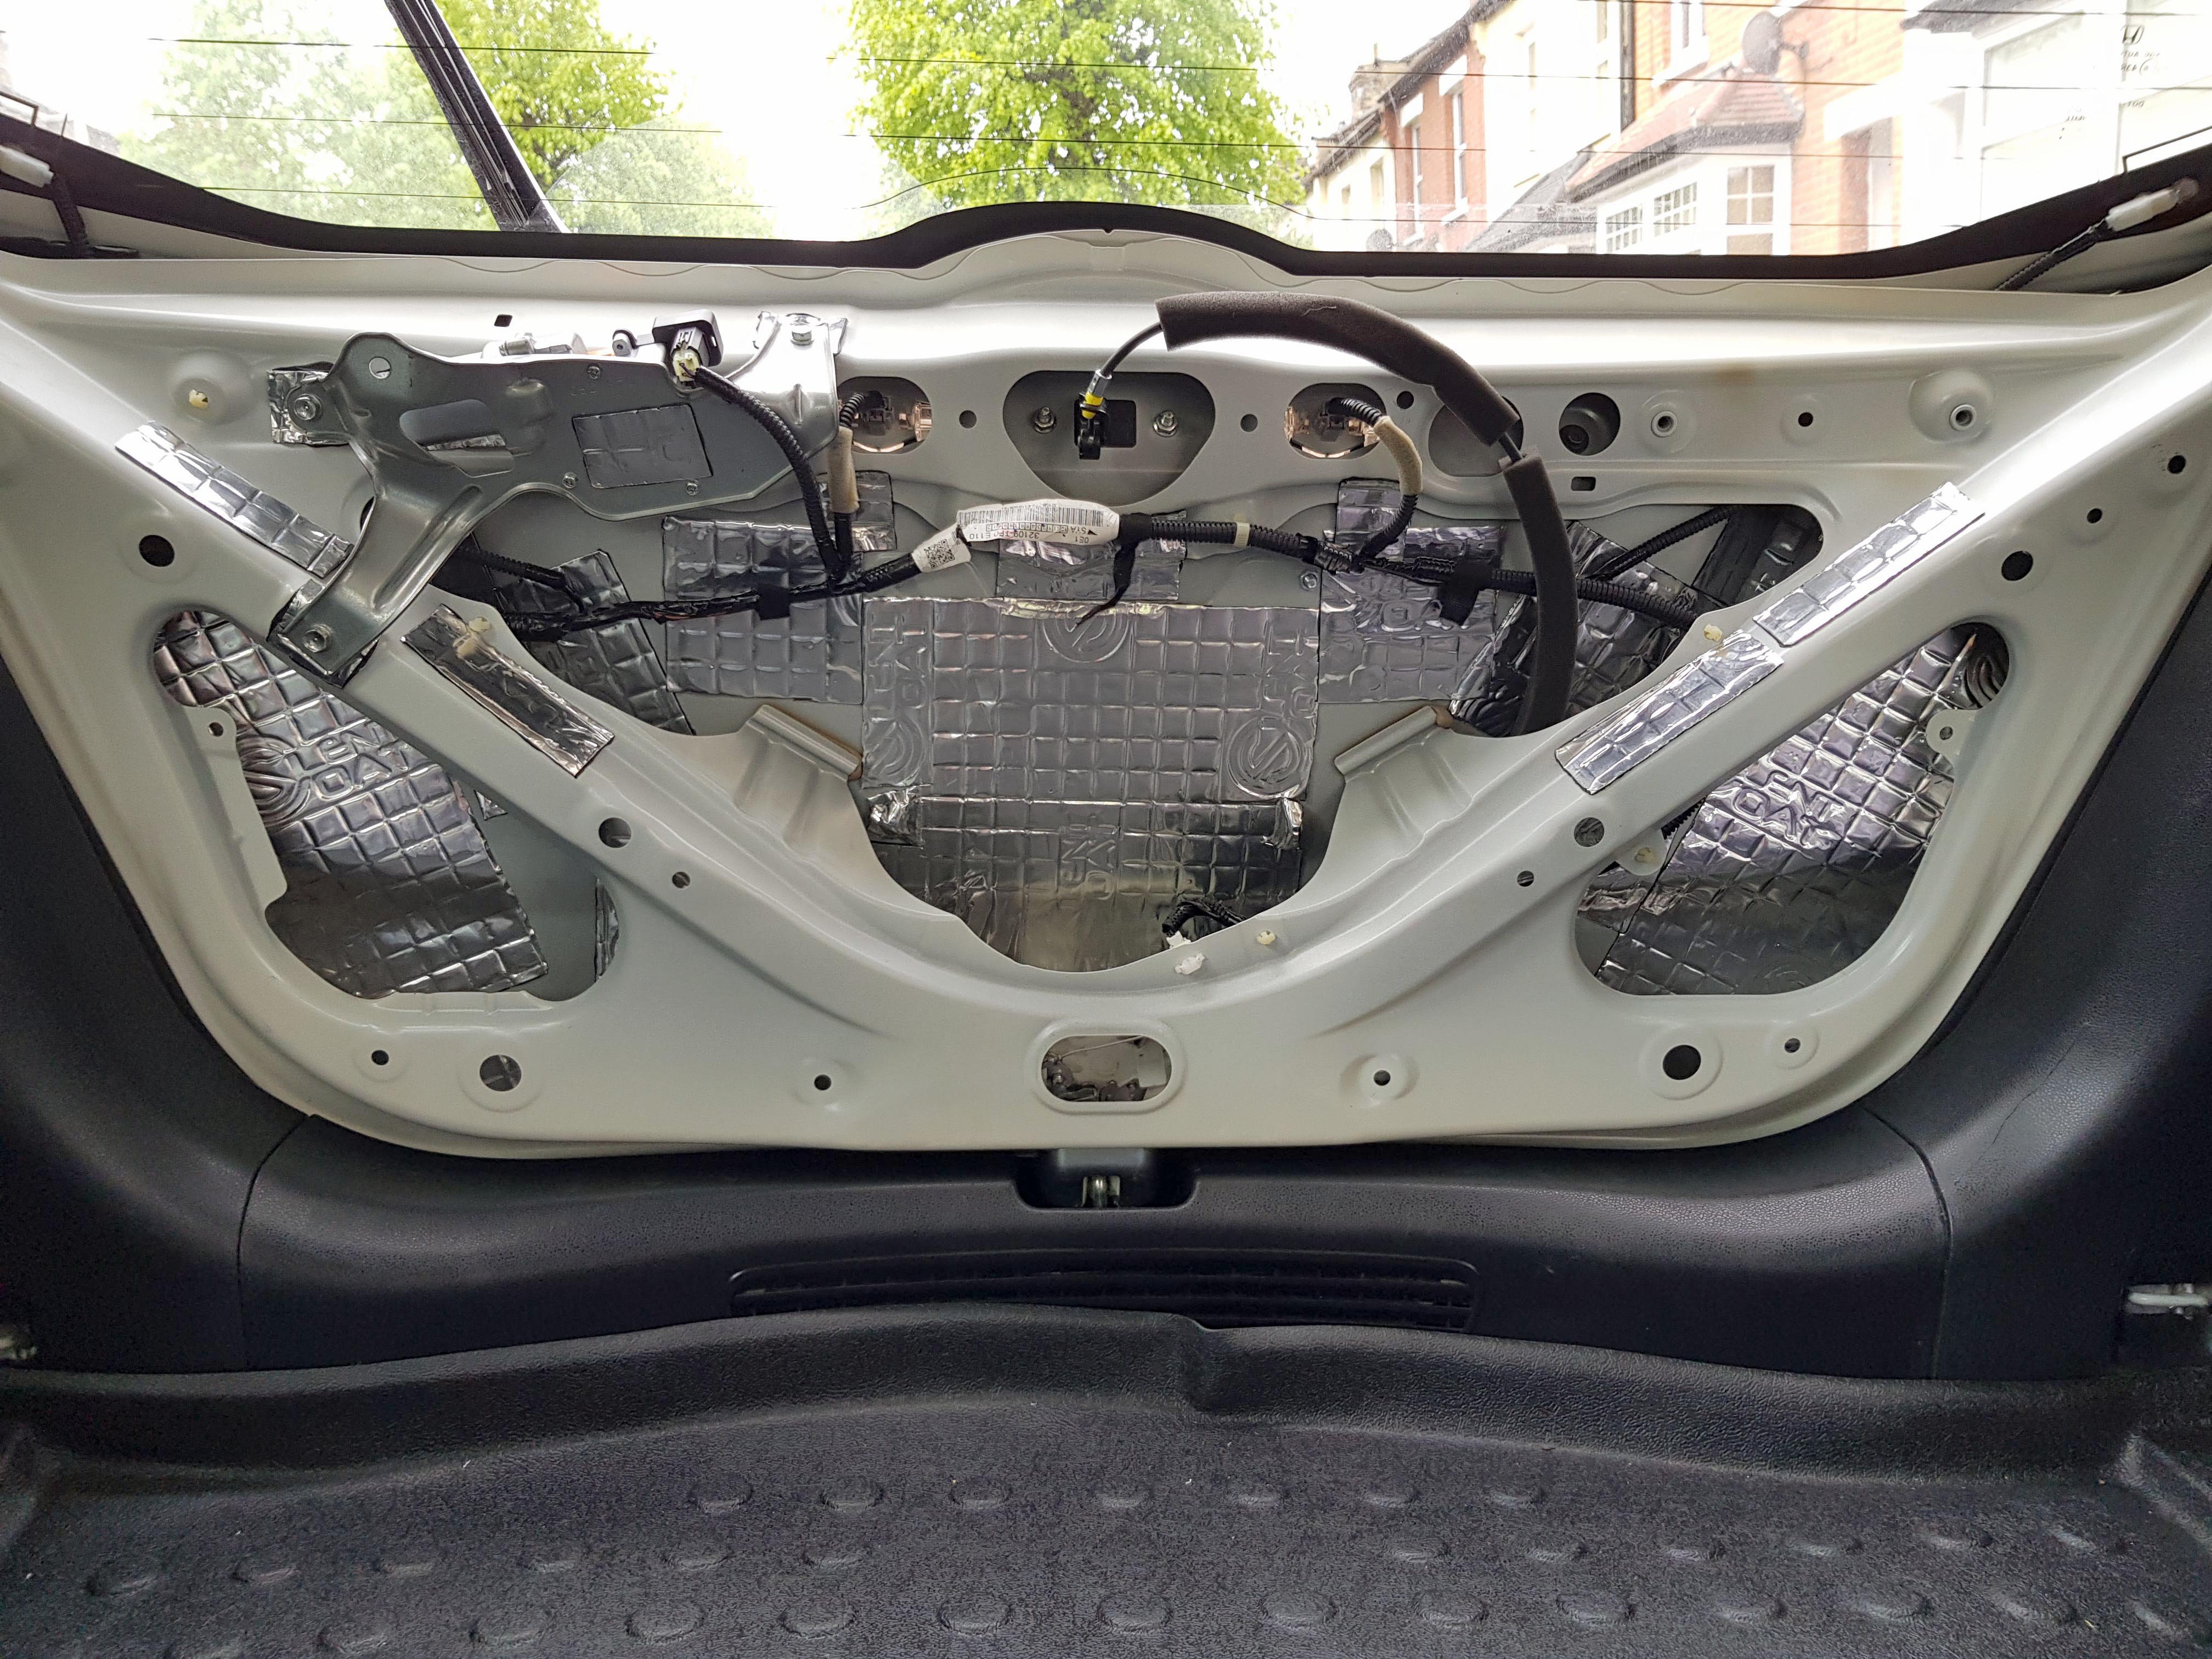
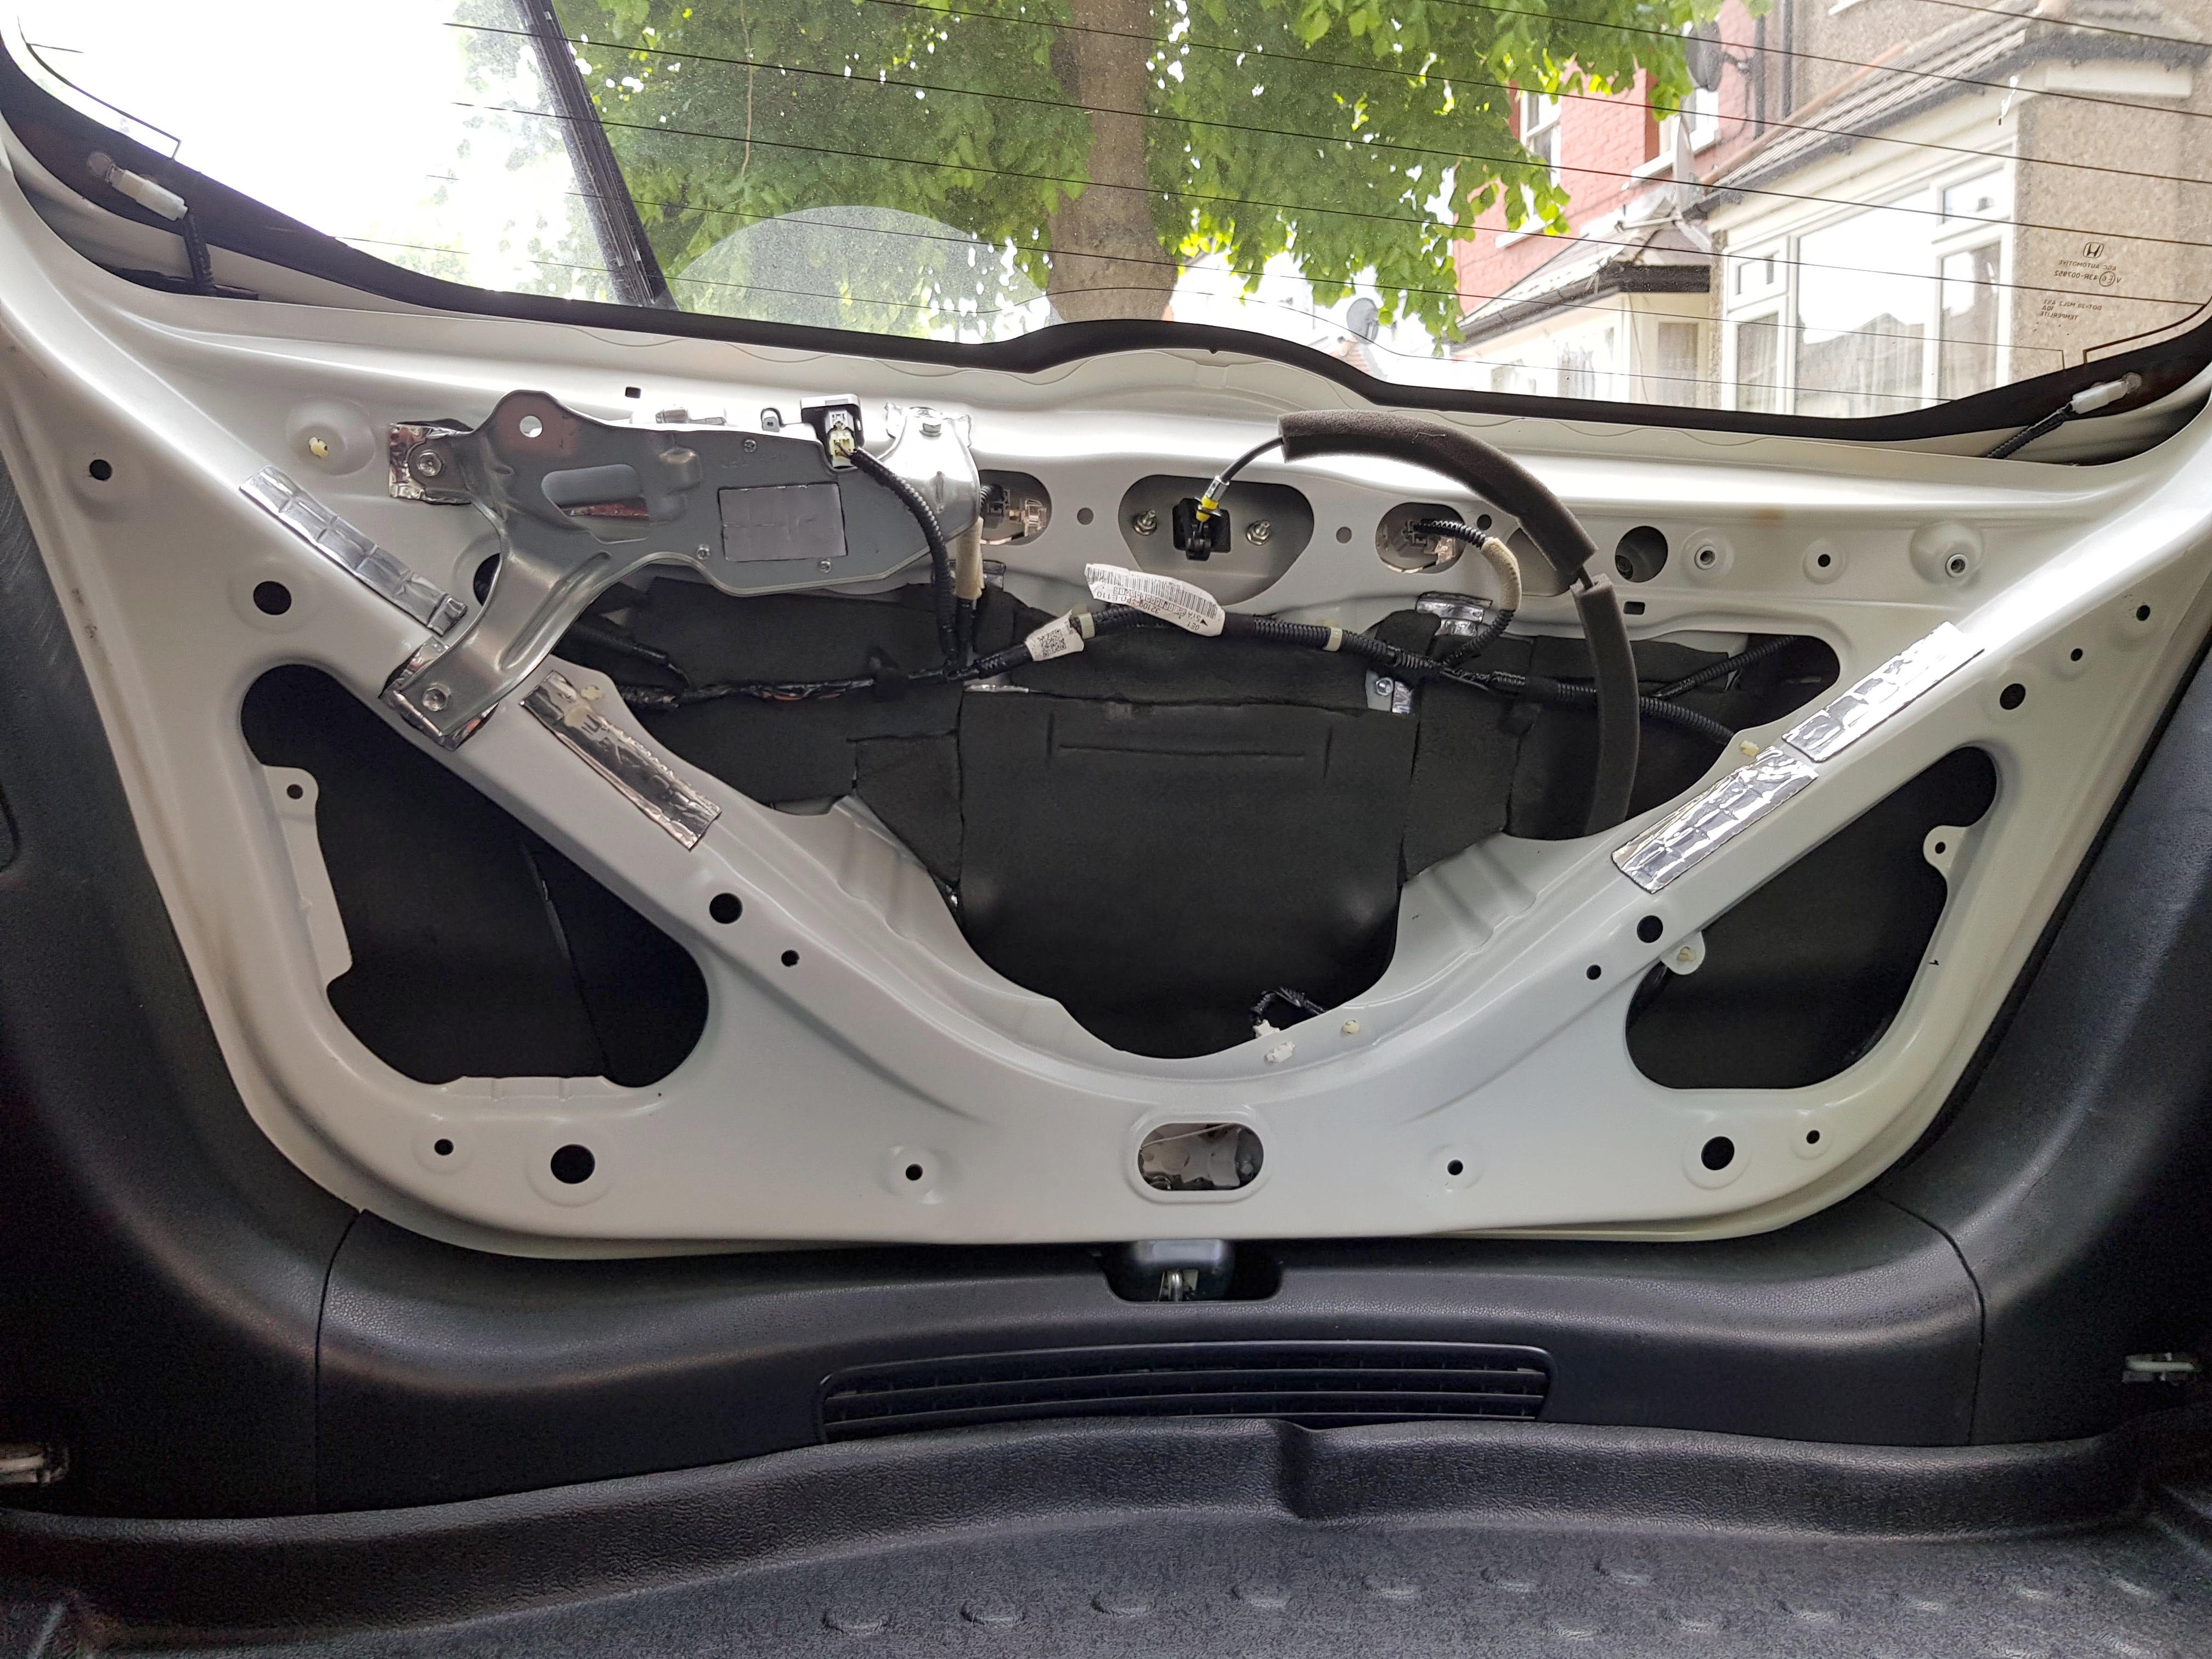
Next to do was the Boot lid.
It was easier to work on from the inside with the boot closed:
The Silent Coat added quite a bit of weight to the boot lid, and made the boot a lot harder to open. Luckily Honda installs a metal weight to the lid so it doesn't fly up too quickly, so I just removed that metal weight and it was basically back to normal again!
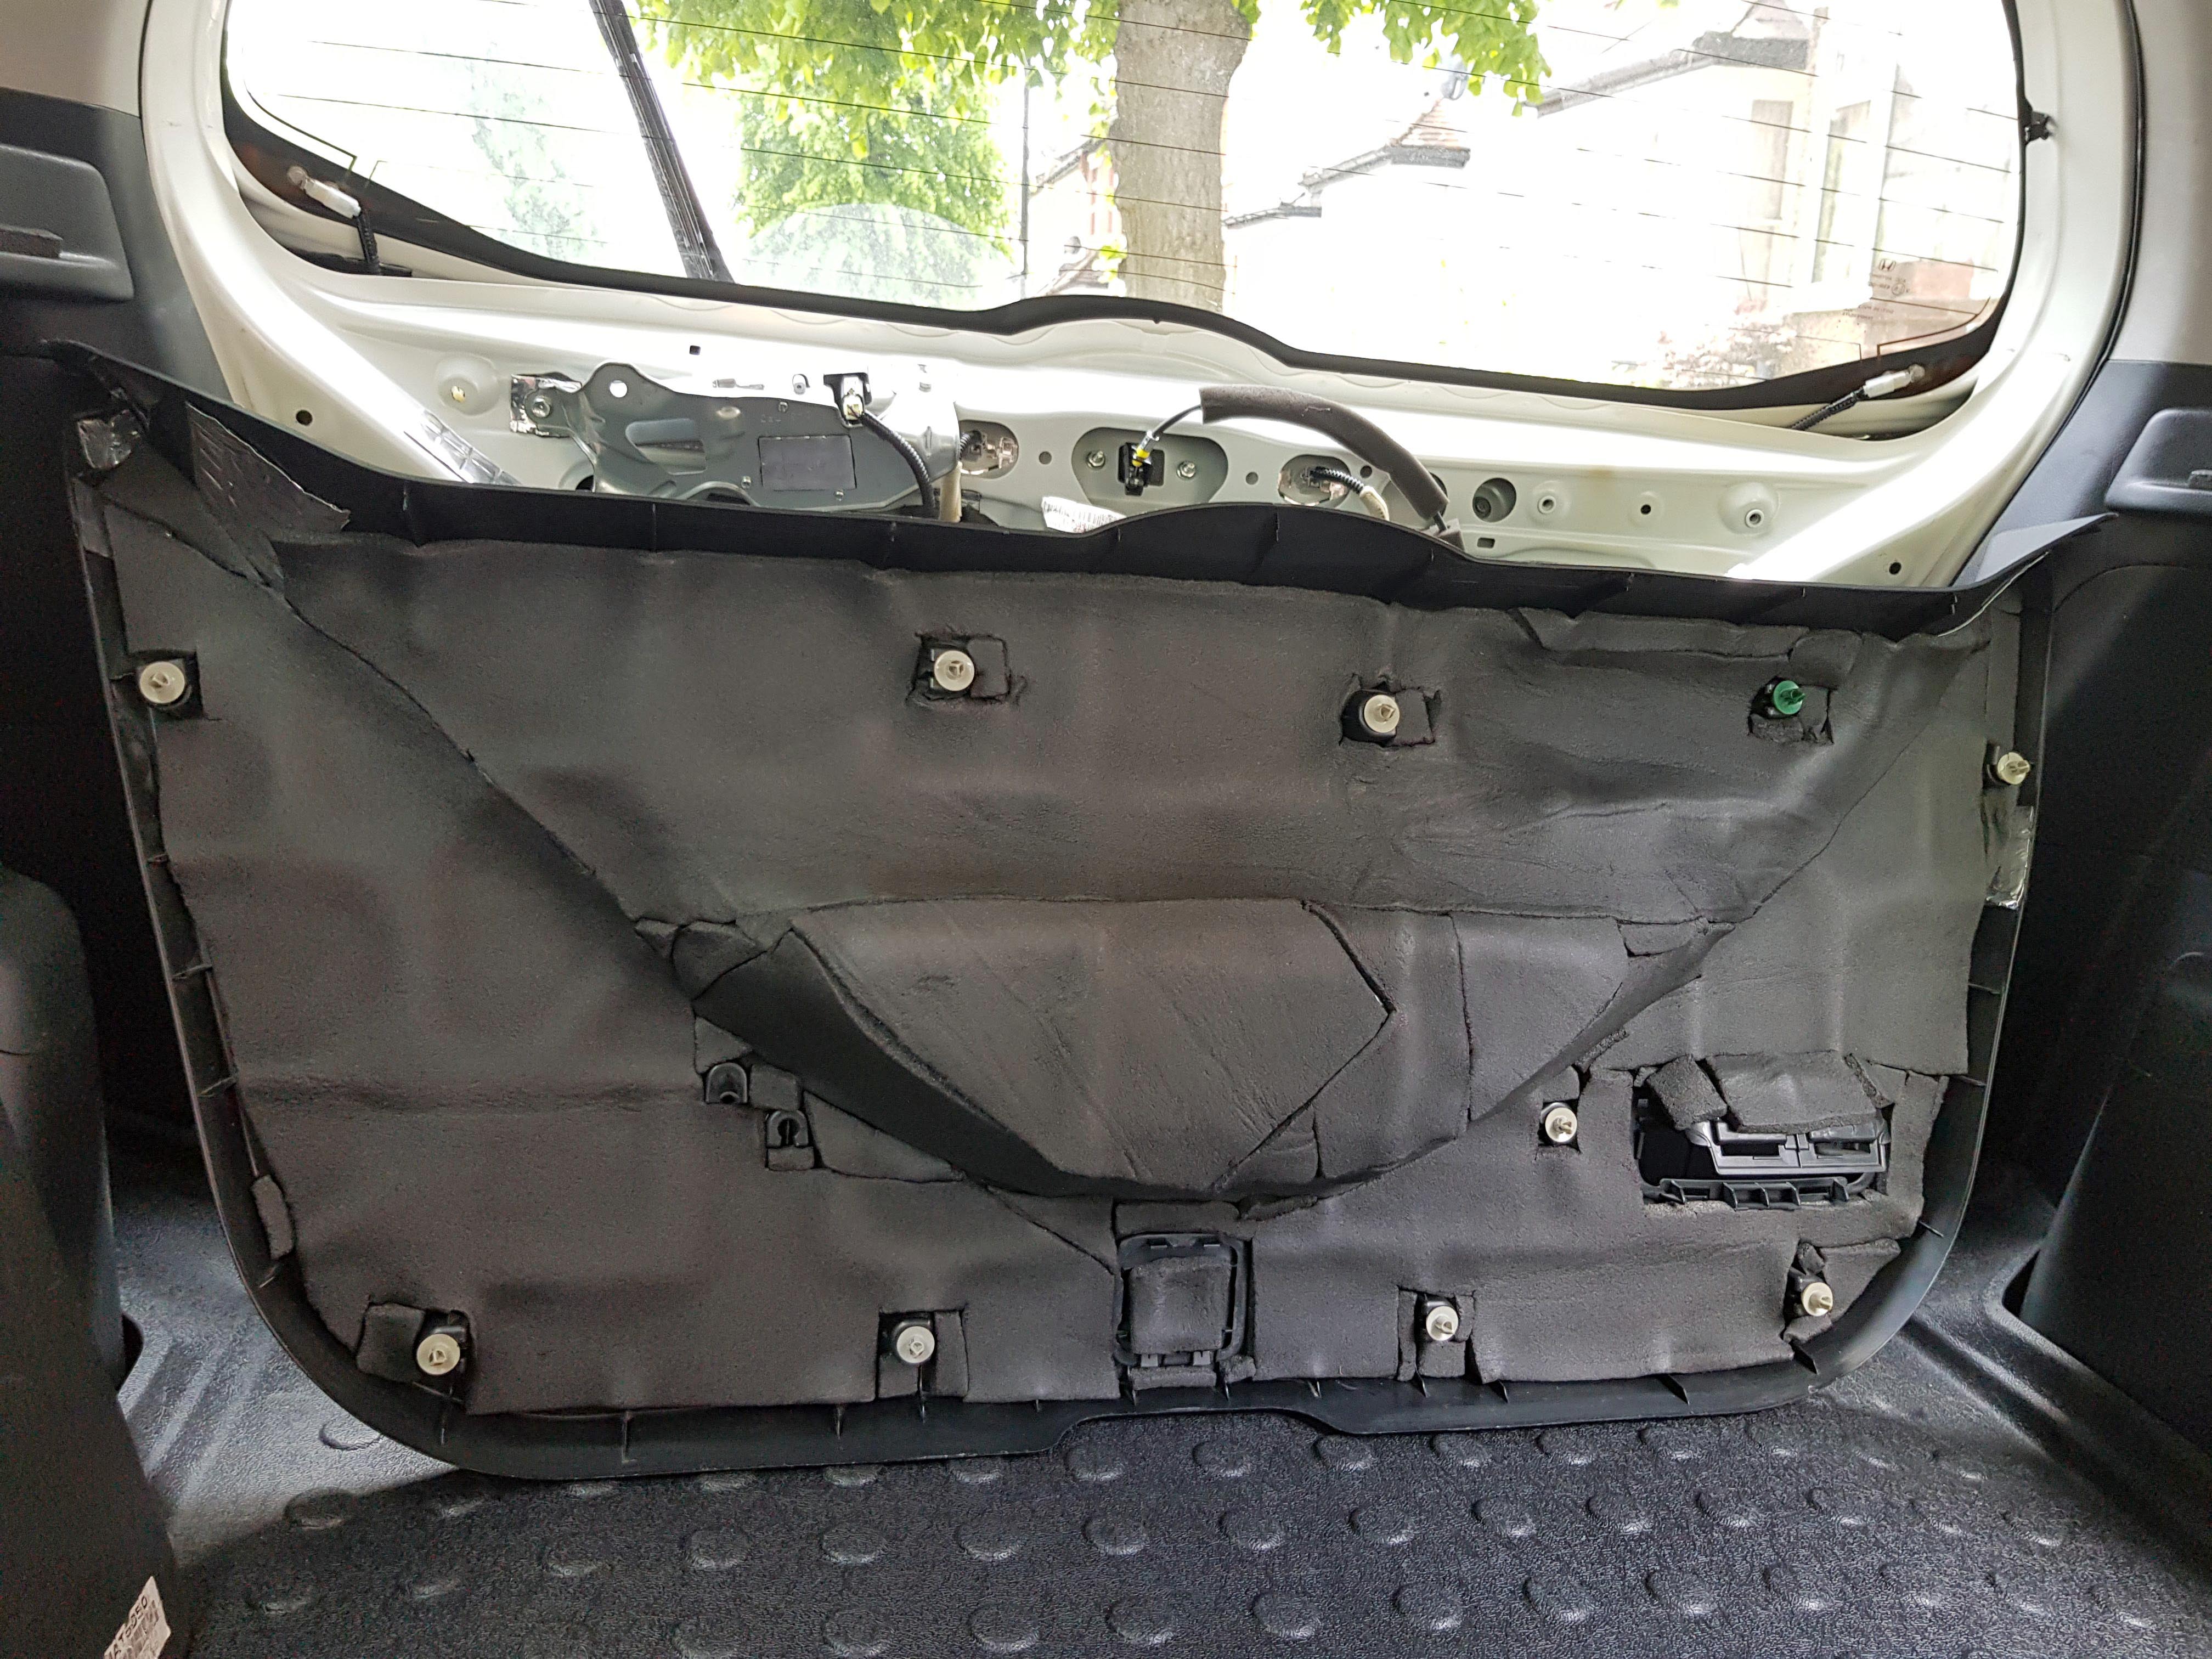
Next was the 10mm Closed Cell Foam
And then the foam installed to the plastic cover:
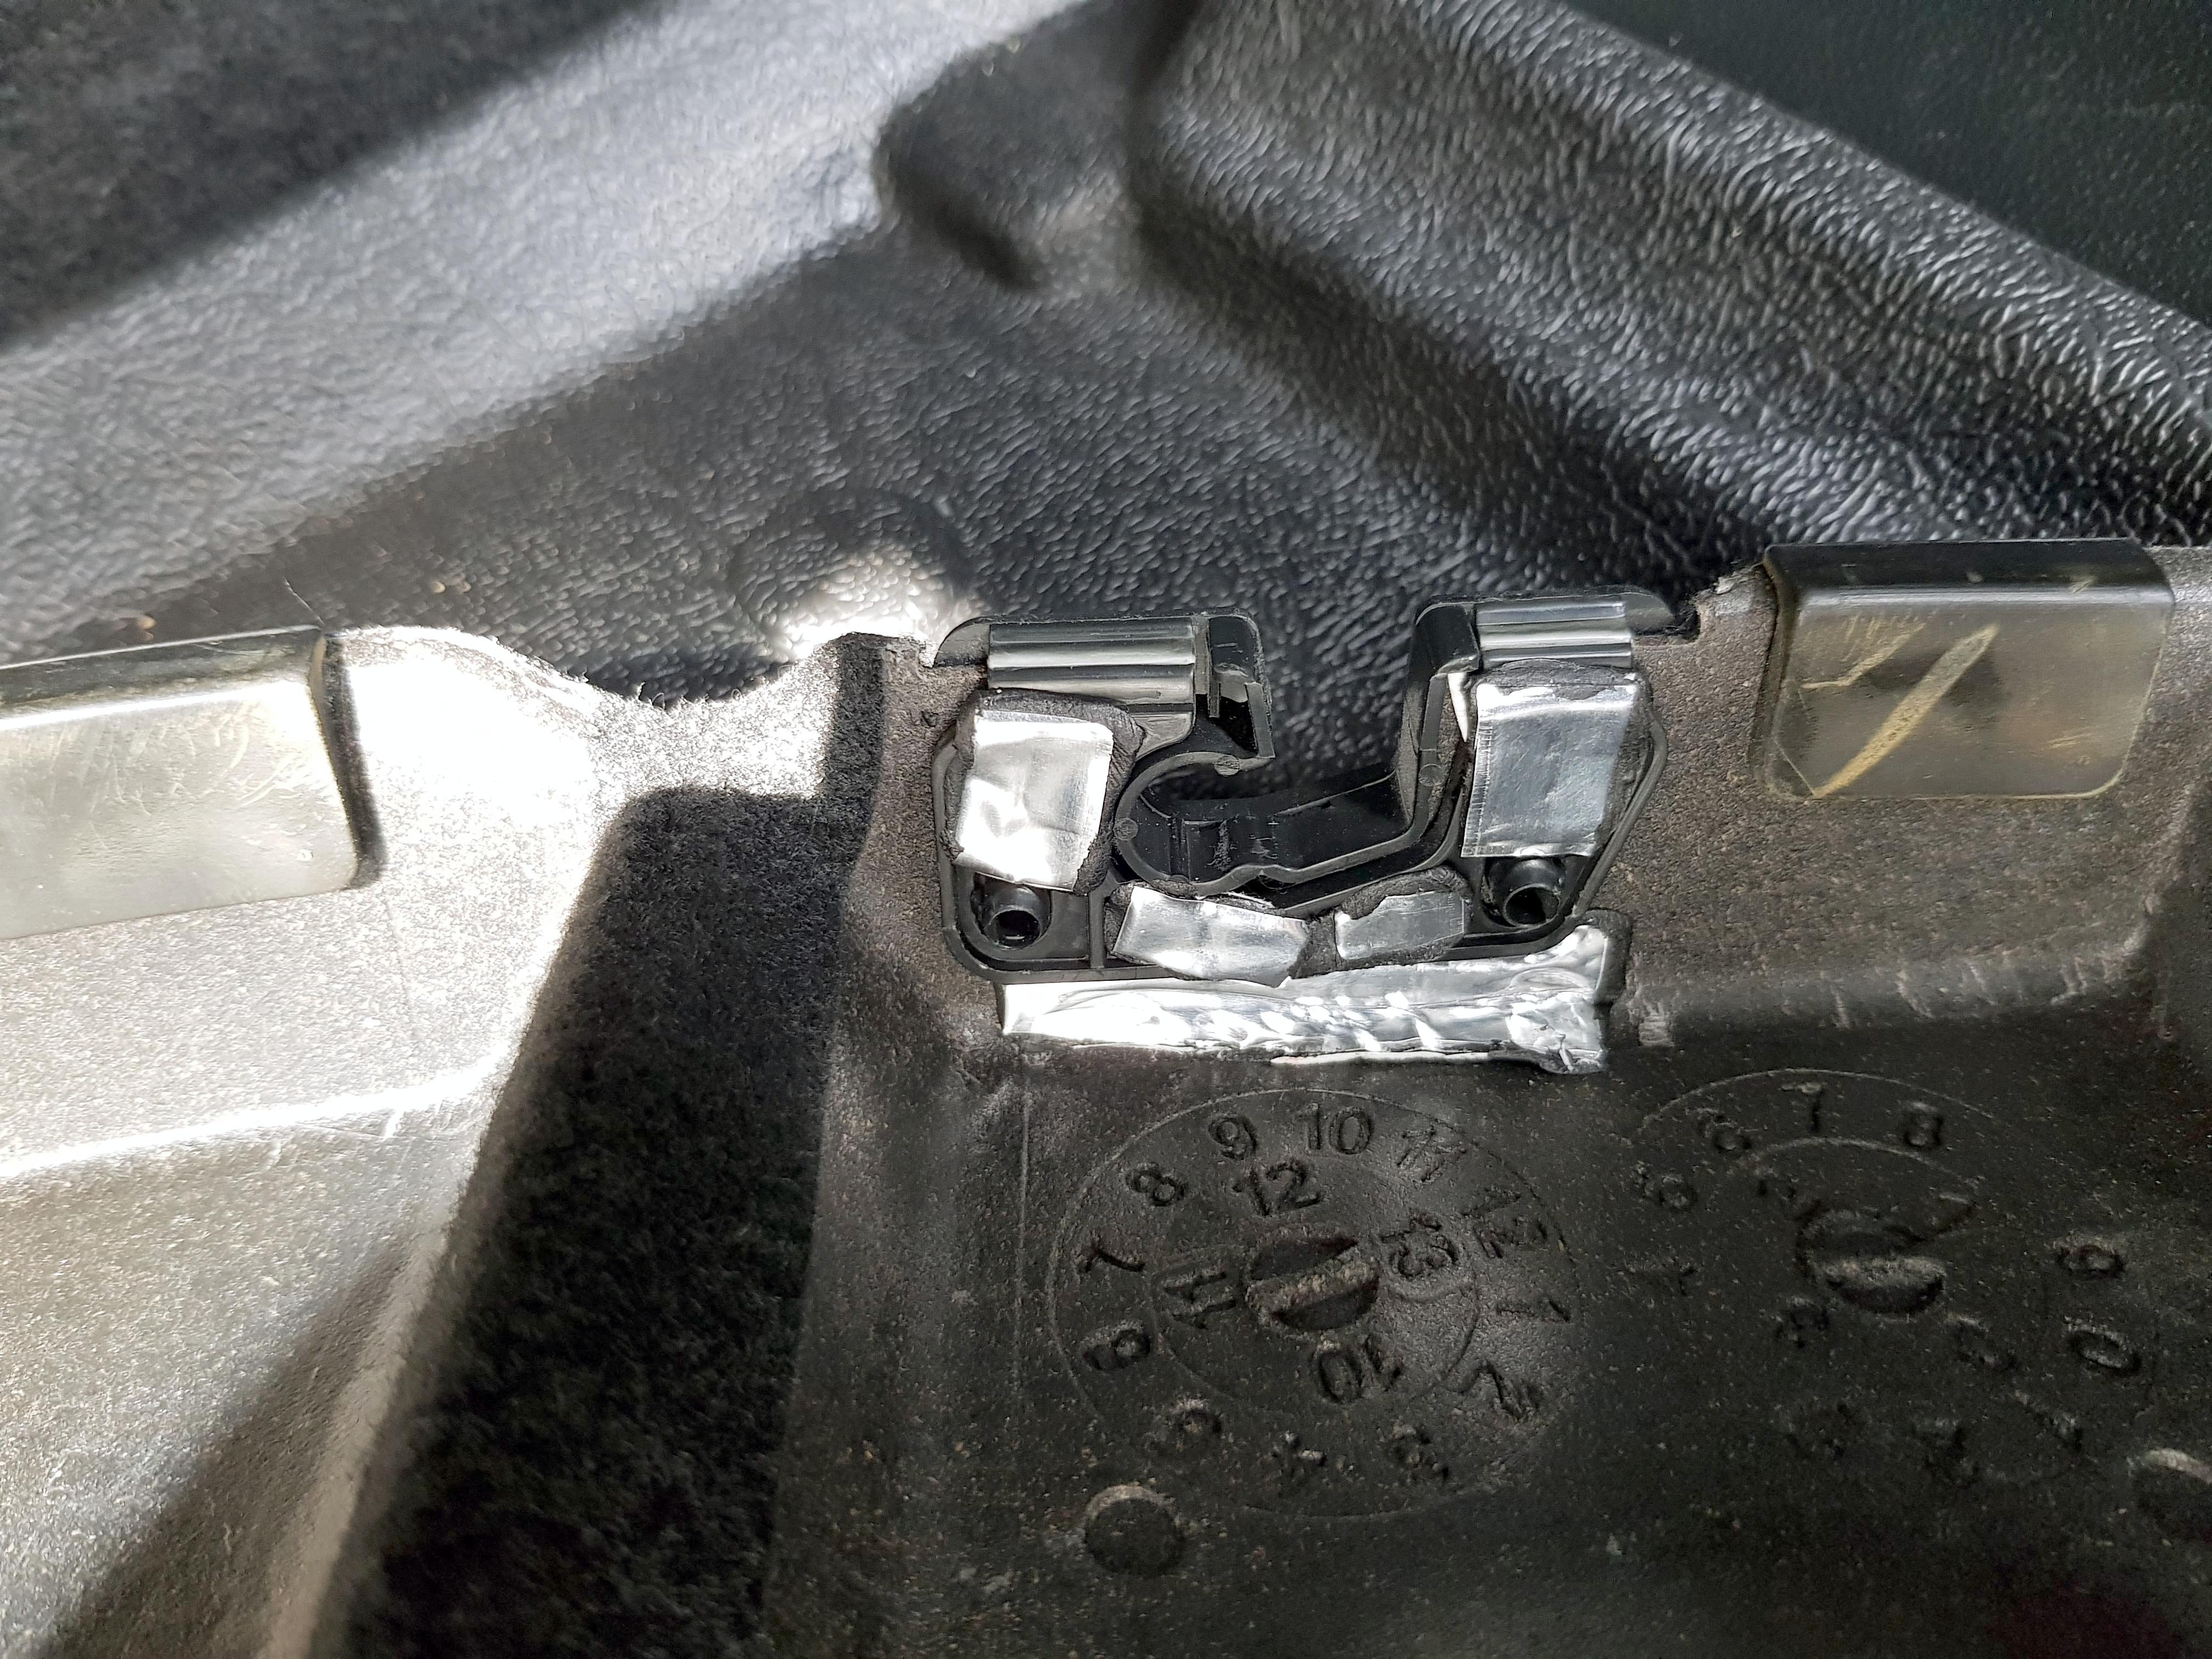
One small little detail that I really noticed and had to fix, was that the parcel shelf rattles when you go over bumpy surfaces, and I never really noticed it before until I made the car quieter, and now it drives me nuts, so I had to fix it!
I applied some silent coat to the areas causing the rattling, and added some closed cell foam to silence any rattling coming from the parcel shelf touching the rear plastic:
Slightly OCD I know, but it really stood out after the car became quieter and now it's rattle free!
Next stage is going to be doing the front inner wheel arches from underneath. Which means removing the front wheels and the wheel arch plastic trim. As I still get a lot of road noise front the front wheel arches. I currently have Bridgestone Turanza ER370's on it, which came from the factory. They are rated at 68db, which seems the lowest rating I can find for tyres for the car, so I don't know if changing them for some Yokohama BluEarth ES32's (which are also rated at 68db) would make any difference to the road noise from the tyres or not.
And I'm going to try and remove the road noise caused by the door seals.
I did notice quite a difference by simply removing the door seals and re fitting them properly with a rubber mallet.
But I saw on another forum someone used some PVC rubber piping and ran it through the standard door seal to create a better seal when the door closes, and they added some extra adhesive rubber door seals to each door to get the gaps the standard ones don't get. So I've ordered some PVC rubber piping and some adhesive door seals and I will take it from there.
Sound Deadening Part 6: Main Interior Closed Cell Foam and Mass Loaded Vinyl
This stage has been one of the most painstaking ones, not just because I had to remove the whole interior again (twice), but also because of getting things to fit back afterwards.
This build really isn't for the faint hearted, and part of me is regretting even starting this build! But I've come this far, and it's all about learning and trying new things.
So first step was to completely remove the interior (again), and cover the floor/boot in Closed Cell Foam.
I wanted to try and get as close to 100% coverage as possible.
So I removed the hand brake and placed a sheet underneath and cut out the holes for the screws, paying special attention that the main handbrake surround was still touching bare metal (for the grounding):
I was hoping to fit the Closed Cell Foam and the Mass Loaded Vinyl both in one day, but as per usual, I underestimated how long things take! So I managed to get all the Closed Cell Foam done in a day, and had to put the interior back in (just the Carpet, centre console and seats), as I had work the next day and needed to drive the car:
I used Gorilla Tape to tape up the gaps in the CCF.
So fitting the MLV took a total of 1 and a half days to do. I did the main interior on Saturday, and finished the boot area the day after. This was such a pain in the arse, and made me want to give up the whole project because of how annoying the whole process was. None the less, I managed to get it done.
I used a sheet of Dodo Barrier MLV 1.25m x 2.05m for the main interior, and I purchased a 5m x 1m sheet of slightly thinner MLV from Car Insulation UK to do the rest of the interior (and possibly other areas depending on how much was left over). Total weight was about 26kg
I wanted to cover as much as possible, as MLV works best with total coverage, and I noticed that there was a nice big gap where sound could come in under the gear linkage. So I followed the service manual very carefully and removed the gear linkage:
Then applied some Closed Cell Foam:
And finally a layer of MLV, and fitted everything back:
Next step was to do the same with the Hand Brake. I wanted to make sure everything was easy to access if it needed to be adjusted in the future:
I wanted to put sound proofing over the cover for the fuel pump, as sound could get through that way, but I didnt want to cover it with CCF then MLV and for it to then be hard to access when the eventual time comes to replace the fuel pump/fuel filter. So I cut out a square of CCF and a square of MLV to cover it, and then stuck the CCF to the MLV, and then placed it on top, so when the fuel pump/fuel filter eventually needs replacing, the sound proofing can be easily removed for access:
The MLV was a nightmare to fit, as it doesn't stretch, and isn't self adhesive. So I had to make lots of cuts to get it to wrap around the contours of the interior:
I tried to get the MLV as high up the firewall as possible, but it was a nightmare to work with, had to settle at this height:
After running out of the Dodo MLV, I switched to the other MLV, which was so much easier to work with, due to being thinner. Did the rear seat area first, then put the interior back in:
There was a noticeable gap on the air ducts, so I taped them up just to be safe:
I fitted the side plastics first, and I'm glad I did, as they wouldn't go back at all, I ended up having to lift up the carpet and remove a large strip of the CCF to have enough room for the plastics to fit back. I wish I had used a thinner CCF, something like 5mm or 3mm to do the interior in hindsight:
After removing some of the CCF, the plastics did eventually fit back on, but there are still some noticeable gaps that I will just have to live with. They aren't too bad, but they are just annoying because everything doesn't look flush and perfect:
Side plastics and centre console all fitted in. Centre console was difficult to fit back in, but I got there:
Next was the boot area. I may have rushed this area a bit, as I was pretty annoyed by this point and just wanted it over with, so I may go back and tidy it up a bit at a later date, but it seems to fit ok for now:
I used all the off cuts of MLV and some of the stock Honda sound insulation that I had removed from the Door cards and rear plastics to stuff the void gaps above the rear wheel well:
So at present everything fits back in "ok".
I am having an issue with the rear seats at the moment.
I couldn't fit the base plate that the rear seats lock into on the floor, so I had to completely remove all the sound deadening around that for it to sit flush again. But now the rear seats don't lock into place when you put the seat part down (in normal position). I think this is due to the carpet being slightly raised from the CCF and MLV underneath.
I don't know if this is an MOT fail or not, but my MOT is due in less than a month, so I don't want to risk it, and I'd feel safer in the knowledge that it locks down like it is suppose to, so I'm going to investigate this issue tomorrow and see if I can fix it.
Initial thoughts after installing the CCF and MLV in the interior:
So, driving it for the first time, I noticed when the car is stationary and driving at very low speeds (up to 10mph), the car is near silent, like luxury car silent. But then the moment you get above 10mph, then the road noise just comes straight through. It is slightly more muffled, but still really noticeably loud.
I put this down to the tyres. It has Bridgestone Turanza ER370 tyres on it, and they are the standard tyres it came with from the factory. The front ones are nearing their limit, so I would imagine they have gotten louder over time, and are at their loudest now they are nearing the end of their life. I am looking at replacing them with some Yokohama BluEarth ES32's, which seem like a good all round tyre, and have a noise rating of 68db. But I'm not going to do that until the tyres actually need replacing.
There is still a lot of engine noise and I have a few tricks up my sleeve that I'm going to try (Mostly a complete bonnet liner (20mm insulation) and putting some MLV on the fire wall under the cowl), but I'm not going to get my hopes up. We shall see.
I also notice that now I have basically eliminated all the places where noise can come through, there is noticeable noise coming through the windows (like when other cars drive past). This is something I think I'm just going to have to accept I cannot fix (bar thicker glass).
I am also going to go down the door seal route, and see if that makes a difference.
I think when I'm done, I'm going to go down to my local Honda Dealer and ask to test drive another Jazz Si so I can actually see the difference for myself. As I have done all this gradually, so I'm not going to notice that huge difference I would have if I had done it all at once.
I did get the chance to drive my Landlady's New(ish) Mini Cooper not long ago, and one of the things I noticed straight away (apart from how poor the visibility was), was how loud the interior was, so if that's anything to go by, the sound deadening seems to have worked well.
Sound Deadening Part 7: Under Bonnet insulation
After reading on this forum about a member getting noticeably quieter engine noise from installing a dynamat hoodliner, I looked into an equivalent product to buy in the UK. The hoodliner is basically 20mm thick Closed Cell Foam with a reflective surface for heat resistance.
So I bought some 1x1m 20mm thick Thermal Acoustic Foam Insulation from carinsulation.co.uk for �22.
My plan was to cover the entire underside of the bonnet.
I had some large sheets of white paper which I used for photo studio background, so I used that to make an outline of the bonnet to make a template:
I then cut that out and used it underneath to draw out the final template.
Something I didn't take into account was the closing of the bonnet, and the gap at the front for air flow. So I ended up having to make a much smaller template than I originally planned:
I cut out the template and drew around it on the foam sheet:
I decided not to keep the holes, as I didnt think the clips would be able to fit with the 20mm foam anyway:
I ended up having to trim a bit more off in order to it to fit better under the bonnet:
To clean up the rough foam edges, I used some aluminium tape, which I thought made it look more professional and factory fitted, rather than aftermarket:
And finally to the install. I decided to leave the small amount of sound insulation I had originally put there:
I wanted to keep the factory sound insulation, as I felt like the combination of the two made much more of a difference:
I used double sided foam tape to secure the bottom two clips, which seems to have done the job nicely.
I had to ditch the air duct that was on the other side, as it was hard to get it to fit back with the new sound deadening, but I don't really know exactly how much difference that was really making, I haven't noticed any difference not having it on.
The under bonnet sound deadening definitely made a noticeable difference to the engine noise, and it is much quieter.
As I have so much 20mm foam left, I'm going to try and fit the rest behind the engine on the firewall at some point. But this stuff is much harder to work with due to its thickness!
Sound Deadening Part 8: Wheel Arches
The factory sound deadening on the arch liner for comparison
I found that the combination of foam on the wheel arch and wheel arch liner meant the liner stuck out just a bit too far and rubbed on the wheel when I turned it full lock. So I had to take it off again and remove the foam from the liner and just have the foam on the arch instead.
I don't remember this making that much of difference to be honest, but that might be because of the extensive work I had already done making it quieter already.
Sound Deadening Part 9: Door Seals
I can't remember where I got the idea from, but I bought some fish tank hose and some WD-40 silicone lubricant and fed the tube into the existing door seals to pack it out a bit more to create a tighter seal.
I think that either it didn't work well or I found a better solution, but I ended up buying 15 metres of 8mm thick Neoprene Sponge Black Cord and using the WD-40 silicone lubricant to feed it through the door seals.
I bought 8mm, but I think you could get away with 10mm
It worked great, and at first the door was a little hard to close, but after a bit of time the seal settled in and closed fine.
I also ordered a seal for the gap between the two doors. This was pretty easy to fit and is holding up well over 2 years later.
The one I purchased is no longer available, but this is basically the same product:
https://www.aliexpress.com/item/10000287853842.html
Sound Deadening Part 10: Making the plastics fit better
I ended up removing a some of the sound deadening because the plastics weren't fitting well. I think I ended up removing about 6kg worth.
I also removed the butyl that was on the pre existing sound deadening to save a bit of weight
The bucket full of removed sound deadening
Sound Deadening Part 11: The Final Verdict - What I learnt and Was it worth it?
There is surprisingly little official information about sound deadening online (mostly stuff from other DIY folk), and a lot of conflicting information as well.
So much I learnt from trial and error and just tonnes and tonnes of research. Including looking at Lexus car plans and seeing how they get their cars so quiet (mostly sound insulation, but also double paned windows, which I can't do anything about in the Jazz).
Here's the important stuff I learnt:
The Butyl layer doesn't need to cover everything. From research, only 33% coverage is really needed, anything more is just diminishing returns. So just putting squares on the areas that resonate most is all that is needed really.
Most of the people who need to cover every surface are people who enter professional car audio competitions, which is where most of the information on sound deadening largely comes from online. I found much better information when looking for sound deadening when converting a commercial Van into a mobile home.
The 3 layers of sound deadening:
Butyl: stops panel resonance/vibration
Closed Cell Foam: sound insulation absorber (and also a needed barrier between Butyl and MLV)
Mass Loaded Vinyl: Sound blocker (not absorber).
If I was doing it all over again, I would not use anywhere near as much Buytl, I would buy the thinnest Closed cell foam and focus on the coverage with the MLV, as the MLV is what really makes the difference when it comes to sound deadening, so the maximum amount of coverage with MLV is best, but MLV is the most expensive part, and it isn't self adhesive like butyl/CCF, so getting it to stick to surfaces is a pain.
Was it worth it?
No, no it wasn't worth it, given the cost (�500), time (100s of hours), added weight to the car (50-55kg) and amount of research and trial & error I had to go through to get to where I am now, it wasn't worth it.
But would I do it again with my next car, given what I now know and the experience I have?
Absolutely! The car is significantly quieter and nicer to drive and just feels so much more premium. Hearing the soft door thud every time I get in the car is so nice. And when I'm a passenger in any other car and hear the loud clang of the door closing and all the road noise that gets let it, it reinforces how much nicer it is with all the sound deadening. Motorway conversations are also so much nicer, no raised voices. The insulation also helps keep it warm in winter and cool in the summer.
So I guess it was worth it then! I just hope I don't have to do it all over again in a hurry that's all! I plan on keeping the Jazz for the foreseeable future.
Hopefully this wrapping up of the build helps anyone thinking of undertaking this themselves.
If anyone has any questions, please feel free to ask!
Hopefully it will notify me this time!


Thread
Thread Starter
Forum
Replies
Last Post
payluder
3rd Generation GK Specific Fit I.C.E. Sub-Forum
21
10-11-2018 02:10 PM
Murat Dilaver
2nd Gen GE8 Specific Fit Interior Modifications Sub-Forum
16
01-12-2016 02:17 PM