
DIY GE Fog Light Removal and Instal of Lamin-X
#1
 06-24-2009, 03:00 PM

DIY GE Fog Light Removal and Instal of Lamin-X
Ok, again as we all say at the beginning of all of the DIY's threads, FitFreak is not responsible for any mistakes I may state or you messn' up.
With that said this was way simpler than I was imagining however I did take my time with the install and total time with taking pictures of each step was around 1 hour... So those who read this it will take around 30 min (15 min per side)
Sorry my cameras battery was dead so had to use my cell phone camera for pics.
__________________________________________________ _____________
OK... we all know how easy our fog lights can crack due to debris thrown up by soccer moms driving in front of us.... ( I already went through both fog lights) So when I got my new ones on I wanted to add some protect ant. I ordered a 7"x8" sheet from Lamin-x which was more than enough to cover the lens. We will see how it holds up and will keep this post updated on how the product holds up to use and heat from the bulbs.
But hey if they dont work well I would rather pay 20 bucks to replace it again than buying new fog lights right
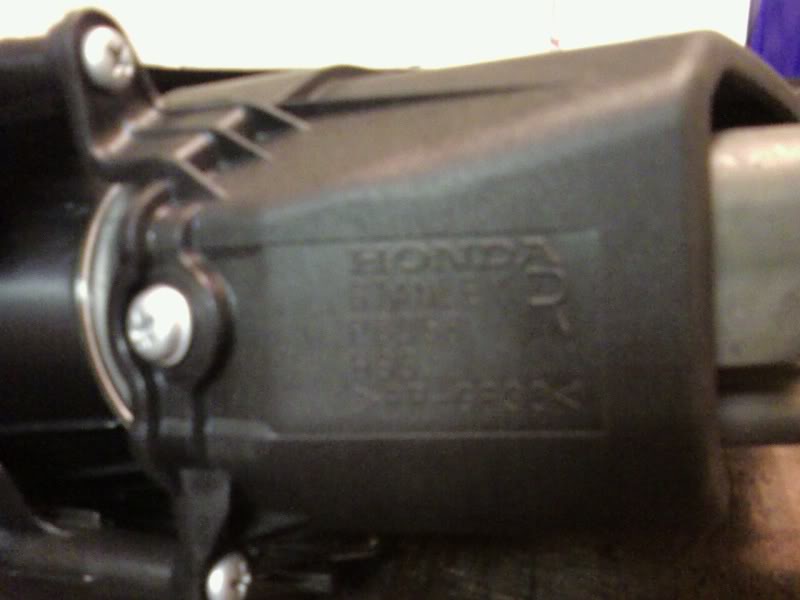
First off you will want to locate 1 screw in the corner of fog light.

Once the screw is out, the whole fog assembly comes out nicely... Becarefull not to damage the little tab on the oppisite side of the screw because that is what hooks the other side in.

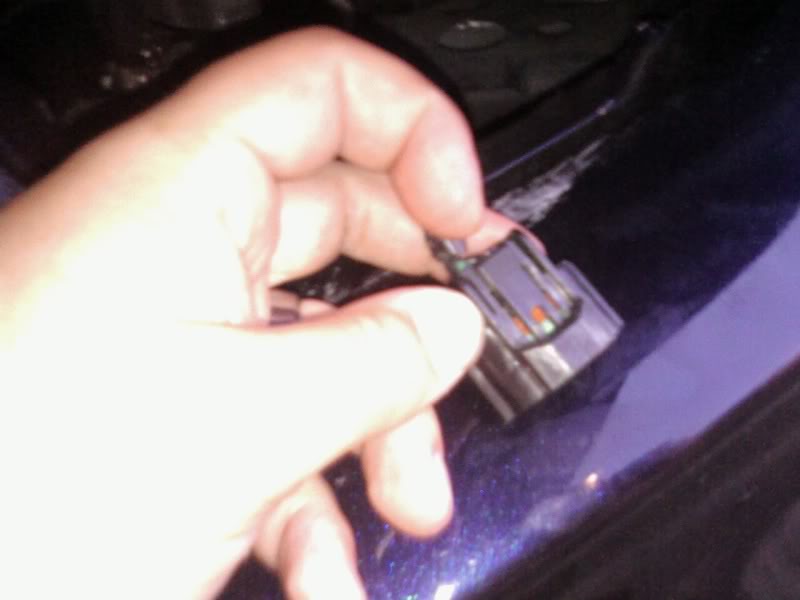
So next you have to disconnect the plug to the light bulb, Just push down on the black tab and pull out... Im pointing at the part to push down to remove plug
Now just work on the next side and bring both fog lights into the house cuz it is friggn' HOT out side!
Both assemblies are labled Right and Left... incase you forget where you took each piece from and you are the type to put a circle in a square hole
Right= passenger side Left= Drivers side (For American drivers reverse for over seas people)
Now once back inside with the AC on high you will notice 3 screws on the back of the unit. Remove all three
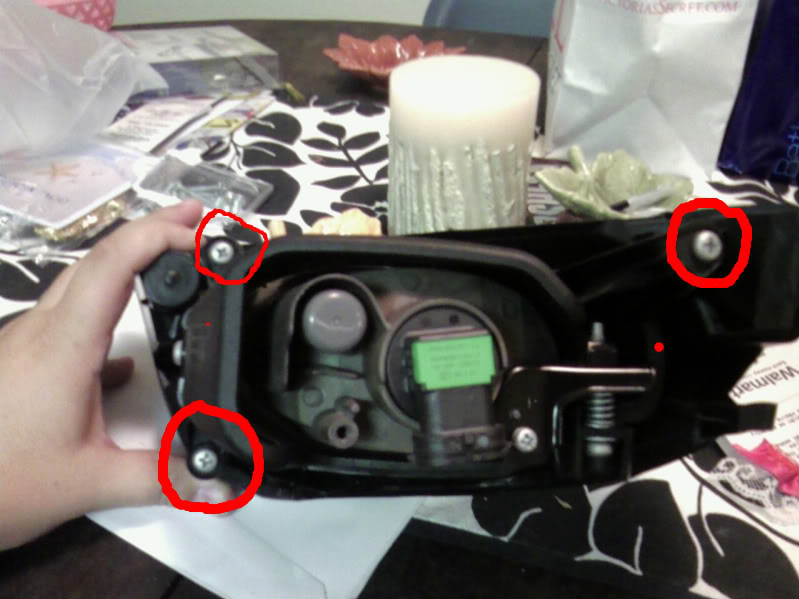
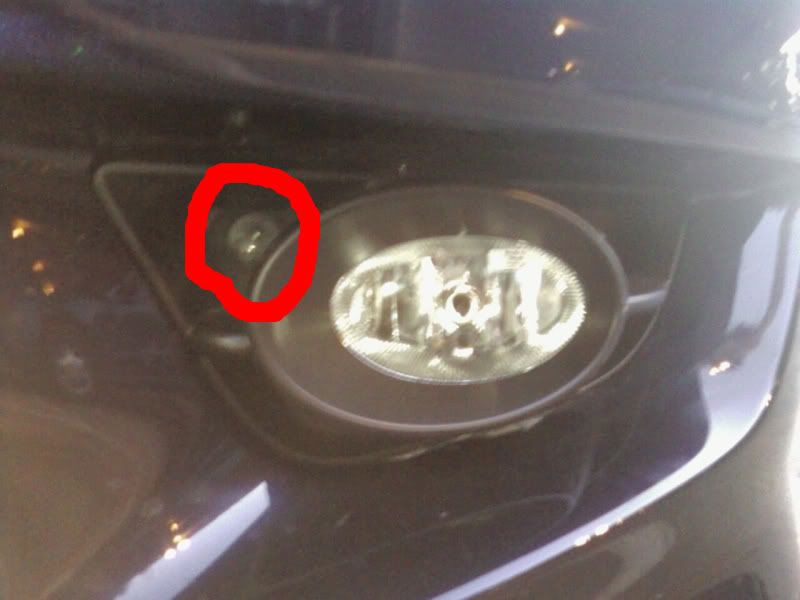
next after we remove these we will need to remove the rest of the housing... there is one screw on the side and one on the back.
 And the other screw is right here
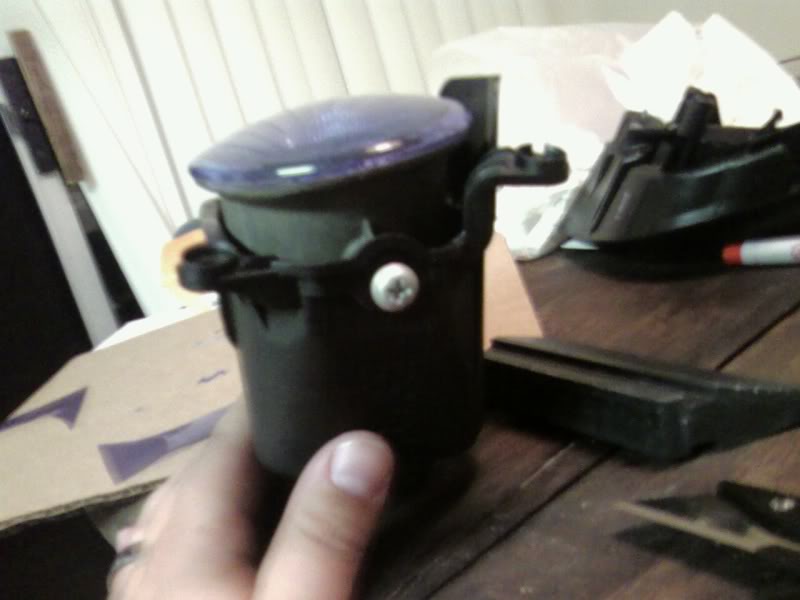
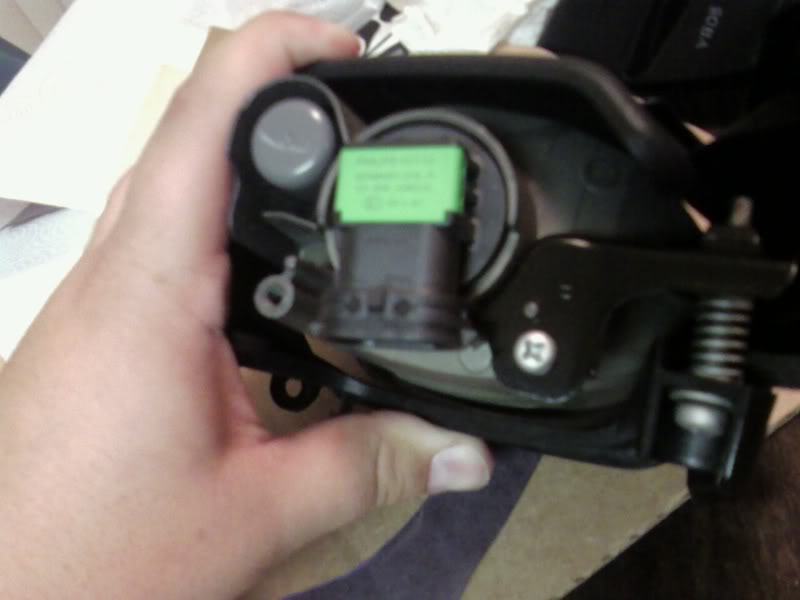 do not remove the screw with the spring because it seems to be the beam adjustment and we do not need to remove it. As you get to this step do not force anything because you will have to wiggle the light out of the housing.
(My first light I did not do this and ran in to the problem that the top of the light was still slightly covered and could not curve the edge around.)
Now we have our light out and ready for laminating. It is shiped in a manilla envelope with cardboard so it does not bend. It comes with printed instructions that say for small applications we do not need to wet the lens like you would if you were doing head lights or tinting.
(I purchased the optic blue color but I know most of you will want to do yellow)
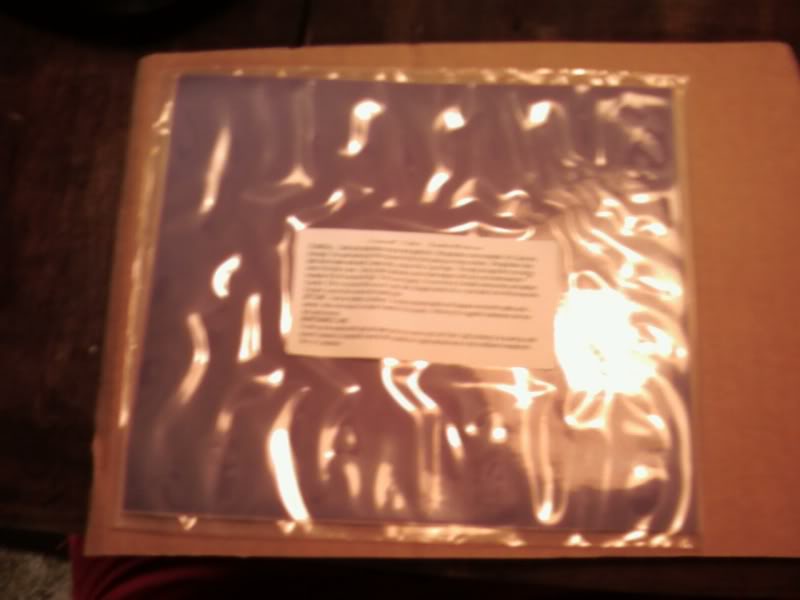
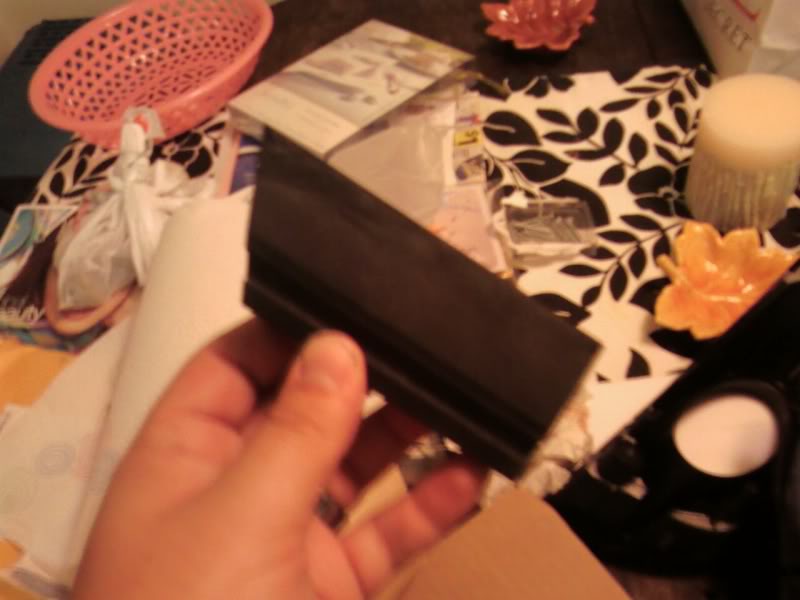
Here is a picture of how thick the lamin-x is

I just cut this in half and stuck the center onto the center of the lens.
Next I roughly trimmed the edges so I could work the edges better. No pics since these are prety self explanitory steps...
Next once trimed I worked my fingers from the center of the lens out, trying not to create any bubbles. If you do you can also use one of these tools which I had from doing my tint.
Next once removing all the air bubbles you will see that the edges do not roll well around the edge so I took a blow dryer and heated the edges of the lamin-x and then the edges curved over easyer and stuck.
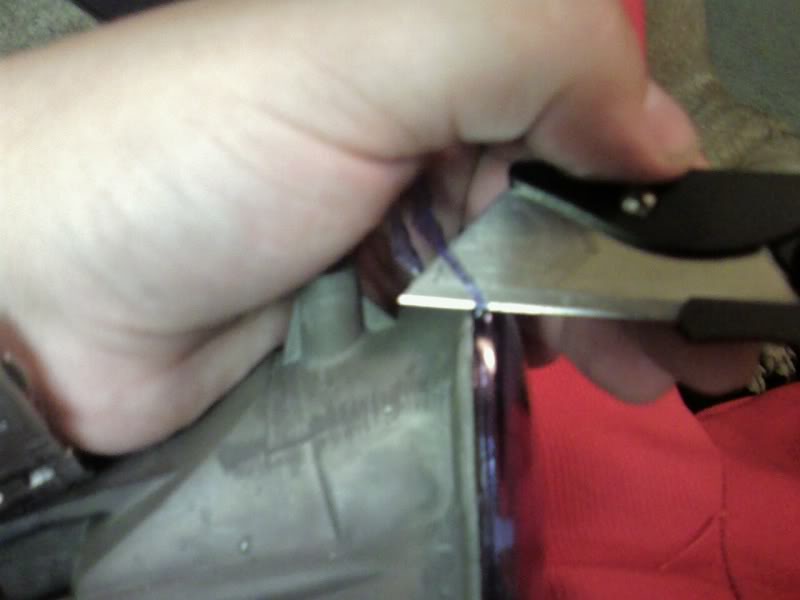
Next final trimming with a razor blade to get all the excess off
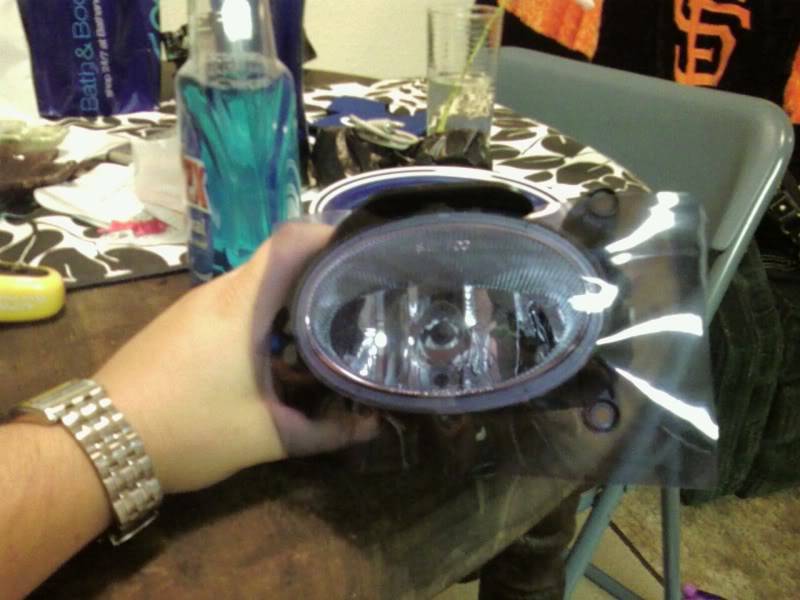
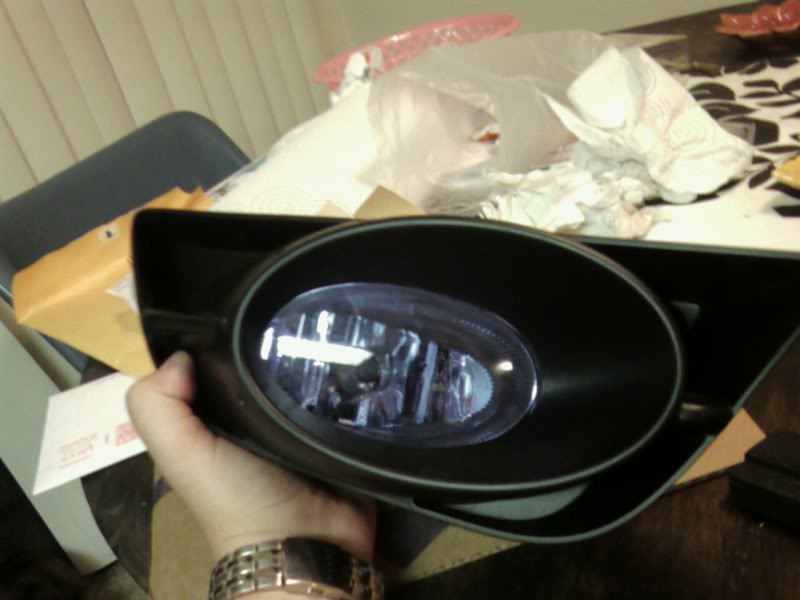
Now just re-assemble everything back and you will have something that will look like this
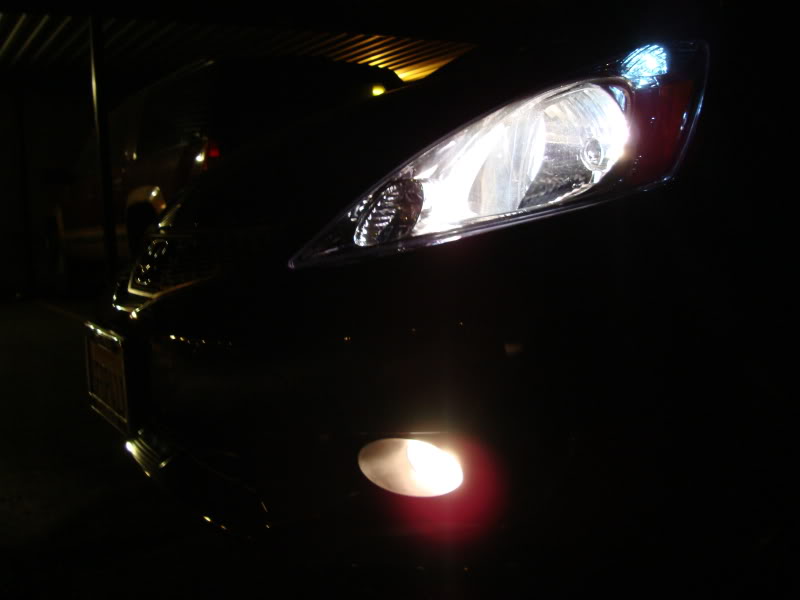
After re-instaling this onto the FIT I can see that the optic blue does not change the fog light color at all... But all is well and most of you will use yellow anyway. (So wait to change your bulbs too so you can kill 2 birds with one stone!!)
Any questions feel free to PM me.
Happy Fit Driving
With that said this was way simpler than I was imagining however I did take my time with the install and total time with taking pictures of each step was around 1 hour... So those who read this it will take around 30 min (15 min per side)
Sorry my cameras battery was dead so had to use my cell phone camera for pics.
__________________________________________________ _____________
OK... we all know how easy our fog lights can crack due to debris thrown up by soccer moms driving in front of us.... ( I already went through both fog lights) So when I got my new ones on I wanted to add some protect ant. I ordered a 7"x8" sheet from Lamin-x which was more than enough to cover the lens. We will see how it holds up and will keep this post updated on how the product holds up to use and heat from the bulbs.
But hey if they dont work well I would rather pay 20 bucks to replace it again than buying new fog lights right
First off you will want to locate 1 screw in the corner of fog light.
Once the screw is out, the whole fog assembly comes out nicely... Becarefull not to damage the little tab on the oppisite side of the screw because that is what hooks the other side in.
So next you have to disconnect the plug to the light bulb, Just push down on the black tab and pull out... Im pointing at the part to push down to remove plug
Now just work on the next side and bring both fog lights into the house cuz it is friggn' HOT out side!
Both assemblies are labled Right and Left... incase you forget where you took each piece from and you are the type to put a circle in a square hole
Right= passenger side Left= Drivers side (For American drivers reverse for over seas people)
Now once back inside with the AC on high you will notice 3 screws on the back of the unit. Remove all three
next after we remove these we will need to remove the rest of the housing... there is one screw on the side and one on the back.
And the other screw is right heredo not remove the screw with the spring because it seems to be the beam adjustment and we do not need to remove it. As you get to this step do not force anything because you will have to wiggle the light out of the housing.(My first light I did not do this and ran in to the problem that the top of the light was still slightly covered and could not curve the edge around.)
Now we have our light out and ready for laminating. It is shiped in a manilla envelope with cardboard so it does not bend. It comes with printed instructions that say for small applications we do not need to wet the lens like you would if you were doing head lights or tinting.
(I purchased the optic blue color but I know most of you will want to do yellow)
Here is a picture of how thick the lamin-x is
I just cut this in half and stuck the center onto the center of the lens.
Next I roughly trimmed the edges so I could work the edges better. No pics since these are prety self explanitory steps...
Next once trimed I worked my fingers from the center of the lens out, trying not to create any bubbles. If you do you can also use one of these tools which I had from doing my tint.
Next once removing all the air bubbles you will see that the edges do not roll well around the edge so I took a blow dryer and heated the edges of the lamin-x and then the edges curved over easyer and stuck.
Next final trimming with a razor blade to get all the excess off
Now just re-assemble everything back and you will have something that will look like this
After re-instaling this onto the FIT I can see that the optic blue does not change the fog light color at all... But all is well and most of you will use yellow anyway. (So wait to change your bulbs too so you can kill 2 birds with one stone!!)
Any questions feel free to PM me.
Happy Fit Driving
#2
06-24-2009, 07:08 PM

Nice writeup, you should really leave a little more room around the edges to let the heat escape, otherwise in the long run you might get brown spots in the center. I did yellow on mine and love it. Thanks for the DIY


#6
06-25-2009, 01:34 AM
Yea I'm back from my Hiatus from FF. Got some more money to waste  Speaker Install coming up next
Too late tonight to take out the car for night pics but tomorrow will be uploaded... still look pretty yellow
Speaker Install coming up next Too late tonight to take out the car for night pics but tomorrow will be uploaded... still look pretty yellow


#9
06-25-2009, 07:07 PM
That is some wire mesh I got left over from the last home project. It is not attached. It is trapped between the plastic housing and the lens assembly. Quite secure and it is not going anywhere. Since the wire mesh is flexible, I press it to make it bulged out to make sure there is clearance between the mesh and lens to absorb impact from road debris. This thread shows how I started:
https://www.fitfreak.net/forums/2nd-...rotection.html
https://www.fitfreak.net/forums/2nd-...rotection.html
#12
10-04-2009, 08:25 AM

But, it's so tight that it snapped the end off my good quality driver! Neither side screw will move.
Before I break something on the car, has anyone else had this problem? Maybe there's some difference in the UK.
#14
02-20-2010, 04:51 PM

Great write up!! I had to replace the Rt side fog, so bought some Lamin-X to keep me from having to do this again!!! I didnot remove the second housing, & had no issues with putting on the film. I went with the 40mil clear.
#15
02-20-2010, 07:52 PM
OP. nice write up. +rep
3m clear bra on mine.
Mines been installed 1yr (Three 500+ miles road trips) so far so good.

3m clear bra on mine.
Mines been installed 1yr (Three 500+ miles road trips) so far so good.
#16
02-20-2010, 08:05 PM
I cut V V V V notches about every half inch around the perimeter of the protective film that I used; this relief let it conform very nicely to the compound curve of the foglight lens, without any hint of lifting around the perimeter.
Nice mesh treatment. What is the metal? If galvanized, I'd be concerned about rust; if aluminum, it should be OK. Stainless steel mesh would be ideal, but I suspect that it's not easy to come by.
Nice mesh treatment. What is the metal? If galvanized, I'd be concerned about rust; if aluminum, it should be OK. Stainless steel mesh would be ideal, but I suspect that it's not easy to come by.
#17
02-20-2010, 10:25 PM
I think it is galvanized. It has been on for over a year. No rust yet. But even if does rust, it will be easy to put another one on.
#18
02-22-2010, 09:05 PM

Found the foglight assembly for $87.94 from Logical-Source. Any reason I shouldn't order from them?
https://www.logical-source.com/searc...2009&model=FIT
https://www.logical-source.com/searc...2009&model=FIT
#19
02-23-2010, 03:38 PM
Found the foglight assembly for $87.94 from Logical-Source. Any reason I shouldn't order from them?
https://www.logical-source.com/searc...2009&model=FIT
https://www.logical-source.com/searc...2009&model=FIT
Logical Source - logicalsrc.com - Reviews, Ratings and Prices at ResellerRatings