
Install of '09 Fit Cargo Cover (P/N 08U35-TK6-110)
#1
 09-15-2008, 08:56 PM


Install of '09 Fit Cargo Cover (P/N 08U35-TK6-110)
Has anyone installed the cargo cover yet? Mine came today from College Hills Honda. The installation instructions (here http://www.collegehillshonda.com/ins...9/AII39855.pdf) don't contain how far down (from headrest to mounts on floor) on the seatback I should install the buttons. Also, there is no good way to measure accurately (they demand centimeter precision) on an uneven surface with a 'squishy' seat cushion as a reference point.
Also, any suggestions about how to make sure that the line of buttons is level? I was thinking about mounting my laser level to the garage wall then backing the Fit in so it would cast a level beam.
I test fitted the thing and the back fabric flap seems almost useless anyways. When the rear seats are in the "recline" position, there is a snug fit between the seatback and the cargo cover.
#3
09-15-2008, 09:14 PM
JDM_DOHC_SiR-san -
Uploading to Photobucket now...
This is unrelated to this post, but in the picture of the lighted ignition trim ring on the JDM Parts thread, your headlight switch and mirror controls are on the right (on the USDM, they're on the left as I'm sure you know), as with the steering wheel. In Japan, they drive on the wrong side of the road, so is that car a USDM Fit modified, or a Fit from another country.
Thanks again!
Last edited by fitfanIU; 09-15-2008 at 09:44 PM.
#4
09-15-2008, 09:22 PM
Here are the pictures of the cargo cover:
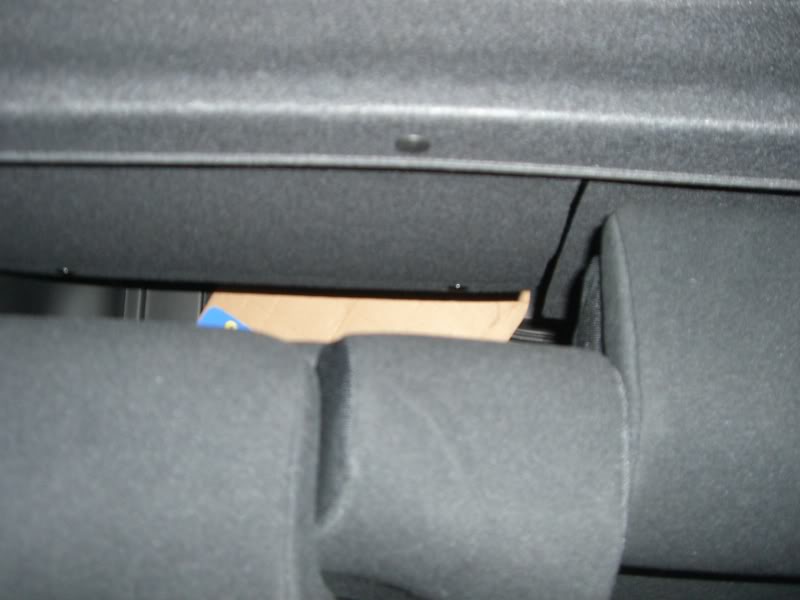
These two pictures show the gap between the cargo cover and the seatbacks with one reclined and the other not.
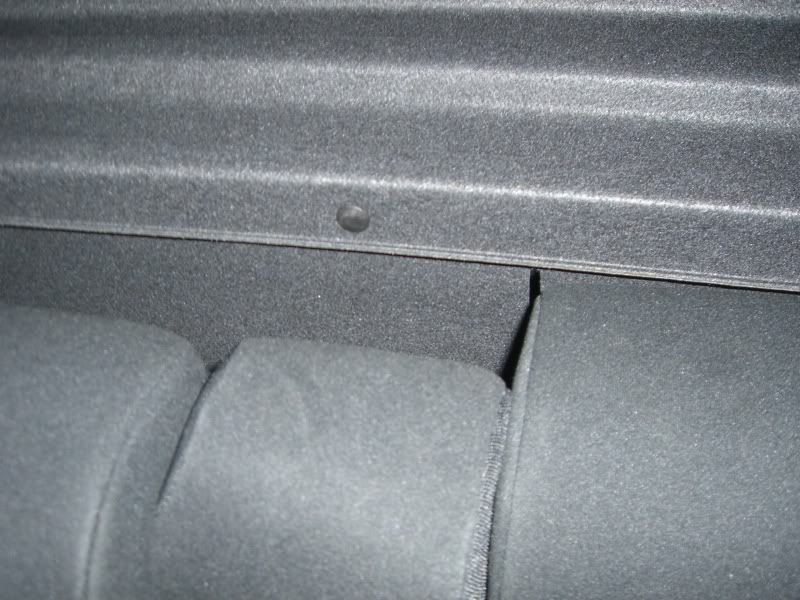
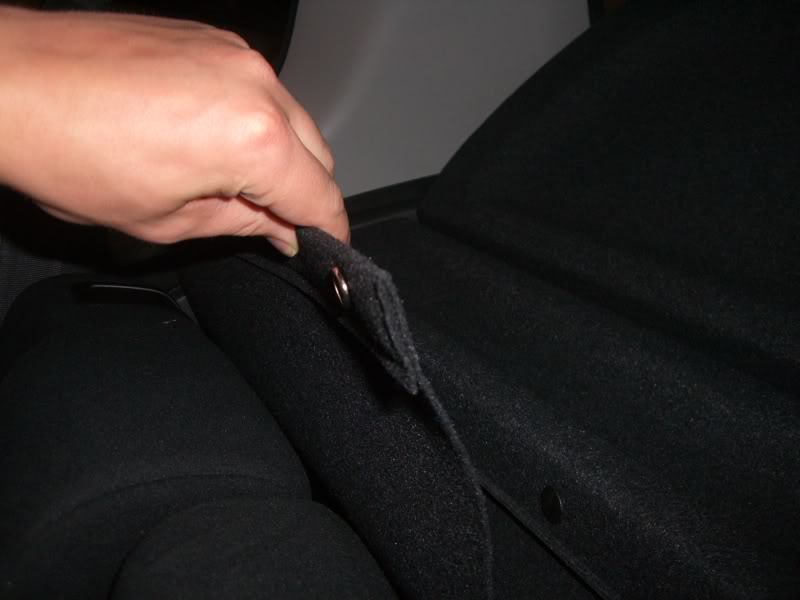
This is a picture of the flap. Its utility seems marginal at best.
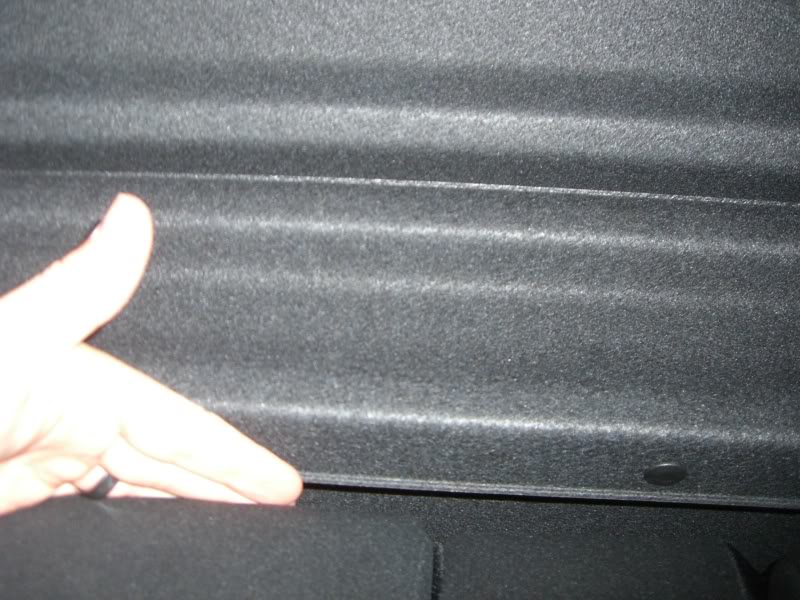
The gap between the cover and the seatback is no larger than a finger when reclined.
These two pictures show the gap between the cargo cover and the seatbacks with one reclined and the other not.
This is a picture of the flap. Its utility seems marginal at best.
The gap between the cover and the seatback is no larger than a finger when reclined.

#6
09-15-2008, 09:50 PM
This is unrelated to this post, but in the picture of the lighted ignition trim ring on the JDM Parts thread, your headlight switch and mirror controls are on the right (on the USDM, they're on the left as I'm sure you know), as with the steering wheel. In Japan, they drive on the wrong side of the road, so is that car a USDM Fit modified, or a Fit from another country.
was the lower door molding. Didn't see the shifter in the middle!
#7
09-15-2008, 10:09 PM


I don't have my Fit yet, but judging from the photos, you can't really have the back seat partly reclined if you have the cargo cover attached to their back - it may rip those back fabric!
I think Honda really took a big step back w/ this cargo cover design
To install the buttons, will it be better if you put the seat backs down in the utility mode, rather than working while they are upright?
I think Honda really took a big step back w/ this cargo cover design
To install the buttons, will it be better if you put the seat backs down in the utility mode, rather than working while they are upright?
#8
09-15-2008, 10:17 PM
To install the buttons, will it be better if you put the seat backs down in the utility mode, rather than working while they are upright?
I 100% agree this new cargo cover is a royal PITA.
#9
09-15-2008, 11:23 PM
To algin the buttons, try to place the cover next to the seat back, use a white chalk or a white tailor's pensil to mark the dot of insertion through the holes. That way you will be sure that all 5 hole spaces will be correctly spaced. Make sure you line up the cover w/ the seat back exactly as you woudl install it. Good luck!
On second thought - is there anyway you can install the buttons on a piece of wood or something (painted black) and then hang that wood onto the seat back or side of the car somehow? or a shower curtain rod that you can fit between the sides w/ spring tension - and then somehow attach the cover to that rod. Then the cover will be independant from the seat backs. If I were you I would find ways to create my own solution that "fits".
On second thought - is there anyway you can install the buttons on a piece of wood or something (painted black) and then hang that wood onto the seat back or side of the car somehow? or a shower curtain rod that you can fit between the sides w/ spring tension - and then somehow attach the cover to that rod. Then the cover will be independant from the seat backs. If I were you I would find ways to create my own solution that "fits".


#13
09-17-2008, 07:11 AM
Well, if you don't like it, just cut it off. It IS your car, right!? The instruction PDF show measuring down 44mm from some reference, a seam, maybe. It also sounds like there are holes already in the solid material underneath the cloth cover, you just need to locate those holes holes, and insert screw there. Good luck!
#14
09-17-2008, 07:19 AM
Well, if you don't like it, just cut it off. It IS your car, right!? The instruction PDF show measuring down 44mm from some reference, a seam, maybe. It also sounds like there are holes already in the solid material underneath the cloth cover, you just need to locate those holes holes, and insert screw there. Good luck!

#15
09-17-2008, 08:51 AM

I just installed mine last night. I didn't want to put marks on the cloth, so I put a strip of blue painters tape across where the buttons go. Once marked on the tape, you can probe through the tape & fabric to find the hole, which are pre drilled. Most of mine were right at where I measured, a couple I had to poke around my mark till I found the hole. The push pin doesn't leave any permanent marks if you miss the hole. Also the plastic cover would cover up any mistakes, unless they are far off the mark.
Once the hole was found, I put the button screw where the pin was & screwed it into place.
The whole installation was pretty easy. Definately work with the seats folded flat!
Like someone posted, you could just do away with the fabric between the cover & the seat if you want to.
Once the hole was found, I put the button screw where the pin was & screwed it into place.
The whole installation was pretty easy. Definately work with the seats folded flat!
Like someone posted, you could just do away with the fabric between the cover & the seat if you want to.
#17
09-17-2008, 06:24 PM
ya from what it shows on the instructions, the measurements will lead you to pre-drilled holes underneath the fabric on the seat back. So if u think u have ur measurement correctly, just push on the fabric with your finger. See if u feel a hole in the metal. if u do, that's the spot!
#18
09-17-2008, 07:05 PM
Hay, I love the velcro idea! just rip and go! Thanks!! But: will it rip the fabric if you do it often?
#19
09-17-2008, 09:54 PM

Just did mine tonight. Not a big deal: just a little hunting required to find the existing holes. I have to say, though, what a dumb design by Honda. All the hoopla about the 1-pull Magic Seat improvement and then they create an accessory (which by my book is a must-have in a wagon/hatchback) that completely defeats the simplicity of the design. It's still worth it to have the cargo contents covered, but a retractable cover would have been a better design and retained the pull-the-lever-and-drop functionality of the Magic Seats.