When you click on links to various merchants on this site and make a purchase, this can result in this site earning a commission. Affiliate programs and affiliations include, but are not limited to, the eBay Partner Network.
I'm hoping that some of you may find this educational/interesting, that it may perhaps expand understanding of the device (as well as brushed electric motors in general) and maybe help with some noise troubleshooting.
Backstory: I replaced my OEM blower motor earlier this year after noticing it had begun to make noise (despite my frequent banging out and replacing of the cabin air filter). I decided to retain it, take it apart, and see if there was something I could lubricate or service to restore life to it, if not just figure out where the noise was coming from. While doing so I took some pictures for my peers, so that they can write it off as trivial since blowers are fairly cheap.
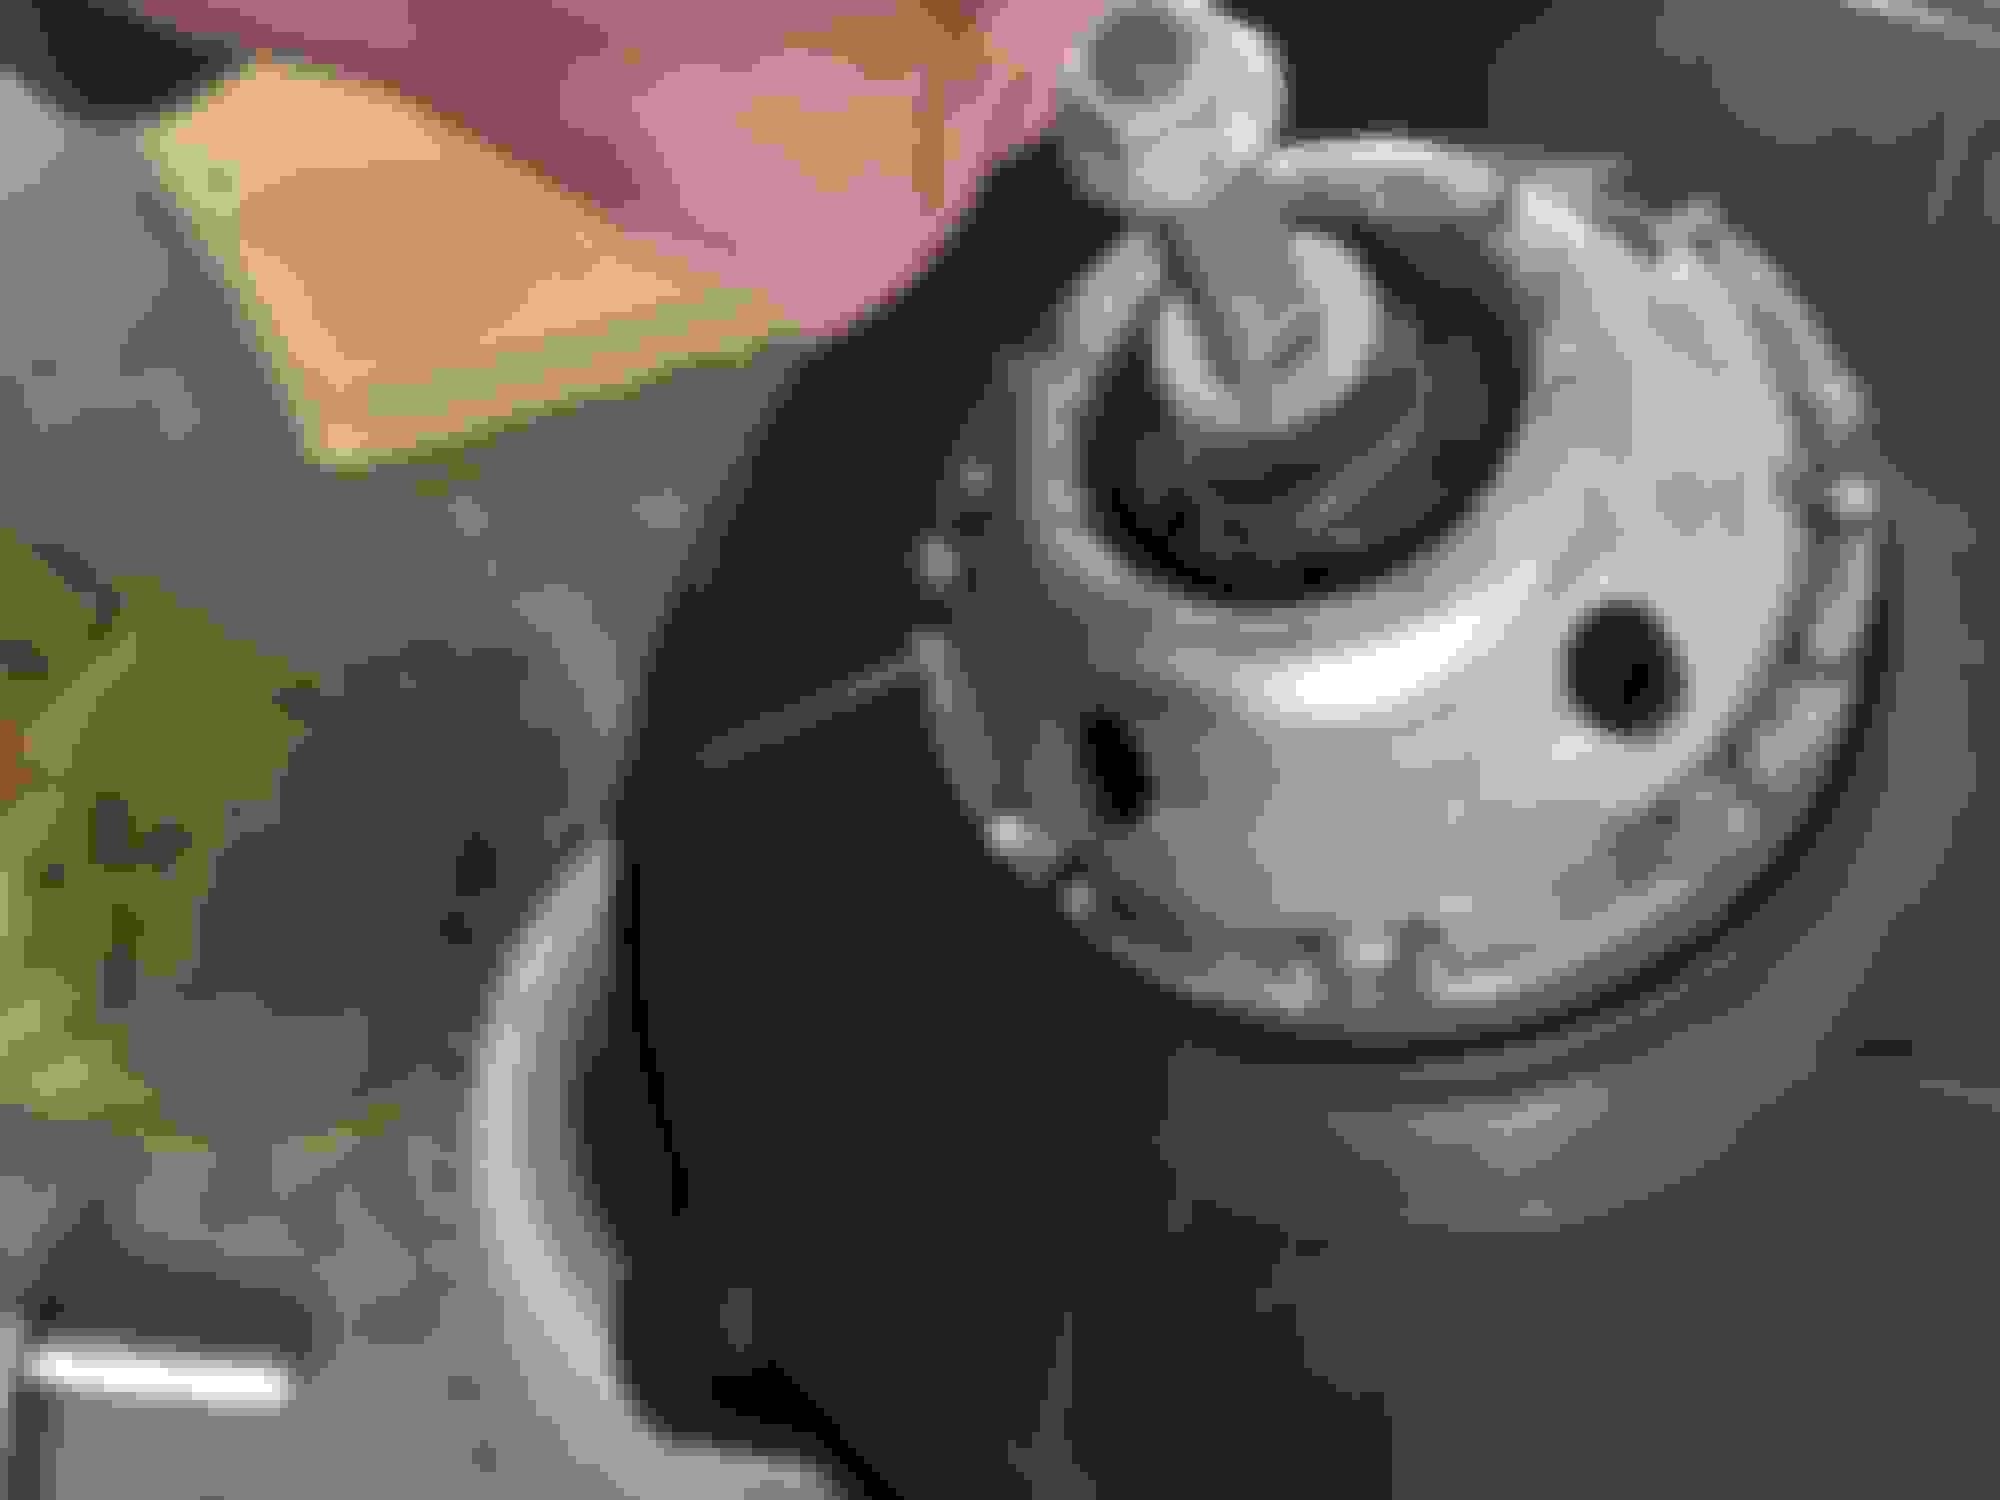
Here we see the front of the blower assembly with the fan removed and sitting below. I noticed that the fan while mounted had some play in moving forward and back. I suspect that may be inherent to design.
Here is the blower again, removed from its housing, stripped of its fancy metal face plate, and with its guts laid upon the floor (I really should have taken an intermediate picture, may update with that tomorrow. maybe not, no one cares!) Here you can see the front \"bearing" if it can so be called. I popped it out of its little fitted cavity. No apparent lubrication, or if there was any, it was negligible enough for me to write it off as my imagination playing tricks.
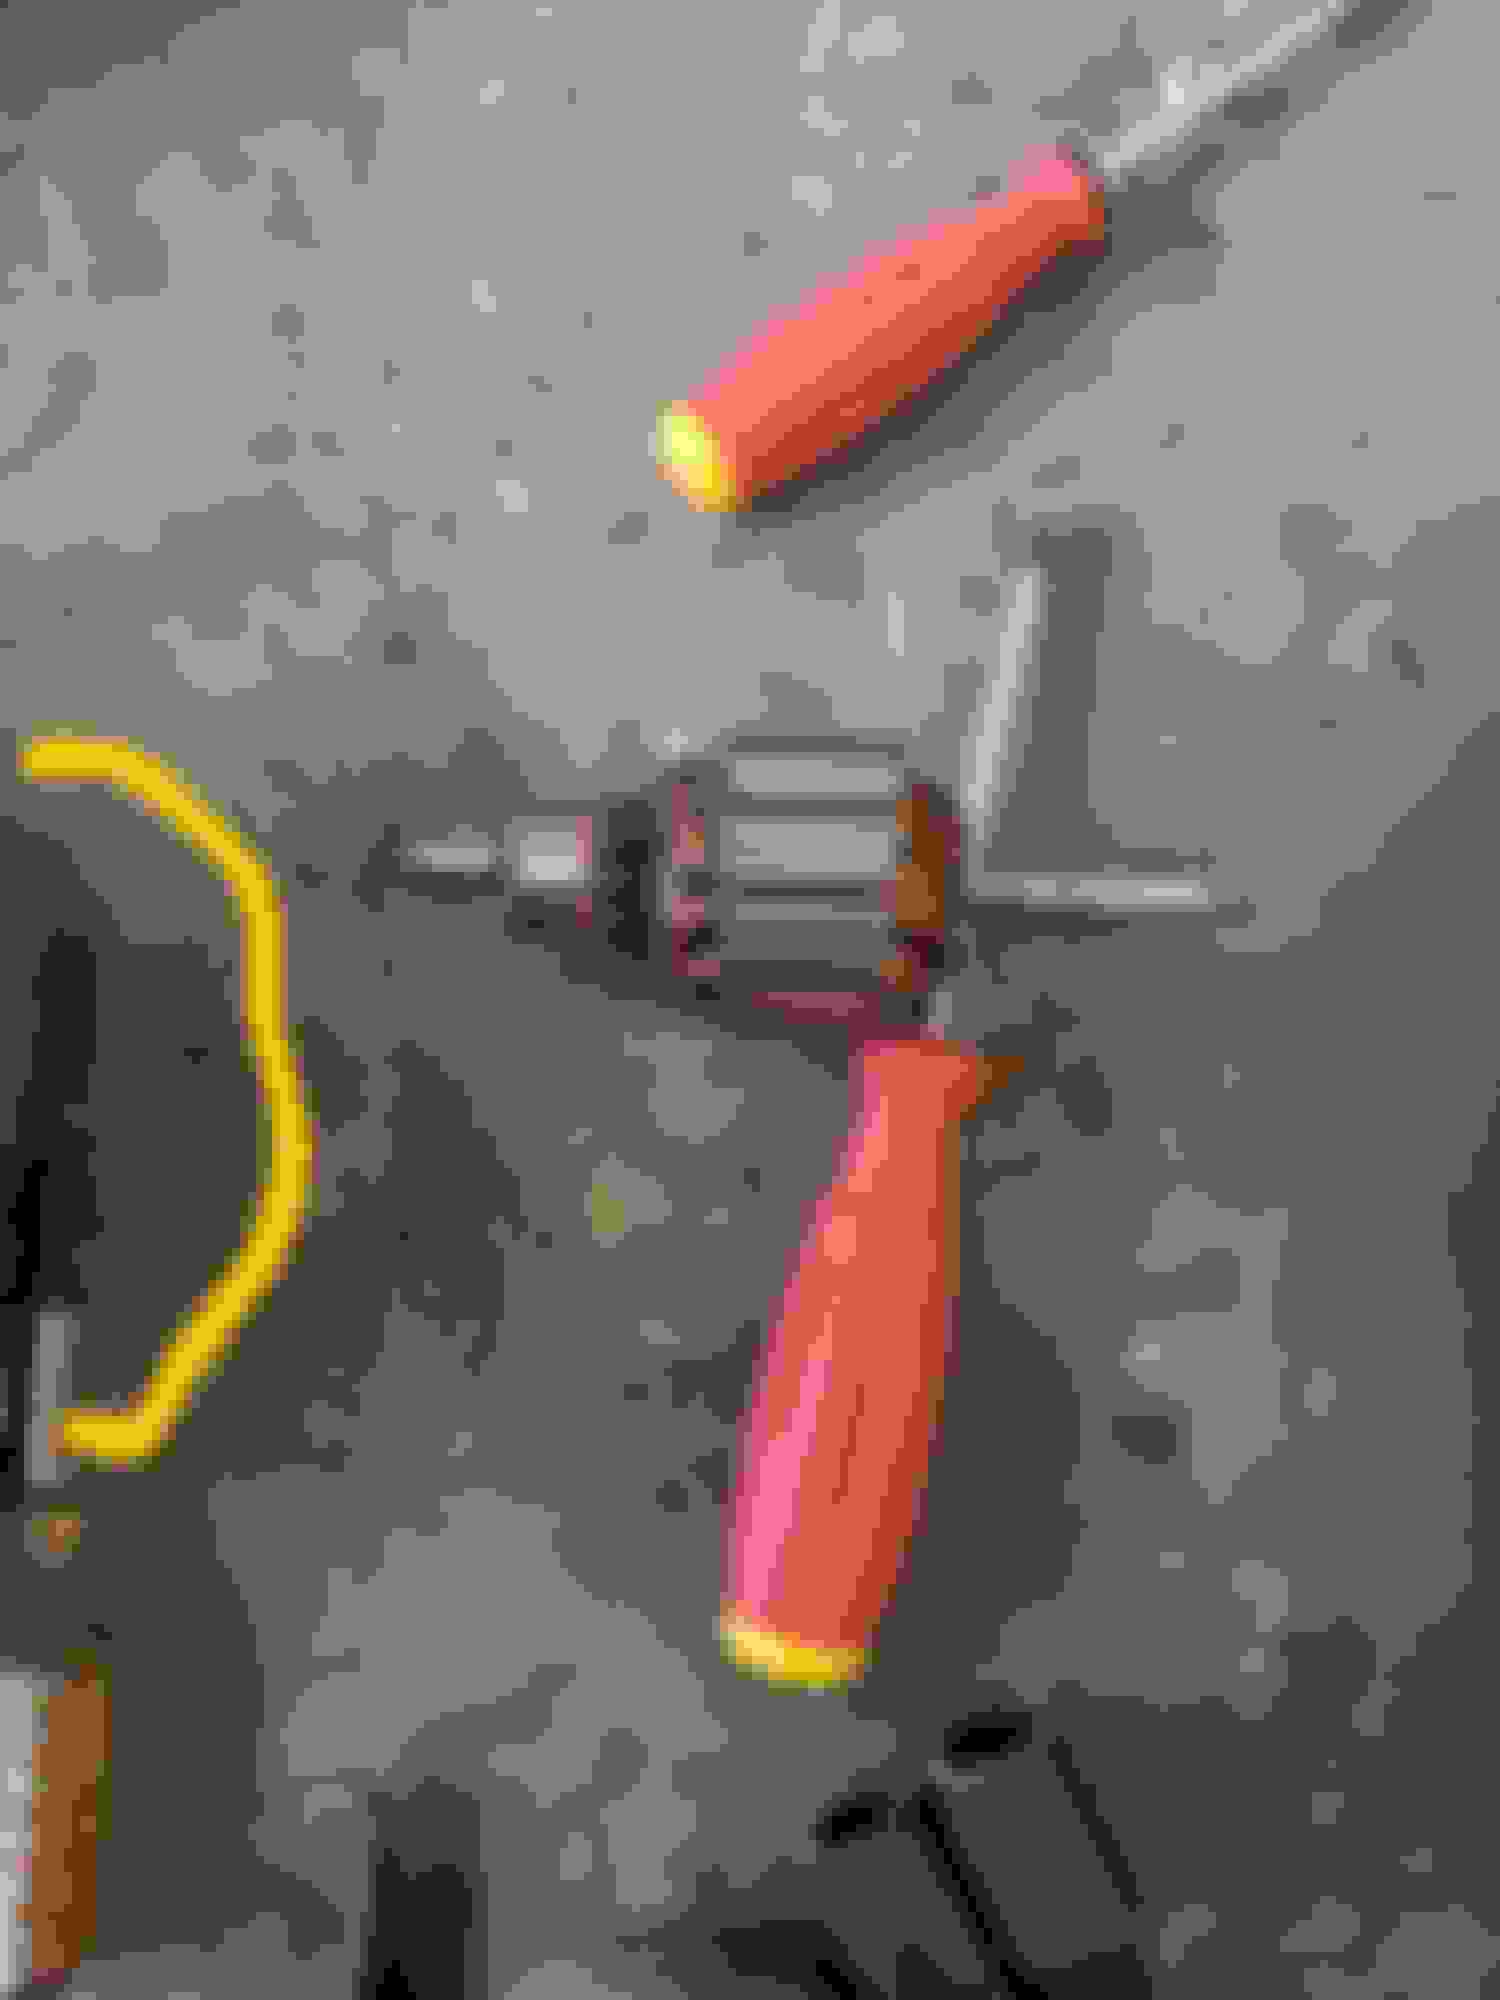
Here you see the guts! and as a little tip of the hat to myself, how I kept the washers and spacers that preceded the fan on the shaft of the motor organized! Maybe this trick will help someone! Th.. They're on the screwdriver. and THIS marvel of engineering (fuel line + pliers) is how i pulled the guts out of the motor by means of its shaft! Yeah! Not a freaking scratch on the perfectly machined thing. Maybe that trick will breathe purpose into the thread?! Did this give you your money's worth?
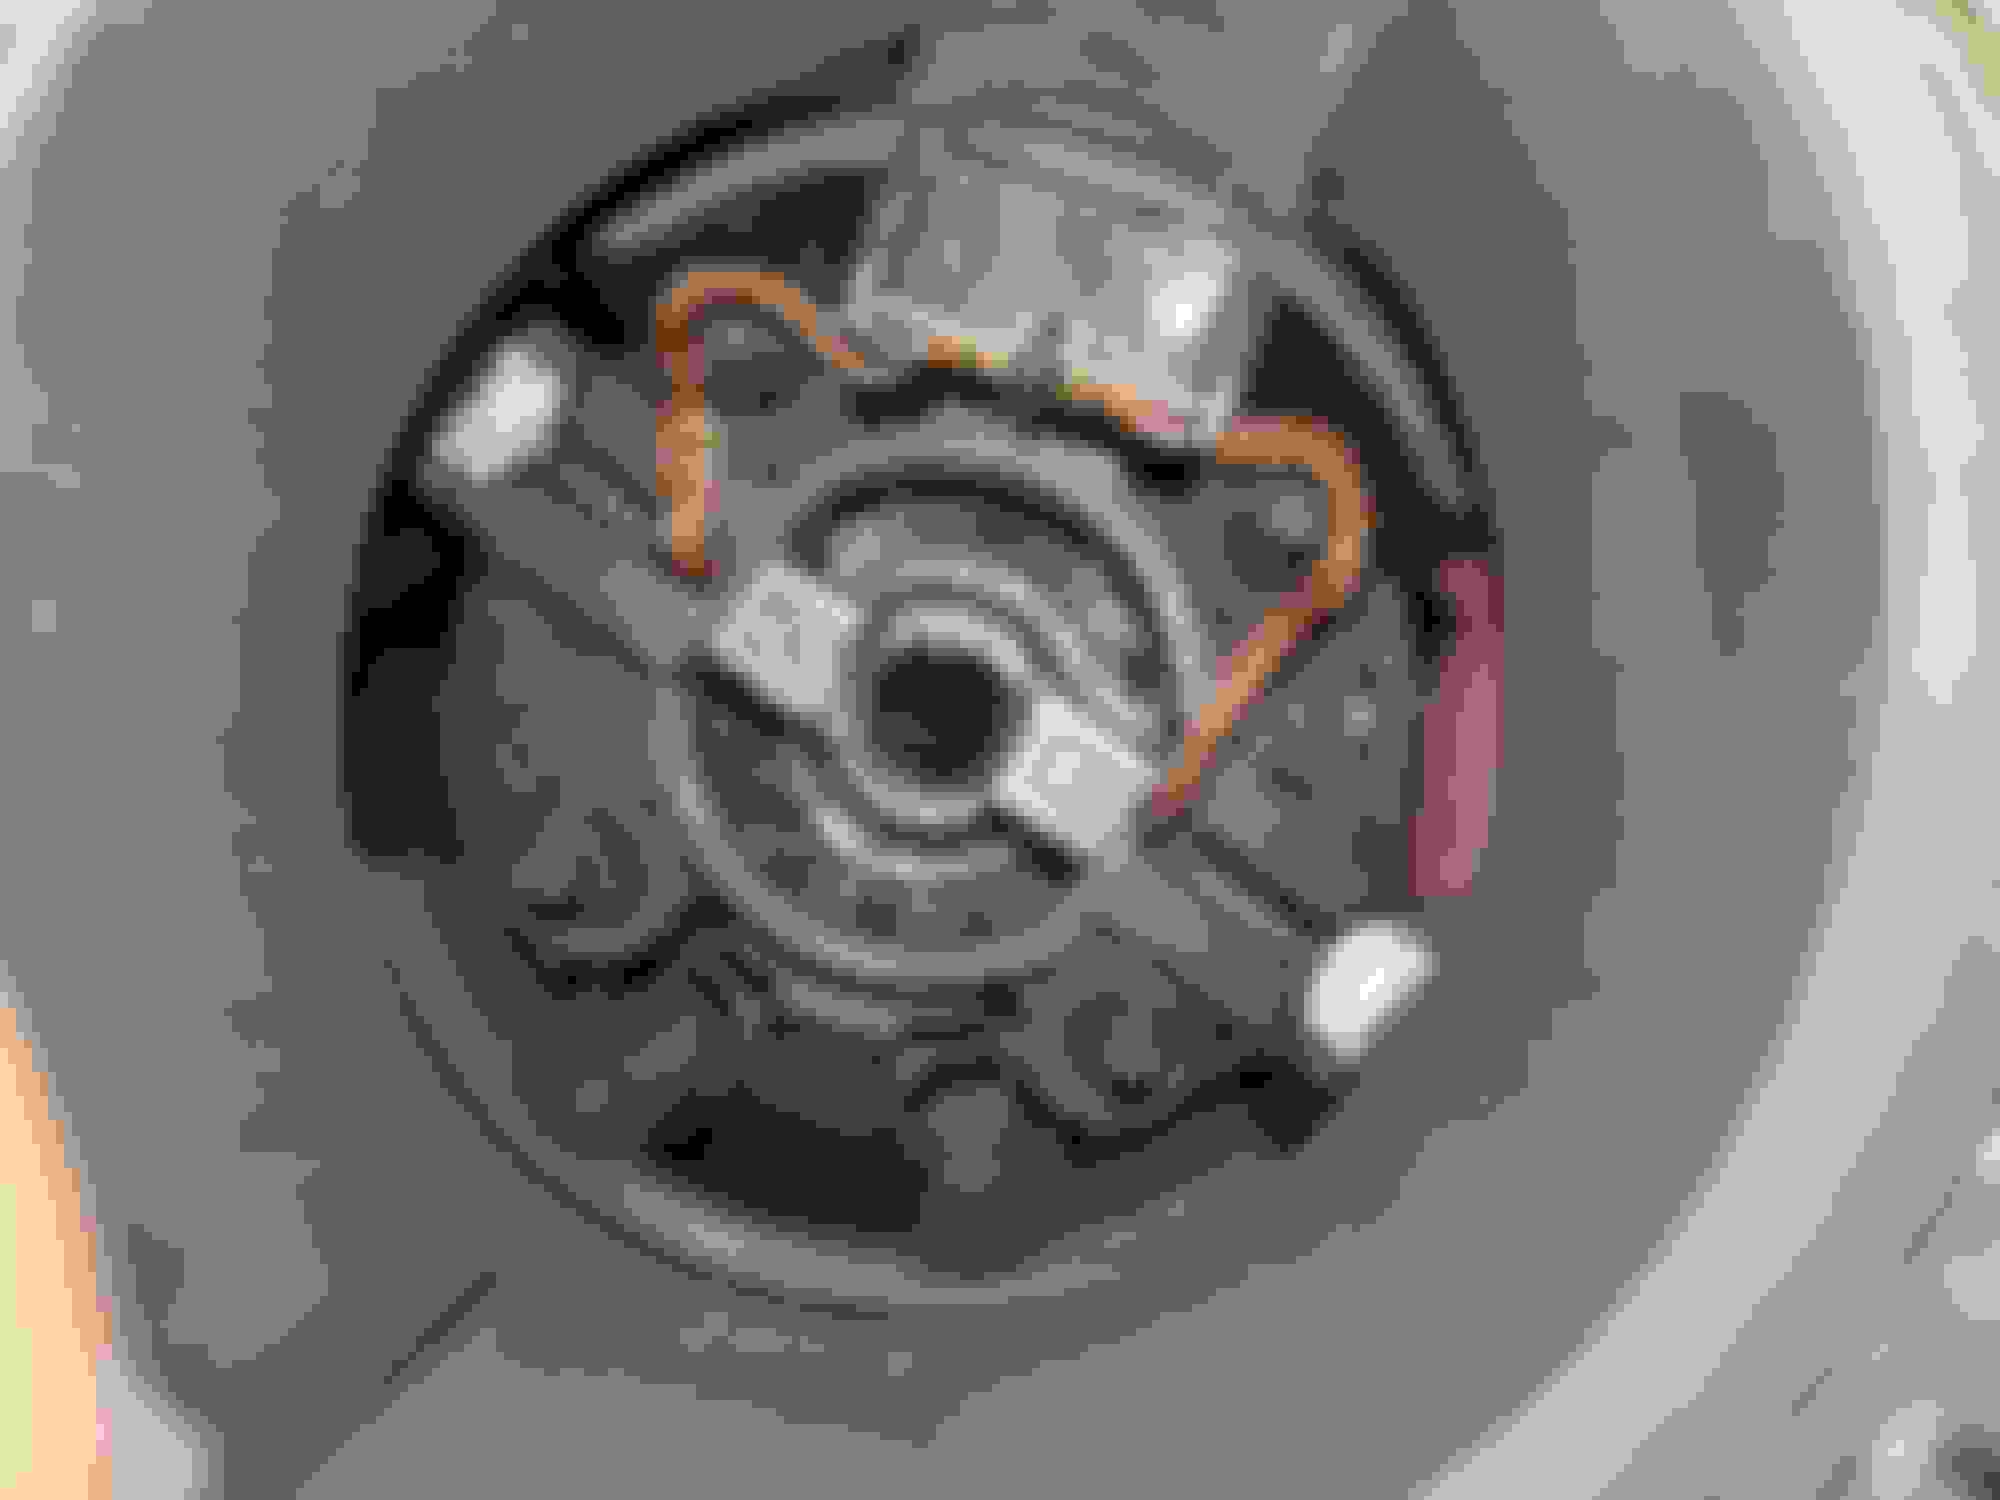
NOW WE GET TO THE WEAR ITEM The BRUSHES (I checked, and that's what these pieces of graphite with brush-like braided wires affixed and the number 74 engraved upon em are referred to as according to my findings) You're also seeing the rear bearing here in the center, with what I suspect to be a little graphite sleeve upon it. See the wear on the graphite?! How its shaped from rubbing on the tail end of that very same shaft that spins the fan blade?
Well, you can at least tell that the "brushes" were worn, damaged, and not in line with the hole behind em that perfectly surrounds the central shaft of the motor. Also can see some damage on that (graphite?) sleeve that sits upon the rear bearing.
The brushes can be removed and replaced for cheaper than a new motor, but I sure wouldn't recommend it after looking this thing over, just buy a new aftermarket assembly. HOWEVER, it may be worth taking a mental note incase you have other electric brush motor powered devices in say, an expensive power tool?
I don't feel like I've verified noise but man it was a heck of a half hour!
Oh, here's a LINK (not a video) to a dude replacing brushes in a blower motor from another vehicle. Way more educational than this thread. Enjoy.
Those brushes look completely worn. They can be replaced but you might not find them at a local supply house lol.
Can you describe the bearings? I had oiled bronze bearings in a few car blower fans. That link says those bearings are sintered which makes them more oily; I think the manufacturing process is to take small beads of bronze then mold them into shape with pressure, heat, and some oil. I have cleaned and soaked old oiled bearings and some come out OK. Better to replace worn bearings IMHO.
A bigger response than expected for such an odd-ball task! I appreciate the well, appreciative tone (!) of the responses.
The brushes are most certainly toast! I'd be surprised if I could source them locally, made of a quality that I'd approve of. In the write-up that i pulled some general information from, the replacement brushes that the gentleman swapped into his blower had far less braided wire affixed to them!
As I began reassembly (just to see if I could) I overlooked something when reinserting the motor guts into it's housing, namely, the brushes. They'd shifted into an obstructive position, and since there was no visibility and the housing of the device was so form fitting, I ignored the resistance, tapped away with my rubber mallet, and WHAM. A spring (along with associated clip) flew out of the side of the motor, taking with it a small thin piece of the plastic housing that holds the brush in place! This image shows the damaged area that will decidedly prevent me from trying my hand at replacing the brushes. It was some delicate work in a way, as I've seen electric motors (namely alternators) constructed on "How It's Made" and it is done by one individual aided by a series of specifically purpose-built robot-type machines. Although I found ways to make due, I couldn't recommend this task to someone else at present whom is not prepared to accidentally damage the first blower that the attempt is made on. I suspect that the brushes should be removed (but perhaps with wires connected) before putting the guts back in.
As for the bearings!! This image shows the only component (there is another on the back portion of the motor's shaft) that resembles and is in position of where a bearing should be. I suspect you're right, Fiting, in saying that the metal was made infused with lubricant based on my findings while looking at it. It does sit cupped in position by metal tabs seen immediately beneath it in this image, and the shaft of the motor does rotate therein, the angle of said shaft maintained center by these two, at a glance identical components.
Soaking the bearings in oil seems reasonable and potentially effective, though it is my thought that said oil may not penetrate deep enough to restore the piece, and any residue may be gummed up by trapped dust (graphite from the brushes?). But experience speaks over assumptions, and in this regard I have no experience whatsoever!
A bigger response than expected for such an odd-ball task!
Not so oddball. You're talking to a bunch of DIY-ers who want to learn. I'm only understanding about every third word that you're saying, but I'm still enjoying it.
Great post, very interesting. Wish you could have found something obvious that was making the noise.
You are right though; it's just not worth trying to fix when a new one is relatively cheap. Some of my power tools came with a set of replacement brushes, so I guess some people replace them rather than buy a new tool.

 09-24-2020, 09:39 PM