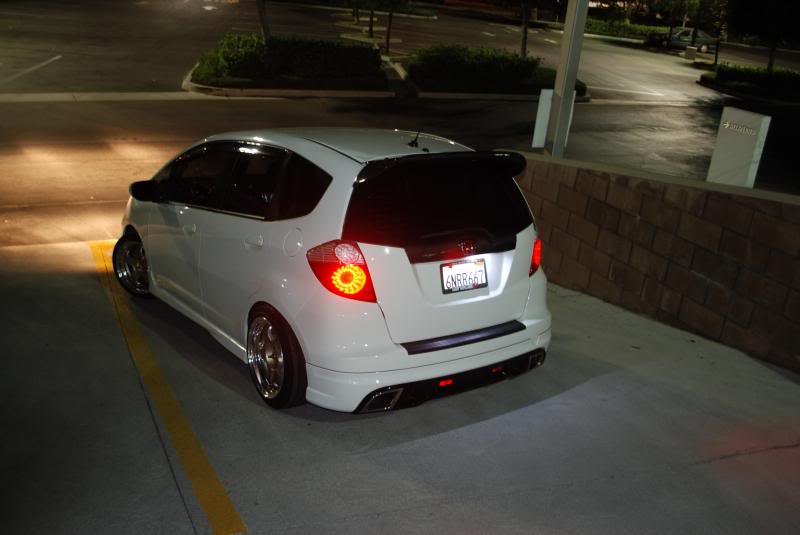
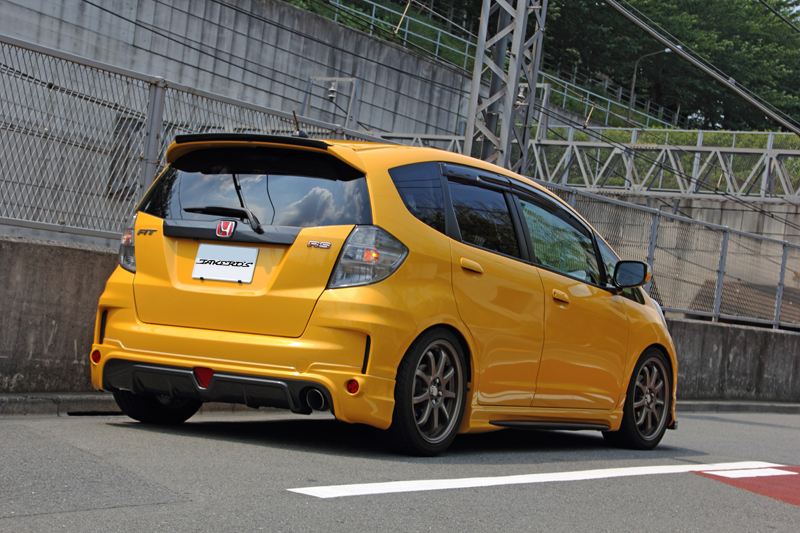
My Takero's Carbon Fiber Rear Wing Add On (Spoiler)
#1
My Takero's Carbon Fiber Rear Wing Add On (Spoiler)
Today finally USPS (EMS) deliver my Takero's Carbon Fiber Rear Wing Add On (Spoiler) that I bought through Japanparts.com.
It came with Double Tape, but I add more double tape just to make sure it stay
Don't want to lose that Add On cause Takero's might discontinued the product soon and even it is available, it is not cheap, so really don't want to lose it because it feel off blown with the wind
as usual, I clean both surface (the Takero's add on and my car rear wing) with alcohol (oh, I wash my car too before that)...
then I install the double tape then after I put the Takero's add on onto the rear wing, I press them hard with my hand, and later I put some clear duct tape all over them and I will let it like that for the next 3 days to make sure the Takero's add on, the double tape and the rear wing glued tightly to each other.
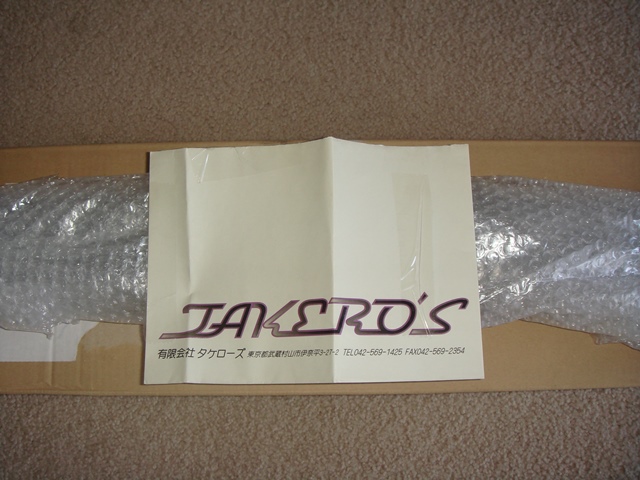
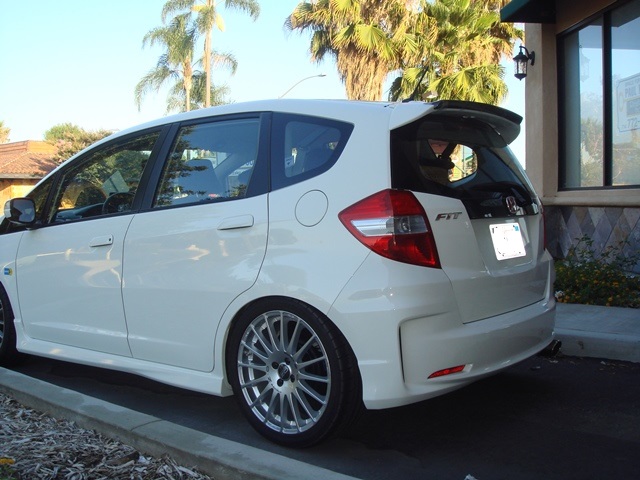
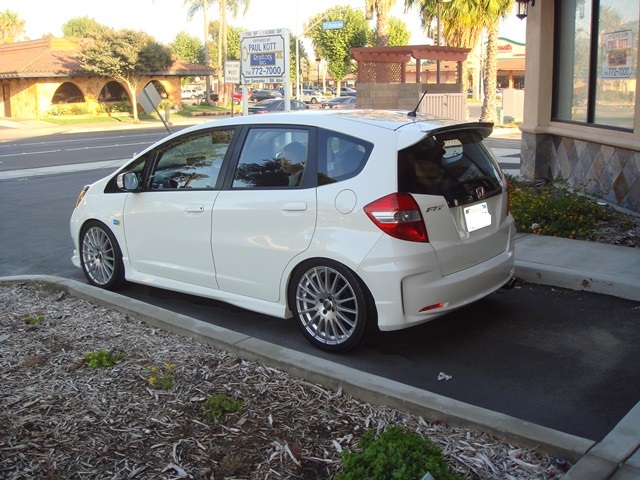
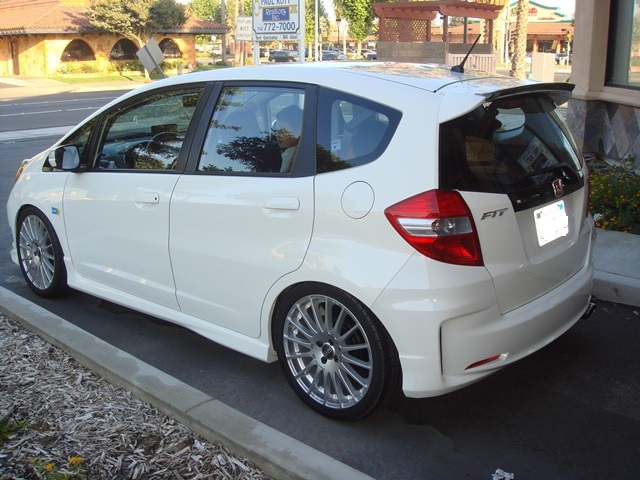
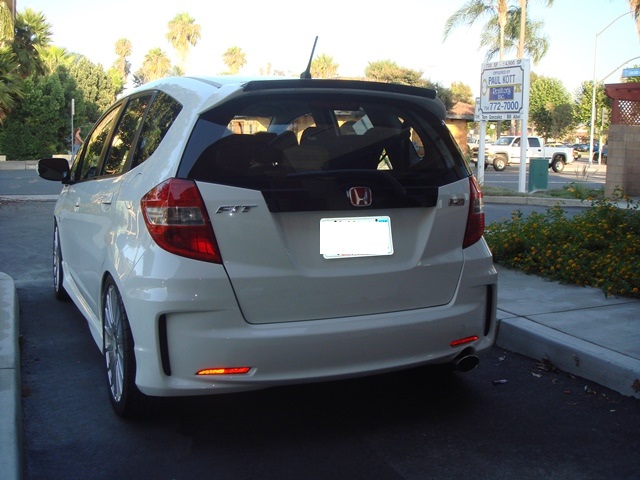
ok, so here are the pictures from just after opening the box and after installed on the car
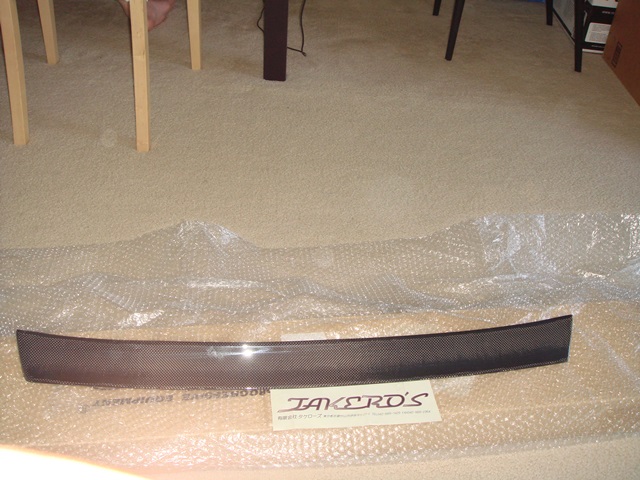
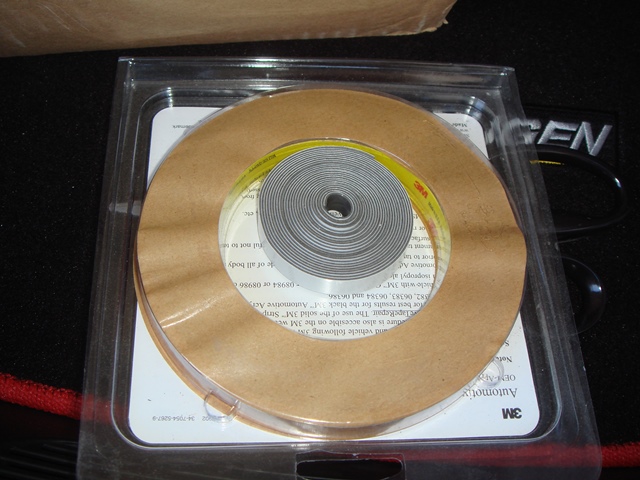
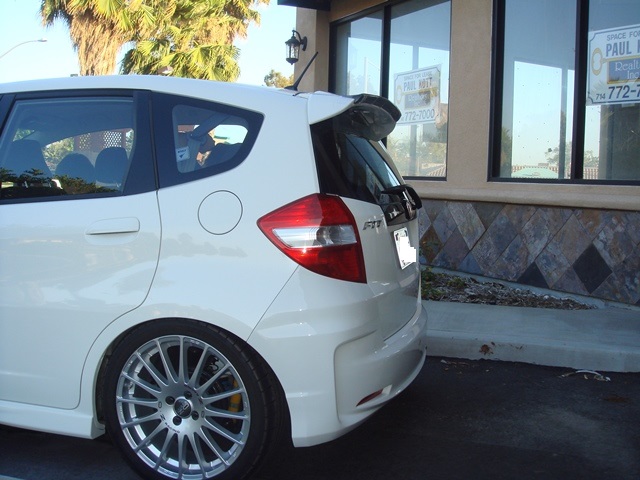
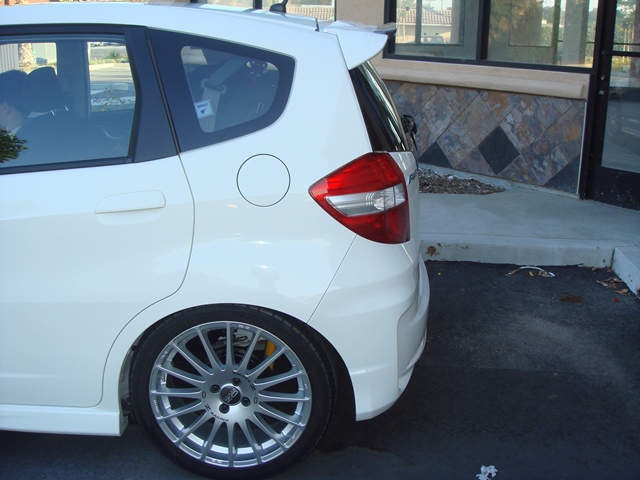
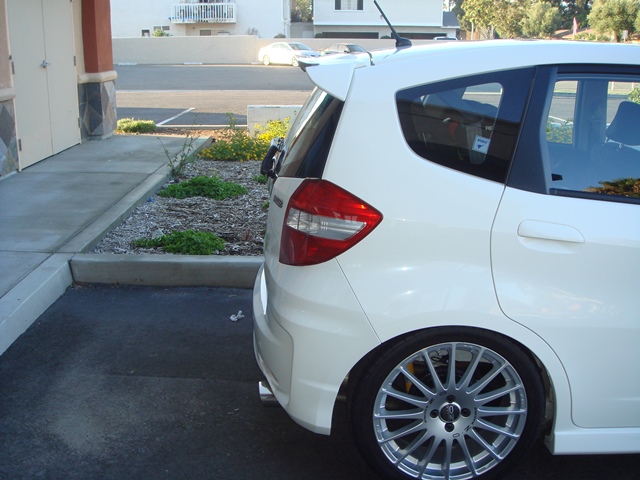
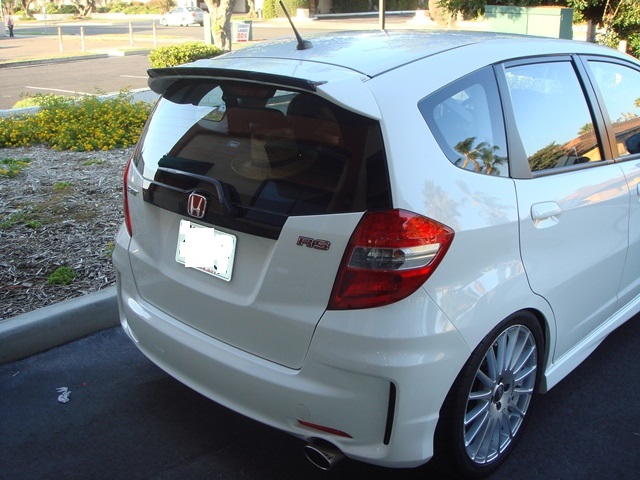
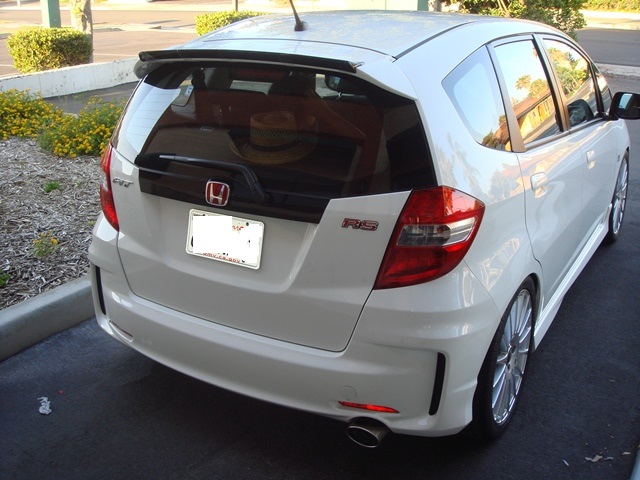
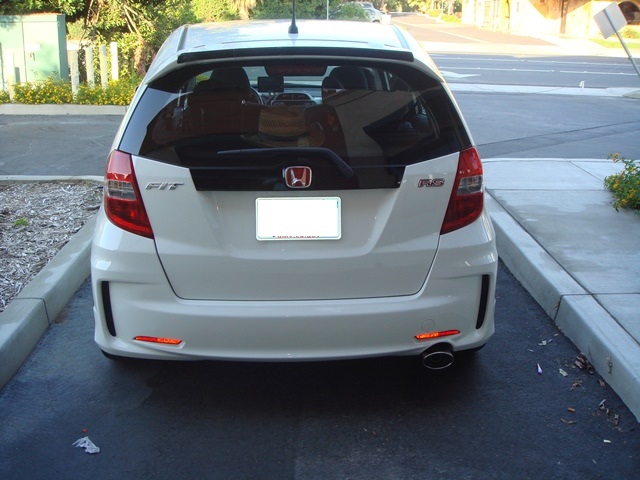
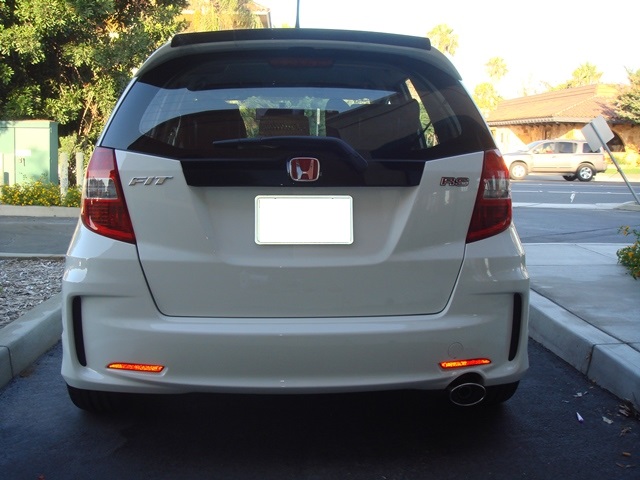
It came with Double Tape, but I add more double tape just to make sure it stay

Don't want to lose that Add On cause Takero's might discontinued the product soon and even it is available, it is not cheap, so really don't want to lose it because it feel off blown with the wind

as usual, I clean both surface (the Takero's add on and my car rear wing) with alcohol (oh, I wash my car too before that)...
then I install the double tape then after I put the Takero's add on onto the rear wing, I press them hard with my hand, and later I put some clear duct tape all over them and I will let it like that for the next 3 days to make sure the Takero's add on, the double tape and the rear wing glued tightly to each other.
ok, so here are the pictures from just after opening the box and after installed on the car


#3
(the one for that bumper right ?)

oh, don't forget to get the Mugen LED Rear Fog Light (ala Formula 1 brake light) to complete the rear looks

but I got to save some money first...

#4
#9
wow

the supercharger you want to buy is that Sprintex kit right?
well, as soon as you install it, please let me know,
since you are in Southern California,
I want to see your car with supercharger,...
if it is reliable enough, then I also want to do it

(but I am NOT brave enough to buy them until I see other had good experience with them)

#10
Yes sir I plan on doing a complete write up on the sprintex kit when I receive it and install it. I'm here in SoCal and will be glad to meet up with all fellow fit owners who are interested.
Yes after the supercharger I plan on doing the complete JDM front and rear conversion. I hate how the rear bumper sits so far back away from the rear tire, it looks awful. The JDM rear bumper sits so much closer and makes it look so much better.
Yes after the supercharger I plan on doing the complete JDM front and rear conversion. I hate how the rear bumper sits so far back away from the rear tire, it looks awful. The JDM rear bumper sits so much closer and makes it look so much better.
#11
Yes sir I plan on doing a complete write up on the sprintex kit when I receive it and install it. I'm here in SoCal and will be glad to meet up with all fellow fit owners who are interested.
Yes after the supercharger I plan on doing the complete JDM front and rear conversion. I hate how the rear bumper sits so far back away from the rear tire, it looks awful. The JDM rear bumper sits so much closer and makes it look so much better.
Yes after the supercharger I plan on doing the complete JDM front and rear conversion. I hate how the rear bumper sits so far back away from the rear tire, it looks awful. The JDM rear bumper sits so much closer and makes it look so much better.
can't wait to see your car after the super charger installed,
and also I really want to follow the process of your JDM front section conversion too,
it sure is going to be awesome

Me my self won't be doing front JDM conversion because I don't want to change or paint any metal parts of the body, because front JDM conversion require new front fender and front hood...
if it is only changing front bumper, then I would want to do it...
unfortunately it is not as simple as rear JDM conversion,...
nevertheless it would be exciting to see you do the full front JDM conversion...
as far as I know, there are only 1 member of fitfreak who did the JDM front conversion, and his conversion was not based on the latest RS (after face lifted model)... and I think AJ racing also had done 1 conversion (again using pre facelifted parts).
so if you going to do this, you will be the first (as far as I know) to do front JDM conversion using the latest RS (after facelift) parts...
and if you add Front Mugen spoiler to this front RS,
that would be even better !
so yes, I really looking forward to see your DIY on this

#12
JDM Japanese Auto Parts specialists | japanparts.com
above is direct link to JapanParts.com if any reader here want to buy this Takero's
The total cost include shipping when I bought it few weeks ago were ¥45,840 JPY
or in USD equal to : $473.59 USD (Using PayPal Yen to USD conversion charge)
and it took about 2 weeks for Takero's to made your order (they were not pre made but built to order).
above is direct link to JapanParts.com if any reader here want to buy this Takero's

The total cost include shipping when I bought it few weeks ago were ¥45,840 JPY
or in USD equal to : $473.59 USD (Using PayPal Yen to USD conversion charge)
and it took about 2 weeks for Takero's to made your order (they were not pre made but built to order).
Last edited by BMW ALPINA; 08-02-2013 at 06:21 PM.
#13
My Takero's Carbon Fiber Rear Wing shape (at the Left Side Edge) do not perfectly follow the contour of the OEM Rear Wing, it have small gaps,...
most likely this is because the double tape is not strong enough to make the left side edge stick perfectly to the rear wing...
so I just bought this:
DW BETATECH PLUS BLACK SAUSAGE 600 ML - Krayden
BMW use Dow BetaLink Adhesive to glue their spoiler to the trunk,
This is the BMW BetaLink package:

and a link of BMW owner using this adhesive:
DIY - OEM Rear Deck Spoiler Lip (official instructions)
and Dow now have this newer improve product called BetaTech.
This online website Krayden.com is the cheapest place I found so far for this product,
so I bought 2 tube from them since the shipping is the same either I buy 1 or 2...
need to have some extra tube, just in case I need them to install some other spoiler in the future
this is another shop that sell this product at much higher price,
but it have the pictures of the item:
Home Page ES#2660840 Betatech Plus Body Panel Adhesive - 600ml - 82699408866
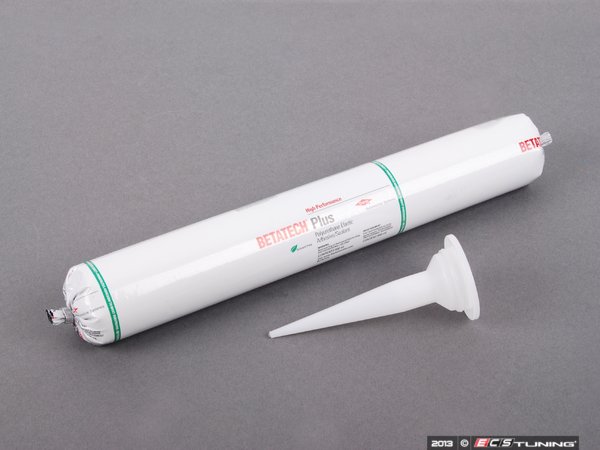
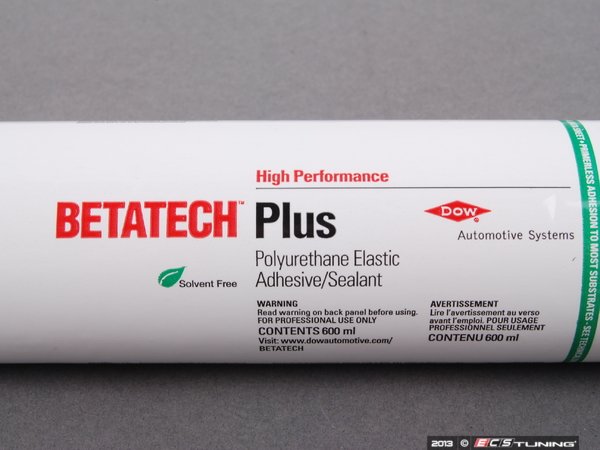
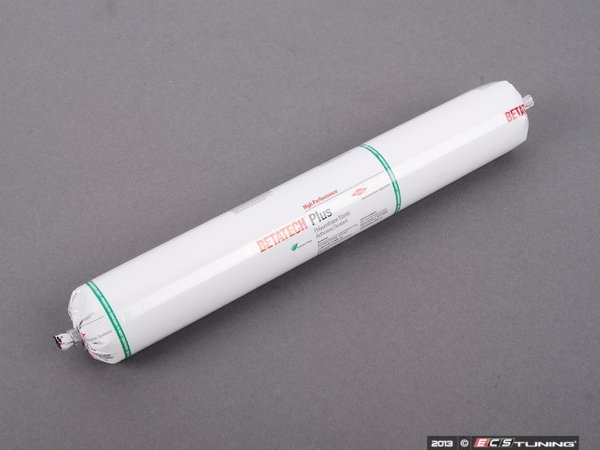
will post DIY after they arrive
most likely this is because the double tape is not strong enough to make the left side edge stick perfectly to the rear wing...
so I just bought this:
DW BETATECH PLUS BLACK SAUSAGE 600 ML - Krayden
BMW use Dow BetaLink Adhesive to glue their spoiler to the trunk,
This is the BMW BetaLink package:
and a link of BMW owner using this adhesive:
DIY - OEM Rear Deck Spoiler Lip (official instructions)
and Dow now have this newer improve product called BetaTech.
This online website Krayden.com is the cheapest place I found so far for this product,
so I bought 2 tube from them since the shipping is the same either I buy 1 or 2...
need to have some extra tube, just in case I need them to install some other spoiler in the future

this is another shop that sell this product at much higher price,
but it have the pictures of the item:
Home Page ES#2660840 Betatech Plus Body Panel Adhesive - 600ml - 82699408866


will post DIY after they arrive

Last edited by BMW ALPINA; 08-25-2013 at 03:26 AM.
#14
that's cool, op!  i like that subtle lip.
on my aero bits, i use VHB tape by 3M. 5952 is wat i use. it has initial instant curing time so make sure you have it positioned exactly before you press the aero bit onto the panel.
then press down for 30-40 sec a section at a time and repeat a few times. let the adhesive cure 24hrs before washing. this adhesive is permanent.
 i like that subtle lip.
on my aero bits, i use VHB tape by 3M. 5952 is wat i use. it has initial instant curing time so make sure you have it positioned exactly before you press the aero bit onto the panel.
then press down for 30-40 sec a section at a time and repeat a few times. let the adhesive cure 24hrs before washing. this adhesive is permanent.
#15
that's cool, op!  i like that subtle lip.
on my aero bits, i use VHB tape by 3M. 5952 is wat i use. it has initial instant curing time so make sure you have it positioned exactly before you press the aero bit onto the panel.
then press down for 30-40 sec a section at a time and repeat a few times. let the adhesive cure 24hrs before washing. this adhesive is permanent.
 i like that subtle lip.
on my aero bits, i use VHB tape by 3M. 5952 is wat i use. it has initial instant curing time so make sure you have it positioned exactly before you press the aero bit onto the panel.
then press down for 30-40 sec a section at a time and repeat a few times. let the adhesive cure 24hrs before washing. this adhesive is permanent.
Thanks for your kind words and also
Thanks for your recommendation,
I also used a 3M tape that specifically for Automobile Body Molding Attachement:
it do attached the spoiler well, it is just that the Takero's Carbon Fiber were not really bend properly so I need to re install it again,
and I think the BMW type Liquid Adhesive from Dow will do a much better job...
the think is, I will need to take off the entire rear wing from the car,
and will do it at the comfort of my living room,
hopefully this way, I will be able to attached the Takero's rear wing properly so it won't have uneven gap where the Takeros meet the factory wing surface...
#16
Hi Kenchan,
Thanks for your kind words and also
Thanks for your recommendation,
I also used a 3M tape that specifically for Automobile Body Molding Attachement:
Foam Tape-Acrylic Gray 1/2"" X 5Yds 1.2Mm 12/Case : Amazon.com : Automotive
it do attached the spoiler well, it is just that the Takero's Carbon Fiber were not really bend properly so I need to re install it again,
and I think the BMW type Liquid Adhesive from Dow will do a much better job...
the think is, I will need to take off the entire rear wing from the car,
and will do it at the comfort of my living room,
hopefully this way, I will be able to attached the Takero's rear wing properly so it won't have uneven gap where the Takeros meet the factory wing surface...
 perhaps clamping it down would have better results even with the tape.
#17
Yes, Clamping is a great idea, Thanks

Actually yesterday night,
I just order this 4 large clamp from Home Depot that should hold
the wing while the liquid adhesive dry out...
I also bought a Scotch Masking tape to help hold it (order all those stuff from Home Depot too)...
Here is the stuff that I ordered :
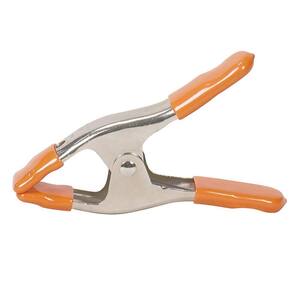
Pony 8 in. Jaw, 3 in. Jaw Opening Spring Clamp-3203-HT-K at The Home Depot

ScotchBlue 1.41 in. x 60 yd. Original Multi-Surface Painter's Tape-2090-1.5B at The Home Depot
#20
Thanks Gawa 
Thanks FitStir,
The adhesive suppose to come by FedEx tomorrow
but the other stuff from Home Depot is still next week,
so hopefully I can make a DIY on using this adhesive next week

Thanks FitStir,
The adhesive suppose to come by FedEx tomorrow

but the other stuff from Home Depot is still next week,
so hopefully I can make a DIY on using this adhesive next week


