My RS Rear BUMPER (JDM Latest Version)
#41
 06-18-2013 | 10:00 PM

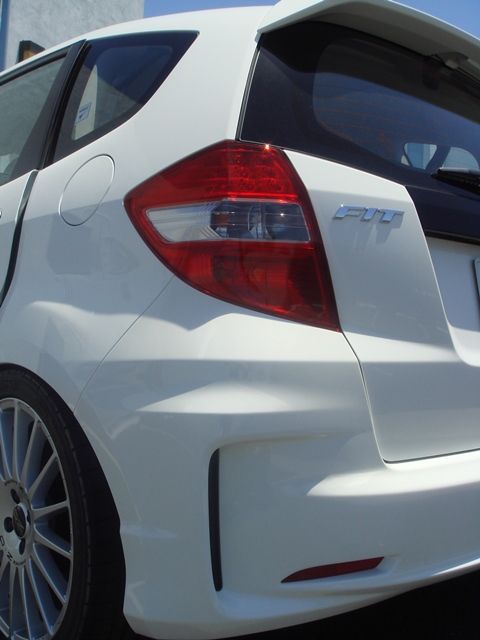
Do you guys want to see "PERFECTION" ?
This is what I think "PERFECTION" for Honda Fit GE RS model Rear Looks :
ups, it is not perfection yet, Takero's forget to install the REAR Mugen LED Fog Light on that Rear Mugen Under Spoiler
This is what I think "PERFECTION" for Honda Fit GE RS model Rear Looks :
ups, it is not perfection yet, Takero's forget to install the REAR Mugen LED Fog Light on that Rear Mugen Under Spoiler


#44
06-19-2013 | 02:14 AM
but now you talk about ventilation,
few days ago I already had other plan involving "ventilation"

you see the BeatRush under engine cover panel had ventilation to help
cool the engine compartment,
here is the picture:


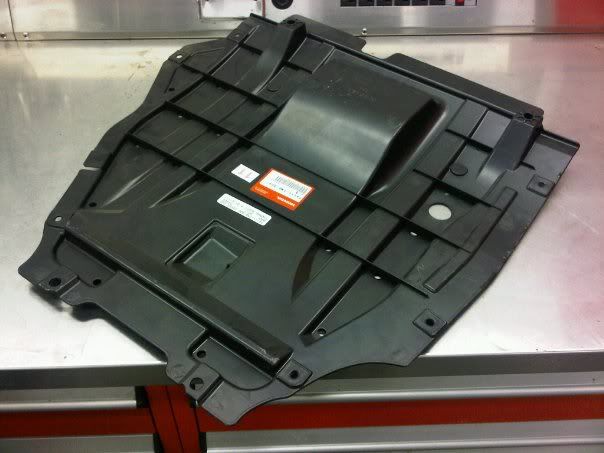
but the Honda CR-Z/Insight Plastic under panel do NOT have any ventilation:
(I borrow the image below from FitFreak member "Mini Odyssey" who post his DIY on fitfreak):
https://www.fitfreak.net/forums/2nd-...ed-my-fit.html
Thanks "Mini Odyssey"
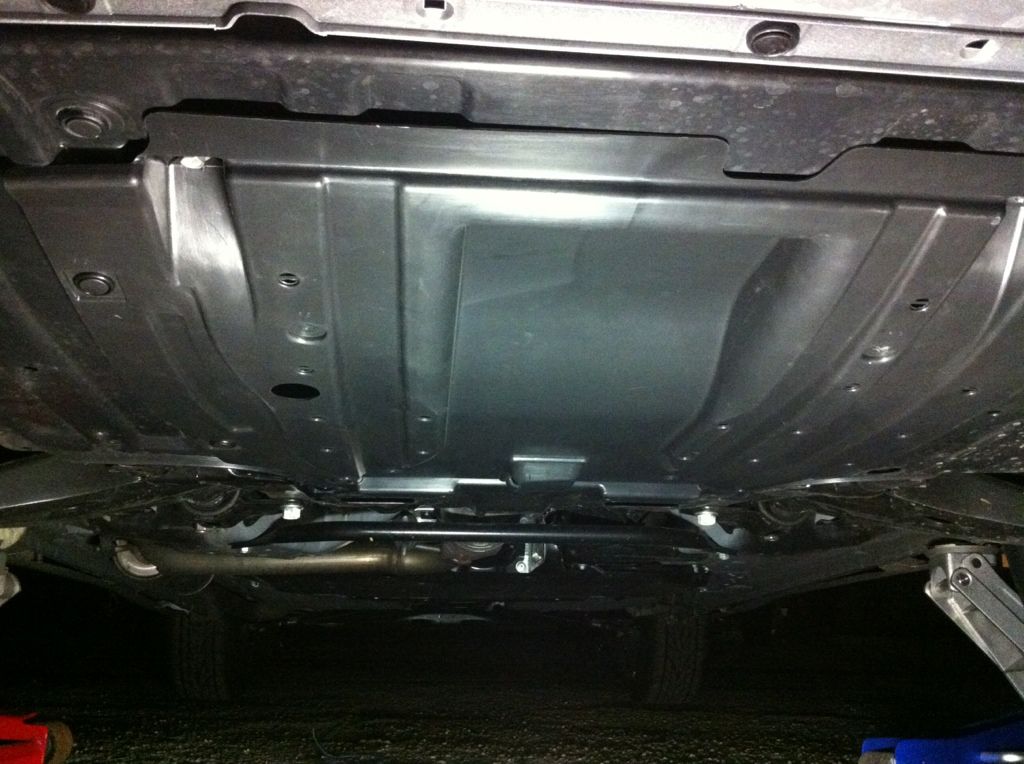
But the advantage of the CR-Z/Insight plastic under engine cover is,
first they are much cheaper,
second they do not require removal of the plastic fender panel near behind the wheel/fender
third they look factory while the beatrush look after market
forth the plastic cover will surely be lighter then the beatrush metal cover...
so how do I make the CR-Z/Insight under engine plastic cover have
ventilation like Beatrush ?
Well I plan to modify the CR-Z/Insight under engine plastic cover by
making a hole and incorporating (using epoxy glue) this item:
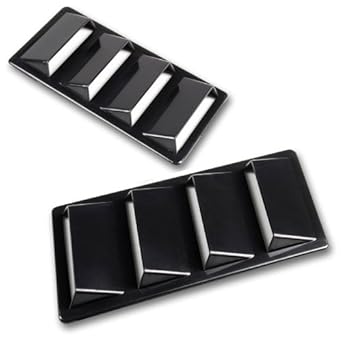
from the description, that item is just decorational,
but I think I can make them work as true vent !!!

theoretically, those vents will help to get the hot air out from engine compartment and also provide more downforce !
but this might be next month project or 2 month more, or 3 months more...
well depend on my mood
but if I am able to make this work, I will have both the advantage of the CR-Z/Insight under engine plastic cover, plus the cooling capability of the beatrush panel all in one cheap package
have another image of the CR-Z/Insight under engine plastic cover panel from member "Acoustic Audio",
Thanks "Acoustic Audio"
https://www.fitfreak.net/forums/1058812-post4.html
Last edited by BMW ALPINA; 06-19-2013 at 02:24 AM.
#46
06-19-2013 | 03:13 AM
Hello,
Thanks for your kind words,
and Thanks for the invitation to the meet,
but
I don't think I would be able to attend the meet,
every time I have free time,
my 2 sons would already "booked" me to go to Toys store or Lego Store
Thanks for your kind words,
and Thanks for the invitation to the meet,
but
I don't think I would be able to attend the meet,
every time I have free time,
my 2 sons would already "booked" me to go to Toys store or Lego Store
#48
06-19-2013 | 09:25 AM

but if I ever get that done, it will have to be this

I thought about the CR-Z underpanel, but decided I'm going with the Beatrush... with rakuten/tenso the price is not bad at all.
Last edited by FitStir; 06-19-2013 at 09:29 AM.
#49
06-19-2013 | 09:28 AM

#50
06-19-2013 | 09:35 AM
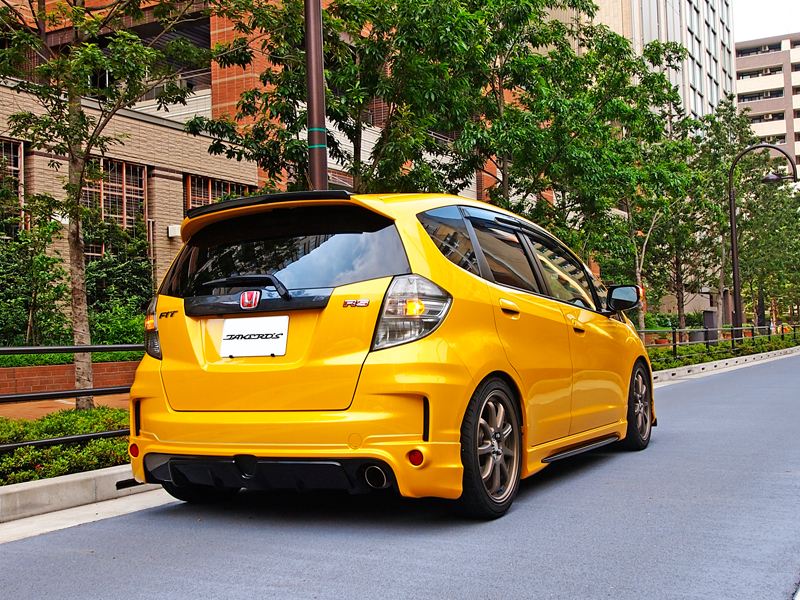
That's how I want mine too.. JDM Mugen front & Noblesse v2 (hybrid) rear.
To avoid the JDM front conversion one could get the ED Mugen front rep, but from the 1 person who installed it they said there were quite a few fitment problems, luckily for him he owns a body shop. So besides fitment issues, it's a rep.

#51
06-19-2013 | 09:38 AM
but you got to reconsider the low ground clearance because of this dual exhaust,
if you look on the picture you post,
below the car, you will notice the pipe connecting the left exhaust to the right exhaust that hanging just 3 inches above the ground...
and if you live in area with snow, that might create a problem...
unless you want to move to Sunny area like here in So-Cal
by the way, as soon as you get the Beatrush panel,
please kindly do a DIY here... because so far the only DIY for Beatrush that I see here is for GD generation only...
Thanks

#53
06-19-2013 | 10:15 AM
ups, I forgot that sunny place is not monopolize by so-cal only hehehe
by the way, I love your BBS wheel,
may I know the spec (width, offset, diameter, type) of your BBS wheel?
and do you modify the pcd ?
Thanks
by the way, I love your BBS wheel,
may I know the spec (width, offset, diameter, type) of your BBS wheel?
and do you modify the pcd ?
Thanks
#54
06-19-2013 | 10:20 AM
lol thanks man.. thinking of redoing them another color possibly.. they are 16x8+24 front and 16X8.5+24 rear. Originally 4x114.3 and got 4x100 drilled so its dual bolt pattern..
#55
06-19-2013 | 10:45 AM
You know me... I'll probably end up buying it in August, and probably not install until next spring. But I'll definitely do a DIY, I'm using the GD3 as a guide myself, looks simple enough.
I did notice that pipe, but a) I wont be that low, b) Even if I do get the bumper, I'll probably have a shop custom the muffler (depending if Hondata releases Flashpro, and I decide to go turbo).
That's if I get the Noblesse rear (which at this point, I doubt it)...

What I need to do is finish installing the rest of the stuff I have waiting, and get those blue heated mirrors.
I did notice that pipe, but a) I wont be that low, b) Even if I do get the bumper, I'll probably have a shop custom the muffler (depending if Hondata releases Flashpro, and I decide to go turbo).
That's if I get the Noblesse rear (which at this point, I doubt it)...
What I need to do is finish installing the rest of the stuff I have waiting, and get those blue heated mirrors.
#56
06-19-2013 | 10:07 PM
Hopefully I can install this emblem and took pictures of the JDM RS rear bumper directly from the rear,
but of course this got to wait only after I install my Progress sway bar first...
but I think this emblem install will take few days too,
since I will be doing it the "correct" way, making sure all pin were secured and not "cut", plus I will be doing the rear hatch sound dampening while I open the rear door hatch panel to install the rear Honda Red Emblem "the correct way"
#58
06-20-2013 | 05:00 PM
Member
Joined: May 2010
Posts: 499
From: CALI, IE
Hopefully I can install this emblem and took pictures of the JDM RS rear bumper directly from the rear,
but of course this got to wait only after I install my Progress sway bar first...
but I think this emblem install will take few days too,
since I will be doing it the "correct" way, making sure all pin were secured and not "cut", plus I will be doing the rear hatch sound dampening while I open the rear door hatch panel to install the rear Honda Red Emblem "the correct way"
#59
06-20-2013 | 05:18 PM

Looks awesome !