
What did you do to the GD Fit today?
#4981
 03-16-2012, 04:40 PM

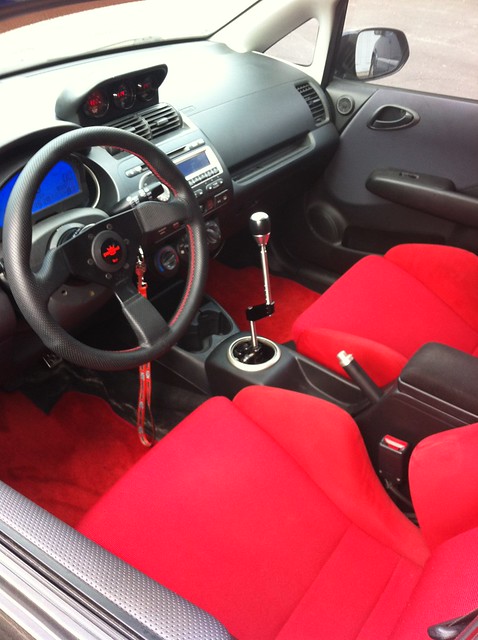
With the help of my brother we made progress on installing the shifterbox
The bracket all welded up

First test fit... We ended up test fitting a bunch of times

after several test fits anf hours later we felt we got it to a point where we wanted it so my brother welded it up

hope to finish the install this weekend.
The bracket all welded up
First test fit... We ended up test fitting a bunch of times
after several test fits anf hours later we felt we got it to a point where we wanted it so my brother welded it up
hope to finish the install this weekend.
#4982
03-17-2012, 01:43 PM


After a long wait, I finally got my GD out of the body shop yesterday for the fender damage and to fill in the hole for the front plate. Its going back in next week for simple stuff they missed though.
Today, I'm making a license plate relocation bracket that WON'T require any drilling. It'll be similar to H-Fit's design but a fraction of the cost.
Today, I'm making a license plate relocation bracket that WON'T require any drilling. It'll be similar to H-Fit's design but a fraction of the cost.
#4983
03-17-2012, 02:37 PM

Thought about doing that, but everything is just going to end up dirty. Especially your oem air box or aftermarket intake.

#4984
03-17-2012, 02:40 PM
No problem. I hope it helps other fits also. Our fits are known to have our front fender liner melt away because of rubbing. I have even seen stock fits that have melted theirs as well.
#4985
03-17-2012, 04:40 PM

 Nice seriously mean looking contraption you have there. Good job!
#4986
03-17-2012, 04:41 PM
After a long wait, I finally got my GD out of the body shop yesterday for the fender damage and to fill in the hole for the front plate. Its going back in next week for simple stuff they missed though.
Today, I'm making a license plate relocation bracket that WON'T require any drilling. It'll be similar to H-Fit's design but a fraction of the cost.
Today, I'm making a license plate relocation bracket that WON'T require any drilling. It'll be similar to H-Fit's design but a fraction of the cost.
#4988
03-18-2012, 12:01 AM
Tell more about this product, cost and installation.... Please , after you've driven enough to tell if it is giving you some relief from pain or just improved comfort, let us old guys hear back from you..
#4989
03-18-2012, 12:09 AM
^^^^$90.00 and quite a bit of work. I removed the seat from the car to install the kit. Not really necessary, but you will at least have to unbolt the seat to get access to the underside to install the pump pouch. I'm an old (49 year) Fit owner too. I'll let you know what I think once I have had a chance to try it out on a long drive.

#4991
03-19-2012, 10:47 AM
I can here the paint rubbing off where the strap is against the bumper....*shudder* but still...that a lil honda fit can do everything it can proves that we REALLY dont NEED the gigantic trucks most of the time.
#4992
03-19-2012, 11:06 AM
I had the same thought as I was strapping them down. This was the first time so I need to do some adjusting. I'm thinking of some pieces of foam under the straps. The rear is kind of the same thing, the straps end up on the bumper. I few people said the straps on the front and back are unnecessary, but I'm kind of paranoid about anything flying off the car.
#4993
03-19-2012, 11:11 AM
Honestly, i think they are right. The curvature of the kayaks nested in between the posts that are holding them will prevent them from moving forwards or backwards. You would be good with just the straps across the top.
I mean if this works so should yours

I mean if this works so should yours
Last edited by dled1286; 03-19-2012 at 11:13 AM.
#4994
03-19-2012, 11:14 AM

Just recently installed a Megan Racing exhaust header. It was a pretty easy part to put on but here's some quick tips I learned.
1.) Jack your car SUPER high. Like, at least 4 notches on the standard jack stand set.
2.) Get a cheater pipe (big wrought-iron pipe from home-depot that slips over the wrench you're using)
3.) There are some spring bolts on the bottom of the header, you MUST torque these off at the exact same time. Meaning: Torque one side a bit first, then the other, then the other and so on. If you torque one off too much, the bolt head will snap off and it's a BITCH to get off from there.
HP before the part: 107
HP after: 110
MPG before (55 mph on the highway, sitting behind a semi-truck for exactly 5 minutes) 39
MPG after (same conditions) 41
#4995
03-19-2012, 12:11 PM
Join Date: Sep 2010
Location: Chicago, Illinois
Posts: 4,428
Just recently installed a Megan Racing exhaust header. It was a pretty easy part to put on but here's some quick tips I learned.
1.) Jack your car SUPER high. Like, at least 4 notches on the standard jack stand set.
2.) Get a cheater pipe (big wrought-iron pipe from home-depot that slips over the wrench you're using)
3.) There are some spring bolts on the bottom of the header, you MUST torque these off at the exact same time. Meaning: Torque one side a bit first, then the other, then the other and so on. If you torque one off too much, the bolt head will snap off and it's a BITCH to get off from there.
HP before the part: 107
HP after: 110
MPG before (55 mph on the highway, sitting behind a semi-truck for exactly 5 minutes) 39
MPG after (same conditions) 41
1.) Jack your car SUPER high. Like, at least 4 notches on the standard jack stand set.
2.) Get a cheater pipe (big wrought-iron pipe from home-depot that slips over the wrench you're using)
3.) There are some spring bolts on the bottom of the header, you MUST torque these off at the exact same time. Meaning: Torque one side a bit first, then the other, then the other and so on. If you torque one off too much, the bolt head will snap off and it's a BITCH to get off from there.
HP before the part: 107
HP after: 110
MPG before (55 mph on the highway, sitting behind a semi-truck for exactly 5 minutes) 39
MPG after (same conditions) 41
Did you pull the motor and dyno it? Or are you just making that up?
Also, a bit early to be making economy gain claims.
#4996
03-19-2012, 12:16 PM
Although this is a bit harsh the point is valid. unless you have some really high hp bolt-ons otherwise, 107 is BHP(Brake Horse Power) or at the flywheel. So you may ASSUME that its given it a 3hp increase but theres no way of telling unless you throw it on a motor dyno or at least a chassis dyno. And the fuel economy claims, yeah, until youve driven it thru several tanks theres no way of telling. You could have been light on the throttle or could have had the wind at your back. either way, youneed hard evidence of your gains like charts and graphs.
#4998
03-19-2012, 02:57 PM
Join Date: Sep 2010
Location: Chicago, Illinois
Posts: 4,428
Want. Very much.

#5000
03-19-2012, 05:56 PM
